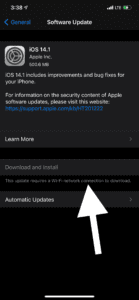
Some iPhone and iPad users have reported that they are seeing an error message saying, "This update requires a Wi-Fi network connection to download". This error message appears on an iPhone’s or iPad’s Software Update screen, which can be accessed by going to Settings > General >** Software Update**. This error makes it impossible for your iPhone or iPad to be updated to the latest version of iOS 17 or iPadOS 17 because the Download and Install button is grayed out. In this article, I will explain why your iPhone or iPad says ‘This Update Requires a Wi-Fi Network Connection to Download’ and show you how to fix the problem.
If your iPhone or iPad need to be updated and your device is connected to Wi-Fi but you still receive This updates requires a Wi-Fi network connection to download and the Download and Install button is greyed out, it is most likely because your Wi-Fi connection is not strong enough. If you are also facing this issue, please try the troubleshooting steps below. After trying each step, check to see if you can update. If you cannot, move to the next step.
Ways to Fix ‘This Update Requires a Wi-Fi Network Connection to Download’ Error
1. Enable iOS and iPadOS updates over cellular
By default, iOS and iPadOS updates may not occur over cellular because these updates may be big and use a lot of data. This can be bad for many because cellular data can be pretty expensive. If you want your iPhone or iPad to update over a cellular network, follow these steps:
- Start the Settings app on your iPhone.
- Tap Cellular/Mobile Data.
- Turn on the switch next to Cellular/Mobile Data if it’s not already.
- Touch Cellular/Mobile Data Options.
- On the next page, tap Data Mode.
- Select Allow More Data on 5G.
2. Restart iPhone
Restarting your iPhone can fix a variety of minor software issues. All the apps and programs running on your iPhone get a fresh start when it turns on again. Here’s how to restart your iPhone:
- Tap on Settings.
- Select General.
- Tap on Shutdown.
- Drag the slider to power off.
- Press and hold the side button or top button until the Apple logo appears.
After turning on your device, go to Settings > General > Software Update. Can you update your iPhone?
3. Restart your Wi-Fi modem/router
Your Wi-Fi may not be strong enough. Restart your Wi-Fi modem. Here’s the procedure:
- Unplug the router. If your modem is separate from your router, unplug that as well. Wait 60 seconds.
- Plug the modem back in (if it is separate) and wait another 60 seconds.
- Plug the router back in. Wait 120 seconds.
4. Turn off Security application or VPN software
Several security app and VPN software users reported connectivity problems. Sometimes, these may interfere with connecting to the iOS or iPadOS update servers. If you are using a security type of software, including VPN, You can try the following:
- Uninstall the security application and then check if you can update your iPhone. If you can update, then, obviously, this app is the problem. Check if there is an update to the app. Then, you can try to install the updated version. If the updated version causes problems, too, you may want to keep the app uninstalled until its developers address the issue.
- VPN services may also cause this. Are you using a VPN? Then disable or uninstall it and then try to update your iPhone or iPad.
5. Reset Network Settings
This one can be a last resort. The reason is that resetting network settings will erase all of your saved Wi-Fi passwords, which for many people, is a big deal. It also resets your cellular, Bluetooth and VPN settings. To reset your network settings:
- Open Settings and tap on General.
- Scroll all the way down and tap on Transfer or Reset iPhone.
- Tap on Reset.
- Tap on Reset Network Settings.