Got a tip for us?

Summary

  • iPhone crashes can be caused by problems with third-party apps or the operating system itself.
  • Troubleshoot app crashes in iOS 27 by killing unresponsive apps, checking for updates, reinstalling problem apps, seeking alternatives, checking app permissions, and ensuring you have free space on your device.
  • System crashes can be fixed by restarting or force restarting, updating the operating system, and reinstalling iOS or iPadOS.

Do your iPhone apps keep crashing after iOS 27 update? Apps can crash or freeze on iPhones, just as they can on any other platform. Apple’s iOS operating systems disguise app crashes by closing the app. If you’re experiencing crashing, freezing, or buggy apps after iOS 27 update, here are a few tips you can use to fix the problem.

Is It an App or Device Crash?

You should first figure out whether it’s an app crash or a device crash. This is pretty simple: if you’re using an app, and it suddenly closes for no reason, the app has crashed. If you’re using an app and it becomes unresponsive, but you can still access other apps, that’s also an app crash. If you’re trying to launch an app and it keeps disappearing, the app is repeatedly crashing.

If your iPhone has become unresponsive across the system, it’s likely a device issue. Your phone will display a black screen or remain stuck on the Apple logo if the device has crashed. Also, if your iPhone is slow for no apparent reason, and across multiple apps, it’s a device issue.

If you cannot connect your wireless headphones, send files over AirDrop, or see AirPlay devices, it’s possible a service used by the operating system has crashed.

Troubleshooting App Crashes After iOS 27 Update

There’s plenty that can go wrong and cause apps to crash, become unresponsive, or refuse to open at all. Problems usually stem from issues with the code, unexpected input, and even hardware limitations. Apps are made by humans, after all, and humans make mistakes. There is also a chance that the app is crashing because it’s not optimized to work with iOS 27.

If an app suddenly disappears, it’s due to a crash. In most cases, reopening resolves the problem. If you’re sharing analytics with developers (more on this later), they receive a crash report they can use to prevent the problem from reoccurring.

Kill Unresponsive Apps

If an app is unresponsive, you can kill it using the app switcher. There’s no need to routinely kill apps using this method unless they’re causing issues.

On modern iPhone models that lack a Home button, the app switcher is accessed by swiping up from the bottom of the screen and flicking to the right. You can also swipe up from the bottom of the screen and hold until you see a list of recently used applications.

If your iPhone has a Home button at the bottom of the screen, double tapping it will reveal a list of recently-used applications.

You can use this list to switch between apps quickly. Find the application causing the issue, and then touch and swipe up on it to “throw it away” and close it. The app will disappear from the list of recently-used apps.

You can now try to restart the app. After you kill apps this way, it takes slightly longer to open them than it does when they’re suspended in the background. This is why you shouldn’t kill apps unnecessarily.

Check for Updates

Apps that are not optimized to work with the iOS 27 can also cause issues. Upgrading from one major version of iOS to another can cause stability issues if an app isn’t updated to account for the changes. Sometimes, developers abandon their apps entirely.

The most obvious solution here is to check for an update. Launch the App Store and tap on your user icon in the top-right corner of the screen. Tap App Updates button:

You can either look for the app that’s causing you trouble in the upcoming updates, or you can tap “Update All” to perform all outstanding updates.

You can also find the app in the App Store (simply search for it) and check the “What’s New” section to see the app’s version history. If an app hasn’t been updated in quite some time, you might want to seek an alternative. Sometimes, developers upload new versions as new apps, with old versions of apps left as “legacy” versions that you can keep using but that may not receive future updates.

You can take a look at a developer’s other apps by tapping its name under the app description in the App Store.

Reinstall Problem Apps

Sometimes, apps crash way too frequently. If an app is crashing each time you try to start it, consider deleting and reinstalling the app. Keep in mind that you’ll lose all local app data when you delete it. You shouldn’t worry about this for apps that use cloud storage (like Evernote, Google Drive, and Pages).

If the app requires that you log in, you’ll have to do this again when you reinstall it.

There are multiple ways to delete an app from your device, but the easiest is to simply search for it. To do this, pull down on the Home screen to reveal a search field and type in the name of the app. Now tap and hold on it until you see a context menu appear. Hit “Delete App” and confirm in the pop-up that appears.

If an app has been hidden, you’ll need to find it first. To do this, unlock your device and scroll left on the Home screen until you find the App Library. Scroll down to the bottom of the app categories, and tap on the “Hidden” category and the app should appear. You can now tap and hold the app icon and choose “Delete App” then confirm.

Now launch the App Store and search for the app to reinstall it.

Check Your App Permissions

Sometimes, privacy settings can wreak havoc with your apps. For example, if a mapping app can’t fetch your location, you need to make sure it has access to that information.

Head to Settings > Privacy & Security and check any relevant categories, like Camera, Microphone, or Location Services. Any apps that require your permission to access services or information will be listed here.

Create Some Free Space

If your device is full to the brim, you may encounter weird app behavior. This is particularly true of apps that require free space to function, like camera apps, audio recorders, and so on. You might also encounter a general operating system slowdown.

Head to Settings > General > iPhone Storage to see how much free space you have.

Get a Refund

If you’ve downloaded an app that doesn’t work with iOS 27, you can reach out to Apple and request a refund. To contact the developer, find the app on the App Store, and then scroll down to the “Information” section. Tap on “Report a Problem” and login with your Apple account when prompted.

Use the “I’d like to…” drop-down to pick “Request a refund” and then describe the problem. Hit “Next” and submit your complaint. Apple will review your request and (hopefully) refund your account. Just make sure that you’re using the same Apple account with which you purchased (or downloaded) the app.

Troubleshooting Hardware and System Crashes

iPhone use Apple’s iOS software. Despite the platform being relatively stable, problems can occur occasionally. These can include random restarts, software glitches, and freezes that require manual intervention.

Restart Your iPhone

Many issues are resolved simply by restarting your device. If you’ve noticed weird OS behavior, like a screen that won’t “sleep” or problems with audio playback, a restart might do the trick.

The easiest way to restart your iPhone is to trigger Siri and ask “restart my iPhone.” You’ll then be asked to confirm your request. You can also restart your device by switching it off and on again. To do this, press and hold the “Side” (lock) button and one of the volume buttons until the “Slide to Power Off” menu appears.

Use the slider to turn the device off, wait a few seconds, and then press and hold the Side button to turn your iPhone back on again.

Recover an Unresponsive iPhone

If your iPhone is completely unresponsive or appears to be frozen, you’ll need to force a reset by holding some buttons.

You can do this by pressing the Volume Up button, pressing and releasing Volume Down button, and then pressing and holding the “Side” (lock) button until the Apple logo appears. You’ll need to be quick, so you might have to try multiple times to get this working.

Update iOS

Updating your iPhone can resolve issues sometimes. You can do this by heading to Settings > General > System Update and seeing if there are any updates waiting for you. You can also opt out of beta access using this menu. Beta versions of iOS can be unstable and cause crashes. After opting out you’ll need to wait for the next stable version to drop before you can update.

Reinstall iOS

Sometimes, problems can’t be solved by a restart, and you might need to reinstall the operating system. This is the last resort for persistent issues related to the core operating system. Problems like this can arise from the use of third-party software used to “clean” or maintain your iPhone and jailbreaking.

Keep in mind that reinstalling iOS will cause you to lose all of the data on your iPhone. Make sure you have an iCloud backup so you can restore your data when you’re done.

First, you’ll need to remove your device from Find My iPhone to disable Activation Lock. To do this, head to Settings and tap on your name followed by “Find My.” Tap the “Find My iPhone” option, then toggle “Find My iPhone” off and enter your Apple account password.

If this option is grayed out, you’ll need to disable Stolen Device Protection under Settings > Face ID & Passcode then tapping “Stolen Device Protection” followed by “Turn Off Protection” and following the instructions.

To reinstall iOS you’ll need to connect your device to a Mac or PC running Windows. On a Mac you can connect your device, accept the connection request that appears, and then use Finder to select your iPhone from the “Locations” section of the sidebar.

On Windows you’ll need to download and install iTunes, then select your device at the top of the screen.

You should now see a list of options under the “Summary” tab for your device. Use the “Restore iPhone…” option and follow the prompts to restore iOS.

Suspect a Hardware Issue?

If you’ve tried everything and believe your issue is hardware-related, you can find out for free by booking yourself an appointment at the nearest Apple Store or authorized service center. If your iPhone is still under warranty, any repairs will be covered and free of charge. You can find out if you’re covered on Apple’s website.

If your iPhone isn’t covered, you’ll only be charged for any work you approve. Apple’s technicians will run a diagnostic on your device and find out if there are any issues under the hood.

You can then decide whether you want to get the device repaired. If repairs are expensive, it might be worth opting for a new device, instead. Apple will offer you some trade-in credit to use on your new device.

Tag: iOS 27

Is iPhone Auto-Brightness not working after iOS 27 update? Auto-brightness ensures your iPhone’s screen brightness levels adapt automatically according to the light around you. For example, when you step out in the sun, the brightness increases. And inside a room, it decreases. If your iPhone’s auto-brightness feature stopped working after iOS 27 update, it can spoil your user experience and even consume more battery. The auto-brightness feature is on by default.

When auto-brightness is on, you’ll notice that the brightness slider on your device moves according to changing light conditions.

To turn auto-brightness on or off:

  1. In the Settings app, tap Accessibility.
  2. Tap Display & Text Size.
  3. Scroll to Auto-Brightness and tap to turn the feature on or off.

If auto-brightness isn’t working on your iPhone running iOS 27, you can use these solutions to fix it. Once that’s done, it should be more comfortable to use your iPhone during the day, night, and any other times.

1. Clean Your iPhone’s front camera Area

The ambient light sensor is at the top of your iPhone screen. Body oils, sweat, and other such gunk may stick to this sensor when holding the phone to your ear during long calls. Due to this, it may stop your iPhone’s ambient light sensor working, which is what’s responsible for adjusting the screen brightness according to your surroundings.

To fix this, use a clean, dry cloth to wipe the top portion of your iPhone screen. After this, auto-brightness should work fine. If not, follow the remaining solutions below.

2. Restart Your iPhone

If you haven’t turned off your iPhone in a while, it can cause a few problems, like auto-brightness not working correctly. To fix this, simply restart your iPhone. After the device powers on, everything should work as well as it usually does.

3. Enable and Disable Auto-Brightness

Another quick solution to fix the iPhone’s auto-brightness problem after iOS 27 update is to turn this feature off and on. Here’s how to do that:

  1. Open Settings and tap Accessibility.
  2. Tap Display & Text Size.
  3. Turn off Auto-Brightness.
  4. Restart your iPhone.
  5. Go to Settings > Accessibility > Display & Text Size and enable Auto-Brightness.

4. Update Your iPhone

If turning off auto-brightness and then turning it back on doesn’t fix your issue, make sure that you are running the newest version of iOS 27. This will ensure your iPhone has all the latest features, bug fixes, and security patches.

To update your iPhone, go to Settings > General > Software Update.

5. Try Turning Off Night Shift

In case none of the above solutions work for you, consider turning off Night Shift. For this:

  1. Open the Settings app, tap Display & Brightness, then tap Night Shift.

    The Display and Brightness screen on an iPhone 15 Pro

  2. Turn off Manually Enable Until Tomorrow and Scheduled.

6. Remove Any Thick Screen Protectors

Are you using an abnormally thick screen protector on your iPhone? If yes, it may cause problems with the smooth working of the ambient light sensor. To address this, consider removing your screen protector. If you must use one, opt for a screen protector that’s thinner, or medium thickness, instead.

Similarly, if you have a case that covers the entire front of the device, or even partially blocks the top sensor area, remove that as well.

7. Reset All Settings

When you reset all settings, personal data like downloaded apps, music, photos, videos, and such won’t be deleted. However, all the settings you have customized to your liking will reset and return to the default options. This includes Wi-Fi, Bluetooth, VPN configurations, Home Screen layout, keyboard settings, and more.

After you reset all your settings, several problems such as auto-brightness not functioning should be fixed. Here’s how to do it:

  1. Open Settings and tap General.
  2. Tap Transfer or Reset iPhone.
  3. Tap Reset and choose Reset All Settings.
  4. Enter your device passcode to confirm.

Once it completes, your iPhone should adjust the screen brightness correctly based on the light around you.

Problems With Third-Party iPhone Displays

Did you break your iPhone screen and get it repaired at by an unauthorized service provider? If yes, it may cause multiple problems, like Face ID not working correctly, True Tone not functioning, and possible auto-brightness issues.

Contact Apple Support to get your device repaired by Apple authorized service providers instead.

Auto-Brightness Makes Your iPhone Easier on the Eyes

After following the above fixes, your iPhone display should automatically adjust the screen brightness to match your environment, ensuring that the screen is always comfortable to look at.

If auto-brightness still doesn’t work, you may want to turn off auto-brightness and adjust it manually until you get your device inspected at an Apple Store instead.

Tag: iOS 27

Face ID isn’t working on your iPad after iPadOS 27 update and you don’t know why. You can still log in using your passcode, but if you’re like most people, the iPad Face ID feature was one of the main selling points when you bought your iPad, and it’s frustrating when it doesn’t work! In this article, I’ll explain why Face ID is not working on your iPad after iPadOS 27 update and show you how to fix this problem for good.

Before we dive into the troubleshooting steps, it’s a good idea to double-check to make sure you’ve gone though the normal setup process. If you’re sure Face ID is set up correctly, follow the troubleshooting steps below to learn what to do when Face ID is not working on your iPad after iPadOS 27 update.

1. Restart Your iPad

The first thing to do when iPad Face ID is not working in iPadOS 27 is restart your iPad. This has the potential to fix a small software glitch that could be causing the problem.

Press and hold the top button and either volume button until “slide to power off” appears on the screen. Use a finger to swipe the red and white power icon from left to right. Your iPad will shut down.

Wait 30–60 seconds, then press and hold the top button again until the Apple logo appears on the screen. Your iPad will turn on again shortly after.

2. Make Sure You’re Holding Your iPad Far Enough Away From Your Face

Face ID is designed to work when you hold your iPad 10–20 inches away from your face. If you’re holding your iPad to close or too far from your face, it could be the reason why Face ID is not working on your iPad. As a general rule, extend your arms straight out in front of you when using Face ID.

3. Make Sure There Are No Other Faces Around You

If there are multiple faces in the line of the cameras and sensors on your iPad when you’re trying to use Face ID, it may not work properly. If you’re in a busy place such as a city street, try to find a more private spot to use Face ID. If you’re trying to show off this cool feature to your friends, just make sure they aren’t standing right next to you!

4. Remove Any Clothing Or Jewelry Covering Your Face

Face ID works with hats, scarves, and glasses as long as the TrueDepth camera can see your eyes, nose, and mouth. Clothing or jewelry could be covering parts of your face, making it more difficult for Face ID to recognize who you are.

5. Check Lighting Conditions

Another thing to be careful of when using Face ID is the lighting conditions around you. Face ID uses infrared, so it’s designed to work indoors, outdoors, and even in total darkness.

6. Clean The Cameras & Sensors On The Front Of Your iPad

Next, try cleaning off the front iPad. Gunk or debris could be covering one of the cameras or sensors used for Face ID. We recommend gently wiping the camera and sensors with a microfiber cloth.

7. Take Off Your iPad Case Or Screen Protector

If you have a case or screen protector on your iPad, take it off before using Face ID. Sometimes, a case or screen protector may cover or interfere with one of your iPad’s cameras or sensors, causing Face ID to not work properly.

8. Make Sure Your Finger Or Palm Isn’t Covering The TrueDepth Camera

Face ID on iPad works in any orientation, but in landscape mode your finger or palm can cover the TrueDepth camera without you noticing. If you’re using iPad in landscape orientation, make sure that your finger or palm isn’t covering the TrueDepth camera. You might see an alert at the top of the screen that says “Camera covered.”

9. Delete Your Face ID And Set It Up Again

If Face ID consistently fails, try deleting your saved Face ID, then setting it up again. If something went wrong during the initial set-up process, you may have trouble using Face ID in the future.

To delete your iPad Face ID, open the Settings app and tap Face ID & Passcode. After entering your passcode, tap Reset Face ID.

Now that Face ID has been reset, tap Set Up Face ID. Follow the instructions on the screen to set up the new iPad Face ID.

10. Check For An iPad Software Update

Since Face ID is an iPad feature, there may be small bugs or glitches that could be fixed by a software update. To check for a software update, go to Settings > General > Software Update. If an update is available, tap Download & Install. If your iPad is already up to date, it will say “Your software is up to date.” on this menu.

11. Reset All Settings

If Face ID still isn’t working, try resetting all settings on your iPad. When you reset all settings, all of the settings in your iPad’s Settings app will be reset to factory defaults. This step can sometimes fix a troublesome software issue that may be difficult to track down.

To reset all settings, open the Settings app and tap General > Transfer or Reset iPad > Reset > Reset All Settings. Enter your passcode, then tap Reset All Settings when the confirmation pop-up appears on the screen. After the settings are reset, your iPad will restart.

12. DFU Restore Your iPad

A DFU restore is the deepest type of iPad restore and a last-ditch effort to fix a persistent software problem. Before performing a DFU restore, we recommend saving a backup of your iPad so you won’t lose your contacts, photos, and other data.

13. Repair Your iPad

If you’ve made it this far and Face ID still won’t work, you may need to get your iPad repaired. If your iPad is still under warranty, we recommend bringing in your iPad to your local Apple Store. Remember to make an appointment first!

Fresh-faced Face ID!

Face ID is working once again and you can finally unlock your iPad with your smile. Now that you know what to do when Face ID is not working on your iPad, make sure to share this article on social media before your friends and family turn blue in the face trying to fix the problem. We’d love to hear from you in the comments section below to know what you think about Face ID!

Is your iPhone frozen after iOS 27 update? A frozen iPhone won’t respond to touch, with the display completely stuck or working intermittently. Touches may register in the wrong locations, and physical buttons may refuse to work.

The Home Screen or an app could become non-interactive. With a frozen iPhone—different from an iPhone stuck in a boot loop—standard troubleshooting steps will only take you so far.

But worry not; you’ve come to the right place to seek advice. Follow along with us as we show how to fix a frozen or unresponsive iPhone in iOS 27.

If your screen responds intermittently to touch

  • Make sure that your screen is clean and free of any debris or water.
  • Disconnect any Lightning or USB-C accessories. If your screen works after removing an accessory, try using a different outlet, cable, or charger.
  • Remove any cases or screen protectors.

What to Do if My iPhone Freezes After iOS 27 Update? Try Force Quitting Apps!

If a specific app is causing your iPhone to freeze, force quitting the app can resolve the issue most of the time.

  • iPhones with Face ID: Swipe up from the bottom edge and stop near the middle of the screen, then swipe up on the app to close it.
  • iPhones with the Home button: Double-click the Home button to show the App Switcher, then swipe up on the app to close it.

Upon identifying the app causing the freezing, reinstall it. To do this, press and hold its app icon until a context menu appears, then tap on Remove App and choose Delete to confirm.

Doing so will also delete any app settings from the device that might be causing issues. You can now redownload a fresh copy of the app from the App Store. If the iPhone display remains frozen and generally unresponsive, the next troubleshooting step is a force restart.

Force Restarting May Unfreeze Your iPhone

Does your iPhone not display a shutdown screen at all? Here’s what you can do.

  • iPhone 11 and newer: Press and hold the Volume button and the Side button simultaneously until the power off slider appears, then drag it to turn the phone off.
  • iPhone SE (2nd and 3rd generation): Press and hold the Side button until the shutdown screen shows up, then drag the power off slider.

Wait 30 seconds after dragging the slider for the phone to fully shut down before turning it back on. The problem is that a fully frozen iPhone may not even let you reach the shutdown screen. If you cannot restart your iPhone because it’s not responding to your touches, performing a force restart might help bring it back to normal.

Force Restart an iPhone on iOS 27

Here’s how to force-restart iPhones running iOS 27:

  1. Press and quickly release the volume up button.
  2. Press and quickly release the volume down button.
  3. Press and hold the side button until you see the Apple logo (this might take longer than 10 seconds).

Assuming this is a minor iOS 27 glitch, restarting should fix the frozen iPhone. But if it doesn’t, and your iPhone keeps freezing, draining the battery intentionally is next on your list of potential fixes.

iPhone Is Stuck after iOS 27 update? Wait for the Battery to Drain!

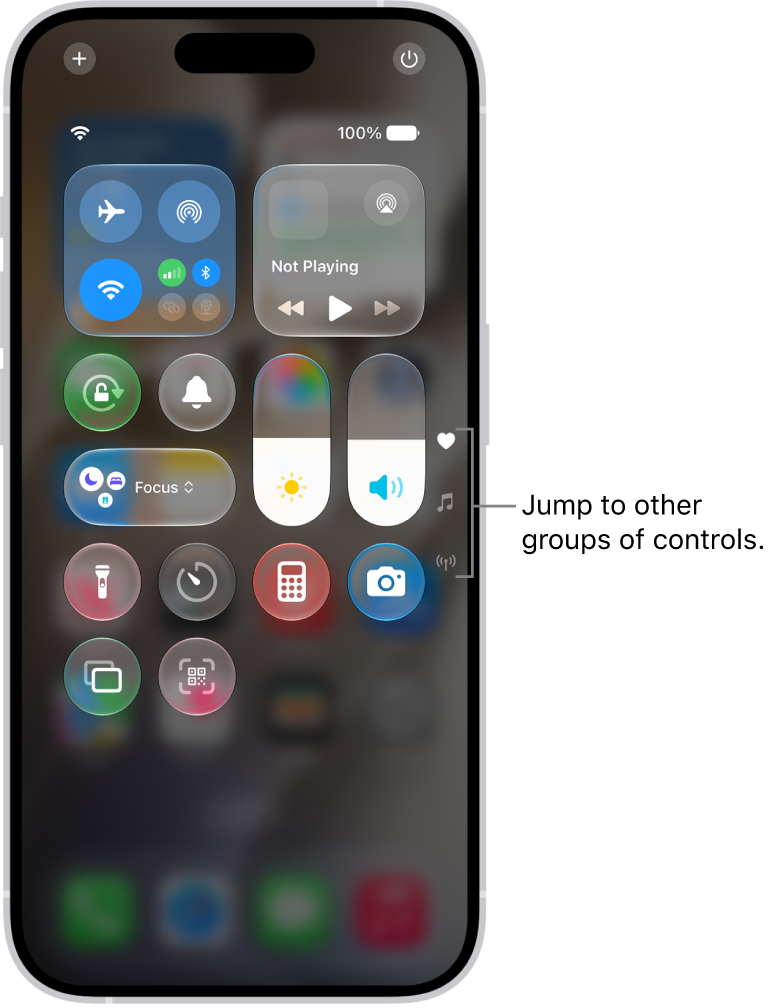
Leave your iPhone on until the battery charge is depleted and the device shuts down by itself. If your iPhone isn’t completely unresponsive, you can go to Settings > Display & Brightness > Auto-Lock and set it to Never to speed up the process. Plus, you can go to the Control Center and boost the brightness all the way up and make the battery drain faster.

With the battery depleted and your iPhone powered down, wait at least 30 seconds before plugging it back into power. The device will start up automatically after a few minutes, as soon as the battery has enough charge for booting. But if draining the battery makes no difference, try putting a frozen iPhone into Recovery Mode.

How to Fix a Frozen iPhone With Recovery Mode

Entering Recovery Mode allows you to restore your iPhone from an iCloud or iTunes backup, which may fix the frozen iPhone without deleting any apps or settings. Connect your phone to a computer and open the Finder (macOS) or iTunes (Windows), then do the following:

  1. Press and immediately release the Volume Up button
  2. Press and immediately release the Volume Down button
  3. Press and hold the Side button until you see the Recovery Mode screen

A common mistake here is letting go of the button as soon as you see the Apple logo. Be sure to keep holding the button past the Apple logo, and don’t let go until the device enters Recovery Mode and is recognized in the Finder or iTunes.

With the Recovery Mode active, a prompt should appear on the computer offering to restore or update your device. Click Update to have the computer download and install the latest version of iOS 27. Don’t worry; this won’t erase any data on the phone. Once the operating system has been reinstalled, your iPhone should be fully responsive again.

With the device restored and responsive again, now’s a good time to go to Settings > General > Software Update and install any pending iOS or security updates.

With that done, venture into Settings > General > iPhone Storage and delete anything that’s clogging storage space, like massive photo libraries, cached videos in streaming apps, games, and so on.

iOS needs at least one gigabyte of free storage space to function smoothly. Clearing storage space is the best way to avoid issues like slow-downs that could lead to sudden freezes.

Nothing Helps? Contact Apple Support

Is your iPhone still frozen even after trying out all the above tips? If so, we highly recommend talking to experts at Apple, as they’ll be able to assist you in more ways than we could in case the hardware is at fault.

Even better, you can make an Apple Store appointment at a Genius Bar, provided you have one nearby where you live.

An Unresponsive iPhone Is Virtually Useless

An iPhone that suddenly freezes is a brick in your hand. Whether iOS is outdated, some apps are incompatible with it, the battery is low, or the device is running low on storage space, following the instructions in this guide should help fix a frozen iPhone.

Hopefully, you won’t have to factory reset your iPhone and wipe all the saved data and settings just to solve the responsiveness and freezing problems.

Tag: iOS 27

Summary

  • If you’re lucky, a force restart may be all you need to fix iOS 27 black screen issue on your iPhone. Otherwise, you’ll need a computer.
  • If Find My is enabled, or you’re connecting your iPhone to a computer for the first time, you cannot restore it using Finder or the Apple Devices app.
  • If software fixes fail, physical damage might be the culprit. Take your iPhone to Apple or an authorized service provider to diagnose and resolve hardware issues.

The black screen of death occurs when an iPhone is completely unresponsive. You’ll hear alerts and feel vibrations, but you won’t be able to interact with your phone. Although physical damage is often the culprit, users have reported that they started experiencing this problem immediately after iOS 27 update. So, if your iPhone has black screen after iOS 27 update, try these fixes first.

1. Force Restart Your iPhone

The first thing you should do to fix the iOS 27 black screen of death issue is to force restart your iPhone. This is different from a regular reboot, and it’s useful when you can’t shut your iPhone down normally.

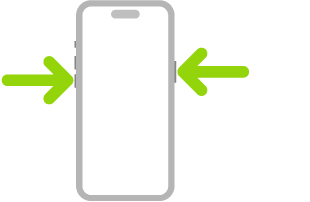
Force restarting requires a combination of button presses and can take a few tries since you’ll need to press each button quickly. Press and release the Volume Up button. Repeat the same with the Volume Down button. Then, press and hold your iPhone’s Side button until the Apple logo appears.
2. Restore Your iPhone With Apple Devices or Finder

If your iPhone doesn’t reboot even after you’ve tried force restarting it, you’ll need to factory reset it. You can do this using the Apple Devices app for Windows or Finder on macOS.

Restoring your iPhone with the Apple Devices app or Finder will erase all its data and bring it to factory settings. So, only try this if you have a recent backup so that you don’t lose all your data.

Note that this method will only work if you’ve connected your iPhone to Apple Devices or Finder before. That’s because when you connect your iPhone to a computer for the first time, you’ll get an alert on your iPhone (and your computer), prompting you to trust the device.

You can’t tap Trust on an iPhone showing a black screen, so you’ll have to hard reset your iPhone using the recovery or DFU mode, which we’ll discuss later.

Additionally, you can only proceed with these steps if you have Find My disabled on your iPhone. Otherwise, you’ll get an alert message prompting you to turn off Find My during the process. In this case, you’ll need to disable the Find My feature from iCloud and erase your iPhone remotely.

As long as you meet the above requirements, you’re all set. Simply connect your iPhone to your PC or Mac using a USB cable. Launch the Apple Devices app or Finder, and follow the steps mentioned below:

  1. Click [Your Name]’s iPhone under the Locations header on the sidebar. You can skip this step if you’re using Apple Devices.
  2. Head to the General tab and click Restore iPhone on the right.
  3. When prompted to back up your settings before restoring your iPhone, click Back Up.
  4. Next, click Restore when you get a confirmation pop-up.

The process may take several minutes to complete. So, be patient. Once it’s done, you can restore your iPhone from a backup.

3. Use Recovery Mode to Factory Reset Your iPhone

Recovery mode is Apple’s built-in recovery system that allows you to factory reset your device and reinstall the latest iOS version when your iPhone becomes completely unresponsive.

Entering recovery mode on your iPhone requires you to hold and release a combination of buttons on your device in a specified order once you connect it to your computer and launch Apple Devices or Finder.

Press and release the Volume Up button. Then, repeat the same with the Volume Down button. Finally, press and hold the Side button until you see the Recovery Mode screen.

The Apple Devices app or Finder will now show a pop-up message indicating that it has detected an iPhone in recovery mode, after which you can choose to Update or Restore your device.

4. Take Your iPhone to Apple

If everything fails, the black screen of death is likely due to physical damage or other hardware issues. In that case, you must contact Apple Support or take your iPhone to a nearby Apple Store or an Apple Authorized Service Provider. It’s easy to make an Apple Store appointment at a Genius Bar.

Remember that Apple’s standard one-year warranty doesn’t cover replacements or repairs for damaged screens. So, unless you’ve spent money on an AppleCare+ extended warranty plan, you’ll have to pay a fee to get your iPhone serviced.

Although the black screen of death on an iPhone can be an immediate cause for concern, it’s worth trying a few software fixes before seeking professional help, especially if you haven’t physically damaged your iPhone. However, in case of hardware issues, you have no choice but to contact Apple or a third-party service provider for expert assistance.

Tag: iOS 27

Is your iPhone not charging after iOS 27 update, or charging very slowly? This is a sadly common problem for Apple customers, and the complaint spikes in the weeks after a major software release like iOS 27. Before long the battery will be empty and you’ll be stuck with the world’s most expensive chopping board.

This isn’t a problem that’s unique to Apple products: for various reasons the charging port and cable are almost always a weak point on tablets and smartphones.

Your iPhone’s charging port – USB-C on iPhone 15 models and later, Lightning on iPhone 14 models and earlier – is open to the air and therefore susceptible to dust getting inside and clogging up the connections; the bit just behind the head of the charging cable often frays. And this all assumes that there are no problems with the plug or your power outlet, and that the iPhone’s battery unit is still performing properly – neither of which are safe assumptions.

In this article we walk you through a range of troubleshooting tips that will help you establish why your iPhone won’t charge after iOS 27 update, and offer solutions that will fix many of these issues either permanently or temporarily. If all else fails, we explain your consumer rights, and offer some advice about getting Apple to step in and repair a malfunctioning device for you.

1. Absolute basics

Let’s check the absolute basics first.

Make sure the cable is plugged firmly and fully into the iPhone, that the other end is plugged firmly into the power adapter plug, and that the adapter plug is plugged firmly into the wall outlet. Apple starts in the same place with an iPhone that won’t charge: a wall outlet, firm connections the whole way along, and a different outlet if you have one to hand. (If you’re charging via a Mac rather than through a wall plug, jump to the next step.)

Make sure the power outlet is switched on. Yes, we know – but it’s still worth checking.

2. Charging via a Mac

A computer is rarely the quickest way to fill a battery. Plug into a machine or a hub that already has other devices hanging off it and the maximum power output drops, because everything attached is drawing on the same budget. Car ports are no better.

The iPhone may warn you if the Mac isn’t able to charge it, but in our experience that often doesn’t happen: sometimes the charging icon appears yet the percentage doesn’t increase, or does so at a glacial rate.

If you’re charging via a MacBook, make sure the MacBook itself is plugged in: depending on the settings you’ve selected, there may be problems if the laptop is trying to preserve battery power. And whichever Mac you’re using, be sure to plug into the Mac itself rather than a USB-connected keyboard or similar.

As in the previous step, make sure the cable is attached firmly to the Mac. Similarly, make sure the Mac is switched on and awake. Technically, you should be able to charge from a sleeping Mac provided it was awake when you plugged your device in – if it then goes to sleep the charging should continue. But let’s play it safe here.

3. Stop using the iPhone!

Are you using your iPhone at the same time as charging it? Any charge you gain will be set against the loss incurred through working the processor and screen. Graphics-heavy games, processor-heavy apps, the camera, video streamed at full brightness – all of them slow the charge while they run.

Charging via a Mac in particular (see previous step) is almost always a dead loss if you have the screen powered on at the same time – a sad fact we discovered after trying to use an iPad Air 2 as a spare screen at work. Despite being plugged into the main Mac and only having a (continually refreshing) web page open, the iPad was always dead by lunchtime. You’re losing charge quicker than you’re gaining it.

In other words, try switching the iPhone off – at least power off the screen – and see if that helps.

4. Check the charging port for detritus

Remove the cable from the charging port and take a look at the connector at the bottom of your device. Every iPhone that can run iOS 27 has either a USB-C port (iPhone 15 models and later) or a Lightning port (iPhone 14 models and earlier). Whichever you have, the same principles apply.

Clear any debris out of the port, then plug the cable back in firmly. Check here before you spend money on an iPhone not charging after iOS 27 update: lint compacts at the bottom of a port over months, and it will hold the connector just short of contact.

5. Are you using the right kind of charger?

The old 5W, 10W and 12W plugs are long gone. Pair a modern iPhone with the wrong adapter and you can lose an afternoon diagnosing a fault that was never there.

For fast wired charging you want a USB-C Power Delivery charger, with a USB-C cable on iPhone 15 models and later, or a USB-C to Lightning cable on iPhone 14 models and earlier. A wired charger of 7.5W or less will crawl. So will a wireless charger under 10W, such as a Qi1 pad. And with a USB-A charger, iPhone 15 models and later cap out at 7.5W anyway.

An iPhone 8 or later reaches 50 percent in around 30 minutes on an Apple 18W or greater USB-C Power Adapter, or a comparable third-party unit that supports USB Power Delivery. iPhone 12 and later need 20W or higher. iPhone 17, iPhone 17 Pro and iPhone 17 Pro Max get to 50 percent in around 20 minutes on a 40W adapter or higher.

If you’re not sure which Apple power adapter you have, the wattage is printed on the top or bottom of the plug. Label it once you know, and you’ll never grab the wrong one again.

6. Check your charge limit before blaming the update

Here is the one to check before you buy anything. If the percentage climbs and then parks at 80, an iPhone won’t charge after iOS 27 update because you told it not to.

Optimized Battery Charging reduces the time your iPhone spends fully charged, and delays charging past 80 percent when your iPhone predicts it will be connected to a charger for an extended period. When it’s active, a notification on the Lock Screen says when your iPhone will be fully charged. If you need it charged sooner, touch and hold the notification, then tap Charge Now.

On iPhone 15 models and later there’s also Charge Limit, which stops charging at a level you set:

  1. Open the Settings app, then tap Battery.
  2. Tap Charging.
  3. Choose an option. You can choose a charge limit between 80 percent and 100 percent in 5 percent increments. When the charge limit is 100 percent, Optimized Battery Charging is available.

On iPhone 14 models and earlier, open the Settings app, tap Battery, tap Battery Health & Charging, then turn Optimized Battery Charging on or off.

The same screen flags chargers, too. A Slow Charger message appears on the Lock Screen and in Battery when a higher-wattage charger would improve things. An Incompatible Charger message appears when iOS sees a charger connected but not charging. It will also show you whether charging went on hold because the battery got too warm.

7. Waiting, restarting and resetting

Leave it plugged in for half an hour before going any further. That costs nothing but patience, and it clears a surprising amount.

If it still won’t power on, or the screen just shows a battery icon, force restart it. Press and quickly release the volume up button. Press and quickly release the volume down button. Press and hold the side button until the Apple logo appears. Then give it another half hour on the charger.

You may see an alert when you plug in your device saying the accessory isn’t supported or certified. In which case you know the problem is the charging equipment. Connect the device straight to the charger with nothing in between, clear the port, restart the iPhone, try a different cable or charger, and check you’re on the latest version of iOS. We’ll try swapping out various parts of the charging setup in the next step.

8. Work out which component isn’t working

At this point we appear to be headed into the realms of component failure. But if we’re lucky, the part that is misbehaving may be cheap to replace. Fingers crossed.

Set up the iPhone, cable and plug as before – keep everything the same – but this time, plug into a different power outlet (or into a different USB port on your Mac). If it starts working, congratulations! Your power outlet (or USB port) is broken. Okay, that’s not ideal but at least you know.

If it still won’t charge, keep everything the same but this time use a spare charging cable or borrow one from a friend. There are alternatives to Apple’s own cable: you can buy a third-party MFi-certified cable.

Finally, do the same with the plug adapter on the end of the charging cable.

If your cable or power adapter is at fault, in almost every case we would strongly advise paying for a new unit instead of attempting a repair – the words "amateur repair" and "mains power" should never appear in the same sentence.

If none of these substitutions work, it’s most likely your iPhone that’s misbehaving. If that’s the case, we need to get help from the professionals.

9. Get Apple to fix your iPhone

First of all, be warned that the Apple representative who deals with your issue will ask you to repeat some or all of the steps we have outlined previously. Try not to lose your patience!

Many of us prefer to speak to an Apple employee face to face while discussing tech problems, but it may be inconvenient to get to an Apple Store, or to make an appointment there. Instead you may choose to get in touch with Apple support, but you will most likely be asked to send or take in your iPhone for a service, and at that point you just have to sit back and wait for Apple’s diagnosis.

If you’re still in warranty, this should remain financially painless. The one-year warranty covers the battery as well, on top of whatever rights your local consumer law gives you. Out of warranty, you may be able to claim for the repair through any insurance you took out specifically to cover the iPhone, or even a good quality of home and contents insurance.

If not, consider whether the repair is worth the cost. Check the latest prices for the model you would choose as a replacement. Would you have been thinking about an upgrade soon anyway?

Before you get that far, though, go back to step 6. An iPhone not charging after iOS 27 update is far more often a charge limit somebody set and forgot than anything a technician needs to open up.

Tag: iOS 27

From getting Siri to control your iPhone to crazy new photo editing features, here are the top new features of iOS 27.

Quick new iOS 27 features

The updated Timer control

In the Control Center, you’ll find the updated Timer control that has a cool new visualizer. It is so much better to use in iOS 27. You swipe to set the time from anything between 1 minute to 2 hours. It also has a satisfying haptic effect as you swipe, which is nice.

Shortcuts you can describe out loud

Another great iOS 27 feature is in the Shortcuts app, where you can create shortcuts by saying what you want them to do. For example, you can say make a noise to tell me to put my phone on charge when the battery is below 20%. You hit Send and then it’ll make that shortcut for you in a matter of seconds. These used to be hard to make but now they’re easy.

Shake to undo

Let’s say you’ve made a bunch of changes customizing your home screen. If you shake, you can undo that one change. If you shake again, you can undo the previous change. And if you shake again, you can undo the previous change and keep on shaking until you are completely satisfied with all your changes.

Shake to undo also works in other apps. In Notes, for example, you can bring back any deleted text. In Safari, maybe you deleted a tab, you can bring the tab back. Even with Messages, if you deleted something by mistake, you can shake to bring it back. This is useful, especially when it comes to customizing your home screen.

Customization

The Liquid Glass transparency slider

There have been a bunch of updates to customization. In the Appearance settings, under Liquid Glass, there’s now a new slider that makes everything less transparent or more transparent. This means you can now control the transparency of let’s say your app icons or widgets to make things look a lot more visible. Nice.

Minimizing the lock screen clock

The lock screen also had a major update that I love, starting with the clock, where you’ll find a new icon. If you tap the icon, that minimizes the clock and puts it inside the top widget section. So if you want a better view of your wallpaper, now you can. Sweet.

Extend for wallpapers

If you want to set a photo or image of yours that doesn’t fit too well as a background, you can now pinch to zoom out to get the new Extend option. If you tap Extend, your iPhone will extend that image and generate everything around your wallpaper to get that perfect framing. Extend also works with regular photos you want to use, basically any image you might have. You’ve got to admit that is crazy cool.

Image Playground wallpapers

If you don’t have an image, you could instead choose the new Image Playground option. All you do is type in a description of what you want, like desert dunes at midnight, hit Send, and in a couple of seconds, it’ll generate a brand new wallpaper for you. That looks good. You can get some pretty cool results and even take your own photos and generate them into multiple different styles.

The resizable connectivity control

This is super hidden, but in the Control Center, when you go to edit your controls and you resize the connectivity control, it now has a few other sizes. So you get the large original one, a new medium size, the pill-shaped sizes, and the small size you already know.

Full screen home screen widgets

The home screen widgets also got a new size in iOS 27. If you tap and hold down and extend the handle, you can now have full screen widgets. This works with the photo widgets, the weather, notes, reminders, music, and the calendar. Basically all the good ones. And don’t forget, you could stack these giant widgets all into one, because you do get a lot more detail with them.

App updates

Custom passes in Wallet

Three apps got some big changes in iOS 27: Wallet, Weather, and Camera. But Wallet is probably my favorite update, because when you go to add a card now, you can create your own custom pass. So finally we can add membership cards, loyalty cards, tickets, all that jazz. All you have to do is scan the card. Your iPhone then automatically creates the pass for you and you can then customize it.

If you hit the little palette icon, firstly, you can change the background color. There are a few different options to choose from, nothing too crazy. Then there are four different background options to choose from. You can have a bit of fun with it. Then you can also choose a completely custom icon. Mine was a gym pass. I went with a little gym bro. In all the text fields, you can put down exactly what info it is you want.

In iOS 27, there is no need to carry around a stack of cards. You can add them to your iPhone. The crazy part though is Samsung has had this feature for 10 years. So it’s about time, Apple. Thank you.

A more detailed Weather app

The Weather app got way more detailed in iOS 27. There are three new buttons at the top. The first one is Conditions. That shows the temperature and cloud cover. The second is Precipitation. That shows you how likely it is to rain and also how many inches it’ll rain. Then you get the Wind button that shows speed graphs and directions.

The redesigned Camera settings

As for the Camera app, it got a slightly updated design because all your camera settings now live at the top of the camera screen. If you swipe down, you can see all of them, but the important ones are still right at the top, like your flash and resolution.

Siri mode in Camera

The biggest upgrade in iOS 27 has got to be the brand new Siri mode. You’ll notice it’s got a new logo that looks like something you might find on a can of soda. If you take a photo in Siri mode, Siri will give you some information on what it is you took a photo of, like the product’s name, for example. You can then even chat about that product and ask it things like, “where do I buy this?” And it’ll quickly respond with a couple of links, which is cool.

The new photo editing tools

To find the new photo editing tools in iOS 27, all you do is open any photo, tap the Edit button, then tap Tools, and they’re all at the bottom. We’ve got Clean Up, Extend, and Reframe.

Reframe

Reframe does something nuts. It scans your image, then you can pinch to zoom out and swipe either left or right to adjust the angle the image was taken in, which is crazy. Then tap Reframe and it’ll recreate your photo as if it was taken from that angle. It works incredibly well.

Extend in Photos

The Extend option works the exact same way as the wallpaper. You pinch to zoom out, but you can also adjust the aspect ratio. I went with the square, you then tap Extend and, like magic, it fills out the empty areas. That was a lot of extra detail to get right and it did such a good job. That is impressive.

Clean Up

There’s also the Clean Up tool. We have had Clean Up for a while, but it has been updated in iOS 27. All you do is draw over what it is you want to remove and your iPhone will remove that specific thing from the photo. Much better. It even highlights suggestions for you. And if you tap on the highlights, poof, they are gone.

Siri

Probably the craziest new feature on iOS 27 is Siri can now edit photos for you. Wow.

How to open Siri

Straight off the bat, to open Siri in iOS 27, you can either swipe down on the Dynamic Island and start chatting with it in a new interface, or you can press and hold down the side button just like before, or you can use the new Siri app that comes with iOS 27. The Siri app is where you’ll find all your conversations with it.

Switching from Siri to ChatGPT

Essentially it’s like ChatGPT, but for Siri. By default, when you start a new conversation, it’ll use the updated Siri AI model, which is way more advanced than before, but you can also tap the text input field, then tap Ask and change from Siri to ChatGPT. That’s in case you ever wanted to do more complex things like in-depth research, writing, or even coding.

Siri can see your screen

Besides for chatting, Siri can now also see what is on your screen. So you can ask it any questions about what is on your screen, like “summarize this page for me,” and it comes back with “The iPhone is a line of smartphones developed by Apple.” Or “please reply to this message,” and it comes back with “I’ve drafted a reply for you.” Siri will look at your conversation and put a reply together. Whoa.

Siri can act inside your apps

In iOS 27, Siri now works in your photos. This works in a few different ways. For example, you can ask it, “please open the Photos app and make my most recent photo black and white.” Siri will then open the Photos app, open the editing menu, go to the filters and give it a black and white filter. I’m amazed this actually works now.

Or you could say, “Hey Siri, take a photo,” and it comes back with “Photo in three, two, one.” You can also say: “please open Amazon and search for dog toys,” and again, Siri opens up Amazon and searches for that specific thing. This is handy now.

Siri in the keyboard

Siri is now also in the keyboard too. If you get a message from someone, straight away it gives you a suggestion on what to reply with. Nice. Or if you press the Siri icon, you can straight up ask it to write a reply for you. Then give it a couple seconds and boom, you got yourself a reply. There are a ton of new things Siri can do, and I’m impressed.

More new features in Photos

Image search

Inside the Photos app, if you open an image, then swipe up on it, there’s a new image search option, which looks that item up on Google and then gives you a bunch of search results. This is handy for finding things like products.

Star ratings for photos

In iOS 27, you’ll notice a new star icon on the top right hand side of your images. This is for rating your photos from one to five stars. So now you’ll be able to filter your photos out based on what star rating you gave them. This is off by default, but all you do is tap your profile icon, scroll down and turn on Show Ratings Control.

Captions in videos

In videos, there’s now also a new captions button in the play bar. If you tap the captions button, then turn it on, it’ll show you the subtitles for any and every video in your Photos app. What’s even cooler is there are four different subtitle styles to pick from, but unfortunately this doesn’t work for US English for now.

Save Video Frame as Photo

Still in videos, if you ever want to grab a still from a video, you tap the three dots in the top right and you have the new Save Video Frame as Photo option that will extract a literal frame out the video for you. Love it.

Insight buttons

If you open a photo of something like a loyalty card and swipe up, there are new insight buttons, like Add Pass to Wallet. Different buttons show up for different things. So with a poster, you’ll get an Add to Calendar button. For a business card, there’s Add to Contacts along with a couple other ways to directly contact that person. Sweet.

Identity Documents

This is pretty hidden, but back inside the Photos app under Collections, if you scroll down to Utilities, there’s a new option, Identity Documents. This groups all your photos of IDs, passports, and cards into one spot, which is handy.

Connectivity Assist

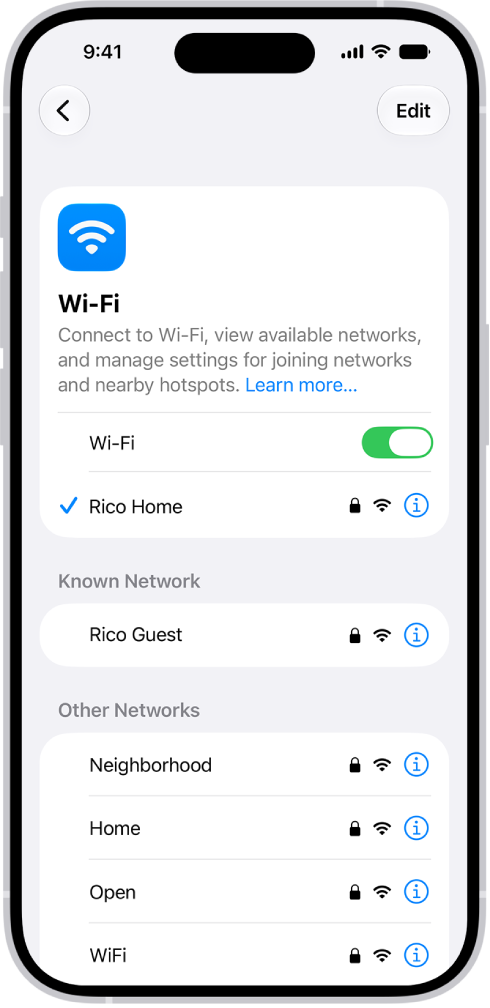
If you go to Settings, tap Wi-Fi youll see an option called Connectivity Assist. What this does is it makes your iPhone instantly switch from Wi-Fi to data when your Wi-Fi signal drops. So if you’re on a call or anything, it doesn’t get interrupted. Nice.

Separate alarm and system volumes

This setting is something you should turn off. This one is found inside Sounds & Haptics, and by default Alarms and Timers, as well as Alerts and System Sounds, are turned on, but when you turn them off, looky, looky, you can now finally adjust those volumes on their own. So if you want it, you can now set your ringtone to max, your alarms and timers to mid and system sounds to low. I am glad we can finally do this.

The redesigned AirPods settings

In iOS 27, AirPods settings got something brand new too. When you connect a pair of AirPods, then jump into Settings and AirPods settings straight away, you’ll notice that everything now looks different. Compared to the old iOS, everything has now been categorized into its own separate sections.

For example, if you wanted to find the biggest new AirPods feature in iOS 27, all you have to do is go into Audio & Routing. You’ll find the equalizer. Yeah, that’s right. After literally 10 years of having the AirPods, we finally get the equalizer. It’s nothing too complicated. You can adjust your lows, your mids and your highs. This is how I like to have it for some extra bass. So if you want that extra bump in your tunes, then copy this setup.

Shortcuts

My favorite new shortcuts

Here are a few of my favorite shortcuts in iOS 27 that you got to try. Inside the Shortcuts app, all you do now is hit the plus icon and describe what shortcuts you want. For example, “create a shortcut that gives me a summary of the temperature, my phone’s battery, my commute time to home, and add a nice affirmation.” You tap Send. What’s crazy is it does everything for you. You don’t have to know exactly how Shortcuts works anymore.

What I also love is if you don’t like its response or the way it looks, you can go back into the chat section and say something like “stylize this with bullet points and emojis.” Then hit Send, it’ll do its whole AI thing. When you’re done with the shortcuts, add it to your home screen. You can customize the icon as well if you want. But now anytime you press that shortcut, boom, you get a rundown of all that info in a nice stylized form.

Another cool shortcut you can try in iOS 27 is “create a shortcut that automatically finds and delete screenshots older than 10 days.” Again, you hit Send, it’ll do its thing. And now anytime you run that shortcut, it’ll bring up all your screenshots older than 10 days and you can delete them with one tap.

Another one you can try is “create a shortcut that shows me five pictures I took on this day two years ago.” But as cool as shortcuts are, shortcut automations are even cooler.

Shortcut automations

You can say “create an automation where every time I put my phone on charge, it says, oh yeah.” I also like this one: “create an automation that shows me a picture of coffee and an inspirational message every day at 3pm.” Now every time it hits 3pm, I automatically get a sick inspirational message and a pic of coffee. What’s not to love? There is so much more you can do with shortcuts.

Tag: iOS 27

Recently, Apple released the second public beta for iOS 27. This is how to install the beta on your iPhone or iPad for free, and what to expect from it.

If you currently have the developer beta installed on your main device, you might want to consider switching over to the public beta, and I’ll explain why and how to do that.

Installing iOS 27 public beta on iPhone

To install iOS 27 public beta on your iPhone, first go into Safari and navigate to beta.apple.com. Once you get to that page, the iOS 27 public beta shows up. If you go down, there’s a sign up or a sign in button. You most likely already have an Apple account. You want to go to where it says Already a member, tap Sign In, and sign in to your Apple ID.

Then you’re going to see the Beta Software Program Agreement. Scroll down and tap Agree. It’s going to give you a guide for beta software. This is where you’re going to choose iOS, iPadOS, macOS, and so on.

iOS 27 appears along with some of the changes that are coming with it. Look underneath the Get Started section, where there’s a blue link that says Please enroll your iOS device. You want to tap that link. After you’ve done that, it will give you some advice on doing a backup.

Then there’s a spot where it says Turn On Beta Updates. If you tap that blue button, it will open up in Settings where it shows your iOS 27 beta. It will say iOS 27 public beta.

You can also access this by going into Settings, General, Software Updates, and then tapping where it says Beta Updates. That is also where the iOS 27 public beta populates. You want to make sure to tap and select the iOS 27 public beta. Then when you go back, the iOS 27 public beta populates where you can download and install it.

These days, getting the public beta on your device is very simple. There are no profiles. There’s no money exchange. There’s nothing like that. It shows up automatically inside of your Settings.

Back up before you install

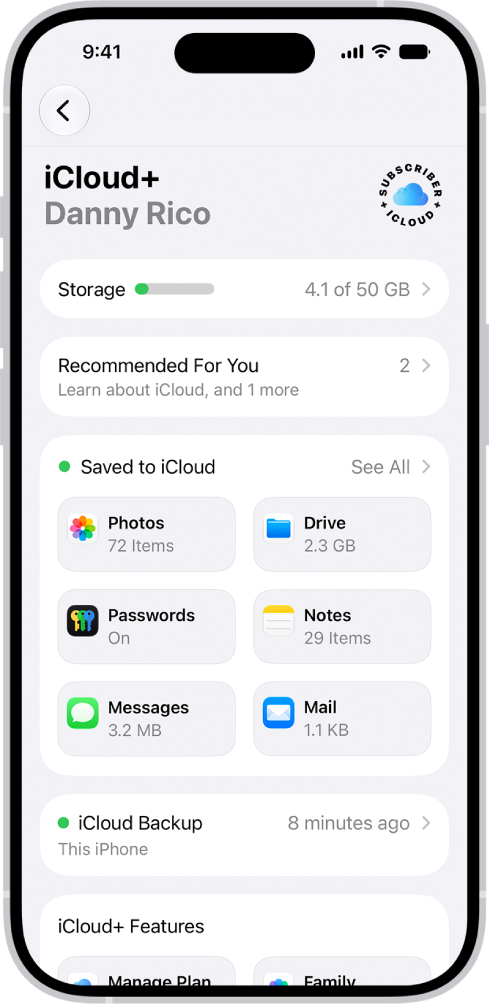
Before you download and install iOS 27 beta, you do want to go into your Settings and go up to your accounts, go down to iCloud, and you want to make sure to go into iCloud Backup and make sure you have a backup from right before you install the public beta. Just in case something goes wrong, you want to make sure all your data is up to date in your backups. Make sure you do that, and make sure it says the last successful backup was just now.

What to expect from iOS 27 public beta

There are a lot of things that you need to be aware of with the iOS 27 public beta. The first thing that I have to mention is that this is the most stable beta in recent memory. I’ve covered that quite a few times, but with that being said, there will still be bugs.

This is beta software. This is not a final release. It’s not going to be ready until September for the public. This is just a public beta. You are being a beta tester for Apple.

Keep in mind that with these betas, especially iOS 27, things can and will change. You will expect changes to the icons, the way settings are. Don’t get used to anything at this point in the beta, because it will change at some point in the future.

With that comes the responsibility of reporting the bugs in the Feedback application. You’re agreeing to test the software for Apple in exchange for giving feedback on things that may not be working as they should.

Reporting bugs in the Feedback application

Once you have the iOS 27 public beta on your device, you get the Feedback application. If you don’t see it on your Home Screen, search for Feedback. This is where you will be submitting any of the bugs that you come across. Anytime you run into an issue, you could always take a screenshot of it, and you will attach that to your feedback.

Open the Feedback app, go to New Feedback, go to iOS and iPadOS, and then you will fill out the information and you can attach it there. It will pull up the system diagnosis automatically for you and you will add your attachments for the issue, and you can describe what was going wrong. Sometimes Apple will respond to you as well and tell you thank you, and that they’ve fixed that bug in the next version.

If you go into Recent Activity, this is also where you could see the release notes for the upcoming betas as well. If you’re curious about the specific things that have been fixed, this will cover that information there as well. The release notes are focused on code changes for the most part. Your duty as a beta tester is to report those bugs in the Feedback application.

Issues you might run into on iOS 27 public beta

Once you install iOS 27 beta on your device, you will have different issues like frame rate issues. You might have some crashes. You might notice the performance and stability is not as good as it is on the stable build of iOS 26, for example. Your battery life might not be great. I’ve personally had a great experience with battery life so far on the betas, but again, it is still a beta.

Banking and other applications

One question I get asked all the time — a lot of people don’t install the betas because they’re worried about their applications not working, like their banking applications, their investment applications, things like that. But those seem to be issues of the past. These days, I wouldn’t worry about that too much.

I’ve not run into any application that does not work at this point on the iOS 27 public beta. If you’re worried about that, I would say do not worry about it. Pretty much every banking application that I’ve tried and other people have tried has worked just fine on the iOS 27 betas.

Liquid Glass slider

If you go into the Settings app, you go into Appearance, you go into Liquid Glass, we do have a Liquid Glass slider now where you can adjust and tweak the intensity of Liquid Glass system wide. You now have full control over that.

Whereas before, you just had two options. You could choose less opaque or more opaque. But now you have a slider, which is nice.

Lock screen changes

If you go into an application and you swipe down and you have a subject on your lock screen, there’s a cool, funny effect where the subject populates over top of your content.

When you pull down the lock screen, you’ll also notice the compact time up at the top. That is something you could also change in iOS 27. If you tap on that, you have a new button that says Customize. That allows you to have a compact, clean little clock up there at the top of your lock screen. I really liked that personally.

Siri AI

The headlining feature in iOS 27 is going to be Siri AI, the completely revamped version of Siri that has personal context and on-screen awareness. It can perform in-app actions across multiple applications, and has broad world knowledge. There’s even a standalone application now for Siri. If you go into the Siri application, we have our previous chats. It’s like ChatGPT now in pretty much every way, which is awesome.

With the new Siri, I can do a lot more than I could before. For example, I can ask Siri, “Take a look at my screen and tell me where this Apple Store is located.”

What it’s going to do is take a look at my screen with the new on-screen awareness feature. It shows me that that is the Apple Store in Aventura, Miami, which is accurate. So I was able to look at that screen with no context, no details of where I was, and it was able to pinpoint where that was. It shows me the map, I can call directions, all of that, which is cool.

You can also swipe down once you get something in Siri and you can continue in that conversation and go back and forth with Siri in terms of having a conversation. Like I mentioned, Siri also has access to your messages, your contacts, your emails, everything. You could ask questions and it will go into those applications and pull that information for you.

Creating shortcuts with natural language

You can also now create shortcuts using natural language. If you open the Shortcuts app and go to create a new shortcut, you can type in exactly what you want and it will create that shortcut for you. You can say, “make a GIF from a video,” and it will do what’s necessary to create that shortcut. This is a very simple one, but you can get a lot more advanced as well.

It could also build onto that shortcut. It will do that, and you can press play and it will run to see if it’s what you like. You could also tap Edit and you can tweak exactly what’s going on with that shortcut in the builder, or you could go back and continue to talk in natural language to describe the changes and it will go ahead and keep changing that shortcut for you without you having to build the shortcut yourself. You can do it with your words.

Create a Pass in Wallet

Easily one of my favorite iOS 27 features that has become very useful already is the fact that you can now create passes inside the Wallet application. If you open the Wallet app and then go to the plus, at the bottom we have Create a Pass. This allows you to make a custom pass for tickets, memberships, and more. When you do that, you would scan the QR code. If you have it on your phone or take a screenshot, you could pull a screenshot from your Photos and you could do things like add your gym membership to your Apple Wallet.

Every time I go into Planet Fitness, now my gym, I’m able to double click my side button to pull up my Wallet and I scan my membership without having to go all the way into the application and log in, pull up my card. There’s something like five buttons, and about 20 seconds at least that I save every single time I go, because this is now saved into my Wallet. You could do that for anything that’s not previously supported with Apple Wallet, which is convenient.

Extend and Reframe in Photos

In Photos, if you go to Tools, we have Clean Up along with Extend and Reframe. Extend and Reframe are cool because this will allow you to extend the image and make it larger.

You could also reframe. If you want to change the direction or the angle of the photo, you can manipulate it well. You can move it and change the angle at which that photo is taken. It’s neat. It works well.

Clean Up

The Clean Up feature is much better now, because it works using generative AI. For example, if I take a photo and want to hide my hand, it will recreate the shirt behind it. Whereas before it would just leave a black mark. It wouldn’t recreate what was behind where you’re trying to clean up. Now it will do that since it’s using generative AI and not just filling in.

You also have different options. You could choose either Fast or High Quality. High Quality is going to look the best.

Developer beta versus public beta

I do also want to answer a few questions that I get all the time when it comes to iOS beta. The first one is what is the difference in the developer beta and the public beta, and which one should I install? First off, the public beta and the developer beta are typically the exact same. Just one comes after the other.

The developer beta typically comes first and the public beta is released hours or days after the release of the developer beta, but they are typically the exact same. They will have the same build number. It’s just the public beta comes out later. You might be wondering: why does it come out later? It’s because that way you will avoid any potential major issues that might break the software that the developers might’ve had to experience.

The developer beta is a lot more risky because Apple, they’re going to have time to fix it by the time the public beta gets released. But if you install the developer beta and it breaks, you were the guinea pig for that. That’s why I always recommend for most people on their main device to install the public beta instead of the developer beta, especially after the public beta comes out, because a lot of the main features have already been released.

Should you switch from the developer beta?

If it’s your main device, if you only have one device, I would personally switch over from the developer beta to the public beta, because you’re going to avoid some of those more major bugs that could be introduced in the developer beta. Plus, most of the big new features were already added. You’re not going to get as much FOMO as maybe you had for the first couple of betas.

But with that being said, if you are a seasoned beta tester, if you’ve beta tested for years before, you already know what to expect. You know the issues to expect, you know how to navigate those issues. Then sure, stay on the developer beta. There’s no reason to switch over to the public beta, especially if you are a tech nerd like me and you really like having everything as soon as it comes out.

Just know that public betas are well known and well documented for being less risky since they get released afterwards. It gives Apple time to fix the things that might’ve gone wrong in the developer beta.

How to switch

If you do ever want to switch from the developer beta to the public beta, it’s very simple. You go into your Software Updates screen and go into Beta Updates. Then from there, the iOS 27 developer beta and the iOS 27 public beta populate. All you want to do is switch from one to the other. You will select iOS 27 public beta instead of developer beta. Then when you go back, it will start populating the public betas from here on out.

You could always switch back and forth as well. It’s not like something you change one time and you can’t change it again. You could always change back and forth if you would like to.

That is everything you need to know about the iOS 27 public beta. It’s pretty straightforward. It’s pretty simple, but I do want to explain it because there are always new people joining the iOS beta scene. I need to let you know what to expect from it, and the fundamentals of beta testing on iOS.

In this quick guide, we’ll show you how to insert the degree symbol (°) anywhere on your iPhone, iPad, and Mac without copying & pasting it off the internet. You don’t even have to use a third-party app!

When you’re writing something where you want to use the degree symbol, do you just type the word "degrees" instead?

Whether you’re talking about the temperature (25°C or 83°F), angle (90°), the geographic coordinates (28.61° N (latitude) 77.21° E (longitude)), or something similar, you don’t have to use the word ‘degree’. Once you see how easy it is to insert the degree symbol, you’ll wish you had found out sooner!

Type the degree symbol on iPhone and iPad

Inserting the degree sign is super simple if you use the default iOS keyboard on your iPhone or iPad.

  1. Open the app you’re typing in and make sure the keyboard is up and ready.
  2. Access the numeric keyboard by tapping the 123 button.
  3. Press and hold the zero (0) key until the little pop-up appears.
  4. Slide your finger to the degree symbol (°) to select it and release your finger.

The above steps may also work with third-party iPhone and iPad keyboards. For example, it does work with SwiftKey.

Type the degree symbol on Mac

On Mac, it’s even easier! Just use the Shift Option 8 keyboard shortcut to type the degree sign.

With all the useful keyboard shortcuts you can use on Mac, this may be one you’ll forget if you don’t use it often. In that case, just use the emoji keyboard (Character Viewer) to pop in the degree symbol.

If you have Emoji & Symbols in your menu bar, select it, or you can use Edit > Emoji & Symbols from the menu bar for the app. Enter "degree" into the search box, and you’ll see the degree sign appear. Just drag it to the document, email, note, or whatever. If you don’t see it in search results, go to the Punctuation category, and it should appear there.

Tip: If you plan to use the degree sign often, you can add it to your Favorites in the Character Viewer.

Note: You can also use the Text Replacement feature to enter the degree symbol on iPhone, iPad, and Mac. However, it will add a space between the number and the degree symbol (27 ° and not 27°). To fix this, place the cursor to the left of the degree symbol and remove the extra space.

Even the best smartphone is pretty useless if you can’t get it going. Luckily, we have solutions if your iPhone won’t turn on after iOS 27 update.

There is nothing new about the problem of iPhone not turning on as it has existed on almost all iPhone models. This problem has affected many iPhone models, including iPhone 17.

If your iPhone won’t turn on after iOS 27 update, read below to learn why and what you can do about it.

Why won’t my iPhone turn on after iOS 27 update?

Whether you’re rocking an older iPhone 11, or newer iPhone 17, nothing is more frustrating than a device that won’t turn on. Before you give up, there are a few fixable reasons your iPhone may not be powering up after iOS 27 update. If none of the problems below apply to you, it could be time to take your device in for a checkup at an Apple store.

The iPhone is out of battery

The most obvious reason for your iPhone not turning on after iOS 27 update is that the battery is dead. Luckily, this is the easiest solution to fix. On the iPhone 11 and newer, charging from 0—50% takes only 30 minutes.

Fast charging works when you use an Apple USB-C to Lightning cable or USB-C cable and one of these adapters:

  • Apple 18W, 20W,2 29W, 30W, 35W, 61W, 67W, 87W, or 96W, or 140W USB-C Power Adapter
  • A comparable third-party USB-C power adapter that supports USB Power Delivery (USB-PD)

If you’re not sure which Apple Power Adapter you have, check the wattage on the top or bottom of the adapter.

Your charger isn’t working properly

If you left your iPhone to charge up and came back to a device that still won’t turn on, your charger may be the culprit. Faulty third-party chargers or even a worn-out one from Apple are worth replacing. There is also the possibility that the outlet you are plugging into isn’t supplying power.

Your iPhone is frozen

iPhones can sometimes freeze or get stuck on a black screen. Often, this is the result of an outdated version of iOS or a glitchy app.

How to get your iPhone to turn on again

If (fingers crossed) you’re facing a minor issue, one of the solutions below will likely help you get your iPhone turned back on. If your iPhone is completely shot, it may just be time to replace it.

Charge your battery

If your device’s battery is dead, you need to charge it. If iPhone is very low on power, it may display an image of a nearly depleted battery, indicating that it needs to charge for up to 10 minutes before you can use it. If iPhone is extremely low on power when you begin to charge it, the display may be blank for up to 2 minutes before the low-battery image appears. See our troubleshooting guide if your iPhone won’t charge.

To charge iPhone, do any of the following:

  • Connect your iPhone to a power source using the charging cable (included) and an Apple USB power adapter (sold separately).
  • Place iPhone face up on MagSafe Charger or MagSafe Duo Charger (connected to Apple 20W USB-C power adapter or other compatible power adapter) or on a Qi-certified charger. (MagSafe Charger, MagSafe Duo Charger, power adapters, and Qi-certified chargers are sold separately.) Note: You can also use third-party power adapters and Qi-certified chargers that are compliant with applicable country regulations and international and regional safety standards.
  • Connect iPhone and your computer with a cable. Make sure your computer is turned on—if iPhone is connected to a computer that’s turned off, the battery may drain instead of charge. Look for the Charging icon on the battery icon to make sure your iPhone is charging.

WARNING: If your iPhone won’t turn on as a result of water damage, don’t plug the charging cable into it.

Assess your cable, adapter and outlet

If your iPhone doesn’t turn on after trying the above solution, inspect your charging cable, charging adapter and power outlet.

We understand your iPhone stopped charging after iOS 27 update, but the cable is one of the first things to check. Especially if it’s an accessory you’ve had for a long time, possibly since the phone was purchased. Our cables go through plenty of torture. They go with you to many places, not to mention we can often step or trip on them, they often get tangled up, we throw them in bags carelessly, and so on.

Inspect your charging cable thoroughly and see if there are any evident signs of damage. Any rips, bends, cuts, or general damage will be a good reason for cables not functioning correctly. Also, try to charge another device with it and see if it works. If it does, the issue might be the device. You can also try using another cable to see if it will charge your iPhone battery.

If you find out a damaged cable is the issue, go ahead and get a replacement.

Of course, the charging adapter is just as important as the cable. Go ahead and put it through the paces. Inspect it for any damage. Cracks or bent outlets are obvious red flags. Likewise, try using it with other devices and switching it with another brick to see if this is the problem.

Finally, plug something else into the same outlet you’re trying to charge your iPhone with and see if it works. Sometimes outlets go bad, or a section of your home might have electric problems. Additionally, some power sources can be weak. If you find issues with your outlet, try other outlets in the house.

Those trying to charge using a USB port in a computer or power strip might not be getting the juice the iPhone needs to charge correctly. Move to a regular outlet and see if this gets rid of your charging woes.

Check your charging port

If your cable and charger work with other devices, it’s time to start looking at your phone. A common culprit is the charging port. For starters, go ahead and check if there is any dirt or debris in the charging port. Something as simple as a dirty port will mess up your charging. You can try cleaning the charging port with a brush or compressed air.

Have you noticed the charging port feeling loose lately? Charging ports can get worn out with excessive usage. You could also find signs of corrosion in there. Sadly, there isn’t much you can do about this, other than replacing the phone or trying to have the charging port replaced.

Force restart your iPhone

If your device doesn’t charge, force a restart. Your device may have frozen after iOS 27 update and could require juice once it powers up.

To force restart your iPhone, follow the steps below:

  1. Press and quickly release the Volume Up button.
  2. Press and quickly release the Volume Down button.
  3. Press and hold the Side button until the Apple logo appears.
  4. iPhone won’t turn on still? Contact Apple Support

    If you’ve tried the solutions above, and your iPhone will not turn on, it may have a hardware failure. At this point, your best chance to get your device working is to locate the nearest Apple Store. Apple store employees can help determine what the underlying issue is with your iPhone. If you don’t have an Apple Store nearby, you can also contact Apple for support and service.

    Successfully fixed iPhone not turning on issue

    If your iPhone doesn’t turn on after iOS 27 update, it might be dead or facing issues charging. Finally, you may need to force the device to restart. Let us know which of the above troubleshooting steps fixed your iPhone not turning on issue.

    Tag: Power