


An Apple Watch is the best smartwatch out there. If you’re just carefully unwrapping a new one from its clever, elongated packaging, congratulations!
I’ve been privileged to use every new Apple Watch from the first model, right up to the new Apple Watch Ultra, so I’ve had some experience in setting them up. In this article, I’ll share with you what I do, and the settings I change, to make sure the Apple Watch is up and ready to go in double-quick time.
1. Getting started with your Apple Watch is easy
The best thing about the Apple Watch? You really don’t have to be an expert in order to get everything started. The very first thing you should do is to charge your watch, and you’ll need to keep the charging plinth nearby during the setup process as the Apple Watch may need to be placed on charge again, especially if there are software updates to install during the process.
Once the Apple Watch is fully charged, turn it on by pressing and holding the button located below the Digital Crown for a few seconds. When it’s active, check your iPhone because, there’s a good chance, an alert is already displayed on the screen asking if you want your phone to begin the pairing process. It really is that simple, plus the required Watch app comes pre-installed on an iPhone too. Simplyhit Continue on the iPhone’s screen to get going and follow the onscreen prompts.
2. Set up your Apple Watch from scratch
If you’ve had an Apple Watch previously, your new Apple Watch can be set up to mirror the settings you previously configured, including installed apps, Siri preferences, and even which wrist you normally wear it on. If you want to set it up as a new Apple Watch, simply tap Customize Settings and look for Set Up as a New Apple Watch at the bottom of the screen. If this is your first Apple Watch, then this option won’t appear. The whole process will take less than 10 minutes to complete.
3. Be smart with your passcode
I’m not a fan of the Apple Watch’s passcode, but appreciate it has to be used in certain occasions. If you set one up, then you’ll need to tap in the PIN code every time you put the Apple Watch back on your wrist after taking it off. Sometimes i do forget, and that means some notifications don’t come through until I remember.
If you intend to use an Apple Pay, then using a passcode is a must. I suggest you keep it short, as you have to tap it out on the small screen. Yes, I know this probably goes against all the usual security warnings, but the thought of regularly tapping out a 12-digit PIN on my wrist isn’t a sweet one.
4. Remember to check for watchOS updates
It’s very likely the latest version of watchOS is waiting to be downloaded once the process of setting the Apple Watch is complete. Follow the steps below:
- Open the Watch app on your iPhone.
- Tap General.
- Tap Software Update.
- If an update is available, it’ll start downloading immediately.
I always do this straight away, since it’s better than waiting for iOS to show me an alert, plus I want all the latest features and fixes before I get into using the Watch.
This is where you’ll need to use the charger again. Once the process of downloading the update is complete, you need to put the Apple Watch back on the charger for it to install. The battery also needs to have more than 50% charge, which, provided you charged the Apple Watch to 100% before setting it up, won’t be a problem. It’s so much more convenient to get software updates sorted at this time. It does need a little time though, so get ready to spend about an hour doing all this.
5. Have fun choosing a watch face
While you’re waiting for the update to download, go ahead and take a look at the watch faces available. On the Watch app’s main screen, tap the image of the watch face currently set to your watch, then look for the Face Gallery option located at the bottom of the screen. Tap it, and you’ll be presented all the watch faces available.
Each one can be customized with different colors, different designs, and different complications. I have a few that I suggest you try, mostly because they are more watch-like and less cluttered. I like to see the time — not a screen full of numbers and fitness metrics. For example, the California and Chronograph faces with a black background, and the “Pepsi” (which denotes the blue and red around the dial) GMT face are some of my favorites. If you want something bolder, then Numerals Duo is great, and so is the Unity Lights face.
If you have an Apple Watch Series 7 or Apple Watch Series 8, the Contour watch face is exclusive, so you may want to show it off, as is the Wayfinder face on the Apple Watch Ultra. I stick with the Wayfinder face on the Ultra but usually opt for the World Time with a red accent on the Apple Watch SE 2. For complications, I like the temperature, battery level, activity rings, and moon phase. When you’re done, just tap Add, and it’ll instantly transfer to your Apple Watch.
6. Important Apple Watch settings to change
One of the cool things about the Apple Watch is that by default, virtually all essential health and fitness features are active, the always-on screen works straight away if you have an Apple Watch Series 8 or Ultra, plus it takes a lot of the information from your iPhone to ensure the Watch operates seamlessly. You really don’t have to do very much at all, and it feels like “part of you” right from the start.
There are a couple of things I change, though. I don’t like the Apple Watch chiming, and the volume is turned up by default, meaning you get an audible alert with notifications. To change this, follow the steps below:
- Go to Settings.
- Tap Sounds and Haptics.
- Either use the little speaker icons to raise or lower the volume or use Silent Mode to mute sounds entirely.
You can also set Silent Mode by pulling up the Quick Settings from the Watch face and tapping the bell icon. I also activate the hand washing timer, which you can access by following the steps below:
- Go to Settings.
- Tap Handwashing.
It’s automatic, so it’s no hassle to use, and it’s surprisingly accurate.
Finally, I don’t use Siri often enough to find the Raise to Speak option helpful, so I turn this option off. Follow the steps below:
- Go to Settings.
- Tap Siri.
I leave the Hey Siri command on, though, and find the Apple Watch is very reliable with listening out for it — and for understanding my commands too.
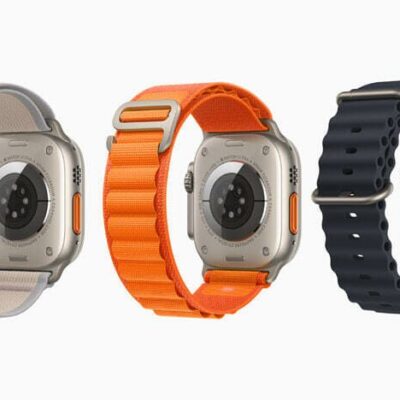
7. Add other Apple Watch bands to your collection
The Sport band and Sport Loop band are the default choices for the Apple Watch, and one of these is most likely the one that has come fitted to your new Apple Watch. Personally, I find the Sport Loop the most comfortable and convenient for everyday, all-day use. It’s easy to tighten when you exercise to get the most accurate heart rate reading, and it’s soft enough to wear overnight and track your sleep. Plus, it looks beautiful. I also really like the Braided Solo Loop band, although it’s a significant investment at $100.
That’s really all there is to setting up your new Apple Watch.