Got a tip for us?

Apple Watch Guides

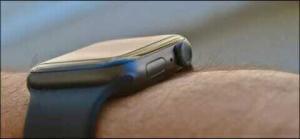
Your Apple Watch side button is not working and you’re not sure why. Every time you try to press the button, nothing happens. In this article, I’ll explain why your Apple Watch side button is stuck or not working and show you how to fix the problem!

Side Button on Apple Watch  

Why is Apple Watch Side Button Not Working?

  • The Apple Watch case is causing interference with the Side button.
  • A significant amount of dirt has accumulated around the side button.
  • Physical damage.
  • A software glitch that’s causing the side button to be unresponsive.

If your side button is completely damaged, then taking it for repair is the only option. But if it is stuck, slow, or working intermittently, here’s how to fix it.

The information in this article apply to the following Apple Watch models:

  • Apple Watch Series 3
  • Apple Watch Series 4
  • Apple Watch Series 5
  • Apple Watch SE (2020)
  • Apple Watch Series 6
  • Apple Watch Series 7
  • Apple Watch SE (2022)
  • Apple Watch Series 8
  • Apple Watch Ultra

How to Fix Apple Watch Side Button Not Working

1. Remove protective film or case from your Apple Watch

Try removing any protective films or cases that might block the side button and pressing the side button — is it working now? If it is, you’ll probably need to swap out your case. If the side button still isn’t working, keep reading!

2. Is The Button Stuck Or Can You Press It Down?

There are two distinct types of side button problems on an Apple Watch. Either the Apple Watch side button is stuck and you can’t press it at all, or the side button isn’t stuck, but when you press it, nothing happens!

If your Apple Watch side button is stuck and you can’t press it, you’ll probably have to get it repaired.

If you can press down your Apple Watch side button, but nothing happens when you do, it’s possible you’re dealing with a software problem. Anytime you press a button on your Apple Watch, it’s the software that decides whether or not something happens on the screen! To try and fix a minor software glitch, restart your Apple Watch.

Press the Digital Crown on your Apple Watch then go to Settings -> General -> Shut Down. Swipe the power icon left to right across slide to power off to turn off your Apple Watch. To turn your Apple Watch back on, place it on it’s charger — it’ll turn back on shortly after.

3. Clean the side button

Check for debris or dirt around the side button and clean your Apple Watch. Here’s how:

  1. Hold the Apple Watch under a faucet running lukewarm water.
  2. Repeatedly press the side button for 15-30 seconds.
  3. Dry off your Apple Watch using a soft cloth.

It’s also a good idea to eject water from your Apple Watch’s speakers if your side button begins working. Swipe up from the bottom of the touch screen to bring up the Control Center, tap the Water Lock icon, and press and hold the Digital Crown until the device finishes chiming.

4. Unpair and re-pair your Apple Watch

If the side button is not responding because of watchOS bugs or other system abnormalities, go ahead and erase your Apple Watch using your iPhone. Once that’s done, you can pair it again.

  1. With your Watch in range of your iPhone, open the Apple Watch app on your iPhone.
  2. Select the My Watch tab.
  3. Tap All Watches.
  4. Tap the info button next to your Apple Watch.
  5. Tap Unpair Apple Watch.
  6. Type your Apple ID password to disable Activation Lock, then tap Unpair.

Now, pair your Apple Watch to an iPhone using the built-in Watch app like you did the first time after purchasing it.

5. Make Sure Your Apple Watch software is updated

Apple regularly releases watchOS updates to fix known bugs and introduce new settings and features. Your Apple Watch side button may be unresponsive because your watch is running an outdated version of watchOS.

To update your Apple Watch, launch the Watch app on your iPhone and go to General -> Software Update. Tap Download and Install if a watchOS update is available.

6. Getting The Apple Watch Side Button Repaired

If your Apple Watch side button still isn’t working, is damaged, or works intermittently, you can set up a repair. When you’re ready to get the side button repaired, you have a couple of great options. If you have AppleCare , schedule an appointment at your local Apple Store’s Genius Bar.

Apple Watch Side Button: Fixed!

You’ve successfully fixed your Apple Watch side button, or you’ve chosen a great repair option. Next time your Apple Watch side button is stuck or not working, you’ll know exactly how to fix the problem! If you have any other questions, leave them in the comments section below!

We explain 7 valuable ways you can check and improve heart health with Apple Watch.

Whether you own an Apple Watch Series 6, Apple Watch Series 7, Apple Watch Series 8, Apple Watch Ultra, or the second-gen Apple Watch SE, you should be able to find some useful features to check and improve your heart health in this guide.

Check and improve heart health with Apple Watch: 7 features

1. High and low heart rate notifications

If you’d like an alert when your heart rate dips below or rises above a certain threshold and remains there for 10 minutes while inactive, this feature is available for those 13 years old and up.
If you didn’t turn it on the first time opening the Heart Rate app or want to change it:

  1. On your iPhone, open the Apple Watch app.
  2. Tap the My Watch tab, then tap Heart.
  3. Tap High Heart Rate, then select a BPM.
  4. Tap Low Heart Rate, then select a BPM.

2. Irregular heart rhythm notifications

The irregular rhythm notification feature on your Apple Watch will occasionally look at your heartbeat to check for an irregular rhythm that might be suggestive of atrial fibrillation (AFib).

If you get a notification, the irregular rhythm notification feature on your Apple Watch identified an irregular rhythm suggestive of AFib and confirmed it with multiple readings. If you have not been diagnosed with AFib by a physician, you should talk to your doctor.

To make sure this feature is set up, follow the steps below:

  1. On your iPhone, open the Health app.
  2. Tap the Browse tab, then head over to Heart > Irregular Rhythm Notifications.
  3. Once enabled, you can turn irregular rhythm notifications on or off in the Apple Watch app on your iPhone: Open the Apple Watch app, tap the My Watch tab, then go to Heart > Irregular Rhythm.

3. ECG and AFib History

Apple Watch Series 4 and newer offers an electrical heart rate sensor that, along with the ECG app , allows you to take an electrocardiogram (or ECG).

ECGs are for Apple Watch users at least 22 years old. If you haven’t used it before or didn’t set it up when you first got your watch:

  1. Open the Health app on your iPhone.
  2. If you don’t see a prompt to set up, tap Browse located at the bottom right, tap Heart, then tap Electrocardiogram (ECG).
  3. Open the ECG app on your Apple Watch.
  4. Rest your arm on a table or in your lap.
  5. With the hand opposite your watch, hold your finger on the Digital Crown, then wait while Apple Watch records the ECG.

At the end of the recording, you receive a classification. You can then tap Add Symptoms and choose your symptoms. Tap Save to note any symptoms, then tap Done.

To view your results on iPhone, open the Health app on iPhone, tap Browse located at the bottom right, then tap Heart > Electrocardiograms (ECG).

You can also set up the more recent AFib History feature – this regularly checks for signs of AFib in the background

  1. Head back to the Health app on your iPhone
  2. Go to Browse > Heart > look for Set Up near the bottom under AFib History

Apple highlights that after an ECG “Regardless of the result, if you aren’t feeling well or are experiencing any symptoms, you should talk to your doctor.”

4. Cardio Fitness

Here’s how Apple describes Cardio Fitness (VO2 max):

“Cardio fitness is a measurement of your VO2 max, which is the maximum amount of oxygen your body can consume during exercise. Your cardio fitness level is a strong indicator of your overall physical health and a predictor of your long-term health.”

If you haven’t set it up before,

  1. open the Health app on your iPhone.
  2. Tap Summary and swipe down near the bottom and look for Cardio Fitness (under “Get More From Health” – you can also look under Browse > Heart > Cardio Fitness)
  3. Choose the blue Set Up button
  4. Follow the prompts like confirming your health details (must be at least 20 years old)
  5. You can choose to turn Low Cardio Fitness Notifications

Now you’ll see cardio fitness show up under the Heart section in the Health app

5. Heart rate variability (HRV)

What is HRV? It’s the measurement of how the interval of time between heartbeats changes, measured in milliseconds – notably this is a metric that changes a lot, so looking at broad trends, not daily numbers is most helpful.

Heart Rate Variability is an important metric that many Apple Watch users often ignore. HRV can provide you with good guidance regarding your health.

For example, if you’re taking steps to improve your fitness and overall health, you should gradually increase your average heart rate variability over time.

A downward trend in your HRV over several days is worth paying attention to!

This could signify that you’re training too hard, not sleeping enough, getting sick, eating poorly, encountering too much stress, or failing to hydrate properly.

Higher HRV is associated with reduced morbidity and mortality and improved psychological well-being and quality of life.

The best place to locate heart rate variability information is by using the Health app on your iPhone.

The information is not readily available on your Apple Watch. Here’s how you can track the details around your Heart Rate Variability (HRV).How to Analyze HRV (Heart Rate Variability) on your Apple Watch

  1. Open the Health App on your iPhone.
  2. Tap on the Browse tab located at the bottom of your screen.
  3. Now, tap on Heart and choose Heart Rate Variability.
  4. This report shows your HRV for the current day, week, month, and year.

6. View your heart data history

Your heart rate is an important way to monitor how your body is doing. You can check your heart rate during a workout; see your resting, walking, workout, and post-workout heart rates, and your heart rate during a Breathe session; or take a new reading at any time.

On Apple Watch

  1. Open the Heart Rate app on your Apple Watch. to see daily data (app with heart icon)
  2. You’ll see your current heart rate, swipe or scroll down with the Digital Crown
  3. Now you can see your resting rate, walking average, workout heart rate, and heart rate recovery data (if you’ve done a workout recently)

On iPhone

To see your heart rate data over a longer period of time, follow the steps below:

  1. Open the Health app on your iPhone.
  2. Tap on Browse.
  3. Tap on Heart.
  4. Tap an entry. You can show heart data for the last hour, day, week, month, or year.

7. Bonus features – Vascular Age and Blood Pressure

Compatible with Apple Health, the Withings Body Cardio smart scale offers a Vascular Age feature that measures the “speed at which the blood pressure pulse propagates through the circulatory system.”

With those measurements, the smart scale is able to determine your arterial stiffness and health with a comparison to the average of people in your age group.

Body Cardio also tracks weight, BMI, body composition (water, fat, bone, and muscle), heart rate tracking, and more.

And if you want a seamless way to measure and track your blood pressure with Apple Health, the Withings BPM Connect is a great option.

Valuable ways to check and improve heart health with Apple Watch

These are the best Apple Watch features that will help your heart health. Have you been using some or all of these features with your Apple Watch? I’d love to hear your experiences in the comments section below!

If you need to close an app on your Apple Watch Ultra, we have you covered. The only reason to close an Apple Watch app is if one is malfunctioning, or if you want to remove it from your recent list for organizational purposes.

QUICK ANSWER

To close an app on your Apple Watch Ultra, press the side button, then swipe left over the app you want to close and tap the X.

How to close apps on your Apple Watch Ultra

Closing apps on your Apple Watch Ultra is simple. Locate the side button just below your Digital Crown and then follow the steps below:

  1. Press the side button on your Apple Watch Ultra to bring up your app dock.
  2. Swipe left over the app you want to close and tap the red X.

How to force-quit apps on your Apple Watch Ultra

If an app starts to glitch or won’t close normally, you can also force-quit.

  1. From the app’s screen, press and hold the side button until the power-down menu appears.
  2. Press and hold the Digital Crown until the app closes and you return to the watch screen.

How to automatically close background apps on Apple Watch Ultra

To preserve battery life, you can also disable Background App Refresh. This feature keeps your apps updated so they are ready when you need them. For example, email or sports scores will continue to update in the background so information is available as soon as you open the relevant app. If the feature is disabled, you may have to wait for items or messages to load. On the other hand, disabling Background App Refresh will also help minimize notifications from pesky apps.

  1. Launch the Settings app on your Apple Watch Ultra.
  2. Scroll down to and tap Background App Refresh.
  3. To disable the feature for all apps, tap the toggle next to Background App Refresh.
  4. To disable the feature for specific apps only, scroll down and tap the toggle next to the app for which you want to manage refresh settings.

An Apple Watch is the best smartwatch out there. If you’re just carefully unwrapping a new one from its clever, elongated packaging, congratulations!

I’ve been privileged to use every new Apple Watch from the first model, right up to the new Apple Watch Ultra, so I’ve had some experience in setting them up. In this article, I’ll share with you what I do, and the settings I change, to make sure the Apple Watch is up and ready to go in double-quick time.

1. Getting started with your Apple Watch is easy

The best thing about the Apple Watch? You really don’t have to be an expert in order to get everything started. The very first thing you should do is to charge your watch, and you’ll need to keep the charging plinth nearby during the setup process as the Apple Watch may need to be placed on charge again, especially if there are software updates to install during the process.

Once the Apple Watch is fully charged, turn it on by pressing and holding the button located below the Digital Crown for a few seconds. When it’s active, check your iPhone because, there’s a good chance, an alert is already displayed on the screen asking if you want your phone to begin the pairing process. It really is that simple, plus the required Watch app comes pre-installed on an iPhone too. Simplyhit Continue on the iPhone’s screen to get going and follow the onscreen prompts.

2. Set up your Apple Watch from scratch

If you’ve had an Apple Watch previously, your new Apple Watch can be set up to mirror the settings you previously configured, including installed apps, Siri preferences, and even which wrist you normally wear it on. If you want to set it up as a new Apple Watch, simply tap Customize Settings and look for Set Up as a New Apple Watch at the bottom of the screen. If this is your first Apple Watch, then this option won’t appear. The whole process will take less than 10 minutes to complete.

3. Be smart with your passcode

I’m not a fan of the Apple Watch’s passcode, but appreciate it has to be used in certain occasions. If you set one up, then you’ll need to tap in the PIN code every time you put the Apple Watch back on your wrist after taking it off. Sometimes i do forget, and that means some notifications don’t come through until I remember.

If you intend to use an Apple Pay, then using a passcode is a must. I suggest you keep it short, as you have to tap it out on the small screen. Yes, I know this probably goes against all the usual security warnings, but the thought of regularly tapping out a 12-digit PIN on my wrist isn’t a sweet one.

4. Remember to check for watchOS updates

It’s very likely the latest version of watchOS is waiting to be downloaded once the process of setting the Apple Watch is complete. Follow the steps below:

  1. Open the Watch app on your iPhone.
  2. Tap General.
  3. Tap Software Update.
  4. If an update is available, it’ll start downloading immediately.

I always do this straight away, since it’s better than waiting for iOS to show me an alert, plus I want all the latest features and fixes before I get into using the Watch.

This is where you’ll need to use the charger again. Once the process of downloading the update is complete, you need to put the Apple Watch back on the charger for it to install. The battery also needs to have more than 50% charge, which, provided you charged the Apple Watch to 100% before setting it up, won’t be a problem. It’s so much more convenient to get software updates sorted at this time. It does need a little time though, so get ready to spend about an hour doing all this.

5. Have fun choosing a watch face

While you’re waiting for the update to download, go ahead and take a look at the watch faces available. On the Watch app’s main screen, tap the image of the watch face currently set to your watch, then look for the Face Gallery option located at the bottom of the screen. Tap it, and you’ll be presented all the watch faces available.

Each one can be customized with different colors, different designs, and different complications. I have a few that I suggest you try, mostly because they are more watch-like and less cluttered. I like to see the time — not a screen full of numbers and fitness metrics. For example, the California and Chronograph faces with a black background, and the “Pepsi” (which denotes the blue and red around the dial) GMT face are some of my favorites. If you want something bolder, then Numerals Duo is great, and so is the Unity Lights face.

If you have an Apple Watch Series 7 or Apple Watch Series 8, the Contour watch face is exclusive, so you may want to show it off, as is the Wayfinder face on the Apple Watch Ultra. I stick with the Wayfinder face on the Ultra but usually opt for the World Time with a red accent on the Apple Watch SE 2. For complications, I like the temperature, battery level, activity rings, and moon phase. When you’re done, just tap Add, and it’ll instantly transfer to your Apple Watch.

6. Important Apple Watch settings to change

One of the cool things about the Apple Watch is that by default, virtually all essential health and fitness features are active, the always-on screen works straight away if you have an Apple Watch Series 8 or Ultra, plus it takes a lot of the information from your iPhone to ensure the Watch operates seamlessly. You really don’t have to do very much at all, and it feels like “part of you” right from the start.

There are a couple of things I change, though. I don’t like the Apple Watch chiming, and the volume is turned up by default, meaning you get an audible alert with notifications. To change this, follow the steps below:

  1. Go to Settings.
  2. Tap Sounds and Haptics.
  3. Either use the little speaker icons to raise or lower the volume or use Silent Mode to mute sounds entirely.

You can also set Silent Mode by pulling up the Quick Settings from the Watch face and tapping the bell icon. I also activate the hand washing timer, which you can access by following the steps below:

  1. Go to Settings.
  2. Tap Handwashing.

It’s automatic, so it’s no hassle to use, and it’s surprisingly accurate.

Finally, I don’t use Siri often enough to find the Raise to Speak option helpful, so I turn this option off. Follow the steps below:

  1. Go to Settings.
  2. Tap Siri.

I leave the Hey Siri command on, though, and find the Apple Watch is very reliable with listening out for it — and for understanding my commands too.

7. Add other Apple Watch bands to your collection

The Sport band and Sport Loop band are the default choices for the Apple Watch, and one of these is most likely the one that has come fitted to your new Apple Watch. Personally, I find the Sport Loop the most comfortable and convenient for everyday, all-day use. It’s easy to tighten when you exercise to get the most accurate heart rate reading, and it’s soft enough to wear overnight and track your sleep. Plus, it looks beautiful. I also really like the Braided Solo Loop band, although it’s a significant investment at $100.

That’s really all there is to setting up your new Apple Watch.

The Apple Watch Ultra is prone to accumulating dirt, earwax, grime, and other debris that can affect it’s performance. Here’s how to clean it safely.

Apple Watch Ultra is the most instantly recognizable wearable around. But as great as it is, it also get dirty fairly easily. Despite it’s ragged design, the Apple Watch Ultra is prone to accumulating dirt, earwax, grime, and other debris that can affect its performance. Cleaning your Apple Watch Ultra regularly is important for maintaining it’s appearance, functionality, and longevity. And while it may seem intimidating at first, cleaning your Apple Watch Ultra is actually quite easy and can be done without requiring any professional equipment. Follow the simple steps in this guide to clean your Apple Watch Ultra and keep it in good working order.

How to clean the Apple Watch Ultra

Before cleaning, remove your device from the charger and turn it off. If the Apple Watch Ultra is attached to a band that is not water-resistant, remove the band as well.

  • Wipe down the Apple Watch Ultra with a nonabrasive, lint-free cloth. Lightly dampen the cloth with water if needed, or hold the device under warm running water for ten to fifteen seconds.
  • Spin and press the Digital Crown under low-running, warm water to clear substances like dirt or lotion from the Digital Crown.
  • Dry the front and back of your Apple Watch Ultra using a dry, nonabrasive, lint-free cloth.

According to Apple, it’s completely safe to disinfect your watch with a Clorox wipe and certain alcohol wipes, but don’t introduce any other soaps or cleaning products.

How to clean the Apple Watch Ultra band

Apple Watch bands come at a variety of costs, from affordable to somewhat astronomical. Depending on how much you’ve invested in your particular band, it’s best to follow the manufacturer’s directions.

Silicone bands for Apple Watch Ultra

You can’t close those rings without breaking a sweat. Bands made of synthetic rubber or silicone are often marketed specifically for working out, so easy cleaning is made a priority. Water-resistant and sweat-resistant, these materials can be cleaned with soap and warm water.

  • For light cleaning, you’ll need to remove the band from your Apple Watch and wipe it clean with a nonabrasive, lint-free cloth.
  • For a deeper clean, simply rinse the band with warm water and mild hand soap.
  • Dry the band with a nonabrasive, lint-free cloth before reattaching it to your Apple Watch Ultra.

Nylon or braided loop bands for Apple Watch ultra

Nylon bands are great for sleep tracking but aren’t impervious to stains. Likewise, Apple’s Braided Solo Loop is made from polyester yarn braided around silicone thread, forming an eye-catching design that unfortunately also catches grime and dirt.

  • detach the band from the Apple Watch Ultra and wipe clean with a nonabrasive, lint-free cloth. If needed, lightly dampen the cloth with warm water.
  • If you own a loop band, some users suggest cleaning the intricacies of this band with a soft bristle toothbrush and warm water but do so at your own risk. Apple recommends only using a nonabrasive lint-free cloth, slightly dampened if necessary. Venturing from these guidelines may void the item’s one-year limited warranty.
  • Let the band air dry before reattaching it to your Apple Watch Ultra.

Leather bands for Apple Watch ultra

Leather bands are not water-resistant, so deep cleaning after a particularly sweaty session isn’t easy. Please note, you should not soak your leather band in water, and try to avoid external heat sources.

  • detach the band from the Apple Watch ultra and wipe clean with a nonabrasive, lint-free cloth. Lightly dampen the cloth if necessary but avoid focusing moisture too much in one spot. Some third-party retailers advise using warm soapy water on stains, though Apple doesn’t suggest it.
  • Let the band air dry before reattaching it to your Apple Watch Ultra.

Metal bands for Apple Watch Ultra

Metal bands can elevate your Apple Watch Ultra for special occasions or help you fit in with the office dress code. When cleaning these high-end bands, make sure your cloth is completely clear of dirt and debris to avoid scratching the metal.

  • Detach the band from the Apple Watch Ultra and wipe clean with a nonabrasive, lint-free cloth. If needed, lightly dampen the cloth with warm water.
  • Dry the band with a dry, nonabrasive, lint-free cloth before reattaching it to your Apple Watch.

See also: 18 Best Apple Watch Ultra Tips and Tricks of 2023

Want to learn how to fast charge your Apple Watch Ultra? We explain everything you need to know.

One of the big new features added to the Apple Watch 7 and carried over to the Apple Watch Ultra was fast charging. Here’s how to ensure you’re charging your Apple Watch Ultra as quickly as possible.

While this might seem a little obvious, the Apple Watch Ultra will only utilise its fastest charging speeds when used with a certain cable and plug – so it’s best to make sure you’re doing it right.

There are also no visual cues as to how fast the Apple Watch Ultra will charge when you plug it in, but following this guide will make sure that you do it properly. In terms of how quickly you can get from 0-100%, in our review we got a full charge in an hour, and 20% (enough for a night’s sleep) in 10 minutes.

What you’ll need to fast charge the Apple Watch Ultra

  • An Apple Watch Ultra (this will also work with Apple Watch Series 8 and Apple Watch Series 7)
  • The included USB-C charging cable (it needs to be this specific one)
  • A plug with a USB-C port

How to charge Apple Watch ultra faster

Step 1: Get your USB-C plug ready

To fast charge an Apple Watch Ultra, you need to have a USB-C plug ready and these are no longer included with the wearable. Instead, you could use the same plug you use to charge a recent iPhone, iPad or USB-C laptop.

Step 2: Attach the cable that came with your Apple Watch

Once you’ve got your USB-C plug, you’ll need to get the USB-C to Apple Watch magnetic charger that’s included with the Apple watch Ultra. You need to use this specific cable to charge the Apple Watch Ultra faster, as an older Apple Watch cable will charge at a slower rate. Plug the cable into the USB-C plug.

Step 3: Pop on the Apple Watch

Next, just pop the Apple Watch Ultra onto the magnetic charger and it should start juicing up at the faster speeds.

See also: How to Clean Your Apple Watch Ultra Without Damaging it

So you got yourself an Apple Watch Ultra, and you’re not sure where to start? Luckily, the Apple Watch is already easy enough to set up and use. But changing a few settings can make it even more convenient.

For example, you can decide how you’d like to activate Siri, select which apps appear in your dock, make your apps appear in a list view rather than a grid and set Portrait Mode photos from your iPhone as your watch background.

Here’s a look at the Apple Watch Ultra settings you should change to get the most out of your watch.

Adjust all of your Activity goals

With the release of WatchOS 7 in 2020, Apple added the option to change your goals for the amount of time you stand and exercise. Previously, you could only change your Move (or calories) goal.

So instead of using the defaults — 30 minutes of exercise and a cumulative 12 standing hours a day — you can change either one to fit your actual daily routine.

This small change will make it possible for you to hit your own targets when you actually start your day, not when Apple tells you to. For example, if you use sleep tracking overnight and need to charge your watch more often in the morning, you won’t feel like you’ve lost an hour of time needed to close those rings.

  1. Open the Activity app on your watch.
  2. Scroll to the bottom and tap Change Goals.
  3. Make your adjustments for all three metrics and start closing those rings.

So long, random screenshots

To take a screenshot on the Apple Watch Ultra, you press the Digital Crown and side button at the same time. It’s a simple and convenient method, unless you’re like me and find yourself frequently triggering it accidentally, filling up the Photos app with random pictures of your watch face.

To turn off the ability to take screenshots altogether:

  1. Open the Settings app on your watch or use the Watch app on your phone.
  2. Go to General.
  3. Scroll down until you find Screenshots. Tap this option.
  4. Toggle off the switch next to Enable Screenshots for a clutter-free camera roll.

3. Customize which apps appear in your dock

If you have a lot of apps installed on your Apple Watch Ultra, it can be difficult to find the right ones when you need them. That’s where the Apple Watch’s dock comes in handy. If you’re not familiar, the dock is essentially the iPhone’s app switcher, but for the Apple Watch. You can trigger it by tapping the side button, which pulls up a carousel of recently used apps.

However, you can also customize the dock to show any apps you want instead of your most recent apps. To do this on your watch, follow these steps:

  1. Open the Settings menu.
  2. Tap Dock.
  3. Select the Favorites option. But I recommend setting this up in the Phone’s Watch app instead so that you can customize these apps.
  4. Open the Watch app on your iPhone.
  5. Tap Dock.
  6. Once the Favorites option is selected, you’ll see a list of apps divided into two sections: Favorites and Do Not Include. Favorites are the apps that are currently in your dock, while the latter lists all of the other apps on your watch that aren’t included. Tap the Edit button in the top right corner to customize the Favorites list to your liking.

4. Choose the Portrait mode photos you want to see on your wrist

You can set Portrait mode photos as the background for your watch face. But first, you have to dig into the settings in the Watch app on your iPhone. To get started:

  1. Launch the Watch app.
  2. Navigate to the Face Gallery tab at the bottom of the screen. Then, tap the Portraits option under the New Watch Faces category.
  3. Tap the Choose Photos option under Content to select up to 24 photos that will rotate automatically when you raise your wrist or tap the screen.

5. Keep the Apple Watch Ultra screen awake for a longer period of time

There are times when you might not want your Apple Watch’s screen to go idle right away. Perhaps you were in the middle of reading a long text message and got distracted, or maybe you want to keep an eye on your timer. Once you tap the Apple Watch’s screen, it typically stays active for 15 seconds. But you can extend that to 70 seconds by following these steps:

  1. Open the Settings menu on your watch.
  2. Tap Display & Brightness.
  3. Select Wake Duration.
  4. Choose the Wake for 70 Seconds option.

6. Stop every app from automatically installing on your Apple Watch Ultra

Every time you install an app on your iPhone, it will automatically install its Apple Watch counterpart if there is one. This can clutter up your watch’s app grid pretty quickly, making it hard to find the apps you do want to use on your watch.

  1. Open the Watch app on your phone.
  2. Tap on Settings.
  3. Tap General.
  4. Slide the switch next to Automatic App Install to the Off position.

You can also do this on the watch by opening the Settings menu, tapping App Store and toggling the switch next to Automatic Downloads.

From now on, you’ll install individual apps on your watch by opening the Watch app on your phone, then scrolling to the bottom where you’ll find a list of available apps.

7. Silence those noisy notifications

Apple Watch ultra can can come in handy when you want to discreetly checking an alert or the time. But loud notifications can defeat the purpose. Turn on your Apple Watch’s silent mode.

  1. Swipe up from the bottom of the screen to launch the Control Center.
  2. Tap the icon that looks like a bell to trigger Silent Mode.

You can also do this by opening the Apple Watch’s Settings menu, scrolling down to Sound & Haptics and toggling the switch next to Silent Mode. There’s also a volume slider for adjusting how loud or quiet incoming notifications sound if you’d rather not mute them completely.

8. Have Siri only speak out loud when you’re wearing headphones

Siri can be useful for quickly setting timers, starting workouts or checking the weather from your watch. But you might not always want to have Siri speak out loud. You can easily change this so that Siri only provides audible feedback when you’re wearing headphones.

  1. Open the Settings menu on your Apple Watch,
  2. scroll down to Siri and navigate to the Siri Responses section.
  3. Tap the Headphones Only option.

When your Bluetooth headphones are connected to your Apple Watch, you should now see the name of your headphones appear above the Siri volume setting in the watch’s settings menu.

9. Make text easier to read by increasing the font size

Reading notifications and news headlines can be difficult on a screen that’s so small. Luckily, you can increase the font size on the Apple Watch Ultra to make things a bit easier on your eyes. To do this:

  1. Launch the Settings app on your watch.
  2. Tap Display & Brightness.
  3. Scroll down to Text Size.
  4. Rotate the Digital Crown or tap the letters that appear on either side of the meter to adjust the text size on your watch.

10. Stop those annoying reminders to breathe

The Breathe reminder is designed to help you take a few minutes to clear your mind and control your respiration, potentially helping you feel more centered and calm. But if you’re like me and never follow the prompt, take a few seconds to turn it off so you no longer have to be reminded to breathe.

  1. Open the Apple Watch app on your iPhone,.
  2. Scroll down and tap the Mindfulness app option.
  3. Next, select Notifications off.
  4. Unlock your Apple Watch with your iPhone

Typing in your passcode to unlock your Apple Watch Ultra can be a pain, but there’s an easier way to do it. You can choose to have your Apple Watch unlock automatically when your iPhone is unlocked.

  1. Tap the Digital Crown and navigate to the Apple Watch’s Settings menu.
  2. Scroll down to Passcode, and make sure the switch next to Unlock with iPhone is toggled on.

Your iPhone will now also display an alert saying that your iPhone is being used to unlock your Apple Watch whenever you put this into practice.

12. Make it easier to find your apps

The honeycomb app grid looks great at first glance, but it can be difficult to find the app you want to launch, particularly if you have a lot of apps installed on your Apple watch Ultra. Instead of in a grid, the watch can display all of your apps in an alphabetical list.

  1. Either in the Watch app on your phone or in the Settings app on the Watch, tap App View.
  2. Tap List View.

Now, when you press the Digital Crown to leave your watch face, you’ll see a list of apps that you can quickly scroll through and find what you’re looking for.

13. Control when you’ll see Siri

There are three different ways to activate Siri on your Apple Watch Ultra. You can raise your wrist toward your mouth and start talking, long-press the Digital Crown or use the wake phrase, “Hey, Siri.”

I’ve found that I often accidentally trigger Siri when trying to check the time or read a notification while I’m talking to someone else (but my watch thinks I’m trying to talk to Siri). It’s annoying, but it can be changed.

  1. Either in the Watch app on your phone or in the Settings app on the Watch, select Siri.
  2. You’ll find three buttons to control when you’ll see Siri. Slide each button to the Off position for any of the options you don’t want to use.

14. Rearrange Control Center

Just like Control Center on your iPhone, Control Center on the Apple Watch is where you go to quickly adjust settings like do not disturb and airplane mode and to activate the flashlight.

You may find the default list of options in the Control Center isn’t the best fit for how you use your watch, however, and you want to rearrange the list. For me, that means moving the Bedtime toggle from near the bottom of the list to the top. That way when I want to track my sleep over the weekend when I don’t have sleep goals set, I can swipe up and tap the icon.

To access the Control Center on your watch Ultra:

  1. Swipe up from the bottom of the watch face, or when in an app you can long-press on the bottom of the screen until you see Control Center start to slide up, after which you just need to slide your finger up to access it. The same trick works to view your notifications from anywhere.
  2. Change the order, or hide some buttons in the Control Center by tapping the Edit button at the bottom of the list. The icons will begin to jiggle and show a red minus sign to hide an option. Drag and drop the icons into your preferred order, or tap the red minus button to remove the option altogether.
  3. When you’re done, tap Done or press the Digital Crown on the side of your watch to go back to the watch face.