Got a tip for us?

iPhone 12 mini

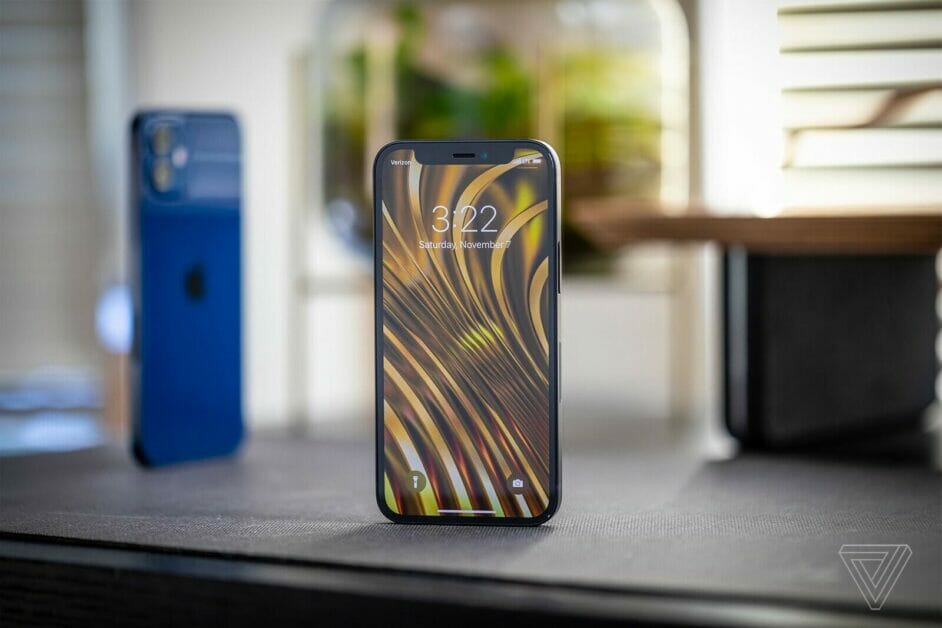
Charging your phone isn’t as simple as just plugging it in. Here is how to fast charge your iPhone 12 mini.

It’s a known fact that chip technology is progressing at a rampant pace but batteries are struggling to keep up with the changes. Sure, we might have fast charging tech to counter it, but at times, it’s just not enough. So, today, we are going to share some tips on how to fast charge iPhone 12 mini and hopefully help you juice up quicker and get online faster.

See also: How to fix iPhone 12 mini charging issues

How to Fast Charge iPhone 12 mini

Here’s how you can fast charge iPhone 12 mini and spend more time online:

1. Use a fast Charger

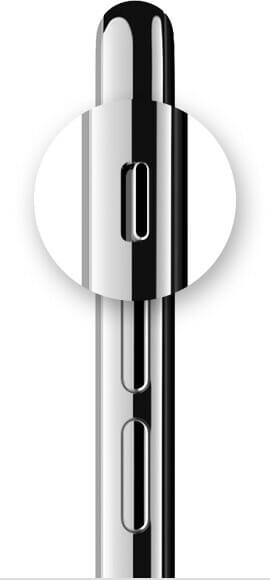
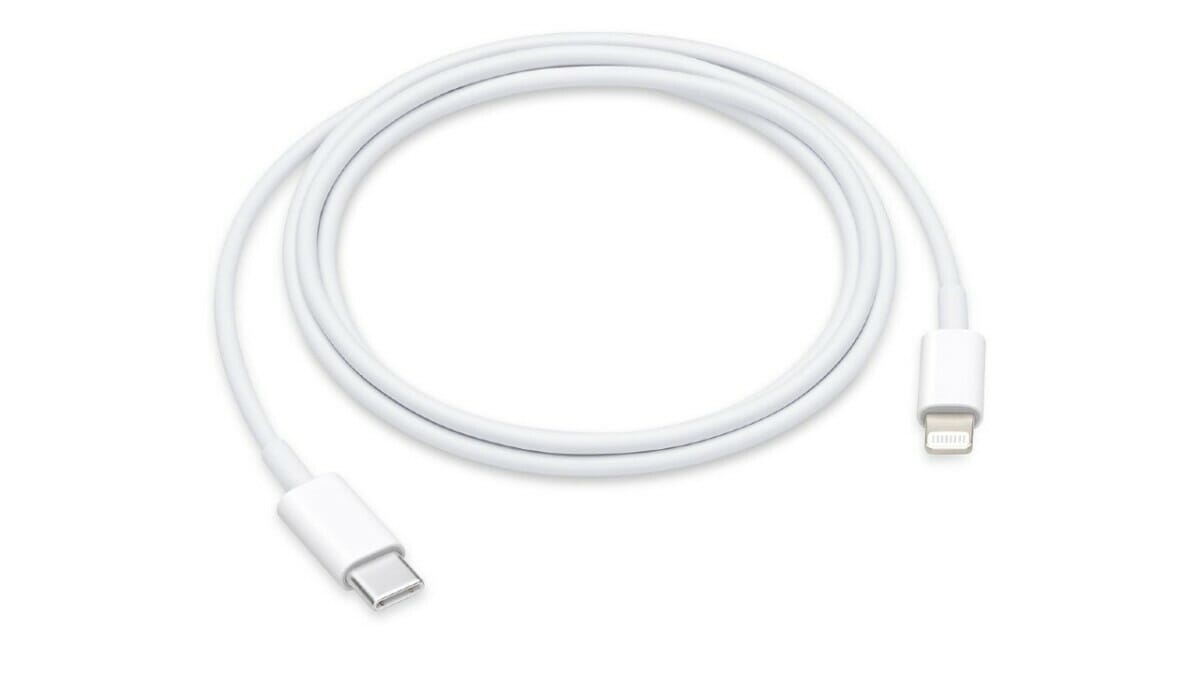
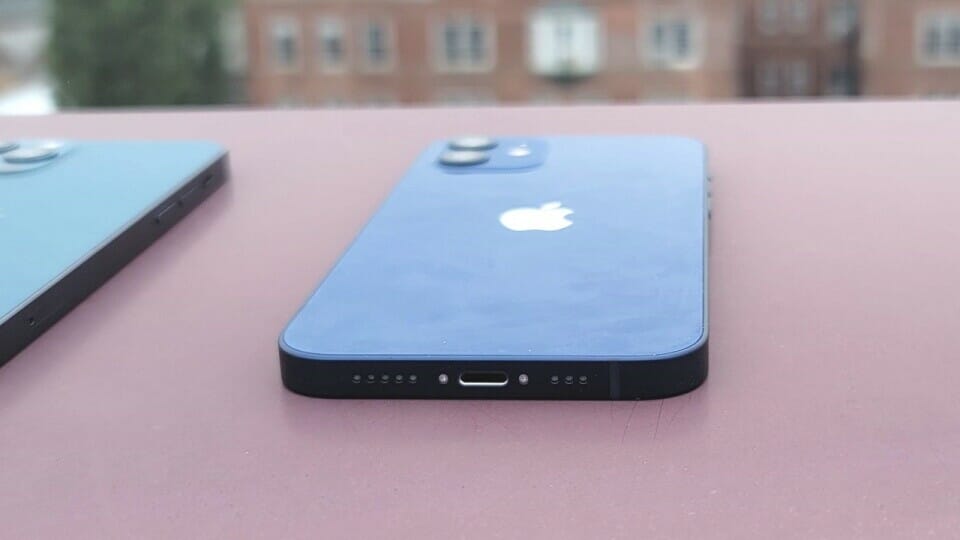
When it comes to the iPhone 12 mini, you might be wondering why it takes so long to charge. Apple no longer includes the standard USB charging brick with the iPhone 12 mini, iPhone 12, iPhone 12 Pro or iPhone 12 Pro max. There is only one cable included in the box — a USB-C to Lightning cable. With the old USB-A charger it takes over three hours to charge in full. But the phone does come with Fast Charging support. And Fast Charging allows you to recharge your iPhone 12 mini battery up to 50 percent in just 30 minutes. And up to about 80% in an hour.

Now, when it comes to fast charging your iPhone 12 mini you need the proper accessories. You need to get an Apple’s 20W USB-C Fast Charger. Using a USB-C cable and USB-C charger will allow the iPhone 12 mini to charge at faster speeds. Using USB-C, you can charge the iPhone 12 mini to 50% in about 30 minutes. The highest wattage the iPhone 12 mini will use is around 22 watts, so a 20 watt or 30 watt charger will result in the about same charging speed. But basically any USB-C charger will be significantly faster than the old USB-A chargers. Make the investment, it’s totally worth it.

2. Enable Airplane Mode

One of the biggest draws on your battery is the network signal. As a general rule, the worse your signal, the faster your battery will drain.

Consequently, if you live in an area with a poor signal, charging your iPhone takes longer than if you reside in a place with a strong signal — the signal is eating through your power as you charge.

The quick solution? Put your iPhone in Airplane Mode before you plug it in. Testing suggests it could reduce the amount of time needed for a full charge by as much as 25 percent.

To put your iPhone into Airplane Mode, simply swipe down from top right of your screen and tap the Airplane Mode icon.

Just make sure you turn it off again once your battery is full!

See also: iPhone 12 mini keeps losing signal? Fix it here

3. Turn off Your iPhone

Simple, obvious, but often overlooked. If your iPhone 12 mini is turned off while it’s powering up, it’s going to charge a lot faster. Nothing will be drawing on the battery while you fill it up.

4. Use a Wall Socket

Using a USB port on your computer or in your car leads to a much more inefficient charging experience.

Typically, non-wall socket USB ports only offer a power output of 0.5A. Wall socket charging will usually give you 1A (depending on your device). There’s nothing wrong with receiving a lower amperage — it won’t harm your device — but you’ll definitely be twiddling your thumbs for a lot longer.

5. Buy a Power Bank

If you need to recharge your iPhone 12 mini while you’re on the go — for example, if you’re often out travelling all day — a power bank can be a lifesaver.

Many power banks offer the same amperage output as a wall socket, and in some cases, even more. But a word of warning, while your iPhone might charge faster with a two-amp output, you need to make sure your USB cable can handle the extra power.

6. Don’t use Wireless Charging

I’m not going to criticize wireless chargers — they entail fewer cables, and that’s something I’m sure we can all get onboard with.

However, if charging speed is your number one priority, you should avoid them. They offer a considerably slower charging experience than their wired counterparts. In fact, testing suggests they could be as much as 50 percent slower.

Why? There are two reasons. First, it’s more efficient to transfer energy through a cable than via simple contact. Second, the wasted energy manifests itself as excess heat. More on that in point seven.

7. Avoid Cases While Charging

As odd it may sound but a case on a hot summer day might actually throttle your charging performance and may even lead to battery damage in the long run due to increased heat. So, in order to fast charge iPhone 12 mini at a respectable rate, take that case off for a while, it’s totally worth it.
See also: How to fix iPhone 12 mini overheating issues

How to fast charge iPhone 12 mini? Now you know!

I’ve introduced you to seven ways you can make your iPhone 12 mini charge faster. If you work through the tips methodically, you can save time charging your phone.

I’d love to know what else you’d add to this list. Have you found an iOS setting that considerably alters the amount of time it takes to recharge your battery? Do you know about a accessory your fellow readers can purchase to make the charging process easier?

Now that you’ve fixed slow charging, check out how to fix other common 12 mini problems. And if your iPhone 12 mini won’t charge at all, try these fixes.

If you can’t get any sound from your iPhone 12 mini microphone or it sounds distorted, try these solutions.

Have you had a phone call recently where the other person mentioned that your voice wasn’t clear? When this happens, you might chalk it up to a connection issue. However, you might instead be suffering from microphone issues on your iPhone 12 mini.

You may not even be aware of your mic’s problems; the worst-case scenario is having a broken mic. Let’s take a look at some of the issues your iPhone 12 mini mic can encounter and methods to fix them.

What’s the Cause of iPhone 12 mini Microphone Issues?

So why and how do iPhone microphone problems arise? Your mic can become distorted for a variety of reasons, with the most common being a dirty iPhone. If you aren’t someone who cleans their iPhone regularly, you might be surprised to see how much dirt gets built up.

Other common issues are related to software updates and third-party app installations. These tend to reconfigure or disable your mic without you realizing it. Your mic can also become damaged due to physical issues, such as internal malfunctioning or damaged hardware from mishandling your iPhone.

How Do You Know Your iPhone 12 mini Mic Is Faulty?

If you suspect that your mic might be broken or malfunctioning, it’s best to test it to make sure. Here’s how to test your iPhone 12 mini microphone.

Voice Record Yourself

The easiest way to make sure your mic works is to record your voice on your iPhone and listen to the recording. You can easily tell if your voice sounds distorted to can help you ascertain the problem.

An iPhone 12 mini come with a built-in voice memo you can use.

See also: 10 ways to fix iPhone 12 mini audio issues

Ways to Fix Your iPhone 12 mini Mic Issues

If you’ve confirmed that your iPhone microphone isn’t working properly, now you can set out to fix it. Since there are various reasons why your iPhone 12 mini microphone may malfunction, let’s go through different ways to fix your problem.

Solution #1: Restart and Check for Updates

Sometimes the easiest solution is the best solution. Restarting your iPhone refreshes your iOS by clearing all processes and open apps. It can be a quick fix to your iPhone 12 mini microphone Issues.

Go to settings > General > Shut down. Leave it off for 30-60 seconds before turning it back on, then check to see if the issue is Fixed.

If a quick reboot doesn’t work, check for software updates, which is located under Settings > General > software update. A new software update usually fixes any bugs/errors that the current version may have, which could affect your iPhone’s microphone.

Solution #2: Clean Your iPhone’s Microphone

If you don’t clean your iPhone regularly, dirt can build up in the small openings of your phone, like the microphone port. Simply wiping your phone is not enough, as dust or other small debris can get packed in.

Like iPhone SE, your iPhone 12 mini is equipped with three different microphones, on multiple locations. For example, if you turn the iPhone, and carefully look at the rear camera, you’ll see a tiny hole beside the camera, that’s a microphone for the Camera, to record Videos and perform camera-related functions. Another microphone is near the lightning connector, often users get confused between Stereo Speaker and Microphone grill. The first four holes from the right side are the built-in stereo speaker grills, whereas the rest of them is the microphone holes. Plus, on the top near the ear speaker, there’s one more microphone.

Grab a toothbrush, or similar and use it to gently clean your microphones. The other alternative is to blow directly at them, to remove all the built-up debris. However, if you do this, be careful not to blow air further into the iPhone.

Another aspect to check while cleaning for is your case or screen guard. When you install a new protective accessory on your iPhone, there’s a chance that you’ll cover your mic with it. Make sure that no part of your case is blocking your mic, and that there’s no dust buildup trapped inside crevices of your case either.

See also: 10 ways to fix iPhone 12 mini Camera Issues

Solution #3: Disconnect Bluetooth Devices

There’s also the chance that you left your iPhone connected to a Bluetooth headset or other device with a microphone. If that’s the case, your iPhone will use that as the primary microphone instead of the built-in one.

Make sure to check what’s currently connected under Settings > Bluetooth. Disable any active Bluetooth devices and try using the mic again to fix your problem.

See also: How to fix iPhone12 Minnie bluetooth issues

Solution #4: Enable Microphone Access for Third-Party Apps

Are you having problems with video calls on apps like FaceTime, Skype, or WhatsApp? Chances are, you haven’t enabled the permission for the microphone for these apps.

Head over to Settings > Privacy > Microphone, and enable microphone access to the relevant apps.

Solution #5: Turn off Noise Cancellation

iPhone 12 mini come with a feature called noise cancellation enabled by default. Noise cancellation helps reduce the background noise when you are on a call or recording a video.

For those unaware of this, the result can sound a bit disorientating, so it’s easy to assume there is something wrong with your mic. Here’s how you can disable the setting to make sure your mic is fine:

Launch the Settings app on your iPhone and navigate to Accessibility > Audio/Visual. Switch off Noise Cancellation toggle. Have a call with a friend and make sure the microphone is functioning properly. If it’s still malfunctioning then re-enable the feature and move to the next trick.

Solution #6. Reset All iPhone Settings

If your iPhone 12 mini microphone is still not working properly after following all the steps above, then consider taking this as a last resort. You will have to restore your iPhone to factory settings. It won’t delete your data but the step will erase all saved Wi-Fi passwords.

Go to Settings > General > Reset > and tap on Reset All Settings.

Solution #7: Take It to Apple Store

If all else fails, there is a good chance your iPhone is damaged. Mics are delicate parts and can easily break from fall, water, or similar damage. In this scenario, it is best to take your iPhone to Apple technician who can determine the fault within your device. Be sure to make a genius Bar appointment before visiting the Apple store to avoid waiting in line.

iPhone 12 mini Microphone issue: Fixed!

There are various reasons your iPhone 12 mini mic may not work properly. If you ever run into a problem, the methods above should help you identify and fix the issues with the mic.

The best way to avoid issues from popping up in the future is to take good care of your iPhone.

Several iPhone 12 mini users have been facing display issues on their device. Users have complained about flickering screen, a green tint and other colour inaccuracies in the phone’s display. Users have further stated that the issue occurs when brightness is set around 90 percent or lower in some cases.

If your iPhone 12 mini display is exhibiting flickering, a green or gray glow, or other unintended lighting variations under some conditions, work through these steps to get everything back to normal.

Solution #1: Reboot Your iPhone

The easiest way to ensure this isn’t a temporary glitch is to first restart your iPhone. Doing that kills all the active third-party background services and processes. It will also refresh your iPhone’s components in case any one of them had crashed during a taskt. Go to settings > general > shut down.

After rebooting, if the display is no longer failing, you should go ahead and review all the recent apps you’ve installed.

See also: Tips to Speed Up iOS 14 on iPhone & iPad

Solution #2: Disable Auto Brightness

accessibility > Display & Text Size.

Solution #3: Check for Updates

general > software update.

See also: How to Fix iPhone 12 mini Wi-Fi Issues

Solution #4: Perform a factory Reset

Rebooting is the most rudimentary troubleshooting method you can execute and for most problems it will do the trick.

However, if it doesn’t fix iPhone 12 mini display issues, the next step is wiping your phone entirely by performing a hard reset. That will restore your phone to its factory settings and clear the cache.

So if there’s any unprocessed data hampering your iPhone’s functions, a hard reset will clear everything right away. Of course, you can back up your phone (here’s how to backup iPhone data if there’s anything you’d like to restore later.

Go to the Settings > General,tap the Reset button and Erase All Content and Settings. Your iPhone will take a few minutes to reset depending on the amount of data it houses.

Solution #5: Get it checked by apple

Your last resort is, of course, to get in touch with Apple Support and have it checked out by a professional. If none of the aforementioned techniques fixed your iPhone 12 mini Display Problems, it’s likely a hardware failure. In most scenarios, you will have to hand in your iPhone for a repair.

There’s no guarantee that any of those steps will be able to save your iPhone. Even if Genius Bar has a solution, chances are it won’t be cheap. So, it’s worth giving each one of these a shot before deciding between a paid repair or a new iPhone:

  • Reboot your iPhone
  • Disable auto-brightness
  • Check for updates
  • perform a Factory Reset
  • Get it checked by Apple

While it’s never fun to troubleshoot, hopefully these tips and tricks will help get your iPhone 12 mini display back to working condition.

And for other types of issues, take a look at these fixes for when your iPhone 12 mini is overheating.

Find that your Messenger keeps crashing on your iPhone 12 mini?

Then you’re not alone.

This guide is written specifically for you if you’re experiencing app crashes and glitches with the Facebook Messenger app on your iPhone 12 mini. The solutions shared in this guide are tested and can help troubleshoot and subsequently fix the crash issues with the Messenger app.

Please try the steps below to fix your problem. After each step, test Messenger to see if your problem is fixed.

See also: Facebook keeps crashing on iPhone 12 mini?

How to troubleshoot messenger keeps crashing on iPhone 12 mini

Solution #1: Restart iPhone 12 mini to fix Messenger keeps crashing issue.

Simply restarting your iPhone may resolve your problem. Here is how:

Press and hold the volume up (or down) and the side buttons together until the power off slider appears. Then drag the slider from left to right. Wait a few seconds for your iPhone to completely turn off. Then press and hold the side button until the Apple logo appears.

Solution #2: Restart the Messenger app

Close and reopen Messenger. Here is how:

go to the Home Screen and then swipe up from the bottom of your iPhone’s screen. This will Bring up your recently used apps. Find Messenger (you may swipe left or right) and then swipe up on the app.
And then try to open Messenger to see if it is working now.

Solution #3: Update iPhone 12 mini to fix the Messenger crashing issue.

Update your iPhone to the latest version of iOS. You can easily update your iPhone by going to Settings > General, then Software Update. And if there is an update available, follow the onscreen instructions.

Solution #4: Update the Messenger app to fix crashing issue on iPhone 12 mini

You may want to update the Messenger app. Updating may fix a bug that may be causing your problem. It is a good idea to keep your apps up to date. Here is how:

Open the App Store on your iPhone.
Tap Today.
Tap your profile icon.
Scroll down and find Messenger.
Tap Update.

Solution #5: Delete and re-install The messenger app on your iPhone 12 mini

If you are still having this problem, you may want to remove the app and then reinstall it. Touch and hold the Messenger app icon on your Home screen.
Tap Delete App.
Tap Delete again.

Launch the App Store on your iPhone.
Using the search field, search for Messenger.
Then download and install.

What to do if your iPhone 12 mini Messenger app still keeps crashing?

Are you still having this problem? You may want to contact Messenger support team. You can also visit the Facebook messenger help Center.

Several users have said that the Facebook app keeps crashing or freezing on the iPhone 12 mini.

There can be several reasons for this problem. You may experience this problem when your Internet connection is slow or unstable. The lack of available storage space on your iPhone may also cause this. And lastly, you may run into this problem when your iPhone’s internal memory is loaded heavily with other apps. Following the steps below will address these issues. This guide is written specifically for you if you’re experiencing app crashes and glitches with the Facebook app on your iPhone 12 mini. The solutions shared in this guide are tested and can help troubleshoot and subsequently fix the crash issues with the Facebook app. Try these steps in order until your problem is fixed.

Without further ado, let’s dive right in.

See this article if Messenger keeps crashing on iPhone 12 mini

How to troubleshoot Facebook keeps crashing on iPhone 12 mini

Solution #1: Restart the app

Close and reopen Facebook. Here is how:

go to the Home Screen and then swipe up from the bottom of your iPhone’s screen. This will Bring up your recently used apps. Find Facebook (you may swipe left or right) and then swipe up on the app.
And then try to open Facebook to see if it is working now.

Solution #2: Update your iPhone and Facebook

Update your iPhone 12 mini to the latest version of iOS. You can check for updates by going to Settings > General > Software Update.
And ensure that you are using the latest version of Facebook. You can update your apps manually or automatically. You can manually update Facebook by opening the App Store app (App Store > your profile icon). Alternatively, you can turn on Automatic Updates by going to Settings > App Store. If you are having issues with updating automatically, see: Automatic App Updates Not Working.

Solution #3: Restart

Restart your iPhone. Restarting is a simple but effective way to fix this problem. Here is how you can do this:

Press and hold the side button and either of the Volume buttons until the power off slider appears. Drag the slider. Wait for your iPhone to fully turn off. Then press and hold the side button until you see the Apple logo.

Solution#4: Delete the Facebook app and then re-download

Please note that data stored in the app may be lost. Here is how:

On your Home Screen, tap and hold the Facebook icon. And then tap Remove App (-) icon and then tap Delete to confirm.
Restart your iPhone.
Then open the App Store app, find Facebook and download again.

Solution #5: Force restart

If you are still having this problem, try force restarting your iPhone. Here is how:

Press and release the volume up button and then press and release the volume down button and then press and release the power button until you see the Apple logo (when your iPhone restarts).

What to do if your iPhone 12 mini Facebook app still keeps crashing?

If you are still having issues, you may want to contact Facebook.

iPhone 12 mini

It has been reported by several users that their iPhone 12 mini is facing some issues with the camera application. Fortunately, a few possible fixes have been worked out and can be used to remedy iPhone 12 mini Camera issues.

Common iPhone 12 mini Camera Issues

Here are the most common iPhone 12 mini Camera Problems:

Before we explain how to troubleshoot iPhone 12 mini Camera problems, let me explain the black camera issue so you don’t misunderstand it for some other issue. Basically, when you launch the Camera, instead of seeing the objects, the Camera app is black, which makes it impossible to take a photo.

Even though many users had already reported these iPhone 12 mini camera issues, Apple has not officially released a statement. With that being said, we cannot just accept that these problems will be unresolved.

In this guide, we make sure to bring you some good news to ease your problem. Thus, we have compiled a list of reliable methods to help you work around these iPhone 12 mini Camera issues while waiting for a fix from Apple.

Let’s get started!

How to fix iPhone 12 mini camera issues

If you are experiencing Camera Issues on your iPhone 12 mini, follow these steps, testing after each step until your issue is resolved:

Solution #1: Close and restart the Camera app

While Apple’s motto is “it just works,” sometimes it doesn’t. Apple isn’t perfect, so its operating systems certainly aren’t immune to errors now and then — sometimes they aren’t properly loaded up when launched. In this case, you should try force quitting out of the Camera app and relaunch it. This is how most iPhone 12 mini Camera issues usually resolves for me.

Swipe up from the bottom of your screen to open the App Switcher, swipe right to find the camera app, then swipe up on the app.

See also: 5 hidden iPhone 12 mini Tipss and Tricks you should know about

Solution #2: Switch between the front and rear cameras

Sometimes, iPhone 12 mini Camera Issues can be resolved by just switching between the rear and front-facing selfie camera. The problems could be caused by the app not loading properly, and each time you switch cameras, it forces the app to load again, so this could help. Another suggestion is to see if a third-party camera or video app works, such as Instagram or Snapchat.

While taking a picture or video, or using FaceTime, you can easily switch between the rear-facing and front-facing cameras. Once you have opened the “Camera” or “FaceTime” app, you will be able to see the “Switch Camera” icon. Tap the icon to switch back and forth between cameras.

Solution #3: Make sure VoiceOver is turned off

For some reason, VoiceOver seems to cause iPhone 12 mini Camera issues, so if you have it on, it’s a good time to try turning it off to see if it solves your issue.

Use any of these methods to turn off VoiceOver:
Summon Siri and say “Turn off VoiceOver”
Triple-click the side button
Go to Settings > Accessibility > VoiceOver, then turn the setting off.

See also: 5 IPHONE ACCESSIBILITY FEATURES YOU DIDN’T KNOW ABOUT

Solution #4: Restart your iPhone

If the other steps so far have not alleviated the iPhone 12 mini Camera problems, you should try restarting your iPhone. A good reboot of the hardware fixes a myriad of issues and could be what your iPhone needs. After all, a reboot refreshes the device’s memory and clears caches.

Do one of the following to turn off your iPhone:

Use the physical buttons on your iPhone.
Press and hold both the side button and either volume button until the slider appears on the screen.
Drag the slider.
Use the Settings menu.
Go to Settings > General > Shutdown.
Drag the slider.
Now, turn your iPhone back on by pressing and holding the side button until the Apple logo appears.

Solution #5: Force Restart your iPhone

A force restart can be useful for clearing up common iPhone 12 mini Issues. This includes situations where your iPhone keeps freezing or restarting.

To force restart your iPhone:
Quickly press the volume up button followed by the volume down button.
Press and hold the side button until the Apple logo appears.

Solution #6: Update iOS

If you’re running an older version of iOS, you may be experiencing glitches and bugs that may be patched in newer versions of the OS. It’s important to keep your hardware up-to-date with the latest versions of iOS. Not only do new versions of iOS patch previous issues, but they also make your device more secure and less vulnerable to security exploits. You can wirelessly update your iPhone by going to Settings > General > Software Update. You may want to turn on Automatic Updates.

See also: iPhone & iPad: how to protect yourself from hackers

Solution #7: Clean The Camera (External) Lens.

if your iPhone 12 mini Camera is not focusing, make sure that your phone’s camera lens is clean. Dust and dirt can affect the outcome of your captured images and videos. Even fingerprint smudges can also be a factor as to why your camera is not focusing on your iPhone 12 mini.

You can prevent this by cleaning your camera or external lens using a microfiber cleaning cloth, which helps clean hard surfaces like smartphones and oleophobic (oil repellent) iPhone screens. Do not attempt to use your fingers to clean them as it will leave fingerprint smudges, which we are trying to clean in the first place.

See also: Coronavirus: How To Clean And Disinfect Your iPhone & Other Smartphones

Solution #8: Take off The Phone Case.

Phone cases are one of the simple reasons why captioned images or videos can be blurred. We use them to add protection to our devices from any physical damages, but it can also cause some iPhone 12 mini Camera Issues. The additional layer of plastic or glass can result in poor images or videos.

In some cases, if you are using phone cases that partially cover the flash or the camera lenses, this can also cause iPhone 12 mini Camera problems. Magnetic phone cases are also the same as they can also affect your camera’s optical image stabilization feature. You can try taking some pictures or videos with the phone case, then try them without it to know if there are any differences.

Solution #9: Perform a factory reset

And when all else fails, and you still have iPhone 12 mini Camera Issues, you may need to try resetting your Device back to factory settings. If default factory settings do not work, the next step would be to erase all data and reset the phone — start with a clean slate, basically.

However, these are last resort steps and should only be used when everything else has failed. If you end up having to erase all of your data and resetting the phone, then make sure that you have backed up your iPhone first. Go to settings > general > Reset > Erase all content and settings.

Solution #10: Contact Apple Support

If you have tried everything in this guide and still have iPhone 12 mini camera problems, then it may be an issue with your hardware. The only way to fix that is to contact Apple Support or take it to an authorized repair center to see what they can do.

Questions?

Are you still facing iPhone 12 mini Camera Issues? Or do you have another fix for the problems that we didn’t include here? Drop us a comment and let us know!

iPhone 12 mini

Now, many of you might be wondering what the actual reasons for iPhone 12 mini call issues are? Well, there’s no pinpoint reason for these issues. It could be due to a bad network, carrier issues, glitches in software, etc. Below are a few ways to fix iPhone 12 mini call issues including iPhone 12 mini not making calls, iPhone not receiving calls, call failure issues etc.

Smartphone connectivity has continued to improve over the years. People can now send instant messages, make video calls, send emails, etc., using their smartphones. Even with all these, phone calls remains an indispensable feature used to connect with people as it can be accessed on any phone. However, one of the problems users usually encounter is iPhone is not making or receiving calls sometimes.  By reading this post, you’ll know about the reasons why this problem persists and how to fix iPhone 12 mini call Issues and reconnect with your loved ones.

See also: 11 ways to fix iPhone 12 mini antenna issues

What to do if you can’t make calls on your iPhone 12 mini

If you can’t make calls on your iPhone 12 mini, follow these steps, testing after each step until your issue is fixed:

Verify that you’re in network: While relatively rare, dead spots still exist. You might encounter this when underground (in a basement or on mass transit) or in a rural area. Reception issues can also happen if you’re near another country’s border and your iPhone thinks you’re roaming.

Make sure that airplane mode is not enabled: When this mode is turned on, Cellular networks are disabled, and incoming phone calls go to voicemail. If Wi-Fi is on, you can still surf the web and send messages using data, though. Swipe down from the top right of your screen to access Control Center, or go to Settings > Airplane mode to check the status.

Check that Cellular data is enabled: When your iPhone connects to a network, you should see your carrier’s name. Go to settings > Cellular. See this article if your iPhone 12 mini shows no service.

Contact your carrier: Have you paid your bill? Even if you have auto-pay set up, that can fail due to problems with your bank or a technical glitch. Your carrier should alert you to this, but it may be via snail mail. If there isn’t a payment issue, technical support can help you check for other problems and alert you to area outages.

Restart your iPhone: If none of the above is the problem, this action can fix many issues. Go to settings > general > shut down.

Perform a factory reset: A hard reset can take care of issues that a simple restart doesn’t, but make sure you’ve backed up important data before doing so. Go to settings > general > Reset > erase all content and settings.

Contact Apple or carrier: If all else fails, the issue might be due to hardware damage. Find out if it’s worth repairing or how to get a replacement. If you can, visit the nearest Apple store so the Genius Bar can conduct some troubleshooting.

What to do if you can’t receive calls on your iPhone 12 mini

If you can’t receive calls on your iPhone 12 mini, follow these steps, testing after each step until your issue is fixed:

Restart your iPhone: Try this first. Simply restart your device to fix this problem. This is a very simple process. You can shut down your iPhone by going to Settings > General > Shut Down. You can also power off your iPhone by pressing and holding the side and one of the volume buttons (up or down)

Check blocked contacts: Go to Settings > Phone > Blocked Contacts

Is “Do not disturb mode” enabled?: Make sure the “do not disturb” mode is turned off. Go to settings > do not disturb.

Is call forwarding activated?: Make sure call forwarding is not enabled on your iPhone. Go to settings > phone > call forwarding.

Check to see if Silence Unknown Callers is turned on: If the setting is on, a caller must be listed in your Contacts or Recents. Or they must have shared their number in Mail or sent you a message using that number in order for their call to go through. Add their number to Contacts to ensure the phone rings.

Update your iPhone: A new update may be available.

If your iPhone has a SIM card, remove the SIM card, then reinsert it.
Check for updates: Make sure that your iPhone has the latest version of the iOS software. If not, a new update may fix this problem. You can easily update your iPhone wirelessly. On your iPhone, go to Settings > General > Software Update. software update

Disable and enable Cellular: On your iPhone, tap Settings > Cellular and toggle off Cellular Data wait several seconds, and turn it back on.

Enable and disable Airplane Mode: On your iPhone, go to Settings and turn on Airplane mode and wait several seconds and turn it off again.

Reset network settings: On your iPhone, go to Settings > General > Settings and then tap Reset Network Settings (you may have to enter your passcode). Note that resetting your network settings will erase your network settings like your Wi-Fi passwords etc.

Try to make or receive calls in another location

See also: iPhone 12 mini keeps losing signal? Fix it here
Switch to a different network band: Go to Settings > Cellular > Cellular Data Options > Voice & Data > Enable LTE and turn off Enable LTE, 4G, or 3G

What to do if you get Call Failed Error on iPhone 12 mini

If your iPhone 12 mini keep saying “Call Failed” whenever you try calling someone, follow these steps, testing after each step until your issue is fixed:

Check your network Signal: Make sure there is network signal on your iPhone by looking at the status bar, because some times calls getting failed on iPhone 12 mini can be as a result of poor or no network reception in the location you are presently at. If that’s the case, then you will need to move to another place where there’s strong network signal, because your service provider signal doesn’t cover some regions.

Turn airplane mode on and off: If you’re continuously facing the “Call Failed” prompt while trying to make a call, enable Airplane Mode and wait 10 seconds then disable it: Go to Settings > Airplane Mode or use Control Center. You should now be able to make calls without any issues.

Make sure do not disturb is turned off: Go to Settings > Do Not Disturb on your iPhone and ensure that Do Not Disturb is off. You will see a moon icon in the status bar if it is enabled.

See also: 10 ways to fix iPhone 12 mini audio issues

Check blocked numbers: Make sure that the person you want to call is not blocked. Check your Blocked Contacts list. Go to Settings > Phone > Blocked Contacts to see the list.

Check your SIM card: If you are using a SIM card, please ensure that it is properly inserted into your iPhone. Eject and re-insert your SIM card to fix any underlying issues. The SIM card tray is usually located at the right on your iPhone. Remove the SIM card tray using the Sim ejector tool and put it back in. Please follow these steps:

Find the SIM tray. You will see a hole beside the tray.
Insert the Sim ejector tool that came with your iPhone. The tray will pop open.
Verify the SIM card, make sure that it is not damaged.
Try to clean it gently.
Then reinsert it. Now check if you are still getting call failure issues on your iPhone 12 mini. . See this article if you get no SIM card installed error on your iPhone.

Restart your iPhone: Most people tend to overlook the power of restarting your iPhone. So many issues can be solved just by restarting your device. Sometimes it might be a software conflict that’s causing call failure on iPhone 12 mini. Just by restarting the device, all system files will be refreshed and everything will start working well. To restart your iPhone: Press and hold the volume up (or down) and the side buttons together until you see the power off slider. Drag the slider. After your phone turns off, press and hold the side button until the Apple logo appears.

Update: There are two types of updates that you should check:

Update your iPhone 12 mini to the latest version of the iOS software. A bug in your iPhone’s current firmware could be causing call failure issues on the device. So, check and update it to the latest available iOS version. To check for updates: Go to Settings > General, then tap Software Update. If there is an update available, tap download and install.

A pending carrier update could be causing issues with calls on your iPhone 12 mini. So, check if you have a pending carrier settings update and install it if available: Go to Settings > General > About and wait a few seconds, a popup will appear if there is an update.

Reset network settings: Resetting your network settings can help fix the “Call Failed” error on your iPhone 12 mini. However, note that this will also erase all your saved Wifi passwords and VPN settings. Please follow these steps:

go to Settings > General > Reset.
Tap Reset Network Settings.
If asked, enter your passcode.
Tap Reset Network Settings to confirm.

Factory reset your iPhone: If the call failed errors still persist after trying all the above solutions, then you will have to backup your files and restore factory settings

Please Note: resetting your iPhone to factory default will delete all of the data on your device so please make a backup of the data before you do so. Go to settings > general > Reset > erase all content and settings.

Contact Apple support: If you are still having iPhone 12 mini call issues, you may want to contact Apple support. Note that Apple also offers live chat support.

Final word

These were some handy solutions to fix iPhone 12 mini call issues. Do try them and let me know which one helped you resolve your problem. I, too, faced some of these issues, but it was specific to low network areas. Anyway, do let me know your experience in the comments below.

5G: The 5G status-bar icon.  

Try these tips to fix iPhone 12 mini antenna problems

Poor reception on an iPhone can be the result of any number of software and hardware-related malfunctioning. In order to physically troubleshoot the iPhone 12 mini antenna issues, you need to open your device. Doing so voids any existing warranty on the device. Before attempting to physically diagnose your iPhone 12 mini antenna problems, ensure you first rule out all other potential defects of your device.

How to Fix iPhone 12 mini Antenna Problems

If you have an iPhone 12 mini and experience a lot of dropped calls, there are a few options available to you. Try any one of these solutions to fix your iPhone 12 mini antenna problems.

Fix #1: Enable / Disable Airplane Mode

This is the quickest fix that you can apply when you are experiencing antenna issues on your iPhone 12 mini. Disabling AirPlane Mode on iPhone will force your terminal to reconnect to the closest cellular cell available and thus restore connectivity. Please follow these steps:
Swipe-down from the top-right corner of the screen, to launch the Control Center. Tap the AirPlane Mode icon to enable it. Wait a couple of seconds. Tap the same toggle again to exit AirPlane mode. Check the status bar and notice if the signal bars are back on.

Fix #2: Reboot your iPhone

Our next solution in the list is to force restart your iPhone. This will not only force your device to reconnect to the carrier when booting back up, but could also eliminate any minor software glitches that might cause your iPhone 12 mini antenna issues. Please follow these steps:
Press and release the Volume Up, followed by the Volume Down and press & hold the Side Button until the Apple logo shows up on the screen.

Fix #3: Check SIM Card

The iPhone 12 mini connects to your carrier’s network with the help of a SIM card. If you’re using the SIM card from your old iPhone, it might malfunction. Please follow these steps:
Turn off your iPhone, eject the SIM card using the SIM ejector tool. Dust-proof it gently and insert it back in the tray. Turn the iPhone back ON and check if your issue was fixed.

Fix #4: Replace SIM Card

iPhone 12 mini uses a SIM card to help communicate with service provider cell towers. The most common cause of poor or no reception on an iPhone 12 mini is a defective SIM card. Visit your local service provider and request a new SIM card. A SIM card replacement is provided at no charge when you visit an official corporate retailer, while some non-corporate authorized retailers may charge for the service.

Fix #5: Disable 5G

The iPhone 12 mini antenna issue could be caused by the new 5G functionality. You can attempt to turn of 5G and see if this helps. Please follow these steps:
Open the Settings app and tap on Cellular. Tap on Cellular Data Options. Open Voice & Data and select LTE instead of the ‘5G Auto’ default.

5G+: A higher-frequency 5G status-bar icon.  

setting.

Fix #6: Disable Data Roaming

Turning off Data Roaming can fix iPhone 12 mini antenna problems. Please follow these steps:
Launch the Settings app and go to Cellular > Cellular Data Options. Use the toggle next to Data Roaming to disable it.

Fix #7: Check For Software Update

Make sure that your iPhone has the latest version of iOS. Please follow these steps:
Go to settings > general > Software Update.

Fix #8: Manual Network Selection

If you’re still facing iPhone 12 mini antenna issues, switch for manual network selection and disable 5G Auto. Please follow these steps:

Step 1: Go to Settings > Cellular > Network Selection > Automatic (disable it!) > Manually select your carrier from the list!.

Step 2: Go to Settings > Cellular > Cellular Data Options > Voice & Data > Select 5G On instead of 5G Auto

5G U/W: A higher-frequency 5G status-bar icon.  

Fix #9: Reset Network Settings

Many issues with service and connectivity are linked to software malfunctions. A simple reset of your iPhone 12 mini network settings can rectify most of these glitches. Please follow these steps:
Open the Settings app and go to “General,” select “Reset” and then tap “Reset Network Settings.”

Fix #10: Factory Data Reset

Factory resetting your device will resolve any issues you are experiencing with your iPhone 12 mini antenna that are not directly related to physically defective components of the phone. Before doing this, make sure you back up your iPhone through iTunes or iCloud. Please follow these steps:
Open the Settings app, go to “General” and then “Reset.” Choose “Erase all Content and Settings.” You can also factory reset the device by plugging it into iTunes and choosing the “Restore” option.

Fix #11: Physical Troubleshooting

It is highly advisable that any physical troubleshooting on your iPhone be done by an authorized Apple technician. Remember, since your iPhone 12 mini is less than one year old, you may be entitled to a free repair or replacement through Apple if you don’t void the warranty first.

If you choose to do physical work on your iPhone yourself, you will need to purchase a special toolkit — available on most online retailers (links in Resources) — and remove the backing from your iPhone. With the iPhone open, locate the antenna wrapped around the top and sides of the device and inspect it for any cracks or corrosion. You can purchase a replacement antenna and install it to replace the defective unit.

iPhone Ring/Silent switch  

If you are facing iPhone 12 mini audio issues, it may be a volume or settings issue that can be easily resolved.

Common iPhone 12 mini audio issues

Here are the most common iPhone 12 mini audio problems:

  • iPhone 12 mini sound not working
  • iPhone 12 mini not ringing
  • iPhone 12 mini not ringing loud

If you can’t hear a person’s voice clearly, hear crackling, hear static, or have issues with sound quality on your iPhone 12 mini, learn what to do.

You should first try Solutions such as checking the volume and turning off Do Not Disturb or Silent mode to fix iPhone 12 mini audio problems.

Consider restarting your Device or having it serviced as a final step to fix your iPhone 12 mini audio issues.

If your iPhone 12 mini isn’t ringing properly, there may be several reasons why.

If you are scratching your head thinking “wait a second, my iPhone 12 mini isn’t ringing?”., check that your iPhone doesn’t have Do Not Disturb Mode enabled or that it’s not stuck in headphone mode.

You should also make sure that your iPhone 12 mini isn’t on Silent, and that any custom ringtones are working properly.

How to fix iPhone 12 mini audio issues

Here are a few tips on how to fix your iPhone 12 mini audio issues:

Fix #1: Ensure your iPhone isn’t on Silent mode

Make sure that your iPhone’s Ring/Silent switch isn’t in the Silent position. Try moving the switch forward—toward your iPhone’s display—so that orange isn’t showing. If it’s down (with a band of red visible) it’s set to silent, and might have accidentally been bumped into that position.

Quick tip: You can find your iPhone’s Ring/Silent switch on the left side of the iPhone, above the volume controls.

Fix#2: Increase your iPhone volume

It’s possible that your iPhone 12 mini volume is too low to hear it ringing. To fix a volume issue, press the Volume up button on the left side of the phone until you can hear something.

You can then test if your iPhone 12 mini audio issues were fixed by playing music or a video. If you hear noise, you have fixed the problem.

Fix #3: Check the sound on your iPhone

Go to Settings > Sounds & Haptics), and drag the Ringer and Alerts slider back and forth a few times. If you don’t hear any sound, or if your speaker button on the Ringer and Alerts slider is dimmed, your speaker might need service. Contact Apple Support.

Fix #4: Turn off do not disturb mode

If your iPhone 12 mini is in Do Not Disturb mode, all incoming calls will be silenced. When enabled, there’s a crescent moon icon in your status bar. If you see it, here’s how to disable Do Not Disturb mode:
Open Settings > Do Not Disturb and make sure that Do Not Disturb is off.

Fix #5: Check that your iPhone isn’t stuck in headphone mode

It’s possible that your iPhone 12 mini is “stuck” in a mode in which it thinks it’s playing the ringtone, but it’s sending it to a device that isn’t connected, like earbuds that aren’t plugged in or a Bluetooth device that isn’t turned on.

Here are a few things you can try to “wake up” your iPhone’s audio connection so it’s working properly:

Plug earbuds into your iPhone and remove them again to coax the phone into recognizing there are no earbuds plugged in.
Make sure you’re not connected to another audio device by swiping down from the top right of your iPhone screen to display the Control Center. Then tap the Airplay icon in the music pane – it looks like a triangle with three circles – and if anything other than the iPhone is selected, choose the iPhone.

Enable and disable Airplane mode by tapping the airplane icon in the Control Center.

Fix #6: See if any custom ringtones aren’t working

If you are having iPhone 12 mini audio issues for a specific caller and that person isn’t blocked, then check to see if it’s a custom ringtone you assigned to them that isn’t working.

Follow these steps to remove a custom ringtone before resetting the tone for a contact.

Step 1: Start the Settings app.

Step 2: Go to “Sounds & Haptics.”

Step 3: Tap on “Ringtone.”

Step 4: Find the tone you want to delete from the Ringtones list before swiping left on it.

Step 5: Tap the red “Delete” icon that appears to delete the ringtone.

Step 6: Go back to your contact and assign another ringtone to their profile.

Fix #7: Restart your iPhone

If you are still facing iPhone 12 mini audio issues, consider restarting or force-restarting your Device. This step is important especially when your device runs into software bugs that cause lagging Issues on iPhone 12 mini or wonky, including if its sound or ringer has stopped working.

to restart your iPhone: go to settings > general > shut down.

To force Restart your iPhone:

  • Press the volume up immediately followed by the volume down button.
  • Press and hold the side button until you see the Apple logo on the screen.

Fix #8: Clean your receivers and speakers

Remove all screen protectors, films, or cases from your iPhone. Check the speaker opening to see if it’s blocked or dirty. Make sure that the receiver is not blocked or dirty. If necessary, clean the speaker or receiver opening with a small, soft-bristled brush. Make sure that the brush is clean and dry.

See also: Clever iPhone Tricks Make Your Music Louder – so you can use it as a speaker

Fix #9: Try making a call

If you hear sound, try making a call with your iPhone and turn on speakerphone. If you still can’t hear, or hear static or crackling, then your network or reception could be the issue. Try to call again later, or from a different location.

See also: iPhone 12 mini Dropping Calls? Fix

Fix #10: Get your iPhone serviced

If none of the other troubleshooting tricks solved your iPhone 12 mini audio problems, you probably have a hardware problem with your iOS device, like a damaged speaker or a fried port.

You can go to Apple’s support page and make a Genius Bar reservation to have someone look at it in person. You can also contact Apple through live chat.

lighting to usb-c charging cable  

Having iPhone 12 mini charging issues? Follow these tips to figure out why and get it working again.

You probably don’t think much about the process of charging your iPhone; just plug in the cable and walk away—that is, until one day your iPhone won’t charge and you’re left scratching your head thinking “wait a second, my iPhone isn’t charging?”.

Fortunately, you don’t have to immediately rush to an Apple Store when this happens because the problem could have one of many simple explanations. More often than not, most iPhone 12 mini charging Issues can be solved at home.

Common iPhone 12 mini Charging Issues

Here are the most common iPhone 12 mini charging Issues:

  • iPhone 12 mini not charging when plugged in
  • iPhone 12 mini not charging with MagSafe
  • iPhone 12 mini not charging after 80
  • iPhone 12 mini charging slow than expected
  • iPhone 12 mini overheating
  • ‘Accessory not supported’ pop-up messages get displayed

If you’ve ever had these iPhone 12 mini Charging problems, you’ve come to the right place, because we’ll be talking about how to troubleshoot these issues and get your battery all charged up for a day’s worth of use.

What to do when your iPhone 12 mini isn’t charging when plugged in

Reboot your iPhone – Often, the reason why your iPhone 12 mini isn’t charging when plugged in is that there’s been a simple connection hiccup. To rule out a temporary glitch as the cause, a reboot should always be the first thing you do.

Restarting your phone will kill all background services and could solve your iPhone 12 mini charging problems. A restart also refreshes your iPhone’s core components, in case one of them had crashed while performing a task. To perform a reboot: go to settings > General > Shut down.

If your iPhone starts charging normally again after a reboot, then your problem is solved.

Re-seat the Lightning cable – If you plug in a cable to charge your iPhone 12 mini and your Status Bar doesn’t seem to recognize that the phone is connected to power, try unplugging and plugging the cable back in again. Sometimes the electrical contacts on the Lightning cable wear out over time and they simply don’t get a good bite on the Lightning connector in your device.
Let it charge for a bit – If you’ve plugged your iPhone 12 mini in and the screen is completely black, the battery might just be too dead to show anything, so try giving it 30 minutes to an hour to see if anything comes up on the screen after the battery has some time to collect a little juice.
Inspect the Lightning port for damage – Other times, you might have a damaged Lightning port and the Lightning cable isn’t getting gripped tight enough. In this scenario, there is too much play and the contacts can’t stay seated for the iPhone 12 mini to charge. You may need to contact Apple support to resolve this problem, and it usually comes from over-using your port or from being hard on it.

closeup of iPhone 12 lightning port  

Clean the junk out of your Lightning port – Your lightning port could just be full of lint and dirt that is keeping your Lightning cable from being plugged in all the way. Try to remove the junk with a nylon or wooden toothpick (non-conductive), but don’t use anything metal like a paperclip, as this could cause electronic damage in the event of electric or static discharge.
Inspect the Lightning cable for damage – Just like the port itself, the cable may have sustained damage. Apple’s cables aren’t exactly known for having durability built into their design. They’re thin and the part of the connector where the wire meets often gets damaged. Look for signs of tears or frays in the cable.
Use a different power outlet – If charging with a power outlet, it may not be providing electricity. If charging with a USB port on your computer, the same could happen. Try a new power outlet or a new USB port.

What to do when iPhone 12 mini is not charging with MagSafe

It can be quite frustrating if your iPhone 12 mini wireless charging is not working.

There are two potential reasons for this MagSafe charging issue. The first is that it could be an issue with the case, so try taking it off and try charging your iPhone 12 mini over MagSafe directly. If that doesn’t work, the issue is likely related to your iPhone 12 mini itself.

But don’t panic. Fortunately, there appears to be bug with iOS 14 that disables wireless charging and can be easily fixed. All you have to do hard restart your iPhone 12 mini.

Force restart your iPhone 12 mini to fix the MagSafe charging problem! Quickly press and release the Volume Up button, followed by the Volume Down button. Next, press & hold the Side Button until you see the Apple logo on the screen. Release and be patient until the phone reboots!

When your iPhone 12 mini restarts, try charging it again — it worked for me. You should see the MagSafe animation as well as the charging icon in the upper-right corner of the display.

magsafe  

What to do if iPhone 12 mini is not charging after 80

If your iPhone 12 mini is not charging past 80%, that’s because Apple introduced a new feature in iOS 13 called “Optimized Battery Charging.” This feature has the software preventing or delaying your device’s charging at 80% for as long as you aren’t using the device.

While the Optimized Battery Charging feature is supposed to help you extend your battery’s life, maybe you want to turn it off to see if your device can fully charge to 100%. Or perhaps you don’t like the feature. Thankfully, turning it off is easy! Go to Settings > Battery > Battery Health. Tap the toggle for Optimized Battery Charging to OFF (gray). You’ll be presented with two options for when turning Optimized Battery Charging to off: Turn Off Until Tomorrow or Turn Off (permanently). Choose which one you prefer.

See also: Optimized Battery charging not working on iPhone? Fix

You may find your iPhone 12 mini battery not charging after 80% because of the battery temperature. When you overcharge your iPhone, it may overheat, causing your iPhone battery health to drop fast. You should try moving your iPhone 12 mini to a cooler location, which would be more conducive. Avoid things like direct sunlight, rooms with poor ventilation, other appliances, and electronics, or other devices that can generate heat, if you can. If the environment is still too hot, you should try cooling it off with fans or air conditioners before attempting to charge.

See also: Your iPhone Gets Hot? Here is Why and How to fix

What to do when iPhone 12 mini is charging too slowly

In some cases, the problems charging your phone might not be with the device not charging at all, but rather with the iPhone charging too slowly. Here are some things you can try in this scenario:

Use a higher-watt power adapter – Using a low-watt power adapter like those supplied with previous iPhone models are going to make your iPhone 12 mini battery take forever to charge. Use a higher-watt power adapter like the 20W version that is sold by Apple.
Use a different USB port – On some computers, some USB ports are able to provide more power than others.
Check for cable damage – A charging cable with damage may be resulting in a slower charge. There is a certain amount of conductive metal in the cable, and when any part of that metal gets frayed, the volume efficiency is reduced and the amount of electricity that can travel through the wire is reduced, which may lead to less power getting supplied to the device.
Check for port damage – With a visual inspection, make sure that none of the contacts in the Lightning port are damaged.
Clean the charging port – Dust particles can quickly accumulate in the charging inlet and hinder your iPhone’s connection to a power source. Inspect your iPhone’s charging port and if you notice a buildup of dirt or other grime, clean it. You can do this easily by gently scrubbing the area with a dry cotton swab. Keep a light touch and don’t go ramming anything too far into your charging outlet.

To have a better look at what’s going on inside your port, use a flashlight to fully inspect the area. If you notice any foreign debris stuck inside, you can do heavier cleaning using a SIM ejector tool or a toothpick. After giving your port a good cleaning, try to charge your iPhone again.

What to do if iPhone 12 mini is not charging after water damage

Water and electrics don’t mix. If your iPhone has gotten wet and you’re now wondering why your iPhone 12 mini won’t charge, then it’s highly likely that water is the culprit.

You shouldn’t charge your iPhone 12 mini at all if there’s a possibility of water damage. First, you have to make sure your iPhone’s internals are completely dry.

iPhone 12 mini Overheating when charging

Update – Please ensure that your iPhone is running the latest version of iOS. Also, make sure that all of your apps are up to date.

To update iOS: Head to Settings > General > Software Update. If there is an update, follow the onscreen instructions to update your device.
To update apps: Head to App Store > Today > Your Profile > Update All.
Avoid charging while using your iPhone – Do not charge while gaming (especially graphic-intensive games) or streaming.
Use the right charger – Make sure you use the original accessories to fix overheating issues on iPhone. If it is a third party charger or cable, make sure it’s Apple certified.
Take off the case – Removing the case will help your iPhone to cool down quicker.
Disconnect the charging cable – Unplug the charging cable, if it is plugged in.

See also: How to fix iPhone 12 mini overheating issues

What to do when iPhone 12 mini says your accessory isn’t certified

If you ever get strange pop-up alerts on your iPhone 12 mini when you attempt to charge it with the inexpensive Lightning cable you just bought from Walmart, Ebay, or Amazon, you’re not alone. After all, Apple’s OEM replacements are expensive, and third-party cables are cheaper.

The only problem with this is Apple has a little chip inside of the cables that the iOS device communicates with and it tells the device whether or not the cable is ‘Made for iPhone’ or MFi certified. If it’s not, you may get these little error messages every so often, and the wording sometimes varies depending on the scenario.

Here’s what you can do:

Try re-seating the Lightning cable – I’ve had luck simply un-plugging and plugging the cable back in again. Although I sometimes get these messages, simply dismissing them and proceeding anyway tends to work most of the time (not all the time).
Use an OEM Apple Lightning cable – If you have an OEM Lightning cable, use it instead. The pop-up is appearing because the cable isn’t made by Apple and this makes Apple cranky. Avoid third-party Lightning cables and USB adapters unless you have no real choice, as they can actually cause damage to the battery.
Make sure iOS is up to date – There have been instabilities in iOS in the past where even OEM cables are not recognized as certified. Apple has helped improve the check process in later versions of iOS, so make sure your version of iOS is up to date from Settings > General > Software Update.
Reboot your iPhone – Sometimes simply rebooting your iPhone can wake the device up from its MFi hypnosis. Try this at least once if the pop-up isn’t going away.
Clean your Lightning port – Sweep away any dust or debris that might be hindering communications in your Lightning port. As recommended earlier, use only a nylon or wooden toothpick, as these are non-conductive and won’t short anything out.
Contact Apple Support – If the continues to have issues, and you’re using an OEM Lightning cable, you can always contact Apple support and ask the Genius Bar why you are having iPhone 12 mini charging problems. They may be able to find a fault that you’ve missed or diagnose a hardware failure. Hopefully, your iPhone is still in warranty so you don’t have to pay anything for the repair. Otherwise, you may have to pay to replace whatever component has broken.

iPhone 12 mini charging Issues Fixed!

Hopefully you’ve been able to resolve your iPhone 12 mini Charging problems after following some of these tips. Given how many little components are responsible for charging your iPhone’s battery, charging issues have become more common, especially as phones get even thinner which need extra care and maintenance.