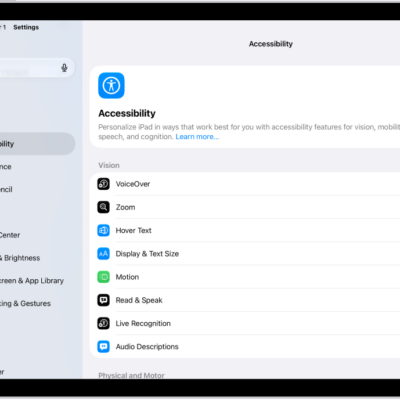
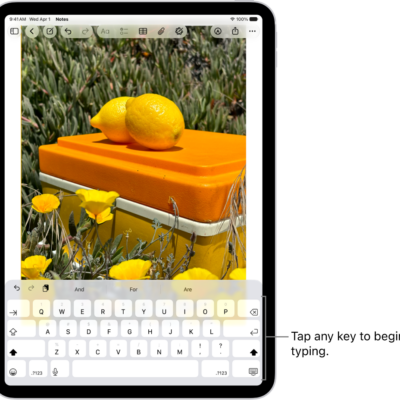
With Eye Tracking, you can control iPad using just your eyes. An onscreen pointer follows the movement of your eyes, and when you hold your gaze steady on an item—or dwell—you perform an action, such as a tap. All data used to set up and control Eye Tracking is processed on device.
It uses the built-in, front-facing camera, and you need to calibrate it every time you turn it on.
Before you begin
Eye Tracking works through the built-in, front-facing camera on iPad. You’ll get the best results when your face is adequately lit and clearly visible to the camera, with iPad on a stable surface roughly a foot and a half from your face.
Eye Tracking is available with supported iPad models.
Turn on Eye Tracking
- Open Settings, tap Accessibility, tap Eye Tracking, and then turn on Eye Tracking.
-
Follow the onscreen instructions to calibrate Eye Tracking. As a dot appears in different locations around the screen, follow its movement with your eyes.
Note: You need to calibrate Eye Tracking every time you turn it on.
Use Eye Tracking
When Eye Tracking is on and calibrated, an onscreen pointer follows the movement of your eyes. And by default, an outline appears around whatever item on the screen you’re looking at.
If Snap to Item is turned off, when you hold your gaze steady at a location on the screen, the dwell pointer appears where you’re looking and the dwell timer begins (the dwell pointer circle starts to fill). When the dwell timer finishes, an action—tap, by default—is performed.
Use the AssistiveTouch menu for additional onscreen gestures or physical button presses. For details, check out our guide, Use AssistiveTouch.
Recalibrate Eye Tracking
If you move your face or your iPad and recalibration is needed, Eye Tracking calibration starts automatically. You can also start Eye Tracking calibration manually.
-
Look at the top-left corner of your screen and hold your gaze steady.
The dwell pointer appears and the dwell timer begins (the dwell pointer circle starts to fill). When the dwell timer finishes, Eye Tracking calibration starts.
- Follow the onscreen instructions to calibrate Eye Tracking. As a dot appears in different locations around the screen, follow its movement with your eyes.
You can change which corner of the screen you look at to start recalibration, and you can assign actions to other corners, too. Read our article, Set up Dwell Control.
Set options for Eye Tracking
You can set options for how the Eye Tracking pointer responds to your gaze.
- Open Settings, tap Accessibility and tap Eye Tracking. Adjust any of the following:
- Smoothing: Increase this value to make the movement of the pointer smoother. Or decrease this value to make the pointer more responsive.
- Snap to Item: Have the Eye Tracking pointer automatically move to the item on the screen that’s closest to where you’re looking.
- Zoom on Keyboard Keys: When you dwell on the keyboard, zoom in on the section of the keyboard you’re looking at. Dwell again on a key to tap it.
- Auto-Hide: Show the Eye Tracking pointer when you hold your gaze steady for the amount of time specified. When your eyes are moving, the pointer automatically fades.
- Dwell Control: Turn Dwell Control on or off. To adjust settings for Dwell Control, such as the default dwell action and the duration of the dwell timer, see Set up Dwell Control.
- Show Face Guidance: Turn Show Face Guidance on or off to get help adjusting how you’re positioned.
To change the size or color of the Eye Tracking pointer, go to Settings > Accessibility > Pointer Control. See Make the pointer easier to see.
Use an external eye-tracking device with iPad
You can also use a Made for iPad (MFi) eye-tracking device to control iPad.
- Follow the eye-tracking device manufacturer’s instructions to connect your device to iPad with a Lightning or USB-C connector (depending on your iPad model).
- Set up your eye-tracking device using the device’s companion app.
- Open Settings, tap Accessibility, tap Touch, tap AssistiveTouch, and turn on AssistiveTouch.
-
If you want to be able to interact with an item on the screen when you hold your gaze steady on the item, turn on Dwell Control.
To adjust settings for Dwell Control, such as the default dwell action and the duration of the dwell timer, see Set up Dwell Control.
-
To set additional options for your eye-tracking device, tap Devices (below Pointer Devices), tap the name of the device, and adjust any of the following:
- Customize Additional Buttons: Perform actions using a physical switch (if supported by your eye-tracking device).
- Snap to Item: Have the pointer automatically move to the item on the screen that’s closest to where you’re looking.
- Auto-Hide: Show the pointer when you hold your gaze steady for the amount of time specified. When your eyes are moving, the pointer automatically fades.
To change the color and size of the pointer, go to Settings > Accessibility > Pointer Control. See Make the pointer easier to see when using a mouse or trackpad with iPad.
See also