Your iMessage texts appear in blue bubbles, while SMS, MMS, or RCS messages appear in green bubbles. It’s an easy way to tell them apart. Before you start texting, you can turn on iMessage, sync messages on all your Apple devices, choose other devices for SMS, MMS, or RCS messaging, and share your name and photo.
The Messages app gives you several different ways to send text messages:
- Over Wi-Fi or cellular service, using iMessage with others who also use iMessage. Your iMessage texts appear in blue bubbles.
- Over cellular service with SMS, MMS, or RCS messages, which appear in green bubbles. (RCS messages aren’t supported by all carriers or in all countries or regions.)
- Over satellite when you’re outside of cellular and Wi-Fi coverage, using iMessage or SMS on supported iPhone models and certain carriers (U.S., Canada, and Mexico only).
Turn on iMessage
- Open the Settings app on your iPhone.
- Tap Apps, then tap Messages.
-
Turn on iMessage.
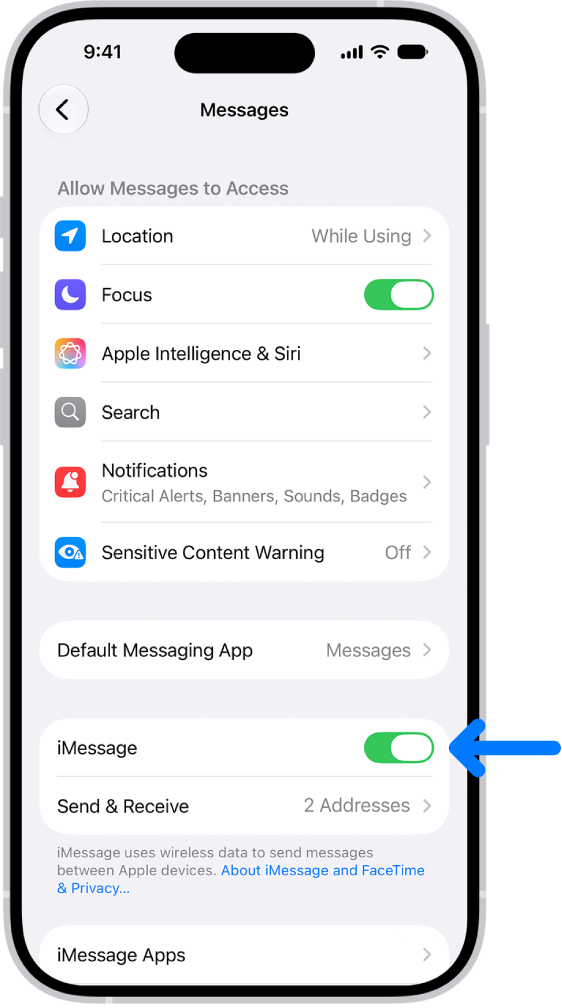
- To select which of your phone numbers and email addresses you want to use with iMessage, tap Send & Receive and choose from the available options below You can receive iMessages to and reply from.
Sync messages on all your Apple devices
Turn on Messages in iCloud, and iCloud saves the messages you send and receive on your iPhone. Once another device is signed in to the same Apple Account with Messages in iCloud turned on, your conversations show up and sync there as well. Your entire message history stays current on those devices, even on a new device you set up, including messages sent or received with SMS, MMS, RCS, or iMessage.
- Make sure that your iPhone is turned on and connected to a Wi-Fi or cellular network, and that you sign in to the same Apple Account on each device.
- Open the Settings app on your iPhone.
-
Tap your name and tap iCloud. Tap Messages.
If Messages doesn’t appear, tap See All in the Saved to iCloud section.
- Turn on Use on this iPhone (if it’s not already turned on).
- To confirm which devices receive any SMS, MMS, or RCS text messages you get on your iPhone, go to Settings, tap Apps, and then tap Messages. Tap Text Message Forwarding and turn on your other devices.
Once Messages in iCloud is on, deleting messages or attachments from iPhone also deletes them from your other Apple devices where Messages in iCloud is turned on (visionOS 1, watchOS 1, macOS 10.13.5, iPadOS 13, iOS 11.4, or later).
Note: Messages in iCloud uses iCloud storage.
Choose other devices for SMS, MMS, or RCS messaging
With text message forwarding set up on your iPhone, your other Apple devices show messages you send or receive, without needing Messages in iCloud.
Note: Availability varies by region and carrier.
- Open the Settings app on your iPhone.
- Tap Apps, then tap Messages.
-
Tap Text Message Forwarding, then turn on any devices you want to include.
If your iPhone is set up with Dual SIM, turn on each line.
Note: If you’re not using two-factor authentication, you’ll have to enter the six-digit activation code shown on the other device.
Share your name and photo
In Messages, you can share your name and photo** with others. You decide whether to share it whenever you send or receive a message from someone new.
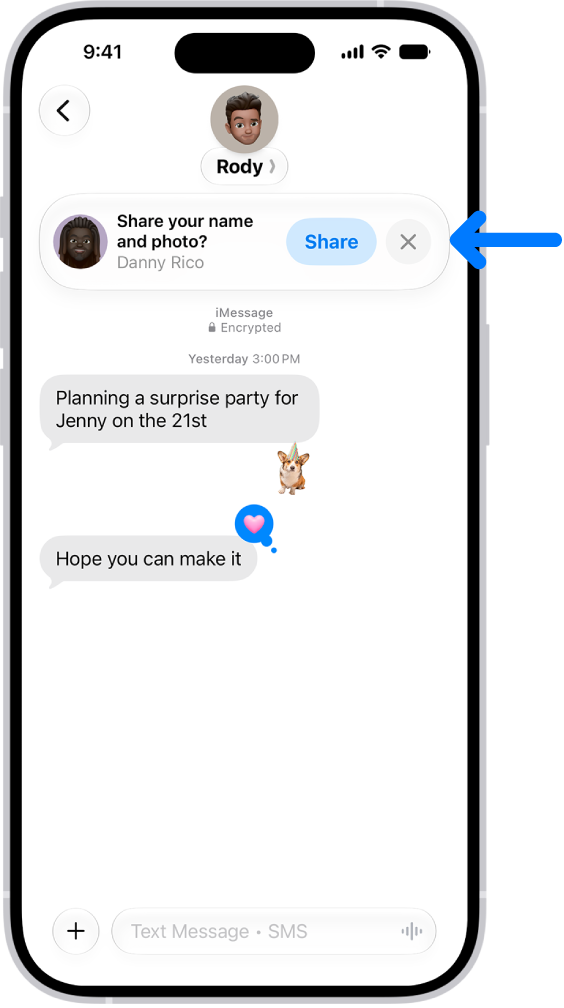
- Open the Messages app on your iPhone.
- Do one of the following:
- At the top of the conversation list, tap Edit, then tap Set Up Name & Photo.
- Swipe up to the top of the conversation list, then tap Share Your Name & Photo.
- Choose how you want to be represented, scroll down, and then turn on Name and Photo Sharing.
- Tap Share Automatically and then choose one of the following:
- Contacts Only: Anyone who is a saved contact receives the option of using the name and image you chose when they communicate with you.
- Always Ask: You decide to share your name and photo as you communicate with each contact.
- Tap the Done button to save your changes.
To change these settings after you set them up, tap Edit, then tap Name & Photo.
Note: Recipients using non-Apple devices may not see your name and photo as expected.
**Availability varies by region.