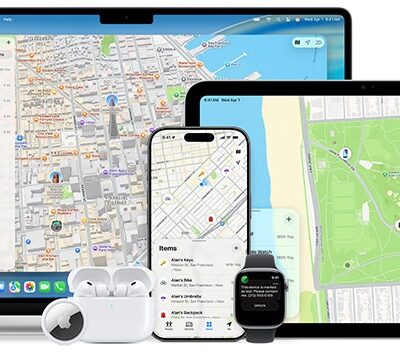





The Find My app’s Devices view and the Find Devices web app initially show a zoomed-out map plotting all your devices that are close to you and within reasonable proximity, as with people. If you’re in a Family Sharing group, you can see all devices of members in your group sharing their location with you. That can be quite a few devices. On an Apple Watch, you can only view a list and tap to see a map.
Any iPhone, iPad, Mac, or Apple Watch you own will appear as a device, along with all Apple and Beats audio devices. Because audio-device tracking has become more useful and differentiated over time, AirPods are covered separately.
The list is organized by person for Family Sharing with you at the top. As with People, each device shows the name assigned to it, a rough location, the last update, and its approximate distance from your location.
Your location is also plotted on the map as a blue dot if you’re near or between any of your devices, as is likely.
Find My doesn’t differentiate devices based on whether they’re located via an internet connection, proximity to your equipment, or the Find My network.
Select a device in the list or on the map, and Find My zooms in to center it in the map, typically showing it within a rectangle shaped by a radius of about 1/4 to 1/2 mile (400 m to 800 m). In the version 27 releases, select the device again to have the map zoom out.
You can take action on the device like this:
- On an iPhone or iPad or macOS 27: Select a device and view the actions available in its sheet. Tap or click the close button in the upper-right corner to return to the full list.
- On macOS 26 or earlier: After selecting a device, click the Info button to the right of the device name in macOS. Click anywhere but in the actions sheet in macOS to dismiss it.
- On an Apple Watch: Tap the device and scroll down for actions. Tap the back arrow button to return to the main view.
- On iCloud.com: A sheet appears in the upper-left corner of the webpage when you select a device.
Only the Directions options and the Notifications label (with different options) also appear in the People View.
Here’s what you can view or select from in Devices:
- Play Sound: See how to play a sound on a lost device.
- Directions: See how to play a sound on a lost device.
- Notifications: See how to get Find My alerts.
- Lost Mode/Mark As Lost: See how to mark an iPhone as lost.
- Erase/Erase This Device: See how to erase a lost iPhone or Mac remotely.
The top of the Find My sheet of actions shows a graphical depiction of the battery level for an iPhone, iPad, Apple Watch, or Mac laptop. Audio devices’ battery levels are not displayed.
Find My shows the device’s location on the map as a dot with its model icon above it. The dot is the center of a blue-shaded area if a device can be pinpointed; otherwise, the shaded area is larger and green. The shading radius indicates the level of confidence in the location.
Devices are listed even if they haven’t connected for months—or years! If it’s been longer than 24 hours, they appear as “No location found.” (For the full status rundown, see how to read the Find My app’s status labels.)
To remove old devices, see how Activation Lock protects a lost or stolen device.
Find a device you cannot reach
Here’s how to help someone else find their lost device—or find your own when you don’t have one of your devices at hand:
- Family Sharing: Use the Find My app on a device or the Find Devices web app at iCloud.com from a group account with which the missing device’s owner has enabled sharing.
- iCloud.com: For all other uses, turn to the Find Devices web app at https://www.icloud.com/find.
Some actions are limited: on the sheet for a device, you can play a sound, mark as lost, or enable notifications when found for your or anyone’s device using the Find My app on any device in the Family Sharing group. To erase a device, Find My prompts for the Apple Account password of the associated account.
If you cannot pass two-factor authentication
Apple requires two-factor authentication (2FA) for nearly all Apple Accounts—it’s useful in resisting account hijacking. However, it complicates using Find My if you (or someone you’re helping) don’t have access to any trusted, or Apple Account-linked, devices or phone numbers. Here are three approaches to set up in advance:
- Add a trusted phone number for people you trust: You can add a phone number for a partner, family member, close friend, or even an attorney or other professional you could contact in an emergency. Then, as long as you remember your Apple Account password, you can select that other person’s phone number in the 2FA validation process and they can provide you the code.
- Create a passkey for your Apple Account: Apple lets you bypass two-factor authentication if you enable a passkey. While a passkey is typically stored on your iCloud-synced devices, you can use some password managers to store one instead.
- Use a hardware encryption key: Apple lets you rely on hardware encryption keys for Apple Account access. As long as you still have one of the keys you set, you’re not locked out of iCloud.