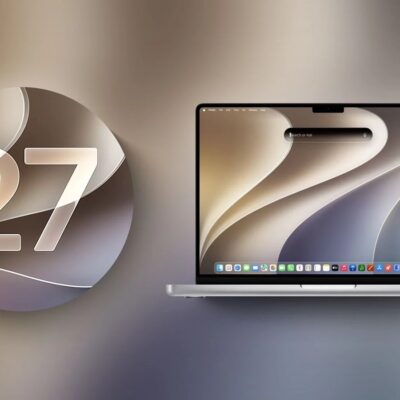
macOS 27 Golden Gate is a refinement release. Most of what it changes is small, and easy to walk past.
These are the macOS 27 Golden Gate tips that are easy to miss. Switches buried two panes deep, right-click menus with no other route, and two settings Apple moved quietly. Every one is new in this release. I tested each macOS 27 tip on my MacBook Pro rather than reprinting Apple’s feature list.
1. Turn Siri on later
You can always enable or disable Siri later: go to System Settings > Siri > Requests once macOS 27 is up and running and choose your desired setting.
2. An update switch moved
While you’re at it, make sure App Store is set up for automatic updates. In Sequoia and earlier, the Software Update pane of System Settings included an “Install application updates from the App Store” switch. That’s no longer there in macOS 27; instead, it’s right here: go to App Store > Settings and select Automatic Updates.
3. Why Mail says optimizing
The first time you launch Mail under macOS 27, a window may inform you that it’s “optimizing” your Mail database. This step should take no more than a few minutes, and is necessary because the macOS 27 version of Mail has updated the database format it uses to store information about your messages.
The massive overhaul in Siri technology also comes with a complete redo of Spotlight searching in macOS. The new indexing process can apparently take longer—potentially far longer than the previous Spotlight indexing. You might see a note that Siri and Search are optimizing in Settings > Siri or Settings > Spotlight until this is complete.
4. Liquid Glass tips beyond the slider
macOS 27 adds a Liquid Glass slider in System Settings > Appearance. To get rid of most transparency altogether, you must still open System Settings > Accessibility > Display and turn on “Reduce transparency.” That makes the menu bar, menus, sidebars, and toolbars opaque, while greatly reducing the transparency of the Dock and certain other elements. However, paradoxically, it also removes the shading from sidebars, making them less clearly separated from the rest of the window.
5. Right-size a Finder column
In column view, right-click or Control-click in any column, choose Show View Options, and check “Resize columns to fit filenames.” The columns autosize to the width of the longest names in each one. Uncheck that box to go back to regular sizing. You can also right-click or Control-click the double-bar button at the bottom of a column divider to show a menu with Right Size This Column, Right Size All Columns Individually, and Right Size All Columns Equally, where “right size” is Apple’s term for sizing determined by filename length.
6. Search without Siri
Here are the four categories:
Apps (⌘-1): In this view, only apps are shown (regardless of where they’re located on your Mac). Recently used apps appear at the top, until you start typing.
Files (⌘-2): Similarly, in this view, only files and folders appear, but that includes apps, too! Again, recent files appear at the top (below Suggestions, explained in a moment) until you start typing.
Actions (⌘-3): Actions are activities (some provided by Apple, others provided by third-party apps) that you can access directly from Spotlight without opening apps or performing additional steps.
Clipboard (⌘-4): Spotlight can keep track of things you’ve put on your clipboard previously, including them in search results, as long as this feature is enabled (as it is by default): go to System Settings > Spotlight, scroll to the bottom, and turn Results from Clipboard on or off.
7. Copy a note as Markdown
You can use Edit > Copy as Markdown Edit > Copy as Markdown to copy styled text from a note with Markdown tags, ready to paste elsewhere.
Oddly, as of publication time, there’s no corresponding Paste as Markdown command, but perhaps that’s coming in the future.
8. Link to a note section
If you use section headings in your note, you can insert links elsewhere in your note that jump to them. Choose Edit > Add Link (⌘-K), choose the section heading from the Link to Section pop-up menu, and click OK.
Finally, you can now add horizontal divider lines in your notes by choosing Edit > Insert Divider Line (⌘-L).
9. Upgrade an old Shared Album
In Photos, rght-click or Control-click an album in the sidebar and choose Upgrade Shared Album; this walks you through a series of steps, after which Photos spends a considerable amount of time—perhaps hours—thinking.
10. Two-finger swipe to refresh
In any app that already has a refresh or reload mechanism (such as Mail and Safari), you can swipe down with two fingers on a laptop’s built-in trackpad, a Magic Trackpad, or a Magic Mouse to refresh the page, just as you would (with one finger) on an iPhone or iPad.
11. Control Center when mirroring
You can now, finally, access Control Center on your iPhone from iPhone Mirroring—choose View > Control Center or press ⌘-4. And you can even watch copy-protected videos (such as those from Apple TV) on your iPhone while using iPhone Mirroring.
12. Hide your Lock Screen name
A new “Show user name and photo” switch is on by default, giving you the same behavior seen in Tahoe and earlier. But if you turn it off, usernames and photos no longer appear when your Mac is locked, which might be better for privacy in settings where a Mac may be visible to the public.
13. Fill passwords from another manager
In the AutoFill & Passwords category, there’s a new “AutoFill from” switch, with entries indicating which app(s) can be used to supply AutoFill data. By default, Passwords is the only option (turned on by default), but if you have one or more third-party password managers, they may also appear here.
If you have not upgraded yet, start with how to upgrade without losing data. For additional macOS 27 Golden Gate tips and tricks, see the complete guide to macOS 27 Golden Gate.