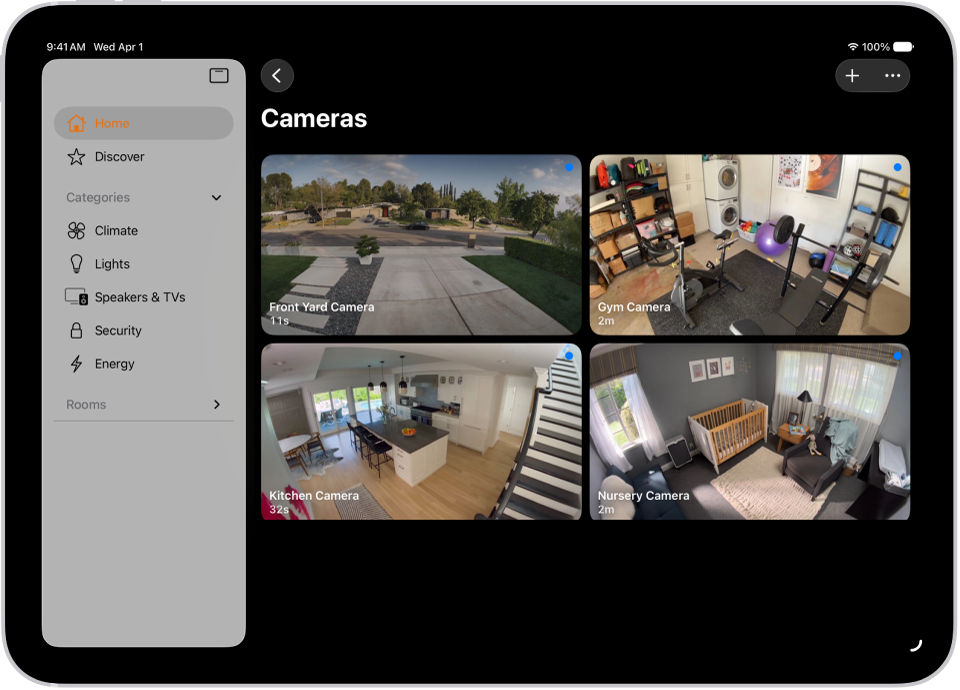
You can use the Home app to view video activity captured by your home’s cameras. With any Apple Home-compatible camera, you can view video streams, choose who can view them, and set up notifications when activity is detected. When you add a camera, you can choose streaming options and assign it to a room, such as your front porch. By default, up to four cameras show up as favorites on the Home tab.
With one or more HomeKit Secure Video cameras, you get these extra features:
- Encrypted video: Video captured by your cameras is privately analyzed and encrypted on your home hub device (Apple TV 4K or HomePod) and securely uploaded to iCloud so that only you and those you share it with can view it.
-
Record video: If you subscribe to iCloud+, you can view the last 10 days of activity from one to an unlimited number of cameras. The 50 GB iCloud+ plan supports a single camera, the 200 GB iCloud+ plan supports up to five cameras, and the 2 TB, 6 TB, and 12 TB iCloud+ plans support an unlimited number of cameras.
Note: Video content doesn’t count against your iCloud storage limit.
- Activity Zones: Create zones that focus your camera on the most important areas within its view.
- Face recognition: Receive notifications when people you’ve tagged in the Photos app are within the camera’s view.
Camera options
When you add a camera in the Home app, you can choose streaming options and assign the camera to a room. With a HomeKit Secure Video camera, you can also choose recording options. By default, up to four cameras are marked as favorites and appear on the Home tab. To edit those settings later, tap the Camera tile, then tap the Settings button to see these options:
- Room: A camera can be located in a room inside your home, or you can create a room for an outside location such as your front porch or back yard.
- Notifications: Choose to receive notifications when the camera detects activity, changes status, or goes offline.
-
Recording options for HomeKit Secure Video cameras: You can create separate recording settings for when you’re home and when you’re away. For example, when you’re home, you might choose to stop streaming and recording from a camera inside your home, but continue to stream and record from an outdoor camera.
Note: The Home app uses the location of devices belonging to members of the home to switch between Home and Away modes. For example, when you leave for work with your iPad, the camera switches from the When Home settings to the When Away settings.
Set up notifications
- Open the Home app on your iPad.
- Tap the More button, then tap Home Settings.
- Tap Cameras & Doorbells.
-
Tap a camera and turn on Activity Notifications.
All Apple Home-compatible cameras can send a notification when motion is detected. HomeKit Secure Video cameras can additionally send notifications based on these factors:
- The time of day
- When someone is or isn’t home
- When a clip is recorded
-
When any or a specific type of motion is detected
When you choose a specific motion, you receive a notification when the camera detects people, animals, or vehicles, or when a package is delivered. For a package to be detected, it must be within the camera’s view after delivery.
Choosing a specific motion, rather than any motion, results in fewer clips (and fewer clip notifications) and less video to review. For example, if you choose to detect people, your camera doesn’t capture the movement of leaves on a tree or a squirrel leaping from branch to branch.
Create Activity Zones for HomeKit Secure Video cameras
To point your HomeKit Secure Video camera at the areas within its view that matter most, like your front walkway but not the sidewalk behind it, create zones. You’ll then get an alert when motion is detected in these zones.
Note: Activity Zones are available only for cameras that are set up to record when a specific motion is detected, and they don’t affect motion detection automations.
- Open the Home app on your iPad.
- On the Home tab, tap the camera tile. Then tap the Settings button.
-
Tap Select Activity Zones. Tap the video to create a zone.
To have your camera detect motion only outside the zone you defined, tap Invert Zone.
- Create any additional zones you want within the camera’s view—one for the driveway and another for the mailbox, for example.
- Tap Done.
To remove an activity zone, tap Select Activity Zones, tap inside a zone, then tap Clear.
View video
- Open the Home app on your iPad.
-
On the Home tab, tap the camera tile.
Live video should play automatically.
- If you’ve chosen to record video, swipe through the timeline at the bottom of the screen to browse recorded clips.
- Tap a clip to play it.
- Pinch the clip open left and right to show the timeline and then drag to go forward or back through the video.
- Tap Live to switch back to live video.
Set up the camera to detect specific motion, and the timeline displays unique symbols for people, animals, vehicles, and packages.
Note: With more cameras in your home than Home Hubs that can analyze their video, some of the cameras’ video may not be analyzed. Clips still get recorded, but they’ll have the Unanalyzed Video badge, a sign that the video wasn’t analyzed for specific motion.
Live and recorded video is also available in the Home app on a Mac with macOS 10.15.1 or later.
Choose access options
To allow other people to view video from your cameras, follow these steps:
- Open the Home app on your iPad.
- Tap the More button, then tap Home Settings.
- Below the People heading, tap a person.
- Tap Cameras and choose an option.
To learn how to allow other people to view video from your cameras, see Invite others to control accessories in your home.
See also