In the Photos app, you can change and adjust the lighting effects, depth of field, and focus point of images you take in Portrait mode.
You can apply, change, or remove Portrait Lighting effects, and edit portraits taken on other devices. Natural Light, for example, keeps the face in sharp focus against a blurred background, while Stage Light spotlights the face against a deep black background.
Here’s how to edit Portrait mode photos on iPad.
Change the Portrait Lighting effect
In Portrait mode photos, you can apply, change, or remove the Portrait Lighting effects, and even edit portraits taken on other devices.
- Open the Photos app on your iPad.
- Tap a Portrait mode photo to open it, then tap the Edit button.
-
Tap the Lighting Intensity Off button at the top of the screen.
The Lighting effects appear on the right side of the screen.
-
Touch the Portrait Lighting button. Then slide your finger up or down to choose a lighting effect:
- Natural Light: The face is in sharp focus against a blurred background.
- Studio Light: The face is brightly lit, and the photo has an overall clean look.
- Contour Light: The face has dramatic shadows with highlights and lowlights.
- Stage Light: The face is spotlit against a deep black background.
- Stage Light Mono: The effect is like Stage Light, but the photo is in classic black and white.
- High-Key Light Mono: The effect creates a grayscale subject on a white background.
- Drag the slider up or down to adjust the intensity of the lighting effect.
-
Tap Done.
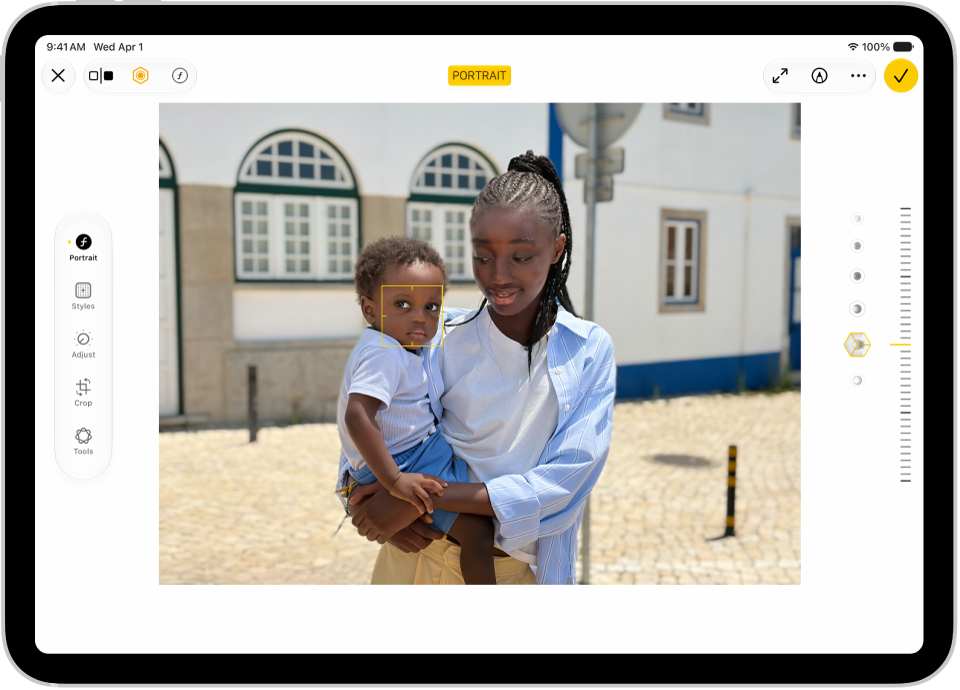
Note: To remove Portrait Lighting from a photo, tap the Edit button, and then tap Portrait at the top of the screen.
Blur the background in portraits
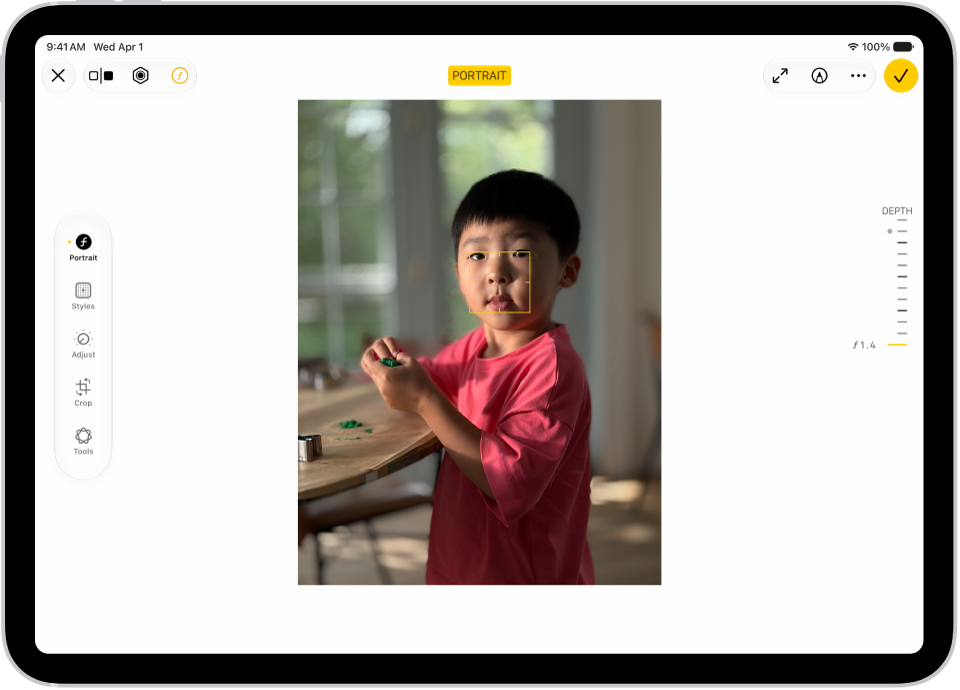
On models that support Depth Control, use the Depth Control slider to adjust the level of background blur in your portraits.
- Open the Photos app on your iPad.
- Tap a Portrait mode photo to open it, then tap the Edit button.
-
Tap Portrait on the left side of the screen and drag the slider on the right to adjust the background blur effect.
A white dot marks the original depth value for the photo.
- Tap Done.
Change the focus point of a portrait
If a portrait was taken on an iPhone 13 or later running iOS 16 or later, you can use Depth and Focus Control on your iPad to change the subject (or focus point). Pick a new subject, and the depth of field (or blur) adjusts automatically so it appears sharp and in focus. Make sure, though, the new subject isn’t blurry or too far in the distance.
- Open the Photos app on your iPad.
- Tap a Portrait mode photo to view it in full screen and tap the Edit button.
- Tap a new subject or focus point in the photo.
- Tap Done.
Remove the portrait effect
You can remove the portrait effect (background blur) from a photo taken in Portrait mode.
- Open the Photos app on your iPad.
- Open a photo taken in Portrait mode.
- Tap Portrait on the left side of the screen and tap Portrait Off.
See also
- Take a Portrait mode selfie with your iPad camera
- Edit Cinematic mode videos on iPad
- Edit photos and videos on iPad