If you were lucky enough to get a new iPhone SE 2022, we’ve got a series of useful tips and tricks for you that will help you get the most out of your new device. Here are the best iPhone SE 2022 tips and tricks that will help you to get the most out of your new device.
From checking your iPhone’s Warranty to using Siri offline, we’ve got an assortment of iPhone SE 3 tips and tricks you probably didn’t know your iOS device could do. These iPhone SE 2022 tips and tricks will have you showing off your abilities to your friends and having them ask you where you learned it all – you can link them here and share the knowledge, of course!
Without any further ado, here are the best iPhone SE 2022 tips and tricks you should try first.
Best iPhone SE 2022 tips and tricks
Here is a list of the Best iPhone SE 2022 Tips and Tricks:
1. Check Your iPhone Warranty
If you need a repair, want to pick up AppleCare for your new iPhone, or just want to see your warranty status and what’s available to you, you can do it right on your device.
- Open up the Settings app.
- Tap on “General.”
- Tap on “Limited Warranty” or “AppleCare ” to see your device
If you have AppleCare , the section will be labeled with AppleCare and will let you know your AppleCare expiration date. If you don’t, it will say “Limited Warranty” and it will let you know when it expires.
AppleCare is good for two years or indefinitely if you renew it monthly or yearly, and it covers manufacturer issues and two incidents of accidental damage per year so long as you pay the deductible. It’s generally a good idea if you’re accident-prone and want to make sure you can get an affordable fix if you drop or otherwise damage your phone.
The Limited Warranty is Apple’s manufacturer warranty that lasts for a year after purchasing your iPhone. It entitles you to hardware support for any manufacturing issues, and it allows for a year of chat and phone support.
With the Limited Warranty, once that year is up, your iPhone is considered out of warranty. If you didn’t purchase AppleCare when you bought your phone and want to get it, you have 60 days to do so.
2. Auto Schedule Low Power Mode to Save Battery
Using the Shortcuts app, you can create an automation that will cause Low Power Mode to come on automatically at a certain battery percentage, so you won’t need to turn it on manually.
- Open up the Shortcuts app.
- Tap on “Automation.”
- Tap on the ” ” button.
- Tap on “Create Personal Automation.”
- Scroll down to “Battery Level.” low power mode
- Tap on the parameter that you want. Options include “Equals x%,” “Rises Above x%,” and “Falls below x%.” You’ll want to use “Falls Below” or “Equals” for this Shortcut.
- Use the slider to select a specific percentage.
- Tap “Next.”
- Tap “Add Action.”
- Search for “Low Power Mode.”
- Tap on “Set Low Power Mode.”
- Tap on “Next.”
- If you want your iPhone to ask you before turning on Low Power Mode, leave the “Ask Before Running” toggle activated. If not, turn it off.
- Tap “Done.”
From there, your Shortcut will run any time your iPhone hits the threshold that you set for Low Power mode. You can adjust the setting in the Automation section of the Shortcuts app.
If you want to set Low Power Mode to come on at a certain time, follow the above steps but use “Time of Day” as the first parameter, choose a time, and then follow steps 8 through 14.
Low Power Mode is designed to cut down on background processes to preserve battery life when your iPhone is low on battery, and your iPhone will automatically present a Low Power Mode pop-up suggestion when the battery dips below 20 percent. Using the Shortcuts app to create the Low Power Mode automation is a useful way to get Low Power Mode to come on when your battery is at a higher percentage.
3. Customize Your Safari Start Page
You can change what’s displayed on your Safari start page, opting in to (or out of) sections like Frequently Visited, Shared With You, Siri Suggestions, and more, plus you can pick a custom wallpaper.
- Open up Safari.
- Open up a new blank page.
- Scroll all the way down to the bottom of the page.
- Tap on “Edit.”
- Toggle on the sections that you prefer.
- Toggle on “Background Image” if you want to pick a custom background for Safari. You can choose from the available Apple-designed backgrounds or use your own photo by tapping on the ” ” button.
- If you want the same Start Page on all devices where you’re signed into iCloud, toggle on “Use Start Page on All Devices” at the top of the page.
- When you’re all done customizing, tap on the “X” button in the upper right hand corner.
Options that you can toggle on or off include Favorites, Frequently Visited, Shared With You, Privacy Report, Siri Suggestions, Reading List, and iCloud Tabs.
4. Change Your Safari Design
Apple attempted to introduce an overhauled Safari design in iOS 15 with floating tabs and an interface that merged the tab bar and the URL bar, but the changes were not well received and Apple ultimately reverted to the standard iOS 14 Safari design.
There are still remnants of that new Safari design, though, and you can elect to move your Safari Tab Bar to the bottom of the Safari interface, and you can chose to activate “Allow Website Tinting,” a feature that blends the background color of the website with the URL bar when it’s positioned at the top.
- Open up the Settings app.
- Scroll down to Safari.
- Under Tabs, select the “Tab Bar” option for a tab bar located at the bottom of the Safari window. Choose “Single Tab” for the top bar.
- Toggle on “Allow Website Tinting” if you want to have the color blending feature when using the top bar, and choose “Landscape Tab Bar” if you want to see your open tabs when the iPhone is held horizontally.
Note that “Allow Website Tinting” is a feature that shows up when using the top bar. It causes the URL bar to turn the background color of the website when you scroll down on a page for a more seamless look.
Tip: You can also swap between the top and bottom navigation bars in Safari itself. Just tap on the “Aa” icon in the URL bar and then choose “Show Bottom Tab Bar” or “Show Top Address Bar.”
5. Rearrange Your Home Screen Pages
If you want to rearrange your various Home Screen pages that house apps, you can do so quickly and easily.
- Press and hold in an empty space on the Home Screen to enter “jiggle mode,” where the app icons are wiggling slightly.
- Tap on the row of dots at the bottom of the page.
- Your Home Screen pages will be shown in a grid view. Put a finger on one page and drag it to move it to a new position relative to your other pages.
- Once you have your pages the way you want them, tap on “Done” in the upper right corner.
Tip: You can also delete Home Screen pages using this interface. At the grid view, tap on the checkmark under the page that you want to eliminate, and then tap on the minus (-) icon to delete it.
6. Store Two-Factor Authentication Codes in Passwords
It’s a good idea to set up two-factor authentication for any online account where the feature is available, and with iOS 15, you no longer need a separate verification code app like Google Authenticator or Authy for storing one-time passwords. Two-factor authentication codes (or one-time passwords) are the secondary passcodes that you use when logging into a website, with these codes regenerated every 30 seconds, which makes it much more difficult for your accounts to be breached.
Apple now has a built-in feature for storing two-factor authentication codes right alongside your iCloud Keychain passwords. Here’s how to add a code:
- Open up the Settings app.
- Scroll down to “Passwords.”
- If you’re adding a two-factor code for a login and password already stored in iCloud Keychain, search for the entry that you’re looking for. Otherwise, tap the ” ” button to add a new login.
- After either accessing your login and password for the account you’re interested in or adding new details, tap on “Set Up Verification Code.”
- Initiate the two-factor authentication process for the website or account where you’re enabling two-factor verification.
- For many services, you’re provided with a QR code that you can scan to set up two-factor authentication, though this does require two devices. If you have a QR code to scan, tap on the “Scan QR Code” option. Alternatively, tap on “Enter Setup Key” and enter the number that you’re provided from the website.
- After the QR code is scanned or the Setup Key is entered, the login will automatically update with the verification key.
- Once set up, you can use the verification code found in the Passwords app whenever you need to verify your identity with a one-time passcode for that website or service. If you hold down on the verification code, you can copy it and then paste it into the site where it’s needed, and if you have iCloud Keychain enabled, it will autofill across your devices.
You will need to set this up individually for each website that uses two-factor authentication.
Tip: If you’re setting up two-factor authentication on a website on your iPhone, when you see the QR code, long press on it with your finger. You’ll see an option to “Add Verification Code in Passwords,” and if you tap it, you can automatically add the two-factor verification to your site login without needing to scan a QR code.
7. Maximize Your Privacy With iCloud Relay and Hide My Email
iOS 15 makes web browsing and sending email more secure by cutting down on the ways that companies can track your online behavior. iCloud Private Relay, for example, obscures personal information like IP address and location, which can be used to track your browsing across different websites.
Make sure you have iCloud Private Relay turned on by following these steps:
- Open up the Settings app. settings
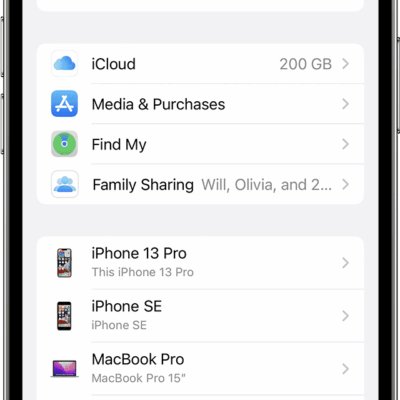
- Tap on your name to open up your Apple ID and iCloud settings.
- Tap on “iCloud.”
- Tap on “Private Relay.” settings
- Make sure “Private Relay” is toggled on.
Hide My Email, which also requires a paid iCloud account, lets you create different email addresses for each site, so you can disable them if you start getting spam or other unwanted content from someone you’ve interacted with. Hide My Email temporary addresses all forward to your main Apple email address and can be easily managed.
You can use Hide My Email in two ways. If you have iOS 15.2 or later installed, it’s as simple as opening up the Mail app and composing an email. In the From field, tap and then choose “Hide My Email” to automatically generate a random address that will forward to your inbox.
Alternatively, follow these steps:
- Open up the Settings app.
- Tap on your name. settings
- Tap on “iCloud.”
- Tap on “Hide My Email.”
- Tap on the ” Create New Address” button.
- Choose a label for your Hide My Email address.
- Tap “Next,” then tap “Done” and your randomly generated email address is ready to use. settings
This Hide My Email interface in the Settings app is also where you can manage all of the temporary email addresses that you’ve created. You can deactivate any of the temporary email addresses at any time and the company or person that has that email address will no longer be able to contact you.
8. Share Content Using Siri
Siri is smarter in iOS 15 with improved contextual awareness, and the personal assistant can now recognize what’s on your screen and share it with someone else.
- Open up what you want to share, like an Apple Music song.
- Say “Hey Siri” to activate Siri.
- Say “Share this with [person’s name].”
- At that point, Siri will confirm your request and ask “Are you ready to send it?” Just reply with a “yes” to send the content along.
If you attempt to share something that isn’t naturally shareable, Siri will take a screenshot and send that instead. As an example, if you’re in the Weather app and ask Siri to share with someone, Siri will capture a screenshot and send that.
The Siri sharing feature works with Apple Music, Podcasts, Apple News, Maps, web pages in Safari, the Photos app, Messages, and more.
9. Take a screenshot by tapping on the back of your iPhone SE 2022
This is an awesome iPhone trick that went viral on social media a few months back. Put simply, there’s a way to take a screenshot simply by tapping the back of your iPhone. It’s called Back Tap and it’s been around since iOS 14.
You can turn this on by opening up the Settings app. Next, open up the Accessibility preferences. Following that, scroll down to “Physical and Motor” and select “Touch.” You can now scroll down further and select the “Back Tap” option.
Once you do that, you can pick which type of action you’d like a Back Tap to trigger. Some options include taking a screenshot, adjusting the volume, and muting your device.
10. Locate a misplaced iPhone in the dark
If you misplaced your iPhone but know that it’s in your house, there’s a clever way to locate it. Simply turn off all the lights and use the Hey Siri command to turn on the iPhone flashlight. It may not be as useful during the afternoon, but it’s a nifty iPhone SE 2022 trick to keep in mind if it’s later in the day.
11. Use your iPhone as a level
This is another iPhone SE 2022 trick that novice users might be surprised to learn about. You can actually use your iPhone as a level. It can be used on both horizontal and upright surfaces. You can access it by opening the Measure app and then selecting Level.
12. Make sure your headphone volume is at a safe level
This iPhone SE 2022 trick first came about with the iOS 14. In short, there’s a way to gauge the decibel level of your headphones. This is a particularly handy feature if you’re prone to blasting your music and want to avoid causing any type of ear damage in the process.
To use this feature, open up the Settings app and select Control Center. Next, hit the green “plus” icon located next to the Hearing setting. Once you do this, you’ll see the Hearing icon in the Control Center every time you open it up. If audio is playing when you open up the Control Center, you’ll see a color-coded audio level. If it’s green, the decibel level is at an appropriate level and if it’s yellow, you’ll be encouraged to lower the volume.
For more information, you can actually tap the icon and you’ll see the exact decibel level of your headphones.
13. Measure someone’s height with this awesome iPhone SE 3 trick
This is a fun iPhone SE 2022 trick that leverages Apple’s AR technologies. Basically, you can use your iPhone to quickly and accurately measure someone’s height. All you have to do is open up the Measure app and make sure that the person you’re trying to measure is fully within the screen. If done correctly, you’ll see a line appear above the person’s head. This will reveal how tall they are.
If you need to save the photo for reference, you can conveniently tap the white shutter button to the right.
14. Scheduling trips with Apple Maps
This feature is new to iOS 15. Essentially, the latest iteration of Apple Maps lets users bring up travel directions while also specifying exact arrival or departure times. This iPhone SE 2022 trick won’t seem great to seasoned Google Maps users, but it’s nice to see Apple Maps finally add it.
15. Use snazzy effects when texting
Apple a few years ago added several visual effects to the Messages app. To access them, simply type your message and long press on the up arrow. Once you do that, you’ll be able to select from a handful of text effects that will add more pizzaz to your messages.
16. Push notifications for rain and snow
There are few things worse than stepping outside and getting caught in a torrential downpour or snowstorm. To prevent this from happening, iOS 15 includes a feature that lets users turn on push notifications for rain and snow. This can be turned on by going to Settings > Privacy > Location Services > Weather. Once there, allow the Weather app to always access your location.
Following that, simply open up the Weather app, tap the hamburger menu icon in the bottom right-hand corner and select the “Turn On Notifications” setting.
17. Set up a Legacy Contact
With all of the sensitive and personal information people store on their devices, it only makes sense to set up a Legacy Contact so that someone can access your device if you pass away. It’s a morbid feature, to be sure, but it’s nonetheless helpful to be aware of.
By setting up a Legacy Contact, Apple notes that this chosen person can “access your account and personal information in the event of your death.”
To do this, open up the Settings app and then tap on your Apple ID profile. Next, select Password and Security > Legacy Contact.
18. Keep unused apps out of sight
This iPhone SE 2022 trick is all about keeping rarely used apps out of sight. After all, sometimes there’s an app that you don’t want to delete because you do use it on very rare occasions.
To hide an unused app, long press on the app in question. Upon doing so, you’ll see a “Remove App” option at the bottom. Once you select that, you’ll see an option to “Move to App Library.” Select that. Following that, the app will be removed from its location. You can still access it by swiping to your last page of apps and then swiping to the left once more.
19. Quickly activate video mode
When you fire up the Camera app, it defaults to the Photo setting. Switching to the Video setting is easy and quick, but there’s an iPhone SE 2022 trick that speeds up the process ever so slightly. If you’re looking to start recording immediately — say your toddler is about to walk for the first time — there’s a solution worth mentioning. Simply open up the Camera app whereupon you’ll see the Photos view. Now, drag the shutter button to the right and it will automatically start recording in Video mode.
20. iPhone SE 2022 tips and tricks: Use your iPhone’s camera to scan any text
Have you ever wished you could point your iPhone’s camera at a sign or piece of paper and have it automatically identify then copy the text into an email or a document? That’s where Live Text comes in – this new iPhone SE 2022 trick lets you scan and copy text from photos and your iPhone camera, even if it’s handwritten. And once you’ve pulled the text, you can paste it into any text field. It’s great for quickly sharing addresses, phone numbers, and anything else you don’t want to type out manually.
To use the iPhone SE scan text feature, long-press inside a text field as if you are going to use the copy and paste prompt. Only, you’ll now see a Scan Text button. You may also see a button that uses just the scan icon, which looks like a piece of paper with brackets around it.
Tap the button, which will then replace your keyboard with your iPhone camera’s viewfinder. Point your camera at whatever you want to scan, and then follow the prompts on the screen. For instance, if you’re moving the camera too fast, you’ll see a “Slow Down” message flash on the screen.
As you’re lining up the camera and text just right, you’ll see a live preview of the text your iPhone is identifying and ready to place in your document. Tap the Insert button when you’re ready.
21. iPhone SE 2022 Tips and Tricks: Quick Take Videos
To capture a QuickTake video, just press and hold the Shutter button.. Release the button to stop recording. Swipe your finger to the right if you want to switch to video recording completely.
See also: 30 Best iPhone 13 and iPhone 13 Pro Tips and Tricks
Your Favorite iPhone SE 3 Tips and Tricks
So these were some of the best iPhone SE 2022 tips and tricks you would love to try today. My favorite iPhone SE 3 tips and tricks include sharing content using siri, rearranging home screen pages, and iCloud private Relay. There’s surely plenty more hidden iPhone SE 2022 tips and tricks to discover, so I’ll keep tapping, swiping and noting anything I find. Did we miss out on something important that needs to be added to the list? Which are your favorite iPhone SE 3 tips and tricks? Let me know in the comments section below.