To set up Switch Control, you need to connect and add one or more switches, then assign an action to each switch. You can choose a scanning style and fine-tune other settings to suit your needs. You can use only one switch, or multiple switches for different actions, like selecting an item or moving the cursor to the next item.
After you turn it on, you may need to change the assigned actions or readjust the settings. If you have difficulty with these steps, you can get personalized help at your nearest Apple Store.
Step 1: Connect an external switch (optional)
To use a joystick, game controller, adaptive accessory, or MFi device for Switch Control, first connect it to iPad using the manufacturer’s instructions. You’ll also need to pair a Bluetooth® switch with iPad.
You can also add nonexternal switches, like sounds or AirPod Gestures. For details, see Step 2: Add switches, recipes, and switch sets.
- Turn on the switch.
- Open Settings, tap Bluetooth, turn on Bluetooth, tap the name of the switch, and then follow the onscreen instructions.
Step 2: Add switches, recipes, and switch sets
A single switch works, or you can use multiple switches to accommodate different actions, with each switch performing an assigned action, such as selecting an item or advancing the cursor to the next item.
- Open the Settings app on your iPad.
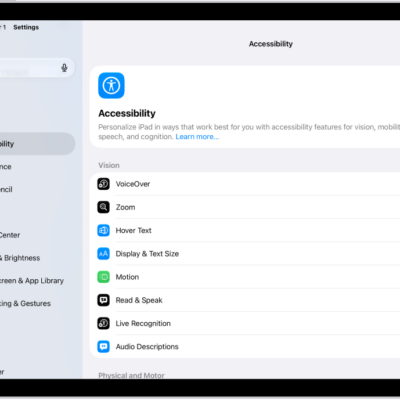
- Tap Accessibility and tap Switch Control. Then tap Switches.
-
Tap Add New Switch. Choose External, Screen, Camera, Back Tap, Sound, or AirPod Gestures.
If you’re trying to add an external switch but it isn’t shown in the list, make sure it’s connected to your iPad as described above in Step 1: Connect an external switch (optional).
-
Assign an action to the switch.
The action for the switch depends on the number of switches you have and the scanning style you choose in Step 3: Choose a scanning style, below. If you don’t know which action to assign, choose Select Item, which is compatible with Auto Scanning (the default scanning style). You can return to this setting later to change the assigned action.
Tip: Turn your iPad into a game controller that uses gestures you’ve already set up, like the same switch (or alternative input method) that you navigate and control your iPad with.
You can also assign recipes—a set of temporary, specialized actions—to your switches. Use recipes for repetitive, complex actions in apps such as turning pages in the Books app. To create a recipe, go to Settings > Accessibility > Switch Control > Recipes.
If you have multiple sets of switches or recipes that you switch between, you can create a Switch Set for your settings. To create a profile, go to Settings > Accessibility > Switch Control > Switch Sets > Add New Switch Set.
Step 3: Choose a scanning style
After a specified duration, the cursor automatically moves to the next item by default. To move the cursor manually instead, choose a different scanning style.
Go to Settings > Accessibility > Switch Control > Scanning Style, then choose one of the following:
-
Auto Scanning: The cursor automatically moves to the next item after a specified duration. This is the default scanning style.
If you use Auto Scanning with just one switch, make sure the Select Item action is assigned to the switch.
-
Manual Scanning: When you activate your Move to Next Item switch, the cursor moves to the next item.
Manual Scanning requires at least two switches. Make sure the Move to Next Item action is assigned to one switch, and the Select Item action is assigned to another switch.
-
Single Switch Step Scanning: When you activate the Move to Next Item switch, the cursor moves to the next item; if no action is taken within a specified duration, the current item is automatically selected.
This scanning style requires only one switch. Make sure the Move to Next Item action is assigned to the switch.
Step 4: Fine-tune Switch Control settings
The behavior of Switch Control can be adjusted in many ways to suit your specific needs and style. For instance, you might change the scanning speed or have iPad speak the highlighted items.
Go to Settings > Accessibility > Switch Control, then adjust any of the following:
- Auto Scanning Time: Adjust the item scanning speed.
- Pause on First Item: Set scanning to pause on the first item in a group.
- Loops: Choose how many times to cycle through the screen before hiding Switch Control.
- Move Repeat: Set the delay before moving to the previous or next item while a switch is pressed.
- Long Press: Set whether a different action occurs when you press and hold a switch, and how long to wait before performing that action.
- Tap Behavior: Choose a tap behavior and set the interval for performing a second switch action to show the Scanner menu.
- Focused Item After Tap: Choose whether Switch Control resumes scanning at an item you tap or from the beginning.
- Scan Same Key After Tap: Turn on scanning the same key after tapping.
- Always Tap Keyboard Keys: Turn on always tapping keyboard keys.
- Extended Predictions: Turn on extended predictions.
- Hold Duration: Specify how long you need to press and hold a switch before it’s accepted as a switch action.
- Ignore Repeat: Ignore accidental repeated switch triggers.
- Sound Effects: Turn on sound effects.
- Speech: Speak items as they’re scanned.
- Menu Items: Choose the actions shown in the Scanner menu and the order in which they appear.
- Group Items: Group items for faster navigation.
- Large Cursor: Make the highlight more prominent.
- Cursor Color: Choose a different highlight color.
- Saved Gestures: Create a custom gesture.
- Confirm with Switch Control: Turn on Confirm with Switch Control to confirm payments with your passcode or any time double-clicking the top button is required.
Step 5: Turn on Switch Control
Important: When Switch Control is turned on, you can’t use the standard gestures on the touchscreen to exit Switch Control.
Go to Settings > Accessibility > Switch Control, then turn on Switch Control.
Quick tip: Add Switch Control to Accessibility Shortcut, and you can turn it on or off quickly by triple-clicking the Home button (on iPad models with a Home button) or the top button (on other models of iPad).
See also
- Intro to Switch Control on iPad
- Use Switch Control on iPad to select items, perform actions, and more
- Control several devices with one switch on iPad
- Accessibility features for mobility on iPad