








Got a tip for us?

iOS 27

Apple’s Mail and Messages apps both offer a variety of Apple Intelligence features, and there’s a fair amount of overlap between the two, even if the implementation is a bit different. (Live Translation in Messages is covered separately.)

Use Smart Reply

Mail and Messages both offer smart replies, which are brief suggestions of what you might want to say that you can click or tap to save a few keystrokes or taps. Apple Intelligence looks for anything in the text of the message you’re replying to that could lead to a simple reply.

Mail offers a suggestion, if it has one, when you click to begin composing your reply. On a Mac, a little menu pops up; on an iPhone or iPad, the suggestions appear on the QuickType bar. Click or tap one of the words or phrases, and Mail expands it into a complete suggested response, which you can then accept as is or edit to taste. (Based on what we’ve seen, you will almost certainly want to edit it to sound more like you.)

Click Done to accept the response, or Revert to restore whatever you had originally. If you like the prewritten response, you can tell Apple by clicking or tapping the thumbs up button; if not, you can click or tap the thumbs down button and fill out a form explaining what was wrong. On a Mac, these buttons appear only when you hover over the Smart Reply bar; on an iPhone or iPad, they appear automatically on the QuickType bar.

In Messages, Apple Intelligence looks for questions or comments that could potentially result in a common response. Yes/no questions fall into this category, as do questions reminding you of appointments, confirming upcoming meetings, and making simple requests. (We’re sure there are many others, but there’s no definitive list.)

As in Mail, when Apple Intelligence comes up with a likely response, it’s displayed in a little pop-up control that looks just like the ones used for autocorrect on a Mac or on the QuickType bar on an iPhone or iPad. To accept one of the suggestions, click it; to dismiss them, click the close button. (You can also simply ignore the prompts and type as you normally would.)

Matching your style?

According to Apple, if you use the Smart Reply feature in Mail or Messages, the suggested replies adopt your writing style, punctuation, and tone. We tried this several times, and all we can say is…it did not. One of us would be ashamed to send any of these “smart” replies, because he does not write like an AI robot, and anyone who knows him would instantly see that something is off. (If you do write like an AI robot, maybe you’ll have better luck with this than we did.)

We urge you to double-check all Smart Replies before sending a message. We’ve seen cases in which the suggested text was incorrect or misleading, regardless of the style.

If you find Smart Replies to be not-so-smart or just plain annoying, you can disable them altogether, but Apple doesn’t make it easy. On a Mac, you can find the control in System Settings > Keyboard. Click Edit next to Input Sources and then turn off “Show suggested replies.” On an iPhone or iPad, go to Settings > Siri > App Access > Mail, then turn off Show in App; do the same thing for Messages. (In other words, as Douglas Adams might have put it, it’s on display in the bottom of a locked filing cabinet stuck in a disused lavatory with a sign on the door saying “Beware of the Leopard.”)

Take action in other apps with suggestions

Suggestions may appear when Mail or Messages notices something in a conversation that you may want to take action on, such as adding a calendar event or searching for a photo.

Use improved search in Mail

Apple says that Mail in iOS 27, iPadOS 27, and macOS 27 has improved, offering more relevant search results. When you type in the Search field, a banner appears telling you that Mail looks for meaning beyond the specific words you enter, presumably using Apple Intelligence.

In our tests, we were unable to get any expansive searches to pull up results that didn’t include words in the search phrase. Perhaps the improvements will become more evident later.

See Priority Messages in Mail

Apple Intelligence attempts to identify especially important messages and bubbles them up to the top of your Mail inbox. Apple says this applies to “time-sensitive messages” such as invitations and flight check-in reminders.

In our testing, this feature hasn’t been terribly helpful. It has identified messages that weren’t in any sense urgent while ignoring some that were. Unfortunately, it’s a black box; you can neither see nor influence what factors Apple Intelligence takes into account when assigning a message “Priority” status.

You can, however, turn off this feature: on a Mac, choose View > Show Priority Messages to uncheck it, or do the same using the More menu on the toolbar; on an iPhone or iPad, tap More > Show Priority. Note, however, that if Mail Categories is enabled (that is, Show Categories is selected on the same menu), the Show Priority Messages command is available only when the Primary category is selected.

This AI “priority” feature has nothing to do with the optional Low/Normal/High priority you can assign a message using the Message > Set Priority submenu.

Summarize Mail messages and threads

At the top of each message or thread is the word Summarize, with an icon to its left. Click or tap that, wait a few seconds, and a summary of the message appears. The accuracy of the summaries varies greatly, so don’t assume they are correct or contain everything of importance from the message.

If you click or tap the little pop-up menu button (Mac) or the More button (iPhone or iPad) in the preview, you can choose either Looks Good (to tell Apple the results were useful) or Something Isn’t Right. With the latter choice, a form appears in which you can fill in details about how the summary didn’t meet your needs and send the information to Apple to help them improve summaries in the future.

There’s also a second, simpler type of summary, which appears in the message preview (the little snippet of the message you see beneath the subject in the message list), right after a Summary icon. This is an attempt to briefly explain what the message is about, without summarizing the entire thing.

Although preview summaries are enabled by default, you can turn them off if you like. On a Mac, go to Mail > Settings > Viewing and uncheck Summarize Message Previews. On an iPhone or iPad, go to Settings > Apps > Mail and turn off Summarize Message Previews.
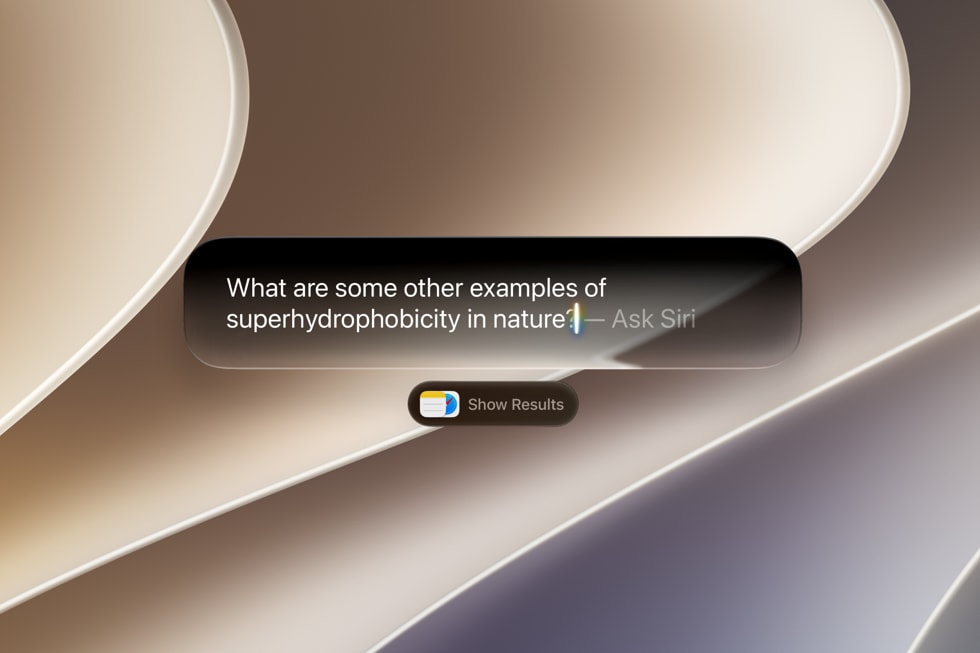
Even though Apple is now working with Google for Siri AI, the company continues to support OpenAI’s ChatGPT—though not via Private Compute Cloud—and Apple seems to be downplaying ChatGPT now. How does that work?

Awkwardly.

The previous integration of ChatGPT was an explicit one—by default, you had to choose to let Siri use ChatGPT, which was also relied on for creating images. If Siri couldn’t answer something and ChatGPT was enabled, it would ask you if you want to consult ChatGPT.

In iOS 27, iPadOS 27, and macOS 27, ChatGPT remains in place, but now only at your request. Siri no longer asks you whether you want to pass a query to ChatGPT; that’s now the job of Siri AI and the expanded PCC.

Because ChatGPT requests don’t use PCC, the privacy of your requests is at high risk compared to Siri AI. However, ChatGPT doesn’t have access to your private data by default; it has context about you only if you sign in to an account. We remain concerned about this.

How ChatGPT handles your data

  • If you don’t sign in, then all requests your device sends to ChatGPT are anonymized—they can’t be traced back to you. In addition, OpenAI is prohibited from using your requests to train their models, and your requests are not stored (unless required by law). However, you’ll be limited as to the number and complexity of requests you can make per day.
  • If you do sign in, all requests go through your ChatGPT account, so OpenAI knows who’s making them. If you pay for your account, you can effectively remove any daily limit. OpenAI’s privacy policy applies; they will store your requests (which can be useful in providing more context for future requests) and use them for training.

Use ChatGPT alongside Siri AI

If you want to use ChatGPT with Search or Ask:

  1. Activate Siri using a method where you can type to it.
  2. Touch and hold in the Search or Ask field on an iPhone or iPad, or Control-click/right-click that field on a Mac.
  3. From the menu that appears, choose Ask > Use ChatGPT.
  4. The text in the field changes to ChatGPT. Enter your query.

When the query is complete, Siri reverts to the default Search or Ask using Siri AI.

You can also explicitly add “ChatGPT” to a request—for example, Ask ChatGPT the best way to fry an egg. This works with spoken requests, too!

To use ChatGPT with Image Playground, choose ChatGPT from the Any Style pop-up menu.

You can opt to disable ChatGPT entirely or make other changes to its settings; see every Siri setting worth changing.

Apple devices have long offered a wide range of features intended to make them easier to use for people who have difficulties with some aspect of the default interface—which doesn’t necessarily imply a disability, but also encompasses personal preference and a limited tolerance for Apple’s Liquid Glass shenanigans, for example.

Increasingly, these features have become more powerful by incorporating features from Apple Intelligence.

Apple appears to still be finishing and reconciling some Apple Intelligence accessibility features as we write this. Some terms mentioned in a May 2026 announcement by Apple and in the Learn More pages within Settings > Accessibility on an iPhone and iPad don’t match the interface element names or certain functionality. We’ll update this section as Apple finalizes these features and makes the documentation consistent.

VoiceOver

When enabled, VoiceOver describes what appears on screen when you move your pointer, tap, or change focus. It’s a way to interact with buttons and interface elements and have text that is part of the interface—such as labels under switches—read aloud. VoiceOver is a mode, not something you invoke: when you turn it on, all the options you set are in effect for as long as it’s enabled.

With iOS 27 and iPadOS 27, VoiceOver taps into Apple Intelligence to provide richer descriptions of visual material that wasn’t previously available. You can enable and configure this new feature in Settings > Accessibility > VoiceOver > VoiceOver Recognition. You can also ask follow-up questions about what it describes.

We have not seen changes to VoiceOver in Golden Gate; it appears that the Apple Intelligence features are only available in iOS and iPadOS.

Magnifier

The Magnifier app lets you use your iPhone or iPad, or any camera connected to your Mac, to zoom in (or out) to see something better. That might mean zooming in to see more detail, turning on the flashlight to provide better lighting, or adjusting image processing, such as changing brightness or contrast. You can also use it to capture what you see as a photo, apply filters, and more.

It’s been enhanced in iOS 27, iPadOS 27, and macOS 27 with an Apple Intelligence feature called Live Recognition that identifies what the camera is looking at. Use the Ask button to query Live Recognition. Type in a request, such as Read this aloud or Summarize this bill, and Siri provides the response. For example, point it at a bill and ask it what the bill’s total is.

Voice Control

In addition to Siri, your Mac, iPhone, and iPad have a feature called Voice Control, which lets you control your interface directly using voice commands—this goes far beyond actions you can take using Siri. You can effectively “click” or “tap” interface elements with your voice. It also includes context-based automatic text dictation, enabled whenever a page or field with a text insertion point is active.

While Voice Control has been in place for years, Apple Intelligence is now part of Voice Control. This addition lets you be much less precise in your descriptions of what to click, tap, or move. Describe what you want to do in natural language, and your device can then figure out what you intended.

To enable Voice Control, go to Settings > Accessibility > Voice Control on iPhone or iPad, or System Settings > Accessibility > Voice Control on a Mac, then turn on the Voice Control switch; turn it off to disable it. For help using the feature, you can click or tap (or ask your device to click or tap) Open Tutorial.

Accessibility Reader

Accessibility Reader is a feature designed to make text easier to read. After turning it on in Settings > Accessibility > Read & Speak on iPhone or iPad, or System Settings > Accessibility > Read & Speak on a Mac, you can enable it on a Mac by pressing ⌘-Esc on a Mac, or on an iPhone or iPad using a Share menu command, an Accessibility Shortcut, or Control Center, almost anywhere you see text. (This doesn’t include text labels for controls and the like, but does include things like email messages, webpages, and open documents.)

When you do, a new window appears that’s a bit like Safari’s Reader view: it displays whatever text was in the foreground window but without graphics, links, or other distractions. You can use the controls in this window to change the magnification, font, color, line spacing, and so on, or even click the play button to have your device read the text aloud.

Apple Intelligence enables this feature to operate on more complex documents, provide a simpler view of structured information such as tables, and provide summaries and translations if you request them.

Generated captions

Your device automatically generates captions from any uncaptioned video you’re watching in Photos and other supported apps. (As of publication time, it works only on an iPhone or iPad.)

These automatic subtitles aren’t related to tvOS or TV app captioning.

An automated caption icon appears at the start of each onscreen subtitle to let you know that the caption was generated.

Tap or click the Caption button on the toolbar to change settings. For instance, you might want to adjust the subtitles’ size or hide them.

If captions already exist, you can have them automatically translated between supported languages.

Siri’s own dictation also improved in this release, covered in Siri AI expressive voice and Advanced Dictation requirements.

To use Siri AI’s expressive voice and take advantage of more advanced dictation, you need a newer device than Siri AI itself requires.

Extended requirements for Siri AI

All Apple hardware with an M3 or later chip and 12 GB or more of unified memory supports these features. If you’re not sure if your device hits that mark, here’s the list:

  • iPhone Air, iPhone 17 Pro, iPhone 17 Pro Max, or later
  • iPads with an M4 or later chip
  • Macs with an M4 or later M-series chip
  • Macs with an M3 chip and 12 GB or more unified memory, which excludes some configurations
  • Apple Vision Pro M5

Note: This list excludes the base configurations of the M4 iPad Pro. The 256 GB and 512 GB models carry 8 GB of unified memory, below the 12 GB minimum. The 1 TB and 2 TB M4 models have 16 GB and qualify, as do the M5 iPad Pros.

Siri AI voice settings

It has long been possible to choose among various male- and female-sounding voices and even different dialects, and Siri AI adds even more choices. But now, you can also adjust Siri’s speed and expressiveness. If you want a zippy, flat, “just the facts” response; a relaxed, cheerful response; or anything in between, you can go to Settings > Siri on iPhone or iPad, or System Settings > Siri on a Mac, and click or tap Voice. On this pane, you can select a base voice and then drag the Pace and Expressivity sliders as sample responses are played to dial in exactly the tone you prefer.

Dictation

Although Apple devices have had a Dictation feature for many years, starting in iOS 27, iPadOS 27, and macOS 27, Apple offers an improved version of Dictation—assuming your device meets the system requirements. You’ll need an iPhone 17 Pro or Pro Max, iPhone Air, or later; an iPad with an M4 chip or later and at least 12 GB of RAM; a Mac with an M3 chip or later with at least 12 GB of RAM; or an M5 Vision Pro.

Assuming your device meets those requirements, you can go to Settings > General > Keyboard on iPhone or iPad, or System Settings > Keyboard on a Mac, and enable Advanced Dictation Preview, which applies systemwide. Apple says this version of Dictation offers improved accuracy and automatic punctuation, while keeping all processing on your device. We have not yet been able to test this feature to validate this claim.

Besides using Siri to learn things like the current score of a sports event or details about the cast of a movie, you can also use it to perform tasks on your device. Siri can adjust various settings, enable or disable features, open apps, play music, add calendar events and reminders, create notes, and countless other activities.

There’s no exhaustive list of the commands you can issue; your best bet is simply to try whatever you’re curious about. Here is just a handful of examples to get you started:

  • Change settings:
    • Increase the screen brightness
    • Lower the volume by 20 percent
    • Turn on Reduce Transparency
    • Enable VoiceOver

Some of these commands may require confirmation with a switch or button on screen.

  • Work with apps:

    • Open Safari
    • Play something by Angine de Poitrine
    • Pause music
    • Add peanut butter to the Shopping list
    • Remind me to water the garden
    • Start a FaceTime audio call with Johnson
  • Find information:

    • Show me documents I created last week
    • Find PDFs with the label Important
    • Look up Stacey Butler’s address

Thanks to an Apple framework called App Intents, third-party developers can provide hooks in their own apps that let Siri gather information and perform actions. Over time, as more apps add these capabilities, you should be able to ask Siri to do an ever-increasing number of tasks for you.

Apple started deploying what’s loosely called “artificial intelligence” over a decade ago, when they silently switched the original Siri voice-assistant system to use a neural network—a software model that mimics neurons in the brain—in 2014. Unfortunately, even then, Siri was always somewhat frustrating to use unless you learned exactly the set of words you should use for particular kinds of instructions, and were patient when it got it wrong—repeatedly. Other voice assistants, like Amazon’s Alexa and Google Assistant, offered more natural interactions.

The new Siri AI in iOS 27, iPadOS 27, and macOS 27, along with many other features under the broader Apple Intelligence umbrella, seems to have gotten it right: you can use Siri much more like a chatbot offered by numerous companies. You ask questions with free-flowing natural language, and Siri responds. You can ask follow-up questions, and it maintains the thread of context to dig in.

Learn how AI learns

Siri and its competitors were built using a machine-learning approach called deep learning, which creates neural networks that have a very, very loose relationship to the way that humans think. These networks are formed through training: feeding sometimes billions of examples of a thing, like human speech, that’s been classified by human beings. The model develops a fuzzy pseudo-understanding of, say, the difference between a photo that contains a cat or a dog, or between the words “hermetic” and “emetic.”

The emergence of deep learning is why Apple’s transcription of spoken words became quite good, with Siri and dictation. More generally, it’s why image recognition became useful—like in Photos when you would search for “dogs” and get images of dogs that weren’t labeled dog—and computerized voice transcription suddenly jumped from passable to very good.

However, the issue with Siri and other machine-learning interactive tools was that they often understood the precise words you said, but couldn’t correctly act on them. Google and Amazon seemed to advance their products with the same input limitations as Apple—however invasive to our privacy they might be—ostensibly by building out answers to queries instead of parsing them and generating results on the fly. We’ll never know for sure what happened behind the scenes.

The rise of large language models (LLMs), a specific form of neural network—one that relies on predictive models—seemed to spur Apple to action. Chatbots based on LLMs first appeared in 2022. LLMs also require massive amounts of training, but generalized training, rather than specialized.

Where previous deep-learning models were given massive amounts of very similar things to identify them—a billion animal photos—LLMs ingest written materials (like books, academic papers, webpages, and source code) and visual materials (illustrations, photographs, cartoons, and more).

Having swallowed the world of knowledge, an LLM has a sort of statistical, fuzzy basis on which to produce words and images. The interactive interface to an LLM can produce credible-sounding responses or graphics based on prompts, or what a user says, types, or uploads, because it has had such vast training on what humans have ever written, said, or visually created.

Some LLMs violated copyright in training

It is alleged—and we believe the evidence shows this is true—that some companies building LLMs have trained their models on copyrighted material for which they lacked permission. In our view, this violates the rights of, and effectively steals from, authors, artists, and programmers by failing to reach an agreement with or compensate them (including us).

Courts remain undecided on our opinion that this is theft. A judge in an author-driven lawsuit against Anthropic—they make Claude—ruled that the company’s scanning 7 million books and using them for training fell under “fair use,” but Anthropic’s central storage of the scanned items was a violation. Anthropic has agreed to settle the remaining issue for $1.5 billion without agreeing that their actions violated copyright. This will play out for years to come.

LLMs also enabled generative uses: you could ask an LLM model to revise an essay, write an academic paper, draw a cartoon, or create a photo showing the Pope in a fashion-forward puffer jacket. Using known sequences and analyzed features in images sometimes allowed plausible-sounding results. However, LLMs aren’t particularly good at any of these tasks. We cover that in the Apple Intelligence features to skip.

Hallucinations and big models

We still worry about LLM-based hallucinations, which is typically when a model either doesn’t know something and “makes it up” by compiling unrelated information into something that sounds plausible, or when a back-and-forth conversation has continued so long that its random walk down word selection has gone way off the rails. It’s something all the AI companies have tried to correct for.

In our testing of Siri AI, we haven’t seen meaningful hallucinations yet, in the sense that we get answers that seem to be on target, and we’re not told to, for instance, add glue to a pizza’s top to keep the cheese from sliding off. However, it’s always worth remembering that Siri AI may be working from a knowledge base Apple has defined, but it remains limited by the fact that it doesn’t understand what it is telling you.

Understand Apple’s retooling

Apple’s launch of Apple Intelligence (their own brand of artificial intelligence) in 2024 was supposed to happen alongside the revamp of Siri, which would finally be more reliable at understanding and acting on, or answering, what we said. This revamp apparently incorporated LLM technology, though to what extent, it’s unclear.

When that didn’t pan out well enough to release, Apple Intelligence on its own seemed a bit lackluster. You could see improvements built on it in the fall 2024 and fall 2025 releases that were increasingly useful, such as Live Voicemail, call screening in the Phone app, and Live Translation.

iOS 27, iPadOS 27, and macOS 27 contain Apple’s long-promised update.

To use the new Siri in iOS 27, iPadOS 27, macOS 27, or watchOS 27, you have to trigger or invoke it. Apple offers multiple ways to activate Siri AI on each kind of hardware.

Siri’s appearance when activated and some of the methods to bring up its interface have changed since the version 26 releases. Its static icon has changed. Siri shows its active state using a consistent animation across platforms. On iPhone and iPad, that animation appears at the top of the device rather than as a glowing animation on all four edges.

Use Spotlight

Back in the olden days of (checks notes) mid-2025, Spotlight was for searching, and Siri was for other sorts of requests. Both involved a text field on your screen, though Siri could, of course, also respond to your voice.

In Golden Gate, when you press the Spotlight shortcut (⌘-Space by default), and on an iPhone or iPad when you swipe down on the Home Screen, you see a text field that serves both purposes. You can type the name of an app or file, and it will give you the same results as Spotlight always has, but you can also ask questions that Siri will answer from its nearly unlimited storehouse of information. Or you can use a plain-language description of what you’re looking for on your device, and Siri will find it. If, while this window is open, you prefer to speak your request, click or tap the microphone button, then speak.

A MacBook screen showing Siri AI integrated into Spotlight, answering a question.

Apple removed the “type to Siri” option introduced in iOS 26, which let you double-tap the bottom of the display.

Use the Siri menu bar icon

On a Mac, if you click the Siri menu bar icon, you see the same combined Spotlight/Siri “Search or Ask” field as when you activate Spotlight via a keyboard shortcut.

Use “(Hey) Siri”

Optionally, Siri can continuously listen for requests. If you enable this (in Settings > Siri > Requests on iPhone or iPad, or System Settings > Siri > Requests on a Mac), you can say “Siri” or “Hey Siri” (depending on your settings) to trigger an animated, glowing blob that indicates Siri is ready to listen for spoken commands.

The first time you enable this, Siri asks you to repeat several phrases so it can adapt to the sound of your voice.

This also works on an Apple Watch: go to Settings > Siri, tap “Listen for,” and then tap either “Siri” or “Hey Siri” or just “Hey Siri.”

Use buttons on iPhones or iPads

On iPhones, you can press and hold the side button to activate Siri. Similarly, on iPads without a Home button, press and hold the top button. On iPads with a Home button, press and hold it instead.

Use Digital Crown or Raise Wrist on Apple Watch

In addition to listening for “Hey Siri” and/or “Siri,” your Apple Watch can activate Siri when you press the Digital Crown or when you raise your wrist. To enable either or both of these features, go to Settings > Siri and turn on Raise to Speak or Press Digital Crown.

Use contextual menus

On a Mac, you can select text, one or more files or folders, images in Photos, or other types of objects, then right-click or Control-click and choose Ask Siri from the contextual menu. Doing so not only activates Siri but also feeds it the selected item(s) as input it can work with. This even works in System Settings!

Likewise, on an iPhone or iPad, you can touch and hold text, images, and other objects, then tap the Siri button on the pop-up menu. An “Ask Siri about this” field appears, where, again, you can ask Siri anything but also give it the context of whatever was selected.

Use AirPods

With your AirPods connected to a Mac, iPhone, iPad, or Apple Watch that has “Siri” or “Hey Siri” enabled, you can speak your request just as you would if you were using the device without AirPods—but only if the AirPods are a recent model (AirPods 4, AirPods Pro 2, AirPods Pro 3, AirPods Max 2, or later). On older models, you must use “Hey Siri.”

Using “Siri” as the trigger may be unavailable in some countries and regions, even with a supported device.

In addition, you can use physical controls on your AirPods to activate Siri. The exact steps vary by AirPods model.

Use CarPlay

With an iPhone with iOS 27 installed connected to a CarPlay system, you can carry out Siri conversations, and these are synced in the Siri app, marked with a car icon.

Activate Siri while you have an iPhone connected to CarPlay using one of several methods:

  • The voice triggers you have set work as they would if your iPhone weren’t connected.
  • If your car has a steering-wheel activation button, press and hold it. Talk to Siri while continuing to hold the button for the entire time you’re talking. (Some cars trigger the automaker’s system with a short push, so be sure to press and keep holding.)
  • Touch and hold the Dashboard or Home button on the CarPlay screen. In the interests of safety, we recommend never doing this while driving.

Use Apple Vision Pro

On an Apple Vision Pro, say “Siri” and the new app appears with its glowing orb. Once it appears, you can grab and pin it in your environment, after which you can just look at the Siri orb to activate it and start talking.

You can also reach Siri via the Home button. Hold your palm open and look at it, then pinch and hold the Home button. A Siri orb appears above it, and you can start speaking. You have to keep your fingers pinched while you speak, much like a Siri Remote for Apple TV requires you hold the Siri button as you speak.

Siri AI doesn’t switch itself on when you update your device.

Siri AI has the same basic requirements as Apple Intelligence. If your device is capable enough for Apple Intelligence, it can install iOS 27, iPadOS 27, or macOS 27 and use Siri AI. watchOS 27 also provides ancillary access via a paired iPhone on supported Apple Watch models. Apple Vision Pro can also use Apple Intelligence. However, Apple also has language and region requirements at launch.

How to turn on Siri AI

Go to Settings > Siri on iPhone or iPad, or System Settings > Siri on a Mac, and tap or click “Try the new Siri.”

Why search and Siri must optimize

After you enable Siri AI on your device, it may need to “optimize” both search and Siri. This is some kind of elaborate indexing. Keep your device plugged in for faster optimization.

On a fresh install and some upgrades, you may have to wait some period of time. On an unloaded iPhone—freshly restored to factory settings and with relatively little synced material—it took well over a day for the optimization message to disappear and for Siri’s new features to start working.

Monochrome or colorful Siri icon

The Siri pane of Settings on iPhone and iPad, or System Settings on a Mac, lets you configure numerous aspects of Siri AI. You can use this pane to understand whether Siri AI is currently engaged, something that’s not always the case.

If you see the new monochrome Siri icon, that means your device is currently configured to use Siri AI. If you see the old, colorful Siri icon, that means it’s not.

Among the reasons the old icon might appear are that your device, or Siri, is set to an incompatible language, that your two language settings don’t match, or that you have turned off Siri.

Both your Siri language and your system language (Settings > General > Language & Region > Preferred Languages on iPhone and iPad, or System Settings > General > Language & Region on a Mac) must be identical—including the dialect, if applicable on your device. For example, if one is set to English (United States) and the other is set to English (Canada) on a Mac, you’ll get the old version of Siri. Make sure the two match—and note that switching your system language may require a restart.

As writers and technologists with combined experience in the tech industry of well over six decades—much of it focused on Apple—we have fairly well-developed opinions about which features are genuinely useful to a wide range of people and which ones lack practical utility and are more effective as marketing tools. That’s especially true for people in our age range (Gen X) and older, who constitute the vast majority of our readers.

Even though we want to be thorough and describe all the Apple Intelligence capabilities, there are a few that we think most people are better off avoiding because they may waste your time or may negatively impact your life. We briefly discuss the Image Playground app, Genmoji, and Write with Siri (formerly known as Writing Tools); you can make up your own mind as to whether they’re worth your time.

Image Playground

The Image Playground app uses Apple Intelligence to create images, or alter existing images from Photos or files on your device, based on descriptions you enter. So, if you ever had a burning need to see a picture of a goat skateboarding down a pyramid in central London or picture yourself dressed as a space pirate, Image Playground has you covered.

When you ask for a new image, Image Playground now displays a pop-up Any Style menu that lets you choose Animation, Illustration, Sketch, Genmoji, or ChatGPT (the latter of which is most likely to be photorealistic). It also lets you describe both the initial image and any desired changes (including changes to the style) in your own words. You can also sketch an image in Notes using the Magic Wand tool in iOS 27 and iPadOS 27 and have the app automagically interpret it.

One of us tried “An owl and a pussycat in a beautiful pea-green boat” and got a reasonable image of just that (for some values of “beautiful” and “pea-green”), something that had completely flummoxed Image Playground in Tahoe unless he replaced “pussycat” with “cat” (we’ll let you puzzle that one out on your own), but even then, the picture in Tahoe showed actual peas. The other tried to get an image of the “world’s largest collection of LPs,” and the first go-round showed someone on a ladder with just the edges of the LPs on a huge number of shelves.

When you describe a change, the image adjusts per your request. So, one of us said, “The owl is singing to a small guitar,” and sure enough, that’s what the next version showed. (And, OK, the owl wasn’t singing to the cat, nor was there any sign of honey or money, but then, he hadn’t asked for that.) The other asked Image Playground to refine his shelved LP images to show album covers face outward, and, wow, the generated cover images were something to behold—none real, but so many variations that resembled actual ones.

Genmoji creation and editing

Genmoji are conceptually similar to the images created by Image Playground, but smaller, more cartoonish, and without the backgrounds. They’re like emoji in that you can use them on the fly in Messages (and a few other places). Instead of picking from a fixed list of emoji, you describe what you want (“a squirrel playing a piano” or “a hammer with wings,” say) and let your device create it from scratch. Like Image Playground, Genmoji can also incorporate images of people from Photos (for example, “my wife riding a dragon” or “my grandmother skydiving”).

To use a Genmoji in Messages, click or tap the plus button next to the iMessage field and choose Genmoji from the pop-up menu. In the popover that appears, type a description of what you’d like to see and press Return (or tap or click the yellow arrow button), and after a moment, an image appears. If you like it, click Add to insert it in your message; if you want to see something different, type into the “Describe a change” field.

For the first time in Siri history, you can ask Siri questions or ask it to do something and almost always get a satisfactory outcome. Revolutionary! Even better, Siri retains context: you can have an ongoing conversation in the Siri app, and the vastly upgraded chatbot feature now doesn’t lose the thread.

Many people have mixed feelings about chatbots, particularly when they veer from utility into social, emotional, and personal interactions, but Siri is designed to stay largely on the utility target. Siri is designed for a purpose, and works well within those constraints. More broadly, it has the same limitations, advantages, and failings of other chatbots.

Carry on conversations

The power of Siri AI extends beyond asking it questions, of course. Engaging in conversations lets you drill down, rephrase your question, or ask follow-ups. This can be done after activating Siri, where you are just continuing on. This is already different than before iOS 27, when Siri’s ability to keep up its side of the conversation dropped off immediately or quickly.

Or you can open the Siri app. You can also click or tap answers from Siri in its pop-up or sheet-based view, and your device will open the Siri app.

However you navigate to activate Siri, you can immediately type or speak something after its response to whatever your first question or requested action was.

This can be useful if Siri’s first response or action wasn’t sufficient, or if it provided information or succeeded and you want to follow up by using context. You don’t have to define your scenario once again, which Siri often required before Siri AI.

For instance, we followed this line of questioning: “I watched a movie with Orson Welles in it last night. I think it took place in Austria.” Siri responds, “The movie you are thinking of is likely The Third Man. This 1949 film noir stars Orson Welles as Harry Lime and is famously set in post-World War II Vienna, Austria.”

You can then continue down that line of questions. We then asked why the zither was so prominent. It provided a detailed response (and an accurate one). Thinking of zithers, we wondered whether there was any zither music in the library. He hit a limit here: Siri only knows about locally stored music from its metadata, as far as we can tell, or at least without asking further questions. So it found, appropriately, “The Third Man” by Anton Karas in Apple Music, and offered to play it.