Got a tip for us?

iOS 27

When Connectivity Assist is on, iPhone uses cellular data along with Wi-Fi to keep your internet connection reliable when Wi-Fi is weak, busy, or not connected to the internet. But what about the reverse? If you live in an area with poor cellular coverage, can you boost your internet connection by requiring your iPhone 18 Pro Max to use Wi-Fi? Not precisely.

iPhone connects in this order: the most recently used Wi-Fi network, then a Wi-Fi network you choose from the list, then your carrier’s cellular data network. Your iPhone continuously scans for Wi-Fi networks while you’re using cell data. If your device finds a suitable Wi-Fi network, iOS relies on your Settings > Wi-Fi choices as to what to do next.

Make sure Ask to Join Networks is set to Ask, and you’ll always be prompted when a nearby network is discovered. If you’ve previously connected to it, your device automatically joins; otherwise, the Ask option means you’re prompted.

With Auto-Join Hotspot, Apple can detect nearby personal hotspots that you’re eligible to join: your own on an iPhone that’s not your current device, one available on an iPhone owned by someone in your Family Sharing group if you’re in one, or one that has been set to Allow Others to Join, though you will need to know the password.

If you have a 5G plan and a 5G network is available, your device prefers 5G cell data instead of a Wi-Fi connection in many cases.

The option is called Allow More Data on 5G and you find it in Settings > Cellular > Cellular Data Options > Data Mode. When Data Mode is set to Allow More Data on 5G, your iPhone 18 Pro or iPhone 18 Pro Max may tap the 5G network when it can deliver a faster or more consistent performance than the connected Wi-Fi for specific tasks, like streaming video and performing iCloud backups. However, you can change this to Standard, which only uses the 5G network for updates and certain background tasks, or Low Data Mode, which avoids using the cellular network for background tasks and automatic updates.

You can keep your iPhone from dropping onto a cellular network if it loses its Wi-Fi connection. For most people, some internet service is better than none, but if cell data is so erratic in your current location that it’s frustrating to use, you might prefer to be cut off. In that case, go to Settings > Cellular and switch Cellular Data off. (You can also reveal the Control Center and tap the Cellular icon.) If cellular data is off, all data services—including email, web browsing, and notifications—use Wi-Fi only.

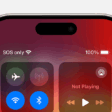
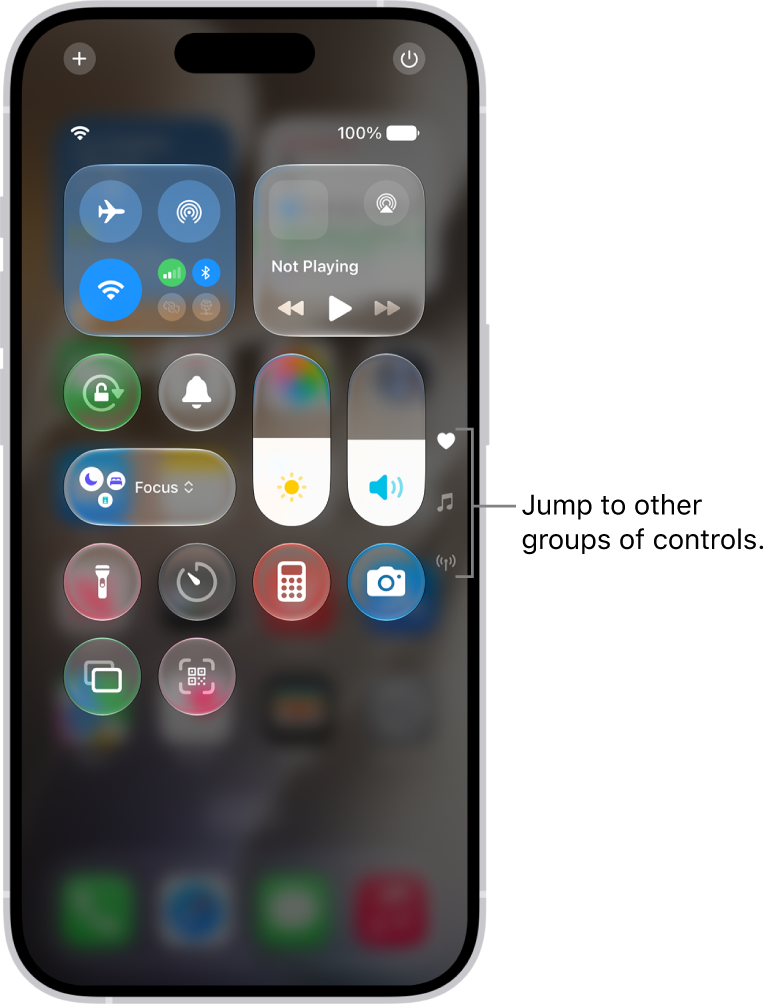
Control Center open on the iPhone screen, with icons on the right for viewing other groups of controls.

Tip: If you want to ensure that you place voice calls using your wireless provider over Wi-Fi instead of cellular, make sure you have Wi-Fi Calling enabled—or that your provider offers it.

Apple added an option designed to improve your experience on your iPhone 18 Pro or iPhone 18 Pro Max when you were on a Wi-Fi network, but your cellular plan gave you access to a higher-throughput 5G network. For instance, you can enable this option to have higher-quality FaceTime connections where using a Wi-Fi network would only provide lower-definition FaceTime.

Enabling Settings > Cellular > Cellular Data Options > Data Mode > Allow More Data on 5G lets your device make different choices. Some carriers may enable this option by default if you have an unlimited-usage plan. (That option might be under Settings > Cellular Data or Settings > Mobile Data, and nested under a carrier’s settings if you have a SIM and eSIM or two eSIMs installed.)

Note: iPhone 18 Pro Max models purchased in the United States can only be activated with an eSIM.

The details mix together data usage and quality into a single group of settings, particularly around video and downloads. With Allow More Data on 5G turned on, your device may switch to 5G for what Apple describes as “higher-quality FaceTime,” high-definition content for streaming video via the Apple TV app, all music and videos played from the Music app, system updates, and automatic iCloud backups. Third-party apps can also tap 5G with the option on for higher-bandwidth purposes.

How does it choose when to do so? If you’re on either an insecure Wi-Fi network, one that requires no password to join, or one you use infrequently (as tracked silently by your iPhone 18 Pro Max), your device may switch to 5G.

The other two choices don’t incorporate Wi-Fi usage at all: they’re really a binary choice—Standard and Low Data:

  • Low Data reduces cellular data usage by pausing automatic downloads and many background tasks. (You can also set Low Data as an option on a Wi-Fi network.)
  • Standard is a “normal” mode, essentially what we’ve seen for many years with an iPhone over cellular. Video streaming and FaceTime are throttled to “standard quality,” an ambiguous term only meaningful in contrast to what is ostensibly higher quality over 5G or high-performance Wi-Fi networks connected to high-speed Internet.

On a network that iOS has decided to boost data over 5G, you can opt to override the operating system’s choice.

You can override this choice for Wi-Fi networks for which your device has decided to override Wi-Fi. Go to Settings > Wi-Fi and tap the More Info button next to the connected network. Turn off Use Connectivity Assist to block the override for a current network or a future connection.

The Wi-Fi options screen in Settings. Wi-Fi is turned on, and a network is selected.

All three options above are distinct from Connectivity Assist, found in Settings > Wi-Fi, which will use any generation of a cellular network to provide a data boost—but only when connected to a poorly performing Wi-Fi network.

The Connectivity Assist feature backfills a low-quality Wi-Fi network, supplements one that you have a weak connection to, or covers outage gaps when your broadband service goes down. But, readers want to know, will it increase your mobile bill?

A few years ago, the answer (at least for U.S. residents) was: Probably. However, it’s far less likely to be an issue.

First, Connectivity Assist only supplements on-device bandwidth use. If you’re using your iPhone 18 Pro or iPhone 18 Pro Max as a Personal Hotspot, you’re already tapping the cellular network subject to limits and pricing set in your cellular plan.

Second, Apple doesn’t back all apps and services with Connectivity Assist. Connectivity Assist uses cellular data only when needed to maintain a reliable connection. It isn’t used when iPhone is roaming internationally, in cellular Low Data Mode, or with some apps that stream audio and video.

Third, a significant number of U.S. cellular subscribers have “unlimited” bandwidth on their cellular plans. That’s “unlimited” in quotation marks because cell companies don’t cut off or charge overages on these flat-rate plans, but rather throttle you to a low data rate (like 256Kbps or 3G speeds), or lower your priority among other users once you pass a fixed amount. It’s typically 5GB to 50GB per month per line. Other subscribers pay for fixed amounts of data, after which they’re cut off or have to pay additional fees for more usage that month.

So you’re likely to consume more bandwidth only if you’re routinely using a Wi-Fi network with poor performance and only face a consequence of it if that usage bumps your monthly total over a threshold or cap.

You can check your current usage of Connectivity Assist, which is turned on by default, by going to Settings > Wi-Fi. My most recent consumption was 916KB—that’s just under one megabyte—while I used nearly 2GB directly on my phone. Tap the switch if you want to disable it.

Does your iPhone 18 Pro Max keep running out of cellular data before your allowance is reset each month? Do you feel like your cap is too restrictive, but can’t afford to upgrade to a more generous iPhone contract?

If you’re tired of running out of data every month, follow our tips and never hit your limit again.

Turn on Low Data Mode

Before you reach your limit for the month, you could simply turn on Low Data Mode.

With this mode switched on anything that might be using up data needlessly will be stopped.

With Low Data Mode switched on apps will stop using data in the background, there will be no automatic app downloads, and emails won’t be automatically retrieved.

To turn on Low Data Mode follow these steps:

  1. Open Settings.
  2. Tap Cellular, then tap Cellular Data Options.
  3. Tap Data Mode, then choose Low Data Mode.

Connectivity Assist

Another one worth checking before we move on to more difficult or inconvenient solutions.

When Connectivity Assist is on, iPhone uses cellular data along with Wi-Fi to keep your internet connection reliable when Wi-Fi is weak, busy, or not connected to the internet – often handy, but likely to increase your data consumption.

If you think this is happening to you, you can turn this feature off in Settings > Wi-Fi, where you can turn off Connectivity Assist.

iPhone shows the amount of cellular data Connectivity Assist has used. It’s still a feature that’s on by default, though.

Apple has at least made sure that there are some limitations to the feature. It won’t work when you are using data roaming in another country, and not all apps can access the feature; for example, video and audio streaming apps are exempt. However, Apple’s Safari, Mail, Maps and Apple Music do use the feature.

Track how much iPhone data you use

Before you can start to manage your iPhone 18 Pro Max cellular data usage, you need to keep tabs on how much you’re using. To view how much data you’ve used, go to Settings > Cellular and scroll down to see your mobile data usage for the current period. Below this you’ll see how much data has been used by each app.

Wondering how long the Current Period was? To find out that you will need to scroll all the way to the bottom to see when you last reset the statistics.

Our advice is to get in the habit of resetting it every month; perhaps set an alert on your phone so you remember to reset it on the day your network resets your allowance. To reset your statistics, scroll down to the bottom of the page and tap Reset Statistics. Get in the habit of looking here once in a while so you can see if you’re on target to stay under the limit, or if you’re overdoing it and need to rein things in.

To get the most accurate cellular data usage from a current period, contact your carrier.

Alternatively you could take a look at Data Usage (49p/99c), an app that we’ve used for the past three years to keep track of our monthly data usage.

The app looks to measure cellular and Wi-Fi data usage in real time, and offers this in two different ways – via the app itself, and via a handy Today widget.

The app asks you to input your monthly data limit and then produces statistics like how much you should use per day until your data is renewed, or if you’re likely to go over your allowance in any given month.

Users can also take a look back at the data from any month in the past, as long as the app was being used then, of course.

Stop iPhone apps using cellular data

You can see how much data each app has used and you can turn off cellular data for individual apps.

When we are close to our allowance, we head to Settings > Cellular and scroll down to switch off a number of apps’ cellular privileges.

The other benefit of stopping some of your apps using cellular data is that it should stop them updating in the background when you’re out and about – thereby improving battery life.

Below each of the apps on the Settings > Cellular page you will see just how much data they have been using. Any that stand out as guzzling a lot more data that you think they should be can be switched off here.

Turn off 3G and 4G data on your iPhone 18 Pro Max

If things are really desperate, one way to preserve your data when you’re running low is to temporarily disable cellular data. This way if you have a week or so to go until your contract renews you can manage your usage rather than running out completely.

To turn off your cellular data go to Settings > Cellular and toggle the Cellular Data switch to off.

This will turn off all cellular data and restrict all data to Wi-Fi, including email, web browsing and push notifications. We also find this is a handy way to preserve battery life – as opposed to switching on Airplane Mode, which preserves power but means nobody can contact you.

Turn off autoplay video in Facebook, X & Instagram

A while ago Facebook added a feature to their iOS app that means when you’re scrolling through your news feed any video that’s been posted will automatically stream – even if you’re not on a Wi-Fi network. Obviously this isn’t an ideal situation if you’ve got a limited data allowance.

We recommend you change your settings so that it only streams if you’re on Wi-Fi.

Open Facebook and click on the three lines at the bottom of the screen. Now choose Settings & Privacy > Settings > Videos and Photos and make sure that Auto-Play is set to On Wi-Fi Connections Only (or you could choose Never Auto-plays Videos.)

Like Facebook, X has an autoplay video feature that you can turn off in the app. Tap your avatar image in the top left to display your profile details, then hit Settings and privacy > Accessibility, display, and languages > Data usage. Tap the ‘Video autoplay’ entry and change it to ‘Only on Wi-Fi’.

A better policy, however, may be to simply hit the Data Saver toggle at the top of the Data Usage page – this turns off autoplay and lowers image quality too.

There is a similar series of steps in Instagram to turn off video streaming over your data connection. Tap the Gear icon in Instagram, select Mobile Data Use and choose the Use Less Data option.

Stop using data-hungry apps on 3G or 4G

FaceTime:It’s great that we can use FaceTime over 3G or 4G, but it sucks up data. Go to Settings > Cellular and scroll down your list of apps to make sure FaceTime is switched off for cellular data. Crucially, this will also stop anyone contacting you via FaceTime over 3G/4G.

iCloud Drive:Go to Settings and tap your name/picture at the top, then tap iCloud. Tap Drive, then turn off Sync this iPhone. Alternatively, turn off the ability for apps to store documents and data in the cloud by toggling the switch beside each app to Off. Tap See All next to Saved to iCloud.
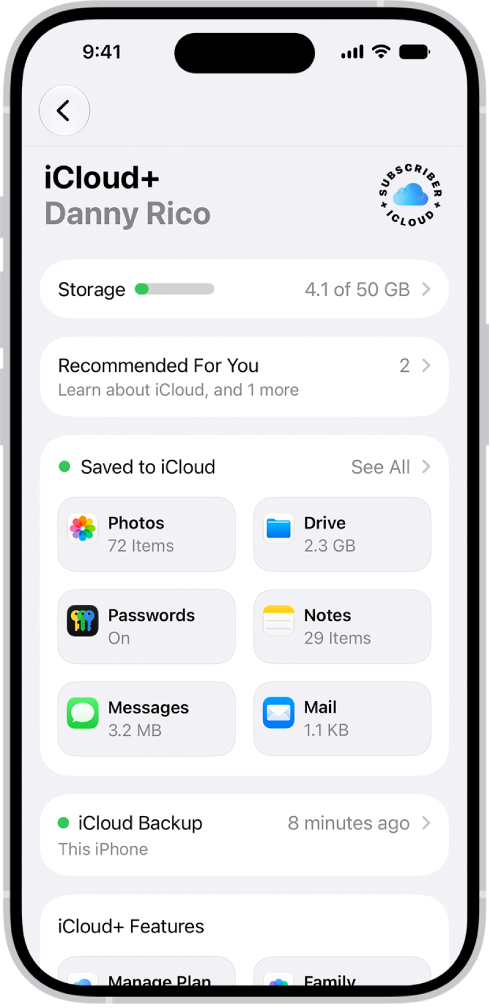
The iCloud settings screen showing the iCloud storage meter and a list of features—including Photos, iCloud Drive, and iCloud Backup—that can be used with iCloud.

App Store:Go to Settings > Apps > App Store and make sure that Cellular Data is switched off. Similarly, if you’re an Apple Music subscriber, make sure Cellular Data is not selected in Settings > Apps > Music.

Use Safari reading list to view articles offline

Safari’s Reading List feature lets you download a web page for reading offline. This is great when you’re reading an article during a commute and about to head into a tunnel.

It’s also great if you are out of data: you can queue up a few web pages in your Reading List while you’re on Wi-Fi, then read them without using up any data.

While you have access to Wi-Fi go to Safari, open the web pages you wish to read, tap the Share icon at the bottom of the page and select Add to Reading List. Wait for the phone to download the article and then head out. You will be able to read this article even if you’re using Airplane Mode.
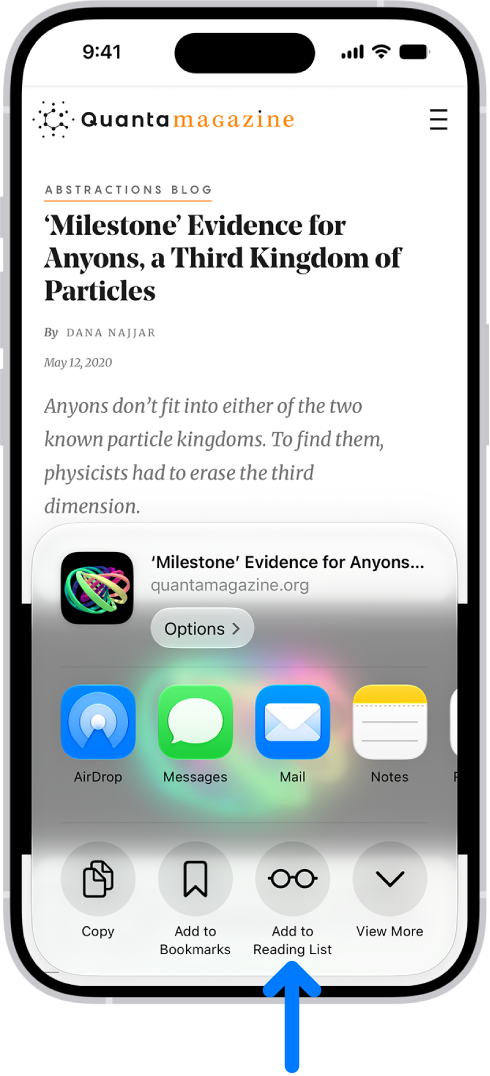
In Safari, the Share button on a webpage has been tapped, revealing a list of options, including Add to Reading List.

Turn off Push Notifications

How many of your applications are using the Apple Push Notifications service to alert you to new data?

Some of those apps might be using data to alert you to changes. If you really don’t need to be told that your friend has replied to your post on Facebook turn Notifications off by tapping Facebook, and switching the slider to off.

Be ruthless with the apps that are alerting you to changes, although if you then end up checking them every five minutes it may be a false economy.

Go to Settings > Notifications to find out. You can easily stop any apps from pestering you with Notifications here.

You can scroll down the list, tap on those apps you don’t want to notify you, and tap on the slider beside Allow Notifications to turn notification off for that app. Alternatively, you can leave Notifications on, but tweak the style, so that you just get Banners, or only in Notification Center.
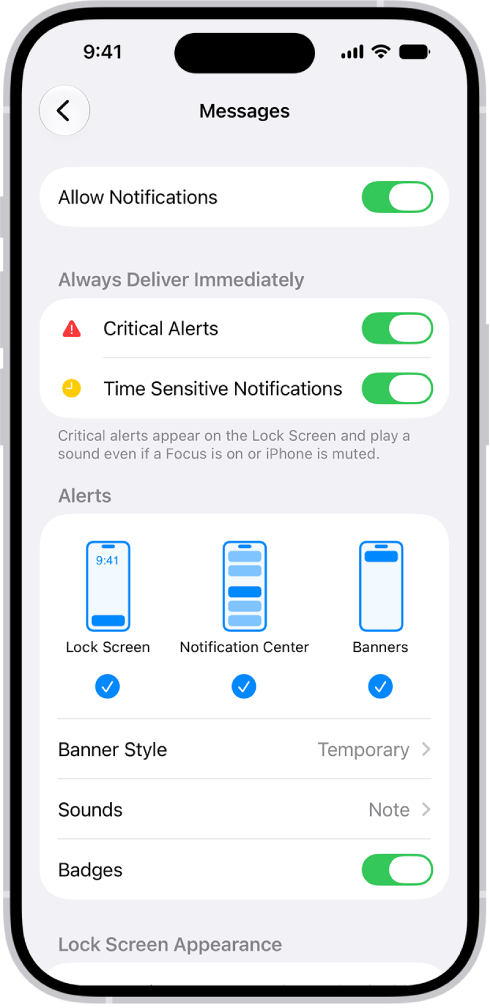
Messages Notification settings in Settings.

It’s slightly annoying that you have to turn off Notifications on a per app basis, but you can at least see the kind of notification setting you have for each app without tapping on them first (it’s below the name of the app).

Note that if you have an Apple Watch you may want some apps to display notifications on that device – go to the Apple Watch app on your iPhone to set this up.

Stop fetching email

Another one to curb is your email. If you have the phone set to fetch data wirelessly at specific intervals you will quickly consume data – this can get really out of hand if you have your iPhone set to Push data to your iPhone from the server as it will be updating all the time.

As we mentioned above, the Low Data Mode will automatically turn this feature off, but you can turn it off separately to the other features of Low Power Mode if you prefer.

You could just stop Mail from using Mobile Data. Just switch the slider beside Mail to off in Settings > Cellular. However you can refine things further if you go to Settings > Apps > Mail > Mail Accounts and then tap on Fetch New Data.

Here you will see a number of options, specific to your different Mail (and Calendar) accounts.

You can choose to fetch data Manually, Hourly, Every 30 Minutes, or Every 15 Minutes. Manually might be the best option if you are trying to limit data.

Or you can be even more precise and amend your fetch settings for separate accounts. Changing these settings also has the benefit of preserving battery life.

Stop background app refresh

Your iPhone 18 Pro or iPhone 18 Pro Max can automatically update its operating system and apps in the background without you having to act. This saves time and hassle.

However, this can cause a problem if your phone decides to update when you’re not on a Wi-Fi network.

Head to Settings > General > Background App Refresh and tap Background App Refresh at the top. Select Wi-Fi (as opposed to Wi-Fi & Cellular Data) to limit this feature’s activities.

Low-res images in Messages

You can choose to send low-quality images in Messages. You can send smaller-sized previews of images so your recipients get them right away, before the full-resolution images arrive.

To do so, go to Settings > Apps > Messages and turn on Send Low Quality Photo Previews. When Low Data Mode is on, only the preview is sent.

Mind what you watch on cellular

Whether it’s Netflix, YouTube or iPlayer, watching your favourite shows could eat up your data if you watch over 3G/4G. In each app, go to Settings and select to play back only over Wi-Fi.

The easiest way to do this is to go to Settings > Cellular and make sure these apps are set to not work when on Mobile data.

Alternatively you could go into each app, for example, in Netflix, go to App Settings > Cellular data usage.

Keep Wi-Fi on

If you’ve ever found yourself switching off Wi-Fi entirely because your iPhone 18 Pro Max keeps trying to connect to a network when you’re in town, you may find yourself using cellular when you get back home.

It’s a frustration that’s easily fixed if you choose to forget the network when one of them pops up.

Just tap the More Info button next to the network name, and in the following screen select Forget This Network.
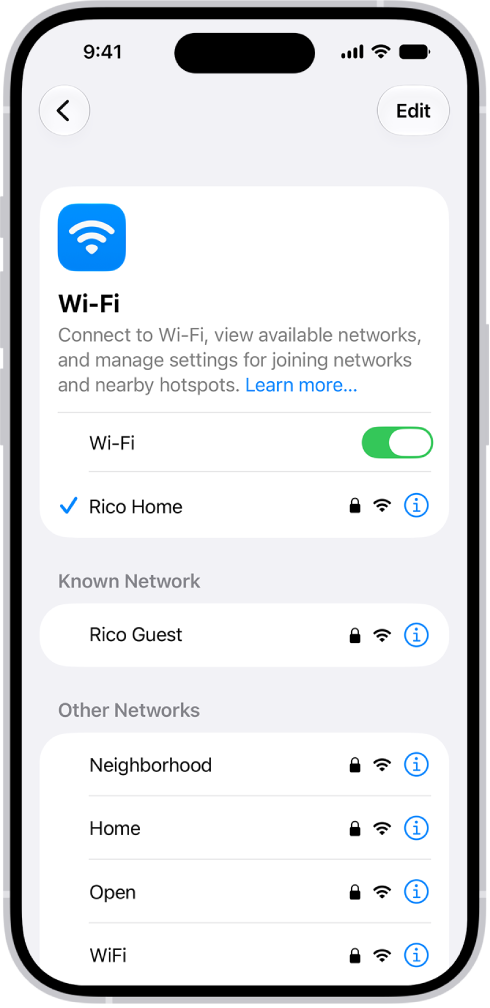
The Wi-Fi options screen in Settings. Wi-Fi is turned on, and a network is selected.

Use Wi-Fi hotspots

You’ll be able to find Wi-Fi networks all around, especially in any big city. You can find Wi-Fi in most coffee shop chains, many restaurants, and other public areas like libraries and airports.

However, you should always exercise an air of caution when accessing a hotspot. The best advice is to use a Wi-Fi hotspot that requires a password – it’s an extra assurance that someone else won’t be spying on what you’re doing.


Have you ever wished you could share your iPhone’s 3G/4G cellular connection with Wi-Fi-only devices nearby, such as laptops and non-cellular iPads? You’re in luck: it’s easy to set up an iPhone 18 Pro Max as a portable Wi-Fi hotspot, opening up its web connection to anyone who is close enough and has the password. Here’s how.

Should I create a Wi-Fi hotspot with my iPhone?

Let’s say you’re travelling with your iPhone, and a MacBook or Wi-Fi-only iPad, and want to do some work. At this point you’ve got two options: do the work on the larger-screen devices, but without being able to connect to any online resources; or go online but be stuck with a smaller screen.

Turning your iPhone into a Wi-Fi hotspot gives you a handy third option, allowing the laptop and tablet to piggyback on the phone’s web connection. Wi-Fi hotspots are great for working on the go.

It’s easy to turn your iPhone 18 Pro Max into a hotspot, but you may wish to check with your phone carrier first or at least check your contract’s terms and conditions; while most networks will include Tethering as part of your plan, some networks prefer you not to do this and may charge you extra (or cap your data allowance) if they spot you setting up a hotspot. For example, a network may include Tethering as part of your data allowance if you are pay monthly, but if you are on PAYG you might have to pay extra.

And while we’re talking about data allowances, this is another thing to bear in mind: if you have a limited allowance you should only use the Wi-Fi hotspot for a short while. Be aware that your Mac or PC might gobble through data at a rapid rate compared to if you were just surfing on your iPhone.

How to turn on hotspot on an iPhone

Creating a hotspot turns the iPhone 18 Pro or iPhone 18 Pro Max into a Wi-Fi router, much like the one in your home. The iPhone connects to the internet using its 3G/4G cellular data connection, and then broadcasts this via a Wi-Fi connection that your Mac, iPad, PC, or other device, can connect to. You can also create a wired connection to your computer’s USB port.

Note that once your hotspot is turned on your iPhone will be using 3G or 4G for its data connection. That fact is pretty obvious, but it’s worth mentioning because you might log onto a hotel Wi-Fi with your iPhone and think you can share it that way: you can’t.

There are two ways to create your hotspot on your iPhone.

Turn on an iPhone hotspot – the quick way

The quickest way to turn on a Hotspot is to do this:

  1. Swipe down from the top-right edge to open Control Center.

    Control Center open on the iPhone screen, with icons on the right for viewing other groups of controls.

  2. Touch and hold inside the block of four icons representing Airplane mode, Wi-Fi and Bluetooth.
  3. This will open a larger block of icons, including AirDrop and Personal Hotspot. Just tap on the Personal Hotspot and it will become ‘Discoverable’.

Turn on an iPhone hotspot via Settings

  1. Open Settings
  2. Tap Personal Hotspot. Follow the onscreen instructions.
  3. If you want to create a Hotspot you will need to Allow Others to Join – even if you aren’t planning to let others join. Your Hotspot will automatically become ‘discoverable’ but others will need to enter a password in order to join your Hotspot.
  4. You can choose who is allowed to use your Personal Hotspot, set a password, and—if you’re in a Family Sharing group—decide if you want to automatically share your Personal Hotspot with specific family members.

To change the password later, go to Settings > Cellular > Personal Hotspot, then tap Wi-Fi password and enter a new password.

How to connect to an iPhone hotspot from an iPhone or iPad

Connecting an iPhone or iPad to a hotspot is simple. Follow these steps:

  1. While sharing your hotspot from your iPhone, open the second iPhone, or iPad open Settings.
  2. Tap on Wi-Fi.

    The Wi-Fi options screen in Settings. Wi-Fi is turned on, and a network is selected.

  3. Various Wi-Fi networks will show up. These should include the Hotspot created by the iPhone. Select that hotspot.
  4. You may need to log on. If you need the password look on the Hotspot sharing iPhone. You’ll see it in Settings > Personal Hotspot (or Settings > Cellular > Personal Hotspot).

You will now be connected to the web via that iPhone’s data connection.

If you are connecting to a Hotspot being broadcast by your own device, then any other device you own should connect without a password, as long as you are logged into iCloud. If you use Family Sharing you will automatically connect to a family member’s Hotspot (and they to yours) without requiring a password.

How to connect to your iPhone 18 Pro Max hotspot from a Mac

Now you are sharing your hotspot from your iPhone you can easily connect to it from a Mac. Here’s how:

  1. Click the Wi-Fi icon in your Mac’s Menu bar. You will see a number of Wi-Fi networks it can see locally. Turn on Wi-Fi if necessary.
  2. In your Personal Hotspots section you should see your iPhone’s Hotspot (if you don’t have a section for Personal Hotspot you should find it below). Choose it.
  3. Your Mac should connect automatically, as long as you are signed in to iCloud, otherwise, enter the password as shown in the Personal Hotspot section on your iPhone.

You can now browse the internet on your Mac or iPad using the data connection from the iPhone. Your mileage may vary, however, depending on how good the iPhone’s network connection is. You might find the internet runs a little slower than you’re used to.

When you’ve finished, don’t forget to tap Settings > Cellular > Personal Hotspot on your iPhone 18 Pro Max and set it to Off.

What if your Mac won’t connect to your Wi-Fi hotspot?

We had an issue connecting our Mac to the Wi-Fi hotspot created by our iPhone. It eventually fixed itself.

We had the options to Run Diagnostics. The wizard ran various diagnostic tests on our Mac before creating a diagnostics report.

How to connect to your iPhone hotspot from a PC (Windows)

Once you are sharing your hotspot from your iPhone you should be able to see the Wi-Fi hotspot and connect to it via your PC.

  1. Start by turning Wi-Fi on.
  2. Then click on the Wi-Fi icon in the taskbar.
  3. Choose your iPhone.
  4. Click Connect.

Enter the password.

How to connect to your iPhone hotspot via Bluetooth

You could also connect using Bluetooth. You will need to pair your iPhone and your computer using a code.

  • On a Mac you will need to open System Settings > Bluetooth, look for your iPhone and click connect.
  • On a PC you will need to click on Join a Personal Area Network, and choose the iPhone from the devices shown.

How to connect to an iPhone hotspot via USB

You can also connect directly to your iPhone from your Mac using a USB-cable, which might be the best option for you if you are somewhere where there are a lot of competing Wi-Fi networks or because you don’t feel that it would be secure to broadcast your connection (although nobody should be able to piggy-back it without a password), it may also be faster to use a USB connection than Wi-Fi. Here’s how:

Connect the iPhone to your Mac using the USB cable the iPhone shipped with.

If you see an alert on your iPhone that says Trust This Computer? tap Trust.

As soon as it’s connected by a cable, your Mac or Windows device is able to use the cellular connection on your iPhone.

Dangers & warnings

What if someone tries to hijack your connection, burning through your data connection and/or accessing dodgy sites and content?

You should be okay, because the iPhone hotspot is password-protected. (All the more reason not to choose the word “password” or something else that’s easily guessed.) And you’ll see a small notification at the top of your iPhone’s screen when a device accesses its hotspot, so you’ll get a warning if someone in your train carriage does manage to guess your password.

A more important warning concerns data limits on your own surfing. It’s easy to forget, when accessing the web over a device that’s normally limited to Wi-Fi connections, that you’re working against a 3G or 4G data limit. Remember that you’re on the clock, so to speak, and we’d suggest avoiding downloading large apps and similar.

Did you know you can send gifts from your Apple device? You can send books, music, and apps from your Apple apps to a friend if they use Apple’s media services like Apple Music or the App Store.

However, sometimes you might be unable to send gifts from your iPhone 18 Pro or iPhone 18 Pro Max. So, if you’re experiencing such an issue, here are some possible reasons.

1. The Recipient Lives in a Different Country or Region

Similar to how the recipient of an Apple Gift Card can’t use it outside the country where it was purchased, the recipient of a gift from an Apple device can’t use it outside of the country or region where it was sent because their Apple Account is in a different country or region.

For instance, if you’re going to gift an app or game from the App Store in the United States, the person you’re sending it to must also have an Apple Account in the United States. However, they can work around this by changing their App Store country, but it has its own set of drawbacks.

2. You’re in an Unsupported Country or Region

You might be unable to send gifts because you can’t buy music, apps, movies, or books in your country or region. This is because certain countries or regions cannot access some Apple services. For instance, if you live in Croatia, you won’t be able to gift books from the App Store.

It’s possible to solve this problem by changing your App Store and iTunes country, but, as we mentioned earlier, it has a few issues of its own. You can visit Apple Support to learn what Apple services your country can access.

3. Your Family Sharing Settings

Apple’s Family Sharing lets you share Apple content and subscriptions with your family. If you’ve enabled this feature on your iPhone 18 Pro Max and turned on Ask to Buy, it’ll prevent you from sending gifts. After turning it off, you should be able to purchase gifts.

4. Using the Wrong Device to Gift an Item

What you can gift depends on whether you’re on an iPhone, Mac, or PC. You can send gifts from the App Store, Apple Books, or iTunes Store on an iPhone. On a Mac or PC, you can send gifts using the iTunes Store.

You need an iPhone to gift apps and a Mac or PC to gift individual songs. For now, there’s no workaround for this.

5. You’re Trying to Gift a Free App

If you can’t gift an item from the App Store, it might be because it’s free. While you can only gift paid items, it is possible to share free ones as well. To do so, tap the share button beside the app, then select a recipient or your means of sending it.

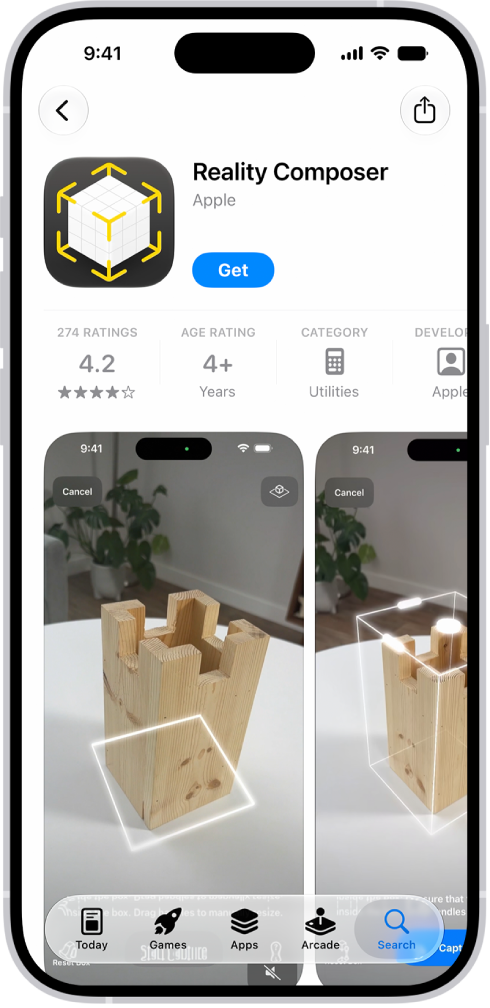
The information page for an app in the App Store. The page shows the Get button, ratings, age ratings, the developer, screenshots, and more. At the bottom, from left to right, are the following buttons: Today, Games, Apps, Arcade, and Search.

Make the Most of Apple’s Gifting Feature

Looking for a great gift for a loved one who’s also an Apple user? Send them an app, book, or another item you know they’ll love from your iPhone 18 Pro Max.

And if you want them to have flexibility in choosing apps or books, send them an Apple Gift Card instead. Whatever it is, they’re bound to appreciate the gift.

While modern iPhones come with Face ID as the main way to unlock the device, underneath there’s always a passcode that acts as a fallback option should the biometrics run awry. You most likely set this up when you first received your iPhone 18 Pro Max and haven’t given it much thought since.

But what if you want to change the code to a new or longer one? Here are the steps you need to take.

How do I change the passcode on my iPhone?

It’s easy to change your iPhone 18 Pro Max passcode: all you need is the existing code and these instructions.

On your iPhone, open Settings then scroll down until you find Face ID & Passcode. Select this and you’ll be asked to enter your current passcode. Do so, then on the next page scroll down and tap the Change Passcode option.

You’ll need to enter your existing passcode once more, then you’ll be prompted to enter a new one to replace it.

iOS defaults to a six-digit code, but there are other configurations available if you tap Passcode Options. These include Custom Alphanumeric Code (one that combines numbers and letters), Custom Numeric Code (as many numbers as you like) or a four-digit numerical code.

Select the one you want to use, then enter the new code and verify it to complete the process.

When should I change my passcode?

Many people will set a passcode and then use it for the entire life of a device and even take it on to the next one with them. While there’s nothing wrong with this, there are some instances where changing to a new one is advisable.

The main situation is if you think someone might have seen you enter your passcode, and thus could access your device if they got their hands on it. If this is the case, then it should be changed immediately.

There’s also the fact that a higher number of digits in the code – or combining numbers and letters in the case of an alphanumeric – will increase the permutations available and make the code harder to crack. So, if you want to have the highest level of security on your iPhone 18 Pro or iPhone 18 Pro Max, a longer passcode will go a long way to making it more secure.

If you’ve forgotten your passcode then you won’t be able to change it without first wiping your iPhone.

Summary

  • Don’t be quick to assume your AirPod is faulty because software bugs, depleted battery, and misconfigured settings could cause this issue.
  • Charging your AirPods and re-pairing or resetting them should fix the issue in most cases.
  • Sometimes, your phone, tablet, or computer might be the culprit, and you’ll need to troubleshoot the Bluetooth settings on it first.

Did one of your AirPods stop working with your iPhone 18 Pro Max all of a sudden? Before you assume it’s a hardware problem and contact Apple for a repair or replacement AirPod, follow these simple troubleshooting steps, as they can often quickly resolve the issue.

1. Check Your AirPods Battery

It’s possible that one of your AirPods stopped working because it ran out of battery. Each AirPod has its own battery charge, and when it gets drained, that particular AirPod will stop functioning. You’ll have to check the battery level of each AirPod to see if that’s the problem.

Put both AirPods back into the charging case and let them charge for at least 30–60 seconds or up to a few minutes. Then, open the case and hold it near your iPhone 18 Pro or iPhone 18 Pro Max to see the battery pop-up. Or, with the case open, use the Settings app to view the AirPods’ battery levels.

Remember that your AirPods case also has its own battery. For this to work, make sure the AirPods case is also fully charged.

2. Restart the Connected Device

Once you’ve checked your AirPods’ battery levels and made sure they’re charged, it’s time to reboot the device you use your AirPods with.

It’s possible there’s an issue with your connected device, like your computer or smartphone, that causes one of your AirPods to disconnect. In that case, rebooting might be all you need to fix an AirPod that’s not working.

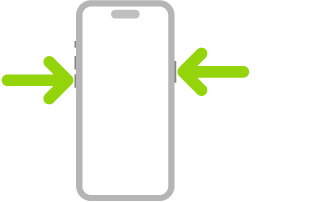
Reboot your iPhone 18 Pro Max. Simultaneously press and hold the side button and either volume button until the sliders appear, then drag the Power Off slider. Press and hold the side button until the Apple logo appears. Once your device is powered on and Bluetooth is enabled, check if both your AirPods connect and work properly again.

An illustration of iPhone with arrows pointing to the side button on the upper right and a volume button on the upper left.

3. Adjust the Audio Balance on Your Devices

Most devices allow you to set the volume level for each AirPod individually. If you or someone else has tweaked this adjustment and routed the audio to only one of the AirPods, that may be why you’re not hearing any sound from the other. It could also be why one AirPod sounds louder than the other when they’re both working.

To adjust the AirPods audio balance on an iPhone 18 Pro or iPhone 18 Pro Max, go to Settings > Accessibility > Audio & Visual. You’ll see a slider with an L on the left and an R on the right. Adjust this slider so that the marker is in the middle. This ensures both your AirPods play sound at an equal volume.

4. Try Your AirPods With Other Devices

It isn’t always your AirPods that have issues. Sometimes, one of your AirPods stops working because of a problem with your smartphone or your computer.

In this case, try using your AirPods with your other devices and see if you can hear the audio on both AirPods.

If both AirPods work just fine on any other device, you know the issue is with your primary device, and you’ll need to fix it instead.

5. Forget Your AirPods From Your Devices

One of the best ways to fix issues with Bluetooth devices is to forget them on your phone or other device and then re-pair them. This allows your device to establish a fresh Bluetooth connection.

To forget AirPods on an iPhone, open the Settings app and tap Bluetooth. Find your AirPods in the list and tap the More Info button next to them. Then, tap Forget This Device. Tap Forget Device to confirm.

After unpairing, you need to re-pair your AirPods to your device. Then, see if both your AirPods work.

6. Reset Your AirPods to Factory Settings

If your AirPods still don’t work after unpairing and re-pairing them, try resetting them to their factory settings. Once they’re unpaired, put your AirPods in their charging case, but don’t close the lid.

Press and hold the setup button on the back of the AirPods charging case for 15 seconds until the light on the front flashes amber and white. Then, let go of the button and, with the lid open, hold your AirPods case near your iPhone.

Your iPhone will prompt you to set them up. If you’re using another device, follow the standard Bluetooth setup steps.

AirPods 4 or 5, or AirPods Pro 3: Put the AirPods in their case, close the lid, then wait 30 seconds. Open the lid, then double-tap the front of the case three times. When you successfully reset your AirPods, the status light flashes amber, then white.

7. Reset Your Phone’s Network Settings

Your phone’s network settings define how it connects to various other devices. It’s worth changing back to the default settings to see if this fixes the AirPod that’s not working.

Once the settings are reset, you can manually reconfigure them on your devices. You’ll also need to reconnect to Wi-Fi networks manually after resetting your network settings.

To reset network settings on your iPhone 18 Pro Max, go to Settings > General > Transfer or Reset iPhone > Reset and choose Reset Network Settings.

If you can only hear audio from one of your AirPods, use the methods outlined above and see if you can get your faulty AirPod to function properly again. If the issue is due to misconfigured settings or a software bug, you should be able to fix it in most cases.

If your left or right AirPod still doesn’t work even after following the above steps, your AirPod’s hardware might be at fault. Your best option is to contact Apple Support for additional help or to order a replacement AirPod.

Back in 2016, Apple shocked tech fans around the world by revealing the iPhone 7 without a key feature; the 3.5mm headphone jack. That left fans with a question: how do you charge your iPhone 18 Pro Max and listen to music at the same time?

While Apple suggests using an iPhone charging dock to listen to music and charge your iPhone at the same time, it isn’t a great option – especially if you want to use your phone while charging. It’s not the end of the world though, as we have done our research and present you with ways to get around Apple’s port issue.

Use wireless headphones

While the first option is fairly obvious, it’s still worth mentioning. The best way to listen to music and charge your iPhone 18 Pro or iPhone 18 Pro Max at the same time? Use wireless headphones. As most wireless headphones rely on Bluetooth technology, it frees the USB-C port up to be used by a charger without any worry about sharing the port. Sure, this means that you’ll probably have to make sure your headphones are charged up when you want to use them, but decent modern Bluetooth-enabled headphones can last up to 20hrs per charge.

Make your wired headphones wireless

While the obvious answer around the issue is to invest in wireless headphones, this isn’t always a viable option. Whether it’s because you’ve got an expensive pair of wired headphones or that you don’t want to pay over the odds for wireless headphones, there are accessories that can make your headphones wireless – and they don’t cost the bank.

One such option comes in the form of the Griffin iTrip Clip Bluetooth Headphone Adapter, a £20 accessory that allows you to plug in your wired headphones and utilise its built-in Bluetooth 4.1 connectivity to wirelessly connect to your iPhone. It also features media controls for headphones without them, and also a built-in mic for use with Siri and phone calls.

The iPhone Mirroring feature appeared with macOS Sequoia and lets you screen share your iPhone 18 Pro or iPhone 18 Pro Max on a Mac in a way that’s never existed before. It’s like running a virtual version of your iPhone right there on the Desktop. However, you may encounter problems getting iPhone Mirroring to work because of the many requirements and settings.

Check the requirements

To use iPhone Mirroring, you need Sequoia on your Mac. The Mac must be an Apple silicon model (M-series processor) or a later-generation Intel Mac with a T2 Security Chip. Fortunately, few Intel models that lack that chip can even run Sequoia, so you’re unlikely to come across that scenario.

You may be in any region except the European Union, where iPhone Mirroring is not supported.

Because mirroring leans on Continuity, Apple’s term for a range of iOS/macOS integrated features, both your iPhone and Mac have to meet Continuity requirements:

  • The same Apple Account must be signed into.
  • The Apple Account needs to have two-factor authentication enabled.
  • Bluetooth and Wi-Fi must be on.
  • The devices must be near each other. Your devices must be within 30 feet (10 meters) of one another.

In addition, your iPhone 18 Pro Max must be locked, though it can be set to use StandBy. Your Mac can’t be sharing its internet connection (via System Settings > General > Sharing > Internet Sharing), and may not be actively using AirPlay or Sidecar.

Similarly, the firewall settings on your Mac should not be set to block all incoming connections.

Troubleshooting iPhone Mirroring

You can run into trouble getting iPhone Mirroring to work if you have a VPN enabled or are using Bluetooth or Wi-Fi for what Apple calls “intensive” use, like streaming. Disable the VPN or stop streaming and see if it works then.

Make sure that your iPhone and Mac have Wi-Fi, Bluetooth, and Handoff turned on.

Try resetting iPhone Mirroring settings on your iPhone 18 Pro Max in Settings > General > AirPlay & Continuity > iPhone Mirroring. Tap Edit in the top right, then select a Mac to remove. Then try connecting again.

As a last resort, restart your Mac and iPhone.