Got a tip for us?

Messages

These are the tips and tricks you should be using to get the most out of Messages app on Your iPhone.

No matter what iPhone model you carry or how you usually use it, one thing is a near-universal constant:

You’re gonna spend a ton of time sending and reading messages.

The messages may be from clients, colleagues, or your cousin Crissy from Cleveland (damn it, Crissy!). But regardless of who sends ’em or what they’re about, they’re all popping up on your phone and cluttering your weary brainspace.

My fellow iPhone adorer, I’m here to tell you there’s a better way.

Apple’s iPhone Messages app has gotten surprisingly good over the years. That’s no big secret. If you’re only relying on what you see on the surface within iPhone Messages, though, you’re missing out on some of its most powerful and underappreciated efficiency-enhancing options.

In this article, we’ll explore the best iPhone Messages tips and tricks. They may not be able to cut down on the number of messages you send and receive on your iPhone (DAMN IT, CRISSY!), but they will help you spend less time fussing with ’em. And they might just help you have a more pleasant experience, too.

Without further ado, here are the best tips and tricks to help you use the Messages app on Your iPhone to its fullest potential.

15 Tips and Tricks for More Efficient iPhone Messaging

1. Reply messages from the Lock Screen

Sometimes all you need to do when you receive a message is give a quick reply. The ability to reply from the Lock Screen makes it possible to send off a reply without taking the time to unlock your iPhone, find the messaging app, select the message and then reply. Thankfully, there’s a cool Messages trick you can use to quickly reply to messages from the Lock Screen on your iPhone.

  1. From the Lock Screen, touch and hold the notification that you want to reply to. Or depending on your device, you might need to swipe left over the notification and tap View.
  2. Type your message.
  3. Tap the Send button.

If you have an iPhone X or later and can’t reply to a message from the Lock Screen, head over to Settings > Face ID & Passcode, and turn on the switch next to Reply with Message. If you have an iPhone SE (2nd and 3rd generation), or iPhone 8 or earlier, head over to Settings > Touch ID & Passcode > Allow Access When Locked, and turn on the switch next to Reply with Message.

2. Pin important conversations in Messages

One way you can make your favorite people and your favorite conversations easier to access is by pinning them to the top of the screen so they stay permanently at the top of your chats. This Messages trick can come in handy when you want to save a text to quickly find it later, instead of scrolling through long conversations looking for it.

  1. In Messages, tap Edit or the More button .
  2. Tap Edit Pins , then tap the Pin button .
  3. Tap Done.

You can also touch and hold a conversation to pin it.

3. Set an iMessage Photo and Name on Your iPhone

Do you ever wish you could share your profile photo and name on iMessage like you can do on some instant messaging (IM) apps? Wish no more! There’s a cool iMessage trick that lets you set a personal photo and name, in addition to tweaking their visibility through dedicated privacy settings. When you share this information with someone, iOS will prompt them to update your contact card on their side. This way, your photo stays up to date in their address book without them having to update your contact card manually. Follow the steps below to set an iMessage photo and name on your iPhone.

  1. Start the Settings app on your iPhone.
  2. Scroll down and select Messages.
  3. Tap on Share Name and Photo.
  4. Turn it on.
  5. Choose a photo in addition to your first and last names.
  6. Click on Contacts Only or Always Ask, depending on whether you want this information to be shared automatically with people you know or not.

Voilà! Now, whenever you chat with someone on iMessage, they’ll receive a prompt to update/add your contact card with the shared name and photo after you share it with them.

To change your name and photo, follow the steps below:

  1. In Messages, tap Edit or the More button .
  2. Tap on Edit Name and Photo.
  3. Edit your name. Or tap the image circle to choose an image, photo, emoji, or Memoji.
  4. Tap Done.

4. Turn on Hide Alerts

If there’s a contact in your Messages app you do not wish to get notifications for, a hidden Messages trick allows you to mute notifications for the contact on Your iPhone.

The best part? The contact won’t be notified that you muted them, and you can steer clear of a crowded Notification Center.

So, let’s take a look at the steps required to mute a text conversation on an iPhone.

  1. Open the Messages app on Your iPhone.
  2. Tap to open the contact you want to mute.
  3. Tap on the contact’s icon at the top of the screen.
  4. Turn on the toggle next to Hide Alerts. You will see a bell icon with a slash on it to show a contact has been muted.

Here’s another method to silence messages from a contact on your iPhone:

  1. Start the Messages app on Your iPhone.
  2. Find the contact in your list of recent conversations.
  3. Swipe left on the contact you want to mute.
  4. Tap on the bell icon. You will notice the same bell con appear next to the conversation to indicate that it has been muted.

5. Hide Messages on Your iPhone

We all hide messages for different reasons. It could be that you don’t want your partner to see them because it can ruin the perfectly good surprise you’ve planned for them, or that your workplace strongly frowns upon receiving texts during work hours.

No matter the reason, it only takes a little effort to hide text messages on your iPhone.

Here’s how to hide messages from a specific person on Your iPhone:

  1. Open the Phone app.

  2. Select Contacts on the bottom menu and then find and tap on the contact whose messages you want to hide.

  3. Tap Edit on the top right corner.

  4. Scroll down, and hit Delete Contact, then tap Delete Contact again on the pop-up window to confirm.

  5. Open the Settings app and scroll down to and tap Messages.

  6. Scroll down and turn on the toggle next to Filter Unknown Senders under the ”MESSAGE FILTERING” heading.

The message sent from the person you removed (or anyone not in your contacts) will now go into a list kept separate from the rest of your messages. To access it, tap Filters on the top-left corner of the Messages app, and then tap Unknown senders.

6. Search for Specific Messages on an iPhone in Messages App

You can search for text messages you’ve sent on your iPhone, meaning that you never have to scroll for hours through your conversations to find a specific message.

  1. Open the Messages app from your iPhone’s home screen.
  2. To access the search bar, swipe down. It’ll be above your most recent message.
  3. Type the phrase, word, or number you’re looking for in the search bar.
  4. As you type, messages containing what you’ve typed will appear on the screen.
  5. Next, tap on the message thread containing the phrase you’re looking for. It will then jump to that conversation, and highlight the exact message containing the phrase you typed.

7. Use Messages on Your iPhone to Share Your Location

This Messages trick lets you send your current location to someone from your iPhone, or share your location even while you’re on the move on an iPhone from the Messages app.

  1. Open a conversation with the person whom you want to send your location to.
  2. Select the name of the person or group at the top of the conversation.
  3. If you want to send your current location, tap ”Send My Current Location.”
  4. If you want to share your location for a period of time, tap "Share My Location," and then choose how long you want your location to be visible — Share for One Hour, Share Until End of Day, or Share Indefinitely.
  5. Tap Done.

8. Insert an Emoji into Text Message Using Siri

Starting with iOS 16, anywhere you can dictate text using Siri, you can verbally insert emojis. That includes in Messages, email, Notes, and elsewhere.

Inserting an emoji into a text message using Siri is very simple and straightforward. Just do this:

  1. Start the Messages app on Your iPhone.
  2. Navigate to the text field and tap the Microphone button at the bottom of the screen.
  3. Dictate your text message as you normally would. When you’re ready to insert the emoji, say the name of the emoji, such as ”smiley face emoji." Continue dictating as desired.
  4. Tap the Microphone button again to stop dictating, and proceed to send your text message.

9. Make a Group Chat on iPhone

Group chats can be a useful tool in both your professional and personal life. Whether you’re planning a happy hour, surprise baby shower, or you want to text hilarious memes to your besties, a group chat is a great way to relay information to multiple people at once.

Make sure you have both iMessage and MMS turned on in Settings > Messages.

  1. Open the Messages app on your iPhone. It looks like a white chat bubble inside a green box.
  2. Tap the Compose button located at the top-right corner of the screen.
  3. Begin entering the names of the people you want to include in the group chat in the To: section. You can also tap the plus button to select people from your contacts.
  4. Type out your message, then tap the Send icon. It looks like an arrow pointing up.

Quick tip: When you add recipients to a new group chat, if one member of the group does not have an iPhone, the header above your recipient list will read New Group MMS. If everyone in the group has an iPhone the header above your recipient list will say New iMessage.

10. Unsend an iMessage on Your iPhone

Have you ever sent a text message only to immediately wish that you hadn’t? Thankfully, there’s an iMessage trick to unsend text messages on iPhone. With this iMessage trick, you can remotely delete a text message you’ve sent, even if the recipient has already seen it.

After you send an iMessage, you’ll have 15 minutes to unsend it and delete it from everyone’s phone.

Unsending only works when you’re texting another person who has iOS 16 or newer.

  1. In the Messages app, open the chat thread containing the sent message that you want to unsend.
  2. Long press the sent message that you want to fix.
  3. Hit Unsend from the pop-over menu. Your text message will explode into blue dust. Once it’s gone, everyone in the conversation will only see a notice saying that a message was deleted.

(If you don’t see the Unsend option, at least fifteen minutes have elapsed and you can no longer unsend it.)

11. Edit a Sent iMessage on iPhone

Even with autocorrect turned on, it’s easy to make typos when texting. That’s why a cool iMessage trick lets you edit texts even after you send them, so no one has to see your fumble-fingered messages.

Before anything, please note the following:

  • You can only edit iMessages — in other words, texts sent to other Apple devices, which appear on your device in blue bubbles. It doesn’t work with SMS messages, the kind that non-Apple phones like Android use, which send inside green bubbles.
  • You can edit messages for up to 15 minutes after sending them. After that point, the Edit option will disappear.
  • Anyone that you’re texting will see the word Edited appear underneath your new message. If they tap it, they’ll be able to see the original text and all the edited versions you’ve made.

With that in mind, follow the steps below to edit sent iMessage on iPhone:

  1. In the Messages app, open the chat thread containing the sent message that you want to edit.
  2. Long press the sent message that you want to fix. (If you don’t see the option, the message was sent over 15 minutes ago and you cannot edit it.)
  3. Tap Edit from the pop-over menu.
  4. You’ll now be able to edit the text of the message however you want — you just can’t erase the entire thing. When you’re done with it, tap the checkmark icon to save and send it again. The new version of your message will replace the original on every device you’re texting.

12. Recover Deleted Messages on iPhone

If you’ve accidentally deleted some text messages that you meant to keep, don’t panic — you can use a hidden messages trick to recover lost text messages on your iPhone.

With iOS 16, you can recover all text messages within one month of deletion.

Here’s how to recover a deleted message on an iPhone running ‌iOS 16.

  1. In the Messages app, navigate to the main Messages screen where filters like Known Senders and Unknown Senders can be found.
  2. Tap Recently Deleted.
  3. Tap the messages that you want to recover so that a blue check mark appears next to each one. (Note that each message show the days remaining before automatic deletion.)
  4. Tap Recover in the bottom-right corner of the screen.
  5. Tap **Recover Message[**s] in the pop-over to confirm.

13. Report Junk SMS and MMS Messages

In ‌iOS 16 and higher‌, you can report SMS/MMS messages as junk in the Messages app which will alert Apple and your network provider and delete the message in question.

To report a message from an unknown sender as junk on an iPhone running ‌iOS 16‌ or higher, follow the steps below:

  1. Navigate to the message and tap the blue Report Junk option that appears below it.
  2. Tap Delete and Report Junk in the pop-over to confirm.

14. Mark a Message as Unread

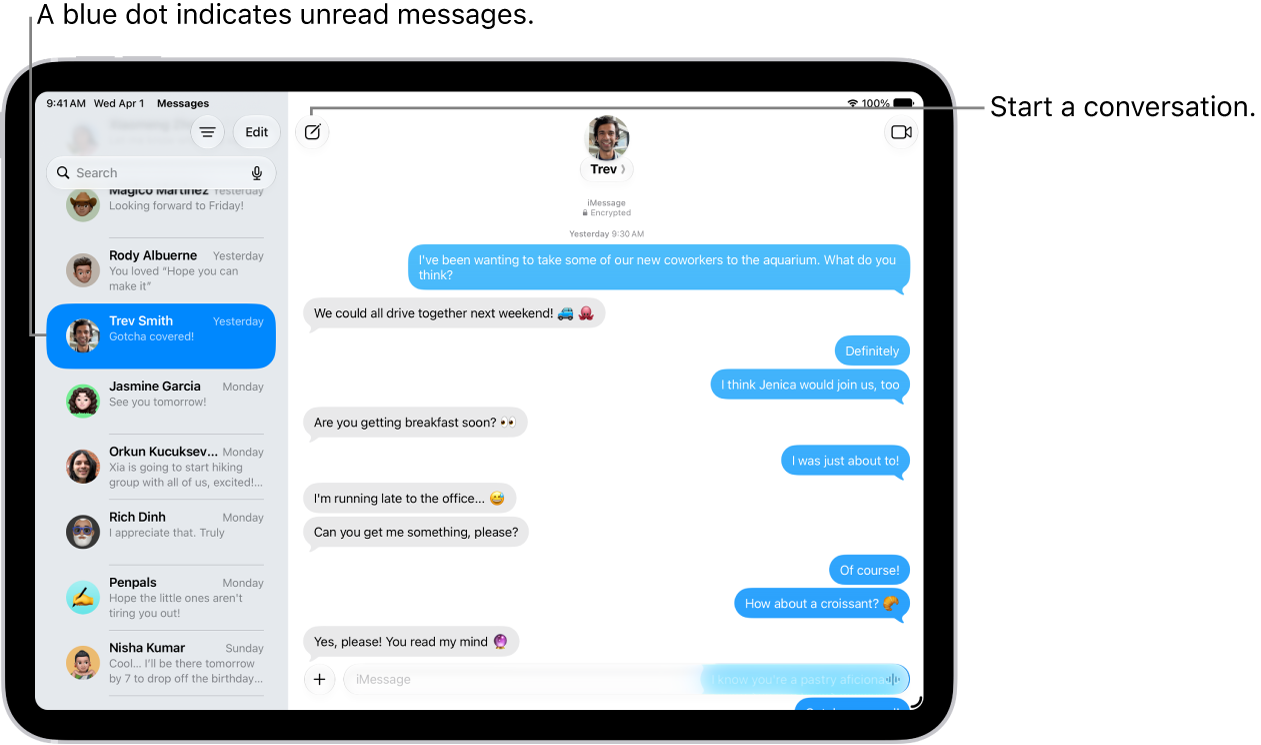
In ‌iOS 16 or higher‌, you can mark an SMS message or iMessage as new, thereby returning the blue dot to the message to remind you to return to it.

Marking a message as unread is pretty useful because it means if you get a message and don’t have time to read it or address its contents, you can mark it as unread so that it appears as a new message again.

Here’s how you mark a Message as unread on an iPhone running ‌iOS 16‌ or higher.

  1. Open the Messages app, and find the message in the conversations list that you want to mark as unread.
  2. Long press on the message in the conversations list.
  3. Tap Mark as Unread from the pop-over menu.

15. Add Reactions to Texts or iMessages on an iPhone

Reacting to text messages on your iPhone stamps them with a small emoji so everyone can see how you feel. Here’s how to react to a text message in the iPhone Messages app.

The process of reacting to a text message is even simpler than typing out a text message:

  1. Tap and hold on the text message you want to react to.
  2. Start Messages app on your iPhone and go into the conversation you want to add reaction.
  3. Tap and hold on the text message you want to react to.
  4. A popup will appear with various different reactions, in the form of emojis. These include symbols for love, like, dislike, laugh, exclamation reactions, and more.
  5. Tap on the reaction you want to send.
  6. An icon will appear on the corner of the text you reacted to.

You can undo a reaction by repeating the same steps mentioned above. Just tap and hold, then tap on the same emoji you already added to remove your reaction. You can also open the same popup by tapping on the icon instead of tapping and holding on to the text.

Your Favorite iPhone Messaging Tips and Tricks?

These are our favorites iPhone messaging tips and tricks. We hope they will enhance your user experience with messaging on your iPhone. What are your favorite iPhone Messages tips and tricks? Drop a comment and let us know.

Is your iPhone 13 or iPhone 13 Pro suddenly not ringing or making any sound when you receive an inbound message? Have you recently missed an important text because your iPhone 13 or iPhone 13 Pro didn’t notify you? Wondering why you didn’t get an alert when someone recently texted you? No text or message notification coming in even from your favorites or in emergencies?

If so, you are not alone! Several users have reported their iPhone 13 has suddenly stop alerting them when new texts or messages arrive. Naturally, this issue causes a lot of trouble for folks, especially when missing those critical messages from family, friends, and workplaces.

See also: What To Do If iPhone 13 / 13 Pro Won’t Send Text Messages

It’s really frustrating when your iPhone 13 or iPhone 13 Pro is not alerting you of texts! How it’s supposed to work: you receive any new message, your iPhone alerts you with a sound, an on-screen alert, and a vibration.

This process should work for all new incoming messages, whether it’s an iMessage or an SMS text. But if you find it’s not working as it should, and your iPhone 13 Pro not alerting you to new texts, we’ve got some tips to fix it quickly!

There are many reasons why your iPhone 13 or iPhone 13 Pro may fail to receive text notifications, including problems with the cellular network or simple software oversights. Problems may only reveal themselves once they are fixed.

Follow these instructions to get your iPhone 13 or iPhone 13 Pro receiving text notifications again.

Check Your iPhone Text Message Sound Effect & Select a Text Tone

Yup, sometimes it’s the easy things that fall through the cracks. So let’s make sure that you selected a tone for your incoming text messages!

Go to Settings > Sounds & Haptics > and scroll down to the section Sounds and Vibration Patterns. In this section, look for Text Tone.

If this says None, tap it and change the alert to something you like.

Use Your Text Tone Default!

Here is another quick solution, just change your text sound to the default and simple Ding or Note. Readers noticed problems with texts not consistently sounding alerts when using longer alert tones. So stick with the defaults!

To update, go to Settings > Sounds & Haptics > Text Tone and change to the default, listed in parenthesis such as Note (Default.)

Alerts Not Sounding For Just A Few Contacts? Look at your custom settings for each contact

Pull up one of the contacts that’s not alerting you (open either the Phone or Contacts app)
Tap Edit in the top right corner
Scroll down to Text Tone and look at the selected sound
If none is listed, tap and select a new Alert Tone from the list and tap Done

Look at Date & Time

It’s always good to check that our date and time are correct and ideally toggle on “Set Automatically.” If your iPhone 13 or iPhone 13 Pro time is incorrect, this may explain why you aren’t getting notifications and alerts promptly.

A mismatch with your Date&Time can cause a whole host of problems. So let’s check it out. Go to Settings > General > Date & Time and toggle on Set Automatically. If this is already on, toggle it off, wait 20 seconds, and turn it back on again.

Check your Message app settings for Filtering Unknown Senders and Blocked Contacts

If you are not receiving texts from folks and businesses that aren’t in your Contacts app, you likely enabled the settings for Filter Unknown Senders. This feature automatically turns off notifications for messages from people and others who aren’t saved in your Contacts.

To change this setting, go to Settings > Messages > Unknown & Spam and turn off Filter Unknown Senders.

Take a look at your Blocked Contacts list

You may have inadvertently added someone to your blocked list.

If you blocked someone in FaceTime, iMessage, the Phone app, or in the Mail app, that block is active on all those apps. So when you block a phone number or contact, messages that are sent or received by that contact won’t be delivered. Blocked contacts can still leave a voicemail, but you won’t get a notification for that voicemail. And when you block an email address from Mail, it goes to the trash folder.

To look at your blocked contacts list, go to Settings > Messages. Under SMS/MMS, tap Blocked Contacts. Swipe to remove them from the blocked list.

You can also find this blocked contact list in the these apps:

  • The Phone App. Go to Settings > Phone. Tap Blocked Contacts to see the list
  • FaceTime. Go to Settings > FaceTime. Under Calls, tap Blocked Contacts
  • The Mail App. Go to Settings > Mail. Under Threading, tap Blocked.

Update Notification Banners

Often, your new text notifications appear but disappear so quickly that you may just miss seeing them. Fortunately, there’s a way to change your text banners from temporary to persistent.

Persistent banners require you to take action before they disappear, while temporary banners go away after a short time on-screen. Both types appear at the top of your screen.

So if you’re missing notifications, try changing to persistent banners and see if this makes a difference. Go to Settings > Notifications > Messages and just below Show as Banners, tap on the icon for Persistent.

Confirm your selection by checking that the word Persistent is circled.

No Text or Message Notification on iPhone 13 or iPhone 13 Pro? Check Do Not Disturb (DND)

First, check and see if you’ve accidentally (or purposefully) turned on Do Not Disturb. Go to Settings > Focus > Do Not Disturb and make sure it’s toggled OFF.

Check if you accidentally turned on Hide Alerts

Sometimes the crescent moon icon doesn’t even show up when DND is activated for a single contact, so it’s a good idea to check that contact, even if you don’t see the crescent moon.

Tap the Message thread and then tap on the name at the top. Edit the contact’s details by pressing the “i” and turn OFF Hide Alerts (or Do Not Disturb.)

Alternatively, if you already know which contacts’ texts are not alerting, tap on a message from the contact and press the “i” and toggle OFF Hide Alerts.

Look at Bluetooth

If you’ve recently connected to a Bluetooth device, sometimes that connection remains and iOS sends alerts to it rather than your iPhone.

To check, go to Settings > Bluetooth and check if any of your Bluetooth devices are connected and routing sound. If so, disconnect or unpair that Bluetooth device.

Alternatively, if you’re not currently using any Bluetooth device, disconnect devices by swiping up Control Center or turn Bluetooth off by going to Settings > Bluetooth > Off.

Paired with an Apple Watch?

If your iPhone pairs to an Apple Watch, by design your paired iPhone does not chime when a new text arrives. Instead, Apple routes your alerts to your Apple Watch, especially when the iPhone is locked.

As of now, there is no option to play a sound alert on BOTH your Apple Watch and your iPhone at the same time. It’s one or the other, based on the locked status of your phone.

The rule of thumb is if your phone is unlocked, notifications go to the iPhone. If your phone is locked, notifications go to your watch.

If you’re experiencing a problem with notifications not routing to your Apple Watch correctly, it’s best to unpair and then repair your Apple Watch to your iPhone.

Check Your Side or Ring/Volume (Mute) Switch

Take a look at your device’s silent switch button and toggle it OFF.

If your switch shows orange, it’s on. That means it’s in silent mode and vibrates for all alerts and incoming calls
When in silent mode, the alarms you set in the Clock app still sound and calls from Favorite contacts still ring.

Change What Sends & Receives

Go to Settings > Messages > Send & Receive. Look under the section: iMessage At Can reach you. If checked, deselect your email address. Select only your phone number and see if that solves the problem.

Turn Notifications ON

It’s common to turn notifications off inadvertently. So best to make sure they are indeed on. Check Settings > Notifications > Messages > Toggle ON Allow Notifications.

Next, make sure you choose an excellent alert sound. Go to Settings > Sounds & Haptics > Text Tones. And pick an alert sound that you like and that you’ll definitely hear.

No notifications or alerts when the phone is locked?

Not getting notified of messages coming in when iPhone 13 or iPhone 13 Pro is locked? If you don’t see or hear any alerts when your iPhone 13 locks, enable the Show on Lock Screen setting.

Go to Settings > Notifications > Messages and verify that Show on Lock Screen is toggled on.

For sound alerts, also check that Settings > Notifications > Messages > Sounds has an alert type selected and does not display None unless that’s the setting you want.

Go to Settings > Face ID. Enter your passcode to validate access
Scroll down to Allow Access hen Locked
Toggle On Notification Center
And toggle on anything else you want to appear on your device’s Lock Screen.

Update Your iPhone to the Latest Version of iOS

It’s common for iOS updates to introduce new problems to your iPhone. In fact, previous iOS updates have been known to cause problems with text notifications not working on iPhone 13.

When this happens, Apple usually releases a new update in the next couple of weeks to fix it. Make sure you’re running the latest version of iOS so you benefit from Apple’s repair patches.

To update your iPhone software:

Connect your iPhone to a working Wi-Fi network.
Go to Settings > General > Software Update.
Wait for your iPhone to check for new software updates.
Download and install any available iOS updates.

Restart your iPhone

If nothing helped thus far, restart your iDevice by going to settings > General > Shut Down and sliding it off. Then turn on as usual.

If that doesn’t help, try a forced restart

Press and quickly release the Volume Up button. Then press and quickly release the Volume Down button. Finally, press and hold the Side button until you see the Apple logo
A forced restart is a hardware level restart of your device. It immediately cuts power and interrupts all processes. That means it clears what’s in the RAM, which in turn often fixes minor issues. And don’t worry, there’s no data loss–all your apps, games, photos, documents and login settings remain as is!

After performing a forced restart, make sure you check your Notification Settings to ensure everything is set-up as you want. Sometimes a forced reboot changes specific settings back to defaults. So the best insurance is to double or even triple check!

Reset Network Settings

. The iPhone Network Settings are a group of preferences that control how the phone accesses cellular networks. Errors in those settings could interfere with sending texts. To solve these problems, reset your Network Settings. You can do this by going to Settings > General > Transfer or reset iPhone > Reset > Reset Network Settings.

Don’t worry; this action DOES NOT impact your data, including apps, photos, documents, files, and so forth. It does wipe out any WiFi passwords, so write those down before you reset your network settings.

Reset all Settings

If none of the tips work for you, let’s try and reset all your iPhone settings. Don’t worry; this action DOES NOT impact your data.

But it does return all your personalized settings to defaults, meaning you need to re-enter things like passwords, Touch ID fingerprints, WiFi passcodes and so forth. So, yup, it’s very time-consuming, but many of our readers report it works.

Go to Settings > General > Transfer or Reset iPhone > Reset > Reset All Settings

iPhone 13 not getting text notifications: Fixed

Hopefully, text notifications are working for new messages on your iPhone 13 or iPhone 13 Pro. If so, let us know what fixed it in the comments!

Is your iPhone 13 or iPhone 13 Pro not Sending text messages? Worry not, the problem seems fixable.

When your iPhone 13 or iPhone 13 Pro can’t send text messages, you may feel cut off from friends and family. There are many reasons why your iPhone 13 or iPhone 13 Pro may fail to send text messages, including problems with the cellular network insufficient airtime, wrong settings, or simple software oversights.

See also: iOS 15: Cellular Data Not Working On iPhone? Fix!

If your iPhone 13 or iPhone 13 Pro can’t send text messages, follow these simple tips to fix the issue.

  • If your iPhone 13 or iPhone 13 Pro is not sending text messages, first make sure your phone has service, as the issue may be with the cellular network, not your device itself.
  • Check in your iPhone’s Settings app that various messaging options are turned on so that your phone can dispatch texts if iMessage fails.
  • Turning your iPhone 13 off and back on again can usually refresh the software and restore better signal connections, enabling your text messages to send once again.

‘why is my iPhone 13 not sending text messages?’

There are a number of reasons why your iPhone 13 or iPhone 13 Pro is not sending text messages. Let’s review those possible reasons and then cover some troubleshooting steps.

Cell Service Issues Can Prevent iPhone 13 from Sending Text Messages

Before proceeding with troubleshooting, let’s cover the most obvious service related reasons why an iPhone 13 or iPhone 13 Pro won’t send a text message:

  • The iPhone has no cellular signal – no SMS text messages can be sent without a traditional cell signal
  • The iPhone has no service – if the iPhone does not have a cellular service plan active, it will not be able to send text messages
  • The cellular reception is so bad that iPhone 13 can’t send a text message – if service is awful (think 1 bar or 1 dot or cycling between “Searching…” and dots), the phone likely won’t be able to send or receive text messages
  • The cell number you are reaching is disconnected – this is often the problem if the recipient has recently changed a phone number or you have multiple contact numbers for the same person, so be sure you are addressing the proper phone number
  • AirPlane mode is enabled, thereby disabling the ability to send messages and text messages – toggling AirPlane mode off will fix this specific issue quickly

It’s pretty obvious when a text message doesn’t send (or iMessage too), you’ll see a little red (!) bang exclamation sign next to the message, usually with a ‘not delivered’ message.

If any of those service related issues are the problem, you’ll need to either regain a stronger cellular signal with the iPhone, or reactivate a cellular service plan if applicable, or insure the proper contact is being messaged. If the cellular connection or service is not the issue, continue on with troubleshooting techniques to fix SMS transmission from iPhones.

If you are not able to send texts on iPhone 13 or iPhone 13 Pro, these troubleshooting steps can help you fix the issue. Before getting started, it’s always a good idea to test your ability to send texts to a few different people, if possible. That could yield some clues as to what the problem might be.

Quit and restart the Messages app

Sometimes apps need to be quit and restarted to solve problems related to memory management. Force-quit the messaging app, then try again.

Check the phone number

Confirm that you are texting the right number. If you entered the number wrong or the intended recipient now has a new number, you may be prevented from sending the text.

Enable send as SMS

Most iPhone users have iMessage enabled, but some may have accidentally (or intentionally) turned off SMS support. So, make sure that your iPhone can send a message as a regular text message when iMessage isn’t available. You can do this by going to Settings app and tap on Messages. Scroll down and then turn on the toggle for Send as SMS.

Check the reception

Mobile networks are sometimes unpredictable. If you see a few or no bars, step outside or find a higher place indoors. If you’re in your home, you can use a signal booster to improve reception throughout the home.

Turn Off and On Airplane Mode

Open the Settings app and tap on the icon for Airplane Mode to enable it. After 30 seconds, tap on the same toggle to disable it. Now, Check if Your iPhone 13 is sending texts. It should work.

Restart Your iPhone

Even after following the above fix, if you have trouble sending texts on your iPhone 13 or iPhone 13 Pro, try restarting your device. Often times rebooting an iPhone is sufficient to remedy problems like this. You can do this by going to Settings > General > Shut Down. After a minute, turn on your iPhone and see if you can send messages. The issue will most likely be fixed.

Remove & Reinsert iPhone’s SIM Card

For this, you can use the ejector tool or a pin to remove the SIM card carefully. Next, slowly and with caution, rub it on a soft dry cloth and insert it back.

See also: iPhone 13 / 13 Pro Not Detecting SIM Card? Fix

Update iOS

Install any outstanding operating system updates, even if an update doesn’t seem relevant to the problem you experience. Some bug fixes and other repairs may address operations or features the texting app uses. Wait for any updates to finish before texting.

  1. Open the Settings app and tap on General.
  2. Next, tap on Software Update. If you see a pending update available, tap on Download and Install.

Once the process completes, there is a strong possibility that the iPhone 13 or iPhone 13 Pro not sending texts issue will be successfully addressed.

Update Carrier settings

Your iPhone 13 has hidden carrier settings that help your phone communicate with the cellular network to place calls, transmit data, and send texts. Wireless carriers periodically update these settings. Make sure you have the latest version by updating your carrier settings. You can do this by going to Settings > General > About.

If there is an update available, the option to update will appear here.

Check your cellular provider’s website

If nothing else works, look for any alerts or updates concerning network issues. Network problems may not be immediately obvious to end users, or may only affect certain functions.

Make Sure your iPhone’s Date and Time is correct

Not just text messages, but several applications and services won’t work properly if your iPhone is set to the wrong time zone. To check if your iPhone has the correct time and date, go to Settings app > General > Date & Time > turn on the toggle for Set Automatically.

Reset Network Settings on iPhone

If you think that network is the culprit behind the problem of iPhone 13 or iPhone 13 Pro not sending texts messages, you can Reset Network Settings. Resetting network settings can be a pain because you lose wi-fi passwords and custom DNS, but it can also be a cure-all solution for many common networking issues with iPhone, including the inability to send messages. You can do this by going to Settings > General > Transfer or reset iPhone > Reset > Reset Network Settings. Enter your iPhone passcode and confirm.

Reset All Settings

If the above less severe reset did not work, You can do this by going to Settings > General > Transfer or reset iPhone > Erase all content and settings. The consequences of this are more significant.

It will erase or return to default, all settings you have ever changed on your iPhone. This includes keyboard settings, Home Screen layout, Wi-Fi, Bluetooth, VPN, Location Settings, and more. But, it won’t delete any personal data like photos, videos, apps, music, etc.

Contact Your Carrier

Finally, if nothing helps, contact your mobile carrier. You can reach them via email, Twitter, or use their mobile app. Make sure there is no pending bill or unpaid charges that have resulted in the suspension of the service.

That’s all!

These are some of the ways to fix iPhone 13 or iPhone 13 Pro not sending texts Messages issue. I hope one of the solutions helped you out of this problem. Know of any other tricks to resolve an inability to send text messages on iPhone 13 or iPhone 13 Pro? Drop a comment and let us know!

Is your iPhone suddenly not ringing or making any sound when you receive a new message? Did you miss important messages, emails, or other alerts because your iPhone didn’t notify you? Wondering why you didn’t get an alert when someone sent you a text message? No text or message notification coming in even from your favorites or in emergencies? In this article, I’ll show you what to do when iPhone text sound is not working.

A couple of users including our own readers have reported that their iPhone and iPads suddenly stop alerting them when new texts or messages arrive. Indeed, this issue is quite depressing, especially when you miss those important messages from family, friends, and place of work.

Here’s how it’s supposed to work: you receive a text message, your iPhone or iPad alerts you with a sound, an on-screen alert, and a vibration. This process should work for all new inbound messages, whether it’s an iMessage or an SMS text. But if you find it’s not working as expected, and your iPhone’s not alerting you to new texts, this troubleshooting guide will help you fix it quickly!

It’s very frustrating when you lose text sound notifications with incoming texts whenever you receive a text message. That’s why we decided to write this guide to explain what to do when your iPhone or iPad is not making any sounds when you get a new message.

This article applies to all iPhone and iPad models including: iPhone 11, iPhone X, iPhone 8, iPhone 6, iPhone 5, iPhone 6s, iPad Air, iPad 2 and iPad Pro.

See also:
Apple Watch Not Getting Notifications From iPhone, Fix

How to fix sound notification problems on iPhone and iPad

If iPad or iPhone notification sounds are not working, meaning if your iPhone (or iPad) does not let you know when you receive an incoming text message (such as iMessage), here is how to fix:

Before you jump into solutions, ensure that your device is running the latest version of iOS or iPadOS. On your device, head over to Settings > General > Software Update. And if an update is available, download and install.

Solution #1. Make sure that the Do Not Disturb is not turned on

One of the most common reasons why iPhone text sounds are not working is because Do Not Disturb is turned on. When this feature is turned on, all calls, texts, and other alerts on your iPhone will be silenced.

To turn off Do Not Disturb, launch the Settings app on your iPhone and tap Do Not Disturb. Then, tap on the switch next to Do Not Disturb to turn it off. You’ll know Do Not Disturb is disabled when the switch is positioned to the left.

Solution #2. Make sure that Do Not Disturb is not enabled for any individual contacts

You can check this by opening the Messages app where you can see your messages.  Do you see a moon sign on any message? If there is, it means that you’ve enabled Do Not Disturb for that particular contact: You can disable this by tapping “Details” and turn off “Do Not Disturb”

Solution #3. make sure that “Allow Notifications” is turned on

Are iPhone text sounds not working for a single app? Your iPhone allows you to turn off all notifications for specific apps, which may be the issue here. Head over to Settings -> Notifications and tap on the app that you’re not getting notification sound from. Make sure the switch next to Allow Notifications is turned on. You’ll know the switch is on when it’s green!
See also:
iPhone Notifications Disappearing From Lock Screen? Fix

Solution #4. Make sure your device is not on silent mode

Are you receiving notifications on your iPhone, but it doesn’t play a sound when you receive notifications? Well. Take a look at the switch located at the left side of your iPhone. This is called the Ring / Silent switch, which puts your iPhone into Silent mode when the switch is pushed towards the back of your iPhone. Push the switch towards the front of your iPhone to hear an audible alert when you receive a notification.

If the switch is pulled towards the front of your iPhone, but it still doesn’t play a noise when you receive a notification, try the next solution.

Solution #5. Select a Text Tone

Make sure that you selected a tone for your incoming text messages. To do this,head over to Settings > Sounds & Haptics > and scroll down until you see the Sounds and Vibration Patterns section. In this section, look for Text Tone. If it’s set to None or Vibrate Only, tap it and change the alert to something else. 

Solution #6. Use Your Text Tone Default

Some users including our own reader found a quick solution, simply change your text sound to the default and simple Ding or Note. Users faced problems with texts not consistently sounding alerts when using longer alert tones. So stick with the defaults. To do this, Start the Settings app and go to Sounds & Haptics > Text Tone and change to the default, listed in parathesis such as Note (Default.)

Solution #7. Restart the Messages app

To force the Messages app to close, on iPhone 8 or earlier, press the home button twice, find the Messages app, and swipe up to close. On iPhone X or newer, swipe up from the bottom of the screen, find the Messages app, and swipe up to close. Then relaunch again.

Solution #8. Restart your device

A minor software glitch could be the reason why your iPhone text sound is not working. Sometimes restarting your iPhone can fix these sorts of minor software glitches. Here is how you can restart your iPhone or iPad:

  • iPhone X, 11 or later: Press and hold the volume up (or down) and the side or top buttons together until the power off slider appears. And slide the slider and wait for your device to turn off completely. Press and hold the side or top button until the Apple logo appears.
  • iPhone 8 or earlier and other iPad models: Press and hold the side or top button until the power off slider appears. Then drag the slider and wait for your device to turn off. Press and hold the side or top button until you see the Apple logo.

Solution #9. Force restart your device

A forced restart is a hardware level restart of your device. It immediately cuts power and interrupts all processes. That means it clears what’s in the RAM, which in turn often fixes minor glitches. And don’t worry, you will not lose any of your data – all your apps, games, photos, documents and login settings remains intact!

  • On an iPhone 6S or earlier as well as all iPads with home button & iPod Touch 6th generation and earlier, press Home and Power button at the same time until the Apple logo appears.
  • For iPhone 7 or iPhone 7 Plus or iPod touch 7th generation: Press and hold both the Side and Volume Down buttons until the Apple logo appears.
  • On an iPad with no home button or an iPhone 8 and higher: quickly press and let go of the Volume Up button. Then quickly press and let go of the Volume Down button. Finally, press and hold the Side/Top button until the Apple logo appears.

Once you do a forced restart, be sure to check your Notification Settings to ensure everything is configured the way you want. Sometimes a forced reboot changes specific settings back to defaults. So it’s a good idea to double or even triple check!

Solution #10. Reset your device

If the above tips did not work for you, try to reset all your iPhone or iDevice settings. Don’t worry; resetting your device DOES NOT erase your data. However, it does return all your personalized settings to defaults, meaning you need to re-enter things like passwords, Touch ID fingerprints, WiFi passcodes and so forth. So, it might take a bit of your time, but in most cases, it works.

Start the Settings app and go to General > Reset > Reset All Settings

Tex sounds are working on your iPhone once again and you aren’t missing important messages and alerts. Next time you find iPhone text sounds not playing, you’ll know exactly how to fix the problem! If you have follow-up questions or other experiences to share, leave them in the comments section below. I look forward to hearing from you!

Though not a common issue for iPhone users, it can be very frustrating to find iPhone deleting messages from the inbox by itself. At times, iPhone text messages disappear from inbox after iOS software updates or after a restart, but there are also situations where iPhone text messages just disappear from iPhone suddenly. More specifically, here are some issues that users are having:

  • The Messages app is only showing a blank, white screen, meaning all messages (text – SMS- and iMessages) seem to have disappeared and gone; however still red number badge indicates that there are some new messages.
  • Unable to send and receive new messages.
  • The send (green or blue) arrow button is not working.
  • Text message notifications and previews on the lock screen seem to be working.

The good news is that, if you have
made a backup for your iPhone
before, you can easily recover disappeared iPhone messages by
restoring your iPhone from iTunes backup
or from iCloud backup.

See also:
Cannot Send or Receive Messages on Your Mac? Fix

In this article, we’ll explain exactly what to do if you find iPhone deleting messages by itself. We will also explain why iPhone text messages disappear from inbox which will help to stop it from happening in the future.

How to fix when text messages disappeared from iPhone or iPad

Try these fixes if the Messages app stops responding, or you encounter a problem while trying to access your messages. After each step, please check to see if your problem is fixed.

  1. Restart your iPhone. To do this, head over to Settings > General > Shut Down (iOS 11 or higher)
  2. Force restart your device. Here is how to hard reset your iPhone:
    • If you own iPhone 8, iPhone X/ XR/XS(Max), or iPhone 11/11 Pro(Max), quickly press and release the Volume Up button, quickly press and release the Volume Down button, then press and hold the Side button until you see the Apple logo.
    • If you own iPhone 7, iPhone 6 or earlier, hold down the Side button and Home button together, then release when the Apple logo appears.
  3. Turn on Airplane mode and wait about 20 seconds and turn it back off.
  4. Head over to Settings > Messages > Keep Messages and select 30 days. Please note, this option will delete your old messages. Consider skipping this if you do not want that and tap Delete.
  5. Head over to Settings > Messages and turn off iMessage and then MMS Messaging and wait for about 20 seconds and turn them back on.
  6. Update your iPhone to the latest version of iOS. To do this, head over to Settings  >  General > Software Update.
  7. Factory Reset your iPhone and restore from a recent backup file to fix your issue. Before you jump into it, ensure that you have a backup file. To check this, head over to Settings > [Your Name] > iCloud > Storage > Manage Storage > Back ups, to view all of your backups.
  8. If you do not have any back up, you may want to back up your iPhone. To do this, head over to Settings > [Your Name] > iCloud > iCloud Backup and then tap Back Up Now. Please note, you can turn on iCloud Backup to automatically back up your device.
  9. Now you have a backup file, the next step is to head over to Settings > General > Reset, then tap “Erase all content and settings.” Just follow the onscreen prompts. Be sure to choose Restore from iCloud Backup.

There you have it! If your iPhone text disappears, the above troubleshooting tips should resolve your issue. Next time you see Messages disappearing on iPhone you’ll know what to do. Thanks for reading and feel free to ask any other questions you may have in the comments section.