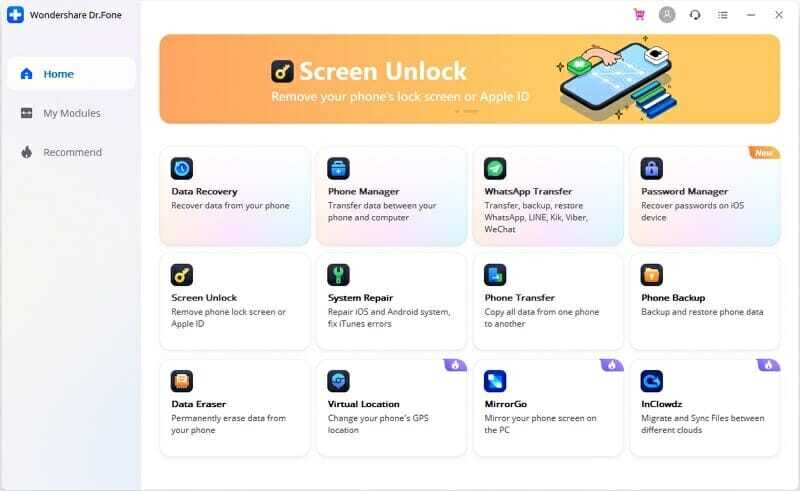
Got a tip for us?

How-To

Want to learn how to fast charge your Apple Watch Ultra? We explain everything you need to know.

One of the big new features added to the Apple Watch 7 and carried over to the Apple Watch Ultra was fast charging. Here’s how to ensure you’re charging your Apple Watch Ultra as quickly as possible.

While this might seem a little obvious, the Apple Watch Ultra will only utilise its fastest charging speeds when used with a certain cable and plug – so it’s best to make sure you’re doing it right.

There are also no visual cues as to how fast the Apple Watch Ultra will charge when you plug it in, but following this guide will make sure that you do it properly. In terms of how quickly you can get from 0-100%, in our review we got a full charge in an hour, and 20% (enough for a night’s sleep) in 10 minutes.

What you’ll need to fast charge the Apple Watch Ultra

  • An Apple Watch Ultra (this will also work with Apple Watch Series 8 and Apple Watch Series 7)
  • The included USB-C charging cable (it needs to be this specific one)
  • A plug with a USB-C port

How to charge Apple Watch ultra faster

Step 1: Get your USB-C plug ready

To fast charge an Apple Watch Ultra, you need to have a USB-C plug ready and these are no longer included with the wearable. Instead, you could use the same plug you use to charge a recent iPhone, iPad or USB-C laptop.

Step 2: Attach the cable that came with your Apple Watch

Once you’ve got your USB-C plug, you’ll need to get the USB-C to Apple Watch magnetic charger that’s included with the Apple watch Ultra. You need to use this specific cable to charge the Apple Watch Ultra faster, as an older Apple Watch cable will charge at a slower rate. Plug the cable into the USB-C plug.

Step 3: Pop on the Apple Watch

Next, just pop the Apple Watch Ultra onto the magnetic charger and it should start juicing up at the faster speeds.

See also: How to Clean Your Apple Watch Ultra Without Damaging it

Charging your iPhone 14 Pro Max quickly isn’t as simple as just plugging it in. Learn these tips and tricks to charge your iPhone 14 Pro Max faster.

Is there anything worse than waiting for your iPhone 14 Pro Max to charge when you have somewhere to be? Even if you’re doing all that you can to make your iPhone 14 Pro Max battery last longer, it’ll eventually hit zero and you’ll need to wait around for it to charge.

While waiting for your iPhone to charge can feel like forever, that seemingly long charge time isn’t entirely psychological. There’s no magic trick that will have your phone’s battery going from zero to 100 percent in 10 minutes, but there are a few things you can do to charge your iPhone 14 Pro Max faster.

Without further ado, here are helpful tips on how to charge iPhone 14 Pro Max faster:

1. Use a Wall Socket to charge your iPhone 14 Pro Max faster

Using a USB port on your computer or in your car leads to a much more inefficient charging experience.

There’s nothing wrong with receiving a lower amperage—it won’t damage your iPhone—but you’ll definitely be twiddling your thumbs for a lot longer.

As a rule of thumb, only use your car or computer for a top-up, not for a full charge.

2. Avoid Wireless Charging

Wireless charging is amazing it’s very convenient, and it entails fewer cables, which is something I’m sure we can all get on board with.

However, if you want to charge your iPhone 14 Pro Max faster, you should avoid it. It offers a considerably slower charging experience than its wired counterpart. In fact, testing suggests it could be as much as 50% slower.

Why? There are two reasons. First, it’s more efficient to transfer energy through a cable than via simple contact. Second, the wasted energy manifests itself as excess heat.

3. Use a fast charger

The iPhone 14 Pro Max supports “fast charging,” which should take your device from zero to about 50 percent battery in around 30 minutes.

That sounds lovely, but Apple has never included a charger with a high enough wattage to support fast charging. That free charger from your older model is probably a slow 5W one and you need at least a 20W charger to fast charge your iPhone 14 Pro Max. And Apple doesn’t even include a charger with its iPhones anymore.

A higher wattage charger will charge your iPhone a lot faster, but know that there’s a limit. It’s not like you can simply buy a 100W charger and juice up your iPhone in a handful of minutes. For example, the iPhone 14 Pro Max has a charging ceiling of 27W; it won’t charge faster than that with a compatible charger.

4. Enable Airplane Mode

One of the biggest draws on your battery is the network signal. As a general rule, the worse your signal, the faster your battery will drain.

Consequently, if you live in an area with a poor signal, charging your iPhone takes longer than if you reside in a place with a strong signal—the signal is eating through your power as you charge.

The quick solution? Put your iPhone in Airplane Mode before you plug it in. Testing suggests it could reduce the amount of time needed for a full charge by as much as 25%.

To put your iPhone into Airplane Mode, simply swipe down on the top right and tap the Airplane mode icon. Alternatively, you can go to Settings and turn on Airplane mode.

Just make sure you turn it off again once your battery is full!

5. Turn Your iPhone Off

Simple, obvious, but often overlooked. If your iPhone 14 Pro Max is turned off while it’s re-powering, it’s going to charge a lot faster. Nothing will be drawing on the battery while you fill it up.

Of course, turning your iPhone off while it is charging has its downsides—you will not be able to receive urgent calls or messages. But if you’re looking to give your iPhone a quick 15-minute boost before you leave the house, powering it down is definitely the way to go.

6. Limit Your iPhone Usage While It’s Charging

If you can’t turn your iPhone off to charge it faster because you wish to stay on top of notifications, try not to use it too much while it’s plugged in. Using your phone while it’s charging slows down the process. In particular, using intensive apps such as games will heat up your phone, slowing the charging process and damaging your battery in the long term.

Prolonged exposure to extreme temperatures is one of the common mistakes that could damage your smartphone. So, in other words, resist the urge to play games, watch videos, or scroll through social media while your handset is tethered to the charger—it will charge faster if you leave it alone.

7. Turn On Low Power Mode to Charge Your iPhone 14 Pro Max Faster

While this won’t bump up your charging time more than shutting your iPhone off completely, enabling Low Power Mode shuts down a lot of background functions that can tax the battery.

You can turn on Low Power Mode in your battery settings.
To turn on Low Power Mode, open up your Settings app and find the “Battery” menu. The Low Power Mode toggle is at the very top of the menu. If you really want to watch your battery, you can set Low Power Mode to turn on automatically when your iPhone hits a certain battery percentage.

8. Turn Off Optimized Battery Charging to Charge Your iPhone to 100%

In a bid to increase the battery life of iPhones, Apple now stops your iPhone from charging past 80% when it is connected to a charger for long periods of time. So, if you need to charge your iPhone 14 Pro Max to 100% faster, you can disable a feature called Optimized Battery Charging.

To turn off the Optimized Battery Charging feature on your iPhone, go to Settings > Battery > Battery Health and tap the slider next to Optimized Battery Charging. You will then see a pop-up warning you that this feature helps reduce your battery, so you should only choose to enable the feature briefly.

From here, you can also see information about your iPhone’s battery health, including its current Maximum Capacity. This tells you how much power your battery can store compared to when it was new. You might also see additional warnings on this screen if there are issues with your iPhone’s battery.

9. Remove Your Phone’s Case

iPhone 14 Pro Max currently rely on lithium-ion batteries. The chemistry behind the way they work dictates that the charging process works much more efficiently when the battery is cool.

For optimal charging, the battery temperature (not the air temperature) should be between 41 and 113 F (5 and 45 C). Obviously, the battery temperature is in part controlled by the ambient surrounding temperature, and removing your case will help lower it.

And in case you’re thinking of putting your iPhone in the fridge to recharge it: don’t. The efficiency drop-off is even more severe at temperatures below the ideal range.

How to charge iPhone 14 Pro Max fast? Now you know!

These were some tips on how you can charge your iPhone 14 Pro Max faster than usual, with or without a fast charger. I personally use these tips in my daily usage to charge my iPhone 14 Pro Max as quickly as possible. Anyway, try them and let me know if they make any difference for you in the comments.

iPhone 14 and iPhone 14 Plus in Product RED

If you own an iPhone 14, you can hang up on an active phone or FaceTime call using the virtual assistant, Siri. Keep reading to learn how it works.

With each version of iOS, Apple seeks to improve the accessibility features of its mobile operating system to ensure that as many people can use it as easily as possible, and that’s been no different in its latest release, ‌iOS 16‌.

Apple has recognized that some users may need or prefer help when hanging up a phone of ‌FaceTime‌ call, and thanks to a new accessibility feature, now you can get ‌Siri‌ to do it for you so you don’t have to lift a finger.

Simply follow these steps to turn on the function on your iPhone 14.

Note: information in this article apply to iPhone 14, iPhone 14 Plus, iPhone 14 Pro and iPhone 14 Pro Max.

  1. Start the Settings app on your iPhone 14.
  2. Go to Accessibility.
  3. Scroll down to the bottom and under “General,” tap Siri.
  4. Scroll down to the bottom and tap Call Hang-up.
  5. Tap the switch next to Call Hang-up to enable the function.

Now that’s done, the next time you wish to end a phone or ‌FaceTime‌ call, simply say “Hey ‌Siri‌, hang up the call.” Note that the other person/people on the call will hear your request to ‌Siri‌ before being hung up on.

If you own an iPhone 14 Pro, you may want to set up Focus modes to filter out distractions, keeping notifications at bay and homing in on the task at hand. The feature came to the iPhone with iOS 15 in 2021, but it’s new and improved for iOS 16, as Apple’s software update has made it easier to set up a Focus mode on your iPhone 14 Pro.

That’s a welcome change. If you’ve yet to embrace the notification-silencing wonders of Focus mode, it’s likely because you found setting up and turning on the feature to be a bit of a pain. iOS 16 Focus streamlines things somewhat — it’s now easier to manage the people and apps you still want to connect with when a particular Focus is enabled. You can now link lock screens that you’ve customized in iOS 16 to particular Focus modes, and you can turn off the focus mode straight from the lock screen if you want.

If that sounds appealing and you’re ready to finally give Focus a try — or another try, if you gave up when the feature first debuted with iOS 15 — here’s how to set up a Focus mode on your iPhone 14 Pro.

Note: information in this article apply to iPhone 14, iPhone 14 Plus, iPhone 14 Pro and iPhone 14 Pro Max.

How to set up a Focus mode on your iPhone 14 Pro

  1. Start the Settings app and tap on Focus.
  2. Pick the Focus setting you wish to set up by tapping either Do Not Disturb, Personal, Sleep or Work. You can set up a customized Focus mode by tapping the Plus ( ) button in the upper right corner. For the purposes of this how-to, let’s set up a Work Focus mode together.
  3. Next, tap Customize Focus.
  4. Next on, choose the people you want to manage the notifications of in your Focus mode by tapping Choose People. From there, you can pick whether to allow notifications from the people you select or silence notifications.
  5. Tap the Plus ( ) button to add people. You can then pick people in your Contacts list and tap done. When you’ve got a complete list, tap Next.
  6. You’ll be asked to choose whose calls to allow. By default, Focus mode will let through contacts you’ve designated as favorites, but you can also change that to the people you’ve allowed in Step No. 5 or everybody. You can also allow calls from anyone in your contacts or a specific contacts group. Tap Done when you’ve made your pick.
  7. Now choose the apps you wish to manage for your Focus mode by selecting Choose Apps. Once again, you can pick whether to allow or silence notifications from a given app.
  8. Tap the Plus ( ) button to add apps. Then pick the apps you want to allow/silence notifications from out of the supplied list and tap Done.
  9. You’re back on the Choose Apps to Allow page. Tap Done again.

At this point, you’ve got the Focus mode basics, with filters set up for people and apps. But iOS 16 lets you take things one step further by tying your Focus mode to a specific lock screen. (You could previously assign a home screen to your Focus mode, which you can still do in iOS 16.)

Here’s how you can set up a Focus mode with specific lock and home screens.

How to set up a Focus mode with specific lock and home screens

  1. Tap Choose under the screen you wish to customize. We’ll start with the lock screen, where you have the option of creating a new lock screen, or selecting one of your existing lock screens. Tap Done when you’ve made your selection.
  2. Tap Choose under the home screen to set a custom home screen for your Focus mode. Again, you can pick from your existing home screens or you can create a new home screen that the Focus mode will populate with relevant apps. For instance, a Focus-generated home page tied to a Work Focus mode, includes the Calendar, Notes, Reminders and Mail apps among others. You can tap Edit Apps to add and delete options, including third-party apps.
  3. When you’re satisfied with the apps on your home screen, tap Add in the upper right corner.

Again, you can stop customizing your Focus mode right now, or you can take advantage of scheduling features for your Focus mode. You have the option of turning on your Focus mode automatically at a set time or location; you can also tie it to a specific app.

How to schedule a Focus Mode

  1. Tap Smart Activation to turn on the feature automatically and then move the slider to the on position on the next screen. This will turn on your Focus mode when your phone decides that it’s a relevant time or location.
  2. If you prefer not to leave such things to chance, tap Add Schedule and then pick a specific time, location or app to activate your Focus mode. In this case, I’ve turned on my work focus between 9 a.m. and 5 p.m. on weekdays.

You can add other times, locations or apps by tapping Add Schedule again.

How to use Focus Filters to set up a Focus mode on your iPhone 14 Pro

Focus Filters is a new addition to iOS 16 that allows you to filter out irrelevant or distracting data when a Focus mode is enabled. Here’s how Focus Filters work with Focus mode.

  1. Tap Add Filter and on the next screen, pick the app you want to customize. We’ll pick Calendars in this example, but you can filter inboxes in Mail, Tab Groups in Safari, conversations in Messages and other apps, including third-party software that’s updated with Focus Filter support.
  2. You now choose which calendar shows up when. For instance, I want my GeeksModo Calendar to show up when my Work Focus is turned on. Tap Add when you’ve selected the right calendar.
  3. You can go back and add more filters if you want by tapping Add Filter.

When you’re satisfied with your Focus mode, tape, the Focus menu button in the upper left corner of the screen to return to the main menu. All your changes will be saved.

How to enable and disable a Focus mode in iPhone 14 Pro

Once you’ve set a Focus mode on your iPhone 14 Pro, it will automatically be turned on. You can turn if off from the Focus screen in Settings by going to the command center (swipe diagonally downward from the lefthand corner of the home screen) and tapping the Focus control. Tap the enabled Focus mode to turn it off.

As of iOS 16, you can also turn off Focus modes from the connected lock screen. Tap the Focus icon on the bottom of the screen and then tap the enabled Focus mode to turn it off from the menu that appears.

Believe me, it’s a lot easier to set up and customize a Focus mode on iPhone 14 Pro than it was before, even if that does sound like a lot of steps. And you should reap the benefits of Focus, as you’ll see fewer unwanted notifications and remove the temptation to fool around with games, text messages and other potential distractions when you really need to be working. (Conversely, Focus is also great for setting up a Personal mode that hides all your work related apps so you can actually spend time relaxing.)

See also: How to Use Siri to Hang Up a Call on iPhone 14

Apple includes an accessibility feature that allows you to unlock your iPhone 14 using just your voice. Keep reading to learn how it works and how to set it up on your ‌iPhone 14‌.

For several years now, Apple’s iOS mobile operating system has included a voice control feature that enables users to control a variety of system functions on their ‌iPhone‌ using only their voice as the trigger.

Until recently, one of the limitations of Voice Control was that it wouldn’t work if your ‌iPhone‌ was locked. Thankfully, Apple includes an enhanced version of the feature so that if your ‌iPhone‌ is on the lock screen, you can now use your voice to enter the passcode and unlock it.

How to Unlock Your iPhone 14 Using Voice Control

The following steps show you how to set up Voice Control to unlock your ‌iPhone‌ 14 using a simple speech command.

Note: information in this article apply to iPhone 14, iPhone 14 Plus, iPhone 14 Pro and iPhone 14 Pro Max.

  1. Start the Settings app on your ‌iPhone 14‌.
  2. Go to Accessibility.
  3. Under ”Physical and Motor,” tap Voice Control.
  4. Toggle on the switch next to Voice Control.
  5. Now lock your ‌iPhone‌ using the Side button.
  6. Tap your ‌iPhone‌ to wake the Lock Screen, then say ”Go Home” to unlock your ‌iPhone‌ with Face ID. If that doesn’t work and you’re presented with the passcode screen, say (for example) “Tap 1” to press the 1 key on the screen with your voice. Repeat this action for all six digits in your passcode to unlock your ‌iPhone‌.
  7. That’s all there is to it. Note that the same Voice Control accessibility feature also works with iPad.
  8. See also: How to set up a Focus mode on your iPhone 14 Pro

One of the upgrades with iOS 16 that’s a bit under the radar is the ability to use haptic feedback with the native keyboard. Here’s how to turn on the iPhone haptic keyboard and why it’s preferable to third-party keyboards.

While we’ve seen third-party keyboards like Google’s Gboard offer haptic feedback for a while, many people prefer to stick with the native iOS keyboard. One of the big reasons is privacy as third-party keyboards often ask for access to track all of your keyboard input.

Fortunately, Apple has made it possible for users to enable vibrations on the native stock iOS keyboard for each tap, providing a physical confirmation for users as they type.

Apple says these vibrations help serve as a “confirmation” as a user types. However, haptic keyboard feedback is turned off by default. Therefore, one has to explicitly turn on haptic keyboard feedback in iOS 16

Here’s how to turn keyboard vibration on or off on iPhone running iOS 16.

How to turn on keyboard vibration on iPhone in iOS 16

To enable the haptic keyboard on an iPhone, make sure that Vibration mode is turned on. Go to Settings, tap Accessibility and then select Touch. Turn on the switch for Vibration if it’s not already on.

To test it out, open an app that triggers the keyboard, such as Notes, Reminder, Messages or Mail. Start tapping the keys on the keyboard to experience it with just the clicking sound turned on (Figure B).

You can also set up your iPhone to use the haptics keyboard in Ring mode versus Silent mode. To do this, go to Settings, and select Sounds & Haptics. Tap the setting for Keyboard Feedback. Turn on the switch for Haptic. Go back to the Sounds & Haptics screen, and make sure the switches are enabled for Play Haptics in Ring Mode and Play Haptics in Silent mode

Return to the keyboard-based app you were using and continue tapping keys. Experience how tapping feels using the haptic keyboard to see if you prefer it enabled or disabled. You can switch back and forth with it on and off to get a better sense of it (Figure D).

You can also try typing with the Sound turned off. Return to the Keyboard Feedback screen under Sounds & Haptics and turn off the switch for Sound. Try different combinations of Sound and Haptic enabled and disabled to judge which setting works best for you.

Apple cautions that turning on keyboard haptics might affect the battery life of your iPhone. Without more details, it’s difficult to know if this is much of an issue. But, you may want to keep haptics turned off for a typical day and then turned on for another typical day to gauge any potential impact to your phone’s battery life.

Intro

If you’ve accidentally deleted important files, photos, and other documents from your Mac that you need to recover, Wondershare Recoverit might just be the lifesaver you’re looking for. This renowned data recovery tool, which has been around since 2003, promises to be one of the simplest, most effective methods of bringing erased data back to life.

Wondershare Recoverit is not limited to retrieve data from your Mac hard drive. It can also recover data from your SD card, digital camera, and much more. It supports any file type, and all of the most popular drive formats, including FAT, NTFS, HFS , APFS, and more.

What is Wondershare Recoverit? Why should you download it?

Recoverit is a well-known and highly regarded data recovery tool for macOS that prides itself on being fast, easy to use, and effective. It has the ability to find and bring back almost any file type that you’ve accidentally deleted from your computer, as well as data that’s disappeared from SD card, digital camera, and lots more. The software comes with a simple user interface that makes it easy for users to navigate through their data and find the particular file they are looking for.

Moreover, Wondershare Recoverit offers several features such as previewing before recovering a file, sorting recovered files by date added, size or type and exporting them in various formats like FAT12/16/32/64-bit disk image (.dmg), compressed folder (.zip) or text file. In addition, the software also allows users to share their recovered files with others directly from within its interface.

How does Wondershare Recoverit for Mac work?

How Wondershare Recoverit for Mac works is by scanning your hard drive for any deleted files and then restoring them to their original location. The user interface of this software is pretty easy to use, and anyone with just a basic knowledge of Mac operating can use it like a pro at the very first time. Once you have installed the software, it will automatically start scanning your hard drive for any deleted files. Once it has found any deleted files, it will offer to restore them to their original location.

How to recover deleted files on Mac using Wondershare Recoverit

With Recoverit for Mac, deleted files recovery has never been so easy. Here’s how to use Recoverit to recover deleted files on Mac:

How to recover lost files using Wondershare Recoverit for Mac

Step 1: Start the Wondershare Recoverit Software on your Mac.

Step 2: You’ll be presented with four different recovery options. Out of them, select the first one and that is, “Lost File Recovery“.

Step 3: Now, choose the drive from which you wish to scan and recovery files. So select the partition. Below that, you’ll see an option asking to choose the File type. If you are looking for a specific file, for example, video or image, then select that. Below that, “Enable Deep Scan” option will be checked. This option performs an extensive scan for files that have been deleted a very long time ago. It takes more time to scan, so if you have recently deleted the file, uncheck it.

Step 4: Next, hit the “Scan” button above the partition selection area.

Step 5. After the scanning is finished, you’ll get a list of files and folders that can be recovered. You can select an entire folder or individual files by checking the box near them. Once you are done with the selection process, hit the “Recover” button on the top and specify the path where you want the files/folders to be recovered.

Easy, right? Now you have got the basic idea of using the Software to recover deleted files on Mac; things will be much easier for using other options of the application. Simply go through the guide below to learn using other recovery options of Wondershare Recoverit.

How to use Partition Recovery feature of Wondershare Recoverit on Mac

Step 1: Start the Wondershare Recoverit software on your Mac.

Step 2: Now, select the Partition Recovery from the four options available.

Step 3: In case you have multiple hard drives, select the one from which you intend to recover deleted partition. You can select quick search or complete search. A comprehensive search will scan a lot deeper and takes much more time.

Step 4: Next, select the partition, so click on “Search Partition” button. You can enable “Raw File Recovery” if you wish to specify file types. This takes, even more, time to scan but works efficiently to recover deleted photos.

Step 5: Next on, hit the “Scan” button.

Step 6: Now select files folders that you wish to recover, just like we did earlier.

Step 7: Next, hit the “Recover” button and specify the location.

How to resume the recovery process of Wondershare on Mac

Step 1: After performing the scanning option, you have the option to decide whether to recover files instantly or later. For this, you’ll need to save the scan info of Wondershare data recovery on your Mac, to resume it later.

Step 2: Once you have reached the list of files and folders that can be recovered, you’ll see a button on top that says “Save Scan Info,” click on it.

Step 3: YouL be asked to specify a path where you wish to save the scanning information. So select the folder where you want to save it.

Step 4: Now anytime in future, if you need to recover the files, launch the software and on the main screen, choose “Resume Recovery” and specify the path where we saved the scan information. The recovery process will then initiated.

How to recover files from Memory card using Wondershare Recoverit on Mac

Step 1: Start the Wondershare Recoverit software on your Mac.

Step 2: Now, connect the memory card to your Mac using a card reader.

Step 3: Next on, click on “Lost File Recovery.”

Step 4: Now, select the memory card. You can also specify file types, deep scan options like we did in the first guide.

Step 5: Next, click on the “Scan” button and wait till the process is complete.

Step 6: Now, select files/folders that you wish to recover and then click on “Recover” button and specify the path.

How to recovery files from Digital Camera using Wondershare Recoverit on Mac

Step 1: Build a connection between the Digital camera and your Mac.

Step 2: Start the Wondershare Recoverit software and select “Lost File Recovery.”

Step 3: Now, instead of selecting the hard drive, select your Digital Camera. Similar to the memory card, here too, you can select file types and other scanning options.

Step 4: Click the “Scan” button and grab a cup of coffee until the process is finished.

Step 5: Now, select the files/folders you intend to recover and hit “Recover” button at the top.

There you go; on top of recovering data from Digital Camera and Memory Card, you can also recover lost data from an external hard drive. You’ll need to select “Lost File Recovery” and then select the external hard drive. Rest of the configuration remains the same.

What are the key features of Wondershare Recoverit for Mac?

Restore more than 1,000 file formats

Wondershare Recoverit data recovery software can restore more than 1,000 file formats. This includes different types of images, videos, audio, email, and document files.

Recoverit can recover DOC, DOCX, RTF, XLS, XLSX, PPR, JPEG, JPG, PNG, RAW, FLA, FLV, MP4, WMV, AAC, ALAC, FLAC, MP3, PCM, emails, archive files like WAT, ZIP, document files, such as EPUB, JIS, KEY, LOG, and many more.

Scanning Options

Recoverit offers users the ability to enable or disable Deep Scan option. The Deep Scan option performs an extensive scan for files that have been deleted a very long time ago. It takes more time to scan, so if you have recently deleted the file, uncheck it.

Simple user interface

We’re all susceptible to accidentally deleting data — especially if we’re novice Mac users — so Recoverit is designed to be incredibly user-friendly. Its interface is clean and streamlined, allowing you to quickly access and navigate your way through the tools you need as soon as you need them.

Preview before Recovery

This feature lets you preview your lost data and choose just the ones you need to retrieve in order to manage your storage space.

Improved Safety of Data

While retrieving lost data, Wondershare guarantees safety of the files and that of other files in the gadget or storage media.

Improved Compatibility

Wondershare Recoverit is compatible with the latest Windows and Mac Operating Systems.

Recovers From Various Situations

Wondershare Recoverit lets you get your lost data back whether it was lost by accidental deletion, damaged storage device, system crash, or any other situation.

Free trial

Wondershare Data Recovery for Mac offers a trial version, to make you acquainted with the interface. The trial version allows you to use all the features of the software. The only limitation is that you’ll not be able to recover files more than 100MB. It will scan every lost file on your Mac and display them on the screen, but won’t let you recover more than 100MB. If you are impressed with the software, you can purchase the full version at $79.95 for one year on one Mac. If you are impressed too much, you can go for the lifetime membership for one Mac for $89.95.

Pros and cons of Wondershare Recoverit for Mac

Pros:

  • Streamlined and simple user interface
  • Can recover any file type
  • Supports external drives, SD Cards, and more
  • It offers a variety of features to help you recover deleted files.
  • The software is affordable.

Cons:

It may take a long time to recover deleted files.

Conclusion

The fact that Recoverit for Mac has been around since 2003 is a testament to its performance and reliability. It’s one of the best data recovery tools for macOS, and with support for so many drives, devices, and file types, it’s likely the only data recovery tool you’ll ever need. Overall, Wondershare Recoverit is a great tool for recovering lost or deleted files on Mac. It’s easy to use and has a lot of features that make it a great choice for anyone who needs to recover lost files on Mac.

Forgot your iPhone password? Here’s how you can regain access to unlock your device.

Apple offers many options for securing your iPhone including four-digit passcode, six-digit passcode, and other options like face ID and Touch ID. However, they might not work in some situations. You could also forget your passcode, which is even more problematic.

If you’re in a similar situation, then this guide is for you. We’ll show you how to unlock iPhone without passcode.

You can unlock your iPhone without passcode using two methods. Let’s find out how to do it in different ways.

1. How to unlock iPhone without passcode using Find My iPhone

You can use the official Find My app on your iPhone or visit the iCloud page to proceed with the process.

Step 1: Launch Find My iPhone page from any browser on any other device.

Step 2: Enter Apple ID and Password when prompted. You’ll see the location of your iPhone.

Step 3: Click on the iPhone you want to unlock.

Step 4: Select the Erase iPhone option.

Step 5: You’ll see a warning prompting that your iPhone data will be erased. If you are okay with this, click on the Erase option.

It’s worth noting that all of this comes at a cost. If your iPhone doesn’t have an active internet connection, you will not be able to unlock it without a passcode. Find My iPhone should also be enabled to unlock your phone. Lastly, the locked iPhone needs an Apple account logged in and its password.

To overcome these issues that you face when using Apple’s Find My iPhone, you can use the Dr.Fone – Screen Unlock software.

2. How to unlock iPhone without passcode using Dr.Fone – Screen Unlock

Wondershare’s Dr.Fone is the perfect solution when it comes to unlocking an iPhone without a passcode. It supports a wide variety of iPhone screen locks, including:

  • four-digit passcode
  • six-digit passcode
  • Face ID
  • Touch ID
  • Screen Time Passcode

Moreover, Dr.Fone has a higher success rate when it comes to unlocking locked iPhones, given that they run iOS 9 and later versions.

Dr.Fone – Screen Unlock has no restrictions like Find My iPhone. So, you won’t have trouble unlocking your iPhone without passcode.

Furthermore, it is super simple to use. You don’t need superior technical knowledge. Here’s how you can use Dr.Fone – Screen Unlock to unlock your iPhone without a passcode

Step 1: Download Dr.Fone – Screen Unlock on your Mac or Windows operating system, and connect your iPhone to your computer.

use Dr.Fone to unlock iphone without passcode

Step 2: You’ll see the unlock window. Simply click the Unlock iOS Screen to get started.

Step 3: Follow the on-screen instructions to put your device into DFU mode.

Enter iPhone in DFU mode

Step 4: Dr.Fone will detect the connected device. Simply click on the Start button, and it’ll download a configuration file to unlock your iPhone. It might take some time depending on your internet speed.

Check information to start unlocking iPhone

Step 5: Once the download is done, click on the Unlock Now button to continue with the process.

Confirm to unlock

Step 6: Once you follow the procedure, your iPhone will unlock without a passcode, and Dr.Fone will remove the previous passcode.

Unlock iPhone without passcode with ease

NOTE: The above steps might delete the data on your device. To protect your files, it’s best to take a backup of your data to a computer first.

Why should you pick Dr.Fone – Screen Unlock over iTunes?

First and foremost, because it’s a Wondershare software! I have tested and used various software by the developers and gladly found them adapt, easy to use, and secure, just like this one.

Then, Dr.Fone – Screen Unlock performs really well and does what it promises. What I love is that it makes unlocking iPhone without passcode so easy. You don’t need special technical skills or wait for hours; the process is quick and efficient.

Additionally, when it comes to unlocking software, there’s always an issue of compatibility, usability, trustability, and success rate. Thankfully, Dr.Fone – Screen Unlock is

  • Compatible with the latest iOS update.
  • Compatible with the latest iPhone models.
  • Compatible with both Mac and Windows.
  • Super-easy to use; unlike iTunes, there are no technical steps involved.

Unlock Your iPhone With Ease

There are several reasons why you might be locked out of your iPhone. However, iPhones are built with security in mind. So, you can use these two methods to unlock your iPhone if you forget your passcode.

Dr.Fone – Screen Unlock is a much better tool than iTunes for unlocking iPhone without passcode since it’s easy to use and has a higher success rate.

iOS 16 brings lots of new features to your iPhone that let you do things like customizing your lock screen, and editing Messages you already sent. However, one new feature received less attention than the headline grabbers, but is great news for some users.

iOS 16 now lets users end calls using the company’s virtual assistant Siri without having to press anything. Here’s how to use the new Siri Call Hangup feature.

How to turn on Siri call hang-up

The ability for Siri to hang up a call is part of Apple’s set of improvements to Accessibility across its platforms. Even though it was designed to help people with motor or motion issues who may find it challenging to touch the red call button, anyone can use it. It’s turned off by default, but you can toggle it on in Settings.

  1. Open Settings app
  2. Tap Siri & Search
  3. Tap Siri Call Hangup
  4. Set the toggle to on

How to hang up a call with Siri in iOS 16

To hang up a FaceTime or phone call with Siri, simply say something along the lines of “Hey Siri, hang up” and your trusted digital assistant will do just that. There’s just one caveat: Those on the call will hear you speaking the phrase out aloud.

System requirements for the Siri call hang-up

This particular command is part of Siri’s expanded offline support in iOS 16 and iPadOS 16. On the iOS side, it requires Apple’s A12 Bionic chip or later so you’ll need at least an iPhone XS/XR or newer. Your iPad must also run at least an A12 Bionic chip, found in the fifth-generation iPad mini, third-generation iPad Air and eighth-generation iPad. According to Apple’s iOS 16 Preview page, Siri call hang-up is initially launching in the following seven languages: German (Germany), English (Australia, Canada, India, UK, US), Spanish (Spain, Mexico, US), French (France), Japanese (Japan), Mandarin Chinese (China mainland) and Cantonese (Hong Kong).

Need to record a conversation, speech, interview, or note? Here’s how to use the Voice Memos app for iPhone.

You can record audio on your iPhone using the Voice Memos app, which is easy to use and can record hours of audio with surprisingly good quality, even without an external microphone.

Creating a voice memo seems simple enough; just tap the record button, right? There’s more to it than that. You can name and save your recordings, edit an audio file, organize your Voice Memos into folders and more.

With that in mind, here’s a complete guide on how to use Voice Memos on iPhone.

Note: information in this article apply to iPhone 13, iPhone 12, iPhone 11, iPhone X, iPhone 8, iPhone 7, and iPhone 6S.

How to Record a Voice Memo on Your iPhone

The first step is recording a voice memo. The steps are pretty straightforward:

  1. Open the Voice Memos app and tap the red Record button.
  2. While a recording is taking place, you’ll see a moving waveform.
  3. Tap the red Stop button to stop recording.
  4. Your recording will save into the list of All Recordings. See this article if microphone is not working on your iPhone.

How to Play a Recording in the Voice Memos App

Once you recorded a voice memo on your iPhone, it’s time to play it back to hear what it sounds like. Here’s how:

  1. Open the Voice Memos app to see a list of recordings.
  2. Tap on your saved recording in the All Recordings list.
  3. Tap the Play button.
  4. To move to a specific point, you can drag the slider. Alternatively, you can use the Fast-Forward or Rewind buttons to jump 15 seconds forward or backwards.
  5. By tapping the Options button (which looks like three sliders), you’ll find other features you can use with playback:
  6. Playback Speed: Dragging towards the turtle makes the playback slower. Dragging towards the rabbit speeds up the playback.
  7. Skip Silence: This feature jumps over gaps of silence in your recording.

How to Edit Voice Memos on Your iPhone

Now, let’s look at the different edits you can make to a voice recording. These can include everything from changing the file name to re-recording sections of the audio.

How to Change the File Name of a Voice Memo

If you only have a couple of voice memos, it’s easy to remember which is which by just looking at the date. But as the list grows, it’s better to label each voice memo with a descriptive name. Here’s how to change your voice memo’s file name:

  1. Open the Voice Memos app to view all your recordings.
  2. Tap on the recording you want to edit.
  3. Hit the More button (which looks like three dots).
  4. Choose Edit Recording.
  5. Tap the file name to change it to your preferred title.

How to Duplicate a Voice Memo on Your iPhone

Before you move on to trimming or making other edits to your voice memos, it’s a good idea to duplicate them first. For example, if you made a voice recording of an interview, it would be disastrous to lose any parts of the audio due to editing. While the Photos app lets you easily revert edited photos to their original state, the Voice Memos app doesn’t offer this for audio.

Therefore, you should duplicate a voice memo before you start editing it:

  1. Tap on your recording and hit the More button.
  2. Choose Duplicate.
  3. An identical duplicate will appear, with the word copy at the end of its name.

How to Trim a Voice Memo on Your iPhone

To create a cleaner and more cohesive recording, you can remove sections of unnecessary audio that pad it out. Here’s how to trim your voice memos:

  1. Tap on your recording and hit the More button
  2. Choose Edit Recording.
  3. Tap the Trim icon (which looks like a square with two extended sides).
  4. Drag the vertical slider on either side of the recording to highlight the section you want to keep or remove.
  5. To keep the highlighted section, choose Trim. To remove the highlighted section, choose Delete.

Right now, there is no way to undo individual edits in the iPhone’s Voice Memos app. You can only tap Cancel while still within the editing window, to undo all the edits you’ve made in that editing session.

How to Replace Parts in a Voice Memo

You can overwrite parts of a voice memo by recording new audio during playback. Here’s how to do that:

  1. Tap on your recording and hit the More button.
  2. Choose Edit Recording.
  3. In the Edit Recording window, drag the time slider to the part where you want to start overwriting with new audio.
  4. Tap Replace to start recording new audio, which will show up in red.
  5. Tap Done to save.

You cannot undo replaced audio. Unlike trimming, there is no Cancel button.

Even if you exit the Voice Memos app without tapping Done, the new audio will already be saved to the file. Therefore, be absolutely sure of what you want to replace before proceeding with such changes.

If you feel the Voice Memos app is too limited when it comes to editing, you should check out third-party audio editing apps for iPhone, all of which offer greater flexibility and better options.

How to Organize Your iPhone Voice Memos Into Folders

Over time, you’ll probably accumulate a long list of voice memos in the app. If you love keeping your iPhone’s apps organized, you should do the same for your voice recordings!

Here’s how to move your voice memo recordings into different folders:

  1. From the All Recordings page in the Voice Memos app, tap the Back arrow to access the Voice Memos page.
  2. Tap the New Folder icon. Name your folder and select Save
  3. Return to the All Recordings page.
  4. Tap on a recording you want to moce and hit the More button.
  5. Choose Move to Folder.
  6. Select the destination folder.

How to Delete and Restore Voice Memos

To delete a voice memo you longer need, simply tap the Trash icon to remove it.

If you accidentally deleted a recording you want back, follow these steps to recover it:

  1. From the All Recordings page, tap the Back arrow.
  2. Select Recently Deleted.
  3. Tap on the recording you want to restore. Select Recover.
  4. Tap Recover Recording to confirm.

Deleted recordings are only available to record for 30 days.

How to share voice memos

All of your voice memos can be shared with others by email, Messages, social networks, and more.

  1. Launch Voice Memos on your iPhone.
  2. Tap the voice memo that you want to share.
  3. Tap the More button. It looks like three horizontal dots.
  4. Tap Share.
  5. Select the method that you want to share your voice recording with.

How to Transcribe a Voice Memo on Your iPhone

To transcribe a voice recording—so you can read it instead of listening to it—you’ll need to use a third-party app, such as Transcribe. These apps aren’t 100 percent accurate, but they usually get the majority right. You may just need to edit it a little bit.

Follow these steps to convert your voice memo to text using the Transcribe app:

  1. In the Voice Memos app, tap on your recording and hit the More button.
  2. Tap Share.
  3. Scroll along the horizontal list of apps and select Transcribe.
  4. Choose your Language and Punctuation Mode. Tap Transcribe.
  5. Once the upload is completed, go to the Transcribe app to see your transcribed voice memo.

Start Recording Audio With the Voice Memos App

As you can see, it’s super easy to quickly record audio with the Voice Memos app whenever you need to. Do you have questions about how to use the Voice Memos app on your iPhone? Let us know in the comments, and we’ll try to help you out.