Got a tip for us?

Notes

In Settings, you can customize your preferences for the Notes app. Choose the default account for new notes, set a password, and more.

You can lock important notes with a password, turn on an On My iPhone account, and get notifications when your name is mentioned in shared notes. You can also choose viewing options, such as the sort order. And when multiple languages are added, you can choose your preferred language.

Customize your Notes settings

  1. Start the Settings app on your iPhone.
  2. Tap Apps, then tap Notes.
  3. Adjust any of the following:
    • Accounts: Add or remove accounts in Notes.
    • Siri: Allow Siri to make suggestions across apps based on the way you use Notes.
    • Search: Allow suggestions and content from Notes to appear in Search and widgets.
    • Language: Choose your preferred language (option appears when multiple languages are added).
    • Default Account: Choose the default account when creating notes using Siri and the Notes widget.
    • Password: Lock important notes.
    • “On My iPhone” Account: Turn on the On My iPhone account.
    • Mention Notifications: Receive notifications when your name is mentioned in shared notes.
    • Viewing: Choose viewing options such as the sort order, lines and grids, and group notes by date.
    • App Links: Get suggested app links.
    • Auto Convert to Tag: Automatically change #text to a tag when typing a space.
    • Save to Photos: Save photos and videos taken in Notes to the Photos app.
    • Access Notes from Lock Screen: Choose Always Create New Note or Resume Last Note. Or turn it off to prevent access from the Lock Screen.
Tag: Notes

In the Notes app, you can use tags as a fast and flexible way to categorize and organize your notes. You can add one or more tags to a note, such as #shopping and #work, and easily search and filter your notes across folders using the Tag Browser or Smart Folders.

Adding a tag is simple: it starts with #, followed by the tag name, and the tag turns yellow when it’s active.

Add tags to notes

To add a tag to a note, type # followed by the tag name, then add a space after the tag to activate it. Active tags turn yellow. You can also choose an existing tag from the menu above the keyboard. Tags must be one word, but you can use dashes and underscores to combine words. If you save a note without activating your tag, it won’t be saved as a tag. You can add multiple tags to a note. Tip: You can use your finger to handwrite a tag in a note. Tap the underlined tag, then tap Convert to tag.

View notes with tags

Under the Tags section at the bottom of the folders list, you can do any of the following:

  • View all notes with tags: Tap All Tags.
  • View notes with specific tags: Tap one or more tags. To exclude a tag, tap the tag until the name has a line through it.

Rename or delete a tag

To rename or delete a tag, do any of the following:

  • Below the Tags section at the bottom of the folders list, touch and hold a tag, then tap Rename Tag or Delete Tag.
  • Tap Edit (at the top of the folders list), scroll down to the tags, then tap a tag to rename it or tap the Delete button. When you delete a tag, it’s also removed from all Smart Folders that use it.
Tag: Notes

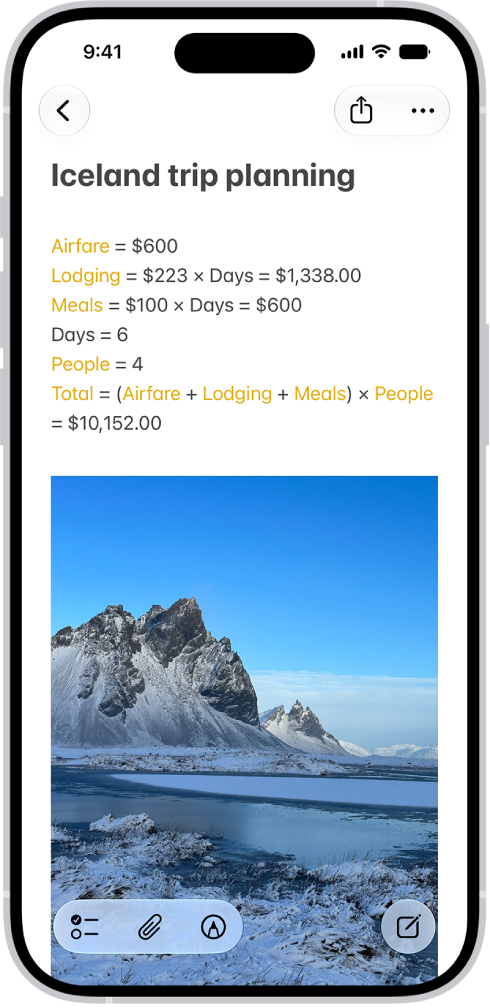
With math in the Notes app, you can draw diagrams, solve equations, assign variables, and plot graphs. Mathematical expressions are solved inline when you write or type an equal sign.

You can type a math expression and include an equal sign, or write one with Markup. You can even write a stack of numbers and draw a horizontal line below them to add them, and you can create a graph.

Note: The Notes app supports math you write using Western Arabic numerals and common mathematical symbols, or math you type using Arabic (Eastern & Western) and Devanagari numerals and common mathematical symbols.

A note for planning a trip, with a calculation of the travel expenses and a photo.

Add mathematical expressions to a note

  1. Start the Notes app on your iPhone.
  2. Open a note, or tap the New Note button to start a new note.
  3. Do any of the following:
    • Type a math expression, then include an equal sign.
    • Tap the Markup button, write a math expression horizontally, then include an equal sign.
    • Tap the Markup button, write a stack of numbers, then draw a horizontal line below the numbers to add the numbers in the stack. Write a different symbol to the left of each digit if you want a different operation.
  4. Tap the equal sign to see what Notes understood in what you wrote and tap Solve.
  5. To correct mistakes, you can fix any of the following:
    • Unrecognized math and unsolvable expressions: Tap any dotted red lines to see details about the error.
    • Ambiguous characters: Tap any dotted blue lines to clarify what you wrote.

Create a graph

  1. Start the Notes app on your iPhone.
  2. Open a note, or tap the New Note button to start a new note.
  3. Type or write an equation with x and y variables, with the y variable on the left side of the equation. For example, y = 5x + 3. You can also tap the equal sign in an equation you already wrote.
  4. When you finish the equation, a menu appears. Tap Insert Graph.
  5. The y variable is represented on the vertical axis, and the x variable is represented on the horizontal axis.
  6. To add another equation to the same graph, type or write a new equation and then tap Add to Existing Graph.

Access Math Notes created in the Calculator app

  1. Start the Notes app on your iPhone.
  2. In the Folders list, tap Math Notes. You may have to tap the Back button to see your folders.
Tag: Notes

In the Notes app, you can open a note in the Pages app and continue working. You can also export the note as a PDF or print the note.

Not everything carries over to Pages. You can’t edit drawings there, scanned documents and PDFs appear as thumbnail images, and tags, mentions, checklists, and links to notes aren’t active items. A locked note also has to be unlocked first.

Here’s how to export or print notes on iPhone.

Open a note in Pages

  1. Make sure your iPhone has the latest version of Pages.
  2. Open the Notes app on your iPhone.
  3. Open the note you want to export.
  4. Tap the Share button and then tap Open in Pages. Note: If the note is locked, you must unlock it before exporting the contents of the note to Pages. You can’t edit drawings in Pages. Content such as scanned documents and PDFs appear as thumbnail images in Pages. Tags, mentions, checklists, and links to notes aren’t active items in Pages. If a note is shared, the resulting Pages document isn’t shared.

Export a note as a PDF

When you create a PDF of a note, it uses the note’s current view settings for its attachments. If the note has a multipage PDF or scanned document, though, the exported PDF contains only the first page of the original.

  1. Open the Notes app on your iPhone.
  2. Open the note you want to export.
  3. Tap the Share button, then tap Markup.
  4. If you don’t see the Markup option, first tap the View More button.
  5. Mark up the pages in the exported PDF as needed and tap the Done button to save the PDF.

Export a note as a Markdown file

You can export your notes as Markdown files to use them in writing, content, and other workflows that support Markdown.

  1. Open the Notes app on your iPhone.
  2. Open the note you want to export.
  3. Tap the Share button and then tap Export as Markdown.
  4. If you don’t see the Markdown option, first tap the View More button.
  5. Choose how to send or save your note.

Print a note

  1. Open the Notes app on your iPhone.
  2. Open the note you want to print.
  3. Tap the Share button, then tap Print.
  4. If you don’t see the Print option, first tap the View More button.
  5. Choose the printer and other options, then tap Print.
Tag: Notes

Use the Notes app to quickly capture your thoughts. You can add images and sketches, solve equations, make checklists, or even scan documents. And with iCloud, your notes stay up to date on all your devices wherever you go.

With Quick Notes, you can jot down information from any app or screen, then add images, links, and more. You can also sketch your thoughts and invite others to collaborate.

Here’s how to get started with Notes on iPhone.

A note for a class brainstorm with tags such as #school and #kine210. The note features a hand-drawn diagram of a box breathing exercise, which illustrates a four-step breathing cycle.

Jot it down

Tap the New Note button, then enter your text.

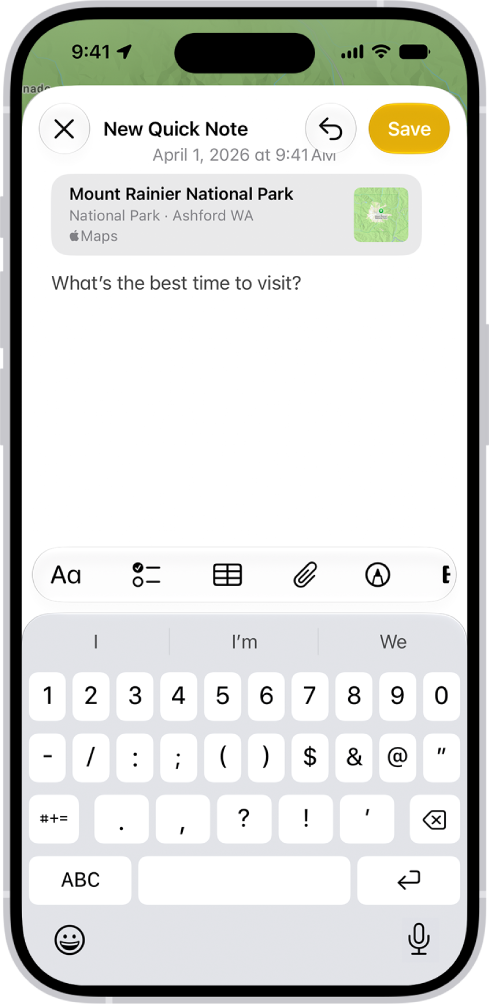
A Quick Note in a window overlay over a map of Mount Rainier National Park. The note has a link to the map, a photo, and text.

Make quick notes anywhere

Use Quick Notes to jot down information from any app or screen. Tap the Quick Note button, then tap New Quick Note. Add images, links, and more.

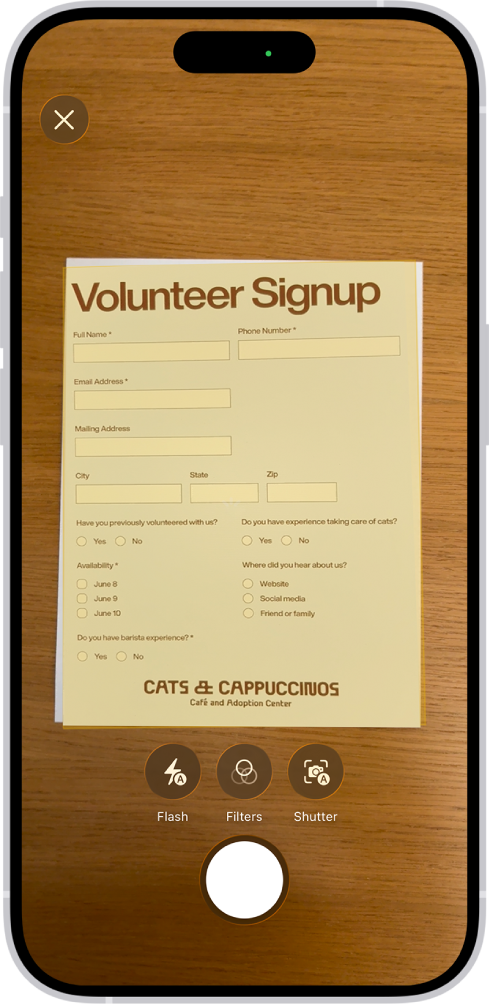
A screen showing a document being scanned. The Take Picture button is at the bottom center.

Add almost anything

You can scan documents, record audio, take photos, and more. Tap the Attachments button, then choose an option.

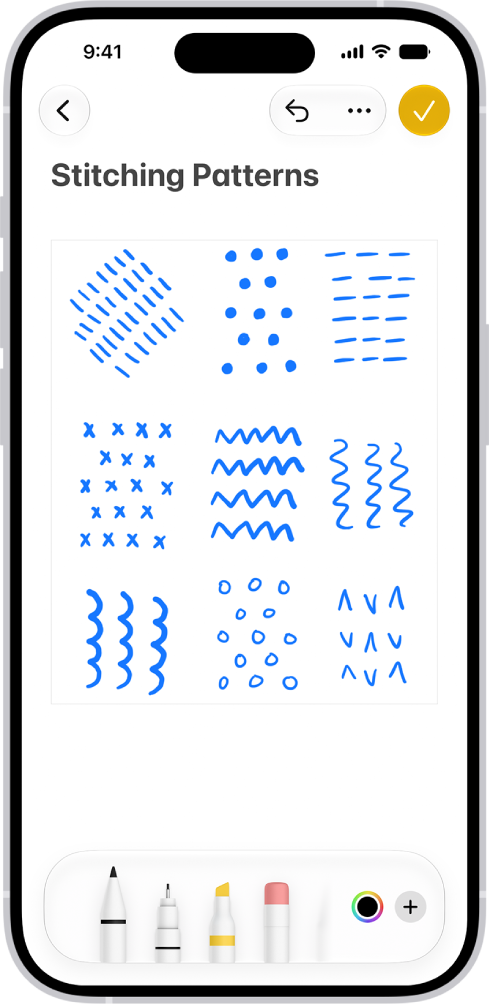
A note showing a drawing and Markup tools along the bottom of the screen.

Sketch your thoughts

Tap the Handwriting Tools button, then draw or write with your finger. You can choose from a variety of Markup tools and colors and draw straight lines with the ruler.

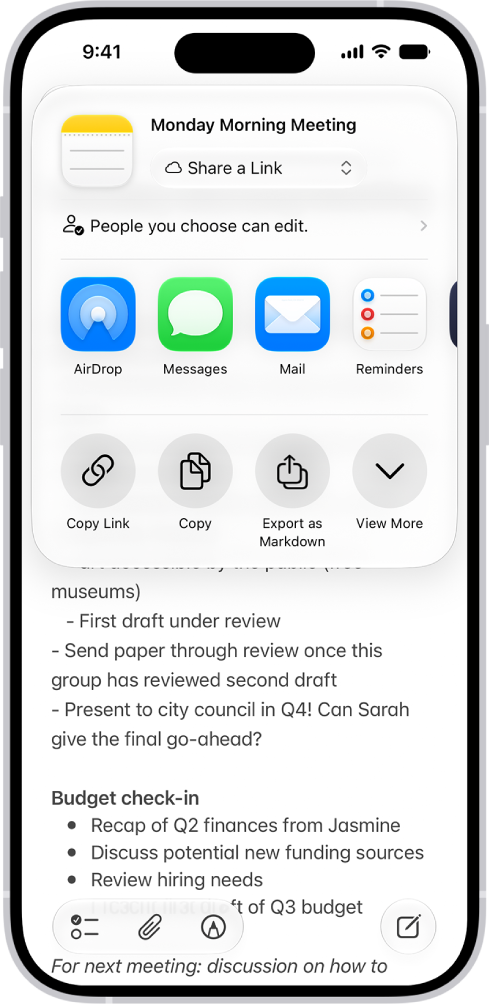
A note with an overlay showing sharing options.

Invite others to collaborate

Tap the Share button, then choose a sharing option. The people you share with can view or make changes to a note. The availability of Notes features may vary depending on your language and country or region.

Tag: Notes

In the Notes app, you can organize your notes into folders and pin the important notes to the top of the notes list.

Folders can hold subfolders, too. You can nest one folder inside another, and create new folders whenever you need them. You can also rename, move, or delete folders, sort and change the folder view, and move a note to another folder.

Here’s how to organize your notes in folders on iPhone.

Create, rename, move, or delete folders

  1. Open the Notes app on your iPhone.
  2. In the folders list (if necessary, tap the Back button to show the folders list), do any of the following:

    • Create a folder: Tap the New Folder button, choose an account (if you have more than one), tap New Folder, and then enter a name.
    • Create a subfolder: Touch and hold a folder and then drag it onto another folder.
    • Rename a folder: Touch and hold a folder, tap Rename, and then enter a new name.
    • Move a folder: Touch and hold the folder and drag it to a new location. The folder becomes a subfolder if you drag it onto another folder.
    • Delete a folder: Swipe left on the folder and then tap the Delete Folder button. Or touch and hold the folder and then tap Delete.

    If you change your mind, open the Recently Deleted folder to recover the notes.

Pin notes

Pin an important note to keep it at the top of the notes list.

  1. Open the Notes app on your iPhone.
  2. In the notes list, touch and hold the note and then tap Pin Note. Or swipe right on the note and then tap the pin.

Sort and change the folder view

  1. Open the Notes app on your iPhone.
  2. In the notes list, tap the Folder Actions button and then do any of the following:

    • Change the folder view: Choose View as Gallery or View as List.
    • Sort the notes by title or date: Tap Sort By, then choose an option. By default, the notes are grouped by date. To turn this off, tap the Folder Actions button and tap Group By Date. Choose an option.
    • Reverse the sort order: Tap Sort By. Choose Oldest First (when sorting by date) or Descending (when sorting by title).

    To choose a default sorting method for all your folders, go to Settings > Apps > Notes, then tap Sort Notes By.

Move a note to another folder

  1. Open the Notes app on your iPhone.
  2. In the notes list, do one of the following:
    • Swipe left on the note, then tap the Move Folder button.
    • Touch and hold the note, tap Move, then choose a folder.

Delete a note

  1. Open the Notes app on your iPhone.
  2. In the notes list, do one of the following:

    • Swipe left on the note, then tap the Delete button.
    • Touch and hold the note, then tap Delete.

    If you change your mind, open the Recently Deleted folder to recover the note.

Tag: Notes

Use the Notes app to draw a sketch or jot a handwritten note with your finger. Choose from a variety of Markup tools and colors, and draw straight lines with the ruler.

Your handwriting isn’t just a picture, either. You can search it in supported languages, select it, and even paste it as typed text in another note or app, and iPhone can straighten your writing and suggest spelling corrections.

Use drawing and handwriting tools

  1. Start the Notes app on your iPhone.
  2. In a note, tap the Handwriting Tools button. Then draw or write with your finger.
  3. Do any of the following:

    • Change color or tools: Use the Markup tools.
    • Adjust the handwriting area: Drag the resize handle (on the left) up or down.

    Tip: You can search handwritten text (in supported languages) in Notes. If the note doesn’t have a title, the first line of handwritten text becomes the suggested title. To edit the title, scroll to the top of the note, then tap Edit.

Select and edit drawings and handwriting

With Smart Selection, you can select drawings and handwriting. You can move, copy, or delete the selection within the note. You can even paste it as typed text in another note or app. Note: Smart Selection and handwriting transcription work if the system language of your iPhone is set to a supported language in Settings > General > Language & Region > iPhone Language.

  1. Start the Notes app on your iPhone.
  2. In a note, select drawings and handwriting with your finger using any of the following methods:
    • With the Lasso tool: Tap the Handwriting Tools button and tap the Lasso tool. Then use your finger to outline the objects you want to select.
    • With gestures:
      • Touch and hold, then drag to expand the selection.
      • Double-tap to select a word.
      • Triple-tap to select a sentence.
      • Drag the handles to adjust the selection as needed.
  3. Tap the selection and choose an option.

Work with handwritten text

iPhone can also straighten your handwriting and suggest spelling corrections.

  1. Start the Notes app on your iPhone.
  2. In a note, select the handwriting.
  3. Do any of the following:
    • Make your writing more level: Tap Straighten.
    • Correct spelling: Tap an underlined word and choose how you want to correct it. The fix appears in your own writing style.
    • Move handwriting: Touch and hold the selected text and then drag it to a new position.
  4. To erase text, scratch out the writing and then hold down your finger on iPhone. (Supported when using a markup tool such as Pen, Mono line, or Marker.)

Drag images from other apps

You can drag images from other apps to a note and combine them with handwritten and drawn content. After you add an image to the drawing area, you can reposition and resize the image.

Use Image Wand

If Apple Intelligence is turned on, you can use Image Wand in Notes to generate images based on rough sketches you create. You can also select empty space to create an image based on words and images from the surrounding area. Note: Apple Intelligence on iOS 27 or later is available on an Apple Intelligence-enabled iPhone 15 Pro, iPhone 15 Pro Max, or iPhone 16 model or later. Apple Intelligence is not available in all languages or regions. Usage limits may apply.* *Apple Intelligence is available with Siri and device language set to Chinese (Simplified), Chinese (Traditional), Danish, Dutch, English, French, German, Italian, Japanese, Korean, Norwegian, Portuguese, Spanish, Swedish, Turkish, or Vietnamese. Some features may not be available in all regions or languages. Some devices may not be available in all regions. Siri AI is available in beta in iOS 27, iPadOS 27, macOS 27, watchOS 27, and visionOS 27 and requires an Apple Intelligence–enabled device set to a supported language. Available in English to start. Siri AI will not be initially available in the EU on iOS, iPadOS, and watchOS. Certain Apple Intelligence features that rely on server-side models are subject to daily usage limits, including but not limited to Siri AI, Intelligent Photo Editing Tools, Image Playground, and AFM 3 Cloud models in Shortcuts. Daily limits may vary by feature, request complexity, system demand, system policies, and other factors. Expanded access to such features will be available for a fee in the future. Use of these features is subject to the Apple Intelligence Terms and Conditions.


Tag: Notes

You can delete notes you no longer need. You can also recover recently deleted notes within 30 days.

A deleted note moves to the Recently Deleted folder in Notes, on iCloud.com, and on your other devices, and it stays there for 30 days before it’s permanently removed. If you don’t see Recently Deleted, there’s nothing to recover. Notes on iCloud.com and your other devices follow the same rules.

Here’s how to delete and recover notes in Notes on iPhone.

Delete a note

  1. Open the Notes app on your iPhone.
  2. In the notes list, swipe left on the note and then tap Delete. Or touch and hold the note and then tap Delete. When you delete a note, it’s moved to the Recently Deleted folder in Notes on your iPhone, on iCloud.com, and on your other devices where you’re signed in to the same Apple Account.

Recover or permanently delete recently deleted notes

A note you delete stays in the Recently Deleted folder for 30 days. After that, it’s permanently removed from iCloud, your iPhone, and other devices where you’re signed in to your Apple Account. Within those 30 days, you can recover deleted notes or delete them permanently at any time.

  1. Open the Notes app on your iPhone.
  2. In the folder list, tap Recently Deleted. If you don’t see Recently Deleted, you don’t have any notes in that folder, and there’s nothing to be recovered.
  3. Do one of the following:

    • Recover a note: Swipe left on the note, then tap Move. Move the note to a new or existing folder.
    • Permanently delete a note: Swipe left on the note, tap Delete, and tap Delete Note.

    Note: If you delete a shared note you don’t own, it’s removed from your list only, not from the owner’s or other participants’ lists, and it won’t appear in Recently Deleted. You can reopen it using the original shared link, unless the owner stopped sharing.

Tag: Notes

In the Notes app, you can search through all your notes for typed and handwritten text, objects in images, and text in scanned documents. You can also search for text within a note or attachment.

You can search for tags, too, and handwritten text in supported languages. Just know that a locked note shows up in the results by its title only.

Here’s how to search through your notes on iPhone.

Search for text, objects, and more in all your notes

Search covers tags, typed and handwritten text (in supported languages), objects in images, and text in scanned documents. Note: Only a locked note’s title appears in search results.

  1. Open the Notes app on your iPhone.
  2. Tap the Search button. Then enter what you’re looking for. You can also choose a suggested search, such as “Notes with Drawings” and then enter additional text to refine your search. If a note is locked, only its title appears in the search results. The search includes handwritten text (in supported languages), photos, and scanned documents.

Search within a note or attachment for typed and handwritten text

  1. Open the Notes app on your iPhone.
  2. Open the note you want to search.
  3. Tap the Note Actions button and then tap Find in Note.
  4. Tap the Search button and select any of the options. To search PDFs and other attachments, select Include Attachments.
  5. Enter the text you’re looking for in the search field.
Tag: Notes

You can use Quick Notes to jot down information over any app or screen on iPhone. Add links, images, tags, and mentions to a Quick Note so you can get to important names, numbers, and ideas easily.

There’s a shortcut back, too. When you highlight text in Safari or add a link from an app, you see a Quick Note thumbnail next time you visit the site, taking you right to what you were viewing before.

You can access all your Quick Notes in the Notes app, and when you make a Quick Note on your iPhone, you can see the note on your iPad and Mac, too.

A Quick Note showing a link to a location in Maps and text underneath. The Save button is on the top left.

Take a Quick Note

You can make a Quick Note in either of these ways:

  • From any app or screen: Add to Control Center, then tap the Quick Note button in Control Center. Tap Save when you’re done.
  • From supported apps: Tap the Share button, then tap Add to Quick Note. Tap Save when you’re done.

View and organize Quick Notes

  1. Open the Notes app on your iPhone.
  2. Tap Quick Notes in the folders list. You may have to tap the Back button to see your folders. Note: You can’t lock a Quick Note unless you move it to a different folder. If you move an individual Quick Note to a different folder, it becomes a standard note and no longer appears as a Quick Note in other apps.
Tag: Notes