Got a tip for us?

Notes

If your iPad is connected to an iPad keyboard, you can use keyboard shortcuts to quickly perform actions in the Notes app. You can learn keyboard shortcuts right on your iPad. It’s one of the ways you can use shortcuts on an Apple external keyboard with iPad.

Examples of keyboard shortcuts

  • Start a new note: Press Command-N.
  • Add a checklist: Press Shift-Command-L.
  • Create a bulleted list: Press Shift-Command-7.
  • Add a link: Press Command-K.
  • Add a divider line: Press Command-L.
  • Hide the sidebar: Press Control-Command-S.

Learn keyboard shortcuts

Press and hold the Globe key or Command (⌘) key until the shortcuts appear.

See also

Use the Notes app to quickly capture your thoughts. You can add images and sketches, solve equations, make checklists, or even scan documents. With iCloud, your notes stay up to date on all your devices wherever you go.

Quick Notes let you jot down information from any app or screen, and you can record audio and take photos in a note, too. You can draw or write with Apple Pencil or your finger, and the people you share a note with can view or make changes to it.

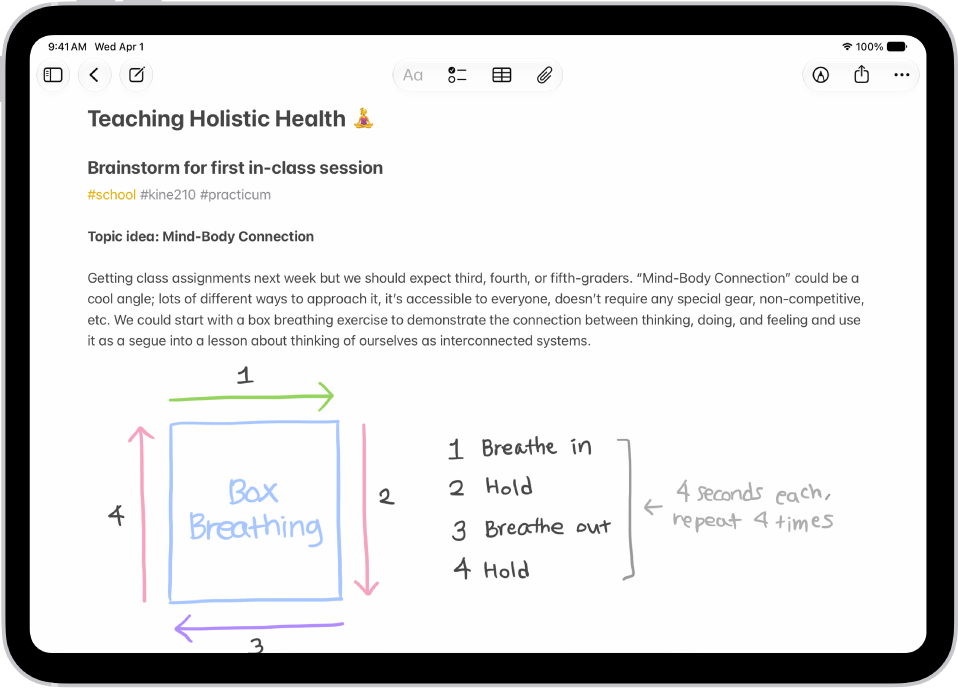
A note for a class brainstorm with tags such as #school and #kine210. The note features a hand-drawn diagram of a box breathing exercise, which illustrates a four-step breathing cycle.

Jot it down

Tap the New Note button, then enter your text.

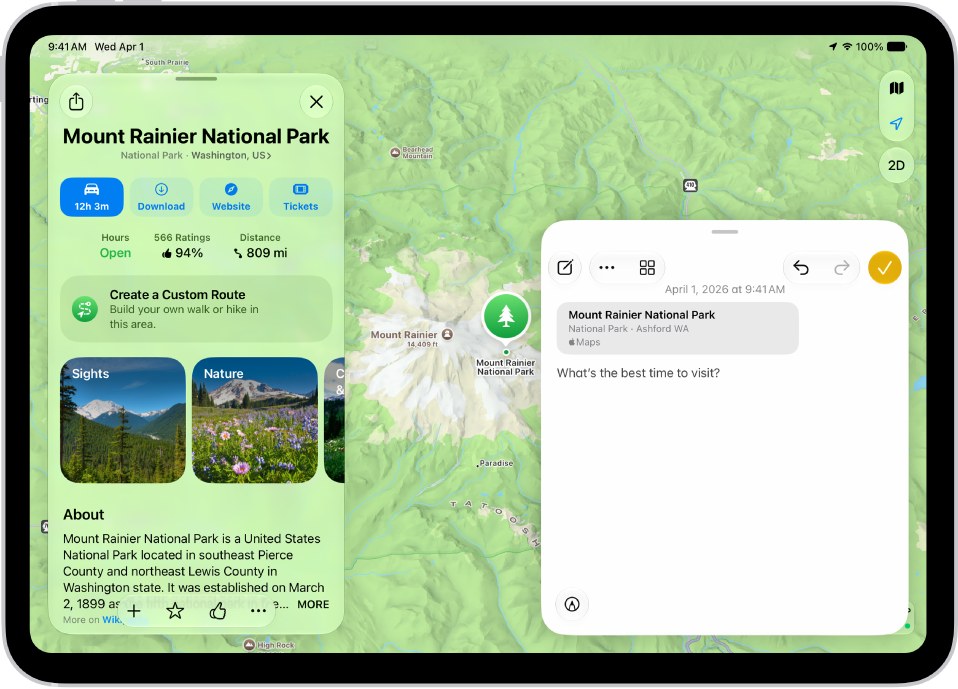
A Quick Note in a window overlay over a map of Mount Rainier National Park. The note has a link to the map, a photo, and text.

Make quick notes anywhere

Use Quick Notes to jot down information from any app or screen. Tap the Share button, then tap Add to Quick Note, or simply swipe up from the bottom right corner of the display using Apple Pencil. Add images, handwriting, links, and more.

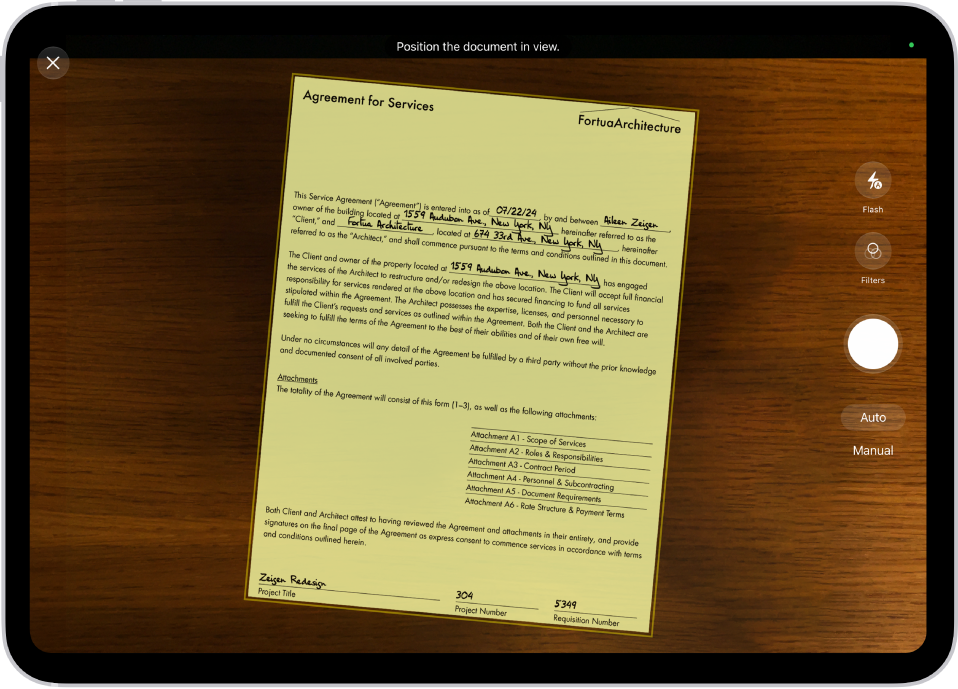
A screen showing a document being scanned. The Take Picture button is at the bottom center.

Add almost anything

You can scan documents, record audio, take photos, and more. Tap the Attachments button, then choose an option.

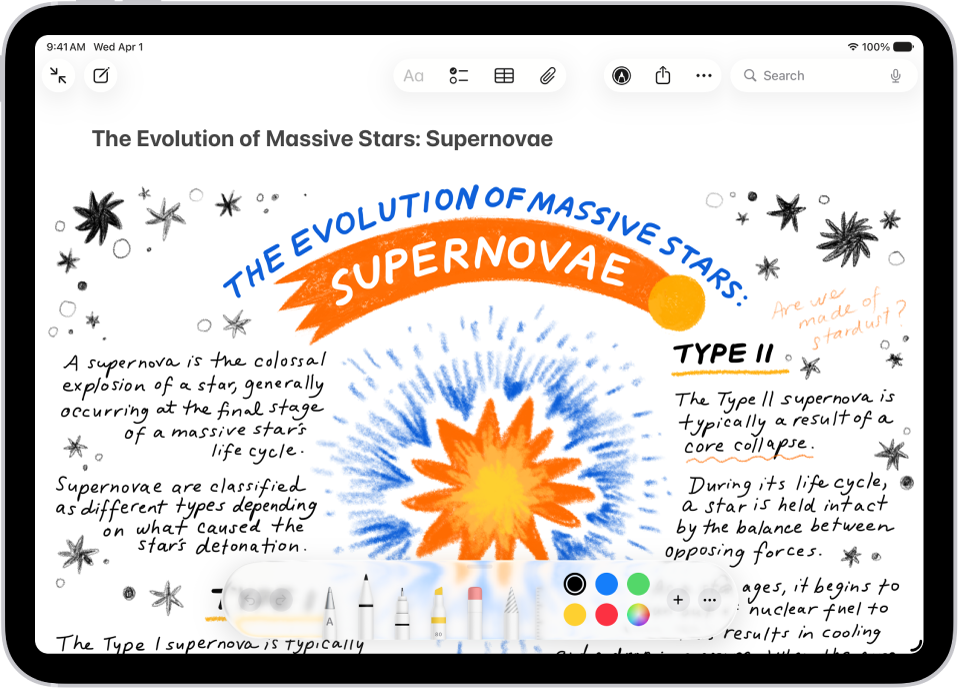
A note showing a drawing and Markup tools along the bottom of the screen.

Sketch your thoughts

Tap the Handwriting Tools button, then draw or write with Apple Pencil or your finger. You can choose from a variety of Markup tools and colors and draw straight lines with the ruler.

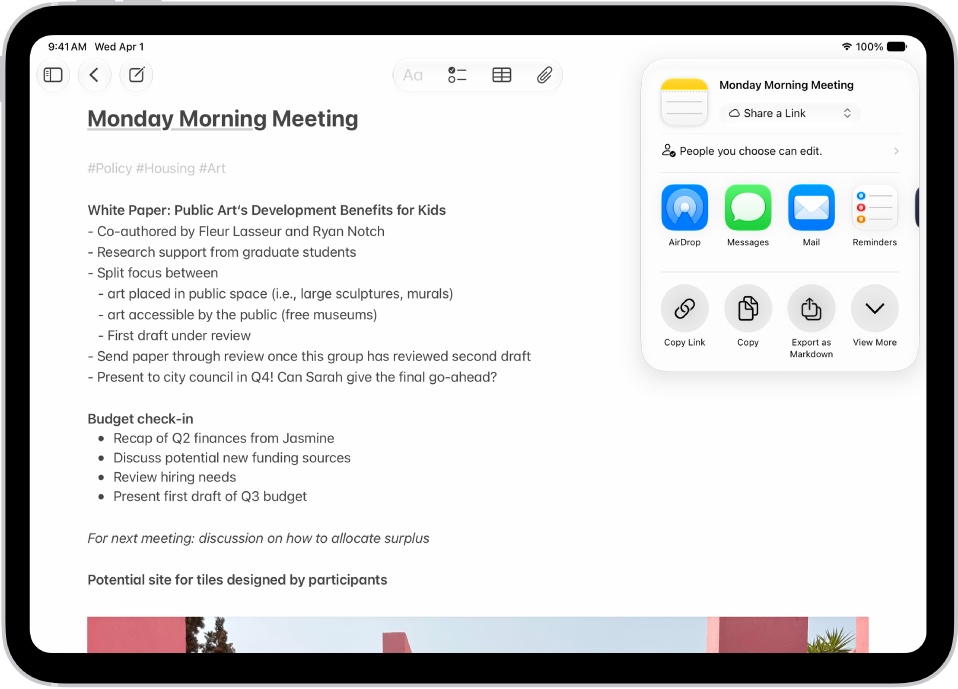
A note with an overlay showing sharing options.

Invite others to collaborate

Tap the Share button, then choose a sharing option. The people you share with can view or make changes to a note.

Notes has a lot more to offer, and these guides walk you through it:

Per Apple, the availability of Notes features may vary depending on your language and country or region.

Tag: Notes

In the Notes app, you can send a copy of a note to a friend. You can also share a link to invite people to collaborate in real time on a note or on a folder of notes in iCloud, and everyone will see the latest changes.

You can set who can access what you share, but you can’t collaborate on a locked note. You can also view activity in a shared note.

A note with an overlay showing sharing options.

Share a copy of a note

  1. Open the Notes app on your iPad.
  2. Open the note you want to share.
  3. Tap the Share button, tap the menu under the note title, and tap Send Copy.
  4. Choose how to send your note.

Collaborate on a note or folder of notes using iCloud

Sharing a link in iCloud to a note or a folder of notes is how you collaborate with others. You decide who can access what you share and set editing permissions, and all participants see changes in real time. Participants also need to be signed in to their Apple Account and have Notes turned on in iCloud settings.

Note: Collaborating isn’t possible on a locked note or a folder with locked notes.

  1. Open the Notes app on your iPad.
  2. Do one of the following:

    • Collaborate on a note: Open the note you want to share, tap the Share button, tap the menu under the note title, and then tap Share a Link.
    • Collaborate on a folder: Open the folder you want to share. Then tap the Share button.
  3. To change the access and permissions, tap Only invited people can edit and then set any of the following:

    • Who can access: Choose People you choose or Anyone with the link. With People you choose, you can turn on Access Requests.

      Note: Requesting access to a note sends an email to the address associated with the owner’s Apple Account.

    • Permissions: Choose Edit or View and Download Only.

Quick tip: When you send the invitation in Messages, you get activity updates in the Messages conversation whenever someone makes changes in the shared note. Tap the updates, and you’ll go to the shared note.

View activity in a note

An orange dot to the left of a note title in the notes list means the note’s changed since you last looked at it.

  1. Open the Notes app on your iPad.
  2. Open the note and then swipe right on the note or swipe up on the Activity card to see who made changes and when.
  3. To adjust how the activity is shown, tap the Collaborate button. Choose any of the following:
    • Show Updates: Shows changes made since you last opened the note.
    • Show All Activity: Shows all activity in the note.
    • Show Highlights: Shows names, dates, and changes made by each participant.

Quick tip: Type an @ sign followed by a participant’s name to mention them and notify them of important updates.

View activity in a folder

  1. Open the Notes app on your iPad.
  2. Touch and hold the folder. Then tap Show Folder Activity.

Change sharing settings

  1. Open the Notes app on your iPad.
  2. The owner of a shared note or folder can change the sharing settings by doing one of the following:

    • Manage a shared note: Tap the Collaborate button, then tap Manage Shared Note.
    • Manage a shared folder: Tap the Folder Actions button. Then tap Manage Shared Folder.
  3. Do any of the following:

    • Remove participants or cancel invitations: Tap the participant you want to remove, then tap Remove Participant or Cancel Invitation.
    • Change access and permission settings: To change the settings for one person, tap their name. To change the settings for all participants, tap Sharing Options.

      Making a participant a Co-Owner allows them to manage participants and permissions for everyone except the owner.

    • Stop sharing: When you choose this option, the shared note or folder is deleted from the devices of the other participants.

See also

Tags: iCloud, Notes

In the Notes app, you can add photos, videos, and information from other apps, such as maps, links, and documents.

That could be a location from Maps, a webpage from Safari, or a PDF from Files. You can change the preview size of attachments, and even draw on a photo. Photos and videos you take in Notes can be saved to the Photos app, too.

Here’s how to add photos, video, and more to notes on iPad.

Add a photo or video

  1. Start the Notes app on your iPad.
  2. In a note, tap the Attachments button and choose an option.

Quick tip: Tap the photo, then tap the Handwriting Tools button, and you can draw on a photo.

To save photos and videos taken in Notes to the Photos app, go to Settings > Apps > Notes, then turn on Save to Photos.

Add info from another app to a note

You can attach information from another app to a note, such as a webpage in Safari, a screenshot, a location in Maps, or a PDF in Files.

  1. In the app you’re using, open the item you want to share (for example, a map or webpage).
  2. Tap Share or the Share button. Then tap Notes or Add to Quick Note.
  3. Save the item to a new note or choose an existing note.

Change the preview size of attachments

  1. Start the Notes app on your iPad.
  2. In a note, you can change the preview size of the following:
    • A single attachment: Touch and hold the attachment or tap the More button, tap View As, and choose an option.
    • All attachments in a note: Tap the More button, tap Attachment View, and then choose Set All to Small or Set All to Large.

View all attachments in Notes

  1. Start the Notes app on your iPad.
  2. Above the notes list, tap the Folder Actions button. Tap View Attachments to see thumbnails of photos, links, documents, and other attachments. (Attachments in locked notes aren’t shown.)
  3. To go to a note with a specific attachment, tap the attachment thumbnail. Then tap Show in Note.

See also

Tag: Notes

Use the Notes app to create, view, pin, and delete notes, and keep them up to date on all your devices with iCloud.

With iCloud, your notes and any changes you make appear on your paired iPhone and other devices. Pinned notes stay at the top, and the rest are sorted by date. Editing existing notes happens on your iPhone, iPad, or Mac, though.

Here’s how to take notes on Apple Watch.

Note: Use your iPhone, iPad, or Mac to edit existing notes; your changes sync with iCloud.

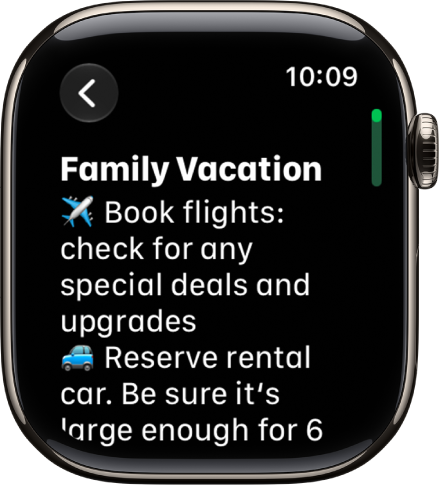
A note for a family vacation.

Keep your notes up to date on all your devices with iCloud

Through iCloud, your notes appear on your paired iPhone, along with any changes you make to them, and on other devices where you’re signed in to your Apple Account.

Create a new note

  1. Start the Notes app on your Apple Watch.
  2. Tap the New Note button.

View a note

Note: Notes on Apple Watch don’t show some formatting and certain attachments, like tables and audio recordings.

  1. Start the Notes app on your Apple Watch.
  2. Turn the Digital Crown to scroll through your notes list.

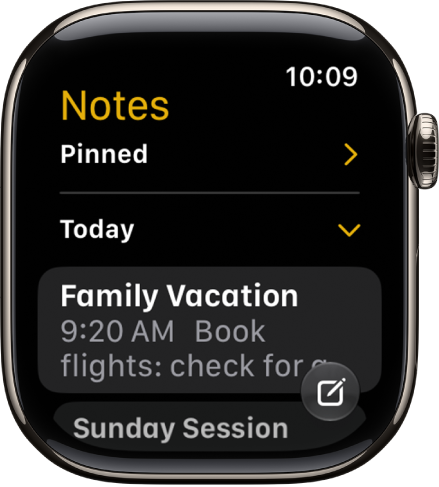
    Pinned notes appear at the top, followed by notes sorted by date.

    A list of notes with pinned notes at the top.

  3. Tap a note to open it.

Pin a note

Notes you access often can stay at the top of the list for convenience.

  1. Start the Notes app on your Apple Watch.
  2. Swipe right on the note and tap the Pin button.

Delete a note

  1. Start the Notes app on your Apple Watch.
  2. Swipe left on the note you want to remove and tap the Delete button.

If you change your mind, you can recover the note. Deleted notes remain in Recently Deleted for 30 days. On your iPhone, open the Notes app, go to the Recently Deleted list, swipe left on the note, then tap Move and choose a folder.

See also

Tag: Notes

In the Notes app, you can add links to webpages or sections in a note. You can also link to related notes, like a trip itinerary and a list of recommended restaurants.

When you add street and email addresses, phone numbers, and dates, they automatically become underlined text that you can act on. There’s even a quick typing shortcut for linking to another note by its title, right in the note body.

Link to a webpage

  1. Open the Notes app on your iPhone.
  2. In the note where you want to insert a link, select the text or tap to place the insertion point.
  3. Tap the Forward button and tap Add Link. Enter the URL to specify the link destination.
  4. Optionally, you can add a name for the link.
  5. Tap the Done button.

Link to a note or section of a note

First, organize a note with sections if you want to link to a section of it.

  1. Open the Notes app on your iPhone.
  2. In the note where you want to add a link, select the text or tap to place the insertion point.
  3. Tap the Forward button and tap Add Link. Do any of the following:
    • Link to a section in the same note: Tap Link to Section, then select a section. To customize the link name, turn on Use Section Title or enter a custom link name. Note: If the title of a linked note or section changes, any link that uses the note or section title as its name is updated automatically.
    • Link to another note: Start typing the title of the target note and then select it. To customize the link name, turn on Use Note Title or enter a custom link name. Tip: To quickly link to another note, type “>>” in the note body, then enter the title of the target note. You can then link to a section in that note by typing “/,” then selecting a section.
    • Link to a section in another note: Link to another note, tap Link to Section. Then select a section.
  4. Tap the Done button. To edit or remove the link, touch and hold the link. Choose an action.

Take action on addresses, phone numbers, dates, and more

In your notes, an underline appears below text that’s recognized as a street or email address, phone number, date, or other data. Tap the underlined text to take action on it. For example, you can see a street address in Maps, compose an email, call a phone number, add a calendar event, or convert units and currency. Note: Data detection is available when the system language of your iPhone is set to a supported language in Settings > General > Language & Region.

Tag: Notes

You can change how your notes appear in the Notes app. Add lines or grids to your notes, view your notes as a list or a gallery, and see all the attachments in one place.

You can show lines or grids in an existing note, or in all new notes, in the style you choose. And from the notes list, you can switch between list and gallery views whenever you like.

Show lines or grids in notes

  • In an existing note: Tap the Note Actions button, tap Lines & Grids, then choose a style.
  • In all new notes: Go to the Settings app , tap Apps, then tap Notes. Tap Lines & Grids, then choose a style.

View notes as a list or gallery

In the notes list, tap the Folder Actions button, then tap View as List or View as Gallery.

View all attachments

In the notes list, tap the Folder Actions button, then tap View Attachments.

Tag: Notes

In the Notes app, you can lock notes to protect your sensitive information. You can access your locked notes using your device passcode or a custom password. If you have multiple Notes accounts, you choose the locking method for each account, for example, for your iCloud account.

The device passcode is the simpler option. You don’t have to create and remember a separate password, and you can use Face ID or Touch ID to open your locked notes.

Lock notes with your device passcode

With your device passcode, there’s no separate password to create and remember, so you’re less likely to lose access to your locked notes, and Face ID or Touch ID works, too. On each device where you’re signed in to the same Apple Account, you unlock notes with that device’s passcode, or the login password on a Mac. Notes locked with a device passcode require iOS 16, iPadOS 16, macOS 13, or later, and you won’t be able to access them on devices with an earlier version of the OS.

  1. Open the Settings app on your iPhone.
  2. Tap Apps, then tap Notes.
  3. Tap Password.
  4. If you have multiple accounts, choose the account you want to set a password for.
  5. Tap Use Device Passcode.
  6. For added convenience, you can also turn on Face ID or Touch ID.

Lock notes with a custom password

A custom password for locked notes can provide additional security, but you may lose access to your locked notes if you forget it. Your custom password works on every device where you’re signed in to the same Apple Account. With multiple iCloud accounts or an “On My iPhone” account, each one can have a different custom password. Notes locked with a custom password require iOS 9.3 or later, iPadOS 13 or later, or OS X 10.11.4 or later, and you won’t see them on devices with an earlier version of the OS.

  1. Open the Settings app on your iPhone.
  2. Tap Apps, then tap Notes.
  3. Tap Password.
  4. If you have multiple accounts, choose the account you want to set a password for.
  5. Tap Use Custom Password.
  6. For added convenience, you can also turn on Face ID or Touch ID. Don’t rely on Face ID or Touch ID as the only means of unlocking your notes. If you update your Face ID or Touch ID settings, or want to change your Notes password, you have to reenter your Notes password. Important: If you forget your custom password, and you can’t use Face ID or Touch ID to access your locked notes, Apple can’t help you regain access to those notes. You can reset your custom password, but this doesn’t give you access to previously locked notes. The new custom password applies to all notes you lock from now on. Go to the Settings app, tap Apps, tap Notes, tap Password, then tap Reset Password.

Change the locking method

You can switch from a custom password to your device passcode. Once you change your locking method, notes you accessed with the previous method start using the new one.

  1. Open the Settings app on your iPhone.
  2. Tap Apps, then tap Notes.
  3. Tap Password, choose an account (if you have more than one), and then choose a password method.

Lock a note

You can lock only notes on your device and notes in iCloud. Notes with video, audio, PDF, or file attachments, notes with tags, and notes that use features from a newer version of Notes can’t be locked. The same goes for Quick Notes, notes that sync with other accounts, and notes shared in iCloud.

  1. Open the Notes app on your iPhone.
  2. Open the note and tap the Note Actions button.
  3. Tap Lock. When a note is locked, the title remains visible in the notes list. To remove a lock from a note, tap the Note Actions button, then tap Remove.

Open your locked notes

When you open one locked note, all your locked notes in the same account open for several minutes, so it’s easy to copy and paste information from other apps or jump into another note.

  1. Open the Notes app on your iPhone.
  2. Tap the locked note and tap the Lock button or View Note.
  3. To open the note, use Face ID, Touch ID, your device passcode, or your Notes password. To lock your notes again, do any of the following: Tap the Unlock button. Tap Lock Now at the top of the notes list.

Tag: Notes

In the Notes app, you can easily search and filter your notes across folders using Smart Folders. A Smart Folder can be created when viewing a list of tagged notes, or you can convert a folder, and its notes move to the Notes folder, tagged with the name of the Smart Folder.

Create a Smart Folder

  1. Start the Notes app on your iPhone.
  2. Tap the New Folder button, choose an account (if you have more than one) and enter a name. Tap Make Into Smart Folder.
  3. Choose one or more filters and then choose to include notes matching any or all of the selected filters. You can filter by tags, dates, mentions, and more. You can also create a Smart Folder when viewing a list of tagged notes. Tap the Folder Actions button and then tap Create Smart Folder.

Convert a folder to a Smart Folder

When viewing the folder you want to convert, tap the Folder Actions button, then tap Convert to Smart Folder. When you convert a folder, its notes are moved to the Notes folder and tagged with the name of the Smart Folder. Note: You can’t convert a shared folder, a folder with a subfolder, or a folder that contains locked notes.

Edit or delete a Smart Folder

There are two ways to edit or delete a Smart Folder:

  • In the folders list, tap Edit, tap the Folder Actions button, then choose an option. Tap the Done button.
  • Touch and hold a Smart Folder, then tap Edit Smart Folder or Delete. When editing a Smart Folder, you can change the name or filters.
Tag: Notes

In the Notes app, you can attach, view, edit, and collaborate on PDFs, including documents you scanned into a note. You can also annotate or sketch directly on PDFs and scanned documents in your note.

You can even preview multiple PDFs in the same note, and change the viewing size. You can attach one from an app such as Files or Mail, too.

Here’s how to work with PDFs in Notes on iPhone.

Attach a PDF to a note

To attach a PDF from an app like Files or Mail, do either of the following:

  • Drag the file into a note.
  • Touch and hold the file, tap the Share button, tap Notes, choose a note, then tap Save.

View and edit a PDF in a note

  1. Open the Notes app on your iPhone.
  2. In the note with the PDF, tap the Menu button. Then do any of the following:
    • Change the viewing size: Tap View As and choose Small, Medium, or Large.
    • View in full screen: Tap Quick Look.
    • Copy, share, rename, or delete the PDF: Choose an action.
  3. When using the Medium or Large preview size, you can also do any of the following:
    • Show or hide thumbnails: Tap the Thumbnails button.
    • Zoom in and see more: Pinch the screen or swipe right to see more pages.
    • Edit a page: Tap the thumbnail for the page, tap the More button, and choose an action such as Rotate Left, Rotate Right, Filters, Crop Page, or Insert Blank Page. (Filters and Crop Page are supported only in scanned documents.)

Annotate a PDF in a note

  • Small preview size: Tap the PDF to open it, then tap the Handwriting Tools button.
  • Medium and large preview sizes: Tap the Handwriting Tools button.

Collaborate with others

When you collaborate on a note with other people, updates come through in real time. Mark up a document, draw a diagram, or add a sticker, and the people you share with see the changes on their devices.

Tag: Notes