Got a tip for us?

iOS 27

It’s normal for all tech gadgets to have a hiccup now and then. Fortunately, you can often resolve the problem at home without any cost. The solution is to soft reset your device.

Let’s first quickly look at what an iPhone soft reset does. Then, we’ll go through the steps on how to soft reset an iPhone 18 Pro or iPhone 18 Pro Max.

What Is an iPhone Soft Reset?

A soft reset is also known as a force restart. A soft reset differs from a “normal” restart. The latter simply involves turning off your iPhone and turning it on again. You can restart your iPhone even if the buttons are broken.

Take note that a soft reset also differs from a hard reset. When you hard reset or factory reset your iPhone, the procedure erases your iPhone’s data and restores your device to its blank, default state, as though you just bought it.

You’ll likely soft reset your iPhone when it’s completely frozen. For example, when your iPhone is stuck on the Apple logo. A soft reset does not erase any data.

How to Soft Reset an iPhone 18 Pro Max

Follow these steps to soft reset your iPhone:

  1. Press the Volume Up button once and release it.
  2. Press the Volume Down button once and release it.
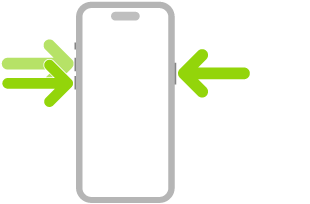
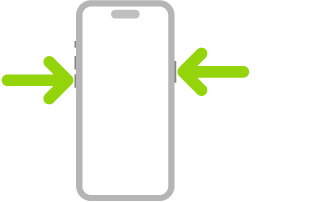
  3. Press and hold the Side button until you see the Apple logo. You can now release the Side button.

    An illustration of iPhone with arrows pointing to the side button on the upper right and the volume up and volume down buttons on the upper left.

It’s important to press each button in immediate succession. However, you don’t need to rush through the steps urgently. Pacing it at one button per second is sufficient.

Carry Out an iPhone Soft Reset Easily

Whenever you face issues with your device, a quick go-to solution is to simply soft reset your iPhone 18 Pro Max.

However, if the problem persists, you might need to put your iPhone in recovery mode and reinstall iOS. Just don’t forget to back up all your data before you do that.

A broken iPhone screen is no fun. After all, we use our phones for almost everything. If the touch response isn’t working, using your iPhone 18 Pro Max can be difficult, and it might not be possible to use it at all. This can make it hard to keep up with friends, plan your day, and even do your job.

Is your iPhone screen not working? If so, we’ll walk you through why that is and what you can do to get it working again.

Why Is Your iPhone Touchscreen Not Working?

There are several reasons your iPhone 18 Pro Max touchscreen could stop working. One of the most common reasons is physical damage. If your screen stopped working after it hit something, the damage is most likely physical.

Other common causes of iPhone touchscreen problems are water damage and excessive heat.

Damage from excessive heat is actually quite common. Those who use a car vent clip for their iPhones are likely to experience heat damage if they turn the heat on. Many might not realize that the vent is even on since they don’t feel it, but the iPhone could get damaged in the process.

If your iPhone was exposed to salt water before it stopped working, then that was most likely the cause of the damage. Salt water is corrosive and, while your phone might have been fine right away, the damage could continue to progress for weeks after exposure.

Is Your Touchscreen Broken or Your OLED Screen?

The iPhone actually has two parts to its screen. The top part is the digitizer and the part underneath is the OLED screen. The digitizer is the touchscreen and the OLED screen displays the contents of your iPhone.

When your digitizer isn’t working, your iPhone touch response won’t work properly. Meaning you’ll see your screen, but you won’t be able to interact with it correctly. Sometimes, only part of your screen will work, or it will take extra pressure to tap something.

If your OLED screen is out, your iPhone won’t turn on at all and you won’t see anything on your screen. Alternatively, your screen will be blurry or fuzzy or will have some sort of visible damage.

If there’s a problem with your digitizer, there are a few fixes you can try before taking your iPhone to a repair shop. However, if it’s the OLED, you’ll need to start searching for repairs straight away.

Make Sure Touch Accommodations Is Off

Some users might have activated certain accessibility settings that can interfere with how the touchscreen works. The most common culprit is Touch Accommodations. If enabled, your iPhone 18 Pro Max screen will seem buggy and you’ll have a difficult time navigating the touchscreen.

If your screen is working, but not correctly, this could be the cause.

To check if this is enabled, head to Settings > Accessibility > Touch > Touch Accommodations and tap Reset Touch Accommodations.

If you’re having a hard time navigating there because of the dodgy touchscreen, just activate Siri and say “Turn off Touch Accommodations.”

Alternatively, you can click the side button three times and this will disable it.

Back Up and Factory Reset Your iPhone

If your touchscreen isn’t working correctly, you might have a software issue. While this is rare, it can happen.

If turning your iPhone off and on again doesn’t do anything, you’ll need to do a factory reset. Be sure to back up your iPhone before moving forward. If you can use your screen in some way, navigate to Settings > General > Transfer or Reset iPhone > Erase All Content and Settings.

If you can’t navigate here, you’ll need to plug your iPhone into a computer to perform a factory reset. After resetting, in rare cases, your touchscreen will work again.

If you do choose to get your iPhone repaired, you’ll most likely need to do this anyway. This ensures that the technician won’t be able to access your personal data. They may also need to test Face ID to make sure the repair worked and will need the phone to be unlocked to do so, which means you’re better off erasing all your data first.

Getting Your iPhone Screen Repaired

If the above fixes didn’t work, this means you almost certainly need a physical repair.

If your iPhone 18 Pro Max is under warranty, you’ll want to get Apple to take a look at it as soon as possible. Visit the Apple website to figure out if you have a warranty. If you have AppleCare+, your repair will be deeply discounted.

If you aren’t under warranty and don’t have AppleCare+, you can still find authorized repair shops near you. Apple-recognized repair shops are the best place to go to get your device repaired. However, they can be expensive.

If you’re on a budget, consider exploring other repair alternatives. Screen repair shops and kiosks are popular, and some of them do a great job for a fraction of the price. However, you might not get the best repair.

Repairs performed by untrained individuals or using non-genuine Apple parts may affect the safety and functionality of the device.

Using Your iPhone Without a Touchscreen

If your iPhone isn’t working but you need to access certain files, you can still do that. To do so, you’ll need to activate Voice Control. This can be helpful for backing up and restoring your iPhone.

To do this, your phone screen will need to at least partially work. If so, try to make your way to Settings > Accessibility > Voice Control, tap Set Up Voice Control, then follow the onscreen instructions.

If Siri’s enabled, you can enable Voice Control by saying “Hey Siri, turn on Voice Control.” Once enabled, you can access your iPhone without using the touchscreen.

To use Voice Control, you should familiarize yourself with the basic commands. To browse the full list of supported commands and see examples of how to use them, go to Settings > Accessibility > Voice Control > Commands.

iPhone Screen Not Working? These Fixes Should Have Helped

If your iPhone 18 Pro or iPhone 18 Pro Max stopped responding to touch after damage, heat, or salt water exposure, a repair is likely needed. However, a user might have activated Touch Accommodations, which could be the culprit. There are also rare cases where a software problem can cause the touchscreen to stop working and a factory reset could solve the problem.

No matter what happened to your iPhone screen, it’s important to get your device functional again. After all, we use our phone for everything nowadays, and not being able to use it can change how we engage in daily life.


iPhones often run out of storage space. One quick fix is to delete all or most of your messages from your iPhone 18 Pro or iPhone 18 Pro Max: using the method outlined below we reduced the space taken by the Messages app from 2.2GB to just 112MB.

How do you quickly delete all messages from an iPhone?

Our iPhone was carrying 2.2GB of messages because it was set (as a default) to Keep Messages “Forever”. Follow these simple steps to clear all messages from your iPhone 18 Pro Max at once.

  1. Open the Settings app.
  2. Tap Apps, then tap Messages.
  3. Under Message History, tap where it says Keep Messages.
  4. There are three options: 30 Days, 1 Year, and Forever: choose the first or second option.
  5. Confirm that you want to delete the old messages and attachments by tapping the Delete button.

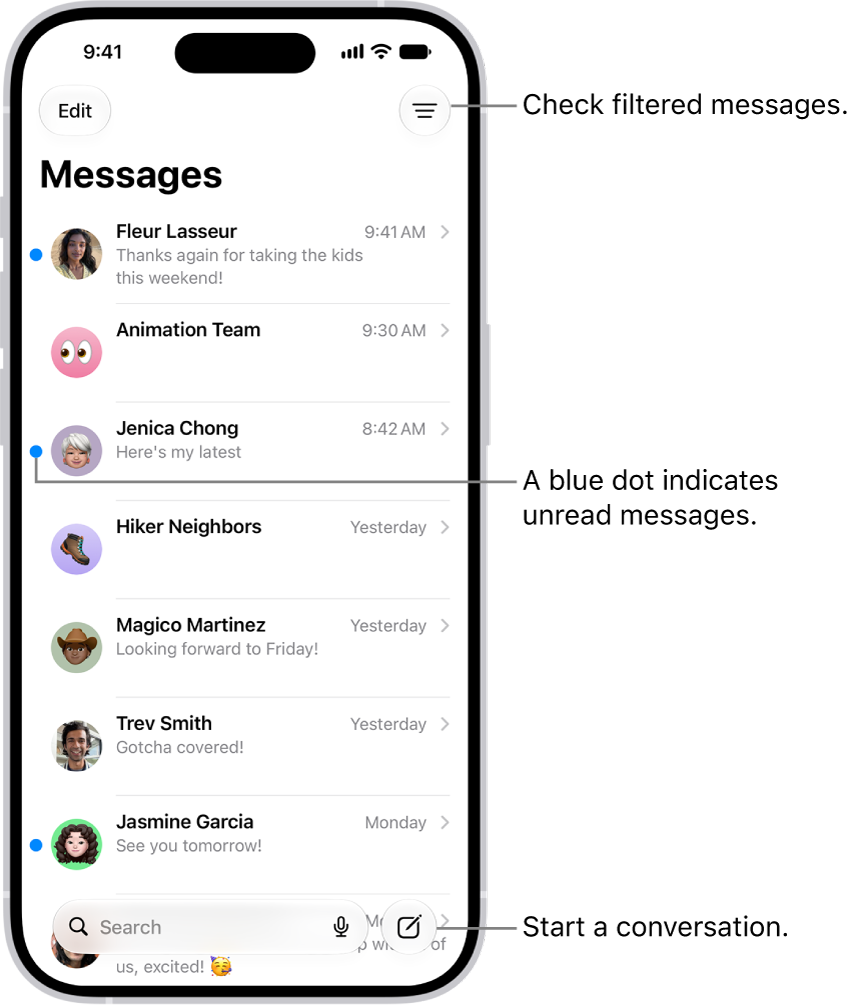
If you select the 30-day option you’ll delete the majority of messages on your iPhone 18 Pro Max and make substantial storage savings. If you want to finish the job, you can open the Messages app. At the top of the conversation list, tap Edit. Tap Select Messages, then select conversations you want to delete.

The Messages conversation list, with the Compose button at the bottom right. A blue dot to the left of a message indicates it’s unread.

We selected 1 Year – down to 885MB.

Finally, we selected to Keep Messages for just 30 days, and reduced the storage space taken up by Messages to just 112MB!

Whether you want to focus on your task at hand or take a much-needed rest without disruptions, Do Not Disturb is a feature that helps you do just that. No story reply, group chat gossip, or work call will reach you as long as you have Do Not Disturb mode enabled on your iPhone 18 Pro or iPhone 18 Pro Max.

However, if you’re still getting texts and calls on Do Not Disturb, it pretty much defeats the purpose of the feature. So, let’s look at the steps you can take when Do Not Disturb is not working on your iPhone.

1. Check Whether You Enabled the Correct Focus Mode

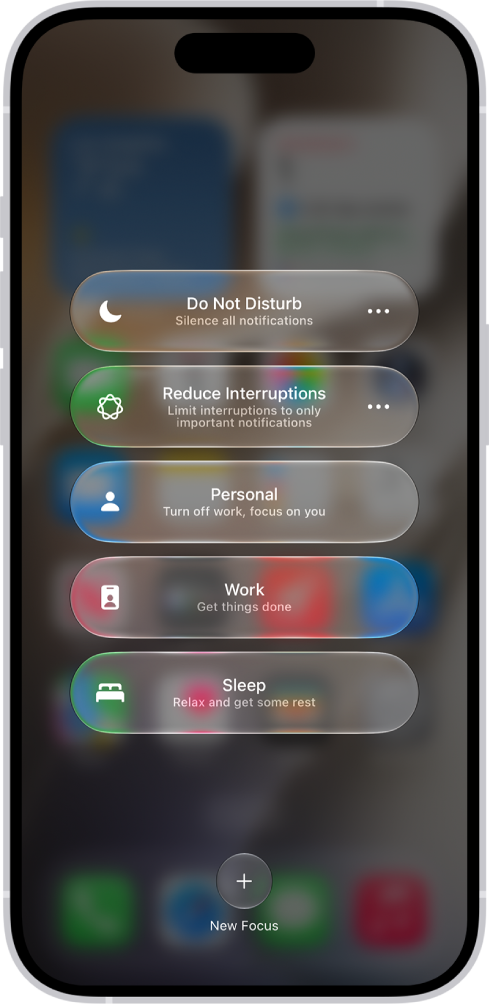
Although Apple started with Do Not Disturb, the feature has since been expanded to Focus mode. Focus includes Do Not Disturb, Personal, Work, and so on. You can set up different Focus modes and customize them for different purposes.

If you accidentally enabled Work mode instead of Do Not Disturb or Personal mode on your iPhone, you will certainly receive texts and calls from work colleagues because the latter wasn’t made to deter people from your workplace.

Therefore, before proceeding with the other suggestions in the list, access your iPhone’s Control Center and check that you have the correct Focus mode turned on to match your activity.

Control Center showing the Focus options, with buttons for setting the duration of the Focus options.

2. Review Your Allowed Apps

Do Not Disturb lets you choose which app you want to receive notifications from, even when it’s enabled. For example, when working, you naturally wouldn’t want to miss notifications from collaborative apps like Slack and Asana.

But if you feel that Do Not Disturb is not working as it should, and you’re left wondering why you’re still getting notifications from apps you don’t want to hear from, go to Settings > Focus > Do Not Disturb > Apps to review the apps with allowed notifications.

Then, tap the minus (-) button to remove an unwanted app from the list. This way, it won’t bypass your Do Not Disturb mode anymore.

3. Disable Time-Sensitive Notifications

Examples of time-sensitive notifications are reminders, emails, or messages that contain references to date and time. So, for instance, even if the Messages app is not in your list of Allowed Apps, an iPhone text message may still pass through Do Not Disturb due to the nature of its content, thus making it seem that Do Not Disturb is not working on your iPhone 18 Pro Max.

If you don’t want to receive such notifications, go to your Do Not Disturb settings in the Settings app. Tap Apps and toggle off Time Sensitive Notifications.

Alternatively, you can tap Turn Off for a specific app if you see its notifications pop up on your Lock Screen.

4. Change Settings for Incoming Calls

When you first enable Do Not Disturb mode on your iPhone, Favorites tends to be the default setting for the incoming calls allowed. If you previously added quite a few family members and friends to your Favorites list, this may be why your iPhone calls are coming through even after you enabled Do Not Disturb, as if it’s not working.

To change this, head to Settings > Focus > Do Not Disturb > People. Now, tap on Allow Calls From and select your preferred option. If you want to only allow specific individuals to call you during Do Not Disturb mode, choose Allowed People Only and tap the Add button above to select your contacts.

5. Don’t Allow Repeated Calls

If someone calls you more than once in a three-minute timespan, Do Not Disturb lets their call come through, regardless of the incoming call preferences you indicated earlier. This feature ensures that people can reach you in cases of emergencies, and it’s not because Do Not Disturb is not working.

But if there are people who call you mindlessly the moment you don’t pick up, and this feature ends up giving you more problems than convenience, you can choose to disable it. As outlined in the previous solution, go to the People settings in Do Not Disturb. Then, toggle off Allow Repeated Calls.

6. Turn Off or Hide Your Focus Status

When you turn on Do Not Disturb, you can also share your Focus status to let your contacts know that you’re temporarily unavailable.

While it’s a thoughtful feature that helps you inform others, a downside is its accompanying Notify Anyway option, which lets people override your Do Not Disturb mode. This causes text messages and calls to come through your iPhone.

To stop receiving texts and calls in this manner, you can turn off your Focus status or hide your Focus status from certain iPhone contacts.

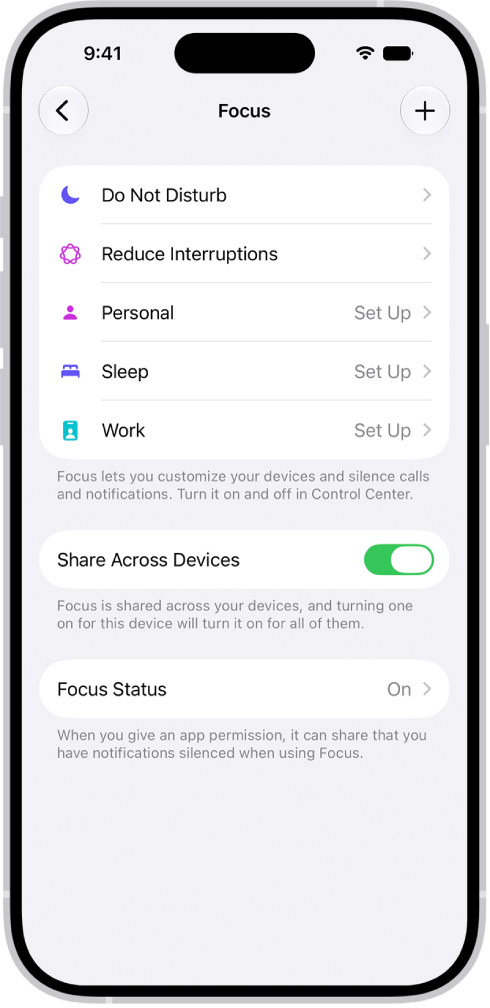
Go to the Settings app on your iPhone. Tap Focus, then tap Focus Status. Turn Share Focus Status on or off.

A screen showing five provided Focus options—Do Not Disturb, No messages during calls, Sleep, Personal, and Work. The Share Across Devices option is on, which allows the same Focus settings to be used across your Apple devices.

7. Review Your Do Not Disturb Schedule

Let’s say you used to work morning shifts every day and had set your Do Not Disturb schedule to match. If you suddenly switch to afternoon shifts, you may feel that Do Not Disturb is not working because you’re receiving unwanted texts and calls on your iPhone 18 Pro Max during your new working hours.

However, it’s simply because of your old Do Not Disturb schedule, which automatically turns off in the evening, as per your original setting. So, if there’s a change in your routine, remember to check and adjust your Do Not Disturb schedule to fit accordingly.

Head to your Do Not Disturb settings and tap on your existing schedule to edit it. You can also tap Add Schedule to set a new time to turn on Do Not Disturb.

8. Restart Your iPhone 18 Pro Max and Update iOS

If you went through all the steps above and your iPhone’s Do Not Disturb mode is still not working, try restarting your iPhone to see if it resolves the issue. Software glitches can sometimes prevent features like Do Not Disturb from functioning as intended, which you can fix with a simple reboot. Simultaneously press and hold the side button and either volume button until the sliders appear, then drag the Power Off slider. Press and hold the side button until the Apple logo appears.

An illustration of iPhone with arrows pointing to the side button on the upper right and a volume button on the upper left.

And if you haven’t, update your iPhone to the latest iOS version as well. Apple’s software updates often come with bug fixes and patches for performance-related issues. Go to the Settings app on your iPhone. Tap General, then tap Software Update.

No More Disruptions on Do Not Disturb Mode

Do Not Disturb mode aims to help you focus on your task or rest and recharge when needed while ensuring you’re still aware of the important matters that require your immediate attention.

Apple offers many customization options in Do Not Disturb mode. But since many people use the default settings in Do Not Disturb, they may get text messages and phone calls and have the impression that Do Not Disturb is not working on their iPhones.

But once you carefully go through the above list and change the right settings, you’ll no longer get unwanted notifications on Do Not Disturb mode.

Sitting in the library and your iPhone won’t connect to the Wi-Fi? Out on a trip and your cellular connection refuses to work? If you’re having trouble connecting to the internet on your iPhone 18 Pro or iPhone 18 Pro Max, this guide is for you.

Resetting your iPhone’s network settings is usually the most effective fix for all your Wi-Fi and cellular issues. Below, we’ll discuss when you should reset your iPhone’s network settings, what it does, and how you can do it easily.

When Should You Reset Network Settings?

If you can’t seem to connect to a Wi-Fi or cellular network, have issues staying connected, experience bugs, glitches, and lagging, or are finding general, consistent problems with your internet connectivity, resetting your network settings will fix the problem more often than not.

The reset only takes a few seconds and can be done on the go. If it doesn’t seem to work, or you want to avoid resetting all your network settings, you can try other fixes to connect your iPhone to Wi-Fi.

How to Reset Network Settings on an iPhone

This quick fix is pretty easy to pull off and can be done from the Settings app on your iPhone 18 Pro or iPhone 18 Pro Max with just a few taps. Follow the steps below to learn how you can reset your iPhone’s network settings to remove all existing Wi-Fi connections from your device:

  1. Open Settings and tap on General.
  2. Scroll down and select Transfer or Reset iPhone at the very bottom of the list.
  3. From the two options, choose Reset.
  4. To reset your iPhone’s network settings, select Reset Network Settings.
  5. Enter your iPhone’s passcode to finish the job. All your network settings will be reset as soon as you enter your passcode.

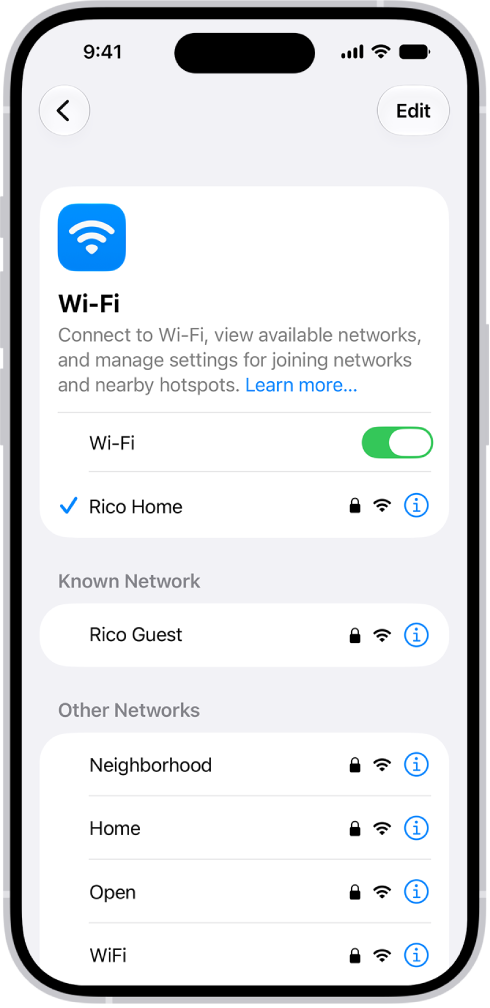
Once you’re done, head to the Wi-Fi settings menu to manually connect to your desired network. Can’t see it in the list? Don’t worry. Tap Other, then enter the name of the network, security type, and password.

The Wi-Fi options screen in Settings. Wi-Fi is turned on, and a network is selected.

What Happens When You Reset Your iPhone’s Network Settings?

When you reset your network settings, it will delete all network-related data stored on your device. This includes Wi-Fi passwords, saved Bluetooth connections, VPN information, and network preferences. They will all be restored to their default factory values, and your device will not remember any network names, login information, or paired devices.

Once you reset network settings, you will manually have to enter login information and pair your devices once again.

On the bright side, you won’t lose any files, photos, texts, browsing history, or other important data on your iPhone, as a network reset is completely different from a factory reset. A factory reset wipes your iPhone, reverting it back to the state it was in before you used it. A network reset does this only for your network settings specifically.

If you’re worried about losing passwords and any cellular network settings, you can back up your iPhone to iCloud before you proceed with the reset and then restore your iPhone from a backup afterward.

Reset Network Settings to Fix Connectivity Problems on Your iPhone 18 Pro Max

Whether you’re facing issues with your Wi-Fi or cellular data connection, you can reset your iPhone’s network settings to fix the problem within seconds. It only takes a couple of minutes and is a quick process.

This solution is effective most of the time, but remember that doing this will remove all the saved Wi-Fi networks and paired devices, and you will have to connect to them again manually, which will take some time.

If the top of your iPhone 18 Pro or iPhone 18 Pro Max shows “SOS Only” where it normally shows your cell service reception, there are a few issues that could be going on. For one, you might not have coverage at your current location. Either your carrier doesn’t offer cell service at your coordinates, or you’re blocked by a structure that the signal can’t penetrate.

If neither of those is the culprit, there are several troubleshooting steps you can try to fix this problem. So, let’s take a look.

1. Turn Cellular Data Off and On

Your iPhone’s cellular data may not be working properly. If that’s the case, sometimes the best fix is the easiest fix: turning it off and on again.

Head into Settings > Cellular. It should be already on, so turn the Cellular Data switch off. Give it a few seconds, then turn Cellular Data back on. It may have just needed a quick reset, but if there is still no luck, move on to our next suggestion.

2. Enable Data Roaming

You may need to turn Data Roaming on, especially if you’re traveling internationally. This allows your iPhone to connect to another network in a different country without having to sign up for a new service. Beware that turning this on can come with additional fees on your phone bill.

To enable Data Roaming on your iPhone, go to Settings > Cellular > Cellular Data Options. Then, toggle on the Data Roaming switch.

3. Switch to LTE

Your iPhone may have trouble picking up a specific type of cellular data, especially 5G. While 5G coverage has rapidly expanded over the past several years, LTE still blankets a larger portion of the United States. If your iPhone is set to receive 5G in a location where it’s unavailable, you may need to disable 5G on your device and fall back on another option.

Go to Settings > Cellular > Cellular Data Options like before, but this time tap Voice & Data. If 5G On or 5G Auto is selected, choose LTE and see if that gets rid of the SOS Only status.

4. Restart Your iPhone 18 Pro Max

Of course, we have to mention the good old reboot technique. If you haven’t yet tried turning your iPhone off and on again, let’s go ahead and test it out. You’d be surprised how many little annoyances a quick restart can resolve.

Simultaneously press and hold the side button and either volume button until the sliders appear, then drag the Power Off slider. Press and hold the side button until the Apple logo appears.

An illustration of iPhone with arrows pointing to the side button on the upper right and a volume button on the upper left.

5. Check for Carrier Settings Update

Sometimes, carriers roll out over-the-air updates that can solve problems with connectivity. To check if one is available for your iPhone, open Settings, then go to General > About and wait for a few seconds.

If your device needs a carrier settings update, you’ll get a pop-up on this screen. If you don’t see one, you’re up-to-date already.

Go to Settings > Cellular.

  • If you don’t see your line, you need to set up an eSIM or insert a physical SIM. If you have a physical SIM inserted, take it out and then reinsert it.

    Note: iPhone 18 Pro Max models sold in the United States are activated with an eSIM and do not support a physical SIM.

  • If you see that your line is Off, tap on it. Make sure Turn On this Line is on.
  • If Turn On this Line is already enabled, toggle the switch to turn it off, then turn it back on.

6. Contact Your Carrier

When all else fails, you should contact your carrier to see what’s going on. Since having SOS Only status on your iPhone 18 Pro Max greatly limits the features you can use, you wouldn’t want to have it for long.

There may be an issue with your cell service that’s worth getting to the bottom of. So, visit your carrier’s website and search for a contact or support page to get a customer support phone number.

Getting to the Bottom of “SOS Only”

It’s frustrating when you don’t have cell service on your iPhone 18 Pro or iPhone 18 Pro Max. So, we hope one of these solutions aids in getting your service up and running again.

If “SOS Only” is a frequently reoccurring issue, and you know lack of coverage isn’t the problem, you may want to contact your carrier anyway, even if you managed to fix the issue temporarily.

Dealing with an iPhone 18 Pro or iPhone 18 Pro Max stuck in headphone mode can be frustrating, as it prevents sound from playing through the speakers, even after disconnecting your headphones. Fortunately, it’s not difficult to turn off the headphone mode on your iPhone with the solutions below.

1. Disconnect Your Bluetooth Headphones

Your iPhone allows you to disconnect or unpair your Bluetooth devices, such as headphones, through the Settings app. If your iPhone appears to be stuck connected to Bluetooth headphones, use these steps to disconnect it:

  1. Open the Settings app and tap on Bluetooth.
  2. Tap the More Info button next to your Bluetooth headphones.
  3. Select Disconnect. Alternatively, you can select the Forget This Device option to unpair the headphones.

2. Plug and Unplug Your Wired Headphones

Temporary iOS glitches can sometimes mess up your iPhone’s headphone detection mechanism and prevent it from detecting the removal of headphones. If it’s just a one-off glitch, simply plugging and unplugging your headphones will help you fix the problem.

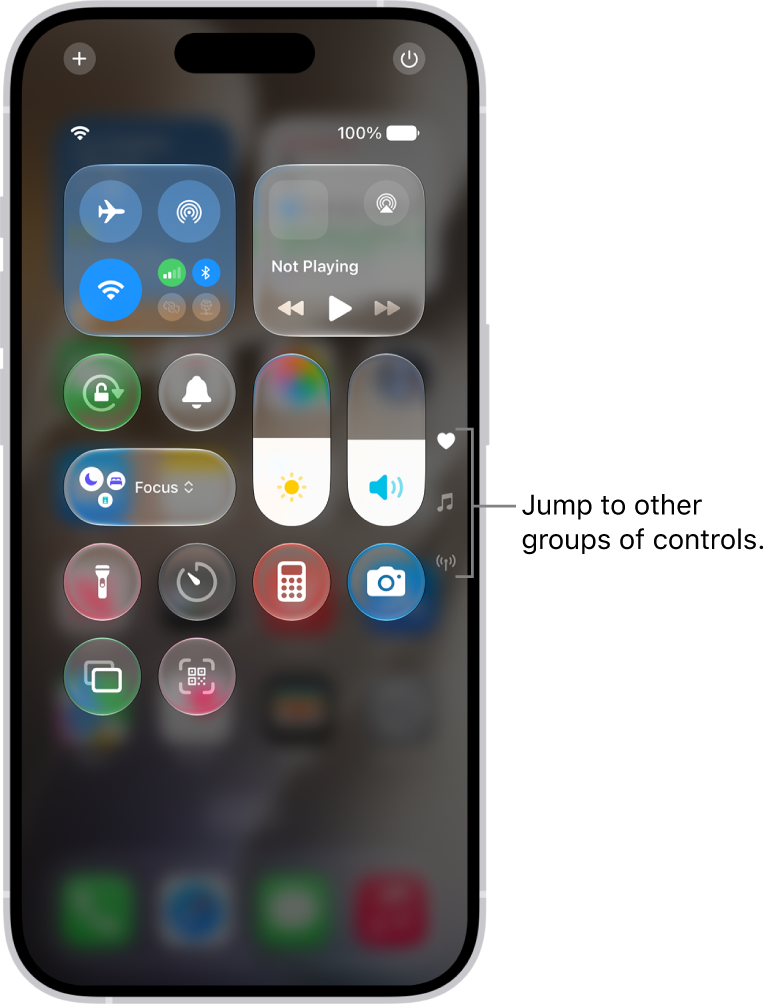
Plug your headphones into your iPhone’s USB-C connector, and then disconnect them. After that, open the Control Center on your iPhone by swiping down from the top-right corner and check if the headphone icon still appears in the volume slider.

Control Center open on the iPhone screen, with icons on the right for viewing other groups of controls.

3. Change the Audio Output

When listening to music or watching videos, your iPhone 18 Pro Max lets you choose between different audio output devices. Open the Control Center, then tap the AirPlay button in the top-right corner of the music player card. Select iPhone from the list to set it as the audio output device.

4. Clean the USB-C Connector

Accumulation of dirt, dust, or lint within your iPhone’s USB-C port can lead the device to incorrectly detect headphones as plugged in, even when they’re not. Inspect the port on your iPhone for any debris. If you find any, you’ll need to clean it out.

Use a soft, slightly damp, lint-free cloth—for example, a lens cloth. Avoid getting moisture in openings.

Apple advises against using compressed air and aerosol sprays for cleaning your iPhone, so it’s best to avoid them. Also, it’s important to be gentle when cleaning the port to avoid damaging internal components.

5. Check for Water Damage

If you can’t find any debris in the ports, but your device is still stuck in headphone mode, it might be a sign of a water-damaged iPhone. This could happen from something as obvious as spilling coffee over your iPhone or as subtle as sweat dripping down your headphone cable.

If you’re unsure, check your iPhone’s Liquid Contact Indicators (LCIs) to get a better idea of whether it has suffered water damage or not. Open the SIM card tray and look for a small sticker inside. Its color is normally white or silver, but if your iPhone has come in contact with water, the LCI should appear red or pink.

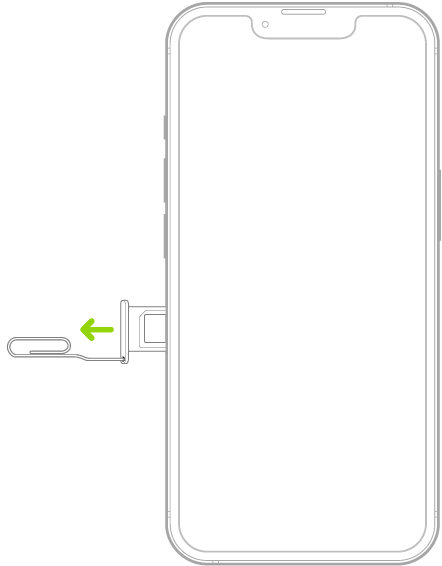
A paper clip or SIM eject tool is inserted into the small hole of the tray on the left side of iPhone to eject and remove the tray.

Note: iPhone 18 Pro Max models purchased in the United States can only be activated with an eSIM.

Apple Support document confirms that eSIM-only iPhones don’t have Liquid Contact Indicators on the outside. They’re located internally, so you’ll need to disassemble your device to find it. However, we don’t recommend doing this.

If your iPhone has suffered water damage recently, it’s better to act quickly and get the water out to prevent further damage. Avoid using rice to dry your iPhone because it may worsen the situation by leaving harmful residue or further obstructing the ports.

6. Install iOS Updates

There’s an odd chance your iPhone 18 Pro Max has become stuck in headphone mode because of a software problem. If that’s the case, it shouldn’t take long for Apple to release a fix via a software update.

Go to Settings > General > Software Update to check for new updates. If any updates are available, download and install them on your iPhone.

7. Restart Your iPhone 18 Pro Max

This may sound cliche, but restarting your iPhone can take care of any temporary issues that may have caused it to become stuck in headphone mode. Hence, don’t skip this step.

Press and hold the Side button with one of the Volume buttons until the power slider appears. Drag the slider to your right and wait for your iPhone to turn off completely. Then, press and hold the Side button again to turn it back on. After that, check if your iPhone outputs audio through its built-in speakers.

An illustration of iPhone with arrows pointing to the side button on the upper right and a volume button on the upper left.

8. Factory Reset Your iPhone

If installing iOS updates proves ineffective, you can consider factory resetting your iPhone. This process will erase all data and revert settings to their factory default values, essentially restoring your iPhone to its original state.

Make sure you back up your iPhone first to protect your valuable data. Go to the Settings app on your iPhone. Tap General, then tap Transfer or Reset iPhone. Tap Erase All Content and Settings.

If nothing seems to work and your iPhone is still under warranty, you can make an Apple Store appointment to have your iPhone checked and repaired by a technician. If it’s a software issue, Apple will cover the repair cost as long as your iPhone’s still under warranty.

However, if physical damage is the culprit, Apple will charge a hefty sum unless you’ve purchased an AppleCare+ warranty, which covers accidental damage. Don’t try to save money by getting it fixed at a third-party repair shop, as that will void your warranty.

Summary

  • The “Offline” status in Find My means your iPhone can’t connect to Apple’s Find My network to provide its location.
  • You’re likely to encounter this when your iPhone has a dead battery or hasn’t connected to the internet in over 24 hours.
  • To find your missing iPhone 18 Pro Max that’s offline, someone else should pick it up, power it back on, and connect it to the internet first.

Apple’s Find My network makes it easy to find a lost iPhone, but what can you do if iCloud shows that your iPhone 18 Pro Max is offline or no location is available? Fortunately, it’s still possible to locate your device.

What Does “Offline” Mean for Find My iPhone?

While the Find My network helps you find your Apple device if it goes missing, you can sometimes encounter the dreaded “Offline” status when you try to locate it. You may also see “No location found” or “Location Services Off” in the Find My app or iCloud Find Devices page.

This means that your iPhone is unable to connect to Apple’s Find My network, and as a result, cannot provide you with its location. But why is this?

Why Is Your iPhone 18 Pro Max Offline?

In most cases, you’ll encounter the “Offline” status in Find My because your iPhone’s battery is completely depleted or it has been 24 hours since its last known location was sent to Apple—due to the lack of an internet connection.

If you suspect that your iPhone is stolen, the thief may have put your iPhone in recovery mode and restored it using a computer. Fortunately, since they cannot turn off Find My without your Apple Account credentials, you will be able to locate your iPhone the moment it connects to the internet. Then again, the thief can remove the SIM card and disconnect from Wi-Fi to prevent this.

There’s also the small possibility that you lost your iPhone in a country without Find My support. A note on Apple’s Support page confirms that Location sharing and finding devices aren’t available in all countries or regions. So on the off chance that you visit, say, North Korea and lose your iPhone, you’re out of luck.

Lastly, it’s possible that you enabled Airplane Mode on your iPhone 18 Pro or iPhone 18 Pro Max before you lost it. In such cases, you’ll only be able to see your iPhone’s last known location.

On a supported iPhone, turning on the Find My network allows you to locate your iPhone for up to 24 hours after it’s turned off, or up to 5 hours when it’s in power reserve mode. However, your iPhone must be near other Apple devices for this to work. So if there aren’t any in the vicinity, Find My might instead display the “Offline” status.

How to Find an iPhone That’s Offline

When you open the Find My app on an Apple device or head to the iCloud Find Devices page, you’ll see a few options when you select your offline iPhone. If you’re using the Find My app on a Mac, Control-click your iPhone or click the Info (i) button next to the iPhone on the map to access the same options.

Firstly, it’ll tell you its battery level, but this isn’t something to be overly concerned about. You may also see its last known location. If you see the Directions option, click it to get a route to this location. If you don’t have this option, it means your iPhone isn’t sending its last known location. But that doesn’t mean it’s game over.

While it may seem futile, click Play Sound first. Sometimes, this can re-establish a connection with the lost iPhone; you’ll know it worked when “Offline” is replaced by “Now.” Once this happens, you should be able to see your iPhone’s location again.

If your iPhone is powered off or isn’t connected to the internet, you’ll see “Pending” when you click Play Sound. Your iPhone will only play the alert when someone turns it on and connects to the internet. In such cases, you can toggle on Notify When Found to be notified the moment your iPhone goes back online.

To take things further, you can tap the More button, then tap Lost Mode to leave a phone number and a message so that someone who finds your missing iPhone can contact you to return it. This remotely locks your iPhone, disables Apple Pay, and prevents notifications from showing up. You can still receive calls and FaceTime calls, so you can get someone to call your device to try retrieving it.

When you turn on Lost Mode for an iPhone that’s offline, you’ll see a “Pending” status until it’s powered on and connected to the internet again.

It’s also worth contacting your mobile service provider. If you know your phone’s IMEI number or serial number (which you can find on your iPhone’s packaging), your carrier may be able to trace its position.

Consider revisiting where you’ve been recently, and if you’re lucky, you may find your iPhone without further help from technology. Otherwise, you need to wait and keep your fingers crossed that someone finds it.

How to Protect Your Data if Your iPhone 18 Pro Max Is Offline

If you’ve tried everything above and waited patiently to get back your lost iPhone but to no avail, the next step is to protect all your data stored in it. If you think someone has stolen it or whoever locates it could access your private information, it’s time to erase your iPhone remotely.

To erase it, select your iPhone in the Find My app, tap the More button, tap Erase, then tap Continue. You can also use the iCloud Find Devices page. On a Mac, you can Control-click your iPhone in the Find My app to access it.

Erasing your iPhone should be your last-resort option. Only proceed if you’ve given up hope, or you’re confident all your data is backed up to iCloud or your computer so that you can restore your iPhone from a backup easily if you get it back.

Before you panic and take this step, remember that if you’re using Face ID and have a strong passcode, no one should be able to access your personal information. Again, your iPhone will only wipe its data when it’s on and connected to the internet.

Hopefully, these tips helped you find your iPhone 18 Pro Max, even if Find My showed it’s offline at first. If you’re out of luck, remember that putting it in Lost Mode for a day or two is safer than erasing all your data.

Do you keep seeing “Location Not Available” while tracking a friend or family member’s location in iMessage or Find My on your iPhone 18 Pro or iPhone 18 Pro Max? It’s an issue that’s pretty easy to resolve. However, you may need to ask your friend or family member to take action on their device as well.

So without any further ado, let’s check out what it takes to fix the “Location Not Available” error on an iPhone. We’ll start with the steps you can try yourself, before moving onto what the person you’re trying to track needs to do.

How to Fix “Location Not Available” From Your Own iPhone 18 Pro Max

There isn’t a lot you can do yourself if Messages or the Find My app says “Location Not Available” when someone has chosen to share their iPhone location with you. But it’s still easiest to try these steps first, before involving somebody else.

Quit and Relaunch Find My or Messages

Sometimes, the Messages or the Find My app can bug out and result in the “Location Not Available” error. The quickest way to resolve that is to force quit and relaunch the app in question.

To force quit Messages or Find My:

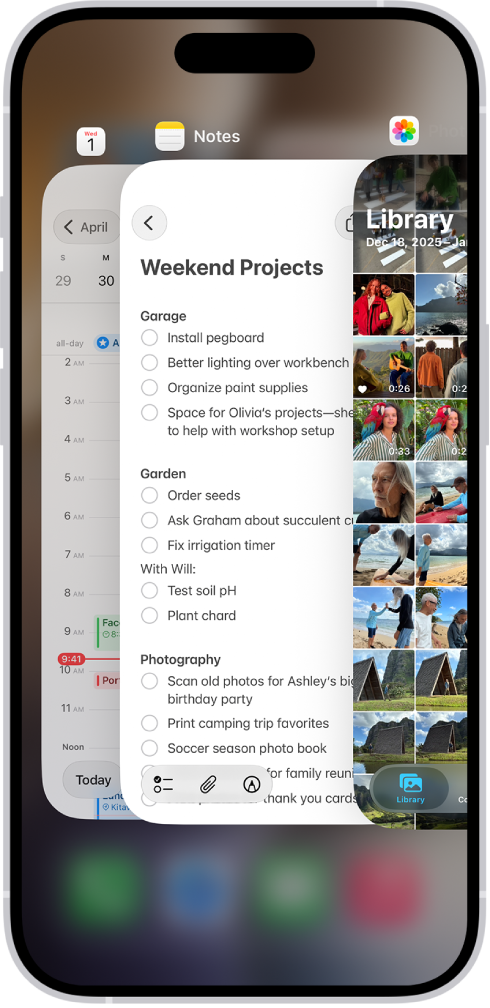
  1. Swipe up from the bottom edge and pause in the center of the screen to invoke the App Switcher.

    The App Switcher. Icons for the open apps appear at the top, and the current screen for each open app appears below its icon.

  2. Locate the Messages or Find My card and push it off the top of the screen to close it.
  3. Now go back to the Home screen and open Messages or Find My again.

Restart Your iPhone 18 Pro Max

If closing and reopening the relevant app didn’t work, you might need to restart your iPhone instead. To restart your iPhone, simply open the Settings app and tap General > Shut Down. Drag the slider to turn off iPhone. Once the screen goes black, wait for several seconds and hold the Side button until you see the Apple logo.

How to Fix “Location Not Available” From Someone Else’s iPhone

If the two fixes above didn’t help, you’ll need to shift your attention to your friend or family member’s iPhone. Walk them through the fixes below on a call. Or, share this post with them and make sure they follow the instructions in this section.

Toggle Share My Location Off and On

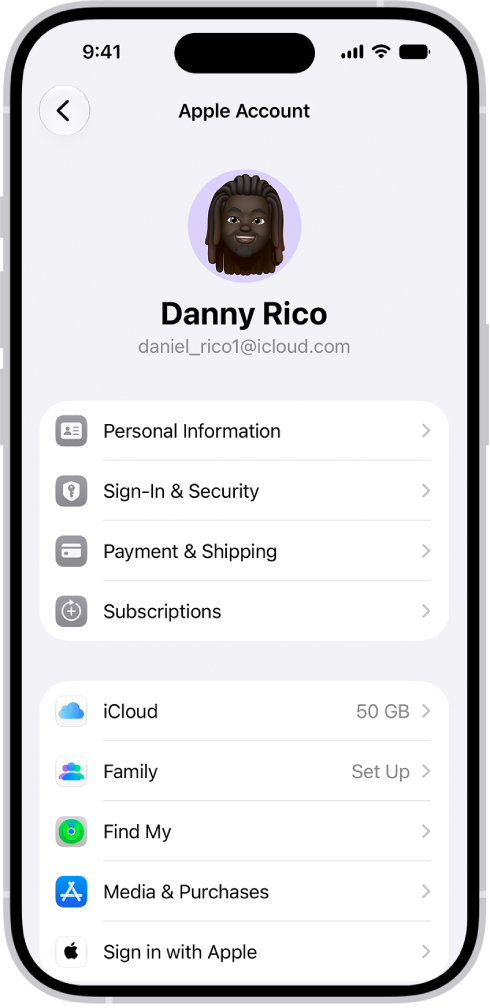
Disabling and re-enabling Share My Location in the Find My preferences can help an iPhone broadcast its location again. To do that, go to Settings and tap the person’s name at the top of the screen, then select Find My. Toggle the switch next to Share My Location off and then on.

The Apple Account Settings shown with a list of options including personal information, subscriptions, Find My, and more.

If you set up location sharing and others still can’t see your location, make sure Location Services is on in Settings > Privacy & Security > Location Services > Find My.

Share the Location in Messages and Find My Again

Next, disable and re-enable location sharing in the Messages or Find My app:

  • In Messages: Open a chat with the person you want to share your location with. Tap the profile picture at the top of the chat and select Stop Sharing My Location. Now tap the Add button, tap Location, then tap Share.
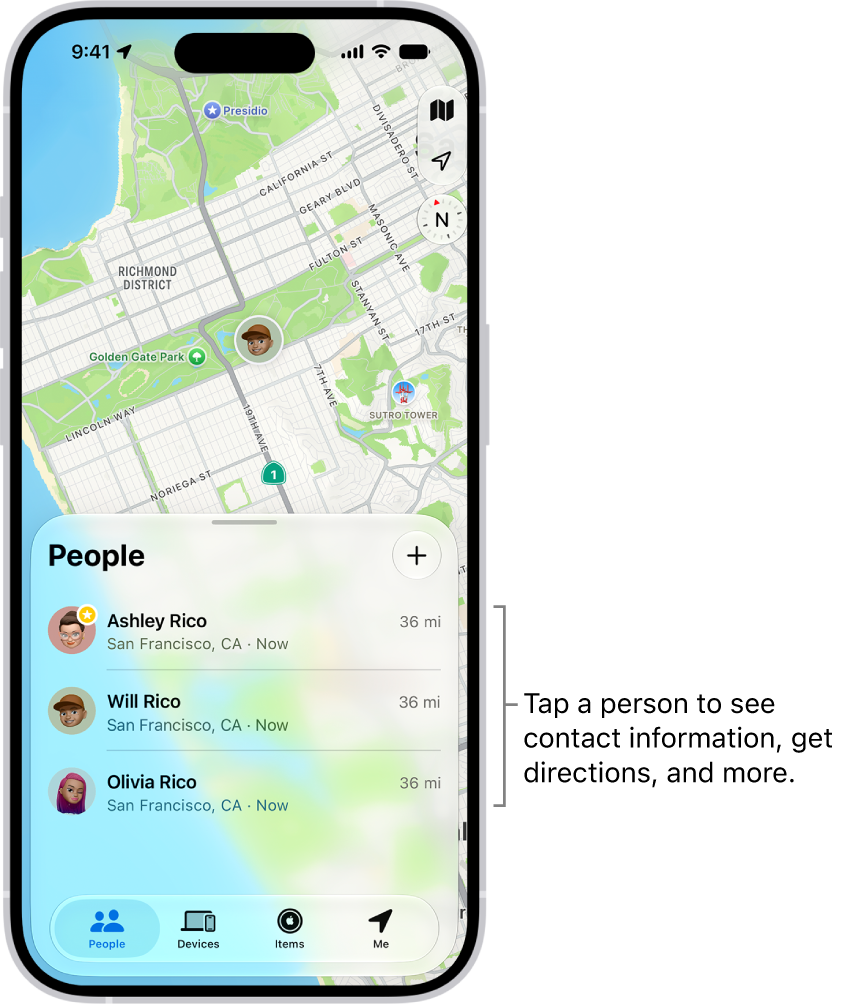
  • In Find My: Switch to the People tab, tap the name of the person you want to share your location with and select Stop Sharing My Location. Then, go back to the People tab, tap the Add button, Share My Location, and choose a contact.

    The Find My People list, with the Add button at the top. Tapping a person in the list shows their contact information, directions, and more.

Restart the iPhone

The simplest method is to go to Settings > General > Shut Down. Drag the slider to turn off iPhone. Then, press and hold the Side button to restart the iPhone.

Check the Date and Time

An incorrect date or time can create issues with location sharing. To check this, go to Settings > General > Date & Time. If the date or time is wrong, turn on the switch next to Set Time Automatically to get the correct date and time from Apple’s servers. If this doesn’t help, deactivate the switch and set the correct time manually.

Switch to Cellular Data

Spotty Wi-Fi can also play a factor, so try using cellular or mobile data instead. To do that, open the iPhone’s Control Center (swipe down from the top-right of the screen) and tap the Wi-Fi icon to disable it.

Control Center open on the iPhone screen, with icons on the right for viewing other groups of controls.

If cellular data is active, the iPhone should automatically start using it. If not, tap the Cellular icon to activate it. Just make sure you don’t have any cellular data problems on your iPhone 18 Pro or iPhone 18 Pro Max as well.

Sharing Your Location Isn’t Always Wise

Location tracking can be a double-edged sword. Although it enables valuable features such as location sharing in iMessage and Find My, various third-party apps and services can also use your location for nefarious purposes.

When you move to a new iPhone 18 Pro Max you don’t want to spend ages setting everything up from scratch to get the apps, data and settings just the way you like them. That’s why restoring from a backup is so convenient: one quick tap, a bit of a wait, and you’re good to go.

The same is true if a phone malfunctions badly, or is bricked. Knowing you can wipe the iPhone and recover your photos, documents and data easily from an iCloud or a computer backup is reassuring.

A backup is also an insurance that, should your iPhone be lost or stolen, you won’t lose everything on it. It’s easier to replace the device than the memories and other data stored on it.

Yes, backups are an essential part of the modern digital life. But knowing how to restore an iPhone 18 Pro Max from that backup is just as important. Read on for our complete guide.

Step 1: Find your iPhone backup

First things first: make sure you’ve got a backup that you can restore from. Crucially, this backup needs to be recent enough to include the apps and data you want to keep, and/or sufficiently old that it happened before the technical problem if you are trying to fix a faulty iPhone.

There are two places you may find a backup, as long as you are making backups. One is iCloud, to which you may need to subscribe to get enough space. The other method depends on whether you are using a Mac or a PC: on a Mac iPhone backups are made via the Finder (in macOS Catalina and later) and on a PC (and older versions of macOS) they are made via iTunes.

To see iCloud backups follow these steps:

  1. Open Settings on your iPhone.
  2. Tap your name/face at the top.

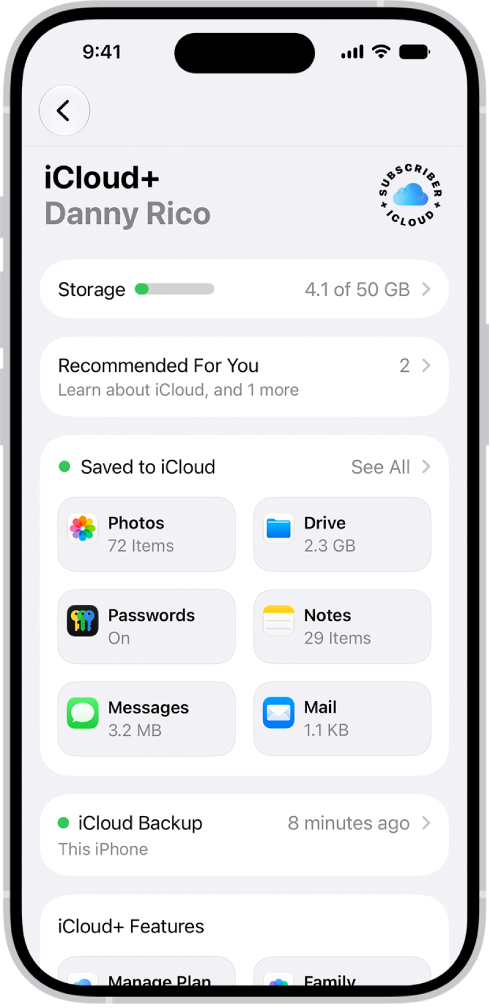
    The Apple Account Settings shown with a list of options including personal information, subscriptions, Find My, and more.

  3. Now tap iCloud.

    The iCloud settings screen showing the iCloud storage meter and a list of features—including Photos, iCloud Drive, and iCloud Backup—that can be used with iCloud.

  4. Tap iCloud Backup, then tap your iPhone (This iPhone).

Computer backups

To see backups made on a Mac follow these steps:

  1. Plug in your iPhone.
  2. Open the Finder.
  3. Click on your device in the sidebar.
  4. In the General tab click Manage Backups.
  5. If there are any backups you will see them here. (You’ll also see if iCloud backups are being made).

The process is similar in iTunes:

  1. Open iTunes.
  2. Click iTunes in the top bar and select Preferences.
  3. Select the tab labelled Devices. The date and time of each backup is listed.

Should I back up first?

If you are wanting to make a backup that you can recover to a new iPhone, and you’re not sure you’ve got a sufficiently recent backup, play it safe by doing another backup of the old device right now.

If you are hoping to solve an issue with your iPhone 18 Pro or iPhone 18 Pro Max that started recently and you have an old iPhone backup you can recover don’t back up your iPhone, the old backup may be your best bet in getting your iPhone working again. This applies if you want to recover your iPhone to a time before you installed a beta version of iOS.

Step 2: Wipe your iPhone

If you are just recovering the backup to a brand-new iPhone, or one that has already been wiped you can skip this step.

However, if you are trying to troubleshoot an issue with your iPhone, want to remove a beta, or if you want to wipe the iPhone you have to pass it on to a new owner, you’ll need to wipe it first. You can’t restore an iCloud backup to an iPhone 18 Pro Max without erasing the contents first.

This process is easier if you are recovering an old backup to an iPhone that is running the same version of iOS that you intend to run. It gets a lot harder if you are running a beta version of iOS–in which case you may need to plug it into a Mac, force the iPhone into recovery mode and restore it that way.

Normally resetting your iPhone so that you can recover a recent backup is a simple process and hopefully one of these two options will work:

On an iPhone:

  1. Open Settings.
  2. General.
  3. Transfer or Reset iPhone. Erase All Content and Settings.
  4. Erase and then work through the various steps.
  5. Your iPhone should restart with the Welcome screen if this process has worked.

On a Mac:

A second option is to plug your iPhone into your Mac and restore it from the Finder.

  1. Open the Finder.
  2. Click on your iPhone in the left-hand column.
  3. Click on Restore iPhone.
  4. Click on Don’t Back Up.
  5. Click on Restore.
  6. Your iPhone should restart with the Welcome screen if this process has worked.

On a Mac using Recovery Mode:

Here’s how to put your iPhone into recovery mode so you can wipe it (if the above options don’t work):

  1. Plug your iPhone into your Mac.
  2. Open the Finder.
  3. You may see a message that indicates you need to download an update to access the iPhone, in our experience the said software was unavailable from the software update server, so don’t worry about this.
  4. Press and release the Volume Up button. Press and release the Volume Down button. Press and hold the Side button. Keep holding the Side button until you see the recovery mode screen.
  5. On your Mac you should now see a message indicating that there is a problem with the iPhone that requires it to be updated or restored. Click on Restore.
  6. You will see a warning: “Are you sure you want to restore the iPhone…” Click on Restore and Update.
  7. Click Agree on the next screen that details the license agreement.
  8. Just note that there’s only about 15 minutes before your iPhone will exit recovery mode, at which point you will have to enter recovery mode again.
  9. Your iPhone should restart with the Welcome screen if this process has worked.

Step 3: Restore your iPhone from a backup

Now you have wiped your iPhone 18 Pro Max you can get on with the process of recovering it from your backup. Or, if you have a brand new iPhone, you can follow these steps to set it up as a clone of your old iPhone with all your data just as you left it.

How to recover from an iCloud backup

We’ll start off with how to recover from an iCloud backup:

  1. Swipe up from the Welcome screen.
  2. Tap on English (or your language) and select your country or region.
  3. Tap Set Up Manually.
  4. Work through the various steps until you get to the Transfer Your Apps & Data screen and tap on Restore from iCloud Backup. Check the date to make sure it’s the backup you want.
  5. Log into your Apple Account and wait while your device signs in.
  6. Now choose an iCloud backup from before you downloaded the beta. Click on Show more backups to find an older one if you don’t see it.
  7. Wait while the Restore from iCloud takes place, which could take a while.

The device will need to be connected to Wi-Fi throughout the process, and it can take a while, depending on how much data needs to be restored. It’s also likely that you’ll be asked to log in again so that any purchased items from the App Store or iTunes Music can be downloaded.

When the core elements of the backup are finished you’ll be able to use the handset again, but you might notice that apps and other data continue to install in the background. This is perfectly normal.

How to recover from a Finder/iTunes backup

Whether you are using the Finder on a Mac running macOS Catalina or later, or iTunes on an older macOS or PC, the process for recovering the iPhone backup is similar.

  1. You need to plug it into a Mac or PC.
  2. If you’ve not connected the device to this particular computer before, you’ll see the ‘Welcome to Your New iPhone’ page.
  3. Click continue and then agree to sync your iPhone.
  4. With this completed, you’ll be taken to the device summary page in the Finder/iTunes, which includes various options for backing up and restoring your device.
  5. In the Backups section you’ll see a button marked Restore Backup (as long as you have one). Click this.
  6. If Find My is switched on then you’ll see a message telling you that it needs to be turned off before you can proceed. To do this, open Settings on your iPhone and tap your name/face at the top of the screen, then tap Find My. Tap Find My iPhone, move the toggle switch to off, enter your password to confirm, then return to iTunes on your Mac or PC.
  7. After clicking Restore Backup a popup should appear with the current iterations available. Select the one you want, then click the Restore button.
  8. Now your iPhone will run through its automated restoration process. iTunes will let you know when the update is complete, then you can disconnect the iPhone and go about your business with your data safely on board.