






Got a tip for us?

iOS 27

Apple started deploying what’s loosely called “artificial intelligence” over a decade ago, when they silently switched the original Siri voice-assistant system to use a neural network—a software model that mimics neurons in the brain—in 2014. Unfortunately, even then, Siri was always somewhat frustrating to use unless you learned exactly the set of words you should use for particular kinds of instructions, and were patient when it got it wrong—repeatedly. Other voice assistants, like Amazon’s Alexa and Google Assistant, offered more natural interactions.

The new Siri AI in iOS 27, iPadOS 27, and macOS 27, along with many other features under the broader Apple Intelligence umbrella, seems to have gotten it right: you can use Siri much more like a chatbot offered by numerous companies. You ask questions with free-flowing natural language, and Siri responds. You can ask follow-up questions, and it maintains the thread of context to dig in.

Learn how AI learns

Siri and its competitors were built using a machine-learning approach called deep learning, which creates neural networks that have a very, very loose relationship to the way that humans think. These networks are formed through training: feeding sometimes billions of examples of a thing, like human speech, that’s been classified by human beings. The model develops a fuzzy pseudo-understanding of, say, the difference between a photo that contains a cat or a dog, or between the words “hermetic” and “emetic.”

The emergence of deep learning is why Apple’s transcription of spoken words became quite good, with Siri and dictation. More generally, it’s why image recognition became useful—like in Photos when you would search for “dogs” and get images of dogs that weren’t labeled dog—and computerized voice transcription suddenly jumped from passable to very good.

However, the issue with Siri and other machine-learning interactive tools was that they often understood the precise words you said, but couldn’t correctly act on them. Google and Amazon seemed to advance their products with the same input limitations as Apple—however invasive to our privacy they might be—ostensibly by building out answers to queries instead of parsing them and generating results on the fly. We’ll never know for sure what happened behind the scenes.

The rise of large language models (LLMs), a specific form of neural network—one that relies on predictive models—seemed to spur Apple to action. Chatbots based on LLMs first appeared in 2022. LLMs also require massive amounts of training, but generalized training, rather than specialized.

Where previous deep-learning models were given massive amounts of very similar things to identify them—a billion animal photos—LLMs ingest written materials (like books, academic papers, webpages, and source code) and visual materials (illustrations, photographs, cartoons, and more).

Having swallowed the world of knowledge, an LLM has a sort of statistical, fuzzy basis on which to produce words and images. The interactive interface to an LLM can produce credible-sounding responses or graphics based on prompts, or what a user says, types, or uploads, because it has had such vast training on what humans have ever written, said, or visually created.

Some LLMs violated copyright in training

It is alleged—and we believe the evidence shows this is true—that some companies building LLMs have trained their models on copyrighted material for which they lacked permission. In our view, this violates the rights of, and effectively steals from, authors, artists, and programmers by failing to reach an agreement with or compensate them (including us).

Courts remain undecided on our opinion that this is theft. A judge in an author-driven lawsuit against Anthropic—they make Claude—ruled that the company’s scanning 7 million books and using them for training fell under “fair use,” but Anthropic’s central storage of the scanned items was a violation. Anthropic has agreed to settle the remaining issue for $1.5 billion without agreeing that their actions violated copyright. This will play out for years to come.

LLMs also enabled generative uses: you could ask an LLM model to revise an essay, write an academic paper, draw a cartoon, or create a photo showing the Pope in a fashion-forward puffer jacket. Using known sequences and analyzed features in images sometimes allowed plausible-sounding results. However, LLMs aren’t particularly good at any of these tasks. We cover that in the Apple Intelligence features to skip.

Hallucinations and big models

We still worry about LLM-based hallucinations, which is typically when a model either doesn’t know something and “makes it up” by compiling unrelated information into something that sounds plausible, or when a back-and-forth conversation has continued so long that its random walk down word selection has gone way off the rails. It’s something all the AI companies have tried to correct for.

In our testing of Siri AI, we haven’t seen meaningful hallucinations yet, in the sense that we get answers that seem to be on target, and we’re not told to, for instance, add glue to a pizza’s top to keep the cheese from sliding off. However, it’s always worth remembering that Siri AI may be working from a knowledge base Apple has defined, but it remains limited by the fact that it doesn’t understand what it is telling you.

Understand Apple’s retooling

Apple’s launch of Apple Intelligence (their own brand of artificial intelligence) in 2024 was supposed to happen alongside the revamp of Siri, which would finally be more reliable at understanding and acting on, or answering, what we said. This revamp apparently incorporated LLM technology, though to what extent, it’s unclear.

When that didn’t pan out well enough to release, Apple Intelligence on its own seemed a bit lackluster. You could see improvements built on it in the fall 2024 and fall 2025 releases that were increasingly useful, such as Live Voicemail, call screening in the Phone app, and Live Translation.

iOS 27, iPadOS 27, and macOS 27 contain Apple’s long-promised update.
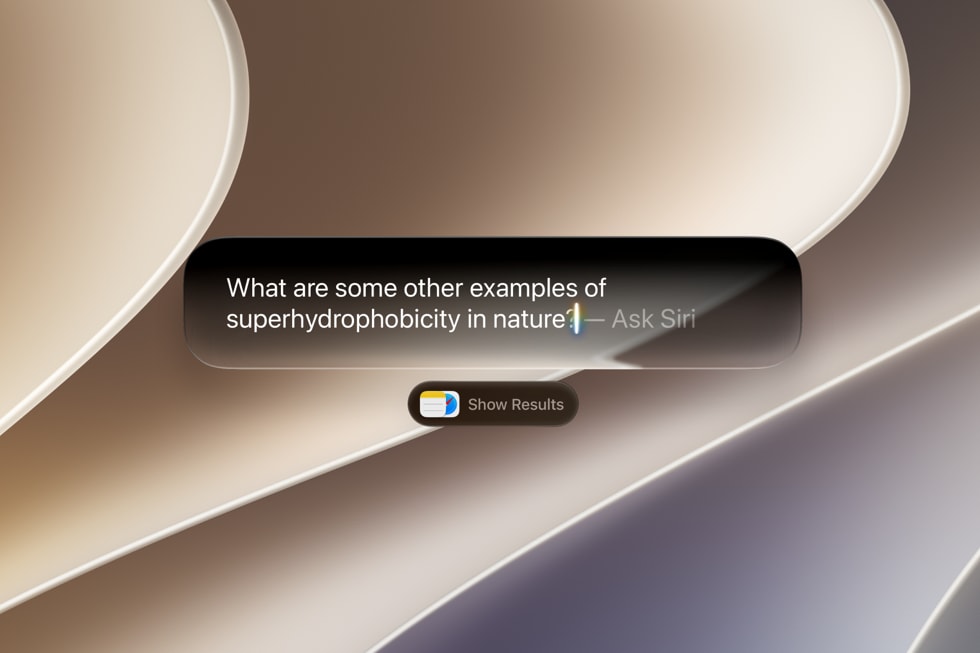
To use the new Siri in iOS 27, iPadOS 27, macOS 27, or watchOS 27, you have to trigger or invoke it. Apple offers multiple ways to activate Siri AI on each kind of hardware.

Siri’s appearance when activated and some of the methods to bring up its interface have changed since the version 26 releases. Its static icon has changed. Siri shows its active state using a consistent animation across platforms. On iPhone and iPad, that animation appears at the top of the device rather than as a glowing animation on all four edges.

Use Spotlight

Back in the olden days of (checks notes) mid-2025, Spotlight was for searching, and Siri was for other sorts of requests. Both involved a text field on your screen, though Siri could, of course, also respond to your voice.

In Golden Gate, when you press the Spotlight shortcut (⌘-Space by default), and on an iPhone or iPad when you swipe down on the Home Screen, you see a text field that serves both purposes. You can type the name of an app or file, and it will give you the same results as Spotlight always has, but you can also ask questions that Siri will answer from its nearly unlimited storehouse of information. Or you can use a plain-language description of what you’re looking for on your device, and Siri will find it. If, while this window is open, you prefer to speak your request, click or tap the microphone button, then speak.

A MacBook screen showing Siri AI integrated into Spotlight, answering a question.

Apple removed the “type to Siri” option introduced in iOS 26, which let you double-tap the bottom of the display.

Use the Siri menu bar icon

On a Mac, if you click the Siri menu bar icon, you see the same combined Spotlight/Siri “Search or Ask” field as when you activate Spotlight via a keyboard shortcut.

Use “(Hey) Siri”

Optionally, Siri can continuously listen for requests. If you enable this (in Settings > Siri > Requests on iPhone or iPad, or System Settings > Siri > Requests on a Mac), you can say “Siri” or “Hey Siri” (depending on your settings) to trigger an animated, glowing blob that indicates Siri is ready to listen for spoken commands.

The first time you enable this, Siri asks you to repeat several phrases so it can adapt to the sound of your voice.

This also works on an Apple Watch: go to Settings > Siri, tap “Listen for,” and then tap either “Siri” or “Hey Siri” or just “Hey Siri.”

Use buttons on iPhones or iPads

On iPhones, you can press and hold the side button to activate Siri. Similarly, on iPads without a Home button, press and hold the top button. On iPads with a Home button, press and hold it instead.

Use Digital Crown or Raise Wrist on Apple Watch

In addition to listening for “Hey Siri” and/or “Siri,” your Apple Watch can activate Siri when you press the Digital Crown or when you raise your wrist. To enable either or both of these features, go to Settings > Siri and turn on Raise to Speak or Press Digital Crown.

Use contextual menus

On a Mac, you can select text, one or more files or folders, images in Photos, or other types of objects, then right-click or Control-click and choose Ask Siri from the contextual menu. Doing so not only activates Siri but also feeds it the selected item(s) as input it can work with. This even works in System Settings!

Likewise, on an iPhone or iPad, you can touch and hold text, images, and other objects, then tap the Siri button on the pop-up menu. An “Ask Siri about this” field appears, where, again, you can ask Siri anything but also give it the context of whatever was selected.

Use AirPods

With your AirPods connected to a Mac, iPhone, iPad, or Apple Watch that has “Siri” or “Hey Siri” enabled, you can speak your request just as you would if you were using the device without AirPods—but only if the AirPods are a recent model (AirPods 4, AirPods Pro 2, AirPods Pro 3, AirPods Max 2, or later). On older models, you must use “Hey Siri.”

Using “Siri” as the trigger may be unavailable in some countries and regions, even with a supported device.

In addition, you can use physical controls on your AirPods to activate Siri. The exact steps vary by AirPods model.

Use CarPlay

With an iPhone with iOS 27 installed connected to a CarPlay system, you can carry out Siri conversations, and these are synced in the Siri app, marked with a car icon.

Activate Siri while you have an iPhone connected to CarPlay using one of several methods:

  • The voice triggers you have set work as they would if your iPhone weren’t connected.
  • If your car has a steering-wheel activation button, press and hold it. Talk to Siri while continuing to hold the button for the entire time you’re talking. (Some cars trigger the automaker’s system with a short push, so be sure to press and keep holding.)
  • Touch and hold the Dashboard or Home button on the CarPlay screen. In the interests of safety, we recommend never doing this while driving.

Use Apple Vision Pro

On an Apple Vision Pro, say “Siri” and the new app appears with its glowing orb. Once it appears, you can grab and pin it in your environment, after which you can just look at the Siri orb to activate it and start talking.

You can also reach Siri via the Home button. Hold your palm open and look at it, then pinch and hold the Home button. A Siri orb appears above it, and you can start speaking. You have to keep your fingers pinched while you speak, much like a Siri Remote for Apple TV requires you hold the Siri button as you speak.

Siri AI doesn’t switch itself on when you update your device.

Siri AI has the same basic requirements as Apple Intelligence. If your device is capable enough for Apple Intelligence, it can install iOS 27, iPadOS 27, or macOS 27 and use Siri AI. watchOS 27 also provides ancillary access via a paired iPhone on supported Apple Watch models. Apple Vision Pro can also use Apple Intelligence. However, Apple also has language and region requirements at launch.

How to turn on Siri AI

Go to Settings > Siri on iPhone or iPad, or System Settings > Siri on a Mac, and tap or click “Try the new Siri.”

Why search and Siri must optimize

After you enable Siri AI on your device, it may need to “optimize” both search and Siri. This is some kind of elaborate indexing. Keep your device plugged in for faster optimization.

On a fresh install and some upgrades, you may have to wait some period of time. On an unloaded iPhone—freshly restored to factory settings and with relatively little synced material—it took well over a day for the optimization message to disappear and for Siri’s new features to start working.

Monochrome or colorful Siri icon

The Siri pane of Settings on iPhone and iPad, or System Settings on a Mac, lets you configure numerous aspects of Siri AI. You can use this pane to understand whether Siri AI is currently engaged, something that’s not always the case.

If you see the new monochrome Siri icon, that means your device is currently configured to use Siri AI. If you see the old, colorful Siri icon, that means it’s not.

Among the reasons the old icon might appear are that your device, or Siri, is set to an incompatible language, that your two language settings don’t match, or that you have turned off Siri.

Both your Siri language and your system language (Settings > General > Language & Region > Preferred Languages on iPhone and iPad, or System Settings > General > Language & Region on a Mac) must be identical—including the dialect, if applicable on your device. For example, if one is set to English (United States) and the other is set to English (Canada) on a Mac, you’ll get the old version of Siri. Make sure the two match—and note that switching your system language may require a restart.

As writers and technologists with combined experience in the tech industry of well over six decades—much of it focused on Apple—we have fairly well-developed opinions about which features are genuinely useful to a wide range of people and which ones lack practical utility and are more effective as marketing tools. That’s especially true for people in our age range (Gen X) and older, who constitute the vast majority of our readers.

Even though we want to be thorough and describe all the Apple Intelligence capabilities, there are a few that we think most people are better off avoiding because they may waste your time or may negatively impact your life. We briefly discuss the Image Playground app, Genmoji, and Write with Siri (formerly known as Writing Tools); you can make up your own mind as to whether they’re worth your time.

Image Playground

The Image Playground app uses Apple Intelligence to create images, or alter existing images from Photos or files on your device, based on descriptions you enter. So, if you ever had a burning need to see a picture of a goat skateboarding down a pyramid in central London or picture yourself dressed as a space pirate, Image Playground has you covered.

When you ask for a new image, Image Playground now displays a pop-up Any Style menu that lets you choose Animation, Illustration, Sketch, Genmoji, or ChatGPT (the latter of which is most likely to be photorealistic). It also lets you describe both the initial image and any desired changes (including changes to the style) in your own words. You can also sketch an image in Notes using the Magic Wand tool in iOS 27 and iPadOS 27 and have the app automagically interpret it.

One of us tried “An owl and a pussycat in a beautiful pea-green boat” and got a reasonable image of just that (for some values of “beautiful” and “pea-green”), something that had completely flummoxed Image Playground in Tahoe unless he replaced “pussycat” with “cat” (we’ll let you puzzle that one out on your own), but even then, the picture in Tahoe showed actual peas. The other tried to get an image of the “world’s largest collection of LPs,” and the first go-round showed someone on a ladder with just the edges of the LPs on a huge number of shelves.

When you describe a change, the image adjusts per your request. So, one of us said, “The owl is singing to a small guitar,” and sure enough, that’s what the next version showed. (And, OK, the owl wasn’t singing to the cat, nor was there any sign of honey or money, but then, he hadn’t asked for that.) The other asked Image Playground to refine his shelved LP images to show album covers face outward, and, wow, the generated cover images were something to behold—none real, but so many variations that resembled actual ones.

Genmoji creation and editing

Genmoji are conceptually similar to the images created by Image Playground, but smaller, more cartoonish, and without the backgrounds. They’re like emoji in that you can use them on the fly in Messages (and a few other places). Instead of picking from a fixed list of emoji, you describe what you want (“a squirrel playing a piano” or “a hammer with wings,” say) and let your device create it from scratch. Like Image Playground, Genmoji can also incorporate images of people from Photos (for example, “my wife riding a dragon” or “my grandmother skydiving”).

To use a Genmoji in Messages, click or tap the plus button next to the iMessage field and choose Genmoji from the pop-up menu. In the popover that appears, type a description of what you’d like to see and press Return (or tap or click the yellow arrow button), and after a moment, an image appears. If you like it, click Add to insert it in your message; if you want to see something different, type into the “Describe a change” field.

For the first time in Siri history, you can ask Siri questions or ask it to do something and almost always get a satisfactory outcome. Revolutionary! Even better, Siri retains context: you can have an ongoing conversation in the Siri app, and the vastly upgraded chatbot feature now doesn’t lose the thread.

Many people have mixed feelings about chatbots, particularly when they veer from utility into social, emotional, and personal interactions, but Siri is designed to stay largely on the utility target. Siri is designed for a purpose, and works well within those constraints. More broadly, it has the same limitations, advantages, and failings of other chatbots.

Carry on conversations

The power of Siri AI extends beyond asking it questions, of course. Engaging in conversations lets you drill down, rephrase your question, or ask follow-ups. This can be done after activating Siri, where you are just continuing on. This is already different than before iOS 27, when Siri’s ability to keep up its side of the conversation dropped off immediately or quickly.

Or you can open the Siri app. You can also click or tap answers from Siri in its pop-up or sheet-based view, and your device will open the Siri app.

However you navigate to activate Siri, you can immediately type or speak something after its response to whatever your first question or requested action was.

This can be useful if Siri’s first response or action wasn’t sufficient, or if it provided information or succeeded and you want to follow up by using context. You don’t have to define your scenario once again, which Siri often required before Siri AI.

For instance, we followed this line of questioning: “I watched a movie with Orson Welles in it last night. I think it took place in Austria.” Siri responds, “The movie you are thinking of is likely The Third Man. This 1949 film noir stars Orson Welles as Harry Lime and is famously set in post-World War II Vienna, Austria.”

You can then continue down that line of questions. We then asked why the zither was so prominent. It provided a detailed response (and an accurate one). Thinking of zithers, we wondered whether there was any zither music in the library. He hit a limit here: Siri only knows about locally stored music from its metadata, as far as we can tell, or at least without asking further questions. So it found, appropriately, “The Third Man” by Anton Karas in Apple Music, and offered to play it.

It’s almost time. Apple is holding its next event, which the company is calling “Surprise and shine,” later today. Historically, Apple has used its September event to announce new hardware, particularly the newest models of iPhones. The company is expected to announce new iPhone 18 Pro models and a new foldable “iPhone Duo” alongside new Apple Watch models, and potentially AirPods 5 and other products during the event, dubbed “Sunshine and Shine.” We expect to hear from Apple’s incoming CEO, John Ternus, for the first time in his role after he took up the mantle on Sept. 1.

Here’s how you can watch Apple’s event today wherever you are in the world.

apple surprise and shine event
There are multiple ways to watch the September 9 event, with details listed below. We’ve also included a useful guide on when the event will take place in your particular time zone.

Apple Events Website

With the Apple Events website, you can watch the event live on a Mac, iPhone, iPad, PC, or any other device with a web browser. The Apple Events website works in Safari, Chrome, Firefox, and other main browsers.

apple website events iphone 18 e1788892558167
Just navigate to www.apple.com/apple-events/ using a web browser at the appropriate time to watch. You can visit the site now to add an event reminder to your calendar.

YouTube

Apple also plans to stream the event live on YouTube, which is perhaps the easiest and most efficient way to watch because the YouTube live stream can be viewed on every platform where YouTube is available, which is pretty much all platforms, from smartphones and tablets to consoles and smart TVs.

play

Apple has posted a placeholder for the September 9 event on YouTube, and you can visit it now to set an event reminder.

Apple TV App

Apple used to have a dedicated Apple Events app on the Apple TV, but ahead of WWDC 2020, it was folded into the Apple TV app. On event day, there will be a prominent Apple TV app section dedicated to the live stream, which can be watched on any device where the Apple TV app is available.

appleevents1
This includes the Apple TV, iPhones, iPads, and Macs, as well as select smart TVs, streaming devices, and gaming consoles. If you have an Apple TV, the Apple TV app is one of the best ways to watch the event live. Apple hasn’t updated the Apple TV app with the new event as of yet, but it should be added soon.

When to Watch the Apple Event

Apple’s event will take place at 10:00 a.m. Pacific Time, like most Apple events. Event times in other time zones are listed below.

  • Honolulu, Hawaii — 7:00 a.m. HST
  • Anchorage, Alaska — 9:00 a.m. AKDT
  • Cupertino, California — 10:00 a.m. PDT
  • Phoenix, Arizona — 10:00 a.m. MST
  • Vancouver, Canada — 10:00 a.m. PDT
  • Denver, Colorado — 11:00 a.m. MDT
  • Dallas, Texas — 12:00 noon CDT
  • New York, New York — 1:00 p.m. EDT
  • Toronto, Canada — 1:00 p.m. EDT
  • Halifax, Canada — 2:00 p.m. ADT
  • Rio de Janeiro, Brazil — 2:00 p.m. BRT
  • London, United Kingdom — 6:00 p.m. BST
  • Berlin, Germany — 7:00 p.m. CEST
  • Paris, France — 7:00 p.m. CEST
  • Cape Town, South Africa — 7:00 p.m. SAST
  • Helsinki, Finland — 8:00 p.m. EEST
  • Istanbul, Turkey — 8:00 p.m. TRT
  • Dubai, United Arab Emirates — 9:00 p.m. GST
  • Delhi, India — 10:30 p.m. IST
  • Jakarta, Indonesia — 12:00 a.m. WIB next day
  • Shanghai, China — 1:00 a.m. CST next day
  • Singapore — 1:00 a.m. SGT next day
  • Perth, Australia — 1:00 a.m. AWST next day
  • Hong Kong — 1:00 a.m. HKT next day
  • Seoul, South Korea — 2:00 a.m. KST next day
  • Tokyo, Japan — 2:00 a.m. JST next day
  • Adelaide, Australia — 2:30 a.m. ACST next day
  • Sydney, Australia — 3:00 a.m. AEST next day
  • Auckland, New Zealand — 5:00 a.m. NZST next day
Tag: iOS 27

Summary

  • iPhone crashes can be caused by problems with third-party apps or the operating system itself.
  • Troubleshoot app crashes in iOS 27 by killing unresponsive apps, checking for updates, reinstalling problem apps, seeking alternatives, checking app permissions, and ensuring you have free space on your device.
  • System crashes can be fixed by restarting or force restarting, updating the operating system, and reinstalling iOS or iPadOS.

Do your iPhone apps keep crashing after iOS 27 update? Apps can crash or freeze on iPhones, just as they can on any other platform. Apple’s iOS operating systems disguise app crashes by closing the app. If you’re experiencing crashing, freezing, or buggy apps after iOS 27 update, here are a few tips you can use to fix the problem.

Is It an App or Device Crash?

You should first figure out whether it’s an app crash or a device crash. This is pretty simple: if you’re using an app, and it suddenly closes for no reason, the app has crashed. If you’re using an app and it becomes unresponsive, but you can still access other apps, that’s also an app crash. If you’re trying to launch an app and it keeps disappearing, the app is repeatedly crashing.

If your iPhone has become unresponsive across the system, it’s likely a device issue. Your phone will display a black screen or remain stuck on the Apple logo if the device has crashed. Also, if your iPhone is slow for no apparent reason, and across multiple apps, it’s a device issue.

If you cannot connect your wireless headphones, send files over AirDrop, or see AirPlay devices, it’s possible a service used by the operating system has crashed.

Troubleshooting App Crashes After iOS 27 Update

There’s plenty that can go wrong and cause apps to crash, become unresponsive, or refuse to open at all. Problems usually stem from issues with the code, unexpected input, and even hardware limitations. Apps are made by humans, after all, and humans make mistakes. There is also a chance that the app is crashing because it’s not optimized to work with iOS 27.

If an app suddenly disappears, it’s due to a crash. In most cases, reopening resolves the problem. If you’re sharing analytics with developers (more on this later), they receive a crash report they can use to prevent the problem from reoccurring.

Kill Unresponsive Apps

If an app is unresponsive, you can kill it using the app switcher. There’s no need to routinely kill apps using this method unless they’re causing issues.

On modern iPhone models that lack a Home button, the app switcher is accessed by swiping up from the bottom of the screen and flicking to the right. You can also swipe up from the bottom of the screen and hold until you see a list of recently used applications.

If your iPhone has a Home button at the bottom of the screen, double tapping it will reveal a list of recently-used applications.

You can use this list to switch between apps quickly. Find the application causing the issue, and then touch and swipe up on it to “throw it away” and close it. The app will disappear from the list of recently-used apps.

You can now try to restart the app. After you kill apps this way, it takes slightly longer to open them than it does when they’re suspended in the background. This is why you shouldn’t kill apps unnecessarily.

Check for Updates

Apps that are not optimized to work with the iOS 27 can also cause issues. Upgrading from one major version of iOS to another can cause stability issues if an app isn’t updated to account for the changes. Sometimes, developers abandon their apps entirely.

The most obvious solution here is to check for an update. Launch the App Store and tap on your user icon in the top-right corner of the screen. Tap App Updates button:

You can either look for the app that’s causing you trouble in the upcoming updates, or you can tap “Update All” to perform all outstanding updates.

You can also find the app in the App Store (simply search for it) and check the “What’s New” section to see the app’s version history. If an app hasn’t been updated in quite some time, you might want to seek an alternative. Sometimes, developers upload new versions as new apps, with old versions of apps left as “legacy” versions that you can keep using but that may not receive future updates.

You can take a look at a developer’s other apps by tapping its name under the app description in the App Store.

Reinstall Problem Apps

Sometimes, apps crash way too frequently. If an app is crashing each time you try to start it, consider deleting and reinstalling the app. Keep in mind that you’ll lose all local app data when you delete it. You shouldn’t worry about this for apps that use cloud storage (like Evernote, Google Drive, and Pages).

If the app requires that you log in, you’ll have to do this again when you reinstall it.

There are multiple ways to delete an app from your device, but the easiest is to simply search for it. To do this, pull down on the Home screen to reveal a search field and type in the name of the app. Now tap and hold on it until you see a context menu appear. Hit “Delete App” and confirm in the pop-up that appears.

If an app has been hidden, you’ll need to find it first. To do this, unlock your device and scroll left on the Home screen until you find the App Library. Scroll down to the bottom of the app categories, and tap on the “Hidden” category and the app should appear. You can now tap and hold the app icon and choose “Delete App” then confirm.

Now launch the App Store and search for the app to reinstall it.

Check Your App Permissions

Sometimes, privacy settings can wreak havoc with your apps. For example, if a mapping app can’t fetch your location, you need to make sure it has access to that information.

Head to Settings > Privacy & Security and check any relevant categories, like Camera, Microphone, or Location Services. Any apps that require your permission to access services or information will be listed here.

Create Some Free Space

If your device is full to the brim, you may encounter weird app behavior. This is particularly true of apps that require free space to function, like camera apps, audio recorders, and so on. You might also encounter a general operating system slowdown.

Head to Settings > General > iPhone Storage to see how much free space you have.

Get a Refund

If you’ve downloaded an app that doesn’t work with iOS 27, you can reach out to Apple and request a refund. To contact the developer, find the app on the App Store, and then scroll down to the “Information” section. Tap on “Report a Problem” and login with your Apple account when prompted.

Use the “I’d like to…” drop-down to pick “Request a refund” and then describe the problem. Hit “Next” and submit your complaint. Apple will review your request and (hopefully) refund your account. Just make sure that you’re using the same Apple account with which you purchased (or downloaded) the app.

Troubleshooting Hardware and System Crashes

iPhone use Apple’s iOS software. Despite the platform being relatively stable, problems can occur occasionally. These can include random restarts, software glitches, and freezes that require manual intervention.

Restart Your iPhone

Many issues are resolved simply by restarting your device. If you’ve noticed weird OS behavior, like a screen that won’t “sleep” or problems with audio playback, a restart might do the trick.

The easiest way to restart your iPhone is to trigger Siri and ask “restart my iPhone.” You’ll then be asked to confirm your request. You can also restart your device by switching it off and on again. To do this, press and hold the “Side” (lock) button and one of the volume buttons until the “Slide to Power Off” menu appears.

Use the slider to turn the device off, wait a few seconds, and then press and hold the Side button to turn your iPhone back on again.

Recover an Unresponsive iPhone

If your iPhone is completely unresponsive or appears to be frozen, you’ll need to force a reset by holding some buttons.

You can do this by pressing the Volume Up button, pressing and releasing Volume Down button, and then pressing and holding the “Side” (lock) button until the Apple logo appears. You’ll need to be quick, so you might have to try multiple times to get this working.

Update iOS

Updating your iPhone can resolve issues sometimes. You can do this by heading to Settings > General > System Update and seeing if there are any updates waiting for you. You can also opt out of beta access using this menu. Beta versions of iOS can be unstable and cause crashes. After opting out you’ll need to wait for the next stable version to drop before you can update.

Reinstall iOS

Sometimes, problems can’t be solved by a restart, and you might need to reinstall the operating system. This is the last resort for persistent issues related to the core operating system. Problems like this can arise from the use of third-party software used to “clean” or maintain your iPhone and jailbreaking.

Keep in mind that reinstalling iOS will cause you to lose all of the data on your iPhone. Make sure you have an iCloud backup so you can restore your data when you’re done.

First, you’ll need to remove your device from Find My iPhone to disable Activation Lock. To do this, head to Settings and tap on your name followed by “Find My.” Tap the “Find My iPhone” option, then toggle “Find My iPhone” off and enter your Apple account password.

If this option is grayed out, you’ll need to disable Stolen Device Protection under Settings > Face ID & Passcode then tapping “Stolen Device Protection” followed by “Turn Off Protection” and following the instructions.

To reinstall iOS you’ll need to connect your device to a Mac or PC running Windows. On a Mac you can connect your device, accept the connection request that appears, and then use Finder to select your iPhone from the “Locations” section of the sidebar.

On Windows you’ll need to download and install iTunes, then select your device at the top of the screen.

You should now see a list of options under the “Summary” tab for your device. Use the “Restore iPhone…” option and follow the prompts to restore iOS.

Suspect a Hardware Issue?

If you’ve tried everything and believe your issue is hardware-related, you can find out for free by booking yourself an appointment at the nearest Apple Store or authorized service center. If your iPhone is still under warranty, any repairs will be covered and free of charge. You can find out if you’re covered on Apple’s website.

If your iPhone isn’t covered, you’ll only be charged for any work you approve. Apple’s technicians will run a diagnostic on your device and find out if there are any issues under the hood.

You can then decide whether you want to get the device repaired. If repairs are expensive, it might be worth opting for a new device, instead. Apple will offer you some trade-in credit to use on your new device.

Tag: iOS 27

Is iPhone Auto-Brightness not working after iOS 27 update? Auto-brightness ensures your iPhone’s screen brightness levels adapt automatically according to the light around you. For example, when you step out in the sun, the brightness increases. And inside a room, it decreases. If your iPhone’s auto-brightness feature stopped working after iOS 27 update, it can spoil your user experience and even consume more battery. The auto-brightness feature is on by default.

When auto-brightness is on, you’ll notice that the brightness slider on your device moves according to changing light conditions.

To turn auto-brightness on or off:

  1. In the Settings app, tap Accessibility.
  2. Tap Display & Text Size.
  3. Scroll to Auto-Brightness and tap to turn the feature on or off.

If auto-brightness isn’t working on your iPhone running iOS 27, you can use these solutions to fix it. Once that’s done, it should be more comfortable to use your iPhone during the day, night, and any other times.

1. Clean Your iPhone’s front camera Area

The ambient light sensor is at the top of your iPhone screen. Body oils, sweat, and other such gunk may stick to this sensor when holding the phone to your ear during long calls. Due to this, it may stop your iPhone’s ambient light sensor working, which is what’s responsible for adjusting the screen brightness according to your surroundings.

To fix this, use a clean, dry cloth to wipe the top portion of your iPhone screen. After this, auto-brightness should work fine. If not, follow the remaining solutions below.

2. Restart Your iPhone

If you haven’t turned off your iPhone in a while, it can cause a few problems, like auto-brightness not working correctly. To fix this, simply restart your iPhone. After the device powers on, everything should work as well as it usually does.

3. Enable and Disable Auto-Brightness

Another quick solution to fix the iPhone’s auto-brightness problem after iOS 27 update is to turn this feature off and on. Here’s how to do that:

  1. Open Settings and tap Accessibility.
  2. Tap Display & Text Size.
  3. Turn off Auto-Brightness.
  4. Restart your iPhone.
  5. Go to Settings > Accessibility > Display & Text Size and enable Auto-Brightness.

4. Update Your iPhone

If turning off auto-brightness and then turning it back on doesn’t fix your issue, make sure that you are running the newest version of iOS 27. This will ensure your iPhone has all the latest features, bug fixes, and security patches.

To update your iPhone, go to Settings > General > Software Update.

5. Try Turning Off Night Shift

In case none of the above solutions work for you, consider turning off Night Shift. For this:

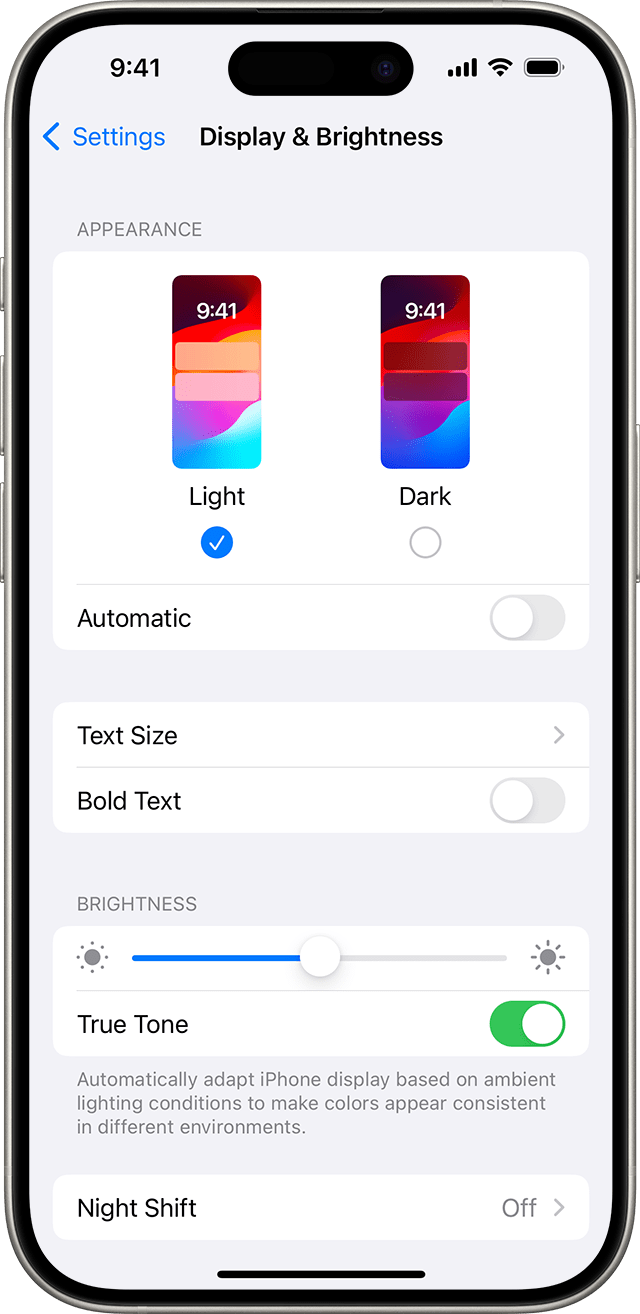
  1. Open the Settings app, tap Display & Brightness, then tap Night Shift.

    The Display and Brightness screen on an iPhone 15 Pro

  2. Turn off Manually Enable Until Tomorrow and Scheduled.

6. Remove Any Thick Screen Protectors

Are you using an abnormally thick screen protector on your iPhone? If yes, it may cause problems with the smooth working of the ambient light sensor. To address this, consider removing your screen protector. If you must use one, opt for a screen protector that’s thinner, or medium thickness, instead.

Similarly, if you have a case that covers the entire front of the device, or even partially blocks the top sensor area, remove that as well.

7. Reset All Settings

When you reset all settings, personal data like downloaded apps, music, photos, videos, and such won’t be deleted. However, all the settings you have customized to your liking will reset and return to the default options. This includes Wi-Fi, Bluetooth, VPN configurations, Home Screen layout, keyboard settings, and more.

After you reset all your settings, several problems such as auto-brightness not functioning should be fixed. Here’s how to do it:

  1. Open Settings and tap General.
  2. Tap Transfer or Reset iPhone.
  3. Tap Reset and choose Reset All Settings.
  4. Enter your device passcode to confirm.

Once it completes, your iPhone should adjust the screen brightness correctly based on the light around you.

Problems With Third-Party iPhone Displays

Did you break your iPhone screen and get it repaired at by an unauthorized service provider? If yes, it may cause multiple problems, like Face ID not working correctly, True Tone not functioning, and possible auto-brightness issues.

Contact Apple Support to get your device repaired by Apple authorized service providers instead.

Auto-Brightness Makes Your iPhone Easier on the Eyes

After following the above fixes, your iPhone display should automatically adjust the screen brightness to match your environment, ensuring that the screen is always comfortable to look at.

If auto-brightness still doesn’t work, you may want to turn off auto-brightness and adjust it manually until you get your device inspected at an Apple Store instead.

Tag: iOS 27

Is your iPhone frozen after iOS 27 update? A frozen iPhone won’t respond to touch, with the display completely stuck or working intermittently. Touches may register in the wrong locations, and physical buttons may refuse to work.

The Home Screen or an app could become non-interactive. With a frozen iPhone—different from an iPhone stuck in a boot loop—standard troubleshooting steps will only take you so far.

But worry not; you’ve come to the right place to seek advice. Follow along with us as we show how to fix a frozen or unresponsive iPhone in iOS 27.

If your screen responds intermittently to touch

  • Make sure that your screen is clean and free of any debris or water.
  • Disconnect any Lightning or USB-C accessories. If your screen works after removing an accessory, try using a different outlet, cable, or charger.
  • Remove any cases or screen protectors.

What to Do if My iPhone Freezes After iOS 27 Update? Try Force Quitting Apps!

If a specific app is causing your iPhone to freeze, force quitting the app can resolve the issue most of the time.

  • iPhones with Face ID: Swipe up from the bottom edge and stop near the middle of the screen, then swipe up on the app to close it.
  • iPhones with the Home button: Double-click the Home button to show the App Switcher, then swipe up on the app to close it.

Upon identifying the app causing the freezing, reinstall it. To do this, press and hold its app icon until a context menu appears, then tap on Remove App and choose Delete to confirm.

Doing so will also delete any app settings from the device that might be causing issues. You can now redownload a fresh copy of the app from the App Store. If the iPhone display remains frozen and generally unresponsive, the next troubleshooting step is a force restart.

Force Restarting May Unfreeze Your iPhone

Does your iPhone not display a shutdown screen at all? Here’s what you can do.

  • iPhone 11 and newer: Press and hold the Volume button and the Side button simultaneously until the power off slider appears, then drag it to turn the phone off.
  • iPhone SE (2nd and 3rd generation): Press and hold the Side button until the shutdown screen shows up, then drag the power off slider.

Wait 30 seconds after dragging the slider for the phone to fully shut down before turning it back on. The problem is that a fully frozen iPhone may not even let you reach the shutdown screen. If you cannot restart your iPhone because it’s not responding to your touches, performing a force restart might help bring it back to normal.

Force Restart an iPhone on iOS 27

Here’s how to force-restart iPhones running iOS 27:

  1. Press and quickly release the volume up button.
  2. Press and quickly release the volume down button.
  3. Press and hold the side button until you see the Apple logo (this might take longer than 10 seconds).

Assuming this is a minor iOS 27 glitch, restarting should fix the frozen iPhone. But if it doesn’t, and your iPhone keeps freezing, draining the battery intentionally is next on your list of potential fixes.

iPhone Is Stuck after iOS 27 update? Wait for the Battery to Drain!

Leave your iPhone on until the battery charge is depleted and the device shuts down by itself. If your iPhone isn’t completely unresponsive, you can go to Settings > Display & Brightness > Auto-Lock and set it to Never to speed up the process. Plus, you can go to the Control Center and boost the brightness all the way up and make the battery drain faster.

With the battery depleted and your iPhone powered down, wait at least 30 seconds before plugging it back into power. The device will start up automatically after a few minutes, as soon as the battery has enough charge for booting. But if draining the battery makes no difference, try putting a frozen iPhone into Recovery Mode.

How to Fix a Frozen iPhone With Recovery Mode

Entering Recovery Mode allows you to restore your iPhone from an iCloud or iTunes backup, which may fix the frozen iPhone without deleting any apps or settings. Connect your phone to a computer and open the Finder (macOS) or iTunes (Windows), then do the following:

  1. Press and immediately release the Volume Up button
  2. Press and immediately release the Volume Down button
  3. Press and hold the Side button until you see the Recovery Mode screen

A common mistake here is letting go of the button as soon as you see the Apple logo. Be sure to keep holding the button past the Apple logo, and don’t let go until the device enters Recovery Mode and is recognized in the Finder or iTunes.

With the Recovery Mode active, a prompt should appear on the computer offering to restore or update your device. Click Update to have the computer download and install the latest version of iOS 27. Don’t worry; this won’t erase any data on the phone. Once the operating system has been reinstalled, your iPhone should be fully responsive again.

With the device restored and responsive again, now’s a good time to go to Settings > General > Software Update and install any pending iOS or security updates.

With that done, venture into Settings > General > iPhone Storage and delete anything that’s clogging storage space, like massive photo libraries, cached videos in streaming apps, games, and so on.

iOS needs at least one gigabyte of free storage space to function smoothly. Clearing storage space is the best way to avoid issues like slow-downs that could lead to sudden freezes.

Nothing Helps? Contact Apple Support

Is your iPhone still frozen even after trying out all the above tips? If so, we highly recommend talking to experts at Apple, as they’ll be able to assist you in more ways than we could in case the hardware is at fault.

Even better, you can make an Apple Store appointment at a Genius Bar, provided you have one nearby where you live.

An Unresponsive iPhone Is Virtually Useless

An iPhone that suddenly freezes is a brick in your hand. Whether iOS is outdated, some apps are incompatible with it, the battery is low, or the device is running low on storage space, following the instructions in this guide should help fix a frozen iPhone.

Hopefully, you won’t have to factory reset your iPhone and wipe all the saved data and settings just to solve the responsiveness and freezing problems.

Tag: iOS 27

Summary

  • If you’re lucky, a force restart may be all you need to fix iOS 27 black screen issue on your iPhone. Otherwise, you’ll need a computer.
  • If Find My is enabled, or you’re connecting your iPhone to a computer for the first time, you cannot restore it using Finder or the Apple Devices app.
  • If software fixes fail, physical damage might be the culprit. Take your iPhone to Apple or an authorized service provider to diagnose and resolve hardware issues.

The black screen of death occurs when an iPhone is completely unresponsive. You’ll hear alerts and feel vibrations, but you won’t be able to interact with your phone. Although physical damage is often the culprit, users have reported that they started experiencing this problem immediately after iOS 27 update. So, if your iPhone has black screen after iOS 27 update, try these fixes first.

1. Force Restart Your iPhone

The first thing you should do to fix the iOS 27 black screen of death issue is to force restart your iPhone. This is different from a regular reboot, and it’s useful when you can’t shut your iPhone down normally.

Force restarting requires a combination of button presses and can take a few tries since you’ll need to press each button quickly. Press and release the Volume Up button. Repeat the same with the Volume Down button. Then, press and hold your iPhone’s Side button until the Apple logo appears.

2. Restore Your iPhone With Apple Devices or Finder

If your iPhone doesn’t reboot even after you’ve tried force restarting it, you’ll need to factory reset it. You can do this using the Apple Devices app for Windows or Finder on macOS.

Restoring your iPhone with the Apple Devices app or Finder will erase all its data and bring it to factory settings. So, only try this if you have a recent backup so that you don’t lose all your data.

Note that this method will only work if you’ve connected your iPhone to Apple Devices or Finder before. That’s because when you connect your iPhone to a computer for the first time, you’ll get an alert on your iPhone (and your computer), prompting you to trust the device.

You can’t tap Trust on an iPhone showing a black screen, so you’ll have to hard reset your iPhone using the recovery or DFU mode, which we’ll discuss later.

Additionally, you can only proceed with these steps if you have Find My disabled on your iPhone. Otherwise, you’ll get an alert message prompting you to turn off Find My during the process. In this case, you’ll need to disable the Find My feature from iCloud and erase your iPhone remotely.

As long as you meet the above requirements, you’re all set. Simply connect your iPhone to your PC or Mac using a USB cable. Launch the Apple Devices app or Finder, and follow the steps mentioned below:

  1. Click [Your Name]’s iPhone under the Locations header on the sidebar. You can skip this step if you’re using Apple Devices.
  2. Head to the General tab and click Restore iPhone on the right.
  3. When prompted to back up your settings before restoring your iPhone, click Back Up.
  4. Next, click Restore when you get a confirmation pop-up.

The process may take several minutes to complete. So, be patient. Once it’s done, you can restore your iPhone from a backup.

3. Use Recovery Mode to Factory Reset Your iPhone

Recovery mode is Apple’s built-in recovery system that allows you to factory reset your device and reinstall the latest iOS version when your iPhone becomes completely unresponsive.

Entering recovery mode on your iPhone requires you to hold and release a combination of buttons on your device in a specified order once you connect it to your computer and launch Apple Devices or Finder.

Press and release the Volume Up button. Then, repeat the same with the Volume Down button. Finally, press and hold the Side button until you see the Recovery Mode screen.

The Apple Devices app or Finder will now show a pop-up message indicating that it has detected an iPhone in recovery mode, after which you can choose to Update or Restore your device.

4. Take Your iPhone to Apple

If everything fails, the black screen of death is likely due to physical damage or other hardware issues. In that case, you must contact Apple Support or take your iPhone to a nearby Apple Store or an Apple Authorized Service Provider. It’s easy to make an Apple Store appointment at a Genius Bar.

Remember that Apple’s standard one-year warranty doesn’t cover replacements or repairs for damaged screens. So, unless you’ve spent money on an AppleCare+ extended warranty plan, you’ll have to pay a fee to get your iPhone serviced.

Although the black screen of death on an iPhone can be an immediate cause for concern, it’s worth trying a few software fixes before seeking professional help, especially if you haven’t physically damaged your iPhone. However, in case of hardware issues, you have no choice but to contact Apple or a third-party service provider for expert assistance.

Tag: iOS 27