








Got a tip for us?

iPhone Troubleshooting

Some users have reported problems with their iPhone 14 not ringing when they are getting a call. If your iPhone 14 doesn’t ring when you get a call, don’t freak out. In this article, I’ll explain why your iPhone 14 is not ringing and show you how to fix the problem so your phone rings loud and clear.
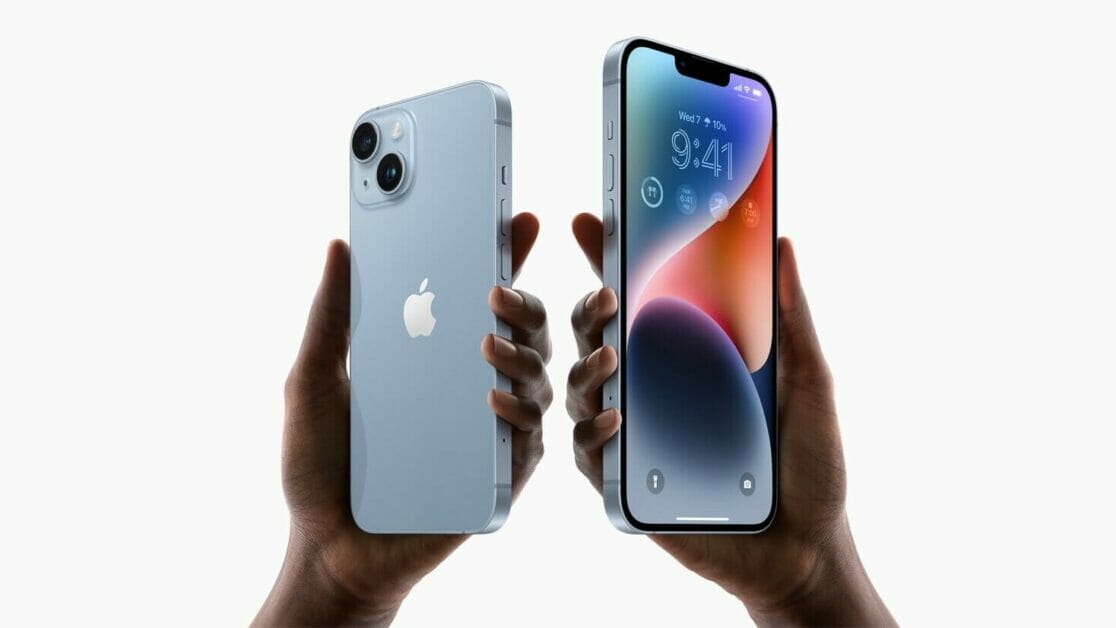
Two hands hold up iPhone 14 and iPhone 14 Plus.

Why is iPhone 14 not ringing?

With almost certain guarantee, the reason an iPhone 14 is not ringing apparently out of the blue is because of the Focus feature, or because the Mute switch has been toggled on. Another reason for your iPhone 14 not ringing could be something as simple as lowered volume levels, bluetooth pairing, silencing unknown callers, or it could be something more serious like a speaker issue.

The solutions below will address all these problems. Here are the best tips on how to fix your iPhone 14 if it’s not ringing.

Note: information in this article apply to iPhone 14, iPhone 14 Plus, iPhone 14 Pro and iPhone 14 Pro Max.

How to fix iPhone 14 not ringing issue

1. Turn off the silent switch of your iPhone

If your iPhone 14 does not ring on all calls, make sure the switch on your phone’s left side isn’t set to Silent mode. Your iPhone 14 will not ring or play a sound when you receive cellular & app calls, notifications, and the likes in this mode.

You can put your iPhone back into ringer mode by using the ringer/silent switch on the side of your iPhone.

Look at the switch on the left side of your phone. If the switch is pushed away from your screen and showing an orange color strip, you have Silent Mode on. Flip the switch to turn it off.

2. Increase your iPhone volume

It’s possible the iPhone 14 volume is too low to hear it ringing. If your iPhone 14 is not ringing when you get a phone call, but your videos and music are playing at a normal volume, then this means your ringer volume is turned all the way down and your media volume is turned up. These are two separate settings in iOS

To adjust your ringer volume, simply adjust the volume with the volume buttons while no media is playing, or instead, go to Settings > Sounds & Haptics and drag the ringer and alerts volume slider to the desired level.

You can then test if your iPhone 14 ringer is not working by playing music or a video. If you hear noise, the issue is low ringer volume, not your ringer not working.

3. Disconnect Bluetooth Audio Devices

If you occasionally use wireless audio devices like Bluetooth headset with your iPhone, then your iPhone is set to automatically connect to it when it’s in range. When it connects, iOS automatically uses AirPlay mirroring to direct all sound to the Bluetooth headset.

In this scenario, what can happen is if you leave home without your Bluetooth headset, your sound might work great when you’re out and about, but when you come back home, sound might start to route to the Bluetooth headset instead of through your iPhone, giving you the illusion that there’s no sound because the iPhone is routing sound to the Bluetooth headset that you’re not using instead.

You can either turn Bluetooth off when you’re not using the Bluetooth headset, or you can turn off the AirPlay connection between your iPhone and the Bluetooth headset. Since I use an Apple Watch, turning off Bluetooth isn’t really an option for me. Instead, I just open Control Center, tap on the AirPlay button, and choose the iPhone speaker instead of the Bluetooth headset, and this makes the incoming call ringtone to normally sound via my iPhone’s speakers.

4. Restart your iPhone

If it’s a software glitch, which can happen from time to time, you might be able to fix it by simply turning your device off and on again. . This is very helpful especially when your iPhone 14 runs into software bugs that cause the phone to run slowly or wonky, including if its sound or ringer has stopped working. Typically, a hard reset is the best, which can be done by pressing and quickly releasing the volume up button, pressing and quickly releasing the volume down button, pressing and holding the Side button for 10 seconds until the iPhone reboots.

5. Confirm Focus Mode Is Disabled

The Focus feature on iOS 15 disables sound and vibration for call, text, and app notifications. If you’ve accidentally enabled Focus Mode, your iPhone 14 won’t ring on incoming calls.

To check this, open Control Center and find the Focus icon. If Focus is enabled, tap on it to turn it off. Now you should start hearing the ringtone when you get any calls. If your iPhone 14 isn’t ringing, check the next solution.

6. Turn Off Silence Unknown Callers

The Silence Unknown Callers feature allows you to stop unknown calls from ringing. Telemarketers and spammers often use the ‘Unknown Caller’ ID to try to reach you, and if you get a lot of them, they can be annoying. However, once you’ve enabled the Silence Unknown Callers feature when someone using an unknown number calls your phone, the call will be sent directly to voicemail, and it will appear in your Recent Calls list, but your iPhone 14 will not ring. Here’s how to disable the Silence Unknown Caller feature and make your phone ring.

Go to Settings > Phone > Silence Unknown Callers then tap Silence Unknown Callers again to turn the feature off (gray color).

7. Make sure the number isn’t blocked on your iPhone

Apple gives you the ability to block specific phone numbers , which is handy if you get a lot of telemarketing and other spam phone calls. If you have blocked a person, you won’t get phone call from them. This naturally means you’re iPhone 14 won’t ring. To make sure you didn’t accidentally block an important number, follow these steps.

  1. Start the Settings app on your iPhone and tap Phone.
  2. Tap Blocked Contacts.
  3. Swipe left on an entry here and tap Unblock.

8. Check if it’s a ringtone issue

If you purchased a third-party ringtone to use on your iPhone 14 and it isn’t working, it could be a software glitch causing the sound to fail when someone calls you. Try switching to one of the iPhone’s pre-installed ringtones, and see if that solves your problem. Here’s how you can access your inbuilt ringtones list.

Start the Settings app on your iPhone and tap Sounds & Haptics. Tap Ringtone, and from the next screen, try selecting a different ringtone. Remember not to select “None” as it’ll turn off all the sounds.

9. Check and Turn Off Call Forwarding

Your iPhone 14 won’t ring if call forwarding is turned on. All your incoming calls will be forwarded to your specified number or to your voicemail. Therefore, when you find that your iPhone 14 doesn’t ring, you can disable call forwarding to fix the issue.

  1. Start the Settings app on your iPhone.
  2. Tap on Phone.
  3. Tap on Call Forwarding.
  4. Turn off the switch next to Call Forwarding.

10. Check for Custom Contact Ringtones

If your iPhone 14 won’t ring for a specific caller and that person isn’t blocked, then check to see if it’s a custom ringtone you assigned to them that isn’t working.

  1. Start the Settings app on your iPhone.
  2. Tap on ”Sounds & Haptics.”
  3. Tap on ”Ringtone.”
  4. Find the tone you want to delete from the Ringtones list before swiping left on it.
  5. Tap on the red ”Delete” icon that appears to delete the ringtone.
  6. Go back to your contact and assign a different ringtone to their profile.

11. Update iOS

Updating iOS can fix lots of bugs for software errors and other problems, including the iPhone 14 not ringing issue. Simply update your iPhone to the latest iOS version by going to Settings > General > Software Update. If an update is available, tap ’Download and Install.’

12. Connect a headset and see if ringer works

If you can’t hear ringer sound with the built-in speakers after trying all of the above steps, but are able to hear ringer sound via the headset when a headset is connected, there could be a problem with your built-in speaker(s).

If you believe an issue is tied to the built-in speakers, then you will most likely have to visit an Apple Store to have your speaker serviced. If the device is under warranty, it should be replaced for free. Otherwise, you may be facing a bench and labor charge.

14. Try Turning Off Calls on Other Devices

If you own other Apple devices and have opted to receive iPhone calls on your Mac, consider turning this feature off to see if it fixes your iPhone 14 not ringing issue. Here’s how:

  1. Start the Settings app and tap Phone.
  2. Tap Calls on Other Devices.
  3. Turn off Allow Calls on Other Devices.

14. Check that it’s not a hardware problem

If absolutely none of the other solutions fixed your iPhone 14 not ringing issue, your phone’s speakers may be damaged in some way. This is especially likely if you’re having trouble playing other audio as well.

If this is the case, go to Apple’s support page and make a Genius Bar reservation to have an Apple technician look at your phone.

Solved iPhone 14 not ringing issue!

The problem of iPhone 14 not ringing can occur without warning, but being armed with the knowledge to handle it can help you to troubleshoot this kind of issue. By now, your iPhone 14 ringing problem should be fixed, ensuring you do not miss future calls. To check, ask a friend or family member to call you.

Have you ever experienced ringer issues on your iOS devices? If so, share what caused them and what fixed them in the comments section below.

Is your iPhone 14 Pro Max not receiving text notifications? You are not alone! If your iPhone 14 Pro Max isn’t receiving text message alerts or playing sound, consider these solutions.

Two hands hold up iPhone 14 and iPhone 14 Plus.

Note: information in this article apply to iPhone 14, iPhone 14 Plus, iPhone 14 Pro, and iPhone 14 pro max.

If you’ve noticed that you’re no longer receiving text notifications on your iPhone 14 Pro Max, you can usually fix the problem by adjusting your settings, restarting the Messages app, restarting your phone, and making sure all of your software is up to date.

What Causes Not Getting Text Notifications on iPhone 14 Pro Max?

When text notifications stop working on an iPhone 14 Pro Max, it can manifest in a few ways:

  • You notice texts that weren’t accompanied by an alert sound
  • Notifications for new iMessage or SMS messages aren’t showing up on the lock screen
  • No red dot on the Messages app when messages arrive

There are a lot of reasons you might not be getting text notifications on an iPhone 14 Pro Max. If you aren’t receiving text messages at all, and you know people have sent you messages, then it’s probably a connectivity problem. In that case, make sure your phone is connected to both Wi-Fi and cellular data and that MMS and SMS are configured correctly. If you are receiving texts but not notifications, here are the most common causes:

  • Misconfigured notification settings
  • Incorrect volume settings
  • Software bug

How to Fix iPhone 14 Pro Max Message Notification Not Working

If you pick up your iPhone from time to time and see messages that weren’t accompanied by a notification sound, vibration, or any other kind of alert, that means something is preventing you from receiving text notifications. To fix that problem and start receiving notifications again, try these fixes.

1. Check your notification settings

If your notification settings aren’t configured properly, your iPhone 14 Pro won’t receive message notifications.

Open Settings > Notifications > Messages, and make sure the Allow Notifications toggle is turned on. Then make sure the boxes for Lock Screen, Notification Center, and Banners are all checked.

2. Set or change your notification sound

If your notification sound is disabled or set to something quiet you don’t notice, you may not hear it.

Open Settings > Sound & Haptics > Text Tone, and select a message tone that you think you’ll notice in the future.

When you tap a sound in the alert tones list, your iPhone will play a preview of that sound.

3. Unmute contacts in Messages

The Messages app allows you to mute conversations. If you do so inadvertently or have forgotten that you muted someone, you’ll find you don’t receive messages from that person when you expect to.

Open the Messages app, and locate any conversation that has a crossed-out bell icon next to it. Swipe left on the conversation, and tap the bell icon that appears to unmute that person.

4. Make sure the contact isn’t blocked

After you block a person, they can’t call or text you. If your iPhone 14 Pro Max isn’t getting texts from a specific person, make sure they are not added (accidentally or on purpose) to the block list.

Open Settings > Messages > Blocked Contacts, and check to see if anyone is on the list accidentally. If they are, swipe left on the contact’s name and tap Unblock.

5. Make sure your phone isn’t on silent or Focus mode

After you put your iPhone in silent mode, new texts won’t have a notification tone. To fix this, turn off silent mode by pushing up the switch that’s above the volume buttons.

Secondly, when your iPhone is in Focus mode, it does not vibrate or play a sound for new texts. You can fix this by opening the iOS Control Center and ensuring the Focus icon is not turned on. If it is, tap it to turn off Focus.

iOS 16 has Focus modes that let you configure which apps and people you want to allow notifications from. If you’re using one of these modes, turn it off from the Control Center or Settings app.

6. Force quit the Messages app

If the Messages app is malfunctioning, that can explain why your iPhone 14 Pro Max is not receiving text notifications. In most cases, you can fix this by force quitting the app and then opening it again.

Swipe halfway up to open multitasking, then swipe up on Messages to close it.

7. Restart your iPhone

If you find your iPhone 14 Pro Max not receiving tex notifications after trying the above solutions, the issue may be with iOS and not the Messages app. When that happens, restarting the iPhone will usually fix the problem.

Press and hold the side button and volume down button simultaneously until the power off slider appears, then release buttons.

Alternatively you can go to Settings > General and tap Shut Down. After a minute, turn on your iPhone either by using the Side button or plugging in your charger.

8. Disconnect Bluetooth devices

If you have a Bluetooth device paired to your iPhone, text alerts may go to that device instead of the phone speaker. Either open the Control Center and tap Bluetooth to turn it off, turn off the Bluetooth device itself, or unpair the device to make sure it isn’t connected. Then check to see if you receive text alerts on your iPhone 14 Pro Max.

9. Check your custom text tones

Your iPhone allows you to set custom ring and text tones to each of your contacts. If you accidentally set it to none, your iPhone 14 Pro Max won’t receive a sound notification when that person texts you.

Open Contacts, and tap the name of the person you aren’t receiving notifications from. Tap Text Tone, and select any option other than None. After you’ve chosen a tone, tap Done.

10. Turn on Notify Me

Have you muted one or more conversations in the Messages app because you were receiving too many notifications, but now you aren’t receiving important notifications? If you turn on Notify Me, you’ll get an alert whenever someone mentions you in a Messages conversation even if you have it muted.

Open Settings > Messages, and make sure the Notify Me toggle is turned on.

11. Turn off Message Forwarding

Are you receiving text notifications on your other Apple devices, but not on your iPhone 14 Pro Max? Try turning off Message Forwarding, and see if that allows your phone to display alerts again.

Open Settings > Messages > Text Message Forwarding, and disable the toggles for each of your connected devices.

12. Turn Off Filter Unknown Senders

iPhone lets you automatically filter spam and texts from unknown people. When you enable this, in rare cases, your iPhone 14 Pro Max might miss a few meaningful text notifications. Plus, if someone who isn’t in your contact list messages you, chances are the Messages app will sort their text in a separate list and not notify you of it.

To fix this, go to Settings > Messages > Unknown & Spam and turn off Filter Unknown Senders.

13. Are You Using an Apple Watch?

If you have enabled text notifications on your Apple Watch, it may not show them on the iPhone 14 Pro Max or play the tone. To address this, make sure your iPhone and Apple Watch are running the latest versions of iOS and watchOS, respectively. You may also choose to turn off text notifications on the Apple Watch from the Watch app.

14. Check for updates for your iPhone

If your iPhone has an update available, try installing it.

Make sure to update your Apple Watch too if you have one, as having one up to date and the other behind on updates can cause notifications to appear on the Apple Watch but not on your iPhone.

Successfully Fixed iPhone 14 Pro Max not Getting Text Notifications issue

Not getting text notifications on your iPhone 14 Pro Max is annoying, but the above tips should help you fix the problem for good.

It’s quite frustrating if your iPhone 14 is not receiving notifications. Thankfully, there are many things you can do to get your notifications back to normal. If your iPhone 13 notifications are not working, here are some fixes to try.

Two hands hold up iPhone 14 and iPhone 14 Plus.

Note: information in this article applied to iPhone 14, iPhone 14 Plus, iPhone 14 Pro, and iPhone 14 Pro Max.

Cause of Notifications Not Showing up on iPhone 14

There are many different causes for not receiving notifications on your iPhone 14. These include:

  • Focus or Airplane Mode is on.
  • App notifications are disabled.
  • Silent mode is preventing your iPhone 14 from delivering notification alerts.
  • Outdated apps or iOS can cause apps to freeze or crash and not deliver notifications.

The problem of iPhone 14 not receiving Notifications can occur at any time, and it isn’t always simple to pinpoint the issue.

How to fix notifications not working on iPhone 14

Here are some of the ways to fix the problem of notifications not showing up on iPhone 14:

1. Ensure Notifications Are Enabled

iPhone Notifications are enabled on a per-app basis. Each app must ask permission to display notifications, which you then grant via a pop-up. Sometimes you may deny permission by mistake, and other times an app may never request the required permission causing them to not appear.

You can rectify this behavior and ensure that notifications are enabled (or disabled, if you’d rather) under Settings > Notifications. Scroll down to the app in question then enable “Allow Notifications” and make sure alerts are enabled wherever you want them: on your lock screen, in the Notification Center, and as drop-down banners at the top of the screen.

You choose between a temporary or permanent banner style, the latter of which requires that you dismiss it manually. This can be handy if you don’t want to miss a notification from a particular app. You can also enable or disable “Notification Grouping” which gathers similar notifications together into an expandable stack.

2. Check That Focus is not enabled

It may seem obvious, but forgetting Focus is enabled is one of the most common causes for iPhone 14 not receiving notifications.

Focus mode can be found in the Control Center by swiping down from the top-right of your screen. Tap and “Focus” to see the different modes available to you: Do Not Disturb, Personal, Work, and Sleep.

These modes can interfere with notification delivery, so make sure to turn them off if you want to receive all notifications. If you find Focus mode useful when working or studying but would prefer to whitelist certain contacts and apps, head to Settings > Focus and set up your desired mode.

This allows you to reap the benefits of disabling distracting notifications from social media or games, while still being able to message or receive calls from friends and family.

3. Disable Notification Summary

Notification Summary is a feature that bundles together “non-urgent” notifications and delivers them as a summary at more convenient times of your choosing. You won’t see certain notifications immediately with this mode enabled, but you’ll still receive calls and messages.

Your iPhone will suggest apps that are particularly heavy on notifications when you first set the feature up. You can disable or reconfigure the feature under Settings > Notifications > Scheduled Summary.

4. Reboot Your iPhone

The next step towards troubleshooting why your iPhone 14 is not getting notifications is to ensure that it’s not a temporary hiccup.

To do that, you’ll need to reboot your iPhone. Doing so puts an end to all background processes or services that might interfere with an app’s ability to push notifications. This will also refresh your iPhone’s core components, in case any of them crashed during a task.

To reboot your iPhone, go to settings > general > shut down.

5. Unmute Your iPhone for Notification Sounds

If you’re seeing notifications but not hearing them, your iPhone 14 is likely muted. You can unmute your iPhone using the toggle switch on the left side of the device (if you’re looking at it in portrait mode, face-on).

The volume of incoming notifications is determined by your ringer volume. You can change this using the slider under Settings > Sounds & Haptics, and modify the default alert sounds for notifications like text messages, new mail, and reminders.

It’s also important to make sure “Sounds” is enabled under Settings > Notifications for any app that you want to sound an alert (this will be on by default).

6. Not Receiving Notifications From A Specific App?

One of the main reasons why your iPhone 14 notifications aren’t working could be due to broken app updates. If your iPhone 14 is not getting notifications from one app in particular, it’s possible that the developers have accidentally rolled out a buggy update. For those scenarios, you have three options.

You can try killing the app and starting it again on your iPhone to see if that helps.

You can also check for any updates the app may have pending by launching the App Store, tapping your user icon, then scrolling down to the updates section. Tap “Update” next to an app to download and apply the update immediately. If the problem persists, you can uninstall the app then reinstall it from the App Store to see if that helps.

If you’re receiving some app notifications but not everything, the way you’ve configured notifications inside the app could be to blame. Some apps, like Twitter, allow you to configure exactly what notifications you want to see. For example, you can see every tweet from certain accounts while excluding mentions or direct messages.

You will need to dig through the app’s settings to change how notifications are set up, and each app will approach this slightly differently.

If you’re using the default Mail app for iOS you won’t get push notifications for a standard Gmail account. This is because Google limits this functionality to the Gmail iPhone app. If you value immediate alerts for your Google email account, this is the app you’ll need to use.

You can set the “fetch” period at which the iOS Mail app checks for new mail under Settings > Mail > Accounts.

7. Check Your Wi-Fi & Cellular Connection

If you don’t have an internet connection, your iPhone 14 won’t receive notifications.

First, check to see if your iPhone is connected to a Wi-Fi network by opening the Settings app and tapping Wi-Fi. Make sure the switch next to Wi-Fi is turned on.

If you see a check mark next to the name of your Wi-Fi network at the top of this menu, your iPhone is connected to Wi-Fi. If you’re not connected to a Wi-Fi network, tap on the one you want to connect to under Choose A Network…

You can quickly check to see if Cellular is turned on by opening Control Center and looking at the Cellular button. If the button is green, Cellular is turned on!

8. Reset All Settings

Still not receiving notifications on your iPhone 14 after all the above fixes? At this point, you should try resetting your device’s settings. Doing this will restore your iPhone’s notification preferences to the defaults, hopefully fixing whatever is affecting notification delivery.

Go to Settings > General > Transfer or Reset iPhone > Reset > Reset All Settings. Type in your iPhone’s passcode and select Reset All Settings on the prompt.

Keep in mind that resetting your iPhone’s settings puts all options back to the default. This means you’ll have to connect to Wi-Fi networks again, re-configure Bluetooth devices, adjust your privacy settings, and similar. However, your data isn’t affected by this.

9. Contact Apple Support

If, after all these steps, you’re still not able to fix your iPhone 14 notifications problem, it might be a hardware issue. In most cases, notifications aren’t working on your iPhone 14 because of a software issue or misconfigured setting. However, there’s an incredibly small chance that the antenna which connects your iPhone to Wi-Fi and cellular networks is broken, especially if you’ve been having trouble recently connecting your iPhone to wireless networks. In that case, it’s best to contact Apple support.

Notifications not working on iPhone 14? Problem fixed!

Chances are that at least one of the fixes mentioned above will resolve your iPhone 14 notification issues. It’s more than likely an accidental setting blocking the notifications than a full-blown problem.

If you still don’t get notifications after executing these fixes, you might have to factory reset your iPhone.

Is your iPhone 14 cellular data not working? Here is what you can do to fix it.

Two hands hold up iPhone 14 and iPhone 14 Plus.

The iPhone 14 works best with an active data connection. When Wi-Fi isn’t available, you need to rely on the mobile data to connect to the internet even in the remotest of places. What if the mobile data (or cellular data) on your iPhone 14 stops working and gets finicky?

If your iPhone 14 cellular data has been letting you down lately, or stopped working all together, don’t worry! There are various fixes you can try before blowing up your cell carrier’s customer support line. In this article, I’ll explain why your iPhone 14 Cellular Data is not working and show you how to fix the problem for good!

Why is iPhone 14 Cellular Data not working?

There are many reasons why your

  • You’re outside of your cellphone carrier’s network.
  • There’s a network outage in your area.
  • Airplane Mode is turned on.
  • There’s a problem with your SIM card.
  • Your iPhone needs a software or carrier settings update.
  • There’s a problem with your carrier account.
  • Your network settings need to be reset.
  • Your iPhone is damaged.

Ways to fix iPhone 14 cellular data issues

If your iPhone 14 cellular data is not working, follow these easy ways to fix the problem now.

Note: information on this article applies to iPhone 14, iPhone 14 Plus, iPhone 14 Pro, and iPhone 14 Pro Max.

1. Pay Your Phone Bill!

This sounds silly, but it’s the most basic, first thing to check. I once spent the morning running errands and wondering, “why is my LTE not working on my iPhone 14?!” Around lunchtime, I finally realized that I had forgotten to pay my phone bill. Problem solved!

Also, check with your cellular service provider to make sure your iPhone is enrolled in the correct data plan. You may have just used up your data for the month!

2. Toggle Airplane Mode to Fix cellular data not working on iPhone 14

One of the most effective ways to fix iPhone 14 cellular data problems is to toggle Airplane mode. Toggling the airplane mode is a neat way to refresh all the network connections on your iPhone. It can potentially fix any minor network glitches. Go to Settings and enable the Airplane mode. Leave it on for a few seconds, and then turn it off.

3. Check Cellular Coverage Area & Check for Cellular Outage

If you’re outside of your cellular coverage area, it’s a given you’ll have no data connection. To check your cellular coverage area on iPhone, look at the icons in the Status bar at the top of your screen. If all the bars are filled white, you have a very strong connection. If only one bar is white, your internet will be extremely slow, if it works at all. If no bars are white, you’ll have no data connection at all.

If your mobile network is not available and cellular data isn’t working, borrow someone else’s phone and call your cellular service provider, or navigate to their website. It may be that the service outage is on their end, and you’ll have to wait for network maintenance and repairs to use your cellular data again.

4. Turn Cellular Data On and Off

There is a possibility that you may have a weak cellular signal where you are trying to connect. Sometimes your iPhone needs to lock in with the strongest signal in the area so it can sync with the cellular network. To help your iPhone do this, you need to refresh your cellular network connection. You can do this by going to Settings > Cellular > Cellular data, and disable it. Wait for a minute and turn it on.

5. Restart Your iPhone 14 to Fix cellular data Issues

You’d be surprised how often simply restarting your device can fix iPhone 14 cellular data problems. A restart clears your iPhone’s active memory (but you won’t lose data), which is where temporary bugs can crop up. To do this, hold one of the volume buttons on the phone and the side button until the power off slider appears on the screen. Next, you need to drag the slider to power off the phone. To turn it on, press and hold the Side button.

6. Check For A Carrier Settings Update

It is known that wireless carriers constantly make changes to their network so they can deliver a good user experience to their clients. Some of these network upgrades require you to change the settings on your iPhone for it to work. This is not complicated because all you have to do is just hit the Update option when a carrier settings update is available.

To find out whether you have any new carrier settings update to be installed, go to Settings > General > About. If there is an update, you’ll get a notification.

7. Eject and Reinsert Your SIM Card

If you find your iPhone 14 Cellular Data not working after trying the above solutions, you should try removing your SIM card and inserting it again. While you’re at it, make sure to inspect your SIM card for any damages too. If possible, try putting your SIM card in another smartphone to check for any issues with the card.

Using a SIM tool or any alternative, pop out your sim card slot on the side of your iPhone, wait a few seconds, and then reinsert it. If this was the problem, you should be able to connect to a cellular data network in a few seconds.

If the card is fine and the problem persists, move to other solutions.

8. Make sure the date and time are properly set

If nothing has fixed iPhone 14 cellular data problem so far, make sure that the date and time on your phone are set correctly for your time zone. The best option to go for is “Set automatically”. Go to Settings > General > Date & Time , tap on Set Automatically.

9. Turn Off VPN

If you are using or are subscribed to a VPN on your iPhone 14, in some rare cases, it can also prevent your cellular signal from connecting. Having a VPN can be used for things like staying safe on public Wi-Fi or bypassing geo-restricted viewing restrictions. Should you find that you are having trouble connecting to your cellular signal on your iPhone 14, disable your VPN temporarily and see if that helps resolve the connection issue.

It might also help to disable the VPN by going into the VPN settings and toggling your app of choice to “off” and then doing a forced restart. With the forced restart, you can be sure that you are completely disconnected. Now see if your iPhone 14 cellular data is working, and if not, move to the next solution.

10. Update iOS to Resolve cellular data problems on iPhone 14

Still no luck? Time to try updating your operating system. Each new version of the iOS brings bug fixes and new features. It could be the cause of your error is fixed in the latest OS update. By the time you read this post, it’s possible that Apple may have already released a new update or two which addresses this cellular data issue with the iPhone 14 model.

Just to be sure that you have the latest bug fixes on your iPhone 14, go to Settings > General > Software Update. Tap Download and install.

11. Reset Network Settings

A simple and powerful fix for data not working on your iPhone 14 is to reset network settings. Your iPhone stores lots of small settings and preferences related to how it connects to networks under the general heading of Network Settings. If one of those settings gets damaged in some way, it could block your access to cellular data networks. Reset your device’s network settings and you’ll create new settings and could fix the iPhone 14 cellular data not working problem.

When you do this, you’ll lose all stored networking settings and passwords. So, you’ll need to re-pair Bluetooth devices and re-enter Wi-Fi passwords. Go to Settings > General > Transfer or reset iPhone > Reset > Reset network settings.

12. Factory reset your iPhone

If all else fails to fix iPhone 14 cellular data not working issue, go ahead and reset your iPhone to factory settings. This will erase everything on your phone and bring all settings to factory defaults. This means your phone will be left like the first time you turned it on (software-wise).

This fixes pretty much any software issue you may encounter. It is the best solution to many problems, but it should be used as a last resort due to the inconveniences deleting all data entails. Here’s how to factory reset your iPhone 14:

  1. Open the Settings app.
  2. Select General.
  3. Tap Transfer or Reset iPhone.
  4. Hit Erase all content and settings.

13. Contact Your Cellular Carrier

In some cases, the issue could be at your mobile data carrier end. Try to reach out to your service provider to check about proper cellular settings or if any outages in your area that might be the cause of unresponsive iPhone 14 cellular data.

14. Get help from Apple

If you continue to have iPhone 14 cellular data problems, take your device to an Apple Authorized Service Provider or make a Genius Bar reservation at an Apple Store, as there may be a corrupted hardware component.

Cellular data not working on iPhone 14? Problem solved!

We hope that we have helped you fix your cellular data not working on your iPhone 14 issue. If you have questions related to this topic, please feel free to leave a comment below. Our team is ready to offer more troubleshooting tips to help you.

It’s incredibly frustrating when your iPhone 14 won’t connect with a Bluetooth accessory. Whether it’s a set of wireless headphones, a smart speaker, or your car stereo, we expect our Bluetooth accessories to work seamlessly, but that isn’t always what happens.

In this article, we’ll walk you through all the best ways to fix Bluetooth problems on your iPhone 14. Most of the time, these problems are the result of a software issue, which means you can usually fix them yourself for free.

Two hands hold up iPhone 14 and iPhone 14 Plus.

Note: information in this article apply to iPhone 14, iPhone 14 Plus, iPhone 14 Pro and iPhone 14 Pro Max.

Bluetooth gives you the freedom to use accessories like Apple Watch and AirPods wirelessly, but every technology has its shortcomings, and Bluetooth may have a few issues that can be easily solved. If your iPhone 14 won’t connect or pair with Bluetooth and you are looking for the solutions to fix it, we have some tips for you. We will identify the reasons for iPhone 14 Bluetooth problems and look at the solutions that can help you fix the issue.

Some of the most common iPhone 14 Bluetooth issues include:

  • iPhone 14 Bluetooth not working
  • iPhone 14 Bluetooth not pairing
  • iPhone 14 not finding Bluetooth devices
  • iPhone 14 Bluetooth keeps disconnecting

Before you head to the Apple Store or start thinking about replacements, follow some of these more common troubleshooting steps to fix iPhone 14 Bluetooth issues. Many times, the most basic steps can resolve iPhone 14 Bluetooth connectivity issues.

Why Is My iPhone 14 Bluetooth not working?

Several things can prevent your iPhone 14 Bluetooth from working properly , including:

  • Bluetooth may be turned off.
  • Your Bluetooth device may be too far away.
  • The device you’re trying to connect to may not be sufficiently charged.
  • Software or firmware could be out of date on either the iPhone or the Bluetooth device.

How to Fix iPhone 14 Bluetooth not working issue

If you’re having Bluetooth issues on your iPhone 14, the steps below should help you fix the problem. Try each one, in order until you find a solution that gets your iPhone 14 Bluetooth working again.

Before you start troubleshooting the iPhone 14, it is essential to rule out that the device is not the cause of the problem. To check if the device is working or not, connect it to another device like a different iPhone or a laptop and check if it works properly on the other devices. If the Bluetooth device is working fine on other iPhonss or iPads, then the problem lies in your phone, and further troubleshooting should be done on the iPhone 14. But suppose the device does not connect on a different phone or another device either. In that case, the problem lies with the device, and you may have to follow the device manual for troubleshooting the device, or you must take it to the manufacturer to get it checked or replaced. This is a critical step to ensure that further troubleshooting of the phone becomes a sensible step when looking for solutions for iPhone Bluetooth problems.

1. Make sure your iPhone’s Bluetooth is turned on

It’s easy enough to accidently (or even on purpose) turn the Bluetooth on your iPhone 14 off. Check to be sure it’s turned on, and then try connecting to your Bluetooth device again. You can do this by going to Settings > Bluetooth.

2. Toggle Bluetooth Off and On

The easiest way to fix most Bluetooth problems on your iPhone 14 is to toggle Bluetooth off and on again. This is particularly effective if your device is struggling to pair with a Bluetooth accessory. It’ll also help if you accidentally disabled Bluetooth on your device.

Follow these steps to toggle Bluetooth:

  1. Swipe down from the top-right corner of the screen to open Control Center.
  2. Find the Bluetooth icon in the top-left section of the Control Center, then tap this icon to toggle Bluetooth off. The icon turns white when Bluetooth is turned off.
  3. Wait 30 seconds, then tap the Bluetooth icon to enable it again. The icon turns blue when Bluetooth is turned on.

3. Make sure your devices are compatible

It seems like a given, but believe it or not, not all devices are compatible. Make sure the Bluetooth device you’re using with your iPhone is actually compatible with the iPhone 14. You can usually check the packaging or the manufacturer’s website for details about compatibility.

4. Make sure your devices are close enough

A Bluetooth signal tends to have a very short range, so make sure your devices are close enough to connect. Usually 2-3 feet is good during the connection process, though you can often separate them by a greater distance once the connection is complete.

5. Make sure your iPhone and your Bluetooth device are both sufficiently charged

You wouldn’t think the charge level on an iPhone or on the Bluetooth device you’re connecting it to would matter, but it can. The more charged the devices are, the better the connection, so if you’re having trouble and either of the devices is less than 50 percent charged, try charging them both completely and starting again.

6. Make sure your Bluetooth device isn’t paired with something else

While it’s true some Bluetooth items will connect with more than one device, that’s not true for all of them. If you already have your Bluetooth device connected to something else, disconnect it and then re-try connecting it to the iPhone 14.

7. Restart Your iPhone And The Device

One of the most tried and tested troubleshooting techniques is to restart your device. If your iPhone 14 isn’t working with a Bluetooth accessory, restart the Apple device and the accessory before trying them again.

To restart your iPhone, press and hold the Side button with either Volume button, then slide to power off.

Once your iPhone powers off, wait 30 seconds before pressing the Side button again to restart it.

Follow the user instructions to restart your Bluetooth accessory.

8. Pair With Your Bluetooth Accessory Again

When it’s working, your iPhone usually pairs with Bluetooth accessories automatically, as soon as it detects them. But it can help to manually pair your devices together using the Settings app.

Here’s exactly what you need to do:

  1. Make sure your Bluetooth accessory is fully charged and powered on (consider replacing the batteries if it uses any).
  2. Follow the instructions for your Bluetooth accessory to put it in pairing mode. You can often do this by holding down a Bluetooth button on the device.
  3. On your iPhone 14, go to Settings > Bluetooth.
  4. Wait for your Bluetooth accessory to appear in the list of devices, then tap its name to pair with it. If your accessory doesn’t show up, try moving it right next to your iPhone 14 while it’s in pairing mode.
  5. The Settings app should say Connected next to your Bluetooth accessory when pairing is complete.

9. Forget Your Bluetooth Accessory and Pair Again

Even if your iPhone 14 won’t connect with a Bluetooth accessory right now, it still remembers information about the accessory from the last time it connected. Sometimes, you need to delete this data to fix your Bluetooth problems.

You can do that by telling your iPhone to Forget a device. Here’s how:

  1. On your iPhone, go to Settings > Bluetooth.
  2. Tap the i icon next to a Bluetooth accessory to reveal more data about it.
  3. Scroll to the bottom and tap Forget This Device, then confirm you want to Forget Device.

After telling your iPhone to forget a Bluetooth accessory, follow the instructions above to pair them again, like you did the first time you used it.

10. Remove All Paired Devices

If you find Bluetooth not working on your iPhone 14 after trying the above steps, give your phone a fresh start by removing all the devices that had been paired before. The chances are that you are looking at a list that has devices that you paired with just once, and you would never be pairing again. It is best to remove such devices from your list and allow your phone to try and pair with the device all over again. To remove all paired devices:

  1. Start the Settings app of your iPhone.
  2. Tap on Bluetooth
  3. When your Bluetooth is On, you will see a list of devices that you had paired it with
  4. There is a settings icon next to the name of each device. Tap on the icon and press forget this device.
  5. Do this for all the devices till you have no devices on your list
  6. Once all the devices are removed, your iPhone will begin scanning again for devices to connect to. It should show the device you want to connect to. Try pairing now and check if it works.

11. Install the Latest iOS Update

It’s possible the Bluetooth isn’t working on your iPhone 14 due to a bug in iOS. When this is the case, all you need to do is install the latest iOS update to fix it—provided Apple has released a patch for that bug already.

On your iPhone 14, go to Settings > General > Software Update to check for new updates.

12. Make sure your Bluetooth device is full updated

Outdated drivers, firmware, and software can create all manner of problems, including connection issues. Use the manufacturer’s directions for updating your specific Bluetooth device, they are usually available on the manufacturer’s website, and generally, you can go into the settings for the device to find the option to update it.

13. Reset your network settings

Up to now, none of the solutions we’ve suggested should have resulted in any data loss from your iPhone. But if you’re iPhone 14 Bluetooth still isn’t working, it’s time to start erasing some settings.

When you Reset Network Settings on your iPhone, it will forget all the Bluetooth devices you’ve connected to, all the Wi-Fi networks you’ve saved, and all the VPNs you may have set up.

As far as data loss goes, this is pretty minor. But you should make sure you’ve got your Wi-Fi password to hand so you can get online again as soon as possible.

Go to Settings > General > Transfer or reset iPhone > Reset and tap Reset Network Settings.

14. Reset Your Bluetooth Accessory to Factory Settings

Sometimes it isn’t your iPhone 14 that’s playing up, it’s your Bluetooth accessory. This could be the case for everything from a car stereo to a set of Apple AirPods.

If your iPhone 14 still can’t connect to your Bluetooth accessory—or if it doesn’t work properly when you do connect it—follow the user instructions to reset the device back to its factory settings.

For most Bluetooth devices, all you need to do is disconnect it from Bluetooth and restart it. But for other devices, you may need to press a certain combination of buttons or go into the settings. Check with the manufacturer to find out exactly what you need to do.

15. Factory reset your iPhone

If you find iPhone 14 Bluetooth not working after trying the above solutions you can factory reset your phone. It’s unlikely this will make much of a difference for your Bluetooth connections, but there’s a slim possibility that something’s gotten corrupted in your Bluetooth capabilities, so if nothing else has fixed your iPhone 14 Bluetooth not working issue, a complete reset of your phone is worth a try.

However, be aware that if you reset your iPhone you’ll lose everything on it, so you might want to create a complete backup before you start. You can do this by going to Settings > General > transfer or Reset iPhone and choose Erase All Content and Settings. Your iPhone passcode is required to start the process.

16. Repair options for your iPhone

Unfortunately, if you followed all the advice above but Bluetooth still isn’t working on your iPhone 14, it means you’re looking at a hardware problem. This is most likely to be an issue with the antenna in your device, which can also affect Wi-Fi connectivity. Setup an appointment for a visit to the Apple Store, setup an appointment at the Genius Bar, or place a call to Apple Care.

If your iPhone 14 is still covered by the limited manufacturer’s warranty or consumer law, Apple should repair or replace your device for free.

Unfortunately, if your iPhone 14 isn’t covered by the warranty or consumer law, you’ll need to pay for this yourself. But still, at least you’ll be able to connect to your Bluetooth accessories after you do so.

iPhone 14 Bluetooth not working? Problem Fixed!

There are a countless number of different ways that Bluetooth can stop working for your iPhone 14 and an equally countless number of potential causes for those problems. Because of this, it’s difficult for us to tell you exactly which step you need to follow to fix your iPhone 14 Bluetooth problem.

However, we did try to list our solutions in order from the simplest and most likely, to the most drastic and least likely solution.

Let us know in the comments how you fixed Bluetooth not working on iPhone 14 issue! Or, if you still haven’t managed to fix it yet, which methods did you try, and did Apple have anything interesting to say about it?

Is Wi-Fi not working on your iPhone 14? You have come to the right place. In this article, we will provide tips on how to fix WiFi problems on iPhone 14 such as WiFi not working, not being able to connect to a WiFi network, WiFi connection keeps dropping out intermittently or WiFi speed being extremely slow.

Two hands hold up iPhone 14 and iPhone 14 Plus.

Note: Instructions in this guide apply to iPhone 14, iPhone 14 Plus, iPhone 14 Pro and iPhone 14 Pro Max.

iPhone 14 comes with cool new features and improvements, but like any other iOS device, it comes with its own set of problems. Some of our readers have reported that they’re facing Wi-Fi problems on their iPhone 14.

The issues being reported, include iPhone Wi-Fi not working, not being able to connect to a Wi-Fi network, Wi-Fi connection keeps dropping off intermittently or WiFi speed being extremely slow, getting an incorrect password prompt even though they seem to be entering the correct password, and Wi-Fi settings grayed out.

Why is Wi-Fi not working on iPhone 14?

There are dozens of reasons why you are experiencing WiFi problems on your iPhone 14. It could be the strength of the WiFi signal, your router or even a problem with the network itself. With so many factors causing iPhone 14 WiFi problems, it can be a little hard to pinpoint the problem and fix it. However, there’s always a way, right?

If your iPhone 14 cannot connect to a Wi-Fi network, is continuously dropping the connection to one, or if the Wi-Fi speeds are extremely slow and you can’t seem to find the problem, then we are here help you find the problem and fix it.

We will talk about tips, workarounds, and solutions to fix Wi-Fi problems on iPhone 14, iPhone 14 Plus, iPhone 14 Pro and iPhone 14 Pro Max.

As there are many factors causing WiFi problems on your iPhone 14, we are going to start from the basic issues and move on to more advanced problems with their solution. All the fixes are super easy, and you will need just a couple of minutes to go through them all. Without further ado, let’s see how to fix iPhone 14 Wi-Fi not working issue.

How to Fix iPhone 14 Wi-Fi Not Working Issue

Here are some time-tested solutions to fix the Wi-Fi issues on your iPhone 14:

1. Are you in range?

A lot of the time, your router’s signal may be poor. If your home or office has a lot of metal, walls, or other objects that could interfere with wireless signals, then you might have a shorter range bubble than you think.

You can check your signal by looking in the Status Bar – three Wi-Fi bars is optimal, two is okay, and one is poor. Sometimes, you might have none at all and it’ll show LTE, 5G, 4G, 3G or E instead; this indicates you’re on a cellular network instead of a Wi-Fi network.

When your signal is too poor, your iPhone 14 will have trouble transmitting data back and forth with the router, and so you want to make sure you’re close enough to the wireless router to do so.

If you’re not in range, try getting closer to the wireless router and see if your iPhone 14 Wi-Fi connectivity problems disappear. If not, move on to the next step.

2. Is Wi-Fi turned on?

If you have Wi-Fi disabled on your iPhone 14, then that could be the main reason you’re unable to connect.

You may have forgotten to turn it on or switched it off by mistake. Luckily for you, this is an easy fix. To make sure Wi-Fi is turned on, you can open Control Center by swiping down from the top right of the screen. Just make sure that Airplane Mode is disabled and that Wi-Fi is turned on.

In Control Center, an item that is toggled on will appear to glow lighter than toggle buttons that are toggled off, which are dimmed out.

Alternatively, you can also open up the Settings app and click on Wi-Fi. Make sure Wi-Fi is toggled on.

You may also want to ensure that your wireless router is turned on. Although not very often the case, there is always a possibility that a reset switch or a power surge may have knocked it off and that it may have been shut off and needs to be restarted.

If everything appears to be turned on, then you can move on to the next step.

3. Toggle Wi-Fi and Airplane mode

Whether your iPhone 14 cannot connect to Wi-Fi at all or your Wi-Fi connection keeps dropping, toggling the Wi-Fi connection is known to be effective in many cases. Start with the Wi-Fi. You can do this by navigating to Settings > Wi-Fi. Turn the feature off, wait for a couple of seconds and then turn it back on.

After this, toggle Airplane mode. You can do this by heading over to Settings, tap Airplane mode and enable it. Leave it on for a minute then turn it off.

4. Does your network show in your Wi-Fi settings?

If you know everything’s turned on and that you’re close enough to the wireless router, but still don’t see an active internet connection, then make sure you’re actually able to see the Wi-Fi network under the Wi-Fi settings on your iPhone 14 via Settings > Wi-Fi.

It’s possible that a network administrator has turned off SSID broadcasting setting from the wireless router, and this could be why you’re unable to connect to your Wi-Fi network as usual.

If they’ve done this, you will not see the Wi-Fi network under the list of available networks, and you will have to enter the SSID manually, along with the password if one applies.

If this doesn’t apply to you, keep moving down the list to the next step.

5. Have you logged on to the network?

You may have accessed the Wi-Fi network, but you will need to enter a password if your Wi-Fi network is protected with a security key. In most cases, you’re asked to enter the security key the moment you join a secured network.

In other cases, you might be accessing a Wi-Fi network where you need to open Safari on your device and try to load a website. When you do, you’ll be redirected to a login portal. These kinds of networks are common in schools, colleges, and institutions.

Once you’re all logged on to the Wi-Fi network, try to use it again and see if you have complete internet access.

If password entry wasn’t the root of your problems, continue on to the next step.

6. Is everything plugged in properly?

Okay so you might have looked to make sure that the router is turned on, but did you check your modem, power cables, coaxial cables, and ethernet cables to make sure that everything is connected?

Sometimes pets, movement of furniture, and kids can break or undo important wiring that is required to have internet access. In cases where wires are disconnected, the wireless router may still broadcast a signal, but it’ll be a dead signal because the router may not have access to your internet.

This is common when the modem becomes unplugged, and not the router, but many modern routers, such as those given out by Verizon, have a modem built into them. For those, the only thing you really need to check is that the coaxial connection is there, because if the power cable wasn’t, the router wouldn’t even be on and you wouldn’t have gotten past step 2!

If everything is plugged in, try the next step.

7. Try restarting everything

In some cases, the iPhone 14, or router or modem may be acting up. Try restarting everything.

You can restart your iPhone 14 by pressing and holding the Side button, and either of the volume buttons then dragging the “Slide to power off” slider from left to right. For your modem or router, all you typically have to do is remove the power cable and wait a minute for all the juice to drain from the capacitors.

After a minute, plug everything back in and turn your iOS device back on. When everything boots up, try to reconnect to your network again.

In many cases, this solves the iPhone 14 Wi-Fi problem. If it doesn’t, don’t fret, there are more things you can try!

8. Forget WiFi Network and Rejoin

If you’re unable to connect to a WiFi network and are prompted that the password you’ve entered is incorrect despite entering the correct password, try to forget the WiFi network and join it again.

To forget the WiFi network, tap on the WiFi network on your iPhone 14 Max, iPhone 14, iPhone 14 Pro, or iPhone 14 Pro Max from the list under Settings > Wi-Fi. Then tap Forget This Network. You’ll be prompted with a popup message asking you if you want to forget the WiFi Network. Tap Forget to forget the network.

Now go back to Settings > Wi-Fi, select the network again, enter the password, and Join the network again to see if it helps.

9. Disable Wi-Fi Assist

The iPhone 14 includes a WiFi Assist feature, which provides more reliable Internet connections when your WiFi network becomes spotty. This feature could do more harm than good in many cases and cause WiFi issues on your iPhone 14.

To turn off WiFi Assist:

  1. Launch the Settings app.
  2. Navigate to Cellular (Mobile in some regions)
  3. Scroll down to the bottom where you will see WiFi Assist. Tap on the toggle to turn it off.

10. Make sure the date and time are properly set

If nothing has fixed your iPhone 14 Wi-Fi issues so far, make sure that the date and time on your phone are set correctly for your time zone. The best option to go for is “Set automatically”. Go to Settings > General > Date & Time , tap on Set Automatically.

11. Update your iPhone

While software versions aren’t a common issue with Wi-Fi connection, these can fix system bugs your iPhone 14 may be encountering. Updating your iPhone software is worth a try, and it’s an effortless way to possibly get things back up and running.

  1. Go into the Settings app.
  2. Tap on General.
  3. Hit Software update.
  4. Your iPhone will let you know if there is an available update. Follow instructions to update.

12. Update Your Router’s Firmware

Update your router’s firmware to ensure that the known bugs have been fixed. In some cases, this could be the reason why your iPhone 14 is not able to connect to a Wi-Fi network. You should ideally regularly update your WiFi router’s firmware as it can improve its performance or fix bugs and security issues.

13. Disable VPN

One of the most common reasons that seem to cause iPhone 14 WiFi issues has been VPN. If you have enabled via the Settings app or a VPN app, then try to disable VPN to see if it resolves the issue. You can disable VPN by navigating to the settings app and disable the VPN toggle. If you are not able to disable it then launch the VPN app to disable VPN temporarily to figure out if it resolves the WiFi problem on your iPhone 14.

14. Reset your iPhone network settings

It’s rare, but your iPhone 14 network settings can become corrupted. iOS comes with an option under Settings > General > transfer or reset iPhone > Reset > Reset Network Settings.

If all else fails, tap on this button and let iOS forget all of your network settings. You will have to reconfigure any VPNs, Wi-Fi networks, and other network-related information, but it gives you a clean slate to start from in case you may have been suffering from some kind of corruption.

15. Contact your ISP

In some scenarios, your Wi-Fi and devices are working just fine. Your internet service provider may just be experiencing a temporary hiccup that they could fix on their end. Try contacting them to see if they can assist you further.

16. Repair options

Even after performing all these steps, you’re still experiencing iPhone 14 Wi-Fi problems, then you might want to visit your nearest Apple Store to know of any possible hardware-related issues. You can also Contact Apple Support. Apple support options include:

Wi-Fi not working on iPhone 14? Problem solved!

Have you faced any WiFi issues on your iPhone 14? If so, did the above tips help in solving the problem for you? Drop a comment and let us know!

Many users have complained that the flashlight on their iPhone 12 accidentally turns on by itself. This happens while their phone is locked and, often, while it is in their pocket. Luckily for us, there are different ways to ensure that it does not happen to us again. Therefore, if the iPhone 12 flashlight turns on by itself , it is not a matter of magic … If not, it will be, for example, due to a configuration that we were not aware of. Read on to know the solutions.

On the iPhone Lock Screen, there is a (non-removable) flashlight button; the problem seems to be that this button gets accidentally pressed while in someone’s pocket. It is definitely an annoying sort of problem – cluelessly walking around with light beaming through your pants – and there is the secondary problem of battery drain caused by the flashlight being on for long periods of time.

If the tap happens when you place the iPhone in your pocket, or while you’re walking, the LED can remain ON for a long time. Obviously, every second of usage drains your iPhone’s battery and you can end up with an overheated phone with almost no battery left!

iPhone 12 Flashlight Turns On Randomly

I’m not sure if this happens because of a modified iOS 15 setting, or due to a change of sensitivity in the iPhone 12 models, but ever since I updated to iOS 15, I’m facing this issue.

It’s been particularly annoying during winter I was skiing a lot and I found that the iPhone 12 flashlight would turn on by itself almost daily. Sometimes, I could spot it right away thanks to the small vibration, while placing the device into the pocket of my winter jacket.

However, often enough the flashlight would stay enabled in my pocket for tens of minutes, if not hours and considerably deplete my iPhones battery!

How To Fix iPhone 12 Flashlight Turns On By Itself

The flashlight shortcut cannot be removed from the lockscreen, but there are several ways to quickly turn it off before you accidentally blind the wrong person. If the flashlight is turning on while inside your pocket, there are a few tweaks that you can apply. Here’s what you can do to prevent your iPhone 12 Flashlight from turning on by itself.

Note: information in this article apply to iPhone 12, iPhone 12 mini, iPhone 12 Pro, and iPhone 12 Pro Max.

1. Disable Tap To Wake

The iPhone 12 include a feature called Tap to Wake, which, much as it sounds, allows the locked iPhone screen to wake up with a tap anywhere on the screen. This makes a lot of sense because the device does not have a Home button to press and wake the screen, so a tap anywhere on the display sort of replicates that Home press function, but Tap to Wake may also lead to a lot of unnecessary screen waking, and theoretically any erroneous screen waking may lead to a accidental taps on the flashlight icon, available in the bottom-left corner of the Lock Screen.

Although not ideal, you can prevent the iPhone 12 flashlight from turning on randomly, by deactivating the Tap to Wake feature. This will prevent the screen from waking up when you tap it, thus prevent any accidental taps on the flashlight icon, available in the bottom-left corner of the Lock Screen.

To turn off Tap to Wake, go to Settings > Accessibility > Touch. Toggle the switch next to Tap to Wake. There is, of course, a downside to turning off Tap to Wake. A lot of people use this feature pretty often; anytime you want to quickly check the time on your phone, especially if you check the time while you are in bed, you just tap the screen. With Tap to Wake turned off, you will need to press the side button to wake your iPhone.

2. Disable Raise To Wake

“Raise to Wake” is a feature designed to make it quicker and easier to start using your phone after picking it up. It allows you to just lift your phone to start using it, rather than having to press any buttons. Generally, when you pick your phone up, you want to use it.

“Raise to Wake” means you don’t have to hold your phone in such a way that you can press the side button to turn it on. One of the downsides is that the feature creates the opportunity of accidental flashlight icon taps. To turn off Raise to Wake, go to Settings > Display & Brightness. Toggle Raise to Wake to OFF.

3. Place iPhone On The Opposite Side

I’ve noticed that the iPhone 12 flashlight turns on randomly when you place the device with the screen towards the outside of your pocket.

To prevent this try to store your phone with the display towards the inside. Does it help?

4. Disable Back Tap

The Back Tap feature allows iPhone users to quickly perform an action by double or triple tapping the back of their iPhone. Users can assign any action to Back Tap feature and perform that action by tapping on the back of their device. You can quickly turn on and off your flashlight with two or three taps on the back of your iPhone using Back Tap. Maybe the feature is activating the flashlight without you meaning to activate it, like when your phone is in your pocket or when you put it on the bed. The good news is, you can disable it in a jiffy. To disable Back Tap on iPhone:

  1. Open the Settings app and go to ‘Accessibility’.
  2. Tap on ‘Touch’ under the ‘Physical and Motor’ section.
  3. Scroll down to the bottom of the Touch settings and go to ‘Back Tap’.
  4. Open ‘Double Tap’ and ‘Triple Tap’ settings one by one and select ‘None’ for both of them. And Back Tap gestures will be disabled.

Conclusion

We hope you’ve fixed the problem and your iPhone 12 Flashlight is no longer turning on randomly. Are you also annoyed by accidental iPhone 12 flashlight taps? Did the above tips help out? Do you know a better solution? Drop a comment and let us know.

Social media is a huge part of our lives. Whether you’re trying to have some fun, keep in touch with others, or promote your next big project, Instagram not working on iPhone 12 is sure to mess with your day. In this article, I’ll explain why Instagram is not working on your iPhone 12 and show you how to fix the problem for good.

Instagram is a free social media platform for sharing photos and videos. If Instagram is not working on your iPhone 12, there are different reasons this could happen. It could be that Instagram’s servers are having a hiccup, your phone is creating problems, or the app is simply misbehaving. For those unfortunate occurrences when Instagram isn’t working on your iPhone 12, we’ve put together a list of ways to fix it. Follow the troubleshooting guide below, and you’ll be able to fix any Instagram problems you might be having on your iPhone 12.

Note: information in this article apply to iPhone 12, iPhone 12 mini, iPhone 12 Pro and iPhone 12 Pro Max.

How to fix Instagram not working on iPhone 12

These tried and tested tips can help you fix the Instagram app not working on iPhone 12 issue.

Check if Instagram is down

If Instagram isn’t working on your iPhone 12, the first thing to consider is that it might not be working for anyone. There are two places to check whether Instagram is down. Down Detector is a site that tracks all kinds of services and whether or not they are down. Head to Down Detector’s Instagram page, and it will tell you whether Instagram is having issues or not. You can also check the Live Outage Map to see if the problem is restricted to specific regions.

The second option is the official Instagram Twitter support account. It will always have the latest news about Instagram outages and how long it might be until it’s back up and running, so follow it if you want to stay updated.

Close and re-open Instagram

If Instagram is up but still isn’t working on your iPhone 12, close the app and re-open it. If the issues persist, try logging out of your account and logging back in. Additionally, uninstalling and re-installing the app sometimes works too. And if you want to take this method a bit further, you can also try logging out of Instagram and logging back in.

Check for updates

Running an old version of an app is usually OK, but it might also bring issues in some instances, especially when significant changes are implemented to apps. It might be worth checking for updates. Open up the App Store and check for available updates. When you log back into Instagram, any missed message will be waiting for you.

How to check for app updates on iPhone:

  1. Open the App Store.
  2. Tap on your profile at the top right of the screen.
  3. Look for the Instagram app.
  4. You should see an Update option if there’s an available update. Tap on it.

While you’re at it, it might also help to have your iPhone’s software on its latest available update.

How to update your iPhone:

  1. Open the Settings app.
  2. Go into General.
  3. Select Software Update.
  4. If an update is available, hit Download & Install.
  5. Follow instructions to finalize the update.

Restart your iPhone

Like many tech problems, the simplest solution is to restart the device. When Instagram isn’t working on iPhone 12, the same logic applies. Reset your device, and it may instantly solve your iPhone 12 Instagram problems. Simply press and hold on to the Side an either of the volume buttons until the power off slider appears. Drag the power slider from left to right to turn off your iPhone. If that doesn’t do the trick, move on to the next fix.

Check your internet connection

The problem may be your internet connection if Instagram is not working on your iPhone 12. A quick way to verify if this is the case would be to test any other app that uses the internet, or open your browser and try to open Google.com. If nothing else works, then your internet connection is likely the issue.

If you’re using data, try switching to Wi-Fi, and vice versa. You can also try moving closer to your router. Resetting the router may solve the issue, too, even if your internet works on other devices. For those using a VPN, you may need to disable it while you use Instagram. Instagram often stops working on iPhone 12 if it detects any third-party apps, including VPNs.

Additionally, if you’re using Wi-Fi, there is a chance the network administrator might be blocking certain services, such as Instagram. This is often the case at schools, libraries, and other places where they would rather not let people use Wi-Fi for entertainment purposes. The only solution would be to ask the administrator to let you use said apps, or simply use data.

Another common issue is that we often turn off mobile data by accident. Make sure you can access mobile data in the Settings.

How to turn on mobile data on iPhone:

  1. Open the Settings app.
  2. Go into Cellular.
  3. Toggle Cellular data on.

Fix Instagram not working on iPhone 12 issue

That’s it for our guide on what to do when Instagram isn’t working on iPhone 12. I hope that this article was helpful to you. Which fix worked for you? Drop a comment and let us know!

Is eSIM not working on your iPhone 13? Well, you have come to the right place. In this article, I’ll explain what to do if eSIM is not working on your iPhone 13 so you can fix the problem for good.

An eSIM is a digital SIM that allows you to activate a cellular plan from your carrier without having to use a physical nano-SIM. With iPhone 13 Pro Max, iPhone 13 Pro, iPhone 13, and iPhone 13 mini, you can use Dual SIM with either two active eSIMs or a nano-SIM and an eSIM. But what if you can’t set up or use eSIM on your iPhone 13?

Learn to fix any issues you might encounter when using eSIM on your iPhone 13.

Note: information in this article applied to iPhone 13, iPhone 13 mini, iPhone 13 Pro, and iPhone 13 Pro Max.

How to fix eSIM not working on iPhone 13

1. Wait

If you’ve just activated eSIM on your iPhone 13 and you’re seeing “No Service” status in the control center, fret not! It may take a few hours before your eSIM is fully activated. Some carriers might take up to 4-5 hours to convert a physical SIM card into an eSIM. Usually, you’ll get an email or SMS when your eSIM is fully serviced by the carrier.

2. Have you tried rebooting?

If eSIM won’t activate on your iPhone 13 after waiting a few hours, try to restart your phone and see if that helps. As unexplainable as it may be, we find most iPhone 13 eSIM problems are fixed with a simple reboot. A plethora of possible discrepancies could cause your iPhone 13 eSIM problem, and chances are that if you are here looking for answers, your phone complication is a bit more complex, but it doesn’t hurt to remind you to try the good ol’ restart. It just might work.

  1. Press and hold on to the Side button and either of the volume buttons.
  2. Drag the power of slider from left to right to reboot your device.

3. Turn eSIM line On/Off:

If you’re getting No Service error on eSIM on your iPhone 13, it might be possible to fix the problem by simply turning On/Off the eSIM line.

  1. Go to Settings.
  2. Select Cellular.
  3. Tap the eSIM data plan.
  4. Turn Off the toggle switch for Turn On This Line, then wait for a few seconds before turning it back on.

4. Check your plan?

Some cellular plans have limitations and throttles. Look into your plan’s terms and see if you’ve used more data than you should. You might be capped or throttled. Also, consider the fact you may be late on your payment. Even the best of us forget about bills sometimes. Not to mention sometimes cards get declined for no apparent reason.

5. Outages and reception

Are you out in the middle of nature? Maybe you’re in a concrete building. Or you’re simply going through an area with spotty reception. There is always a chance you’re unreachable to the network, which will cause problems with your cellular connection.

Also, consider that, while rare, carrier networks can go down too, causing service outages. We like recommending DownDetector.com to check when services are down. The website collects consumer reports and lets you know if there is an outage. There’s also a live map to see if the problem is local. Go in there, type in your Carrier, and hit the search button. If the network is down, all you can do is wait.

6. Turn Airplane Mode On and Off

If you find eSIM not working on your iPhone 13 after trying the above steps, your next step is to turn Airplane Mode on and then off again. Doing this can reset the iPhone’s connection to cellular networks and may resolve the problem.

  1. Once your iPhone is unlocked, swipe down from the top right of the screen.
  2. In the upper-left corner tap the Airplane Mode icon that looks like a circle with a white airplane in the middle.
  3. Tap the Airplane Mode icon again to turn cellular connection back on. When Airplane Mode is on, this icon will turn orange. When it’s off, it will have a transparent background.

7. Check for carrier updates

If your wireless service provider, such as Verizon or Sprint, has released an update, your outdated phone may not be connecting properly, and this can appear to be an eSIM issue. Completing a manual carrier settings update may help.

  1. Go to Settings.
  2. Select General.
  3. Tap About.
  4. Your iPhone will automatically check for the update and a screen will appear after a few seconds if an update is available.

8. Check For An iOS Update

Apple often releases new iOS updates to fix minor bugs and roll out new features. It’s a good idea to keep your iPhone up to date anyway, but it can also fix iPhone 13 eSIM problem.

  1. Open Settings.
  2. Select General.
  3. Tap Software Update.
  4. Tap Download and Install if an iOS update is available. Move onto the next step if your iPhone is up to date.

9. Reset network settings

If you still can’t use the eSIM feature of your iPhone 13, it may mean some extraneous setting was changed along the way. It is likely related to the network, so resetting your network settings to factory defaults might fix the issue. All of your iPhone’s Cellular, Wi-Fi, Bluetooth, and VPN settings get restored to factory defaults when you Reset Network Settings.

  1. Open the Settings app.
  2. Tap General.
  3. Select Transfer or Reset iPhone.
  4. Hit Reset.
  5. Tap on Reset Network settings.

10. Factory reset iPhone

If all else fails to fix iPhone 13 eSIM problem, go ahead and perform a factory reset. This will erase everything on your iPhone and bring all settings to factory defaults. This means your iPhone will be left like the first time you turned it on (software-wise).

This fixes pretty much any software issue you may encounter. It is the best solution to many problems, but it should be used as a last resort due to the inconveniences deleting all content entails.

  1. Open the Settings app.
  2. Tap General.
  3. Select Transfer or Reset iPhone.
  4. Hit Erase all content and settings.

11. Re-install eSIM data plan:

If you can’t fix iPhone 13 eSIM problem after trying the above solutions, you may want to temporarily remove the data plan from your Dual SIM iPhone and then activate again by requesting a new QR Code for eSIM from your carrier.

12. Seek professional help

Now, If you still can’t set up or use eSIM on your iPhone 13, you probably need to have a professional personally inspect the device. When an eSIM issue occurs on your iPhone 13, Apple and your wireless carrier will often point the finger at each other. The truth is that there may be an issue with your iPhone or your account with your wireless carrier, and you won’t know until you get in touch with their customer support.

Check out Apple’s website to get support online, in-store, over the phone, or through live chat. You can find your carrier’s customer service center by typing their name and “customer support” into Google.

Fixed iPhone 13 eSIM not working problem

You’ve fixed the problem and your iPhone 13 eSIM is working again. Next time your iPhone 13 eSIM is not working, you’ll know exactly how to fix the problem. Leave a comment down below if you have any other questions.

Is Chrome not working on your iPhone 13? Don’t panic! We’re here to help you fix the problem.

Chrome is one of those apps you don’t worry about until they stop working. The Google Chrome browser is usually fast and reliable but problems can arise every now an then. Few things are as frustrating as trying to open a webpage for a quick search and have something go wrong at the moment it’s most needed. Thankfully, there are several solutions to try that might get the Chrome browser working on your iPhone 13 again.

Is Chrome browser not working on your iPhone 13? When it hits the fan, you need to get it fixed, but how? We’re here to help, as we break down the most common Chrome issues on iPhone 13 and how to fix them.

Editor’s note: Some of the instructions in this article were generated using iPhone 13 Pro running iOS 15 and iPhone 13 Pro Max running iOS 16.

How to fix Chrome not working on iPhone 13 issue

If Chrome is not working on your iPhone 13, iPhone 13 mini, iPhone 13 Pro or iPhone 13 Pro Max, follow the troubleshooting steps below to get it working again:

Is Chrome down?

You might not be the only one suffering from Chrome not working on iPhone 13. There is a chance the whole service is down. Check Down Detector, a site that will let you know if a Chrome is down. If it turns out that the problem is on Google’s side, there’s nothing you can do but wait it out.

Close and reopen Chrome app on iPhone 13

Those still having problems with Chrome not working on iPhone 13 should try the trustworthy method of simply closing and re-opening the app This is a simple, yet very functional troubleshooting tip that works most of the time. If you find Chrome app crashing on iPhone 13, simply closing and reopening the app might fix any local issues.

  1. From the Home Screen, swipe up from the bottom of the screen and pause in the middle of the screen.
  2. Swipe right or left to find the Chrome app.
  3. Swipe up on the Chrome app to close it.

Check for updates

Sometimes older versions of an app may cause issues. If you find Chrome app crashing on iPhone 13, it won’t hurt to check the App Store and see if there are any updates available for Chrome.

How to check for Chrome app updates:

  1. Launch the App Store.
  2. Search for “Chrome.”
  3. You’ll see an Update button if there is an available update for Chrome. Otherwise, the button will say Open.

While you’re at it, you might want to check if there’s an update available for your iPhone.

How to check for iOS updates:

  1. Go into the Settings app.
  2. Select General.
  3. Hit software update.
  4. If an update is available, tap on Download & Install.
  5. Follow instructions and let the update run.

Once your iPhone 13 boots up, try using Chrome again.

Restart your iPhone

Is Chrome not working on iPhone 13 still? Here’s another fix-it-all solution that seems to work pretty much most of the time. Just restart your device! Some magical thing happens when you do this. To do this, press and hold the side and either of the volume buttons, drag the power off slider, and let the iPhone do its thing. When it reboots, try using Chrome again.

Check your internet connection

Now you’re starting to get irritated and have probably given up on what you wanted to check on the internet. Calm down, breathe, and get back to the basics. Is your internet even working?Are other devices working? Check if you have any. If nothing else works, you might be off the grid.

Start by checking if Airplane Mode is on. Those using Wi-Fi or LAN should take a look at the router and see if it’s connected. Try restarting it. There’s usually a dedicated button, but you can also unplug the router and plug it back in.

More: Is Wi-Fi not working on your iPhone 13 Pro Max? Here are some fixes

You can also check if your data connection is enabled if you’re using cellular data:

  1. Open the Settings app.
  2. Go into Cellular.
  3. Toggle Cellular data on, if it isn’t.

See also: 15 Tips to Fix Cellular Data Not Working on iPhone 13 Pro Max

Uninstalled Chrome app and reinstall it

If you find Chrome not working on iPhone 13 after trying the above fixes, uninstall the Chrome app entirely and then reinstall it from the app store. Here’s how to uninstall the Chrome app from your iPhone 13.

  1. Press and hold the Chrome app.
  2. Tap Remove App.
  3. In the pop-up window, tap Delete App > tap Delete.
  4. Now, install a fresh version from App Store.

That’s all, folks! We hope the problem of Chrome not working on iPhone 13 is now behind your back. Do not forget to let us know your feedback down below in the comments.