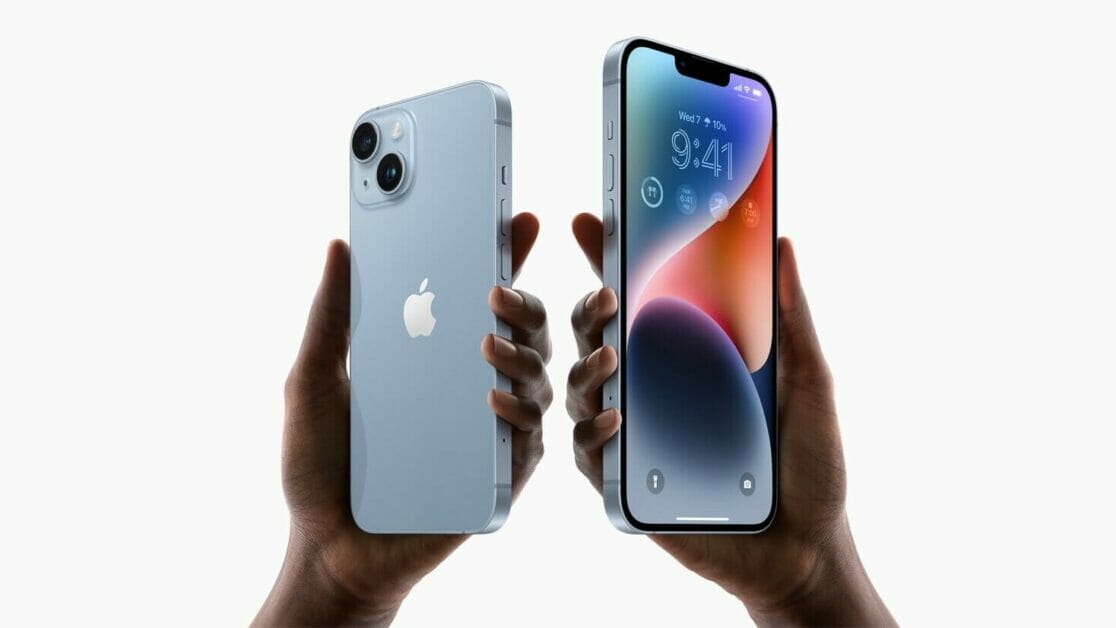
You’re trying to talk to your friends and family using iMessage on your iPhone 14, but it’s not working properly. iMessage is the preferred communication method of many iPhone users, so when it stops working, it affects a lot of people. In this article, I’ll explain what to do when iMessage is not working on iPhone 14 so you can fix the problem for good!
Note: information in this article apply to iPhone 14, iPhone 14 Plus, iPhone 14 Pro, and iPhone 14 Pro Max.
Why Is iMessage Not Working On My iPhone 14?
At this point, we can’t be exactly sure why iMessage is not working on your iPhone 14, but it’s most likely a software issue with your phone or misConfigured settings. Poor connection to Wi-Fi, or Cellular Data, software crashes, outdated software, or iMessage server outage are all things that could be causing iMessage to malfunction on your iPhone 14.
Follow the steps below to diagnose and fix the real reason why iMessage is not working on your iPhone 14 so you get back to chatting with your friends!
What To Do When iMessage Is Not Working On Your iPhone 14
1. Restart Your iPhone
When iMessage is not working on iPhone 14, the first thing to do is restart your phone, which can occasionally resolve minor software glitches or bugs. To restart your iPhone, simultaneously press and hold the side button and either volume button. Release both buttons when “slide to power off” appears on the screen.
Drag the power icon from left to right to shut down your iPhone.
Wait about thirty seconds, then press and hold the side button again until the Apple logo appears on the center of the screen.
2. Close Messages On Your iPhone
When iMessage is not working on your iPhone 14, there’s a decent chance that the Messages app is malfunctioning. Sometimes, closing out of the app and reopening it can fix those minor app glitches.
To close Messages app, swipe up from the very bottom of the screen to the center of the screen. to open up the app switcher, which displays all of the apps currently open on your iPhone. Hold your finger in the center of the screen until the app switcher opens.
Once the app switcher opens, swipe Messages up and off the screen. You’ll know it’s closed when it no longer appears in the app switcher.
3. Do You Have iMessage Turned On?
This could be a quick fix to your problem that’s easy to overlook. Navigate to Settings > Messages. iMessage should already be turned on; if not, alter this now.
4. Turn iMessage Off And Back On
We can try to fix a minor glitch with iMessage by turning it off and back on, like we did when we restarted your iPhone.
To turn iMessage off and back on, open the Settings app and tap Messages. Tap the switch to the right of iMessage to turn it off. You’ll know iMessage is off when the switch is white and positioned to the left. Tap the switch again to turn iMessage back on.
5. Is Airplane mode on?
It may seem like a silly suggestion, but you have no idea how often we accidentally switch settings on and off. Maybe you turned Airplane mode on, which will obviously stop Messages (and pretty much any other app) from working.
Open the Settings app.
Toggle Airplane mode.
6. Check Your Internet Connection
The iPhone 14 requires an internet connection to send and receive imessages, whether that be Wi-Fi or Cellular Data. If you’re using Wi-Fi, head to Settings > Wi-Fi to make sure the switch next to Wi-Fi is on and that a checkmark appears next to the name of your Wi-Fi network. If you’re using data, go to Settings > Cellular and make sure the switch next to Cellular Data is on.
7. Check Your Date & Time Settings
Incorrect Date & Time settings can cause a variety of problems on your iPhone, as they can make your iPhone think it’s in the past, future, or a completely different time zone. Head to Settings > General > Date & Time. Make sure your iPhone is set to the correct Time Zone, and that the date and time are correct.
We recommend turning on the switch next to Set Automatically if it isn’t already. This will help reduce the possibility of an issue with your iPhone’s Date & Time settings in the future.
8. Check to see if you blocked the contact that is trying to send you the iMessage
If you block a contact or number, they will not be able to send you iMessage. To see your blocked contacts, go to Settings > Messages. Tap Blocked Contacts, and make sure the person trying to reach you is not listed here.
9. Check Apple’s System Status Page for iMessage
Occasionally, Apple has issues with its servers, and some of their services go down. Visit Apple’s System Status webpage to see if there are any issues with Apple’s services.
Make sure the dot next to iMessage is green. If it’s not green, that may be the reason why iMessage is not working on your iPhone 14.
Unfortunately, if there are issues with Apple’s systems, there’s not much you can do other than wait it out. Apple knows there is a problem and they’re working on a solution.
10. Apple ID: Sign Out and Back In
This is one of the most common fixes for iMessage trouble: you just need to sign out of your Apple ID and back in again. Go to Settings > Messages > Send & Receive and tap your Apple ID. You should then Sign Out, after which all your details, except the phone number, will disappear. Select Use your Apple ID for iMessage and sign back in. This may take a few moments.
You can send an iMessage via both phone numbers and email addresses. If there’s only one person you’re having trouble sending to, check which email address you have listed for them. Do you have any details listed for their contact? Perhaps their Apple ID uses a different address? Ask them in person or via another messaging service if possible.
To add an email address, go to Contacts, select a name, and choose Edit.
11. Reset the network settings
Sometimes resetting the network settings may fix any issue with iPhone 14 iMessage not working. Resetting the network settings will get everything back to default and undo any discrepancies.
Open the Settings app.
Select General.
Go into Transfer or Reset iPhoneHit Reset.
Tap on Reset network settings.
12. Update Your iPhone
The iPhone 14 iMessage may not be working because of a software glitch that’s patched up by a new software update. You may be able to fix the problem by updating to the latest version of iOS.
Open the Settings app and tap General > Software Update. If an iOS update is available, tap Download and Install. After the new iOS update has downloaded, your iPhone will install the update and restart.
13. Factory reset your phone
This is an extreme measure, but it fixes most issues, and it might get the iMessage back in working order. A factory data reset will wipe your device clean and bring it back to the way it was when you first turned it on. All your files and apps will be deleted, so make sure to backup all your important data before going on with this.
Open the Settings app.
Select General.
Go into Transfer or Reset iPhone.
Hit Erase all content and settings.
Follow instructions to finish the process.
14. Contact Apple Support
If nothing else works, you can try contacting Apple Support. They may have options beyond what we’ve compiled here.
Fixed iMessage not working on iPhone 14 issue!
You’ve successfully fixed iMessage on your iPhone 14 and you can get back to chatting with your friends and family. Next time iMessage is not working on your iPhone 14, you’ll know how to fix the problem! Leave a comment down below if you’re still having issues with iMessage on your iPhone 14.
The iOS App Store is by and large the only way you can get apps on your iPhone 14. Naturally, that means if your iPhone 14 is, for some reason, unable to download apps from the App Store, it will probably be an annoying experience. Well, if you’ve been facing the problem of iPhone 14 not downloading apps, fret not. In this article, I’ll explain why your iPhone 14 won’t download apps and show you how to fix the problem.
Note: information in this article apply to iPhone 14, iPhone 14 Plus, iPhone 14 Pro, and iPhone 14 Pro Max.
Reasons Why iPhone 14 Won’t Download Apps
While fixing an iPhone 14 that won’t download apps is fairly straightforward, the causes aren’t easily diagnosed. Causes may stem from App Store rules, simple software bugs, problems with your Apple ID or iPhone settings or Wi-Fi or Cellular Data issues.
How to Fix an iPhone 14 That Won’t Download Apps
There are several ways to fix an iPhone that fails or stalls while attempting to download apps. If apps on your iPhone 14 won’t download, try these fixes, in this order.
1. Turn Off/On Airplane Mode
Whenever my iPhone won’t download apps, the one quick solution that I go after is to toggle Airplane mode. And guess what, it helps me sort out the problem – more often than not. So, I’m going to bet on it to resolve the issue of iPhone 14 not downloading apps as well.
Swipe down from the top right corner of the screen to access the control center.
Now, tap on the Airplane mode button to turn it on. Wait for some time and then tap on the Airplane mode button to turn it off.
Now, launch App Store to check if the problem is gone. If it has, go ahead and download your favorite apps. If it hasn’t, keep reading.
2. Turn Off/On Mobile Data/Wi-Fi
Another simple yet quite effective trick that you can try to resolve the problem of iPhone 14 not downloading apps is to turn off/on mobile data/Wi-Fi. If the App Store is not downloading apps due to a poor internet connection, it may be able to solve the issue.
Open Settings app on your iPhone > Wi-Fi/Cellular Data. Now, turn off the toggle for Wi-Fi/Cellular Data.
Wait a few seconds then go to Settings > Cellular Data/Wi-Fi (or access control center) and then turn it on.
3. Forget WiFi Network and Reconnect to It
If the above trick hasn’t worked in fixing the problem of iPhone 14 not downloading apps, forget the WiFi network and then reconnect to it.
Open Settings app and go to Wi-Fi. Now, tap on the “i” button right next to the WiFi network. After that, tap on Forget This Network and confirm the action. Once done, reconnect your iPhone to the Wi-Fi network.
4. Restart the App Store app
If your iPhone 14 won’t download apps, you may need to force quit the app. There may be an app glitch causing issues with the downloads, and the only way to get it back on track is to force close it.
Force closing kills the activity’s process and allows it to start anew with the right processes. If your iPhone 14 downloads aren’t working, force closing the app store could reset it to allow downloads.
First, swipe up from the bottom of the screen to view the App Switcher. Then slide the App Store off the top of the screen to close it.
5. Pause and Resume Your App Download
Sometimes, if your iPhone 14 won’t download apps, all you need to do to fix it is pause the download, then resume it again. You can do this from the Home Screen on your device.
While an app is downloading, it should appear on the Home screen as a darkened app icon with a progress circle in the middle. Tap it to pause the download—causing a pause symbol to appear. Wait a few seconds, then tap it again to resume the download.
Alternatively, tap and hold on the app icon to reveal a quick-action menu. You can choose to Pause Download or Resume Download from this menu as well.
Alternatively, you have the option to Prioritize Download from the quick-action menu. This is a good idea if your iPhone is downloading other content as well, since it prioritizes this app above all other downloads.
6. Restart your iPhone
If you still can’t download apps on iPhone 14 after trying the above solutions, you need to restart your device to get things working again. There may be a temporary glitch in the operating system or a software component. A restart usually resolves these issues.
Press and hold the Side button with either Volume button. When prompted, slide to power off your iPhone.
Wait 30 seconds after it powers off before pressing the Side button again to restart it.
7. Check your storage space
Apps may not be downloading on your iPhone 14 because there simply isn’t enough space to download the entire app. Usually, you will receive a notification if your storage is low when attempting a download. However, to check if you have enough available storage:
Go to Settings > General > iPhone Storage to see how much free space you have and take a look at which apps are using the most.
You might also want to free up some space by uninstalling unused apps or deleting old photos and videos you have backed up elsewhere. You can do all of this from the iPhone storage settings.
8. Update Your Apple ID Details
Even if you only download free apps from the App Store, you still need to have valid payment information and contact details linked to your Apple ID account. It’s possible that the payment details on your account expired, so you should check if you need to update them.
Update your Apple ID details from the iPhone Settings app:
Go to Settings and tap [Your Name] at the top of the screen.
Tap Payment & Shipping to view your payment information.
Lastly, tap Add Payment Method to add a payment method, or use Edit to edit your existing methods.
Be sure to also check the Apple ID you’re using. If you have a problem updating an app on your iPhone 14, the problem could be the Apple ID you’re using. When you download an app, it’s tied to the Apple ID you’re logged into at the time. If you change the Apple ID you’re using, apps tied to the old ID can’t update. Sign in to other Apple IDs you’ve used to update apps.
9. Check the Date and Time
Ensure that the date and time on your iPhone are set correctly for your time zone. If the date and time are incorrect, you may be able to sort out the issue by fixing them.
Go to Settings > General > Date & Time.
. Now, make sure the Set Automatically toggle is turned on.
It will automatically set your date and time based on your time zone. If there’s an available time zone update, iOS will inform you about that. This can usually fix the problem of iPhone 14 not downloading apps if it was due to a time zone issue.
10. Turn Off Content and Privacy Restrictions
The content and privacy restrictions on an iPhone let you limit settings, apps, or features to keep the device safe for children. However, those same limitations explain why you can’t download new apps on your iPhone 14.
To edit your restrictions:
Go to Settings > Screen Time > Content & Privacy Restrictions.
If prompted, enter your Screen Time passcode, which may be different from the standard passcode you use to unlock your iPhone.
Turn off all Content & Privacy Restrictions at the top of the screen or change the following setting:
Tap iTunes & App Store Purchases > Installing Apps.
Select Allow to enable installing apps.
11. Sign Out of the App Store, Then Sign In Again
An iPhone 14 that can’t download apps may signify that something is wrong with your Apple ID. If the connection between your iPhone and the Apple App Store is disrupted, signing out and signing back in may fix it.
When you sign out of the App Store, it cancels any app downloads in progress. After signing in again, you need to download the app from the App Store again.
To sign out of the App Store:
Go to Settings > [Your **Name].**
Tap Media & Purchases, then choose to Sign Out from the popup menu.
Confirm you want to Sign Out.
Now tap Media & Purchases again and sign in with your Apple ID account.
12. Delete the App, Then Download It Again
If the above fixes don’t resolve the issue, you may want to delete the half-downloaded app and download it again from scratch. If you never used the app before, there’s nothing to lose from doing this.
However, if you were trying to update an app rather than download it for the first time, deleting it might also delete any data you have saved in the app. You should make a backup of your iPhone before deleting apps to protect your data.
When you want to delete an app from your iPhone, tap and hold the app icon on the Home Screen. In the quick-action menu that appears, tap Remove App, then confirm you want to Delete App.
After deleting an app, restart your iPhone and download it again from the App Store.
13. Make Sure the App Works With Your iPhone
Sometimes, you can’t download or install an app because it’s not compatible with your device. This might happen when the app depends on a piece of hardware your iPhone doesn’t have or when the app developer discontinues support for older versions of iOS.
Open the App Store and search for the app you want to download. View the app details and scroll down to the Information section. Next to Compatibility, the App Store lists whether this app should work on your iPhone or not.
Tap the dropdown arrow to view more information about the app compatibility.
If an app doesn’t work with your device, you might need to update iOS on your iPhone to the latest available version. This is a good idea even if the app is compatible, since iOS updates often fix problematic software bugs.
14. Update iOS
To ward off miscellaneous bugs and also enhance performance, Apple rolls out software updates frequently. Thus, you can get rid of random iOS issues just by updating the software – in most cases. If none of the above-mentioned solutions has worked in resolving the problem of iPhone 14 not downloading apps, updating iOS could be the right answer.
You can update iOS by going to Settings > General > Software update. If an update is available, tap Download & Install.
15. Check Apple’s System Status for App Store
Whenever Apple’s servers face an outage, a number of features and services (i.e iCloud backup, iCloud Drive, App Store, Siri, etc.) are affected. So, if iPhone 14 is still not downloading apps, it would be apt to check the system status of the App Store.
Navigate to Apple’s system status page and then make sure the circle to the left of the App Store is green. If the circle is yellow, there are some technical issues with App Store. And in such a situation, you can’t do anything but wait for the problem to be resolved.
16. Reset Network Settings
Resetting network settings to factory default is another reliable solution that you can count on to troubleshoot the problem of iPhone 14 not downloading apps. So, if the problem seems to be persistent, there is no harm in giving it a shot.
Go to Settings > General > Transfer or Reset iPhone > Reset. Here, tap on Reset Network Settings. Next up, you need to enter your device passcode. You may also need to enter your Screen Time passcode to proceed. Finally, tap on Reset Network Settings to finish.
17. Reset all settings
Whenever I find myself embroiled in complex iOS issues, the one solution that I almost always look up to is resetting the iPhone to factory default. And I must say that it has successfully rescued me on many occasions.
Bear in mind that resetting the iPhone settings to factory default wipes out all the existing settings including VPN and Wi-Fi passwords. However, it keeps all of your media and data untouched. So, you must proceed with this solution keeping these things in mind.
Go to Settings > general > transfer or reset iPhone > resetreset all settings.
Fixed iPhone 14 not downloading apps issue
If your iPhone 14 does not download apps, these seventeen tips should be helpful in fixing the issue. The trick is to try one by one and test out by downloading a free app from the app store. If you tried all these steps and your iPhone 14 still won’t download apps, you need help from the experts at Apple. You can get online or phone support at the Apple website, or book an appointment at the Genius Bar at your local Apple Store for further help.
Are you unable to hear sound during regular or FaceTime calls on your iPhone 14? Sometimes you may notice the call on the other end’s voice breaks or is inaudible. If you’re having trouble hearing the person on the other end of your phone call, help is at hands. In this article, I’ll walk you through all the possible troubleshooting steps to fix iPhone 14 no sound on calls issue.
The problem of no sound during calls on iPhone 14 can manifest itself in different ways. When you are on a call, you might not hear the voice clearly, or you might hear echoes, crackling and static sounds. If you’re getting poor quality sound or no sound during phone call on your iPhone 14, here are some troubleshooting steps you can follow to fix this problem. Without any further delay, let’s get started.
Note: information in this article apply to iPhone 14, iPhone 14 Plus, iPhone 14 Pro, and iPhone 14 Pro Max.
Tips to fix iPhone 14 no sound on calls issue
If your iPhone 14 has no sound during phone ccalls, follow The steps below to fix the issue:
1. Check your location
When you are located in a no-signal zone, you might hear noises during phone calls. Make sure to use your iPhone in an area within your operator’s network coverage to fix the problem.
2. Turn up the Call volume
If you can’t hear calls, the volume may be turned down too low. During a phone call, press the volume up button on your iPhone. This is located on the left side of iPhone. Press this button until you hear the other person speaking. If you still can’t hear anything, please try to talk through loudspeakers during phone call. If the sound is still unclear, that could be a network issue.
3. Disable Bluetooth
When you connect your iPhone to a Bluetooth audio device, the sound is played via the Bluetooth device. So if the earpiece of your iPhone 14 is not able to deliver sound during a call, disable Bluetooth so that sound comes out of your phone. To do that, head to Settings > Bluetooth. If the issue persists, please proceed to the next step.
4. Make Sure Nothing Is Blocking The earpiece
If you are still experiencing the problem of iPhone 14 no sound on calls, make sure the earpiece is not blocked by the protective case or screen protector. If you use a rugged case, waterproof case, or screen protector that covers the top earpiece, microphone, or speakers, remove them! In addition, check whether the receiver is being blocked or dirty. If so, please use a soft dry cloth or a small soft brush to clean it. If you’re still having trouble hearing the person on the other end of your phone call, please check the next solution.
5. Clean the lightening port
As you can imagine, a lot of dust, as well as lint and other debris, can make its way into the lightening port over time. This might cause the problem, as dirt can “trick” your iPhone into thinking headphones are plugged in.
The first thing you should do if you experience the problem of iPhone 14 no sound on call is to look into the port to see just how dirty it is. A flashlight might come in handy for this. The next step is to try and clean it and hope that solves the issue. There are many ways to do this, and some work better than others. One option is to blow into the lightening port, which should take care of at least some of the dust and lint found inside. You can also use a can of compressed air if you have one nearby.
Another great option is to use a cotton swab. Push it into the port and swirl it around to get the dust and lint out. Be very careful when doing this, as the last thing you want to do is cause more damage to the device. You can also damp the cotton swab with rubbing alcohol but make sure you don’t use too much of it.
6. Restart Your iPhone
If everything seems to be in order, but you can’t hear sound during call on your iPhone 14, your phone may have some technical issue that requires you to turn it off and on. A reboot often clears up any software glitches that may disable the sound. Go to Settings > General > Shut Down. Drag the power off slider to turn off your device. Wait for a minute and power your iPhone back on.
If the issue persists, please proceed to the next step.
7. Update your iPhone
If your iPhone 14 still doesn’t deliver sound during a phone call, try updating the software. If the no sound issue is due to a bug, the software update will most probably fix it on your iPhone 14. Go to Settings > General > Software Update.
8. Connect a headset and see if sound works
If you can’t hear anything with the built-in speakers after trying all of the above steps, but are able to hear sounds via the headset when a headset is connected, there could be a problem with your built-in speaker(s).
If you believe an issue is tied to the built-in speakers, then you will most likely have to visit an Apple Store to have your speaker serviced. If the device is under warranty, it should be replaced for free. Otherwise, you may be facing a bench and labor charge.
9. Reset Network Settings
The problem of iPhone 14 no sound on calls can also be caused by a glitch in network settings. If none of the above solutions work to fix the issue, consider resetting the network settings of your iPhone. Go to Settings > General > Transfer or Reset iPhone > Reset > Reset Network Settings.
10. Reset All Settings
Times when I run into a persistent issue that I can’t seem to resolve by simple hacks, I decided to go ahead and reset all settings. On several occasions, it doesn’t disappoint me. Based on my experience, I would suggest you give it a try as well. Go to Settings > General > Transfer or Reset iPhone > Reset > Reset All Settings.
11. Factory-reset an iPhone
If you still can’t hear calls on your iPhone 14, there is one last thing you can do before seeking professional help. A factory reset will completely wipe your iPhone, and the complete operating system will be set to its default settings. If the problem isn’t hardware, a factory reset should fix any software bugs that might be preventing you from hearing calls on your iPhone 14. Go to Settings > General > Transfer or Reset iPhone > Erase all Content & Settings.
12. Contact your network provider
If you can’t hear calls on your iPhone 14 after trying the above steps, contact your service provider to check the network stability or if there have been any network interruptions in your area.
If your service provider confirms that there is currently an issue, you may need to wait until your service provider resolves the current network problems.
If your service provider confirms that there are no current issues with the service, proceed to the last step.
13. Contact Apple Support
If none of the fixes above work, the problem isn’t as minor as hoped. contactingApple Support is the last thing to do when you can’t hear calls on your iPhone 14. . There could be a hardware issue with your iPhone! Apple provides support over-the-phone, online, through the mail, and in-person. Explain the problem to the company, and send it in for repair or replacement.
Fixed iPhone 14 no sound during calls issue
Hopefully, you have resolved the no sound during calls issue on your iPhone 14 using these nifty tips and tricks. If the problem is not hardware-specific, the above-mentioned hacks can help you get rid of the issue. However, if the issue persists even after you have tried all the solutions, contact Apple Support for a permanent fix. That said, do you have any questions or feedback related to the iPhone 14 no sound on calls issue? If yes, make sure to let me know in the comments section below.
If your iPhone 14 says Searching or No Service in the status bar, we’ve got the solution in this post. Read on to find out why your iPhone 14 says Searching or No Service and what you can do to fix the problem.
When your iPhone 14 shows Searching or No Service error at the top of the screen you can’t make or receive phone calls, send texts, or use cellular data. Not much of a smartphone anymore, so how can you fix the issue? Don’t worry, we’ve got you covered with our troubleshooting guide below.
Note: information in this article apply to iPhone 14, iPhone 14 Plus, iPhone 14 Pro and iPhone 14 Pro Max.
Why does my iPhone 14 say No Service or Searching?
There are many reasons why your iPhone 14 could say Searching or Mo Service. These include:
You’re outside of your cellphone carrier’s network.
There’s a network outage in your area.
There’s a problem with your SIM card.
Your iPhone needs a software or carrier settings update.
There’s a problem with your carrier account.
Your network settings need to be reset.
Your iPhone is damaged.
How to fix iPhone 14 No Service error
1. Check Your Location
One of the most common explanations for why your iPhone 14 has no service is because it’s out of range of its carrier’s coverage. Take a moment to consider your physical location. Are you in a remote location or somewhere you haven’t used your iPhone before? Is there a chance your carrier doesn’t offer coverage in this area?
If you’ve used your iPhone in this location before, you can go on to the next step. Otherwise, go to your cell provider’s website and look for a coverage map. Needless to say, if your current location doesn’t have coverage you won’t be able to get cell service there.
2. Restart your iPhone
If your iPhone 14 still has no service, it might have experienced a minor software crash that’s now interfering with cellular network. Often, turning your iPhone off and back on again can resolve this error quickly. Turn your iPhone off by going to Settings > General > Shut Down, wait a few seconds, and then turn it back on.
3. Turn Airplane Mode On and Off
Switching Airplane Mode off and back on can serve as a sort of quick reset for any glitches that happen when communicating with the cellular network. Go to Settings > Airplane Mode. Try turning Airplane Mode off and on a few times to clear out any signal issues preventing your iPhone 14 from getting service. Make sure to leave Airplane Mode in the off position when you finish.
4. Check For Updates To Your Carrier Settings
The next thing to try if your iPhone 14 still shows “No Service” error is to make sure you haven’t missed any carrier settings updates. Carrier settings updates are regularly distributed to iPhones by Apple to keep your iPhone’s Cellular service running efficiently. They usually come in the form of pop-ups on your screen when they’re released. Generally, accepting these updates is always a good idea.
If you can’t remember receiving a pop-up informing you of a new carrier settings update, you can also check for them manually.
Start the Settings app on your iPhone and go to General, then About.
If there are any updates available, the About page will provide a pop up within 15 seconds. If nothing comes up in that time, there are no carrier settings updates available for your iPhone.
5. Test Your SIM Card
Use a SIM Tool or a straightened paper clip, to remove the SIM tray from the side of your iPhone. Test your SIM card in another phone to determine if the Searching or No Service issue is due to a fault in your iPhone 14 or the SIM card itself.
If the SIM card still doesn’t work in another device, you’ll need to contact your cell provider to order a replacement.
6. Update iOS
Update Your iOS
It’s possible a bug in your iOS has caused the Searching or No Service error. To run a software update:
Plug your iPhone into your charger and connect to Wi-Fi.
Go to Settings > General > Software Update.
If a software update is available, tap Download and Install. If a message pops up asking to temporarily remove apps, tap Continue.
If prompted, enter your passcode. The software update will start automatically.
7. Disable Data Roaming
For some iPhone 13 users who were experiencing this problem, switching off data roaming on their devices was able to restore their cellular network.
To turn off data roaming on your iPhone 14, follow these steps:
Start the Settings app on your iPhone.
Tap on ”Cellular”.
Select ”Cellular Data Options”.
At the top of the list should be the option for “Data Roaming”, with a toggle switch beside it. Turn that off.
8. RESET YOUR NETWORK SETTINGS
If none of the previous suggestions have assisted in solving the iPhone 14 No Service error, you might need to get a little more in depth with your fix. The Reset Network Settings feature on an iPhone deletes all information it’s stored regarding wireless services it’s accessed. All devices and networks your iPhone’s connected to through Bluetooth, WiFi, Cellular or VPN services will be forgotten. Performing this reset can sometimes resolve the iPhone 14 “No Service” error.
Go to Settings.
Tap General > Transfer or Reset iPhone > Reset > Reset Network Settings.
If prompted, enter your passcode. Your iPhone will restart.
When reconnecting to your Wi-Fi, virtual private network, or Bluetooth devices again, you will need to reenter your passcodes.
9. Contact Your Wireless Carrier
If you’ve tried every tip up to this point and your iPhone 14 no service error persists, it’s very possible there’s something going on your provider’s end. Visit your Cellular carrier’s website to find the easiest way to reach out to them. Together, you might be able to figure out exactly what’s causing your iPhone 14 to have no service.
Here are the customer Service Contacts for Major Cellular Providers:
AT&T 800-288-2020
Sprint 888-211-4727
T-Mobile 800-937-8997
Verizon 800-922-0204
MetroPCS 888-863-8768
Boost Mobile 866-402-7366
Cricket 800-274-2538
Virgin Mobile 888-322-1122
10. Contact Apple support
If there’s nothing wrong from your carrier’s end, your iPhone may be physically broken. Take it into your local Apple Store or get support online. Make sure to make a Genius Bar appointment first if you plan to get support in-person!
Easy tips to fix iPhone 14 no service or searching error
We hope the above steps have worked in fixing the iPhone 14 Searching or No Service error. The No Service or Searching problem is a frustrating one, but with our guide, you shouldn’t need to worry about it anymore. Tell us which fix worked for you in the comments so we can share them with other readers!
Several users have reported that their iPhone 14 camera app is not working properly. If your iPhone 14 camera won’t take pictures or videos, you may wonder if the camera is broken or if your iPhone needs to be replaced. The good news is your device is probably fine, and we’ll walk you through some easy ways to get it running properly. In this article, I’ll explain why your iPhone 14 Camera is not working and show you how to fix the problem.
Note: information in this article apply to iPhone 14, iPhone 14 Plus, iPhone 14 Pro, and iPhone 14 Pro Max.
The iPhone 14 retains the old 12 MP camera system with the help of the new Photonic Engine (Deep Fusion upgrade) and a slightly wider F1.5 aperture. But what do you do if your iPhone 14 Camera is not working? Read on to find solutions!
Common iPhone 14 camera issues
iPhone 14 camera issues can vary, but three of the most common ones are:
The camera is freezing or lagging.
A black screen appears instead of the traditional camera viewfinder.
The flash won’t work.
If you’re experiencing any of these problems, this guide will help you fix them.
Why is my iPhone 14 Camera not working?
The iPhone 14 Camera not working issue could be both hardware and software related. First, let’s figure out if your camera is experiencing a hardware or software issue.
If it’s a hardware issue, you’ll likely have a problem with only the front or rear camera (not both), and the issue will be consistent across apps.
If it’s a software issue, your camera may work totally fine for one app and have problems with another.
If your iPhone 14 Camera is not working due to a random software glitch, you can get rid of it by trying out some trusted software hacks. However, if it’s due to a hardware failure, you will need to contact Apple or an authorized iPhone service center. Keeping both these aspects in mind, we’ve suggested the solutions that are likely to troubleshoot the Camera not working problem on your iPhone 14.
How to fix iPhone 14 camera not working issue
1. Force Quit the Camera App and Relaunch It
On some occasions, you can fix the iPhone 14 camera not working problem by force quitting the camera app and relaunching it. So, make sure to try this nifty trick before trying the other solutions below.
Swipe up from the bottom of your iPhone to bring up the app switcher, swipe up on the camera app to close it, and relaunch it seconds later. This will usually get it to work properly.
2. Restart Your iPhone
Another simple trick that you should try to resolve the camera not working on iPhone 14 issue is to restart your iPhone. At times, a quick reboot is all you need to fix some miscellaneous software issues.
Go to Settings.
Tap on General.
Select Shut Down.
3. Force Restart Your iPhone
Whenever my iPhone faces a common issue, I usually go for a force restart to iron out random software bugs, and it doesn’t disappoint me on most occasions. Given the high reliability, I’m going to count on it to resolve the iPhone 14 camera not working issue as well.
Press and quickly release the volume up button.
Press and quickly release the volume down button.
Hold down the side button until the screen goes black and the Apple logo shows up.
4. Switch between the front and rear cameras
Sometimes, iPhone 14 Camera Issues can be resolved by just switching between the rear and front-facing selfie camera. The problems could be caused by the app not loading properly, and each time you switch cameras, it forces the app to load again, so this could help. Another suggestion is to see if a third-party camera or video app works, such as Instagram or Snapchat.
While taking a picture or video, or using FaceTime, you can easily switch between the rear-facing and front-facing cameras. Once you have opened the “Camera” or “FaceTime” app, you’ll be able to see the switch. Tap on the Switcher Icon to switch from Front to Rear Camera > Wait for 10 seconds and tap on the Switcher Icon again to return back to the Front Camera.
5. Clean your iPhone 14 and camera lens
if your iPhone 14 Camera is not focusing properly, make sure that your phone’s camera lens is clean. Dust and dirt can affect the outcome of your captured images and videos. Even fingerprint smudges can also be a factor as to why your camera is not focusing on your iPhone 14.
You can prevent this by cleaning your camera or external lens using a microfiber cleaning cloth, which helps clean hard surfaces like smartphones and oleophobic (oil repellent) iPhone screens. Do not attempt to use your fingers to clean them as it will leave fingerprint smudges, which we are trying to clean in the first place.
6. Take off The Phone Case.
Phone cases are one of the simple reasons why captioned images or videos can be blurred. We use them to add protection to our devices from any physical damages, but it can also cause some iPhone 14 Camera Issues. The additional layer of plastic or glass can result in poor images or videos.
In some cases, if you are using phone cases that partially cover the flash or the camera lenses, this can also cause Camera problems. If your iPhone 14 camera is showing a black screen instead of the viewfinder, make sure your case is not blocking the lens.
7. Check your app permissions
When your iPhone 14 camera doesn’t work while you’re using a third-party app, you may think the app is to blame. But it’s possible that you never granted it permission to use your camera. Here’s how to check:
Go to Settings.
Select Privacy & Security.
Tap on Camera.
On the list of apps, make sure the app you want to use is switched on.
If the iPhone 14 camera still doesn’t work after that, try switching back to your default camera app.
8. Update Your iPhone
If none of the tricks mentioned above help resolve the camera not working on your iPhone 14, there is a high chance that the issue is due to a specific software bug. As Apple keeps refining iOS with frequent updates and bug fixes, you count on the software update to resolve the camera issues on your iPhone 14.
Go to Settings.
Tap on General.
Choose Software Update.
If there’s an update available, tap Download and Install.
9. Reset All Settings
If you are still trying to resolve the camera app not working on iPhone 14 issue, I would recommend you to reset all settings. The good news is that doing this doesn’t erase any of your data. Instead, it just resets the way you have some apps set up.
Go to Settings.
Tap General.
Select Transfer or Reset iPhone.
Tap on Reset.
Choose Reset All Settings.
10. Perform a factory reset
A factory reset may fix the problem you’re having with your iPhone 14 camera, but this should be your last resort. Before you reset your device, make sure you back up your iPhone, since everything except for the original software and apps will be erased.
Go to Settings.
Tap General.
Select Transfer or Reset iPhone.
Tap on Erase all content & settings.
11. Contact Apple Support
If you have tried everything in this guide and still have iPhone 14 camera problems, then it may be an issue with your hardware. The only way to fix that is to contact Apple Support or take it to an authorized repair center to see what they can do.
Pro Tips to Fix Camera App Not Working on iPhone 14 Issue
That’s it! Hopefully, your iPhone 14 Camera is working again. Now let us know the hack that has fixed your iPhone 14 Camera problem. And if you know any other reliable solution for resolving this issue, tip us about that as well.
Experiencing poor battery life on iPhone 14? Follow these tips to fix your iPhone 14 battery drain issue.
Note: information in this article apply to iPhone 14, iPhone 14 Plus, iPhone 14 Pro and iPhone 14 Pro Max.
Finding the root cause of iPhone 14 battery drain is important. It is fairly easy to fix the iPhone 14 battery drain problem after finding the cause. Below are some common causes of iPhone 14 battery drain issues and steps to fix them.
Why is iPhone 14 battery draining fast?
The reason could be anything ranging from software issues to misconfigured iPhone settings. Sometimes apps and even your usage pattern determine iPhone battery life. Fortunately, you can quickly change a couple of settings on your iPhone 14 to improve your battery life. So if you’re struggling to make it through the day with a single charge, continue reading to learn how to fix your iPhone 14 battery drain issue. By the time you get to the end of the article, you’ll know how to configure your iPhone 14 to extend its battery life.
How to Fix iPhone 14 Battery Drain Issue
1. Conserve iPhone 14 Battery by Limiting Notifications
Cutting down on the number of notifications that apps are sending is a good way to save a little bit of battery life. If you have apps inundating you with notifications, it’s going to drain battery every time your screen lights up and your phone makes a connection, plus a glut of notifications is just plain annoying.
Go to the Settings app > Notifications. Now, go through each app and adjust whether or not an app can send you notifications by tapping on the toggle.
2. Save Battery Life on Your iPhone 14: Turn On Low Power Mode
When it comes to improving iPhone 14 battery life, the Low Power Mode knows the best. By disabling features such as background refresh and automatic downloads, it saves plenty of juice that plays a key role in extending the overall battery life of the iPhone 14.
So, if it’s time to save every ounce of the battery, you should get the most out of this noted power savior. To turn this feature on, simply go to Settings > Battery and toggle on the Low Power Mode feature.
If you want easy access to Low Power Mode, you can add it to the Control Center. You can do this by going to Settings > Control Center. From there, tap on Customize Controls and tap the green “plus” sign next to Low Power Mode.
Location services is a feature that helps apps know where you are so they can provide a better service. With that said, some apps want to know your location at all times. Not only is this going to drain your iPhone 14 battery, but it’s also kind of creepy. You can manage your location services by going to Settings > Privacy & Security > Location Services. You can choose to turn Location Services off completely or select which apps can have access to your location. What we recommend is reducing the location access to only While Using the App or Never. Most apps don’t always need to know your location. If you feel like an app must always know your location (like Weather) you can then toggle on Precise Location.
4. iPhone 14 Battery Drained? Activate Dark Mode
Dark Mode may not be the game-changing feature many people assumed it would be, but it’s still a nice aesthetic option to have. The sleek look and feel of Dark Mode aside, having Dark Mode on can also help you reduce iPhone 14 battery drain. Some studies have claimed that Dark Mode can improve battery life by upwards of 30%. You can turn Dark Mode on by going to Settings > Display & Brightness and selecting the Dark option.
The brightness of the iPhone screen has an effect on battery life. The brighter the display is, the more power it requires. Keep the screen as dim as possible to save iPhone 14 battery life.
To reduce the screen brightness, open the Settings app, go to Display & Brightness and drag the Brightness slider to the left.
6. Stop iPhone 14 Battery Drain: Auto-Lock Sooner
Having an iPhone auto-lock sooner saves battery. When an iPhone always displays something, whether the brightness is low or not, it constantly requires power. The quick fix is to lock the iPhone, but you can also adjust the auto-lock feature so that it locks automatically. You can choose ranges from 30 seconds to never, but the lower end of the spectrum will help preserve the iPhone 14 battery life by cutting the display when it’s not needed. You can adjust this setting by going to Settings > Display & Brightness > Auto-Lock.
7. Turn Off Raise to Wake to Save iPhone 14 Battery
The Raise to Wake feature tells your iPhone to turn on when you raise it. This is helpful, but it also uses up needed battery power each time you pick up your iPhone.
To disable Raise to Wake feature, navigate to Settings > Display & Brightness and toggle off the switch next to Raise to Wake.
8. Turn off ‘Hey Siri’ to Save iPhone 14 Battery
The iPhone’s ‘Hey Siri’ feature is certainly useful, but having your device remain in an active listening state can slowly but surely drain your iPhone 14 battery. You can turn Hey Siri off by going to Settings > Siri & Search and toggle the “Listen for ‘Hey Siri’” switch into the off position. Note that you can still use Siri with this toggled off, you simply won’t be able to activate Siri by your voice alone.
9. Turn Off Background App Refresh to Save iPhone 14 Battery Life
Apps are constantly refreshing their content with news and updates, so you can see what’s new before you even need to. Of course, not every app needs to do this constantly, and that’s what Background App Refresh is for. If not managed smartly, background app refresh can eat into a large chunk of battery and even trigger unexpected battery drain on your iPhone 14. Therefore, make sure to turn it off or use it selectively to allow only a few important apps to refresh in the background.
If you go to Settings > General > Background App Refresh, you can manage which apps you want to stop refreshing constantly. If you want, you can also turn Background App Refresh off completely. This will save more battery life, but it’s better to manage each app individually since there may be some apps you want to refresh their content constantly.
10. iPhone 14 Dying So Fast? Perform a Force Restart
Believe it or not, force restart has got the knack of fixing common issues that seem to crop up out of nowhere. So, if your iPhone 14 battery is draining faster, you shouldn’t miss out on this handy troubleshooter.
Press and quickly release the volume up button. Press and quickly release the Volume down button. After that, hold down the Side button until the Apple logo shows up on the screen.
11. Stop using power-intensive apps
Some apps are extremely power-hungry, and using them frequently can run your battery down quickly. To see which apps draw the most power, start the Settings app and then tap Battery. Scroll down to the list of apps, and you can see which ones are running your battery down the fastest. Note that you can see the battery usage just within the Last 24 Hours or over the Last 10 Days using the tabs above the graphs.
12. Update apps to fix iPhone 14 battery drain issue
You don’t have to uninstall or stop using an app just because it’s drawing a lot of power. In some cases, apps may perform better if they’re up to date. In other words, un-updated apps can be a drain on your battery. To make sure you’re up to date, start the App Store app and tap your account icon at the top right. If any apps need updating, tap Update All in the available Updates section.
13. Turn On Reduce Motion to Save Battery on iPhone 14
Whenever you do something on your iPhone 14, like switching to another app or going back to the Home Screen, you’ll see a small animation. This is called Motion, and although it’s oddly satisfying to see, it can hurt your battery life.
So, if you can live without those motion effects, you can save some battery on your iPhone 14. Head into the Settings app > Accessibility > Motion and then turn on the Reduced Motion toggle.
14. Disable Auto-Play in Messages
When someone sends you a message effect, it will usually automatically play when you enter the message. If you want to improve your iPhone 14 battery life, you might want to consider turning auto-play Message Effects off, so you decide when to play them instead. To get it done, launch Settings app > Accessibility > Motion. Now, toggle Auto-Play Message Effects off.
15. Disable Auto-Playing Videos in App Store
Auto-playing video previews of apps and games make it pretty straightforward to let you take a peek at what they have to offer. Though there is no denying the fact that they are useful, make sure to disable them, especially when saving battery life is more important to you than having a quick glance at the app’s previews. Go to Settings app > App Store > Video Autoplay and then choose Off.
16. Disable Auto-Playing Videos in Safari
Auto-playing videos in a browser are nothing but a source of annoyance as they tend to distract you and slow down the browsing speed. And if you do not keep them disabled, they can even kill plenty of battery life. Luckily, Apple has provided a better way to turn off auto-playing videos in Safari. To do so, open Settings app > Accessibility > Per-App Settings > Add App > Safari > Auto-Play Video Previews and then choose Off.
17. Turn Off Automatic App Downloads and Updates
When you download an app on your iPhone 14, it’s automatically downloaded on your other device, like your iPad linked with the same iCloud account. And with the auto-update functionality, you can keep all of your apps updated without breaking any sweat.
While both of these features are great, you should never fail to turn them off when your iPhone 14 seems to drain the battery a lot. Navigate to Settings > App Store > turn off the toggles for Apps and App Updates located under the Automatic Downloads section.
18. Turn Off Automatic Software Updates
The automatic software update is quite handy for the folks who love to be on the bleeding edge of technology. While there is no question of how useful this feature is, you should keep it disabled especially when you wish to have better control over battery usage. Moreover, it’s always advisable to have some feedback regarding the performance of any software update beforehand.
To disable automatic software updates, go to Settings app > General > Software Update > Automatic Updates and then turn off both Download iOS Updates and Install iOS Updates toggles.
19. Reduce Transparency
iOS provides a neat way to improve contrast by reducing transparency and also blur some background. Although this Accessibility feature is primarily designed to improve legibility (the quality of being clear enough to read something), it can also play a decent role in boosting the battery life on your iPhone 14.
Navigate to the Settings app > Accessibility > Display & Text Size and then turn on the Reduce Transparency toggle.
20. Clean Up Your Device
It’s always better to keep redundant files and useless apps away. Otherwise, they can easily clog up even massive storage. Thus, if the battery on your iPhone 14 continues to drain, try cleaning up the storage. Also, wipe out all the apps that you hardly use to recover precious storage.
Open Settings app > General > iPhone Storage. Now, check out how much storage has been consumed and which apps have taken into more space. Once you have got a better insight into the storage consumption on your iPhone, go ahead with the complete cleanup drive.
21. Update iOS to fix iPhone 14 battery drain problem
If you have been able to keep a tab on the recent iOS updates, you may already know that these days software updates have become sort of the go-to troubleshooter – for better or worse. Yes, you read that right! In the wake of never-ending bugs and issues, the latest updates seem to have become reliable solutions to fix various iPhone problems.
Therefore, if none of the aforementioned tips have worked in troubleshooting the battery drain problem on your iPhone 14, there is a high chance that a software bug could be behind the issue. Hence, try updating the software on your iPhone. Go to Settings app > General > Software Update and then do the needful.
22. Save Battery on iPhone 14: Place Your iPhone Face Down
When you receive a message or any kind of notification on your iPhone, the screen illuminates for a moment to alert you. This uses unnecessary energy, but there’s an easy way to prevent it.
When you’re not using your iPhone, place the handset face down. The device automatically detects this placement, and won’t light up the display when alerts are received, saving you some extra battery life.
23. Disable Vibrations and Haptic Feedback
When your iPhone vibrates or provides haptic feedback to an interaction, Apple’s Taptic Engine chip engages its physical motor. This uses additional energy, so it might be worth disabling these features if you can live without them.
There are two main vibration settings in Settings > Sounds & Haptics. Try turning off Play Haptics in Ring Mode, Play Haptics in Silent Mode, or both to save power.
Scroll down to the bottom of this menu and you’ll see System Haptics. Disabling this will eliminate system-wide haptic feedback.
24. Use Wi-Fi to Stop iPhone 14 Battery Drain
WiFi uses less power than a cellular connection, so to maximize iPhone 14 battery life, Apple recommends connecting to WiFi whenever possible. At home or work, for example, WiFi should be activated, saving cellular data and battery life.
25. Activate Airplane Mode in Low Signal Areas
When you’re in an area with no cellular coverage or a low signal, your iPhone 14 is draining battery looking for a signal or trying to connect. If you’re experiencing poor cellular coverage, it’s best to activate Airplane Mode since you probably can’t do much with low signal anyway.
Airplane Mode will prevent your iPhone 14 from endlessly searching for a signal, saving the battery until you can get to a place with a better connection.
26. Turn down your iPhone’s volume
The next tip to fix iPhone 14 Max battery drain issue is really simple, but I’m surprised so many people overlook this, and that is the volume on your iPhone’s internal speakers. When you’re watching videos on the internet or listening to music, you may be surprised at how much the speaker actually contributes to battery drain as it’s pumping out a lot of air from your iPhone and taking up a lot of power. If you’re running your volume above 80, I just recommend bumping it down a little bit and that way your speaker is going to be consuming a lot less power.
27. Don’t Share Your iPhone’s Analytics
With every major update, Apple always asks if you want to share your device’s analytics so it can improve its products and services. The truth is, Apple can improve them without your data. Don’t worry; Apple will still deliver another Awesome iPhone next year. So it’s okay if you turn it off to save some power.
Go to Settings > Privacy & Security. Scroll to the bottom and select Analytics & Improvements. Toggle Share iPhone & Watch Analyticsoff.
28. Reset Network Settings
Some users have reported that resetting network settings can fix iPhone 14 battery drain issues, so this may be worth a try. Go to network settings under Settings > General > Transfer or Reset iPhone > Reset > Reset Network Settings. No data will be lost, but you’ll be asked to re-enter your Wi-Fi passwords.
29. Reset All Settings
As someone who has found success with factory reset on numerous occasions, especially when dealing with annoying iOS issues, I can vouch for the effectiveness of this hack. Since it doesn’t delete any media/data and only wipes out the existing settings, including Wi-Fi and VPN, there is no harm in giving this radical yet reliable solution a shot.
Head into Settings app > General > Transfer or Reset iPhone > Reset. Now, tap on Reset All Settings in the menu and confirm the action.
30. Restore Your iPhone As New
Not for nothing, “Restoring the iPhone” as new is known as the nuclear solution. Whenever I find myself deep into any persistent issues on my iPhone, I restore the device as a last resort. Give credit to where it’s due; it doesn’t disappoint me on many occasions. So, I would recommend you go for this. Bear in mind that it will wipe out all the data on your iPhone. Hence, make sure to back up your iPhone first before trying it out.
To get going, connect your iPhone to Mac/Windows PC using a Lightning cable > open Finder/iTunes and then restore the device.
You can also restore your iPhone without iTunes/Finder. Head into the Settings app > General > Transfer or Reset iPhone > Erase All Content and Settings to get it done. Now, follow the instructions to set up your iPhone and also restore the latest backup.
iPhone 14 Battery Drain Issue? 30 Tips to Improve iPhone Battery Life
That’s all there is to it! Most probably, you have finally resolved iPhone 14 battery drain issue. As I said above, the unexpected battery consumption problem is a common phenomenon plaguing iOS for several years. So, you shouldn’t worry about it. More often than not, the above-discussed solutions come in handy in fixing the problem.
By the way, which tip has fixed your iPhone 14 battery drain problem? Sound off in the comments section below.
Is your iPhone 14 overheating? Learn why your device is getting too hot and how to cool it down properly.
iPhone 14 is a beast in its own right. The top-of-the-line specs here are complemented by the robust A16 Bionic chip that excels both in terms of speed and efficiency. That means the iPhone 14 is well-equipped to take on everything from video streaming to high-octane gaming to extensive web browsing. But that is not to suggest Apple’s iPhone 14 is immune to problems. Recently, several iPhone 14 users have reported overheating issues, wondering why the devices are becoming so hot frequently. If you are facing the same problem, try out these 14 tips to fix iPhone 14 overheating issue.
Note: information in this article apply to iPhone 14, iPhone 14 Plus, iPhone 14 Pro and iPhone 14 Pro Max.
Before we take a look at the methods to fix the iPhone 14 overheating issue, let’s first dig into the problem and reveal what could be the cause!
So, What Could be the Cause of the iPhone 14 Overheating Problem?
Now, we’ll take a look at some of the possible causes behind an overheating iPhone 14 or what can be considered as overheating.
On the other hand, if you find your iPhone 14 getting hot or getting an alert for overheating without using your phone, you should be concerned and try to cool it down.
Coming to the reasons for iPhone 14 overheating, there are a few things that could be the main culprits.
Keeping your phone at high brightness
Charging and using your phone at the same time
Leaving your phone in a car too long when it’s too hot outside
Leaving your phone in direct sunlight for too long
Using processor intensive features for too long, such as a graphics-intensive game or GPS
Setting up your phone for the first time or restoring it from a backup
Buggy Apps
Defective charging accessory
If your new iPhone 14 is suddenly overheating, you need to be concerned. In that case, keep reading and check out our tips for cooling down an overheating iPhone 14.
How to fix iPhone 14 Overheating Issue
When your iPhone 14 is overheating, you need to cool it down as soon as possible. Otherwise, you may face significant hardware damage.
But you don’t have to look any further. We have listed some of the best iPhone cooling tips below. Let’s check them out.
1. Is Your Case Heating Up Your iPhone 14?
If you are scratching your head wondering“why is my iPhone 14 heating up?” If you keep your device in a case, this could be the reason. Many cheap and bulky cases lack a heat dissipation design. As a result, they tend to cause overheating issues. A good case is important for your device’s physical protection and also its temperature. Instead of buying a leather case or a bulky one, you should buy a case which will ensure that your iPhone gets the air it needs to remain cool. Leather tends to trap the heat inside and so do many other similar materials. Invest in a good quality hard shell or rubber case, which will give your device a cooler look while keeping it cool.
2. Unplug the Phone and Reboot
If your iPhone 14 is overheating while charging, you need to unplug the device and then reboot it.
3. iPhone 14 Overheating When Charging? Check Your Charger Cable
If your iPhone 14 is overheating while charging, you can try using a different charging cable. Charging cables are a bit fragile and they are prone to damage. Especially if you’ve been using that particular one for a long time.
A damaged cable may be responsible for an uneven power supply which may be causing the iPhone 14 to overheat. It can also damage the battery permanently.
So, you can use a different cable for charging. If the problem is still there after replacing the cable then at least you can be sure that the issue wasn’t cable-related.
Also, make sure you use the original accessories. If it is a third party charger or cable, make sure it’s Apple certified.
4. Turn the brightness down.
This should be pretty obvious, the higher the brightness of your iPhone the more power it is going to require and the hotter the device is going to get. You should keep the brightness of your iPhone down to an acceptable level and you will be surprised with the difference. Screen brightness does not increase the temperature to a paramount level but it does raise the normal temperature, so your device will never be cool to begin with.
Brightness can be controlled through the Control Center on the iPhone using the brightness toggle or through the Display & Brightness section of the Settings app. It’s a good idea to turn on the auto-brightness setting to make sure your screen isn’t overly bright in darker rooms by default, but some manual adjustment may be necessary in brighter rooms and in the sun. Launch Control Centre and drag the Brightness slider to the bottom.
5. Hard Reset Your iPhone 14 to Fix Overheating Issue
Whenever I come across a common/miscellaneous iOS issue, I make sure to try out a hard reset on my iPhone. More often than not, it helps me troubleshoot the issue. Considering how reliable this method is, I suggest you give it a shot to fix the iPhone 14 overheating issue.
Press and release the volume up button. After that, press and release the volume down button. Next, hold down the side button until you see the Apple logo on the screen. Once your iPhone 14 has rebooted, try using it for some time to check if you have got the better of the overheating issue.
6. Disable Bluetooth and Reduce Camera Use
Stop using Bluetooth for too long or at least, turn it off when you are not using with it. Some people have the habit of leaving Bluetooth activated on their iPhones.
This habit is bad for the battery. Bluetooth is battery hungry and in some cases, prolonged use is known to overheat iPhones.
The second culprit is the camera. There are multiple forums dedicated to this particular issue. Now, if you are someone who takes one or two photos now and then, you shouldn’t be worried.
However, the problem appears if you are spending too much time capturing long videos. So, if you are doing something similar, you need to limit your camera use.
7. Close Performance-draining Applications
When the internal temperature of your iPhone 14 is getting out of hand, you need to keep the performance-draining apps in check.
These are the apps that push the processor to the brink and by doing that, consume too much battery. Focus on the games on your mobile and streaming apps like Netflix.
Try not to play games for too long. Most importantly, close the apps when they are not in use. Otherwise, it will continue to run in the background, consume battery and make your iPhone 14 hotter.
Swipe up from the home bar and hold along the middle of the screen to access the app switcher. After that, swipe up on an app card to quit the app.
8. Update All Apps and Remove All the Storage-Hogging Files
It’s no secret that outdated apps are problematic. They tend to crash unexpectedly, freeze every once in a while, and play a key role in slowing down the device. Besides, their power-hungry nature works as a catalyst in triggering overheating issues on iPhone 14. So, make sure apps are always updated to the latest version.
If any apps haven’t got the update for a while, delete them as they might be behind this issue. That aside, I would also recommend you optimize the storage of your iOS device by cleaning up all the storage hogging files. Cluttered storage causes the device to become sluggish, and that invites two other major problems, including unexpected battery drain and overheating.
iOS lets you automatically update apps. So, if you often forget to update apps on your iPhone, be sure to use the automatic update feature. Go to Settings app > App Store. Now, turn on the switch right next to App Updates. Besides, you can also choose to update apps manually. To do so, navigate to App Store > your profile. On this screen, you will get the option to update one app at a time or update all apps at once.
Before removing the clutter on your iPhone 13, head over to Settings app > General > iPhone Storage. Here, you can check out the breakdown of how the storage has been consumed on your iPhone 14. Also, take a close look at all the apps and the amount of storage each one uses on the device.
Once you have checked out the storage consumption, clean up the redundant files and useless screenshots. Additionally, make sure to delete all the apps that you hardly use.
9. Update iOS
If your iPhone 14 is still overheating and none of the solutions mentioned above work in resolving this problem, the issue might be due to a software bug. Apple releases software updates quite frequently to fix bugs and also enhancing the overall performance. So, there is a high chance that the software update may help fix the iPhone 14 overheating problem.
Navigate to the iPhone Settings and tap on General. Select Software Update.
If an update is available, tap on Download and Install.
10. Use Wi-Fi whenever possible
Using Wi-Fi demands less power when compared to being on cellular data. Keeping Wi-Fi on at all times will help in preventing iPhone 14 from overheating.
11. Disable Background App Refresh
Though background app refresh may not seem to have a direct impact on the iPhone 14 overheating issue, it does trigger the problem behind the scene. The continuous background app refresh kills more battery. And when the battery is forced to do the heavy lifting due to excessive power consumption, overheating issue crops up.
Head over to Settings > General > Background App Refresh. . Now, you can either completely turn off background app refresh on your iOS device or allow only a few important apps to refresh in the background. I would suggest you turn it off right now. If that resolves the iPhone 14 overheating issue, you can allow some important apps to refresh in the background later.
12. Stop Continuous Location Tracking
This is another feature that causes iPhone 14 to overheat. If the location services are turned on, your iPhone will consistently update the location of the iPhone, thereby generating a lot of heat. To fix it, go to Settings > Privacy & Security > Location Services. . Now, turn off the Location Services switch to disable it altogether. If you don’t want to disable it, allow only specific apps to track your location. For better control, iOS offers three options to choose from:
Never: Prevent an app from using your location data.
Ask Next Time When i Share: Force an app to ask you every time it needs to track your location.
While Using the App: Allow an app to access your location only when you are using it.
13. Reset All Settings
Another tip to help fix the iPhone 14 overheating issue is to reset all settings. There is a possibility that the issue lies in the settings that you are not familiar with and hence, it would make sense to reset all of them. Do note that when you reset your device, iOS only removes the existing settings, including Wi-Fi and website settings. All of your apps, media, and data will remain secure, so you don’t need to worry about losing anything.
To do that, go to Settings > General > Transfer or Reset iPhone > Reset and then tap on Reset All Settings. . Now, input your device passcode and hit the Reset All Settings again to finish. This should definitely help fix the overheating issue on your iPhone 14.
14. Restore iPhone as New
If nothing else works and the iPhone 14 overheating issue is persistent, you can hard reset your device to clear any potential errors that might be persistent due to a corrupt file. Once you reset your iPhone, all of your data and settings will be deleted and your device will be as good as new. However, be sure to create a backup of your data before you proceed with this step. Head over to Settings > General > Transfer or Reset iPhone > Erase All Content and Settings.
iPhone 14 still overheating? Contact Apple Support
If none of the solutions mentioned above work in fixing the overheating issue on your iPhone 14 or iPhone 14 Pro, contact Apple Support without any delay. There could be hardware issues with your device. There is a high chance that the battery is at fault. So, it would be apt to contact the tech support and get the problem sorted out at the earliest.
Tips and Tricks to Troubleshoot iPhone 14 Overheating Issue
Well, that’s all there is to it! Hopefully, you have found the fix to the overheating issue on your iPhone 14, iPhone 14 Max, iPhone 14 Pro, or iPhone 14 Pro Max. I’m curious to know the solution that worked in helping you troubleshoot the overheating issue on your iPhone 14. Is it the simple hard reset or the software update or replace the faulty charger that has worked for you? Be sure to let me know your feedback. Besides, if there is any related question running in your mind, let us know in the comments section.
Is Siri not working on your iPhone 14? Here are some fixes to get Siri responding to you again.
Does Siri turn away when you ask it for something? That’s probably not because the Assistant is unhappy with you, but rather because there’s an issue on your device. There are many reasons why Siri won’t work on your iPhone 14.
Luckily, there are many solutions when you experience the problem of Siri not working on iPhone 14. Depending on what the problem is, one of the following methods can help you fix Siri and get it working on your iPhone 14 again.
Why is Siri not working on iPhone 14?
There are many reasons why Siri is not working on your iPhone 14. These can range from an iPhone having no internet connection to the Siri setting being disabled on the iPhone 14. Below are some common causes for Siri to malfunction on iPhone 14:
Phone incompatibility.
Siri is disabled in the iPhone’s settings.
The phone is offline.
The microphone is malfunctioning.
There are several items you can look at to try and fix Siri problems on your iPhone 14. If you know what to check, you should be able to get it working again on your phone quickly. Without further ado, let’s try out the possible solutions to resolve Siri not working problem on iPhone 14.
Note: information in this article apply to iPhone 14, iPhone 14 Plus, iPhone 14 Pro and iPhone 14 Pro Max.
How to Fix Siri not working on iPhone 14
Here’s what to do when Siri is not working on your iPhone 14. If Siri does not work properly, if Siri does not respond, if “Hey Siri” is not working, here are solutions to some common problems.
1. Make Sure Siri Supports Certain Features in Your Country or Region
It’s worth pointing out that Siri availability, commands, and features vary by language and country/region. For instance, Siri restaurant reservations feature work only in the United States, Canada, and Mexico. Besides, Siri translation and Neural text-to-speech voice features are yet to be rolled out everywhere. To find out whether or not your country/region supports a specific Siri feature, navigate to Apple’s comprehensive feature availability page.
2. Ensure That Allow Siri When Locked is Enabled
If you are trying to activate Siri when your device is locked and Hey Siri is not working on iPhone 14, make sure the “Allow Siri When Locked” option is enabled. If it is turned off, you can’t invoke the personal assistant when your iPhone is locked.
Open Settings -> Siri & Search. Now, be sure the toggle for Allow Siri When Locked is turned on.
3. Make Sure Siri is Not Restricted on Your iPhone
If you find Siri not working on your iPhone 14 after trying the above fixes, make sure that Siri is not restricted on your phone. Screen Time lets you not only stop Siri from performing web searches but also block explicit language. To remove the restriction, go to Settings app -> Screen Time -> Content & Privacy Restrictions -> Content Restrictions -> Siri. Then, make sure you have allowed Siri to perform tasks without any limitations (if that’s what you are looking for).
4. Ensure You’re Connected to the Internet
Even though Siri will be able to work offline for some queries on iPhone 14, it still needs internet for most of the commands. Therefore, you must make sure you’re connected to the internet via Wi-Fi or cellular data for proper operation.
One easy way to check if your connection is working is to open a browser on your iPhone and launch Google or another site. If it fails to open, you have an issue with your connection. Try restarting your iPhone and router, double-checking that you’re connected to a network at Settings > Wi-Fi, and moving to an area with better connection.
If you’re able to load a site successfully, keep reading to find a solution.
5. Ensure That Always Listen for “Hey Siri” is Enabled
By default, Siri doesn’t respond when your iPhone is placed face down or covered. If you want the virtual assistant to always respond even when your device is covered or facing down, ensure that you have enabled Always Listen for Hey Siri.
Go to the Settings app on your iPhone and choose Accessibility. Then, scroll down to the bottom and select Siri. Finally, make sure the switch right next to Always Listen for “Hey Siri’ is turned on.
6. Force restart your iPhone
If nothing seems to work, you should try to force restart your iPhone 14 to fix any issues with Siri. If you don’t know how to force restart your iPhone 14, follow the steps below:
Press the volume up button. Then, press the volume down button. After that, you need to hold down the power/side button until the Apple logo shows up on the screen.
7. Disable Siri and Set It Up Again
At times, you can troubleshoot Siri issues on your iPhone 14 just by completely disabling the personal assistant and then setting it up again. So, give it a try as well.
Go to the Settings app and choose Siri & Search. Then, turn off the switch right next to “Listen for Hey Siri”. Also, turn off the toggle right next to the Press Side button for Siri. After that, restart your device and then turn on these toggles.
Once you have set up Siri on your device, invoke the personal assistant and ask it to perform certain tasks like, “Hey Siri, how is the weather like today?” If the virtual assistant starts working normally, you are good to go! If Siri says I can’t help with that, move on to the next solution.
8. Turn off Type to Siri
The ‘Type to Siri’ feature may probably be hindering the voice interaction with Siri. So it’s worth turning it off to see if it helps.
To turn off ‘Type to Siri’, go to Settings App and then Accessibility -> Siri. Now turn off the toggle next to ‘Type to Siri’.
9. Reset All Settings on Your iPhone
If you are still experiencing the problem of Siri not working on iPhone 14, try resetting all settings on your phone, it might fix the problem.
Head over to Settings app -> General -> Transfer or Reset iPhone -> Reset -> Reset All Settings. If asked, enter your device and Screen Time passcodes. After that, set up Siri again. Then, activate Siri to check if you have finally got the better of the problem.
10. Check Siri servers
If none of the tricks has worked in fixing Siri not working issue on your iPhone 14, it’s wise to check whether Siri servers are working fine or if they are experiencing any issues currently. To do this, visit Apple’s System Status website. Now look for a green dot next to Siri. If you see it, it means the servers are up and running, otherwise, you should wait until the problem is fixed from Apple’s end.
11. Update iOS
The software update is quite reliable in terms of fixing bugs and miscellaneous issues that are often hard to explain. So, if none of the tricks has worked in resolving Siri not working issue on your iPhone 14, I suspect the problem might be due to a bug. Thus, there is a high chance that the software update can help you troubleshoot Siri problems.
Go to Settings app -> General -> Software Update. Then, download and install the latest version of iOS on your device.
12. Disable VPN on your iPhone
While VPNs won’t always prevent Siri from working, they can potentially cause issues. Because VPN services reroute your network connections, using one could prevent Siri from accessing info properly.
Unless you must use a VPN for some reason, try disabling any VPN apps while you use Siri to see if that helps.
13. Make Sure Your iPhone’s Microphone Is Working
This is a basic fix, but it’s worth checking if you still can’t use Siri on your iPhone 14. As you know, Siri uses your microphone to listen to your commands. Without a working microphone, then, the Assistant won’t listen to any of your commands and thus performs no actions.
If you haven’t already, you should confirm the microphone on your iPhone 14 is working. One way to do that is to use the Voice Memos app on your iPhone. If you hear your voice upon playback, the microphone works.
In case the recorder doesn’t recognize your voice, there’s an issue with your iPhone’s microphone. You’ll need to take care of this before you can use Siri.
Make sure that your microphone isn’t blocked by a poorly fitting case, screen protector, dust, dirt, or lint.
Carefully use a soft cloth to remove the dirt and other gunk from the microphone grills. Don’t use any metal object like a needle or wire as these may cause serious damage. If this doesn’t work, you’ll need to bring your phone to an Apple Store to fix the microphone.
14. Repair options for your iPhone
Should none of the above steps work, it’s probably time to take your iPhone into an Apple Store or a third-party repair shop. Microphones do break, and even if your mic is intact, technicians may be able to diagnose and fix the real cause.
Siri not working on iPhone 14? Problem fixed!
If you heavily rely on Siri for your tasks, it’s extremely frustrating to find that it’s not working. Fortunately, using some of the methods above, you can bring the Siri back into action on your iPhone 14 without much trouble.
So, which tricks proved lucky for you? Don’t forget to let me know your feedback and the tip that did the trick for you.
The iPhone 14 is like any other computer. Sometimes it won’t power up, and sometimes it won’t shut down. If your iPhone 14 is refusing to turn off, here’s how to shut it down anyway—and, hopefully, permanently fix the problem.
It can be a worst nightmare if your iPhone 14 won’t power off. If you leave an iPhone switched on permanently, this will have a negative effect on the battery capacity in the long term. With extreme states of charge as well as with higher states of charge, the electrodes in the battery can oxidize, whereby they lose their ability to absorb the lithium ions and thus ensure the flow of current. So the battery loses its capacity. It is therefore recommended that the smartphone be switched off every now and then.
Why Won’t My iPhone 14 Turn Off?
In most cases, your iPhone 14 won’t turn off because there is either a problem with the software on your iPhone or the screen or power button isn’t working correctly.
Whatever the case, this troubleshooting guide will walk you through how to fix an iPhone 14 that won’t turn off.
Note: information in this article applied to iPhone 14, iPhone 14 Plus, iPhone 14 Pro, and iPhone 14 Pro Max.
How to fix iPhone 14 not turning off issue
1. Try To Turn Off Your iPhone
Before trying any other fix on this guide, try to shut down your iPhone. You can power off your iPhone 14 in two ways:
Using hardware buttons
This is the standard way to switch off an iPhone 14 without using the screen. It comes in handy when you need to turn off your iPhone 14 when the screen is broken or not working.
Press and hold the Side button and Volume Up or Down button until you see the power off slider.
Drag the slider that says “slide to power off” to the right.
Your iPhone will now turn off.
Without power button
There is a hidden setting in iOS to shut down an iPhone 14 without the physical buttons. This way you can easily shut down your iPhone without using the combo of Side and Volume buttons. It is helpful when the Side button isn’t working or when you are using the device with one hand. Surprisingly, not many iPhone users are aware of the virtual Shut Down option.
To turn off your iPhone 14 without the power button,
Go to Settings > General.
Under General, scroll down to the bottom and tap “Shut Down“.
Slide to power off the device.
2. Force restart your iPhone
If your iPhone 14 won’t shut down after trying the above steps, you may need to force it to restart. This will help clear out errors that are causing your iPhone 14 not to shut down without erasing your apps or data. You can do this even when your screen seems frozen or not responding when you touch it. Here’s how:
Quickly press and release the Volume Up button.
Quickly press and release the Volume Down button.
Press and hold the Side button. When the Apple logo appears, release the button.
3. Enable AssistiveTouch And Turn Your iPhone 14 Off Using A Software Power Button
You’re iPhone 14 won’t turn off after trying the above methods? Well, you can shut down your iOS device using just your software that’s built into Settings app.
To reboot your iPhone 14 if the power button doesn’t work,
Go to Settings > Accessibility > Touch.
Tap on “AssistiveTouch” at the top and turn on the toggle for AssistiveTouch.
The AssistiveTouch virtual button will now appear on your screen.
To turn off your iPhone 14 with AssistiveTouch, choose Device and then tap and hold the Lock Screen icon. This will take you to a screen that says “slide to power off.” Drag the red power icon from left to right to turn off your iPhone.
4. Update iOS
iOS needs to be regularly updated to keep on top of issues. You can check for an iOS updates by going to Settings > General > Software Update.
5. Update your apps
If a certain app is causing this issue, for example, when you want to launch the app, your iPhone becomes unresponsive, then ensure that the app is updated to the latest version. You can update your apps by going to App Store > your account > update all. If this does not fix your problem, you can contact its developer for further help or you can uninstall it.
Having a iPhone 14 won’t shut down problem is like having a baby that refuses to go to sleep. These tried and tested solutions should help you fix the problem of iPhone 14 not shutting down. Hope it helps and everything goes off without a hitch. Feel free to drop us a comment if you have any further questions or ideas to share with us.
Are you experiencing problems with Apple CarPlay on your iPhone 14? Sometimes you may not be able to connect your iPhone 14 to CarPlay. Another common issue is that CarPlay suddenly stops working or keeps disconnecting after it is connected, and this may start after an iOS update. Sometimes, your iPhone 14 might not be detected by CarPlay. Sometimes CarPlay may freeze and you may see a black screen. And finally, you may experience CarPlay sound problem. In this article, I’ll explain why CarPlay is not working on iPhone 14 and show you how to fix the problem for good.
CarPlay is a smarter and safer way to use your iPhone in the car, allowing you to stay focused on the road. When you connect your iPhone to CarPlay, you can get turn-by-turn directions, make calls, send and receive messages, listen to music, and more. These features make you feel great until your Apple CarPlay stops working.
Reasons why CarPlay won’t work on your iPhone 14
The most likely reasons why CarPlay is not working on your iPhone 14 include:
Problems with an iOS update.
Integration issues between apps.
Incompatibility issues.
iPhone not detected.
Regardless of the issue, no connection, no sound, apps not working, there are a few simple steps you can follow to fix CarPlay not working on iPhone 14 issue. Try each of these steps to see if it solves your problem and gets CarPlay working again.
Note: information in this article apply to iPhone 14, iPhone 14 Plus, iPhone 14 Pro and iPhone 14 Pro Max.
How to Fix Apple CarPlay not working on iPhone 14 issue
Note: Before you begin to fix CarPlay not working on iPhone 14, make sure that your country or region supports CarPlay and that your car supports CarPlay. If you’re unsure whether your car supports CarPlay, contact the vehicle manufacturer.
Without further ado, here’s how to fix it when Apple CarPlay is not working on iPhone 14:
Make sure CarPlay is enabled on your iPhone 14
A variety of settings could be interfering with the CarPlay connection. For example, if you’ve turned CarPlay off, you’ll need to re-enable it. You can do that by going to Settings > General > CarPlay and reconnect your vehicle to the app. Or to re-enable it if you’ve turned it off in Screen Time, Head over to Settings > Screen Time > Content & Privacy Restrictions > Allowed Apps.
Enable Siri
You must have Siri turned on for CarPlay to work. Go to Settings > Siri & Search and make sure that the following options are turned on:
Listen for “Hey Siri”
Press the side button for Siri
Allow Siri when Locked
The last option, which allows Siri when locked, is often disabled for many iPhone users and is usually the main reason behind CarPlay not working on iPhone 14. Make sure it is enabled.
If your car supports CarPlay via USB cable, make sure it is not faulty. A lot of CarPlay connection problems occur because of a faulty cable. If you see frequent disconnections or CarPlay isn’t working at all, the cable might be the problem.
It’s best to use an original cable. If you use a third-party cable, make sure it is MFi certified.
Check the cable to see if it works with another iPhone or car. If not, it’s likely a faulty cable that you will need to replace.
Try a different USB port
If you’re not connected wirelessly, make sure you’re plugged into the correct port. Some cars have multiple USB ports that support CarPlay.
If the port you’ve used in the past isn’t working, try plugging into other USB ports if they are available. In addition, ensure that your USB cable is connected properly. Finally, ensure that your charging port and the USB port are clean and there are no damages.
Make Sure Bluetooth is On
If your CarPlay is connected wirelessly via Bluetooth, make sure it is switched on. Usually, the reason behind CarPlay not working on iPhone 14 is that the Bluetooth connection is not turned on. So please turn it on, and while doing this, make sure you are removing other connected devices from the list.
Re-Connect Apple CarPlay Connection
Another fix is to forget and re-establish the CarPlay connection. To do this: Go to Settings > General > CarPlay > your car > Forget This Car.
Now you will need to set up again. Here is how:
Depending on your car:
Simply plug your iPhone into the USB port in your car.
Or if your car supports wireless CarPlay, go to Settings > General > CarPlay, tap Available cars, and then select your car.
Restart your vehicle and iPhone to re-establish and reconnect.
Restart your iPhone, your car’s infotainment system and your car. First, restart your iPhone and then restart your vehicle. Sometimes things work accurately when they are restarted and eliminate the problem we are facing. To restart your iPhone: press and hold the side button and Volume up buttons simultaneously.
Next, restart your car’s infotainment system. This is different for different cars and models. For example, you may need to press and hold down the audio system power knob for at least 10 seconds. Again this may be different for your car. Simply check your car’s manual.
Update iOS
If CarPlay worked before but has stopped functioning properly, you might need to install some updates to get it back on track. Head to Settings > General > Software Update to check for iOS updates, and install any that are available.
Update your car’s infotainment system
If the above solutions didn’t fix your iPhone 14 CarPlay problem, there is most likely an issue with your vehicle’s infotainment system. Updating your car infotainment system can resolve your issue. If you have an aftermarket receiver, check the maker’s website to see if there’s a software update. Apply any available updates, then give the connection another try.
If CarPlay Still Won’t Connect Properly
If nothing above corrects your issue with CarPlay, you probably have a more serious problem with either your car or iPhone 14.
Try connecting your iPhone 14 to another vehicle that supports CarPlay, or connecting another iPhone to your car, if possible. This will help you nail down where the problem lies.
If your car won’t accept any CarPlay connections, you should get in touch with the manufacturer or your dealer. There’s a chance that something is wrong with your car’s internals that’s causing CarPlay not to work.
If your iPhone 14 won’t connect to multiple cars that all support CarPlay, make sure that you’re using a good cable and that your charging port is free of obstruction. Failing that, you should contact Apple support to get more help.
CarPlay not working on iPhone 14: fixed!
You’ve successfully fixed the problem and CarPlay is working on your iPhone 14 again. Now that you know why CarPlay won’t work on your iPhone 14, make sure you share this information on social media with your family and friends. If you have any other questions about your iPhone 14, feel free to ask them in the comments section below!