








Got a tip for us?

iPhone Troubleshooting

Many users have complained that the flashlight on their iPhone 14 Pro Max accidentally turns on by itself. This happens while their phone is locked and, often, while it is in their pocket. On the iPhone Lock Screen, there is a (non-removable) flashlight button; the problem seems to be that this button gets accidentally pressed while in someone’s pocket. It is definitely an annoying sort of problem – cluelessly walking around with light beaming through your pants – and there is the secondary problem of battery drain caused by the flashlight being on for long periods of time.

If the tap happens when you place the iPhone in your pocket, or while you’re walking, the LED can remain ON for a long time. Obviously, every second of usage drains your iPhone’s battery and you can end up with an overheated phone with almost no battery left!

iPhone 14 Pro Max Flashlight Turns On Randomly

I’m not sure if this happens because of a modified iOS 16 setting, or due to a change of sensitivity in the current flagships, but ever since I updated to the iPhone 14 Pro Max, I’m facing this issue.

Recently, I found that the iPhone 14 Pro Max flashlight would turn on by itself almost daily. Sometimes, I could spot it right away thanks to the small vibration, while placing the device into the pocket of my jacket.

However, often enough the flashlight would stay enabled in my pocket for tens of minutes, if not hours and considerably deplete my iPhones battery!

How To Fix iPhone 14 Pro Max Flashlight Turns On By Itself

The flashlight shortcut cannot be removed from the lockscreen, but there are several ways to quickly turn it off before you accidentally blind the wrong person. If the flashlight is turning on while inside your pocket, there are a few tweaks that you can apply. Here’s what you can do to prevent your iPhone 14 Pro Max Flashlight from turning on by itself.

Note: information in this article apply to iPhone 14, iPhone 14 Plus, iPhone 14 Pro and iPhone 14 Pro Max.

1. Disable Tap To Wake

The iPhone 14 Pro Max include a feature called Tap to Wake, which, much as it sounds, allows the locked iPhone screen to wake up with a tap anywhere on the screen. This makes a lot of sense because the device does not have a Home button to press and wake the screen, so a tap anywhere on the display sort of replicates that Home press function, but Tap to Wake may also lead to a lot of unnecessary screen waking, and theoretically any erroneous screen waking may lead to a accidental taps on the flashlight icon, available in the bottom-left corner of the Lock Screen.

Although not ideal, you can prevent the iPhone flashlight from turning on randomly, by deactivating the Tap to Wake feature. This will prevent the screen from waking up when you tap it, thus prevent any accidental taps on the flashlight icon, available in the bottom-left corner of the Lock Screen.

Here’s how to turn off Tap to Wake:

  1. Go to Settings.
  2. Tap Accessibility.
  3. Select Touch.
  4. Toggle the switch next to Tap to Wake.

There is, of course, a downside to turning off Tap to Wake. A lot of people use this feature pretty often; anytime you want to quickly check the time on your phone, especially if you check the time while you are in bed, you just tap the screen. With Tap to Wake turned off, you will need to press the side button to wake your iPhone.

2. Disable Raise To Wake

“Raise to Wake” is a feature designed to make it quicker and easier to start using your phone after picking it up. It allows you to just lift your phone to start using it, rather than having to press any buttons. Generally, when you pick your phone up, you want to use it.

“Raise to Wake” means you don’t have to hold your phone in such a way that you can press the side button to turn it on. One of the downsides is that the feature creates the opportunity of accidental flashlight icon taps.

Here’s how to turn off Raise to Wake.

  1. Go to Settings.
  2. Tap display & Brightness.
  3. Toggle Raise to Wake to OFF.

3. Turn off back tap

You can double-tap or triple-tap the back of iPhone to perform actions such as taking a screenshot, turning on the flashlight, running a shortcut, and more.

Here’s how to turn off the back tap flashlight on your iPhone:

  1. Open the Settings app.
  2. Tap Accessibility.
  3. Tap Touch.
  4. Tap Back Tap at the bottom of the page.
  5. Tap Double Tap.
  6. Tap non.
  7. Tap Back Tap at the top-left corner of your screen, then tap Triple Tap.
  8. Tap non.

4. Place iPhone On The Opposite Side

I’ve noticed that the iPhone flashlight turns on randomly when you place the device with the screen towards the outside of your pocket.

To prevent this try to store your phone with the display towards the inside. Does it help?

Are you also annoyed by accidental iPhone 14 Pro Max flashlight taps? Did the above tips help out? Do you know a better solution? Use the comments section and share your feedback.
If your iPhone 14 Pro Max isn’t connecting to Wi-Fi properly, here are the troubleshooting steps to fix the issue.

Since you need a network connection to make the most of your iPhone, it’s frustrating when your iPhone 14 Pro Max won’t connect to Wi-Fi. You’ll instead have to use your cellular data plan, which might be limited. Thankfully, there are a number of solutions you can try if your iPhone 14 Pro Max won’t connect to Wi-Fi.

  • If your iPhone 14 Pro Max won’t connect to Wi-Fi, you should first make sure that your phone isn’t on Airplane Mode, and that Wi-Fi is enabled on your phone.
  • If your iPhone 14 Pro Max is connected to Wi-Fi but no internet access, you can try forgetting the Wi-Fi network and then connecting to it again.
  • If all else fails, you can try resetting your iPhone’s network settings.

Let’s discuss the steps to fix the problem of iPhone 14 Pro Max not connecting to Wi-Fi in more details.

1. Make sure that Wi-Fi is enabled

The first troubleshooting step is to check to see if the Wi-Fi network you want to connect to is within range and already connected. Simply go to the Settings app on your iPhone.

On this screen, make sure your iPhone is not in Airplane Mode which cuts off all your phone’s external connections.

Because of this, toggling airplane mode on and back off can be a helpful troubleshooting step when your iPhone 14 Pro Max won’t connect to Wi-Fi. Try this before moving to other solutions, and make sure airplane mode is off going forward.

You should also check that your iPhone’s Wi-Fi sensors are turned on. Make sure the Wi-Fi slider at the top is green, which means the feature is enabled. Below this, when everything is working, you’ll see the name of your network with a checkmark next to it, showing that you’re connected.

If this doesn’t appear, tap the name of the network you want to connect to in the Other Networks list below to connect to it. If you don’t see the network here, make sure that you are within range of the Wi-Fi network.

The exact distance that Wi-Fi covers will vary based on your router, but you should be as close to your router as possible to ensure a strong signal. If you know you’re close and still don’t see your Wi-Fi network, or it doesn’t connect when you tap it, you’ll need to continue to additional troubleshooting.

2. Reboot Your iPhone and Router

If you find your iPhone 14 Pro Max not connecting to Wi-Fi after trying the above steps, you should take a key troubleshooting step to get rid of any minor glitch. Try to restart your iPhone and router.

You can easily restart your iPhone by going to Settings > General > Shut Down.

If your router has a physical power button, turn it off for about 30 seconds. If your router doesn’t have a power button, unplug it from the power source instead.

Once both devices have rebooted, go to Settings > Wi-Fi and tap your network name again. In case it doesn’t connect, we’ll walk you through the next steps.

If your iPhone 14 Pro Max doesn’t show Wi-Fi and it’s your home network, make sure that your network isn’t hidden. Also, confirm that your router is plugged in and the lights on your modem and router aren’t flashing red or similar. If you’re trying to connect to a public network that won’t appear, speak to its administrator.

3. Forget and join the Network Again

If your iPhone 14 Pro Max doesn’t connect to Wi-Fi after trying the above step, press the blue i icon next to your network’s name. On the next page, tap Forget This Network, which will remove the saved Wi-Fi password and require you to manually add it again.

Now go to the Wi-Fi screen and select your network and enter its password. Your iPhone 14 Pro Max should connect to Wi-Fi with the correct password. But if the password doesn’t work, whoever administers the network might have recently changed it.

For networks where you’re in charge, you can log into your router to view the password and change it, if needed. For networks that aren’t your own, you’ll need to ask the owner to confirm the password. Make sure that you type the password carefully, and don’t confuse characters like “1” and “l”.

In case this step solved your issue, it’s a good idea to enable the Auto-Join slider on the network’s options page. With this on, your iPhone 14 Pro Max will automatically connect to your Wi-Fi network when within range.

4. Look for a Login Page (for Public Wi-Fi)

Many of these steps assume that your iPhone 14 Pro Max won’t connect to Wi-Fi at home. But when you’re trying to get online on a public network, like those at an airport or hotel, there’s often an extra step you have to complete before you can get online.

Once you’ve connected to a public network, open Safari or another browser and try to visit any website. You should be brought to a sign-in page, where you’ll be required to tap a button to confirm that you agree to the network’s terms of service.

After you do this, the Wi-Fi network should work properly, though keep in mind that some functions, like games and media streaming, may still be blocked on that network.

5. Check Your Wi-Fi Network for Issues

Even once your iPhone 14 Pro Max is connected to Wi-Fi, you might still have issues with the network not letting you get online. On the Wi-Fi menu, you’ll see a message like No Internet Connection underneath your network name when there’s an issue. Tap the network to reveal more details about the problem.

If an error appears here, it almost certainly affects your whole network, so other devices won’t be able to get online either. Try getting online with another device, like an iPad or a laptop, to confirm this.

If restarting your router doesn’t fix the issue, the root cause could be a bad cable, incorrect router setting, or ISP outage.

6. Update your iPhone and router

While a software update isn’t likely to fix iPhone 14 Pro Max not connecting to Wi-Fi issue, it’s worth giving it a try if you’ve reached this point. You can update your iPhone by going to Settings > General > Software Update.

Then, update your router. The instructions for doing this vary by device, so try a Google search for your model, or consulting the manufacturers documentation, for help.

7. Check VPN

Sometimes, you might have a VPN installed to protect your network by, for example, hiding your IP address. However, it just might be what’s preventing your iPhone 14 Pro max from connecting to internet.

Go to settings and make sure VPN is disconnected to ensure that it’s not the source of the network problems and check if the issue persists.

8. Try Connecting to Another Wi-Fi Network and Reset Network Settings

If you are still experiencing the problem of iPhone 14 Pro Max not connecting to Wi-Fi, connecting your iOS device to another Wi-Fi network will help you figure out where the problem lies. If you’re able to connect to Wi-Fi successfully at a friend’s house or a coffee shop, then the problem is with your home network. But if your iPhone 14 Pro Max won’t connect to Wi-Fi anywhere, then something on your device is the problem.

You can troubleshoot possible network glitches by going to Settings > General > Transfer or Reset iPhone > Reset > Reset Network Settings. This will return all network-related settings on your iPhone, including Wi-Fi, Bluetooth, APN, and any VPNs, back to their factory default. It’s a bit of a pain to set everything back up, but it’s the final troubleshooting step to eliminate network problems on your iPhone 14 Pro Max.

If your iPhone 14 Pro Max still won’t connect to any Wi-Fi networks after resetting network settings, you should reach out to Apple Support. Your phone is likely suffering from a hardware problem.

iPhone 14 Pro Max Won’t Connect to Wi-Fi? Problem Fixed

You don’t have to worry when your iPhone 14 Pro Max isn’t connecting to Wi-Fi. The problem usually lies with a minor glitch on your device or is network-wide, so there’s probably nothing wrong with your iPhone. By following these troubleshooting steps, you can get your iPhone 14 Pro Max connected back to Wi-Fi in no time.

If your iPhone 14 Pro Max wireless charging is not working, here are the best tips to fix the problem.

Inductive wireless charging is a way to charge your phone without any pesky cables. Qi is the wireless charging standard that most companies share for compatibility. All you have to do is plug in the charging pad and place your iPhone on top.

The process uses electromagnetic induction to charge your iPhone’s battery. This involves a very flat series of coils inside the charging pad. The electromagnetic field generated by the pad sends power to your phone in order to charge the battery.

Although Wireless charging technology is a big selling point for Apple, it can also be problematic at times. Here are a few fixes you can try if wireless charging isn’t working on your iPhone 14 Pro Max.

Note: information in this article apply to iPhone 14, iPhone 14 Plus, iPhone 14 Pro and iPhone 14 Pro Max.

Fix iPhone 14 Pro Max wireless charging not working

Charge your iPhone with a different charger

First, make sure that you can charge your iPhone with the normal charging cable that came with your iPhone to rule out general charging issues. Though wireless charging and wired charging don’t work the same, at least you can find out if the display of charging is typical or not.

Check whether the charging pad is properly connected to the socket

Make sure you’re using a high-quality, Qi-enabled accessory — and make sure it’s plugged in.
This may sound like a “no duh” suggestion, but it’s something to check before trying any other Troubleshooting step. Make sure that your Qi wireless charger is plugged into an outlet or power strip that’s working.

Make sure you’re using a Qi-certified charger

Apple uses Qi standard for its wireless charging, so make sure you’re using a Qi-certified charger from a reputable brand. Wireless chargers that don’t support Qi, or shoddy options from sketchy companies, may not work with your iPhone 14 Pro Max.

Have a look at the USB port for any dirt particles

If there is a charging port between the power cable and the charging mat, try cleaning out the charging port with a Q-tip and see if the charging mat works better.

Restart your iPhone

When in doubt, restart your iPhone.
In many cases, glitchy or buggy behavior can be easily rectified by a simple restart. That’s the case for the iPhone’s wireless charging feature, too. If you’re running into problems wirelessly charging your iPhone 14 Pro Max, you may want to power down your phone or perform a force restart.

To restart your iPhone, go to Settings > General > shut down.

To force restart your iPhone, press and quickly release the Volume Up button. Press and quickly release the Volume Down button. Then press and hold the Side button until you see the Apple logo on your screen.

When your device has restarted, try charging it. Most of the time, this technique should solve iPhone 14 Pro Max wireless charging problem.

Ensure your iOS is up to date

Apple routinely patches software bugs that could inhibit wireless charging. Even if you aren’t actively experiencing charging issues on your iPhone 14 Pro Max, you’ll want to install the latest available software whenever you can.

To download and install the latest iOS updates, head to Settings > General > software update. Once you’re done updating, try to charge again. If it works, awesome. If not, try the next solution.

Try removing any device accessories before charging

Try removing your case, skin, or other accessories on your iPhone. Do not place metal objects, magnets or RFID cards, holders or credit cards in between your device and the wireless charger. These may block wireless signals or cause overheating.

Be mindful of iPhone placement on the wireless charger

How you place your iPhone on a wireless charger is, arguably, the most important thing you’ll want to keep in mind when using Qi-based solutions.

To put it in layman’s terms, Qi uses a charging coil to wirelessly transfer energy to your device. But these coils can be finicky. The most common reason wireless charging is not working on iPhone 14 Pro Max is improper placement on the charging pad. The wireless connection between the device and the charging pad may be interrupted, cutting off the power supply.

If the iPhone is too far away from the charging coil, then charging speeds may end up being ridiculously slow. Similarly, if the coil and iPhone aren’t aligned properly, charging may not take place at all. Worse still, you may even get a charging ”ping” or see the charging indicator working normally — even if your iPhone 14 Pro is not charging. More likely than not, this is why many users wake up to half-charged devices. Check that your device is placed directly in the centre of the pad, without any obstructions.

DFU Restore Your iPhone

If you are still experiencing a problem of your iPhone 14 Pro Max not charging wirelessly and you suspect it could still be a software bug, then you may want to perform a DFU Restore. This is one of the deepest “resets” you can carry out on an iPhone.

Steps to Doing a DFU Restore

  1. Make sure you have a valid backup in iTunes.
  2. Using an USB cable, connect your iPhone to the PC with iTunes installed.
  3. Press Volume up and release.
  4. Press Volume down and release.
  5. Press and continue holding the Side button for 10 seconds.
  6. While still holding the side button, press and hold the Volume down button for 5 seconds.
  7. Release the Side button and continue holding the Volume down button for an additional 10 seconds.

When you successfully enter DFU mode, your iPhone should remain on a black screen, (if not start the process again from the beginning.)

My iPhone 14 Pro Still Won’t Wirelessly Charge!

If you’re still running into problems with wireless charging on your iPhone 14 Pro Max, there may be a damaged component or hardware issue with your device. Try a different wireless charger unit to see if it works; otherwise, we recommend taking your iPhone to an Apple Store or Apple Authorized Service Provider so they can diagnose and fix the problem.

iPhone 14 Pro Max not charging wirelessly? Fixed!

Your iPhone 14 Pro Max is charging wirelessly again. You now know exactly what to do when your iPhone 14 won’t wirelessly charge. Now share this article with your friends and family to teach them what to do when their iPhone 14 Pro Max is not charging wirelessly. Feel free to leave any other questions you have in the comments section below!

Is your iPhone 14 Pro not finding Bluetooth devices? If so, this problem can be resolved with a simple troubleshooting step or two. Below I will explain a few possible fixes for iPhone 14 Pro not discovering Bluetooth issue.

You want to pair or connect a Bluetooth speaker, car stereo, headphones or something else to your iPhone 14 Pro, however, something isn’t working right, and your iPhone 14 Pro is not finding Bluetooth devices. Whether it’s your brand new iPhone 14, iPhone 14 Pro, iPhone 14 Plus or iPhone 14 Pro Max, there’s a lot you can do to troubleshoot before reaching out to Apple or Bluetooth device manufacturer. Sure, sometimes there’s an issue with your headset, speaker, or in-car infotainment system, but often enough it’s a software issue that a few simple steps can fix. If so, follow along and we’ll get you back up and connected in no time!

Turn Bluetooth off and on

The first solution is simple. Just turn Bluetooth off and back on. To do this, head over to Settings > Bluetooth and turn the switch off and back on.

You can also swipe down from the upper right hand corner of your screen to bring up the Control Centre and tap on the Bluetooth button to toggle it off and on. This resets all your Bluetooth connections and might fix the problem. You may have to manually tap on each device to connect it after performing this step.

Restart your iPhone and/or Bluetooth device

Sometimes, all it takes is restarting your iPhone Bluetooth device, or both to resolve this problem. Go to Settings > General > Shut Down and drag the power off slider to turn off your iPhone. Hold the button down again to turn it back on. Consult the manual for your Bluetooth device to figure out how to turn it off and back on. Restarting forces everything to load from scratch which often fixes strange issues in the software.

Force restart iPhone

The next thing to try if your iPhone 14 Pro is not finding Bluetooth devices is to force restart your phone. You can force reboot your iPhone 14 Pro by following the steps below:

Press and quickly release the Volume Up button. Press and quickly release the Volume Down button. Then press and hold the Side button until you see the Apple Logo.

Charge and move closer

Sometimes, it helps to fully charge both devices. Also, move your iPhone 14 Pro closer the device you’re trying to pair or connect to. These simple things can fix the Bluetooth issues you are experiencing.

Make sure your Bluetooth device is discoverable

One of the reason why your iPhone 14 Pro is not finding Bluetooth is because the device’s own Bluetooth is switched off, or isn’t in pairing mode.
Check the manufacturere’s documentation to find out how to make it discoverable by turning on pairing mode. With some headphones, it’s a case of holding the power button down for longer, but with other devices there’s a dedicated Bluetooth button.
Some of the most frustrating devices have to be completely reset before they’ll be discoverable again.

Make sure your iPhone is discoverable

Even if Bluetooth is turned on, your iPhone 14 Pro itself might not be ‘discoverable’. This means that a Bluetooth device you haven’t yet paired cannot see your iPhone 14 Pro.

To make it visible to other devices, open the main Bluetooth settings. Your iPhone 14 Pro will be discoverable when Bluetooth is turned on. It will search for Bluetooth devices available for pairing when you go to Settings > Bluetooth.

Try re-pairing

Sometimes the easiest solution when you’re having the problem of iPhone 14 Pro not discovering Bluetooth devices is to forget your device and pair it again. You can do this by going to Settings > Bluetooth and select the more icon next to your Bluetooth device. From this screen, select forget this device. Once this is done, put your Bluetooth device in pairing mode and pair it to your device again.

Install the Latest iOS Update

If you are still experiencing the problem of iPhone 14 Pro not finding Bluetooth devices, try updating iOS to the latest version. Updating the operating systems to the latest version often fixes bugs, and your iPhone 14 Pro Bluetooth issue might be resolved with the updates. You can update iOS by going to Settings > General > Software Update. The system will check for software updates and if any are found, you will be notified. Choose the download and install button and connect your device to a power source to prevent the battery from dying while the update is installing. Your device will download the update, prepare it, and then reboot to install it. Wait until your device reboots. Check your Bluetooth device and confirm everything is working as expected.

Broken Bluetooth?

It’s rare, but not impossible, for the issue to be that Bluetooth isn’t working properly or at all on your iPhone 14 Pro. If you find that the Bluetooth toggle is greyed out in the iPhone’s settings, then you know the reason why your iPhone 14 Pro is not discovering Bluetooth devices. Check the last solution on this article.

Reset Network Settings

If you find your iPhone 14 Pro not discovering Bluetooth devices after trying the above steps, try to reset network settings. But beware: along with completely wiping all Bluetooth information on your iPhone, this will erase other network settings including known Wi-Fi networks and VPN configurations.

You can do this by going to Settings > General > Transfer or Reset iPhone > Reset. On that page, select Reset Network Settings and type in your passcode. Then your iPhone will turn off and restart. After that, check if your iPhone 14 Pro can find Bluetooth devices. If your problem still isn’t solved, move to the next solution.

Reset the Bluetooth Accessory

Are you still facing the problem of iPhone 14 Pro not recognizing Bluetooth devices? Don’t worry, the problem could be with your Bluetooth accessory. So, try resetting the Bluetooth device. Keep in mind, the process varies from one device to the other. Therefore, take the help of the user manual or contact the manufacturer for help if you don’t know how to reset the device.

Restore and Setup as new iPhone

This is not ideal, but if you find your iPhone 14 Pro not discovering Bluetooth devices after trying the above tips, the last resort is to restore your iPhone via iTunes or Finder in macOS Catalina/Big Sur and set it up as a new device. This way, you start afresh and get rid of possibly problematic customizations and settings on your device.

Visit an Apple Store

If none of the tricks are working for you then it’s a trip to the nearest Apple Store. Your iPhone 14 Pro might be having an hardware issue.

iPhone 14 Pro not discovering Bluetooth devices: Fixed!

While it’s never fun to troubleshoot, hopefully these fixes will help get your iPhone 14 Pro finding Bluetooth devices again. Which trick helped you to resolve the issue? Drop a comment and let us know.

Found yourself in a situation where earphones are not working on your iPhone 14 Pro Max? Problems with the earphones on iPhones aren’t as uncommon as you may think. It happens to many users and can be extremely frustrating, especially for those who regularly listen to music and so on. In this article, I’ll explain what to do if headphones are not working on your iPhone 14 Pro Max. Without any further ado, let’s get started.

Note: information in this article apply to iPhone 14, iPhone 14 Plus, iPhone 14 Pro and iPhone 14 Pro Max.

1. Try Other Headphones

The first step when you find headphones not working on your iPhone 14 Pro Max is an obvious one. It’s quite possible that your headphones are broken. The easiest way to do this is to get another set of headphones—ones that you already know work properly—and plug them into your iPhone 14 Pro Max. If you can hear audio when using your earphones with your iPhone 14 Pro Max, you’ve found the source of the problem. Just purchased a new pair of EarPods, and you’re good to go. If they’re not working with your iPhone, something else is to blame. It’s time to try out one of the other fixes listed below.

If the problems still happen even with new headphones, confirm that the headphones work on another iOS device and then move on to the next step.

2. Check Your AirPlay Output

One reason that you might not hear audio through your headphones is that your iPhone 14 Pro Max is sending the audio to another output. The iPhone is supposed to automatically recognize when headphones are plugged in and switch audio to them, but it’s possible that hasn’t happened in your case. One potential cause is that audio is being sent to an AirPlay-compatible speaker or AirPods. To check for that:

  1. Swipe up from the top right of the iPhone’s screen to bring up Control Center.
  2. Tap the AirPlay button in the top right of Control Center to reveal all available output sources.
  3. Tap Headphones (or iPhone, whichever option is present).
  4. Tap the screen to dismiss Control Center.

With those settings changed, your iPhone’s audio is now being sent to the headphones or the iPhone’s built-in speakers. If that doesn’t solve the problem, check the next solution.

3. Check to see if your iPhone is connected to a different device via Bluetooth

If your iPhone is paired with wireless headphones, a speaker, or any other device via Bluetooth, the lighting jack may be disabled. Normally, when you plug in your earphones, the iPhone should recognize them, and everything should work as intended regardless of the existing Bluetooth connection. However, this isn’t necessarily always the case.

It’s a quick and easy fix, as all you have to do is start the settings app on your iPhone, find the Bluetooth option, and check to see if it’s on. In that case, the iPhone is likely paired with one of the other devices you have in your house. If that’s the problem, turn it off, plug in your earphones, and see if that solves it. If they still don’t work, you should move on to the next solution on this list.

4. Clean the Lighting Port

As you can imagine, dust, as well as lint, can accumulate on the lightning port over time. This might cause the problem, as the dirt can actually block the connection between the earphones and the lightning jack.
The first thing you should do if you are experiencing the problem of iPhone 14 Pro Max earphones not working is to look into the lightning port to see just how dirty it really is. A flashlight might come in handy for this. The next step is to try and clean it and hope that that solves the issue. There are a lot of different ways to do this, some of which work better than others. One option is to blow into the lightning port, which should take care of at least some of the dust and lint found inside. You can also use a can of compressed air if you have one nearby.

A great option is to use a cotton swab. Push it into the port and swirl it around a little bit to get the dust and lint out. Be very careful when you do this, as the last thing you want to do is to damage your iPhone further. You can also damp the cotton swab with rubbing alcohol but make sure you don’t use too much of it.

After you’re done, look into the lightning port again to see just how much dust and lint you were able to get out. If things look better, plug in your earphones to check if your issue is fixed.

5. Check audio settings

There’s also a chance the problem isn’t with the earphones you’re using but has to do with the iPhone’s audio settings. If this is the case, you’ll be able to sort it out in no time. Just start the settings app on your iPhone and check the volume level and any other settings that might mute the sound.

Thankfully, there aren’t many settings like these on an iPhone, so you should find the problem more or less right away. If there is one, that is.

6. Restart the iPhone

If everything seems to be in order, but you are still facing the problem of iPhone 14 Pro Max earphones not working, there’s another simple fix you can try, which is restarting your phone. This can sometimes solve a ton of different iPhone-related problems and takes less than a minute to do. Just press and hold the Side button and either of the volume buttons, wait for the device to turn off completely, and then power your iPhone back on. Now check to see if the problem persists.

7. iPhone 14 Pro Max earphones not working maybe a hardware issue?

If you find your iPhone 14 Pro Max earphones not working after trying the fixes discussed above, your lightening port is probably broken and needs to be repaired. If your iPhone is still under warranty, the best thing to do is contact the seller or Apple. Please explain the problem to the company, and send it in for repair or replacement. This can take quite some time in some cases, but at least it’s free.

In case the warranty has expired, you do have phone insurance. Just make a claim with your provider.

The third solution is definitely the worst one. You may have to get your iPhone repaired by Apple or an Apple certified technician. You’ll have to open up your wallet and pay up to get it fixed, but at least you’ll be able to use the earphones again. Otherwise, you could opt for a pair of wireless Bluetooth headphones, which will also solve the problem. Well, sort of.

These are some of the fixes that we hope will help you resolve iPhone 14 Pro Max earphones not working issue. If you think we have missed any, do let us know in the comments. Also, feel free to share which of the solutions listed above — if any — worked best for you.

Apple’s brand new iPhone 14, iPhone 14 Plus, iPhone 14 Pro, and iPhone 14 Pro Max have been out for a few weeks now, and we’ve managed to go all this time without a single “gate” scandal. However, there are still some problems that early adopters have run into. Luckily, there are often simple solutions to even the most frustrating iPhone 14 and iPhone 14 Pro problems, and in this post, we’ve compiled six of the most common iPhone 14 issues people are running into, along with potential solutions.

1. Battery drain Issue on the iPhone 14

Battery drain issue on the iPhone 14 is relatively common. If it’s a software issue, there’s a chance you can fix it. You can use Low Power Mode, limit your iPhone 14 Pro’s frame rate, disable always on display, lower the screen brightness, disable haptic feedback for keyboard, and stop background app refresh to improve your battery’s performance.

If you notice “Home & Lock Screen” on your battery usage is higher than you’d expect, it’s good to check those settings.

Auto-Lock at 30 seconds will help you preserve the most battery life. Especially with iPhone 14 Pro having an always-on display, 30 seconds can be worth it.

Navigate to Settings > Display & Brightness > Auto-Lock.

Lowering your screen brightness will also help with battery life, but this will come down to personal preference. You can do that in Control Center (swipe down from the top right corner) or Settings > Display & Brightness.

With iPhone 14 Pro HDR brightness now going up to 1600 nits and outdoor peak brightness going to 2000 nits, this is something to keep an eye on to help keep battery life in check.

If you’re looking to eke out the most battery, turning off the always on display feature could help a touch.

Head to Settings > Display and brightness > Always On at the bottom.

To use Low Power Mode, head to Settings > Battery and tap the toggle for Low Power Mode.

If you choose not to use Low Power Mode, you can manually control Push and Fetch for your email/internet accounts.

Head to Settings > Mail > Accounts > Fetch New Data. One approach is to leave your primary account(s) as push to receive new mail asap, and turn less important accounts to fetch every hour or even set them to manual.

If you have one of the Pro models, you can limit your iPhone 14 Pro’s frame rate by opening Settings > Accessibility > Motion and tapping the Limit Frame Rate toggle. Doing this will cap the frame rate at 60 frames per second.

Low Power Mode turns off background app refresh across the board, but you can customize which apps use this feature for a more convenient experience as well as improved battery life. Head to Settings > General > Background App Refresh.

You can also opt to only use background app refresh on Wi-Fi in addition to Wi-Fi and Cellular or turn the feature off totally. However, most users will find leaving Wi-Fi and Cellular on while customizing which apps are used for background app refresh to be the best fit.

Turning off Background App Refresh prevents apps that you’re not actively using from updating (until you open them again).

Dialing in your location services settings is another way to extend battery life. (It can reduce cellular data use too). Head to Settings > Privacy & Security > Location Services to update the privileges for your apps.

Look out for any apps that ask to Always use your location and switch to While Using, Ask Next Time, or Never.

haptic feedback "might affect the battery life of your iPhone." No specifics are given as to how much battery life the keyboard feature does drain, but if you want to conserve battery, it’s best to keep this feature disabled.

Fortunately, it is not on by default. If you’ve enabled it in yourself, go to Settings > Sounds & Haptics > Keyboard Feedback and toggle off Haptic to turn off haptic feedback for your keyboard.

2. iPhone 14 Touchscreen Issues

Unlike battery problems, iPhone 14 touchscreen issues are relatively rare. However, they can make the device virtually unusable. There’s a chance you can fix it without sending it in for repairs, as it’s usually caused by software or user errors.

First, ensure your iPhone 14 is running the latest version of iOS. Next, thoroughly clean your iPhone and disconnect all cables. Restart your iPhone 14 and check if the touchscreen starts working again.

If it doesn’t fix the touchscreen issue, you can try factory resetting your iPhone 14. And, if all else fails, you’ll have to send your iPhone to Apple for repairs. But if you have the hardware expertise, you can take advantage of Apple’s Self Service Repair program.

3. iPhone 14 Wi-Fi Issues

One of the most common iPhone 14 issues has to do with Wi-Fi connections. Sometimes, even while connected to a Wi-Fi network with access to the internet, your iPhone might not work properly.

There are three things you can try to fix this problem:

  • Toggle the Wi-Fi connection off and on.
  • Forget the Wi-Fi network and reconnect.
  • Turn off the Wi-Fi Assist feature on your iPhone.

To toggle your Wi-Fi connection off and on, head to Settings > Wi-Fi. Then, tap the toggle at the top right of the screen. After 30 seconds, tap it again to enable it.

To forget and reconnect to a Wi-Fi network, open Settings > Wi-Fi. Then, tap and hold the corresponding network. Next, tap Forget This Network and then try to reconnect from the Wi-Fi settings menu.

To turn off Wi-Fi Assist, open Settings > Cellular and toggle off Wi-Fi Assist at the bottom of the menu.

4. Activation Error on the iPhone 14 and iPhone 14 Pro

One of the more frustrating iPhone 14 bugs involves activation problems. If you can’t activate your iPhone 14, you won’t be able to log in to use the phone at all.

This can happen in two ways. You’ll either get an activation error, a message stating that the phone can’t detect your SIM card, or that it’s invalid.

Fortunately, you can follow a few steps to solve the iPhone 14 activation bug. However, they’re pretty limited. Here’s one method you can try:

  • Restart your iPhone 14.
  • Connect to a Wi-Fi network.
  • Try activating your iPhone 14 again.

You can try an alternate method if these steps don’t solve the activation issue. For these steps, you’ll need the latest version of macOS or iTunes. Here are the steps you can try:

  1. Update iTunes on your Windows PC. If you use a Mac, update macOS to the latest version.
  2. Ensure your computer has an internet connection.
  3. Use your iPhone 14’s charging cable to connect it to your computer.
  4. Your computer should automatically detect your iPhone 14.
  5. If Set Up as New or Restore from Backup notifications show up on your computer, your iPhone 14 is activated. If SIM card invalid or No SIM Detected notifications appear, you’ll need to reach out to your phone carrier.

But if you see the activation information was invalid message, you’ll have to enter recovery mode to restore your iPhone 14.

You’ll likely have to reach out to Apple or your phone carrier at some point during the activation process if you’re still running into errors after following these steps.

5. iPhone 14 Face ID Issues

Face ID on iPhone 14 can stop working randomly, potentially barring you from using certain apps and built-in features. Fortunately, you can try a few methods to fix Face ID.

First, consider cleaning the front-facing camera. It’s surprising how often Face ID won’t work just because there’s a smudge or two on the camera lens.

You can also check the Face ID settings. To do this, head to Settings > Face ID & Passcode. Then, ensure all the items listed in this menu are toggled on. This includes:

  • iPhone Unlock
  • iTunes & App Store
  • Wallet & Apple Pay
  • Password AutoFill

You can also toggle on Face ID for specific apps from the Settings menu. Simply scroll down, find the app you want to use Face ID for, and use the toggle to enable it.

Another option is to remove and reset Face ID. To do this, go to Settings > Face ID & Passcode. Then, tap Reset Face ID.

Finally, you can add an alternative appearance. First, open Settings > Face ID & Passcode. Then, tap Set Up an Alternative Appearance.

If these tips aren’t working, you can check out our list of solutions for Face ID not working on iPhone 14 Pro.

6. iPhone 14 Pro Max Overheating Issues

If your iPhone 14 is overheating, it might be from overuse. While in most cases, you’ll likely need to send your iPhone 14 in for repairs if it’s overheating, there are a few tweaks you can try beforehand. These are also useful for other battery issues, but they can sometimes help to solve overheating.

First, consider tweaking a few of your iPhone 14’s battery settings. This includes lowering the brightness, disabling Background App Refresh, and turning off Location Services. These changes reduce the overall processing power required by your iPhone, reducing the load on your battery.

If your iPhone 14 is still overheating after these changes, try resetting all settings and restarting your phone. And if that doesn’t help either, you’ll likely have to send your iPhone 14 in for repair.

Fixed the most common iPhone 14 Problems

While every new generation of iPhones comes with impressive hardware and software, none of them are immune to bugs and problems. iPhone 14 issues are relatively common. Luckily, there are a few ways you can solve these issues without sending your phone in for repair.

More often than not, a restart or factory reset can solve most of the bugs or problems. If our list of common iPhone 14 issues and solutions didn’t help, you could try some of the tips in our other guides.

Apple periodically releases updates and upgrades to its iOS operating system. These updates may bring new features and fixes for bugs. Upgrades are major (e.g., iOS 16 etc.), and updates are minor (e.g., iOS 16.1) releases. Usually, these updates are easy to do and go smoothly. However, sometimes you may run into issues. A common issue that can occur with any update is when iPhone 14 Pro is stuck on a screen saying, “Preparing Update…“With this issue, the iPhone never passes this screen. This issue may also occur on the iPhone’ 14, iPhone 14 Plus, or iPhone 14 Pro Max. In this article, I’ll explain why your iPhone 14 Pro is stuck on preparing update and show you what you can do to fix this error.

What is ‘Preparing Update…’?

The Preparing Update step is a part of the iOS update and occurs after your device has downloaded the update from Apple’s update servers. This step involves your device preparing and configuring the downloaded files. After this, your iPhone restarts to install the new update. This step usually lasts a few minutes. You will also see a progress bar under it. However, if you notice that the progress bar is not moving at all for a long time and the screen hangs in this step, there is something wrong with the update. If your iPhone hangs on this screen for more than an hour, you should cancel the update and try again.

Why is your iPhone 14 Pro stuck on ‘Preparing Update…’?

There could be many reasons your iPhone 14 Pro is stuck on preparing update, for example:

  • Poor Wi-Fi connection.
  • Some sort of interruption in the download, process causing corrupted files.
  • Lack of response from Apple’s servers.
  • Lack of available storage on the iPhone.

How to fix iPhone 14 Pro stuck on preparing update issue

Follow these steps in this order until your problem is fixed.

Make sure your iPhone is connected to the Internet

If your iPhone 14 Pro is stuck on preparing update, make sure that your device is connected to a strong Wi-Fi network. While you can download an iOS update via mobile data, it is advisable to update your iPhone over a Wi-Fi. Try the following:

  • Restart your Wi-Fi router.
  • If you are using Hotspot, turn it off.
  • If you are using a VPN, disconnect and try again.

Make sure you have enough storage space

If your iPhone 14 Pro is still stuck on preparing update, ensure that your device has enough available storage to install the update. Ensure that your iPhone has at least 6 GB of free space. You can check your storage by going to Settings > General > iPhone Storage. This screen will show your storage details. This screen will also show how much each app is taking up. You can delete or offload apps to free up storage. You can also delete your videos or photos if needed.

restart your iPhone

iPhone 14 Pro still stuck on preparing update? Restart your phone and then try again.
Go to settings > General > Shut Down.

Delete the update

Delete the downloaded update file, and then restart the process. As I said above, this ‘Preparing Update…’ occurs after you download the iOS file. Follow these steps:

  • Go to Settings > General > iPhone Storage. Wait for a few seconds for the screen to populate. Find the iOS update file from the list of apps and tap it. Then tap Delete Update.
  • After deleting it, restart your iPhone.
  • Then go to Settings > General > Software Update and restart the update process again.

update iPhone manually

If your iPhone 14 Pro is still stuck on preparing update screen, update your device manually instead of wirelessly. For this, you will need a computer. Back up your iPhone first before you continue. Restart your iPhone and then follow the steps below, depending on your computer. Here is how:

If you have a Mac with macOS Catalina or later:

  • Connect your iPhone to your computer with the USB cable.
  • Open a Finder window.
  • From the left Finder sidebar, select your iPhone.
  • Click General > Check for Update and then follow the onscreen instructions.

If you have a Mac with macOS Mojave or earlier or a Windows PC:

  • Open iTunes on your computer.
  • Connect your iPhone to your computer.
  • Then in iTunes, select your iPhone and go to Summary > Check for Update.

If your iPhone 14 speaker isn’t working, that’s a serious problem you can’t hear phone calls, music, or notifications. Here are the top ways to troubleshoot your iPhone 14 speaker not working and hear your audio once again.

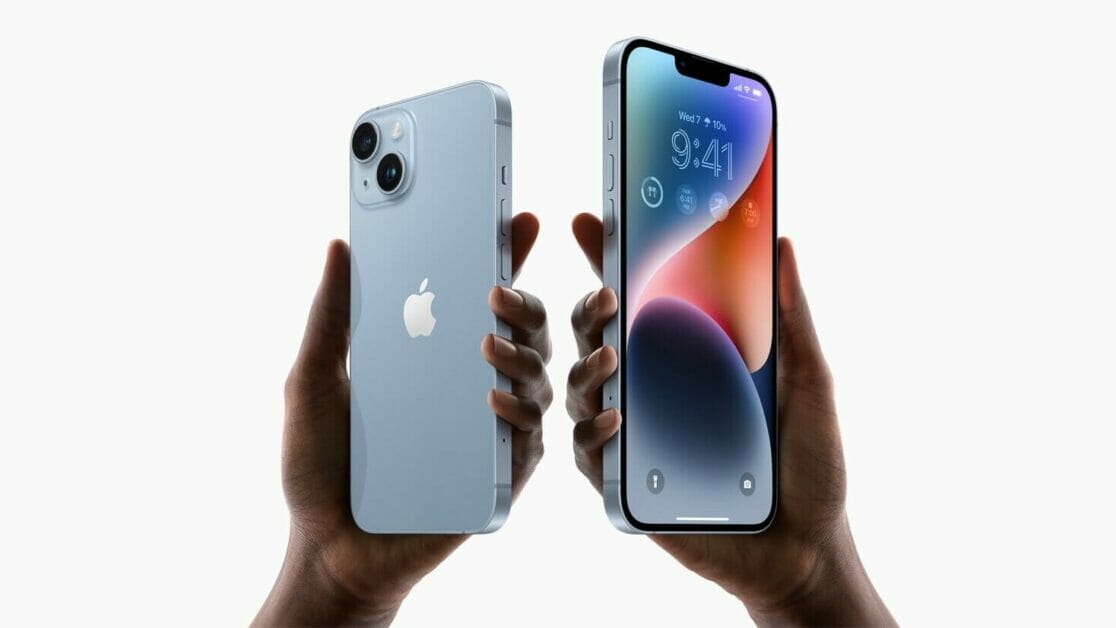
Two hands hold up iPhone 14 and iPhone 14 Plus.

Why is my iPhone 14 speaker not working?

There are many reasons your iPhone 14 speakers may be having issues, but here are some common causes behind iPhone 14 speakers not working:

  • Physical or liquid damage
  • Bluetooth issues
  • Headphone glitch
  • Airplay is connected
  • Silent mode is turned on
  • Dirty or blocked speaker port
  • Software malfunction

Don’t panic, though, as we’ve done the heavy lifting for you. Here’s how you can fix the sound on your iPhone 14 if your speakers have stopped working.

Note: information in this article apply to iPhone 14, iPhone 14 Plus, iPhone 14 Pro and iPhone 14 Pro Max.

How to fix iPhone 14 speakers not working issue

Here are some tips and fixes you can try if your iPhone 14 speakers are not working:

1. iPhone 14 speakers not working? Check the Volume First

Before you spend all day resolving a non-existent issue, check the volume on your iPhone 14 and make sure it’s all the way up. You or someone else may have just accidentally muted your iPhone, as a result, you may not hear audio from speakers! Press and hold the volume up button to increase the volume, or use Siri to adjust it by saying, “Hey Siri, turn up the volume.”

If you want to turn up the Ringer volume as well, go to Settings -> Sounds and haptics and turn on the switch next to Change with Buttons.

2. Make sure the audio isn’t silent or muted

If you can’t hear anything even after adjusting the volume, chances are you accidentally set your iPhone to a silent mode, so the speaker works fine it’s just muted. Just push the switch forward toward the screen so the orange isn’t showing. (If you do see orange, that means your phone is in Silent Mode.)

In addition, make sure your phone isn’t in a Focus mode like Do Not Disturb. Swipe down from the top right of the screen to see the Control Center and make sure the Focus button says Focus rather than another setting. If it says Do mNot Disturb, Personal, or another setting, tap it to disable Focus mode.

3. Disconnect audio accessories

If, after tried the above solutions, you’re still having problems with the iPhone 14 speakers, it’s possible that your phone is trying to send audio to an accessory like headphones, earbuds, or a portable speaker that’s still connected to your phone. If that device is far away or has the volume set low, you might not realize it’s playing the iPhone’s sound.

When a cable is plugged into your iPhone, it’s obvious that a device is connected. With Bluetooth, however, it’s easy to forget.

For example, I use Bluetooth headphones with my iPhone. When I’m not using them, I don’t always remember to swap the playback destination. The result is that audio is streamed to the headset, not my iPhone’s speakers.

So, if you use a Bluetooth headset, remember to switch off or disconnect the device from your iPhone when not in use. You can disconnect all wireless devices by opening the Control Center and tapping the Bluetooth icon. To disconnect devices individually instead, head to Settings > Bluetooth.

Once the Bluetooth devices are disconnected, try to play audio from your iPhone’s speaker again.

4. Make sure you’re not sending audio to AirPlay

Likewise, if you’ve recently used AirPlay to send audio or video to your TV or another AirPlay device, it’s possible it’s in AirPlay mode. To check, swipe down from the top right of the screen to bring up the Control Center and then tap the AirPlay icon at the top right of the music playback section. If another device is receiving audio with AirPlay, tap iPhone to revert back to your own device.

5. Check that your iPhone isn’t stuck in headphone mode

It’s possible that your phone is “stuck” in a mode in which it thinks it’s playing audio, but it’s sending it to a device that isn’t connected, like earbuds that aren’t plugged in or a Bluetooth device that isn’t turned on.

Here are a few things you can try to “wake up” your iPhone’s audio connection so it’s working properly:

Reconnect your headphones then disconnect them again. Repeat this three or four times to loosen any dirt within the port. Then gently shake your iPhone to let loose debris fall out.

If you have Bluetooth headphones, connect and disconnect your headphones by going to Settings > Bluetooth. When you disconnect your headphones, your iPhone should automatically switch back to using the normal speakers.

6. Clean your speaker

Is the speaker blocked, obscured, or dirty? That could be keeping you from hearing audio the speaker is trying to play. To clean your iPhone 14 speaker, remove your iPhone case and screen protector if it’s affecting the speaker in any way. Then check to see if it’s dirty. If necessary, carefully use a small, dry soft-bristled brush to clear away any lint, dirt, or grime.

7. Restart your iPhone

If you’ve gotten this far and your iPhone 14 speaker is still not working properly, you might have a glitch that’s best resolved by turning your phone off and then back on again. That can flush out any corrupt data or glitchy software that might be causing your speaker to fail to work properly. Restart your iPhone by going to Settings > General > Shut Down. Turn your iPhone back on by pressing the Side button and then test your speaker again.

8. Water Accident? Let It Dry

One of the most common consequences of water damage on your iPhone is a malfunctioning speaker. The liquid can quickly make its way to the internal component linked to the open grills. So if you’ve had speaker issues on your iPhone 14 after such an accident, let your device dry off.

There are several methods to dry a wet iPhone. You can blow hot air into it, dump it in a bowl of rice, and more. Whatever you do, turn your iPhone off immediately and let it completely dry before trying to boot it back up.

9. Update iOS

Haven’t been able to fix the iPhone 14 speakers not working issue as yet? There is no need to panic as we still have an efficient solution at our disposal. For better or worse, the iOS update has turned out to be a reliable troubleshooter for fixing random iOS issues these days.

So, if none of the tricks mentioned above has worked in getting rid of the problem, update the software on your iPhone. It would most likely fix the problem.

  • To do so, start the Settings app on your iPhone and select General.
    • After that, tap on Software Update and then download and install the latest version of iOS.

10. Reset All Settings

Tried all of the above solutions, and still getting no sound from your iPhone 14 speakers? Then it’s time for a radical measure. Times when I run into a persistent issue that I can’t seem to resolve by simple hacks, I decided to go ahead and reset all settings. On several occasions, it doesn’t disappoint me. Based on my experience, I would suggest you give it a try as well.

Go to Settings > General > Transfer or Reset iPhone > Reset > Reset All Settings.

11. Still No Sound From Your iPhone 14 Speakers? Contact Apple Support

If your iPhone 14 speaker is still not working, it’s possible that there is a serious hardware problem with your phone. You should seek help from Apple customer service. You can go to Apple’s support page and make a Genius Bar reservation to have someone look at them in person.

iPhone 14 Speakers Not Working? These Fixes Should Have Helped!

With these possible fixes, you should hopefully be able to revive your iPhone 14 speakers if it’s just a software bug.

Have you faced problems with speakers on your iPhone 14? Let us know in the comments section if the above solutions helped you out.

Is your iPhone 14 microphone not working, and you find it a pain to connect over FaceTime, Zoom, Skype, or use features like Siri, audio recording, and more? This can be due to a basic glitch or a faulty microphone. But worry not! In this article, I’ll explain why your iPhone 14 microphone is not working and show you how to fix the problem for good.

Note: information in this article apply to iPhone 14, iPhone 14 Plus, iPhone 14 Pro and iPhone 14 Pro Max.

Why is iPhone 14 Microphone not working?

There are many reasons the iPhone 14 microphone may not be working. The problem may be Bluetooth or app-related, the iOS is out-of-date, or something is blocking or interfering with the microphone and preventing it from functioning properly. Usually, the exact problem only reveals itself through its corresponding fix.

Before we dive into the troubleshooting steps, lets first go through the procedure to first check whether the microphones on your iPhone 14 are working properly or not. After that, we will guide you through various troubleshooting steps that will hopefully fix your iPhone 14 microphone problems.

The iPhone 14 come with three microphones – one at the top, one at the rear and the third one at the bottom.

To check the front and rear microphone, just record two quick videos using the selfie and back camera and check the audio. For the bottom microphone, open the voice memo app on the iPhone and capture a voice note holding the microphone close to your mouth. Play that note and check if the audio is crystal clear or not. If you find your voice fading or cracking in the middle, then your iPhone’s microphone needs looking into.

Now that you have the basics cleared, let’s jump to the fixes.

How to fix iPhone 14 microphone that’s not working

Follow these troubleshooting tips in the order listed to diagnose the problem and get your iPhone 14 microphone working again.

1. Make Sure Nothing is Covering Your iPhone’s Mic

A lot of people out there use third-party cases to protect their iPhones. The legit ones are fine but if you are using a cheap case from an unknown vendor then make sure the holes at the bottom of the case are precise with the ones on your iPhone. If the holes are not aligned, they will end up covering your iPhone’s microphone leading to quality issues with the microphone. Check the bottom, front, and back microphone openings to ensure these openings aren’t covered, blocked, or obstructed in any way.

2. Restart your iPhone

Sometimes the easiest solution is the best solution. Restarting your phone refreshes your system by clearing all processes and open apps. It can be a quick fix to your iPhone 14 microphone issues.

Hold the side button and either of the Volume buttons until the power off slider appears, then drag the slider. Leave it off for 30-60 seconds before turning it back on, then check to see if the microphone problem is resolved.

3. Update your iPhone

Sometimes an out-of-date software can interfere with the microphone working correctly, and updating the iOS can clear the problem. You can do this by going to Settings > General > Software update.

4. Clean Your iPhone’s Microphone

The next basic thing you need to do when your iPhone 14 microphone stops working is to check the microphone grill at the bottom of your iPhone. See if there’s any sort of dust accumulation. Those tiny dust particles sticking in your device’s microphone can be the reason for a muffled voice output on calls. You can clean your iPhone’s microphone using a clean toothbrush or an air compressor. But, be careful about the flow of the compressed air, keep it low otherwise it may damage the internals of your iPhone. Do not insert any sharp object into your iPhone’s microphone hole as that can end up damaging it permanently.

5. Disconnect All Bluetooth Devices

If you find your iPhone 14 microphone not working after trying the above solutions, make sure that you’re not connected to any of the nearby Bluetooth devices. This is because connections to nearby Bluetooth speakers, headphones, and other devices can disable the built-in microphone on your iPhone 14 and use the microphone on the Bluetooth peripheral instead. This happens to me all the time. My wireless earbuds Funcl AI when sitting idle in the charging case, automatically turn on and connect to my iPhone. So, when I receive a call on my iPhone, the device sends it to the connected device and I can’t hear the other person. This can also happen to you if your iPhone is connected to an external Bluetooth speaker or to your car’s infotainment system.

It is always recommended that you manually disconnect Bluetooth devices from your iPhone in such scenarios from the control center to avoid such issues. To do this, go to to the iOS Control Center and tap on the Bluetooth toggle once, if it’s enabled. This will disconnect you from all Bluetooth devices for 24 hours.

6. Disable Phone Noise Cancellation

iPhones come with a feature called phone noise cancellation. Noise cancellation reduces ambient noise on phone calls when you are holding the receiver to your ear.

For those unaware of this, the result can sound a bit disorientating, so it’s easy to assume there is something wrong with your iPhone 14 mic. Here’s how you can disable the setting to make sure your mic is fine:

  1. Go to the Settings app.
  2. Select Accessibility
  3. Tap Audio/Visual
  4. Look for the Phone Noise Cancellation option and disable it.
  5. Restart your phone and check if the problem is solved.

7. Enable Microphone Access for specific Apps

Are you having microphone problems with video calls on apps like FaceTime, Skype, or WhatsApp? Chances are, you haven’t enabled the permission for the microphone for these apps. This can be quickly resolved by going to Settings > Privacy & Security > Microphone. Just use the toggle to give microphone permissions for the app that you’re trying to use.

If you have previously blocked microphone access for websites or for specific apps, this may be the problem.

8. Disconnect All Hardware from iPhone

If you have a physical set of headphones or speakers plugged into the iPhone 12 Pro, try disconnecting those. Some iPhone headphones, like the earbuds, have built-in microphones, which are very convenient to use, but occasionally that headphone-set microphone can become damaged or dirty itself, and make the microphone not pickup audio, or sound muffled. This is an easy thing to check, so just unplug headphones if they’re plugged in and try again.

9. Force Reboot

If none of the above steps worked in your instance, you can try force restarting your device and see if that fixes your iPhone 14 microphone issues. Most minor software-related bugs and glitches can be resolved by force restarting your device. Here’s how:

Press the volume up button first, followed by the volume down button, and then hold the side/power button until you see the Apple logo.

10. Reset All Settings

If your iPhone 14 microphone is still not working properly after following all the steps above, then consider taking this as a last resort. You will have to reset your iPhone back to factory settings. It won’t wipe out any app or their data but the step will delete all saved Wi-Fi passwords. To do this, head over to Settings > General > Transfer or Reset iPhone > Reset and tap on “Reset All Settings”.

11. Take It to Apple Store

If all else fails, there is a good chance your iPhone is damaged. Mics are delicate parts and can easily break from fall, water, or similar damage. In this scenario, it is best to take your phone to a technician who can determine the fault within your device.

Fixed iPhone 14 Microphone not working Issue!

There are various reasons your iPhone 14 mic may not work properly. If you ever run into a problem, the methods above should help you identify and fix the iPhone 14 Mic. Which of the troubleshooting methods we discussed here worked for you? If not, did you get in touch with Apple Support? Do share your personal experience in the comments section down below.

Is your iPhone 14 not able to make or receive phone calls? Relax, as you are not the only one facing this persistent issue. Several iPhone 14 owners have complained about this error on iOS 16. While the problem is reportedly common on the iPhone 14 series, it affects older iPhone models running iOS 16 as well. As always, we have put together a guide to help you fix the problem of iPhone 14 not making or receiving calls. So, let’s get into troubleshooting mode and look at some viable solutions to resolve the issue!

Two hands hold up iPhone 14 and iPhone 14 Plus.

Note: information in this article Apply to iPhone 14, iPhone 14 Plus, iPhone 14 Pro, and iPhone 14 Pro Max.

Getting a good hang of the problem is key to discovering the cause and finding a possible solution. Hence, we have first talked about what could be the possible reason why your iPhone 14 isn’t making or receiving calls before learning the different ways to resolve the issue.

Why is iPhone 14 not making or receiving calls?

There are many reasons your iPhone 14 can’t make or receive calls. Usually this comes down to the strength of cellular network coverage at your location, network outages or disruptions, issues with your account status, device settings on your phone, or a problem with the receiving end of the call.

If you’re hearing an error message when placing calls, this could be due to a number of reasons, depending on the message you’re hearing. You could be dialing incorrectly, so you might want to check the number and try again. If you’re a prepaid customer, you might need to add funds to your account. The person you’re trying to call could have their phone turned off, they may be outside of their carrier’s network coverage, or otherwise unreachable. Try calling a different number to see if you have the same problem, or ask around and see if anyone else you know has had a similar experience when calling the same number. There could be an ongoing network disruption. Try to see if anyone else around you is having similar problems making calls. If you try some basic troubleshooting, you may not have to contact Customer Service at all. However, if you still can’t get your call to go through, check out the troubleshooting tips below!

How To Fix iPhone 14 Not Making or receiving Calls Issue

Here are some tried and tested solutions you can try if your iPhone 14 is not making or receiving calls:

1. Check Your Mobile Plan

To make a call using your iPhone’s Phone app, you need an active mobile plan with sufficient credit or minutes. Check with your network to see if your mobile plan has expired or if there’s insufficient credit left. If this is the case, simply reload your account and you should be able to start making calls again.

2. Check Your Phone Signal

If you’re at a remote outdoor location, or if it’s raining or snowing in your area, you may experience poor cell reception. Check the cell signal icon in your iPhone’s status bar to find out. If there’s only one vertical bar filled in, you can try moving to another location to get a stronger signal in order to make or receive a call. For example, if you’re in your bedroom, simply going to other areas in your house such as the kitchen or garden may get you the signal you need.

If there are no bars at all, or If Your iPhone 14 Says No Service in the status bar, visit your network provider’s website and look for a coverage map to find out if you’re supposed to get any signal in your current location.

3. Check Your iPhone Settings

Sometimes you may have active mobile plan with sufficient credit and there are no network issues causing an impact on your service, but you still can’t get your calls to work. On these occasions, the issue may actually be caused by your phone settings.

  • Check blocked contacts: Go to Settings > Phone > Blocked Contacts to check for if there are any blocked phone numbers on your iPhone.
  • Disable do not disturb: Go to Settings > Focus > Do Not Disturb and see whether Do Not Disturb is off.
  • Make sure you’ve turned Call Forwarding off: Go to Settings > Phone > Call Forwarding.
  • Turn off silent unknown callers: Go to Settings > Phone > Silence Unknown Caller, and turn off the option.

4. Toggle Airplane Mode

Believe it or not, airplane mode is like my go-to troubleshooter for fixing any network-related issues on iPhone. If there is an occasional glitch related to the network, resetting the radios does the trick for me – more often than not. So, make sure to give this nifty hack a shot before moving to other fixes below.

  1. Swipe down from the top right of your screen to bring up the Control Center.
  2. Next, tap the Airplane icon located at the upper-left-hand side corner to turn it on.
  3. Finally, wait a few seconds, tap it again to turn it off.

5. Update Carrier Settings

Another solution that you should try to troubleshoot an iPhone 14 that’s not making or receiving calls is to update the carrier settings. There is a possibility that the problem might be related to a carrier network, which you can resolve by updating the carrier setting on your device. The good thing is carrier providers often release updates to boost the overall performance of the cellular network and get rid of random issues.

To check if your carrier provider has network-related updates, first connect your iPhone to Wi-Fi or enable cellular data. Then, go to the Settings app. Select General and tap About. If an update is available, you’ll see a Carrier Settings Update prompt. Tap Update to begin the installation.

6. Force Restart Your iPhone

Force restart (also known as hard reset) flushes out the cache and deletes useless temporary files, which often works in fixing many iOS issues, on your iPhone. Thus, you should give this nifty solution a try as well.

Press and quickly release the volume up button. Then, quickly press and release the volume down button. After that, press and hold the Side button until the Apple logo shows up on the screen.

7. Remove and Reinsert Your SIM

None of the solutions above have worked in resolving the issue for you? Well, remove the SIM card and reinsert it. Many a time, you can get rid of iPhone 14 call issues by using this age-old trick. Turn off your iPhone and then use a SIM-ejector tool to pull out the SIM tray. After removing the SIM card, gently wipe it with a soft, lint-free cloth. Then, place the SIM card back into the tray and slide it carefully into your iPhone.

After that, press and hold the power button to turn on your device. Now, check if your iPhone 14 can make or receive calls.

8. Update Your iPhone’s iOS

If you are still troubled by the the problem of iPhone 14 not making or receiving calls, a bug is likely to be behind this issue. Hence, updating the software could resolve the problem. Go to Settings > General > Software Update to look for new updates.

9. Reset Network Settings

Your iPhone 14 won’t make or receive calls if there are network-related problems. Whenever I face call issues on my iPhone, the one hack that I make sure to try is resetting the network settings to factory default. . As the the problem of iPhone 14 not making or receiving calls also seems to have a relation with the network, we suggest you try out this trick too.

Rest assured that this is not a factory reset. It simply deletes network data, such as Wi-Fi passwords and Bluetooth device connections—all of which can be easily set up again later on. All the content on your iPhone should be totally fine—like your apps, photos, and music.

To reset network settings on your iPhone, go to Settings > General > Transfer or Reset iPhone > Reset > Reset Network Settings. Then, tap Reset Network Settings when the confirmation alert appears on the display. Your iPhone will reset and turn back on once it’s finished.

10. Reset All Settings

The last solution you can attempt if your iPhone 14 won’t make or receive calls is to reset all the settings on your phone. As long as you follow the guided steps correctly, you still won’t lose any data from resetting your iPhone. Just make sure you don’t choose the option to Erase All Content and Settings.

However, this process can take a long time if you have a lot of data on your device. Before trying this solution, remember to consider whether the problem could actually be with the person you’re trying to call. You may want to find another way to reach out to them to ensure their phone is working before spending more time resetting settings on your own device.

To reset all settings on your iPhone, go to Settings > General > Transfer or Reset iPhone > Reset > Reset all Settings. Then, tap Reset all Settings when the confirmation alert appears on the display. Your iPhone will reset and turn back on once it’s finished.

11. Contact Your Wireless Carrier

It’s time to get in touch with your wireless carrier if your iPhone 14 still won’t make or receive phone calls. Even if your signal looks good, there could be an issue with your cell phone plan.

We recommend contacting your wireless carrier before Apple. If you go to an Apple Store and tell them your iPhone 14 is not making or receiving calls, they’ll probably tell you to go talk your wireless carrier first!

12. Visit The Apple Store

If you’ve contacted your wireless carrier and they can’t help you, your next step would be to take your phone to a nearest Apple Store so the Genius Bar can conduct some troubleshooting. In rare cases, an iPhone 14 might stop making or receiving calls because of damage to one of its antennas.

Resolved iPhone 14 not making or receiving calls issue

So yeah, these are pretty much all the methods you can use to solve the problem of iPhone 14 not making or receiving calls. As we mentioned above, the problem is likely network related. So, tips like resetting the network settings or updating carrier settings are more likely to resolve the problem. Let me know which solution helped you fix the problem of iPhone 14 not making or receiving calls. Moreover, let us know about any other solutions that help troubleshoot this annoying issue in the comments below.