Got a tip for us?

iPad

The iPad is a tablet computer from Apple that runs the iOS mobile operating system. Similar in functionality to the iPhone, the iPads purpose is often quite different, sometimes even serving as a general desktop computer replacement.

In many apps, you can zoom in or out on specific items. For example, you can look closer in Photos or expand webpage columns in Safari. You can also use the Zoom feature to magnify the screen no matter what you’re doing.

You can magnify the entire screen (Full Screen Zoom), magnify only part of the screen with a resizable lens (Window Zoom), or magnify a portion of the screen that stays in one place (Pinned Zoom). And you can use Zoom together with VoiceOver.
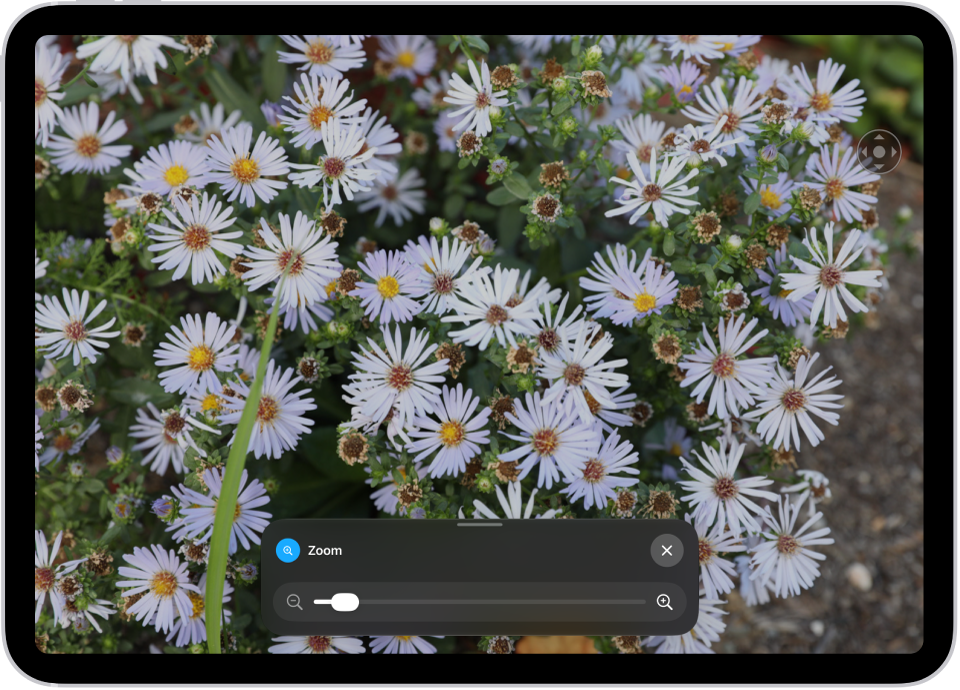
An iPad showing a zoomed in image of white flowers.

Set up Zoom

  1. Open Settings, tap Accessibility, tap Zoom, and turn on Zoom.
  2. Adjust any of the following:
    • Follow Focus: Track your selections, the text insertion point, and your typing.
    • Smart Typing: Switch to Window Zoom when a keyboard appears.
    • Keyboard Shortcuts: Control Zoom using shortcuts on an external keyboard.
    • Zoom Controller: Turn the controller on, set controller actions, and adjust the color and opacity.
    • Zoom Region: Choose Pinned Zoom, Full Screen Zoom, or Window Zoom.
    • Zoom Filter: Choose None, Inverted, Grayscale, Grayscale Inverted, or Low Light.
    • Maximum Zoom Level: Drag the slider to adjust the level.
  3. If you use iPad with a pointer device, you can also set the following below Pointer Control:
    • Zoom Pan: Choose Continuous, Centered, or Edges to set how the screen image moves with the pointer.
    • Adjust Size with Zoom: Allow the pointer to scale with zoom.
  4. To add Zoom to Accessibility Shortcut, open Settings, tap Accessibility, tap Accessibility Shortcut, and then tap Zoom.

Use Zoom

  1. Double-tap the screen with three fingers or use Accessibility Shortcut to turn on Zoom.
  2. To see more of the screen, do any of the following:
    • Adjust the magnification: Double-tap the screen with three fingers (without lifting your fingers after the second tap). Then drag up or down. Or triple-tap with three fingers. Then drag the Zoom Level slider.
    • Move the Zoom lens: (Window Zoom) Drag the handle at the bottom of the Zoom lens.
    • Pan to another area: (Full Screen Zoom) Drag the screen with three fingers.
  3. To adjust the settings with the Zoom menu, triple-tap with three fingers and then adjust any of the following:
    • Choose Region: Choose Pinned Zoom, Full Screen Zoom, or Window Zoom.
    • Resize Lens: (Window Zoom) Tap Resize Lens and then drag any of the round handles that appear.
    • Choose Filter: Choose Inverted, Grayscale, Grayscale Inverted, or Low Light.
    • Show Controller: Show the Zoom Controller.
  4. To use the Zoom Controller, do any of the following:
    • Show the Zoom menu: Tap the controller.
    • Zoom in or out: Double-tap the controller.
    • Pan: When zoomed in, drag the controller.

When you use Zoom with an Apple external keyboard, the Zoom region moves with the insertion point and keeps it in the center of the screen; see our article, iPad Magic Keyboard and Smart Keyboard.

To turn off Zoom, double-tap the screen with three fingers or use Accessibility Shortcut.

See also

Apps ask for permission the first time they want to use something on your iPad, and you control what you share. You can control which apps can access your data, location, camera, and microphone, and manage safety protections.

A messaging app, for example, may request access to your contacts, to find friends who use the same app. When an app is using Location Services, its icon appears in the status bar, and you can turn access on or off for any individual app.

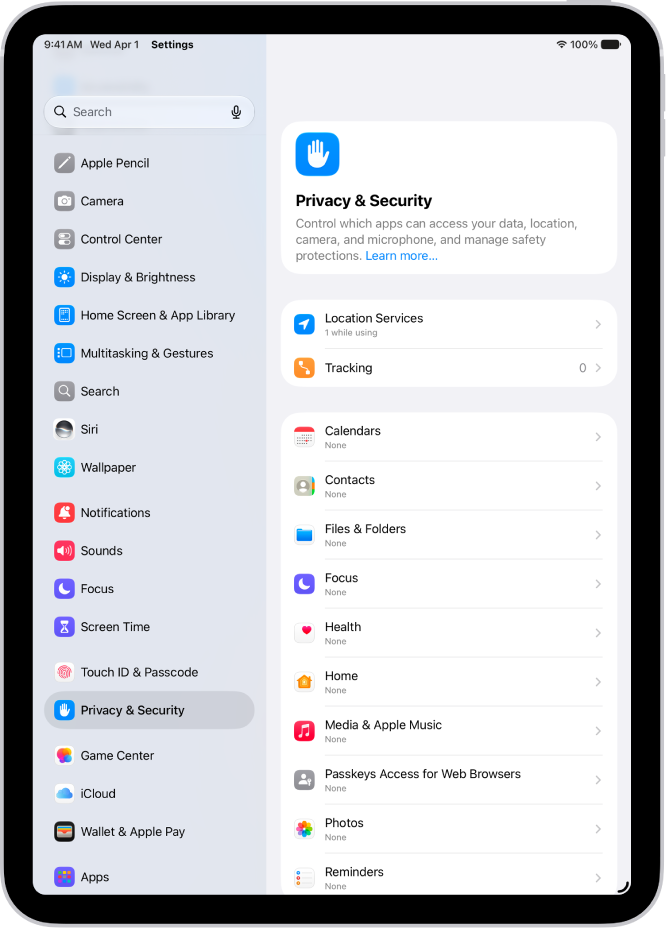
The Privacy & Security screen, with settings for Location Services and Tracking, and settings to control which apps can access your data.

Control which apps have access to information on your iPad

Third-party apps can use information in your iPad apps, like Contacts, Photos, and Calendar, if you let them, and that’ll help you get things done more quickly. A messaging app might request access to your contacts to find friends using the same app, for example. And you can turn access on or off for each app individually.

How to allow access to information in iPad apps

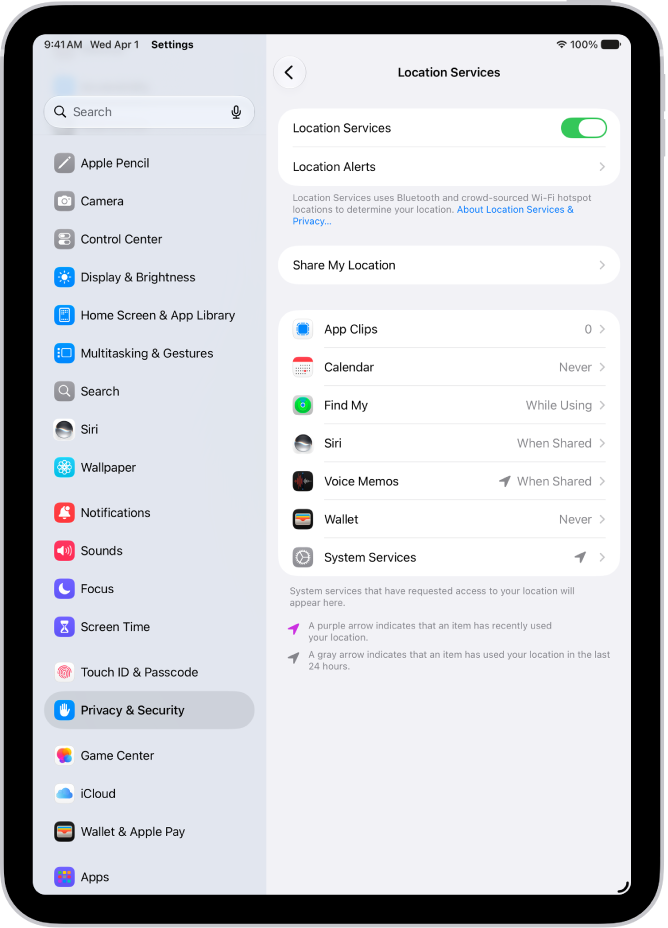
The Location Services screen, with settings to share the location of your iPad with apps.

Control which apps can use the location of your iPad

Apps with access to your iPad’s location can help you get directions, get assistance in an emergency, and more. A ride-sharing app, for example, may ask for your location so it can pick you up. Whenever an app’s using Location Services, its icon shows in the status bar.

How to allow access to the location of your iPad

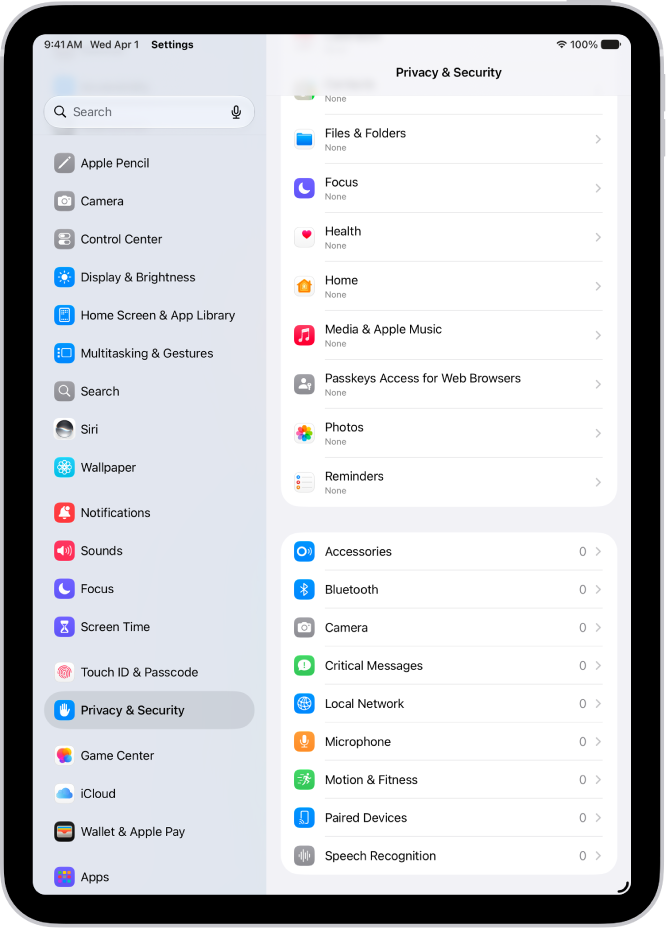
The Privacy & Security screen, with settings to control whether apps can use the camera, microphone, and other parts of your iPad.

Control which apps have access to the camera and microphone on your iPad

Letting apps use the camera and microphone makes it easier to upload content directly to them. A social networking app might ask to use your camera, for example, so you can take and post pictures there. A green indicator appears any time an app uses the camera, even when the camera and microphone are working together.

How to allow access to the camera and microphone

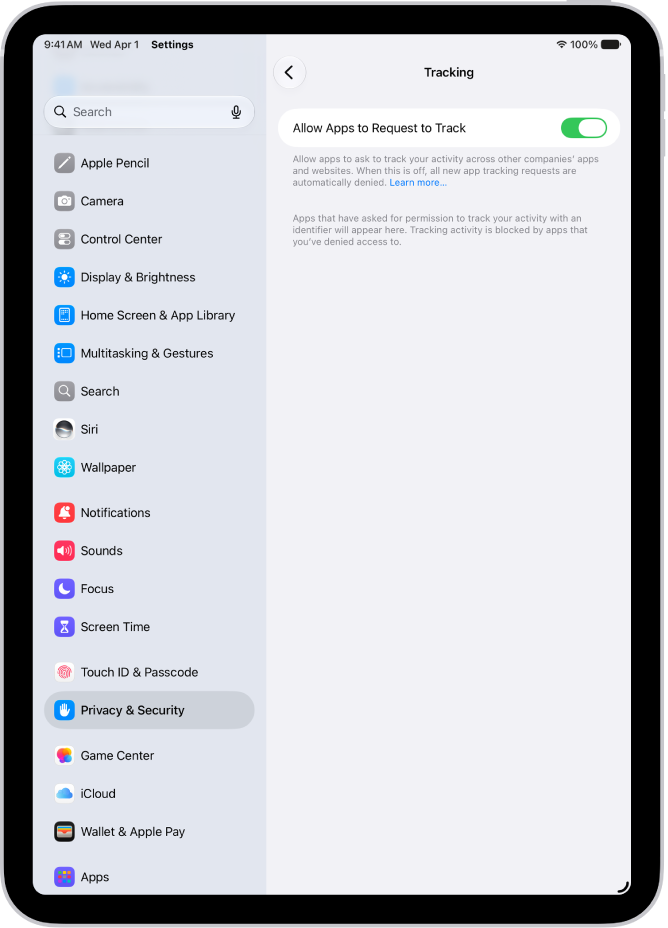
The Tracking screen, with a setting to control whether apps can ask to track you across websites or apps owned by other companies.

Control which apps can track you or your iPad across websites or other apps

Apple says all apps are required to ask your permission before tracking you or your iPad across websites or apps owned by other companies (for example, advertising or to share your information with data brokers). After you grant or deny permission to an app, you can change permission later. You can also stop all apps from requesting permission.

How to allow access to your web activity

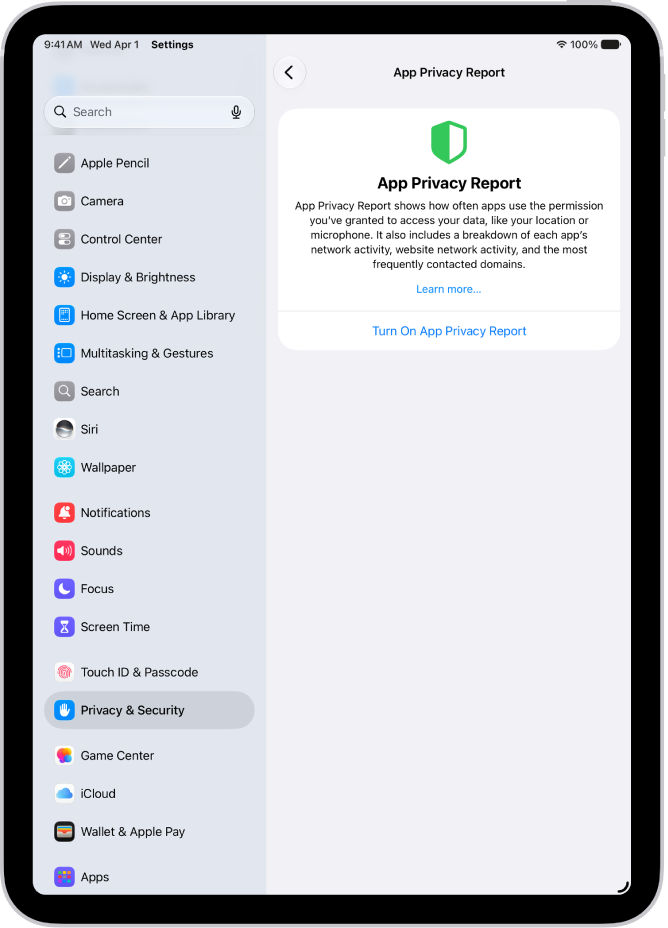
The App Privacy Report screen, where you can turn on a report to show how often apps use the permissions you’ve granted them, along with their network activity.

Review how apps are using the permissions you grant them

You can see how apps are using the permissions you’ve granted them, and their network activity, by reviewing an App Privacy Report.

How to view an app privacy report

Apple Music is an ad-free streaming music service that lets you play millions of songs and your music library. As a subscriber, you can listen any time, online or off, and create your own playlists, stream and download lossless and Dolby Atmos music, get personalized recommendations, follow artists, see music your friends are listening to, and watch exclusive video content.

You can subscribe to Apple Music or to Apple One, which includes Apple Music and other services. New subscribers can start a trial, qualified students can get a discounted student subscription, and you can share Apple Music with up to five other family members.

Note: Apple Music, Apple One, lossless, and Dolby Atmos aren’t available in all countries or regions.

Subscribe to Apple Music

  1. Start the Music app on your iPad.
  2. Follow the onscreen instructions to subscribe to Apple Music.

    If you don’t subscribe to Apple Music when you first open the Music app, you can subscribe later—go to Settings > Apps > Music, then tap Join Apple Music.

A new subscriber can start a trial and cancel at any time. Ending your Apple Music subscription means you can no longer stream Apple Music songs, and Apple Music songs you downloaded won’t play either.

Qualified students can purchase a student subscription at a discounted price.

Share Apple Music with family members

When you subscribe to Apple Music, or to Apple One Family or Apple One Premier, you can use Family Sharing and give up to five other family members access to Apple Music. After your family is set up, they don’t have to lift a finger. Apple Music shows up when they first open the Music app after your subscription begins.

Say you already subscribe and join a family group that’s subscribed to Apple One Premier, Apple One Family, or Apple Music. Your subscription won’t renew on your next billing date, since you’ll be on the group’s subscription. If the family group you join doesn’t subscribe, it uses your subscription.

Note: There are a few ways to stop sharing Apple Music with a family group: cancel the subscription or leave a Family Sharing group, or remove a member from a Family Sharing group.

Change or cancel your Apple Music subscription

You can change or cancel your subscription plan.

  1. Start the Music app on your iPad.
  2. Tap the Show Sidebar button. Then tap your name at the bottom of the sidebar.
  3. Tap Your Name and tap Subscriptions. Then follow the onscreen instructions.

With an Apple Music subscription, the Ambient Music widget can play music from a playlist, too. To add it, see our guide, Add a widget to your Home Screen.

See also

Tag: Music

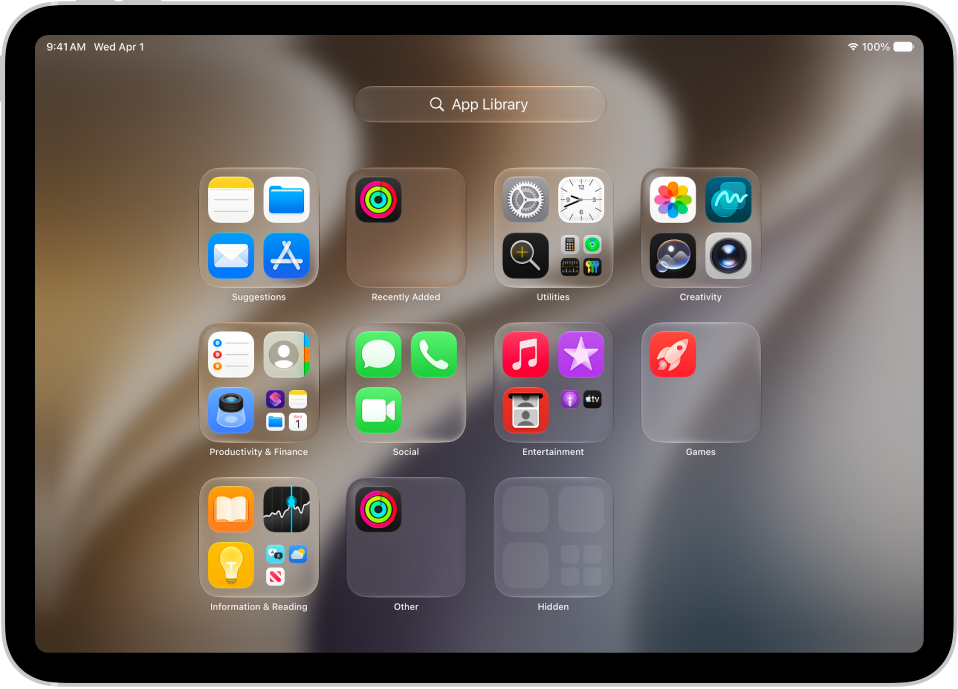
App Library shows your apps—including any you’ve removed from your Home Screen—organized into categories, such as Social, Entertainment, and Productivity & Finance. At the top of the screen, Suggestions shows the apps you use most, and Recently Added shows your newest apps.

App Library is always available, and you can bring it closer by hiding Home Screen pages. You can open it quickly from the Dock, too, or browse an alphabetical list, and easily move an app back to the Home Screen.

App Library on iPad showing the apps organized by category (Entertainment, Productivity & Finance, and so on).

Note: The apps in App Library land in categories intelligently, depending on how you use your apps. And while you can add apps in App Library to your Home Screen, moving one to another App Library category isn’t possible.

Find and open an app in App Library

  1. Go to the Home Screen and swipe left past all your Home Screen pages to get to App Library.

    You can also open App Library quickly by tapping the App Library button, the rightmost button in the Dock at the bottom of the screen.

  2. Tap the search field at the top of the screen. Then enter the name of the app you’re looking for.

    Or scroll to browse the alphabetical list.

  3. To open an app, tap it.

If a category in App Library has a few small app icons, you can tap them to expand the category and see all the apps in it.

Move an app from App Library to the Home Screen

If you moved an app from the Home Screen to App Library, you can easily move it back to the Home Screen.

  1. Go to App Library.
  2. Touch and hold the app until the app icons begin to jiggle and the app moves to the Home Screen and then lift your finger.

Hide and show Home Screen pages

Because you can find all of your apps in App Library, you might not need as many Home Screen pages for apps. You can hide some Home Screen pages, which brings App Library closer to your first Home Screen page. (When you want to see the hidden pages again, you can show them.)

  1. Go to the Home Screen. Then touch and hold the Home Screen wallpaper until the app icons begin to jiggle.
  2. Tap the dots at the bottom of the screen.

    Thumbnail images of your Home Screen pages appear with checkmarks below them.

  3. To hide pages, tap to remove the checkmarks.

    To show hidden pages, tap to add the checkmarks.

  4. Tap the Done button.

With the extra Home Screen pages hidden, you can go from the first page of the Home Screen to App Library (and back) with only one or two swipes.

Note: Apps you download from the App Store while Home Screen pages are hidden may show up in App Library, not on the Home Screen.

Reorder Home Screen pages

Multiple Home Screen pages can be reordered. Gather your favorite apps on one page, for example, and then make that page your first Home Screen page.

  1. Go to the Home Screen. Then touch and hold the Home Screen background until the app icons begin to jiggle.
  2. Tap the dots at the bottom of the screen.

    Thumbnail images of your Home Screen pages appear with checkmarks below them.

  3. To move each Home Screen page, touch and hold it. Drag it to a new position.
  4. Tap the Done button.

Change where new apps get downloaded

You can put new apps you download from the App Store on the Home Screen and in App Library, or in App Library only.

  1. Start the Settings app on your iPad.
  2. Tap Home Screen & App Library.
  3. Choose Add to Home Screen or App Library only.

Note: For app notification badges to show up on apps in App Library, turn on Show in App Library.

See also

In the App Store app, you can discover new apps, featured stories, tips and tricks, in-app events, and offers.

Today shows featured stories, apps, and in-app events, while Games and Apps let you explore new releases and top charts. You can also get information about an app, buy and download it, and share it. You need an internet connection and an Apple Account to use it.

Here’s how to get apps in the App Store on iPad.

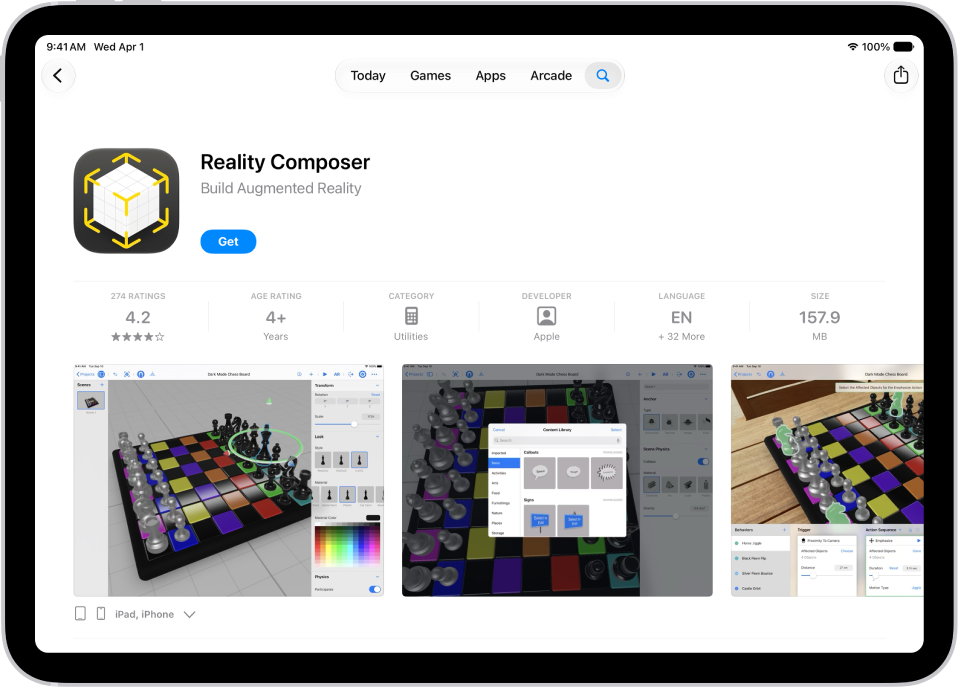
The information page for an app in the App Store. The page shows the Get button, ratings, age ratings, the developer, screenshots, and more. At the top center, from left to right, are the following buttons: Today, Games, Apps, Arcade, and Search.

Note: You need an internet connection and an Apple Account to use the App Store. The availability of the App Store and Apple Arcade varies by country or region.

Discover and find apps

  1. Open the App Store app on your iPad.
  2. Tap any of the following:
    • Today: Browse featured stories, apps, and in-app events.
    • Games: Find your next game across dozens of categories including action, adventure, racing, puzzles, and more.
    • Apps: Explore new releases, see the top charts, or browse by category.
    • Arcade: Enjoy the curated collection of premium games from Apple Arcade (subscription required) without ads or in-app purchases.
    • Search: Tap the Search button, then enter what you’re looking for. You can search by app name, category, developer, and more. You can also explore different categories or browse the suggested apps.

Get information about an app

  1. Open the App Store app on your iPad.
  2. Tap an app’s name or icon to see the following details:
    • Screenshots or previews
    • Ratings and reviews
    • In-app events and offers
    • Developer
    • File size
    • Compatibility with other Apple devices
    • Supported languages
    • Age rating
    • Game Center and Family Sharing support
    • Supported accessibility features
    • Privacy information

Buy and download an app

  1. Open the App Store app on your iPad.
  2. Go to the app you want and tap Get (if the app is free) or the price.

    If you see the Redownload button instead of Get or the price, you’ve already purchased this app before. Tap the Redownload button to download it again for free.

  3. If required, authenticate with Face ID, Touch ID, or your passcode to complete your purchase.

    Purchases are made with the payment method associated with your Apple Account.

The app shows up in the Recently Added category in App Library, and while it’s downloading, its icon displays a progress indicator. For more, see our article, Find and use your apps in App Library, and our guide, Change where new apps get downloaded.

Share and approve purchases with Family Sharing

You can view and download eligible apps other family members purchased if you’re part of a Family Sharing group.

Note: You only see purchases made by family members if they choose to share their purchases. Once a family member leaves the family group, purchases made with Family Sharing may not be accessible.

The family organizer can review and approve eligible purchases made by other family members under a certain age.

See also

You can change the sounds iPad plays when you get a call, message, and alert.

With Silent Mode on, iPad won’t play ringtones, alerts, or system sounds, though alarms, timers, music, and audio from videos still play. You can even change the sounds iPad plays for certain people. And you can change your ringtone, change the sound for alerts and other actions, and set separate volumes for alarms and alerts, which match your ringtone volume by default.

Turn Silent Mode on or off

Silent Mode keeps iPad from playing ringtones, alerts, or system sounds, but alarms, timers, music, and audio from videos still play.

  1. Start the Settings app on your iPad.
  2. Tap Sounds and turn Silent Mode on or off.

You can also open Control Center, then tap the Mute button.

Change ringtone settings

  1. Start the Settings app on your iPad.
  2. Tap Sounds. Do any of the following below Ringtone:
    • Change your ringtone: Tap Ringtone and tap a ringtone to preview it and select it.
    • Adjust ringer volume: Drag the volume slider.
    • Control ringer volume with buttons: Turn Change with Buttons on or off.

You can also change the sounds iPad plays for certain people. Go to the Contacts app, tap a person’s name, tap Edit, then choose a ringtone and text tone.

Change the sound for alerts and other actions

Different sounds can go with calendar alerts, text messages, AirDrop, new mail, sent mail, reminder alerts, and new voicemail.

  1. Start the Settings app on your iPad.
  2. Tap Sounds.
  3. Tap a sound category, such as Text Tone or Calendar Alerts. Tap a sound to select it.

Set separate volumes for alarms and alerts

Your ringtone volume sets the level for alarms, timers, alerts, and system sounds by default. Or set two separate volumes instead, one for alarms and timers and another for alerts and system sounds.

  1. Start the Settings app on your iPad.
  2. Tap Sounds and turn off Match Ringtone Volume under Alarms and Timers or Alerts and System Sounds.
  3. Drag the slider to set the volume.

Change other sound settings

  1. Start the Settings app on your iPad.
  2. Tap Sounds and then do any of the following:
    • Play a click when you type on the keyboard: Turn Keyboard Clicks on or off.
    • Play a sound when you lock iPad: Turn Lock Sound on or off.

See also

When you subscribe to iCloud+, you can use Hide My Email to keep your personal email address private. With Hide My Email, you can generate unique, random email addresses that forward to your personal email account, so you don’t have to share your real email address when filling out forms on the web or signing up for newsletters.

If you don’t like the suggested address, you can get a new one, and you can delete a Hide My Email address at any time.

  1. When you’re asked for your email address on a website, tap the email address field.
  2. Tap Hide My Email above the keyboard.

    The Hide My Email screen suggests a new, randomly generated Hide My Email address.

  3. If you don’t want to use the suggested address, tap the Reload button to see a new suggested address.
  4. Tap Continue.

At any time, you can delete the Hide My Email address; read our guide, Create and manage Hide My Email in Settings.

See also

Tags: iCloud, Safari

Refer to the following resources to get more iPad-related software, service, and support information. They cover the latest information about iPad, getting personalized support, managing your Apple Account, using iCloud, finding your iPad serial number or IMEI, obtaining warranty service, and viewing iPad regulatory information.

To learn about Do this
iPad service and support, tips, forums, and Apple software downloads See the iPad Support website.
The latest information about iPad See the iPad website.
Getting personalized support (not available in all countries or regions) See the Apple Support website.
Managing your Apple Account Sign in to your Apple Account.
Using iCloud See the iCloud User Guide.
Using iTunes for Windows See the iTunes User Guide for Windows.
Manage app billing and subscriptions See the Billing and Subscriptions website.
Finding your iPad serial number or IMEI You can find your iPad serial number or International Mobile Equipment Identity (IMEI) on the iPad packaging. Or, on iPad, go to Settings > General > About.
Obtaining warranty service First follow the advice in this guide, then see the iPad Support website.
Viewing iPad regulatory information On iPad, go to Settings > General > Legal & Regulatory.
Battery service See the Battery Service and Recycling website.
Learn about iPad compliance with power management requirements See the Environmental regulatory information website.
Using iPad in an enterprise environment See the Apple at Work website.
Using iPad in education See the Education website.

By default, iCloud encrypts your information in transit, stores it in an encrypted format, and secures your encryption keys in Apple data centers. Many Apple services also use end-to-end encryption, with keys derived from your devices and your device passcode, which only you know.

With Advanced Data Protection, your protected data can be decrypted only on your trusted devices, protecting your information even in the case of a data breach in the cloud. Not even Apple can access your information.

For the highest level of cloud data security, you can turn on Advanced Data Protection (iPadOS 16.2 or later required). It uses end-to-end encryption on more data categories such as the following:

  • Device backup
  • Messages backup
  • iCloud Drive
  • Notes
  • Photos
  • Reminders
  • Safari bookmarks
  • Siri Shortcuts
  • Voice Memos
  • Wallet passes

Turn on Advanced Data Protection

  1. Open Settings, tap [your name], tap iCloud, and tap Advanced Data Protection.
  2. Tap Turn On Advanced Data Protection.
  3. If you haven’t set up a Recovery Contact or Recovery Key, tap Account Recovery, tap Set Up Account Recovery, and then follow the onscreen instructions.

    WARNING: If you use Advanced Data Protection, you’re responsible for your data recovery. Because Apple won’t have the keys required to recover your data, you’ll need to have a Recovery Contact or Recovery Key set up on your account. You can use these additional recovery methods to regain access to your data if you ever forget your password or lose access to your account.

Should you turn off Advanced Data Protection later, your iCloud data returns to the standard level of security.

Tag: iCloud