Got a tip for us?

Find My

Apple introduced the 1st-generation AirTag in April 2021 and replaced it with the 2nd-generation AirTag in January 2026. (As usual, there’s no numbering system.) The compact device remains priced the same as when introduced: $29 each, or a batch of four for $99. (By not raising the price since then, Apple has effectively dropped the price by 20% due to inflation.)

While Apple stopped selling the 1st-generation AirTag, you can buy them while supplies last from online retailers, which seem to identify them as 1st generation.

Apple has almost entirely abandoned model numbers for their hardware, with the exception of Apple Watch and AirPods—though even with AirPods, they use a generation number within a particular series number! The same is true with AirTags: the original AirTag is the 1st-generation AirTag (2021), and the new one is the 2nd-generation AirTag (2026). In product and sales information, the new model is simply referred to as AirTag.

If you’d like to tell the difference between the two while looking at them, you can examine the reverse. While there’s no version number, Apple printed distinct information on the plastic silver battery cover. Note that the 2nd-generation AirTag uses nearly all uppercase or capital letters, includes the IP67 designation, and omits the “Designed by/Assembled in” details.

There are four technical differences between the two generations:

  • Louder speaker: Apple says that the new model is 50% louder. The frequency of its chime, the sound you can trigger to locate it (see how to play a sound), is also higher-pitched (moving from an F on the chromatic scale to a G). These two changes allow it to be heard from farther away, from the inside of, or underneath things, like inside a piece of luggage or under a pile of clothing.
  • Greater Precision Finding distance: A 2nd-generation ultrawideband (UWB) chip that appears in the iPhone 17 series, the iPhone Air, the Apple Watch Series 11, and the Apple Watch Ultra 3 allows Precision Finding at “from up to 50 percent farther away than the previous generation,” says Apple (see how to use Precision Finding). In practice, this might mean several dozen feet (or 20 to 30 meters) compared to 30 to 50 feet (10 to 15 meters).
  • More powerful Bluetooth: Some features of an AirTag work only within Bluetooth range, such as playing a sound or live finding before Precision Finding kicks in, if available. The 2nd-generation AirTag has a newer Bluetooth chip that expands its range as well as allowing greater penetration through objects. Apple gives no guidance on distance, but if you could previously reach an AirTag over 150 feet (46 m), conceivably that could now be as much as 300 feet (91 m).

Bluetooth is also used to broadcast an encrypted transmission as part of the Find My network, and could improve tracking as the signal could reach more devices.

  • A lack of backwards compatibility: The new AirTag requires iOS 26.2.1/iPadOS 26.2.1 or later to pair with an iPhone or iPad. Once activated, iOS 26, iPadOS 26, macOS 26, or watchOS 26 or later is required to track the items—maybe even the 26.2.1 release of each of those operating systems, but Apple has conflicting information. This means people using older versions of these operating systems will be unable to track an AirTag. If you have mixed generations of gear or have opted not to install some of the version 26 or 27 releases, you might see 1st-generation AirTags on some devices and 2nd-generation AirTags on others.

For most of the purposes of the rest of this book, you can consider a 1st- and 2nd-generation AirTag as interchangeable. I call out differences only where they exist.

What is inside an AirTag

An AirTag uses three different pieces of wireless technology, somewhat shocking for such a small piece of equipment:

  • Near-field communications (NFC): NFC allows a device to read information from an item held very near or literally tapped against the device. NFC is used to identify an AirTag: the NFC tag can be read by any smartphone with NFC technology, and triggers the display of a webpage link connected to that AirTag.

Every Apple Find My item has a unique serial number. The webpage retrieved via an NFC tap is associated with that serial number. You also can open that webpage from a link transmitted via Bluetooth after being warned that an Apple or Google item is moving with you.

The page shows the serial number and a portion of the person’s phone number registered to their Apple Account or Google Account. For more, see how Apple and Google detect an unwanted AirTag. Starting in iOS 18.2/iPadOS 18.2 and macOS 15.2 Sequoia, you can also opt to create a secure tracking link you can share with anyone that also includes email address or phone number in full. See what someone sees when they find your lost device.

  • Ultra-wideband (UWB): UWB is a low-power, broad-spectrum wireless technology introduced by Apple in the iPhone 11 series and Apple Watch Series 6 and later, and, for audio, starting with the charging case of the AirPods Pro (2nd generation). With the right model of iPhone or Apple Watch, you can pinpoint an AirTag or an enabled charging case with Precision Finding, which provides ranging distance and direction. Which models depend on your generation of AirTag; see how to use Precision Finding.
  • Bluetooth LE: A low-power version of the short-range Bluetooth standard lets AirTags announce themselves to a nearby paired iPhone or iPad and to devices that are part of the Find My network. The 2nd-generation AirTag has a more powerful Bluetooth radio.

Apple does occasionally update the AirTag firmware. However, there’s nothing you can do to force that. With whatever logic the company uses, it sends the firmware update out over Bluetooth when it detects AirTags paired with your devices that are out of date.

Size, battery and price

Apple powers the AirTag with a replaceable battery that should last a year. Both generations of AirTag are identical in dimensions and weight: 1.26 inches (32 mm) in diameter, 0.31 inches (8 mm) thick at their widest point, and 0.39 ounces (11 g).

You can personalize your order when ordering directly from Apple by adding an emoji or a few numbers or letters. You might think the emoji or text is a gimmick. But if you buy several AirTags, it can help you distinguish among them. Bonus: When you pair an AirTag, Apple shows you the emoji or text that’s printed on the item in the pairing screen! Nifty.

Tags: Find My, iOS

To view your device’s location, those of people in a Family Sharing group, or your items, use the Find My app on an iPhone, iPad, Mac, or Apple Watch, or the Find Devices app in watchOS 26 or earlier or on iCloud.com. By activating Find My, you’re signed in to the app on all those operating systems and on iCloud.com. Each view in the iPhone, iPad, and Mac Find My app provides access to a different category of location-finding.

The map in each view includes typical actions, such as zooming in and out, switching to satellite view, and switching to 2D view. The icons, such as the Choose Map and 3D view buttons, appear the same as in Apple Maps.

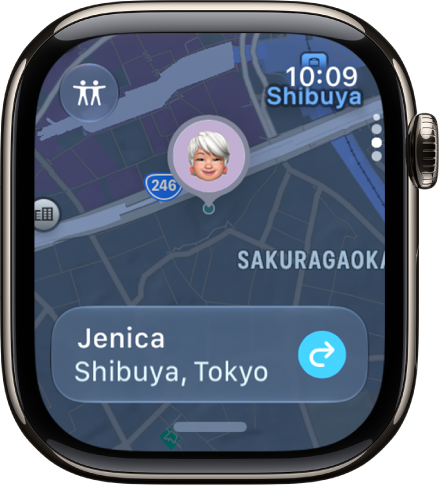
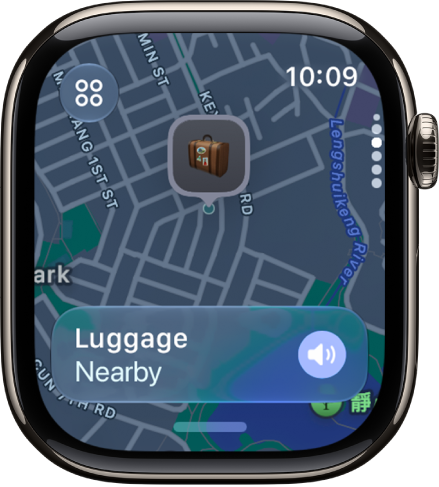
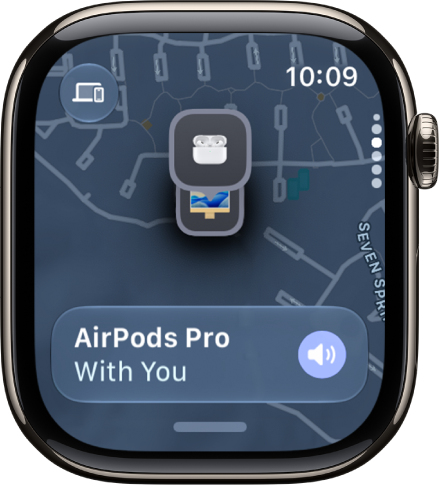
Those Find My views are separate apps on an Apple Watch running watchOS 26 or earlier: Find People, Find Devices, and Find Items. If I mention a view, find the app in watchOS 26 or use Find My in watchOS 27.

You can add a Find My widget to the Home screen or Notifications Center to see people and devices without opening the app.

The three status labels

For each category—People, Devices, and Items—Find My shows the last time a location was updated in the list: to the right of the item on an iPhone/iPad and under the item on a Mac, Apple Watch, and (for devices) on iCloud.com. It also displays this information in the detail view for the selected item.

Here’s what the status messages mean:

  • Live: Devices can provide a continuous stream of location information in the right circumstances. You can watch someone walk down a street or see their train move across the landscape. (Frankly, a little creepy, even though it’s done with permission?)
  • Now: If live updates aren’t possible due to battery, location, connectivity, or operating system version, Now is the second-best. It indicates an update within the last minute.
  • Time duration: Find My shows X minutes ago or a specific date and time for the last location update.

Selecting an entry

Starting with the version 27 releases, you select an entry by tapping or clicking it. This reveals slightly more information, such as a Directions button or a Play button to play a sound. Tap or click the More button to reveal the sheet of actions for that category.

Before the version 27 releases, Apple had two distinct methods for selecting an item from the people, devices, or items list: one for the Find My apps on iPhone, iPad, and Apple Watch; another for the Mac Find My app.

In iOS 26, iPadOS 26, and watchOS 26 and earlier, tapping an entry selects it and causes its sheet to appear. In macOS 26 and earlier, click the item, then click the Info button to reveal the sheet. macOS 26 and earlier also let you Control-click/right-click an entry to reveal several menu items; macOS 27 limits these to just Remove and, for People, Add to Favorites or Remove from Favorites.

What iCloud.com cannot do

You can’t track people or items on iCloud.com, only devices (via the Find My link, which takes you to the Find Devices app). However, iCloud.com’s Find Devices web app is useful for one purpose: when a device is missing or stolen, and the person whose device it is lacks access to Find My on any of their devices. See how to find a lost iPhone or Mac.

What if you’ve lost your Apple hardware and it’s in a place where it can’t reach a Wi-Fi network and either has no active cellular data plan or can’t reach a cellular base station? What if it’s stolen, and the thief has disabled network access through Control Center? What if you stuck an AirTag or other Find My item on your backpack and left it where you can’t remember—or it was taken from you at an unknown time?

Apple’s solution is anonymity-preserving crowdsourcing that relies on the billion active devices their customers use worldwide, running recent-enough versions of iOS, iPadOS, and macOS to participate. The system relies on devices that can’t connect with the internet or a paired device to begin transmitting an anonymized, encrypted Bluetooth network signal that other Apple hardware can pick up.

A user's iPhone 17 Pro shows a screen that reads

Find My crowdsourcing causes every supporting device or item to emit a Bluetooth beacon that incorporates an encrypted hardware identifier.

This ID changes at regular intervals to prevent the privacy or safety nightmare of a third party tracking you, your devices, or your items through a persistent ID. Even Apple doesn’t really know where your devices and items are when using crowdsourcing!

When a device or item sends this beacon varies between Apple devices and Find My items:

  • iPhone, iPad, Mac, or Apple Watch: Find My must be enabled on the device (including the Find My network option), and it must be unable to make a connection to the internet.
  • AirTags and other Find My items as well as Apple and Beats audio hardware: If the audio hardware is within Bluetooth range of its paired device, it acts like a device, relaying its location through it. When beyond that range, it broadcasts a Bluetooth beacon as if it were a Find My item.

While 2nd-generation AirTags have minimum operating system requirements to appear in Find My apps, there is no such issue for the Bluetooth signals they broadcast. Any device that can relay a 1st-generation AirTag’s location can relay that of a 2nd-generation AirTag. (See AirTag 2 vs AirTag.)

The original AirPods rely solely on Bluetooth-based location tracking. When within Bluetooth range, they appear in the Find My app under Devices. However, they don’t work with the crowdsourced network. You can’t mark those audio devices as lost, and you can find those devices only within range of their paired iPhone or iPad.

What Apple can and cannot see

This broadcast is recognized by anyone’s iPhone, iPad, or Mac running at least iOS 13/iPadOS 13 or macOS 10.15. If a device owned by another person has an internet connection, it encrypts a package containing the beacon’s name and location information obtained or inferred, and uploads it to Apple.

That information is stored in a very particular way:

  • Apple doesn’t track what IP address or device uploaded it.
  • Apple doesn’t know to which device or Find My item any Bluetooth ID is associated—only your hardware retains that.
  • Apple doesn’t have encryption keys to extract location information.

It’s a beautiful system, in that no one—not Apple, the other equipment’s owner, or anyone sniffing in the area near your device—can determine who the hardware belongs to.

In the right circumstances using an iPhone, iPad, or Mac native version of the Find My app (see Precision Finding), you trigger retrieval of this location and timestamped location:

  • The Find My app uploads a cryptographic secret that Apple can match against the encrypted bundles they have of Bluetooth ID and location.
  • Apple’s servers transmit matching entries to the requesting device.
  • Using a locally stored encryption key that only your devices possess, the bundles are unlocked to determine the last location found.

What you get back

Find My provides this information in two different ways depending on the hardware you’re using:

  • iPhone, iPad, Mac, or Apple Watch plus audio hardware: The current location appears as expected in the Devices view of a native Find My app. If the device has an internet connection (direct or via a paired device for audio hardware), its location is a directly provided one; if it’s not connected to the internet, the Find My location appears when you use a Find My app.
  • AirTags and other items: The current or last-tracked location of a Find My network item, whether from a paired device or anyone else’s Apple device, is always shown in the Items view of the Find My or Find Items app. If you mark these devices as lost, you have more options: see what someone sees when they find your lost device.

In contrast to the Find My Device service, the Find My network is almost entirely one-way: you can determine where something is, but an owner can’t send a signal to the device unless it’s within Bluetooth range of an owner’s device. It also can’t be locked or erased as with internet-based Find My actions; See how to play a sound on a lost device or AirTag.

There are two actions you can perform as the owner of a Find My item:

  • When marking an item as lost, you can provide a phone number that Apple also stores securely. Someone finding the item can retrieve that data from Apple.
  • When you are near enough to connect to an item from one of your devices via Bluetooth, you can play a sound on it. This is particularly useful for finding a lost item in a classroom, home, or car, or for being notified of one nearby.

If someone’s iPhone or iPad detects that a Find My item or a Google Find Hub item is moving along with them—determined by Bluetooth proximity and across time—they are offered the opportunity to play a sound. That signal is sent via Bluetooth. (The same is true for an Android device detecting an Apple Find My item.) See what an “AirTag Found Moving With You” alert means.

Apple Designed the Find My Network To Deter Stalking

You might conclude that the design of the AirTag and other Find My items is both great for finding your own lost or stolen stuff—and a way someone might deploy tracking against you.

Fortunately, Apple included design elements in their Find My network for AirTags and third-party gear to try to protect the privacy of those who might be under observation without their knowledge, or who wind up accidentally transporting them. I dig into this in depth in Understand Stalking via Tracking.

Industry-Wide Anti-Stalking Standard Launched

Apple developed their system independently, though it offers a license and access to third parties. Facing criticism from a range of politicians and groups about stalking by tracker, Apple and Google—joined by several smaller firms—released a plan for interoperable industry support for identifying trackers across networks that went into effect in operating system and item updates in 2024. For more, see Active Stalking and an Industry Alliance.

You can also enable separation alerts. This feature notices when any Find My device or item is no longer in proximity to your iPhone or iPad. This might happen if you leave an iPhone in a coffee shop or it slips out of your pocket in a movie theater or you forget you put your iPad in an airplane seat’s unhygienic publication pocket. I explain separation alert management in Notifications for Devices and Items.

Google’s Find Hub offers a competing, non-interoperating ecosystem. Apple and Google don’t share location data with each other’s networks. But Android phones, iPhones, and iPads detect unwanted trackers across both ecosystems. See how to check whether someone is tracking you.

Activation Lock is an Apple feature designed to deter theft by preventing erasing and re-using an iPhone, iPad, Mac, or Apple Watch that has Find My enabled. While someone can still erase a device with Find My turned on, they are unable to activate and use the iPhone or iPad without having the Apple Account password for the account with which the device was used. Thieves have some hardware tricks to bypass this, unfortunately, but they don’t always work.

A device with Activation Lock active can still be tracked via Find My even after it’s been erased! And Apple will display a screen to any potential buyer or other user that the device is locked, deterring thefts and duped buyers.

Activation Lock was first released in 2015, and works with the iPhone 5s and later and iPad Air and later. An Apple Watch needs to run watchOS 2 or later. Macs models that support Activation Lock must either have a T2 Security Chip (Intel) or use an Apple silicon processor; in either case, macOS 10.15 Catalina or later must also be installed.

Even AirTags have a sort of Activation Lock—the Find My Lock—which is covered in how to reset an AirTag.

To avoid this when selling an iPhone (or associated Apple Watch), iPad, or Mac, disable Find My before erasing, which requires entering the associated iCloud account’s password. (Apple prompts you to disable Find My before letting you erase your device.) You can also disable it via iCloud.com after a device is out of your hands. Once you disable Find My, tracking is off.

If you haven’t disabled Find My on a device and you lose access to your Apple Account, the device remains permanently locked as well.

When purchasing any used Apple hardware, ensure that Activation Lock was disabled before you pay!

Remove a device from your account

You might see devices in this list that you or your family member no longer possess or that no longer work. You can remove these items from your Apple Account in any of several places. This removal also disables Find My on the device if it’s connected to the internet or the next time it connects.

Starting with the version 27 releases, use your iPhone, iPad, or Mac if you want to remove a device. (Previously, Find My was the better place to start.) Go to System Setting/Settings > Account Name, then scroll to the bottom. You then tap or click Remove from Account. You’re prompted with an improved warning in the version 27 releases:

  • In any version 27 operating system, Apple asks “Still Have This Device?” and defaults to a big blue OK button. To further discourage you, the dialog explains you should go to the device and sign out directly. Otherwise, tap or click Start Removal.
  • In the version 26 releases and earlier, you’re given a briefing on what happens if you remove the device. Tap or click Remove to proceed.

Apple once warned you that “This Mac will reappear if it connects to the Internet and Find My is turned on.” That warning was clearly inadequate about the consequences!

Some devices may offer a removal button in the Find My app on an iPhone, iPad, or Mac. The Find My app appears to be the only way to remove your AirPods from an Apple Account. However, in both the version 26 and 27 releases, I found it inconsistent and confusing why I was sometimes given a Remove from Account or Remove button, and at other times it was dimmed or resulted in an error message.

For instance, I can’t remove my iPhone, even though I’m offered a button to do so. (This may be connected with Stolen Device Protection, but it’s not described that way.) The Find Devices web app on iCloud.com only shows Erase, not Remove, for all devices except my iPhone, and it produced the same error.

Nonetheless, if you’re in a Family Sharing group, you can remove people’s devices from their accounts via an iPhone, iPad, or Mac Find My app or Find Devices at iCloud.com. (Or remove your device from your account.) The Apple Account password for the device is required, and a second factor may also be requested.

The Apple Account website used to let you remove devices, but now it shows the same error in every case.

AppleCare+ needs Find My switched on first

Apple offers an extended warranty against loss and theft for iPhone, iPad, and Apple Watch owners in several countries: “AppleCare+ with Theft and Loss”; in some countries, it’s the only option for these devices. An iPhone plan is $9.99 per month. In the United States, you can also enroll multiple devices with AppleCare One, and any iPhone, iPad, or Apple Watch on that plan receives theft and loss coverage. These plans start at $19.99 per month for up to three devices with no yearly discount.

This theft and loss warranty covers hardware faults at no cost and breakage for a modest fee. In the United States, it’s $29 to fix an iPhone’s screen or back glass, and $99 for other damage.

For loss or theft of these covered models, you pay a bit more, like $149 for an iPhone or $129 for an iPad. They will even ship you a replacement phone if you’re outside your own country and in a covered country! (You can get replacements only twice in any 12-month period.)

However, there are two key requirements. First, Find My Device must be enabled before a loss or theft occurs. Second, your device must remain associated with your Apple Account until a customer service representative tells you to remove it.

When you call AppleCare customer service to report the loss or theft, a representative guides you through erasing your device via Find My (see how to erase a lost iPhone or Mac remotely), disabling it remotely (Apple doesn’t explain what this means), and then “transferring ownership” to ensure no one can reclaim a “lost” phone later. Read the fine print if you sign up for this warranty option.

Apple expects an AirTag’s battery to work for more than a year. In my experience, it’s somewhere between 6 and 12 months.

Apple once published that 6 to 12 month range. Now, I can’t find it mentioned on their site at all.

To replace the battery, open the case, swap the cell, and close it again:

  1. Remove the back cover: Holding the glossy white front, push down to twist the metal back panel counter-clockwise. It only needs to move a small distance before the cover pops off.
  2. Remove the battery: Inside, you’ll see its small coin cell battery. Remove the battery, making note of the right side up: the + sign on the battery will always face you.
  3. Insert the new battery: Put the new cell in with the + sign up, facing you.
  4. Reattach back cover: Now you can look at the cover to see the extended tabs and align those with the hole in the top. Press in and then rotate the cover clockwise against its top until it’s firmly in place.

The small size of the AirTag, its cover, and the battery within are all choking hazards for small children or pets. If you have either or have visitors with them, keep track of loose AirTags or parts.

Many CR2032 lithium batteries are now sold with a “bitterant-coating”—a coating that makes it bitter to the taste—designed to deter a child who gets one in their mouth from swallowing it. They should spit it out instead. (The same danger is present for pets, though the coating may not fully deter animals from swallowing.)

Apple recommends using a battery with such a coating, and particularly notes that the “Duracell 2032 Lithium Coin Battery with Bitter Coating” works with an AirTag. Manufacturers all use different coating methods, so it’s possible you will buy a battery that will not correctly power an AirTag. I’d recommend buying one or a small package first before making a bulk buy.

The U.S. Consumer Product Safety Commission issued a “Notice of Violation” to Apple in January 2025, because their AirTag and packaging failed to include necessary child-protection warnings required by the March 19, 2024, Reese’s Law, named for a child who died after swallowing a coin-cell. Apple updated their packaging since. The company also provides safety information when the Find My app recognizes a battery reaching the end of its life.

If you are resetting an AirTag rather than changing its battery, the sequence is different. The folks at Elevation Lab have created many kinds of AirTag cases, but perhaps their two most striking are the extended battery models, which come in 5- and 10-year versions. The duration depends on two long-life lithium batteries: AAA for 5 years and AA for 10 years. The rugged case is secured with a screw with a difficult-to-find drive head. The company designed it to be installed in hard-to-reach places to provide maximum protection for an estimated 5 or 10 years.

You can track down your AirPods, AirPods Pro, AirPods Max, and Beats audio devices nearly as easily as other hardware. Here’s a rundown on what makes audio devices different than an iPhone, iPad, Mac, or Apple Watch.

Each earbud is tracked separately

AirPods (3rd generation), AirPods 4 with Active Noise Cancellation, and AirPods Pro (any generation) can be tracked by their left and right earbud. If your earbuds are separated, after a short while, they appear as Left and Right entries in Find My. While you can use Find My on any device to search for them, I found the Mac’s display almost useless; use an iPhone if you can. After selecting the case or left or right earbud, tap Find.

Apple doesn’t provide Precision Finding, but uses relative signal strength to help you get close. You can play a sound on each individually, too, which lets you act like a bat and try to echolocate while using the proximity finder.

Which AirPods can be found how

Audio hardware is all located in the Devices tab or in a Find Devices app. Here’s what and when you’ll view and be able to select:

  • AirPods (1st and 2nd generation) offer only in-range Bluetooth tracking with a paired device.
  • AirPods (3rd generation), AirPods 4 with Active Noise Cancellation, AirPods Pro (all generations), and AirPods Max offer Bluetooth tracking.
  • Several Beats models track via Bluetooth and the Find My network.

Which Beats devices support Find My network? Beats Studio Buds, Beats Flex, Powerbeats, Powerbeats Pro, and Solo Pro.

You can carry out just two actions for all audio devices:

AirPods (3rd generation), AirPods 4 with Active Noise Cancellation, AirPods Pro, and AirPods Max also offer:

Audio devices that can’t be found except within Bluetooth range show just Play Sound and Directions.

Find your lost AirPods with Find My

  1. Open the Find My app on your iPhone.
  2. Tap Devices, then choose your AirPods. If your AirPods are out of the case, you might have to pick the left bud or right bud. With AirPods 4 (ANC) or AirPods Pro 2 and later, you can also separately mark each of your AirPods and the case as lost, in the event that you lose just one or your AirPods are separated from the case.

If your AirPods are separated, choose which bud that you want to find.
3. Find your AirPods on the map.

When your AirPods are nearby, tap Play Sound and listen for the series of beeps.

  • If they aren’t near you, tap Get Directions to open their location in Maps.
  • If you’re nearby, tap Play Sound and listen for the series of beeps.
  • Depending on your AirPods or iPhone model, you might also see an option to Find Nearby. Tap it, wait for your AirPods to connect to your iPhone, then follow the prompts to find your AirPods.

If you don’t have an iPhone or other Apple device to use Find My, you can also find your AirPods at iCloud.com/find — but the experience might be different and some functionality might not be available.

If your AirPods are “Offline” or show “No location found”

  • If your AirPods are out of range or need to charge, you might see their last known location. You might also see “Offline” or “No location found.”
  • You might be able to get directions to their last known location — but you won’t be able to play a sound or use Find Nearby.
  • If they come back online, you get a notification on your iPhone (or other Apple device that you use them with).

If you can’t find your AirPods

  1. Launch the Find My app, then choose your AirPods and swipe up.
  2. Under Lost [device], tap Lost Mode or Show Contact Info.
  3. Follow the onscreen steps to display your contact information. This allows someone to contact you if they find your AirPods.

Be ready next time with the Find My network and Notify When Left Behind

Want to help make sure that you find your AirPods next time?

  • The Find My network is an encrypted, anonymous network of hundreds of millions of Apple devices that can help you find your AirPods, even if they’re offline. Nearby devices securely send the location of your missing AirPods to iCloud, so that you can find where they are. It’s all anonymous and encrypted to protect everyone’s privacy. To make sure it’s turned on: On iPhone, open the Settings app, then tap Bluetooth. Tap the More Info buttonNo alt supplied for Imagenext to your AirPods, then scroll down to Find My network and make sure that it’s turned on.
  • With Notify When Left Behind, your iPhone or Apple Watch can alert you when you leave your supported AirPods at an unknown location.

Turn on Notify When Left Behind to get notifications if you leave your AirPods behind

If you still can’t find your AirPods, you can buy a replacement.

The Find My network might be unavailable in some countries and regions due to local laws.

It’s easy to see how Find My could be abused by someone trying to track a person surreptitiously. Someone with access or given too much trust can track a person or, via Family Sharing, track their devices. With Find My items, it can be even more insidious, although Apple built anti-tracking features into that network that they continue to evolve, including in cooperation with other tech companies.

There are three scenarios: tracking a person, tracking their devices, and tracking through a Find My item.

Someone following your location

Apple tries to balance safeguards against unwanted tracking with the utility that ostensibly most people use a feature for. When tracking people with Find My, Apple requires a transparent, consent-driven process when a person shares their location on an ongoing basis with someone else. (See how to get Find My alerts when someone arrives or leaves.) But even after someone has granted permission to be digitally followed, Apple requires more consent if their Find My follower wants to receive location-based notifications about when they arrive at, leave, or aren’t at a location.

Find My uses the People view to list all the people you follow or who are following you. While that seems like great disclosure and an easy way to control location tracking, it doesn’t address a few situations:

  • A non-savvy iPhone or other Apple device user could have people added to Find My without realizing it. This might be a stalker who somehow gains brief access to equipment or an untrustworthy partner. They might create a pseudonymous account that takes the name of someone you trust. Once set up, Find My doesn’t provide additional, ongoing information about person-based tracking. This contrasts with on-device location tracking on an iPhone or iPad, where you’re regularly asked whether you want to continue sharing your location with an app.
  • A domestic abuser, problematic ex-partner, or abusive parent who demands access to personal devices could add themselves to Find My tracking and require—under threat of violence—that you keep it in place. The new Hide Location option in Find My in the version 27 operating system releases offers what might be a safer alternative: you can pause tracking and resume it at will or early the next day. The other person sees only “No location found,” while you’ve paused sending your location. They’re not informed when you pause or resume. Of course, a truly dominating person may be constantly checking, and be provoked if your location disappears, too. (See how to stop or pause sharing your location.)

There is, of course, a completely valid case for parents wanting to track their children at any age while they are minors and living under their strictures, however lax or tight—but that’s a separate matter from a parent or guardian who uses that information not for safety or conforming to promises or rules, but instead as an excuse for abuse and control of the child.

If you’re in the first group or know someone who is, ensure you or they have strong device protection and potentially check Find My from time to time to make sure only names appear they know about.

See how to stop or pause sharing your location for how to stop sharing with people you don’t want to.

When a person who follows you sets up a notification to alert them about your movements, they first have to pass through a dialog that explains you will be informed of this attempt. This is partly a deterrent. Someone who sees it and does not want you to know should think twice.

If you’re the subject of such a notification, like someone setting up an alert when you leave your place of work, you see an alert on your iPhone. A similar notification appears if you have the Find My app open.

Pay attention to these notifications, as they’re the primary way you’re informed.

Someone following your devices

It’s harder to track people via Find My Device than either through their presence in People or an item as noted next. That’s because devices only appear in Find My in stricter circumstances and have more constraints:

  • Only an iPhone, iPad, iPod touch, Mac, or Apple Watch can be tracked as a device: While I’ve read about people setting up an iPhone and attaching it to a car, keeping it charged over time would be a poser, though I guess they could plug it into a charging port or tap into a port within the car body. There are much less expensive GPS trackers that last far longer, and Find My network items like AirTags that have extremely long tracking lives.

Someone could track Apple and Beats audio hardware that shows their location via a paired device or the Find My network, but this category of hardware has short battery life and short range compared to GPS-based trackers with Apple devices for relaying at short ranges.

  • You must be signed in on a device or iCloud.com with an Apple Account: With the additional validation step of two-factor authentication enabled on nearly all Apple Accounts, it’s far more difficult to manage to sign in to someone else’s account.
  • Only your own and Family Sharing devices appear: You can’t add arbitrary devices, as they have to be registered to your Apple Account or, with a Family Sharing group, someone else in that group. While Find My trackers are similarly locked, they have the advantage of battery life and size.

The only warning here? Check to make sure that no odd devices appear in your list of devices, and heed any warnings about devices being added to your account.

Unwanted tracking by a hidden AirTag

Find My items use little power, don’t require a clear path to a satellite navigation network or cellular network, and are tiny. They can easily be hidden, and could track someone across a long period. (Apple applies the same rules to third-party devices as their own.)

The same things that make it possible for someone to be alerted when they accidentally have something with an AirTag or other item in or attached to it—or they stole it!—also may help prevent people from being tracked by stalkers, domestic partners, private detectives, and celebrity hunters, among other categories.

Here’s how to extract information about unknown trackers:

  • Traveling with you: An item traveling with you results in an alert described in what an “AirTag Found Moving With You” alert means. You can then pause that device’s capability to track you or find the item and disable it. (See how to reset an AirTag.)
  • Identify Found Item feature: With an iPhone or iPad, you can use the Find My app’s Identify Found Item link in the Items view. See how to identify an AirTag you have found.
  • Interoperability: With an Android 6 or later device with an update from mid-2024 installed, the device’s owner will receive “moving with you” alerts from any Apple Find My network items; see how to identify an AirTag you have found. Likewise, an iPhone or iPad user with iOS 17.5/iPadOS 17.5 or later installed receives alerts about Google Find Hub network trackers moving with them. See how Apple and Google detect an unwanted AirTag.
  • No Apple hardware: If you don’t have an iPhone, iPad, or Mac with you (or there’s no active network), other devices you may be carrying won’t relay the item and enable tracking. Likewise, even though you can detect unwanted Google trackers, they aren’t relayed through your Apple devices. That sounds like a solution, but if you live in or travel through anywhere other people’s Apple hardware is close enough, those devices will upload tracking updates. That includes driving on a highway or riding public transportation.
  • Separated device alert: If the Find My item’s location is being relayed by other devices around you, however, it will make a sound in the right circumstances if it’s moved between 8 and 24 hours since it last checked in with its paired device to alert you to its presence. See what an “AirTag Found Moving With You” alert means.

Apple once promised an update that would alert you when a separated device is nearby on an iPhone or iPad, with an option to play the sound again or use Precision Finding. That apparently never rolled out.

Apple adding location sharing to Find My items might make it easier for someone to track you without alerts. Someone could place a Find My item in your stuff or a vehicle, then share the item with you and accept the invitation on any of your devices to which they had access when unlocked or if they knew how to unlock it; or they could share one of your items with themselves without you knowing.

However, this is a two-way street: all shared devices appear in your Items tab. If you suspect a shared item, check the Items tab for ones you’ve shared or shared with you that you don’t recognize.

Where to get help

There are many organizations beyond law enforcement eager to help people trapped in situations of domestic abuse or child subject to violence and an unsafe environment. For adults in the United States, that includes the National Domestic Violence Hotline; for children or those concerned about their welfare in the United States and Canada, the Childhelp National Child Abuse Hotline.

For those being stalked, one starting point is Safehope. It’s more likely you will need the help of police or federal authorities. Local police departments have their own paths to navigate, but for online or cyber stalking, it may be better to start with the FBI.

If the person you are worried about may be watching your device, use one they cannot see. Removing a tracker or turning off sharing can be noticed, and advocates warn that it can make a situation worse rather than better, so it is worth talking to someone before you act.

Find My items lack an interface: they’re a one-way conduit of information. The owner of an item can see it displayed on a map, with details updated whenever qualifying Apple devices are nearby and relay the Bluetooth beacons.

A user's iPhone 17 Pro shows an alert that reads,

While a 2nd-generation AirTag has minimum requirements for pairing and tracking via the Find My apps, the new model still reveals information to people using devices that aren’t paired with it. This is part of both helping people find lost objects and Apple’s strategy to deter and detect unwanted tracking.

However, when someone finds one, whether marked lost or not — see what someone sees when they find your lost device — their interaction is limited.

If a device paired with a Find My item is near it, like an iPhone, an AirTag, or other item, it won’t appear to other devices when using a Find My app. This makes sense: if the owner and the paired device are in proximity, it’s not considered lost or tracking you separately. Any AirTag you have shared access to also won’t show up.

Here’s how you can obtain information about an AirTag you’ve found and have in hand, or if you’re trying to find if there’s an AirTag nearby.

Tap an AirTag against a phone

Hold the white side of the device close to an NFC-capable iPhone, iPad, Android, or other device that knows how to read NFC information. That should result in a message appearing that has a link embedded.

Following the link takes the finder to a webpage associated with the AirTag’s serial number. If the item was marked as lost, then the owner’s phone number or email address appears there.

If an item was not marked as lost, the information page shows a “masked” phone number, the last four digits of the phone number connected with the paired Apple Account for the item. This appears to be related to reducing potential abuse; see how Apple and Google detect an unwanted AirTag.

Identify a third-party tracker

With all other Find My items:

  1. Launch Find My, tap the Items button, swipe down, and tap Identify Found Item.
  2. Your iPhone or iPad will list any Find My item nearby that’s out of Bluetooth range of its paired device. Tap the item and tap Continue.
  3. Apple provides information and instructions on how to proceed. For instance, with a Chipolo ONE Spot, you will be told you have to press the button in the item’s middle to retrieve information.
  4. Click Continue on Website to see the tracker’s associated details.

If the tracker is not an Apple Find My item but one that works on Google’s Find My Device network, there’s no way to trigger information about it appearing on your iPhone or iPad. However, because your iPhone or iPad will notice a device that’s not yours that’s following you, you will eventually receive an alert and can tap that to obtain more information as above. See what an “AirTag Found Moving With You” alert means.

If you have an Android phone

With Android 6 or later and an update released in 2024 by Google, you’ll be alerted to any devices moving with you without your knowledge. See how Apple and Google detect an unwanted AirTag.

If you have an Android 9 or later device, find an AirTag, and lack NFC or find any Find My item, you can install Apple’s Tracker Detect, an Android app that performs an active scan for Find My items in the vicinity similar to Identify Found Item in the native Find My apps.

Apple didn’t update the app between February 2022 and December 2025. Reviews are extremely poor, although some people think the app offers Find My features rather than generically revealing nearby Find My items. The adoption of built-in alerts for Android releases dating back several previous releases replaces its purpose.

Find the serial number

If you want to find and potentially make a record of the serial number of a Find My item, select it in the Find My app. On a Mac, also click the Info button next to its name. Now tap or click the label for the last-seen time (like Now or a date and time), and Find My toggles to show its serial number and firmware revision. For third-party Find My items, swipe down to see the serial numbers, as well as the maker, model, and firmware release.

Most advice covers how you manage your own equipment. It’s incredibly useful to know how other people interact with your stuff when it’s lost or stolen and they find it. This lets you understand how someone might reply to you—by calling, emailing, or posting a note in a neighborhood forum—and what they would see that led them to it.

What a finder sees on an iPhone or Mac

Once the action is sent to an iPhone, iPad, iPod touch, or Apple Watch:

  • If the device is connected to the internet and asleep, the next time it’s woken, a passcode must be entered to gain access.
  • If the device is online and in use, the operating system drops the user into the Lock screen where the passcode-entry dialog or keypad is shown along with any message or phone number that was entered when setting up Lost Mode.
  • If the device is offline, the next time it accesses any network with an internet connection, the passcode lock is put into place.

After a restart, or when the device is powered up after being shut down, your phone number or email address appears on the screen if you provided it, along with the preset message Apple showed during the lock process.

What a finder sees with an AirTag

Because Find My items lack screens, someone finding one that is not marked as lost can bring up certain information from it as described in how to identify an AirTag you have found. However, if you have marked your item lost, by enabling Share Contact Information, a person finding it can see the phone number or email address you entered when activating that mode.

If you find an item for which the owner hasn’t shared their contact information, or you can’t pull up a webpage associated with the device, you could post a description to find that person. Try any number of places: social networks, college forums, NextDoor, Bluesky, Craigslist, or a piece of paper posted around the neighborhood. Describe loosely where it was found and what it looks like.

Someone could confirm ownership of the found item by providing details only the owner might know, like what it was attached to, part of (like a bike), or found along with (like a handbag).

An owner can also provide good evidence of their identity by:

  • Serial number: An AirTag and some third-party devices have serial numbers inscribed in the battery compartment. An owner can pull up a serial number via a Find My app. (See how to identify an AirTag you have found.)
  • Phone number: If you can call someone, great, but if they respond via another method (perhaps their phone was stolen!), they can confirm either the last four digits of their number if the item isn’t marked as lost or their entire phone number if it is.
  • Play sound: If you’re comfortable meeting up with a potential owner who hasn’t fully convinced you, if you’re within Bluetooth range they can trigger the item to play a sound from any Find My app they possess.

Apple has extra cues for someone near any Find My item (or Google Find Hub tracker) separated from its owner to aid that person in realizing there’s a tracker near them, see what an “AirTag Found Moving With You” alert means.

What a finder sees with AirPods

While marking audio hardware as lost follows the same steps as marking an item lost—providing contact information—someone finding your AirPods (3rd generation), AirPods 4 with Active Noise Cancellation, AirPods Pro (all generations), and AirPods Max can obtain information a little more easily.

With any AirPods earbuds, someone can open the case near an unlocked iPhone or iPad. This displays the message that the earbuds are lost, including contact information. With AirPods Max, someone would have to try to pair the headphones with an iPhone or iPad.

Turn on contact info for an item

Under Lost AirTag for Apple AirTags or Lost Item for third-party Find My network accessories, you see Show Contact Info and Share Item Information starting in iOS 18.2/iPadOS 18.2 and 15.2 Sequoia. This also appears for some Apple audio hardware: AirPods (3rd generation), AirPods 4 with Active Noise Cancellation, AirPods Pro (all generations), and AirPods Max.

Show Contact Info is the item equivalent of marking a device as lost. For more on Share Item Information, see how to track lost luggage with an AirTag.

Using Show Contact Info effectively marks the item as lost, but because it lacks features available for hardware with a screen, I can see why Apple chose to relabel it.

Here’s how to mark an item or audio hardware as lost on an iPhone, iPad, or Mac:

  1. Beneath Lost AirTag, Lost Item, or Lost Accessory, tap or click Show Contact Info. (In macOS 26 and earlier with audio hardware, you can also Control-click/right-click and choose Mark as Lost.)
  2. After reading the details about what will happen when you turn on contact info, tap Continue.
  3. Audio hardware shows a more lengthy set of info. Tap or click the Close button to back out.

If the item is in Bluetooth range of any of your devices, you receive an error: “Item Is With You” that reads “This feature is only available for items that are lost and not located in close proximity to you.” You cannot proceed and can only tap or click OK.

On an Apple Watch, select your item or supported audio device, tap Lost Mode, and then tap the switch to enable it. You’re then prompted to enter a phone number or email address. (With watchOS 26 or earlier, use the Find Items app for items, and the Find Devices app for audio hardware.)

When an item’s or accessory’s status is updated, you should receive a notification.

When the device comes into proximity with you again—within Bluetooth range of one of your devices—sharing contact information is disabled. If you shared a temporary link, that link becomes inactive at the same time.

The Find My app’s Devices view and the Find Devices web app initially show a zoomed-out map plotting all your devices that are close to you and within reasonable proximity, as with people. If you’re in a Family Sharing group, you can see all devices of members in your group sharing their location with you. That can be quite a few devices. On an Apple Watch, you can only view a list and tap to see a map.

Any iPhone, iPad, Mac, or Apple Watch you own will appear as a device, along with all Apple and Beats audio devices. Because audio-device tracking has become more useful and differentiated over time, AirPods are covered separately.

The list is organized by person for Family Sharing with you at the top. As with People, each device shows the name assigned to it, a rough location, the last update, and its approximate distance from your location.

Your location is also plotted on the map as a blue dot if you’re near or between any of your devices, as is likely.

Find My doesn’t differentiate devices based on whether they’re located via an internet connection, proximity to your equipment, or the Find My network.

Select a device in the list or on the map, and Find My zooms in to center it in the map, typically showing it within a rectangle shaped by a radius of about 1/4 to 1/2 mile (400 m to 800 m). In the version 27 releases, select the device again to have the map zoom out.

You can take action on the device like this:

  • On an iPhone or iPad or macOS 27: Select a device and view the actions available in its sheet. Tap or click the close button in the upper-right corner to return to the full list.
  • On macOS 26 or earlier: After selecting a device, click the Info button to the right of the device name in macOS. Click anywhere but in the actions sheet in macOS to dismiss it.
  • On an Apple Watch: Tap the device and scroll down for actions. Tap the back arrow button to return to the main view.
  • On iCloud.com: A sheet appears in the upper-left corner of the webpage when you select a device.

Only the Directions options and the Notifications label (with different options) also appear in the People View.

Here’s what you can view or select from in Devices:

The top of the Find My sheet of actions shows a graphical depiction of the battery level for an iPhone, iPad, Apple Watch, or Mac laptop. Audio devices’ battery levels are not displayed.

Find My shows the device’s location on the map as a dot with its model icon above it. The dot is the center of a blue-shaded area if a device can be pinpointed; otherwise, the shaded area is larger and green. The shading radius indicates the level of confidence in the location.

Devices are listed even if they haven’t connected for months—or years! If it’s been longer than 24 hours, they appear as “No location found.” (For the full status rundown, see how to read the Find My app’s status labels.)

To remove old devices, see how Activation Lock protects a lost or stolen device.

Find a device you cannot reach

Here’s how to help someone else find their lost device—or find your own when you don’t have one of your devices at hand:

  • Family Sharing: Use the Find My app on a device or the Find Devices web app at iCloud.com from a group account with which the missing device’s owner has enabled sharing.
  • iCloud.com: For all other uses, turn to the Find Devices web app at https://www.icloud.com/find.

Some actions are limited: on the sheet for a device, you can play a sound, mark as lost, or enable notifications when found for your or anyone’s device using the Find My app on any device in the Family Sharing group. To erase a device, Find My prompts for the Apple Account password of the associated account.

If you cannot pass two-factor authentication

Apple requires two-factor authentication (2FA) for nearly all Apple Accounts—it’s useful in resisting account hijacking. However, it complicates using Find My if you (or someone you’re helping) don’t have access to any trusted, or Apple Account-linked, devices or phone numbers. Here are three approaches to set up in advance:

  • Add a trusted phone number for people you trust: You can add a phone number for a partner, family member, close friend, or even an attorney or other professional you could contact in an emergency. Then, as long as you remember your Apple Account password, you can select that other person’s phone number in the 2FA validation process and they can provide you the code.
  • Create a passkey for your Apple Account: Apple lets you bypass two-factor authentication if you enable a passkey. While a passkey is typically stored on your iCloud-synced devices, you can use some password managers to store one instead.
  • Use a hardware encryption key: Apple lets you rely on hardware encryption keys for Apple Account access. As long as you still have one of the keys you set, you’re not locked out of iCloud.