Got a tip for us?

Apple Watch

Change or turn off your passcode, and choose whether to use a simple four-digit passcode. For added security, you can also set Apple Watch to erase its data after 10 failed unlock attempts.

Your Apple Watch passcode can be different from your iPhone passcode, and it’s better to use different passcodes. There’s a catch, though. If you turn off your passcode on your watch, some features won’t be available, such as Apple Pay.

Note: You may be prevented from using a simple passcode or turning off your passcode if your synced iPhone is managed by an organization, such as a company or school. Check with your organization’s administrator.

Change your passcode

  1. Open the Settings app on your Apple Watch.
  2. Tap Passcode, tap Change Passcode, and then follow the onscreen prompts.

    Tip: Your Apple Watch passcode can be different from your iPhone passcode—in fact, it’s better to use different passcodes.

You can also go to the Apple Watch app on your iPhone, tap My Watch, tap Passcode, then tap Change Passcode and follow the onscreen prompts.

Use a four-digit passcode

  1. Open the Settings app on your Apple Watch.
  2. Tap Passcode, then turn on Simple Passcode.

You can also go to the Apple Watch app on your iPhone, tap My Watch, tap Passcode, then turn on Simple Passcode.

Turn off the passcode

Note: If you turn off your passcode, some features won’t be available. For example, you can’t use Apple Pay or unlock your Mac with Apple Watch.

  1. Open the Settings app on your Apple Watch.
  2. Tap Passcode, then tap Turn Passcode Off.

You can also go to the Apple Watch app on your iPhone, tap My Watch, tap Passcode, then tap Turn Passcode Off.

Erase Apple Watch after 10 unlock attempts

If Apple Watch is lost or stolen, you can protect your information by having Apple Watch erase its data after 10 consecutive attempts to unlock it with the wrong passcode.

  1. Open the Settings app on your Apple Watch.
  2. Tap Passcode, then turn on Erase Data.

See also

If your Apple Watch is disabled because you forgot your passcode or entered an incorrect passcode too many times, you can reset it from either your Apple Watch or iPhone and set it up again.

If it has a cellular plan, you can keep your plan to pair again, or remove it to pair with another iPhone. And after you erase it, Activation Lock is enabled, so your Apple Account and password are required to unpair it.

Important: If Erase Data is turned on, the data on your Apple Watch is erased after 10 failed passcode attempts.

Reset your Apple Watch

  1. Put your Apple Watch on its charger and press and hold the side button until the sliders appear.
  2. Press and hold the Digital Crown to show the Erase all content and settings screen.
  3. Tap Reset, then tap Reset again to confirm.
  4. When the process finishes, set up your watch again. When asked, restore from a backup.

Reset your Apple Watch using your paired iPhone

  1. Open the Apple Watch app on your iPhone and then tap My Watch.
  2. Tap General, swipe down, and then tap Reset.
  3. Tap Erase Apple Watch Content and Settings and tap Erase All Content and Settings again to confirm.
  4. If you have an Apple Watch with cellular, choose to keep or remove your cellular plan.
    • Keep your plan if you want to pair your Apple Watch and iPhone again.
    • Remove your plan if you want to pair your Apple Watch with another iPhone or intend to cancel your cellular subscription. (Contact your carrier to cancel your subscription.)
  5. When the process finishes, set up your watch again. When asked, restore from a backup.

When you erase Apple Watch this way, Activation Lock is enabled. With Activation Lock, your Apple Account and password are required before anyone can:

  • Unpair your Apple Watch from your iPhone
  • Pair and use your Apple Watch with a new iPhone
  • Turn off Find My on your device

See also

You can start fresh in more than one way. If you plan to sell or give away your Apple Watch, unpair it from your iPhone; if you plan to keep it and only need to reset it, erase it. Here are the two ways to clear the contents and settings of your Apple Watch:

  • Unpair your Apple Watch from your iPhone. This erases the contents and removes Activation Lock, preventing someone else from activating it. Do this if you plan to sell or give away your Apple Watch.
  • Erase your Apple Watch. This erases all content and settings from Apple Watch, but leaves it paired with your iPhone. Do this if you plan to keep your Apple Watch, and just need to reset it.

Unpair Apple Watch and remove Activation Lock

  1. Open the Apple Watch app on your iPhone.
  2. Tap My Watch, then tap All Watches.
  3. Tap the Info button next to your watch and tap Unpair Apple Watch.

Your Apple Watch is erased and removed from your Apple account, Activation Lock is removed, and your watch is ready to be set up again.

Erase Apple Watch and settings

To erase your Apple Watch without unpairing it, follow these steps.

  1. Open the Settings app on your Apple Watch.
  2. Tap General, then tap Reset.
  3. Tap Erase All Content and Settings. Then enter your passcode.
  4. If you have an Apple Watch with cellular, choose to keep or remove your cellular plan.
    • Keep your plan if you want to pair your Apple Watch and iPhone again.
    • Remove your plan if you want to pair your Apple Watch with another iPhone or intend to cancel your cellular subscription. (Contact your carrier to cancel your subscription.)
  5. When the process finishes, set up your watch again. When asked, restore from a backup.

You can also go to the Apple Watch app on your iPhone, tap My Watch, tap General, tap Reset, then tap Erase Apple Watch Content and Settings.

Note: If you can’t access the Settings app on your Apple Watch because you’ve forgotten your passcode, you must reset it.

Remove your cellular plan

You can remove the cellular plan at any time on an Apple Watch with cellular.

  1. Open the Apple Watch app on your iPhone.
  2. Tap My Watch, tap Cellular, and tap the Info button next to your cellular plan.
  3. Tap Remove [carrier] Plan, then confirm your choice.

    You may need to contact your carrier to remove this Apple Watch from your cellular plan.

See also

Your Apple Watch is backed up automatically to your paired iPhone, and you can restore it from a stored backup. Apple Watch backups are included when you back up your iPhone—either to iCloud, or to your Mac or Windows device.

If your backups are stored in iCloud, you can’t view the information in them. But if you get a new Apple Watch, you can restore it from one of those backups.

Back up and restore Apple Watch

  • Back up your Apple Watch: When paired with an iPhone, Apple Watch content is backed up continuously to the iPhone. If you unpair the devices, a backup is performed first.
  • Restore your Apple Watch from a backup: If you pair your Apple Watch with the same iPhone again, or get a new Apple Watch, you can choose Restore from Backup and select a stored backup on your iPhone.

An Apple Watch that’s managed for a family member backs up directly to the family member’s iCloud account when the watch is connected to power and a Wi-Fi network. To disable iCloud backups for that watch, go to the Settings app on the managed Apple Watch, tap [account name], tap iCloud, tap iCloud Backups, then turn off iCloud Backups.

See also

To use your Apple Watch, you need to pair it with your iPhone. Setup assistants on your iPhone and Apple Watch work together to help you pair and set up your watch.

Your watch needs watchOS 27, on Apple Watch SE 3, Series 9, Ultra 2, or later, and your iPhone needs iOS 27, on iPhone 11 or later. It’s a good idea to update your iPhone first. Then, if your watch has cellular, you can activate cellular service.

WARNING: To avoid injury, read Important safety information for Apple Watch before using your Apple Watch.

What you need

To set up Apple Watch, you need the following:

  • Apple Watch SE 3, Apple Watch Series 9, Apple Watch Ultra 2, or later with watchOS 27 or later
  • iPhone 11 or later with iOS 27 or later

Before you begin

  • Update your iPhone to the latest version of iOS: Go to the Settings app on your iPhone, tap General, then tap Software Update.
  • Make sure that your iPhone has Bluetooth turned on, and it’s connected to a Wi-Fi or cellular network: To check, swipe down from the top-right corner of the iPhone screen to open Control Center. Make sure that Bluetooth and Wi-Fi (or Cellular) are highlighted.

Step 1: Turn on and pair your Apple Watch

Quick tip: VoiceOver or Zoom can help if you have difficulty seeing your Apple Watch or iPhone, even during setup. See our guide, Set up using VoiceOver, or our article, Use Zoom.

  1. Put your Apple Watch on your wrist. Adjust the band or choose a band size so your Apple Watch fits closely but comfortably.
  2. To turn on your Apple Watch, press and hold the side button until you see the Apple logo.

    If your Apple Watch doesn’t turn on, you might need to charge the battery.

  3. Hold your iPhone near your Apple Watch, wait for the Apple Watch pairing screen to appear on your iPhone. Then tap Continue.

    You can also go to the Apple Watch app on your iPhone, then tap Start Pairing.

  4. Tap Set Up for Myself.
  5. When prompted, position your iPhone so that your Apple Watch appears in the viewfinder in the Apple Watch app. This pairs the two devices.

Step 2: Set up your Apple Watch

  1. If this is your first Apple Watch, tap Set Up Apple Watch and then follow the instructions on your iPhone and Apple Watch to finish setup.

    If you’ve set up another Apple Watch with your current iPhone, a screen appears that says Make This Your New Apple Watch. Tap Apps & Data and Settings to see how Express Setup will configure your new watch, then tap Continue. To choose how your new watch is set up, tap Customize Settings. Next, choose a backup from a previous Apple Watch to restore. Or tap Set Up as New Apple Watch if you want to fully customize your new device’s settings.

  2. Follow the onscreen instructions to set up the following:

    • Sign in to your Apple Account.
    • Create a passcode—either a standard four-digit passcode, or a long passcode, which requires six digits.
    • Customize settings for text size, optionally enter personal information such as date of birth and height that are used for fitness and health, and choose the health notifications you want to receive.

    You can change these settings after you’ve set up your Apple Watch.

Step 3: Activate cellular service

If you have an Apple Watch with cellular, you can activate cellular service during setup. If you’ve set up Apple Watch, you can activate cellular later in the Apple Watch app on your iPhone. See Set up and use cellular service.

Your iPhone and Apple Watch need to use the same cellular carrier. The exception is an Apple Watch you set up for someone in your Family Sharing group, since that watch can use a different cellular carrier from the one on the iPhone you manage it with.

Note: Cellular service isn’t available in all countries or regions.

Step 4: Keep your devices close as they sync

Your Apple Watch shows the watch face when syncing finishes and your watch is ready to use.

To learn more about your Apple Watch while it’s syncing, tap Get to Know Your Watch. You can learn what’s new, view Apple Watch tips, and read this user guide, right on your iPhone. To find this information after your Apple Watch is set up, open the Apple Watch app on your iPhone, then tap Discover.
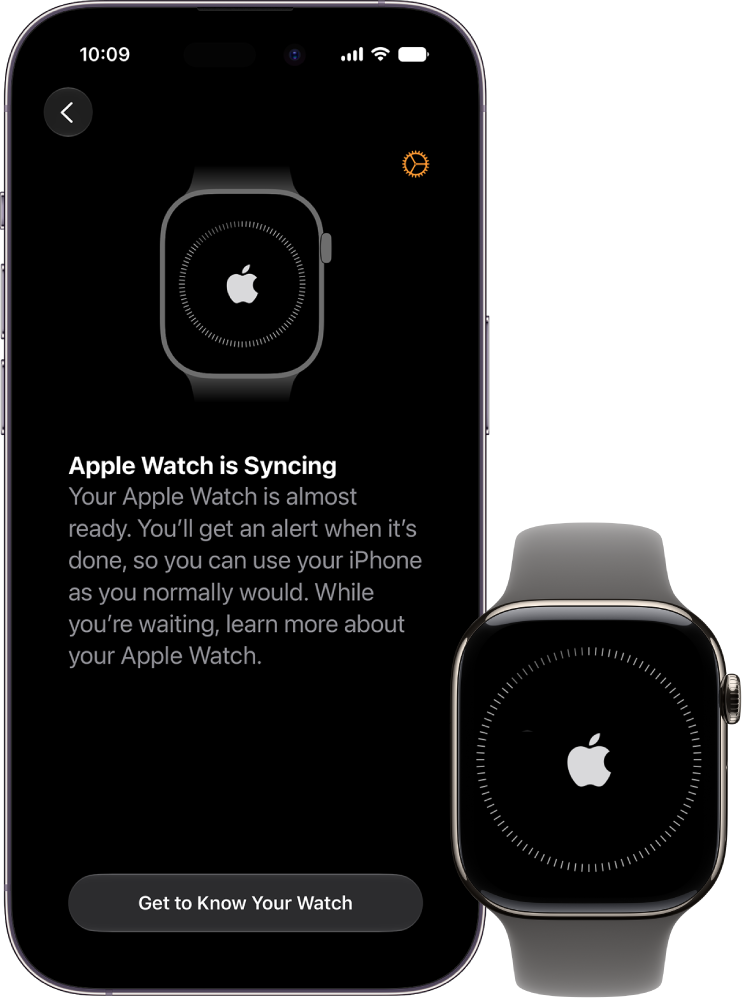
An iPhone and Apple Watch, side by side. The iPhone screen shows “Apple Watch is Syncing.” The Apple Watch shows syncing progress.

Trouble pairing?

  • If you see a watch face when you’re trying to pair: Your Apple Watch is already paired with an iPhone. You need to first erase all Apple Watch content and reset settings.
  • If the camera doesn’t start the pairing process: Tap Pair Apple Watch Manually at the bottom of the iPhone screen, then follow the onscreen instructions.

See also

Tag: Setup

With VoiceOver on your Apple Watch, you can perform many functions with a press, swipe, or turn of the Digital Crown.

You can change or customize a watch face, check notifications from the watch face, open Control Center from the watch face, and show widgets, and there’s more, from the App Switcher and Grid View to reading mail and navigating with the Digital Crown. Try the following while viewing the current watch face.

  • Change the watch face: Triple-tap the screen, turn the Digital Crown to browse available faces, then press the Digital Crown to choose the face.
  • Customize a watch face: Triple-tap the display, swipe down to choose Edit, then double-tap. Swipe left or right with two fingers to browse the customizable features. Turn the Digital Crown to customize the selected feature. When you finish, press the Digital Crown, then double-tap the face to save your changes.
  • Check notifications from the watch face: Swipe down with two fingers.

    To check notifications from most other screens, tap the time in the top-right of the display, then swipe down with two fingers.

  • Open Control Center from the watch face: Press the side button.
  • Show widgets: From the watch face, scroll down with the Digital Crown or swipe up with two fingers.
  • Open the App Switcher: Double-click the Digital Crown, then turn the Digital Crown to scroll through recent apps. Double-tap an app to open it.
  • Open any app in Grid View: Press the Digital Crown once to go to the Home Screen. Turn the Digital Crown to scroll through apps. Drag your finger to highlight an app, then double-tap to open it. Or use Siri to open it: hold down the Digital Crown until you feel the double tap, then say “launch” followed by the app name (for example, “launch Mail”).
  • Read mail: Press the Digital Crown once to go to the Home Screen. Swipe to highlight the Mail app, double-tap (or hold down) the Digital Crown to use Siri, then say “launch Mail.” When the Mail app opens, turn the Digital Crown to navigate and hear messages. Navigate through the message with the Digital Crown.
  • Navigate with the Digital Crown: Triple-tap with two fingers, then turn the Digital Crown to select an item. Triple-tap with two fingers to turn off Digital Crown Navigation.

See also

Apple Watch supports many international braille tables and refreshable braille displays. You can connect a Bluetooth wireless braille display to read VoiceOver output, including contracted and uncontracted braille.

When you edit text, the braille display shows the text in context, and your edits are automatically converted between braille and printed text. You can also use a braille display with input keys to control your Apple Watch when VoiceOver is turned on. And you can change the braille display settings on your watch.

Connect a braille display

  1. Turn on the braille display.
  2. On Apple Watch, open Settings, tap Accessibility, tap VoiceOver, tap Braille, and then choose the display.

Change the braille display settings

  1. On Apple Watch, open Settings, tap Accessibility, tap VoiceOver, and then tap Braille.
  2. Set any of the following:

    Setting Description
    Output Set the braille display output to uncontracted six-dot, uncontracted eight-dot, or contracted braille.
    Input Choose the input method for entering braille on the display—uncontracted six-dot, uncontracted eight-dot, or contracted braille. You can also turn on Automatic Translation.
    Word Wrap Wrap words to the next line.
    Alert Display Duration Adjust the duration that an alert is visible on your braille display.
    Braille Tables Add tables to the Braille Table rotor.

See also

VoiceOver can help you set up your Apple Watch and pair it with your iPhone, and it speaks what’s on the display as you go. See Use VoiceOver.

You can try automatic pairing with your iPhone camera, or pair manually with a six-digit pairing code. When pairing succeeds, you feel a tap from Apple Watch and hear “Your Apple Watch is paired.” Then it syncs with your iPhone.

Here’s how to set up Apple Watch using VoiceOver.

Set up Apple Watch using VoiceOver

  1. If your Apple Watch isn’t on, turn it on by holding down the side button.
  2. On your Apple Watch, turn on VoiceOver by triple-clicking the Digital Crown.
  3. Bring your iPhone near your Apple Watch.
  4. On your iPhone, select Continue, then double-tap.
  5. On your iPhone, tap Set Up Apple Watch and then double-tap.
  6. To try automatic pairing, point the iPhone camera at the watch from about 6 inches away.

    When you hear the pairing confirmation, follow the spoken prompts to complete the setup of your Apple Watch. If you have difficulty, follow steps 7 through 13 to manually complete the setup.

  7. On your iPhone, select Pair Apple Watch Manually. Then double-tap.
  8. On your Apple Watch, select the Info button in the bottom-right corner, then double-tap.
  9. On your Apple Watch, select your Apple Watch ID near the top of the screen. You hear the unique identifier for your Apple Watch—it’s something like “Apple Watch 52345”.
  10. On your iPhone, select this same identifier and then double-tap.
  11. Select the six-digit pairing code on your Apple Watch to hear it.
  12. Enter the pairing code from your Apple Watch on your iPhone using the keyboard.

    When pairing succeeds, you feel a tap from Apple Watch and you hear “Your Apple Watch is paired.” If pairing fails, tap to respond to the alerts. Your Apple Watch and the Apple Watch app on your iPhone reset so you can try again.

  13. On your iPhone, choose Restore from Backup or Set Up as New Apple Watch and then double-tap.

When you’ve completed setup, Apple Watch syncs with your iPhone. This takes a few moments—tap Sync Progress on your iPhone to hear progress. When you hear “sync complete” your Apple Watch is ready to use, displaying the watch face. Swipe left or right to explore watch face features.

See also

Use Zoom to magnify what’s on the Apple Watch display.

With Zoom on, you can zoom in or out, move around the page, and adjust the magnification, and the small Zoom button shows you where you are on the page.

Here’s how to use Zoom on Apple Watch.

Turn on Zoom

  1. Open the Settings app on your Apple Watch.
  2. Go to Accessibility and tap Zoom. Then turn on Zoom.

You can also use your iPhone to turn on Zoom for your Apple Watch—go to the Apple Watch app on your iPhone, tap My Watch, tap Accessibility, then tap Zoom. You can also use the Accessibility Shortcut.

Controlling Zoom

When you’ve turned on Zoom, you can perform these actions on your Apple Watch.

  • Zoom in or out: Double-tap the Apple Watch display with two fingers.

    Tip: Double-tap with two fingers while setting up your Apple Watch to get a better look.

  • Move around (pan): Drag the display with two fingers. You can also turn the Digital Crown to pan over the entire page, left-right and up-down. The small Zoom button that appears shows you where you are on the page.
  • Use the Digital Crown normally instead of panning: Tap the display once with two fingers to switch between using the Digital Crown to pan and using the Digital Crown the way it works without Zoom on (for example, to scroll a list or zoom a map).
  • Adjust magnification: Double-tap and hold with two fingers, then drag your fingers up or down on the display. To limit magnification, tap the plus or minus button on the Maximum Zoom Level slider.

You can use hand gestures instead of taps to control Zoom. Go to the Apple Watch app on your iPhone, tap My Watch, then go to Accessibility > Zoom > Hand Gestures. Turn on Hand Gestures, then use gestures including clench, double clench, tap, and double tap.

Note: The universal double tap gesture isn’t an option once you turn on Hand Gestures for Zoom.

See also

You can change text size and display settings to customize the appearance of onscreen elements. You can make text bold, turn on color filters, and adjust transparency.

Text size is quick to change from Control Center, and you can limit animation, too.

Here’s how to adjust text and display settings on Apple Watch.

Adjust text size in Control Center

  1. Press the side button to open Control Center.
  2. Tap the Adjust Text Size button and turn the Digital Crown to adjust.

Choose how text and other items appear on the screen

You can adjust transparency, make text bold, turn on color filters, and more.

  1. Start the Settings app on your Apple Watch.
  2. Tap Accessibility, then adjust any of the following:
    • On/Off Labels: Adds visual indicators to switches—a vertical line shows when a switch is on, and a circle shows when it’s off.
    • Reduce Transparency: Reduces transparency effects to improve text readability against backgrounds.
    • Increase Contrast: Increases color contrast between text and backgrounds for better visibility.
    • Show Borders: Shows the outline of onscreen elements.
    • Color Filters: Applies a filter to view the entire screen in grayscale or adjust colors for color vision deficiencies.
    • Minimum Brightness: Sets a higher minimum brightness level when the display automatically adjusts to lighting conditions.
    • Text Size: Adjusts the size of text for better readability.
    • Bold Text: Makes text appear bolder and more prominent.

You can also go to the Apple Watch app on your iPhone, tap My Watch, tap Accessibility, then change an option.

Note: Changes in bold text and grayscale take effect after you restart your Apple Watch.

Limit animation

Motion on the Home Screen, and when apps open and close, is something you can limit.

  1. Start the Settings app on your Apple Watch.
  2. Go to Accessibility, tap Reduce Motion, and turn on Reduce Motion.

You can also go to the Apple Watch app on your iPhone, tap My Watch, go to Accessibility > Reduce Motion, then turn on Reduce Motion.

Quick tip: Turn on Reduce Motion, choose grid view for the Home Screen, and every app icon ends up the same size.

See also







