Got a tip for us?

Setup

These are the gestures you use on all iPad models to go to the Home Screen, switch between recent apps, access controls, and more. A few gestures are done differently on an iPad with a Home button. If you’re using Magic Trackpad or Magic Mouse, there are gestures that work on your trackpad or mouse, too.

They let you go Home, quickly access controls, open Exposé, switch between open apps, open the Dock within an app, use Siri, use Accessibility Shortcut, take a screenshot, turn off iPad, and force restart it.

Gesture Description
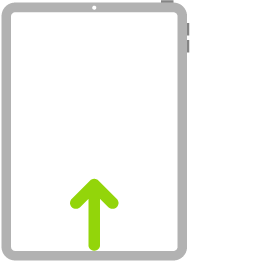
An illustration of iPad with an arrow that indicates swiping up from the bottom. Go Home. Swipe up from the bottom edge of the screen to return to the Home Screen at any time. See Open an app.
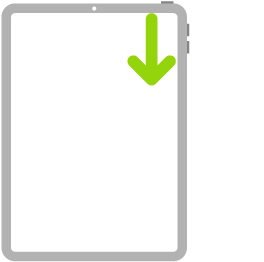
An illustration of iPad with an arrow that indicates swiping down from the top-right corner. Quickly access controls. Swipe down from the top-right corner to open Control Center; touch and hold a control to reveal more options. To add or remove controls, go to the Settings app, then tap Control Center. See Use and customize Control Center.
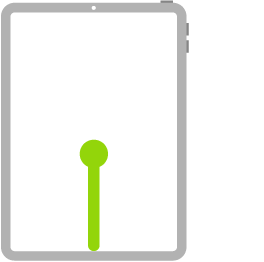
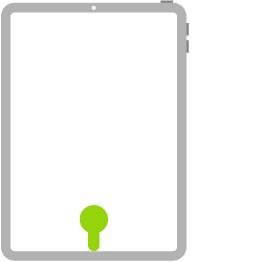
An illustration of iPad. Starting at the bottom center of the screen, a line ending with a dot at the mid-center point of the screen indicates a drag-and-pause gesture. Open Exposé. Swipe up from the bottom edge, pause in the center of the screen, then lift your finger. To browse the open apps, swipe right, then tap the app you want to use. See Switch between apps.
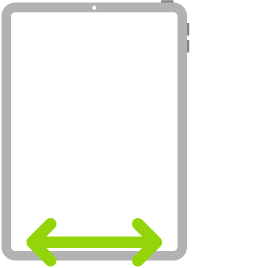
An illustration of iPad. A two-headed arrow indicates swiping left or right across the bottom edge of the screen. Switch between open apps. Swipe left or right along the bottom edge of the screen to quickly switch between open apps. (On an iPad with a Home button, swipe with a slight arc.) See Switch between apps.
Starting at the bottom center of the screen, a line ending with a dot about a finger’s width from the bottom of the screen indicates a drag-and-pause gesture. Open the Dock within an app. Swipe up from the bottom edge of the screen and pause to reveal the Dock. To quickly open another app, tap it in the Dock. See Open an app from the Dock.
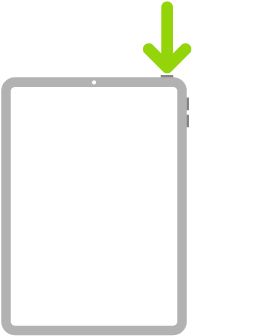
An illustration of iPad with an arrow pointing to the top button. Use Siri. Just say “Siri” or “Hey Siri.” Or press and hold the top button while you ask a question or make a request. (On an iPad with a Home button, press and hold the Home button while you make a request.) See Learn how to use Siri.
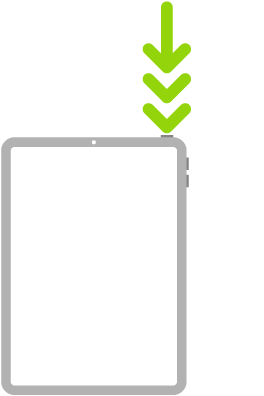
An illustration of iPad with three arrows indicating triple-clicking the top button. Use Accessibility Shortcut. Triple-click the top button. (On an iPad with a Home button, triple-click the Home button.) See Quickly turn accessibility features on or off.
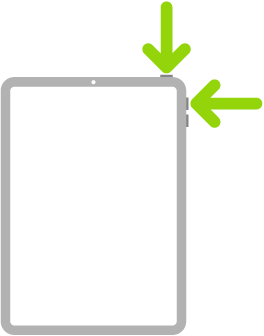
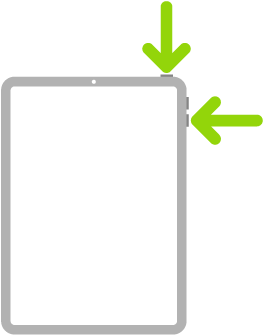
An illustration of iPad with arrows pointing to the top button and the volume up button on the upper right. Take a screenshot. Simultaneously press and quickly release the top button and either volume button. (On an iPad with a Home button, simultaneously press and quickly release the top button and the Home button.) See Take a screenshot.
An illustration of iPad with arrows pointing to the top button and a volume button on the upper right. Turn off. Simultaneously press and hold the top button and either volume button until the sliders appear, then drag the top slider to power off. (On an iPad with a Home button, press and hold the top button until the sliders appear.) Or go to the Settings app, tap General, then tap Shut Down. See Turn iPad off (models with the Home button).
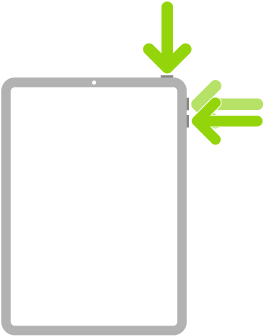
An illustration of iPad with arrows pointing to the top button and the volume up and volume down buttons on the upper right. Force restart. Press and quickly release the volume button nearest the top button, press and quickly release the other volume button, then press and hold the top button until the Apple logo appears. On iPad mini (6th generation) and iPad mini (A17 Pro), the volume buttons are at the top left. See Force restart iPad.

Using a Magic Trackpad or Magic Mouse? Read our guide, use trackpad gestures for iPad, or our article, Mouse actions and gestures for iPad, for gestures that work with it.

See also

Tag: Setup

Control iPad and its apps using a few simple gestures—tap, touch and hold, swipe, scroll, and zoom. Each one has its own symbol in the table below. If you’re using Magic Trackpad or Magic Mouse, there are also gestures that work on your trackpad or mouse, and they’re covered in their own guides.

Symbol Gesture
An icon symbolizing the tap gesture. Tap. Briefly touch an item on the screen with one finger. For example, to open an app, tap its icon on the Home Screen.
An icon symbolizing the touch and hold gesture. Touch and hold. Press an item on the screen until something happens. For example, if you touch and hold the wallpaper of the Home Screen, the app icons begin to jiggle.
Swipe. Move one finger across the screen quickly. For example, swipe left on the Home Screen to see more apps.
An icon symbolizing the scroll gesture. Scroll. Move one finger across the screen without lifting. For example, in Photos, you can drag a list up or down to see more. Swipe to scroll quickly; touch the screen to stop scrolling.
An icon symbolizing the zoom gesture. Zoom. Place two fingers on the screen near each other. Spread them apart to zoom in, or move them toward each other to zoom out.

You can also double-tap a photo or webpage to zoom in, and double-tap again to zoom out.

In Maps, double-tap and hold, then drag up to zoom in or drag down to zoom out.

For gestures that work on a Magic Trackpad or Magic Mouse, see our guide, Trackpad gestures for iPad, or our article, Mouse actions and gestures for iPad.

See also

Tag: Setup

iPad has an easy setup process to help you get going when you first turn on your device. Whether you’re just getting started or want to make sure you have the basics set up, you’re in the right place.

When you begin, you can wirelessly transfer many of your apps, settings, and content to your new iPad. You can also connect to Wi-Fi, set up cellular service, and sign in to your Apple Account to access Apple services such as the App Store, Apple Music, FaceTime, and iCloud.

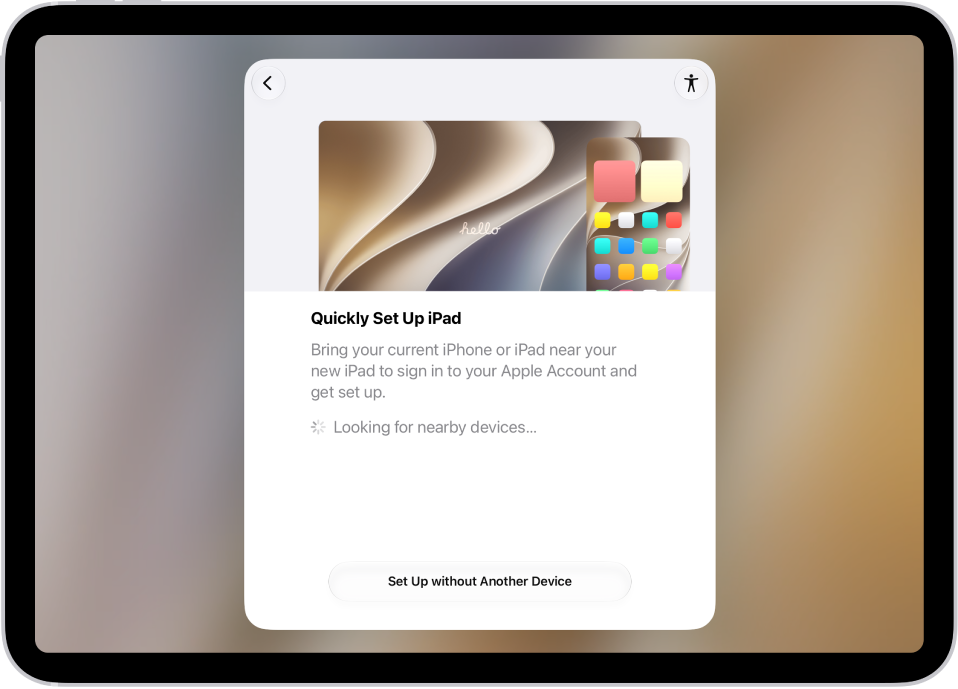
The Quick Start screen, with options to set up your iPad by bringing it close to another iPhone or iPad, or setting it up without another device.

Transfer your apps and info onto your new iPad

When you first turn on your new iPad and begin the setup process, many of your apps, settings, and content can transfer wirelessly from your previous iPad straight to this iPad. Just bring the two devices close together and follow the onscreen instructions.

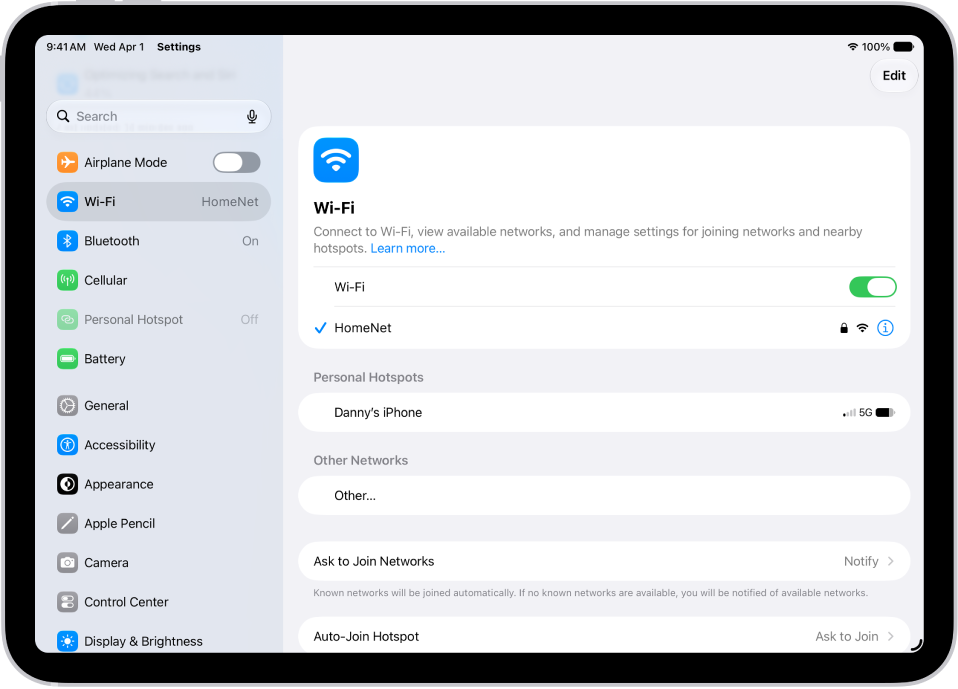
The Settings screen showing available Wi-Fi networks.

Connect to Wi-Fi and set up cellular service

To connect your iPad to your home Wi-Fi network, go to the Settings app, tap Wi-Fi, turn on Wi-Fi, then choose your network. iPad automatically connects to your Wi-Fi network whenever you’re home.

To use an eSIM to connect your iPad with Wi-Fi + Cellular to your cellular network, go to the Settings app, then tap Cellular Data. Or on supported iPad models, install a nano-SIM provided by your carrier.

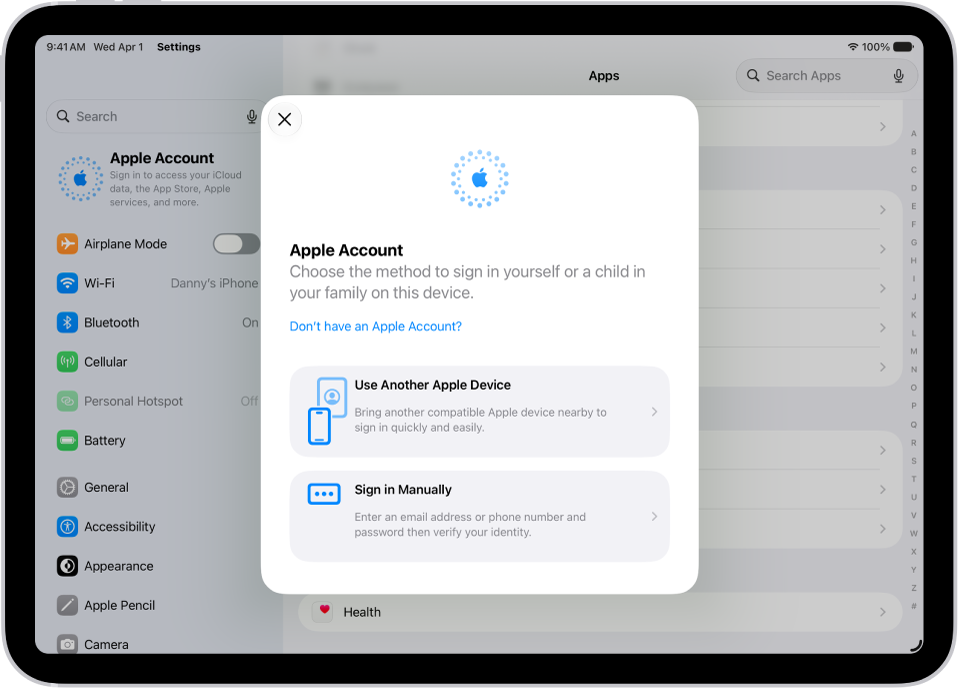
The Settings app, with the Apple Account sign-in dialog in the middle of the screen.

Sign in to your Apple Account

Your Apple Account gives you access to Apple services like iCloud, FaceTime, iMessage, the App Store, the iTunes Store, Apple Books, Apple Music, and more.

To sign in to your Apple Account, go to the Settings app, then tap Apple Account.

With a signed-in iPhone running iOS 17 or later or another iPad running iPadOS 17 or later, you can simply bring your iPad near your other device. If not, you’ll sign in manually.

To verify that you’re signed in, go to the Settings app, then tap your name. Your Apple Account appears below your name.

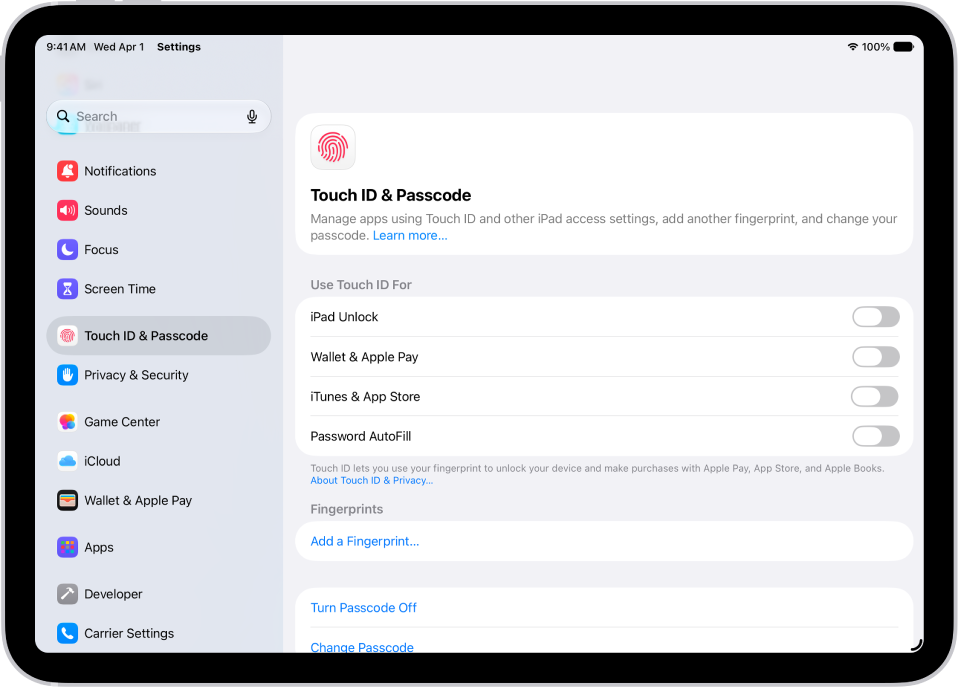
A screen showing settings for Touch ID & Passcode, with options to add a fingerprint and turn passcode on.

Set up Face ID or Touch ID

Face ID, which uses face recognition, or Touch ID, which uses your fingerprint, lets you securely unlock your iPad, make purchases, and sign in to many apps. Face ID and Touch ID data never leaves your device, for your security, and it isn’t saved anywhere else.

Do one of the following, based on your iPad model:

  • Set up Face ID: Go to the Settings app, tap Face ID & Passcode, tap Set up Face ID, then follow the onscreen instructions.
  • Set up Touch ID: Go to the Settings app, tap Touch ID & Passcode, tap Add a Fingerprint, then follow the onscreen instructions.

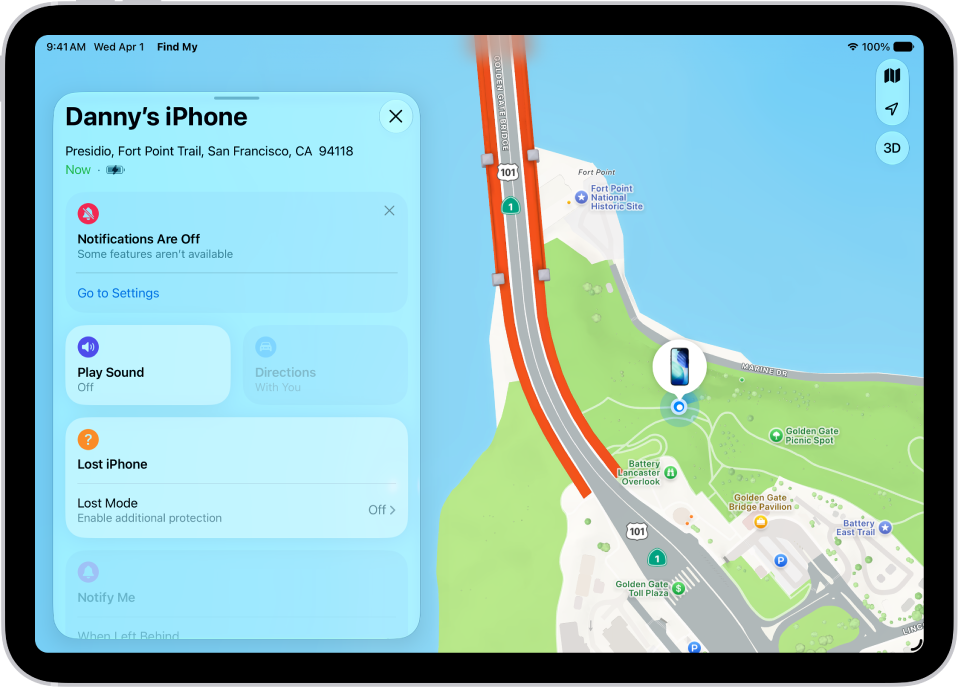
A screen showing settings for the Find My app, with options to turn on notifications.

Turn on Find My iPad

Turning on Find My iPad means you can locate your iPad if it’s ever lost or stolen.

Go to the Settings app, tap your name, tap Find My, tap Find My iPad, then turn on Find My iPad.

To be notified when you leave your iPad behind, go to the Find My app, tap the name of your iPad, then tap When Left Behind. You can also see the location of your devices on the Find Devices website.

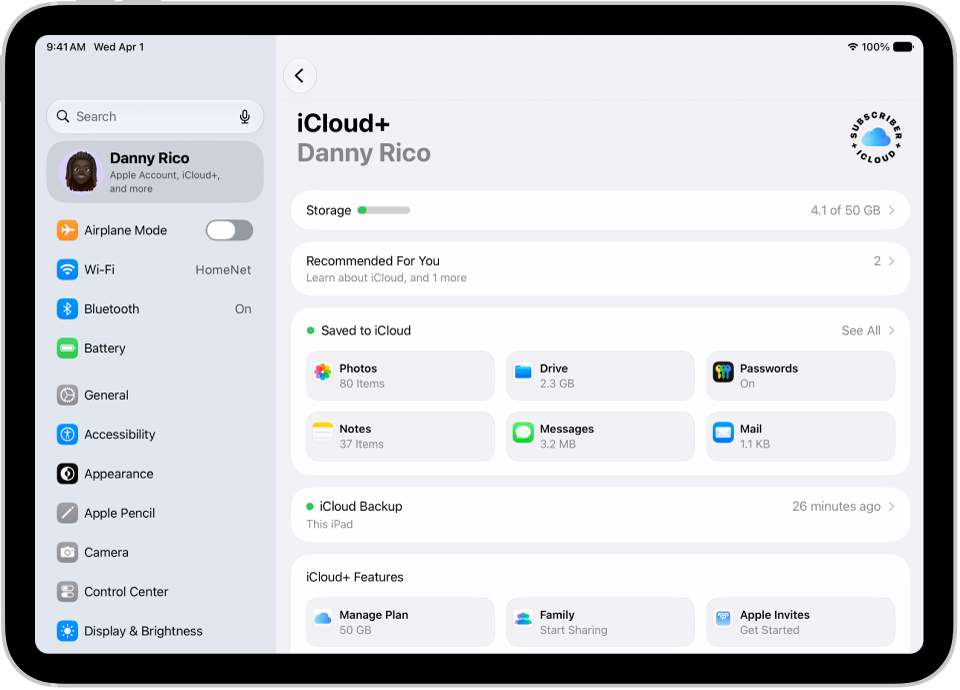
The iCloud settings screen showing the iCloud storage meter and a list of apps and features, including Photos, iCloud Drive, and iCloud Mail that can be used with iCloud.

Store your data in iCloud

Your photos, videos, and more remain secure in iCloud if your iPad is ever replaced, lost, damaged, or stolen, since iCloud keeps your important info safe and synced across your devices.

To turn on or change the features you want to use with iCloud, go to the Settings app, tap your name, then tap iCloud.

For more help getting set up, see these guides:

The availability of features, Apple says, may vary depending on your iPad model and country or region.

Tags: iCloud, Setup

You can turn on and set up your new iPad with an internet connection, or set up iPad by connecting it to your computer. If you have another iPhone, an iPad, or an Android device, you can transfer your data to your new iPad.

To make setup as smooth as possible, it helps to have an internet connection, your Apple Account and password, and your previous iPad or a backup of your device. And you can create an Apple Account during setup if you don’t have one.

Note: When a company, school, or other organization deploys or manages your iPad, ask an administrator or teacher for setup instructions.

Prepare for setup

To make setup go as smoothly as possible, have the following items available:

  • An internet connection through a Wi-Fi network (you may need the name and password of the network) or cellular data service through a carrier (Wi-Fi + Cellular models)
  • Your Apple Account and password; if you don’t have an Apple Account, you can create one during setup
  • Your credit or debit card account information, if you want to add a card to Apple Pay during setup
  • Your previous iPad or a backup of your device, if you’re transferring your data to your new device

    Tip: If you don’t have sufficient storage space to back up your device, iCloud will provide enough storage to complete a temporary backup, free of charge, for up to three weeks from the purchase of your iPad. On your previous device, go to the Settings app, tap General, then tap Transfer or Reset [device]. Tap Get Started, then follow the onscreen instructions.

  • Your Android device, if you’re transferring your Android content

Turn on and set up your iPad

  1. Press and hold the top button until the Apple logo appears.

    A green arrow pointing to the button on the top right of iPad.

    If iPad doesn’t turn on, you might need to charge the battery.

    Tip: If you’re blind or have low vision, you can triple-click the Home button (on an iPad with a Home button) or triple-click the top button (on other iPad models) to turn on VoiceOver, the screen reader. You can also double-tap the screen with three fingers to turn on Zoom. See Get started with accessibility features.

  2. Do one of the following:

    • Set up with another device: If you have another iPhone or iPad with iOS 11, iPadOS 13, or later, you can use it to automatically set up your new device. Bring the two devices close together. Follow the onscreen instructions to securely copy many of your settings, preferences, and iCloud Keychain. You can then restore the rest of your data and content to your new device from your iCloud backup.

      Or, if both devices have iOS 12.4, iPadOS 13, or later, you can transfer all your data wirelessly from your previous device to your new one. Keep your devices near each other and plugged into power until the migration process is complete.

    • Set Up Manually: If you don’t have another device, tap Set Up Without Another Device. Follow the onscreen setup instructions.

Move from an Android device to iPad

Switching from an Android device? The Move to iOS app can transfer your data when you first set up your new iPad.

Note: Already finished setup and want to use Move to iOS? You’ll need to erase your iPad and start over, or move your data manually.

  1. On your device with Android version 4.0 or later, download the Move to iOS app.
  2. On your iPad, do the following:
    • Follow the setup assistant.
    • On the Transfer Your Apps & Data screen, tap From Android.
  3. On the Android device, do the following:
    • Turn on Wi-Fi.
    • Go to the Move to iOS app.
    • Follow the onscreen instructions.

WARNING: To avoid injury, read Important safety information before using iPad.

See also

Tag: Setup

There are multiple ways to turn your iPad on and off—you can use the buttons on the top and side of your iPad, or you can use the controls in Settings and Control Center.

An iPad that doesn’t turn on might need its battery charged. And if your iPad isn’t working as expected, restarting it by turning it off and then on can help, and if that doesn’t fix the issue, you can force it to restart.

Here’s how to turn iPad on or off.

Turn on iPad

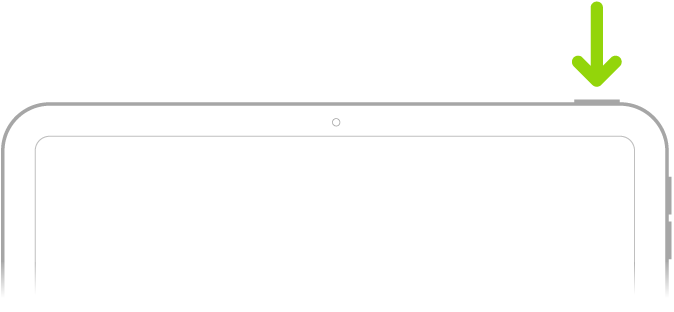
Press and hold the top button until the Apple logo appears.

A green arrow pointing to the button on the top-right of iPad.

When iPad won’t turn on, you might need to charge the battery.

Turn off iPad (models with Face ID or with Touch ID in the top button)

If your iPad doesn’t have the Home button, do the following:

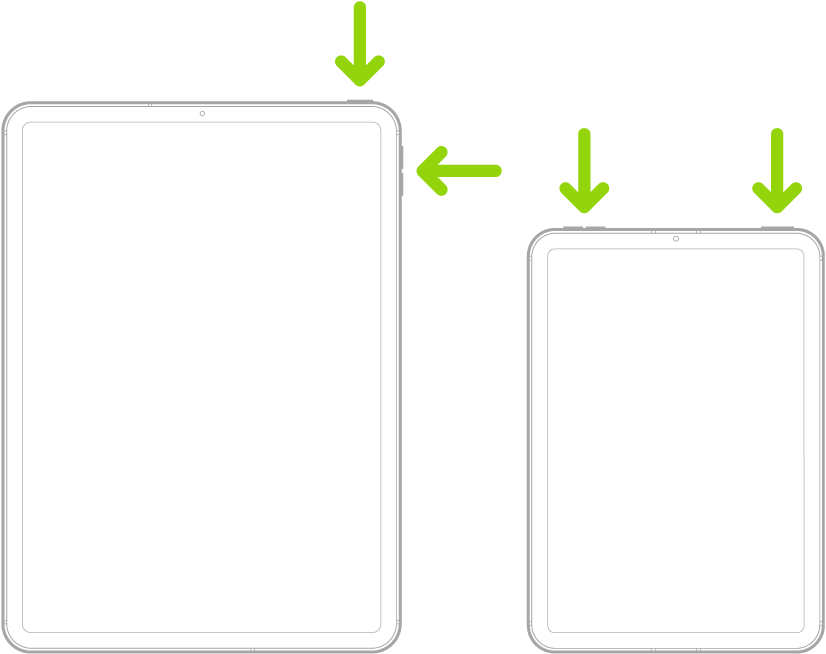
  1. Simultaneously press and hold the top button and either volume button until the Power Off slider appears.

    Two iPad models, each with a top button. One model has volume buttons on the side; the other has volume buttons at the top.

  2. Drag the slider to turn off iPad.

Turn iPad off (models with the Home button)

If your iPad has the Home button, do the following:

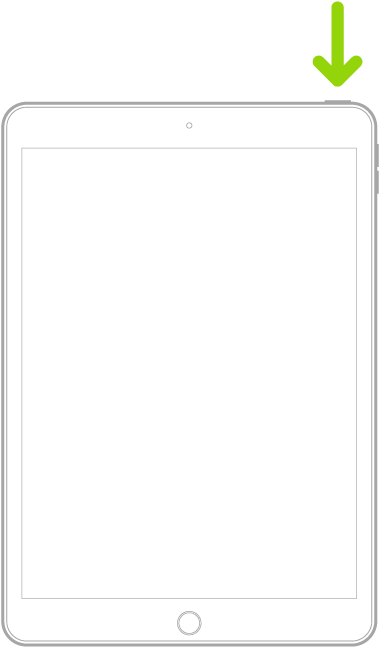
  1. Press and hold the top button.

    An iPad with a Home button. An arrow points to the top button.

  2. Drag the slider to turn off iPad.

Turn off iPad in Control Center

  1. Open Control Center.
  2. Touch and hold the Power button in the top-right corner of your screen.
  3. Drag the slider to turn off iPad.

Turn off iPad in Settings

  1. Open the Settings app on your iPad.
  2. Tap General and scroll down. Tap Shut Down.
  3. Drag the slider to turn off iPad.

Restarting your iPad by turning it off and back on can help when it isn’t working as expected. Still having the issue? Try forcing it to restart.

See also

Tag: Setup
iPad turns off the display to save power, locks for security, and goes to sleep when you’re not using it. You can quickly wake and unlock iPad when you want to use it again.

You can unlock iPad with Face ID, Touch ID, or a passcode, depending on your model. And iPad locks by itself after a certain amount of time without use, though you can lock it manually, too.

Wake iPad

You can wake iPad in a few different ways:

  • Press the top button.

    A green arrow pointing to the button in the top right of iPad.

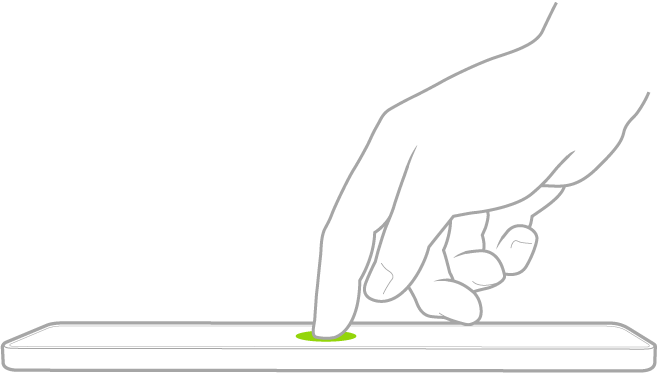
  • Tap the screen (supported models).

    A finger tapping the screen to wake iPad.

  • Open a Smart Folio, Smart Cover, or Magic Keyboard cover.

Unlock iPad with Face ID

If you have an iPad with Face ID, but you didn’t turn on Face ID during setup, see Set up Face ID. Then follow these steps:

  1. Tap the screen, then glance at your iPad.

    The lock icon animates from closed to open to indicate that iPad is unlocked.

  2. Swipe up from the bottom of the screen.

To lock iPad again, press the top button. iPad locks automatically if you don’t touch the screen for a minute or so. However, if Attention Aware Features is turned on, iPad won’t dim or lock as long as it detects attention. To turn it on or off, go to the Settings app, then tap Face ID & Passcode.

Unlock iPad with Touch ID

Have an iPad with Touch ID that you didn’t set up during setup? See our guide, Set up Touch ID. On an iPad with a rectangular button on the top edge, use the top button; with a circular button at the bottom of the screen, the Home button is the one to use, and after that, do one of the following:

  • On an iPad with a Home button: Press the Home button using the finger you registered with Touch ID.

    The Home button (Touch ID) at the bottom of iPad.

  • On iPad (10th generation and later), iPad mini (6th generation), iPad mini (A17 Pro), and iPad Air (4th generation and later): Rest your finger on the top button (Touch ID) using the finger you registered with Touch ID.

    A green arrow pointing to the button in the top right of iPad.

To lock iPad again, press the top button. iPad locks automatically if you don’t touch the screen for a minute or so.

Unlock iPad with a passcode

If you didn’t create a passcode when you set up iPad, see Set a passcode. Then follow these steps:

  1. Press the Home button (on an iPad with a Home button) or swipe up from the bottom of the Lock Screen (on other iPad models).
  2. Enter your passcode.

Lock iPad

You can lock iPad and turn off the screen in the following ways:

  • Manually: Press the top button.
  • Automatically: iPad locks on its own if you don’t interact with it for a certain amount of time. To change how long iPad waits before locking, see Change when iPad automatically locks.

See also

Tag: Setup
You can pair more than one Apple Watch with your iPhone and easily switch from one watch to another.

You pair another Apple Watch the same way you paired your first one. After that, your iPhone detects the paired Apple Watch you’re wearing and connects to it automatically, though you can choose a watch manually, too.

Set up another Apple Watch

You can pair another Apple Watch in the same way you paired your first one. Bring your iPhone near your Apple Watch, wait for the Apple Watch pairing screen to appear on your iPhone, then tap Pair. Or follow these steps:

  1. Start the Apple Watch app on your iPhone.
  2. Tap My Watch, then tap All Watches at the top of the screen.
  3. Tap Add Watch, then follow the onscreen instructions.

Quickly switch to a different Apple Watch

Raise your wrist after you put on a different Apple Watch. Your iPhone picks up the paired Apple Watch you’re wearing and connects to it on its own.

You can also choose an Apple Watch manually:

  1. Start the Apple Watch app on your iPhone.
  2. Tap My Watch, then tap All Watches at the top of the screen.
  3. Turn off Auto Switch and choose a different watch.

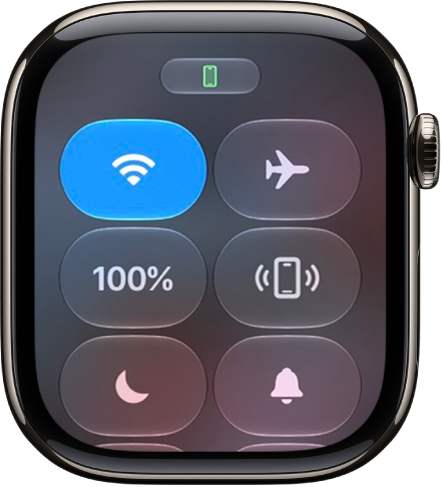
To see if your Apple Watch is connected to your iPhone, press the side button to open Control Center, then look for the Connected status icon at the top of the screen.

Control Center with the Connected status icon at the top showing that the Apple Watch is connected to iPhone.

See also

Tag: Setup
It takes just a few minutes to get up and running with Apple Watch.

To set up your Apple Watch, you pair it with your iPhone, or prepare it for someone in your family who doesn’t have an iPhone. Your Apple Watch comes with both stylish and functional watch faces, too.

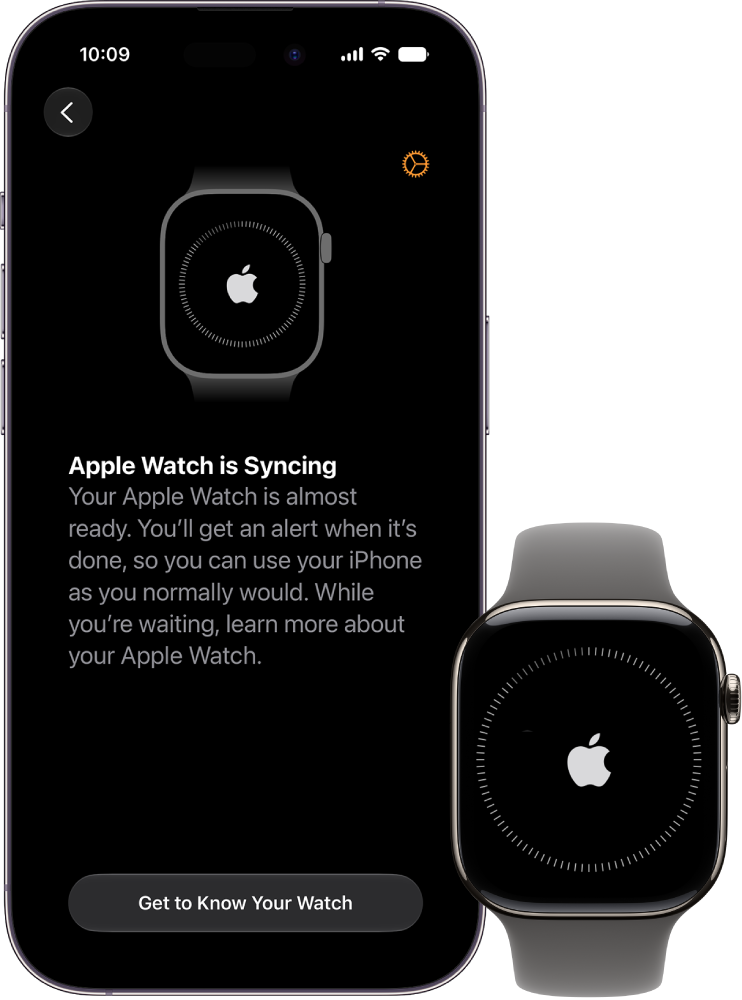
An iPhone and Apple Watch showing their syncing screens.

Pair Apple Watch with your iPhone

To set up your Apple Watch, put it on your wrist snugly, then press and hold the side button to turn it on. Bring your iPhone near your watch, then follow the onscreen instructions. To prepare an Apple Watch for a person in your family who doesn’t have an iPhone, tap Set Up for a Family Member.

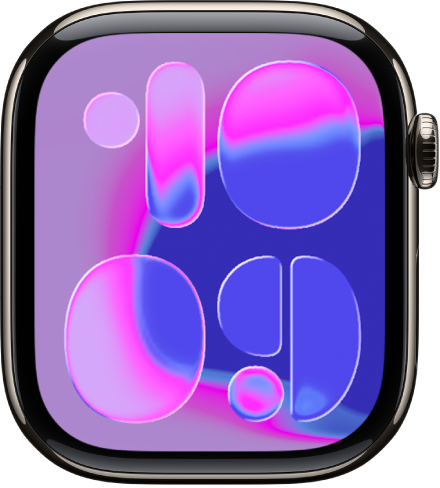
The Flow watch face showing the time in very large numbers.

Choose a watch face

Apple Watch comes with both stylish and functional watch faces. To switch to a different face, touch and hold the display, then swipe left or right across the screen. To see even more available faces, swipe left until you see the Add button, tap the button, then scroll through the faces. Tap Add, customize the watch face if you choose to, then press the Digital Crown to use it.

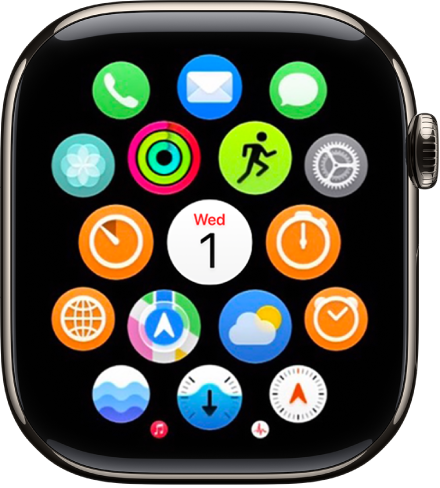
The Home Screen in grid view.

Open an app

Your Apple Watch comes with a variety of apps for staying on top of your health, working out, and keeping in touch. To open an app, press the Digital Crown, then tap the app. To return to the Home Screen, press the Digital Crown again. You can download more apps from the App Store on Apple Watch.

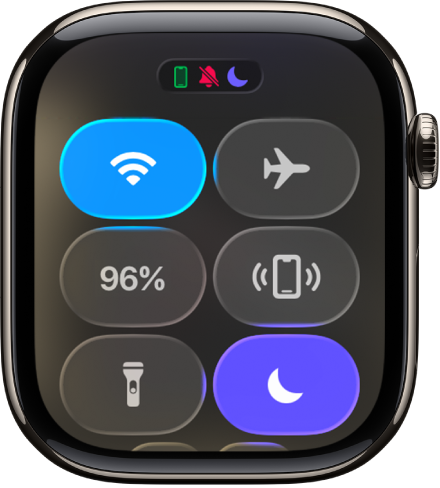
Control Center showing six buttons—Wi-Fi, Ping iPhone, Battery, Silent Mode, Theater Mode, and Do Not Disturb.

Quickly change settings

Control Center gives you instant access to Silent Mode, Do Not Disturb, Wi-Fi, flashlight, and more—just like on iPhone. To open Control Center, press the side button.

There’s a lot more to Apple Watch, and these guides are a good place to start:

Tag: Setup

You can interact with Apple Watch using the Digital Crown, side button, Action button, and gestures. The Digital Crown lets you see the watch face or Home Screen, open the App Switcher, and use Siri, and the side button lets you use Control Center, use Emergency SOS, and use Apple Pay. Gestures include cover to mute, wrist flick, and double tap.

You can also practice these gestures in the Tips app. See Use the Tips app.

Press or turn the Digital Crown

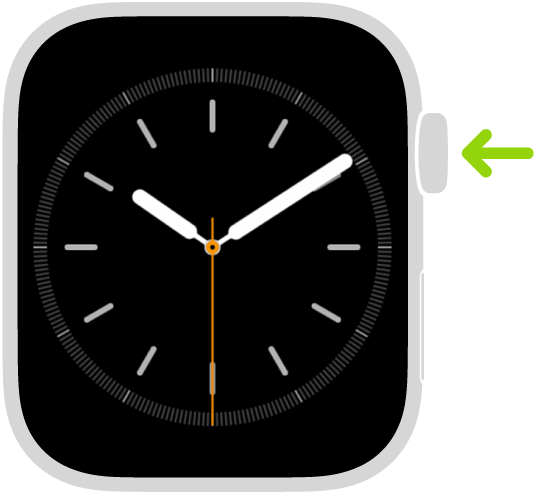
Illustration of Apple Watch with an arrow pointing to the Digital Crown at upper right.

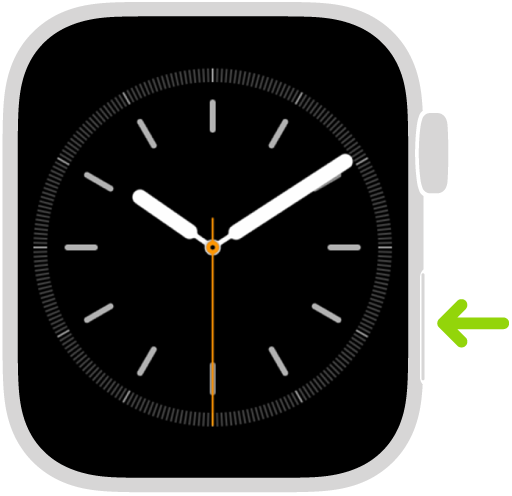
Press the side button

Illustration of Apple Watch with an arrow pointing to the side button at lower right.

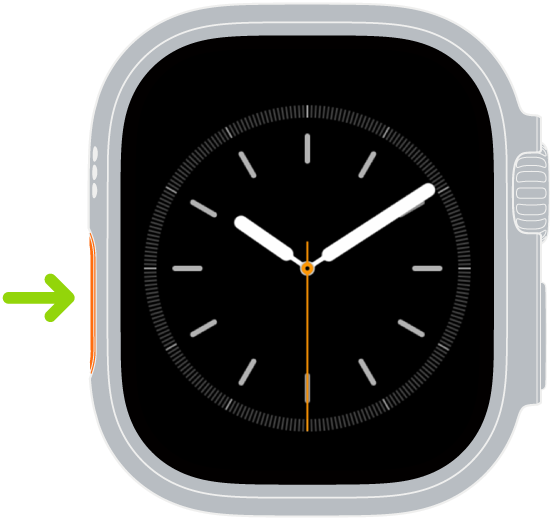
Press the Action button (Apple Watch Ultra models)

Illustration of Apple Watch Ultra with an arrow pointing to the Action button on the left side.

Use gestures

See also

Tag: Setup
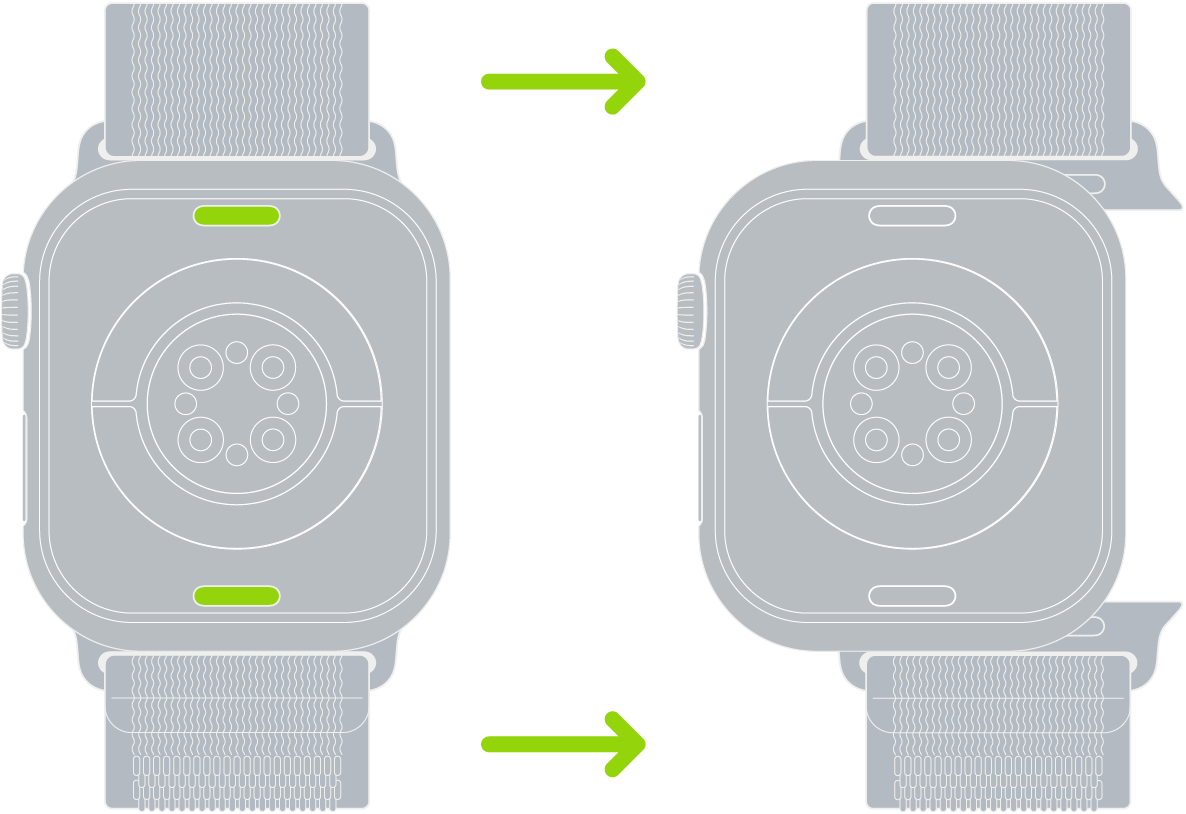
Different Apple Watch bands use the same release mechanism, so follow these general steps to remove and attach a band. It’s simple. Never force a band into the slot, though, and if you’re having trouble removing or inserting a band, the steps cover that, too. You can also see the Apple Watch models.

Remove and change a watch band

  1. Hold down the band release button on your Apple Watch.
  2. Slide the band across to remove it. Then slide the new band in.

    Never force a band into the slot. If you’re having trouble removing or inserting a band, hold down the band release button again.

    Two images of Apple Watch. The image on the left shows the band release button. The image on the right shows a watch band partially inserted into the band slot.

See also

Tag: Setup