Got a tip for us?

iPad

The iPad is a tablet computer from Apple that runs the iOS mobile operating system. Similar in functionality to the iPhone, the iPads purpose is often quite different, sometimes even serving as a general desktop computer replacement.

On iPhone 16 Pro or later (except iPhone 16e), you can create a layered recording by adding a vocal layer on top of an instrumental recording. On an iPad with iPadOS 18.2 or later, where you’re signed in to the same Apple Account, you can see any layered recordings you created on a supported iPhone.

You can mix the two layers, or separate them to edit them or play them separately, and the two layers then appear as separate recordings. You can even import layered recordings into Logic Pro.

Note: Layered recordings use the QTA (QuickTime Audio) format, which means devices that have iOS 18.1, iPadOS 18.1, macOS 15.1, or earlier can’t show them. Once you separate the layers, each one is in .m4a format and appears on devices running iOS 18.1, iPadOS 18.1, macOS 15.1, or earlier.

Mix the layers

You can mix a layered recording’s two layers.

  1. Go to the Voice Memos app on your iPad.
  2. Tap the layered recording you want to mix.
  3. Tap the Options button.
  4. Drag the Layer Mix slider to mix the layers.

Separate the layers

Separating the two layers of a layered recording on your iPad means you can edit or play them separately.

  1. Open the Voice Memos app on your iPad.
  2. In the list of recordings, touch and hold the layered recording you want to separate and tap Separate Layers.

    The two layers appear as separate recordings in the list. You can select them, edit them, and play them separately.

    Note: The separated layers are in .m4a format and will appear on devices with iOS 18.1, iPadOS 18.1, macOS 15.1, or earlier.

Import layered recordings into Logic Pro

With Voice Memos turned on in iCloud settings, a layered recording from your iPhone opens on your iPad, as long as you’re signed in to the same Apple Account there, so you can export the recording to Files. From there, import it into Logic Pro for iPad for editing, and in Logic Pro 11.1.1 or later, the two layers automatically open as two distinct tracks.

See also

In the Voice Memos app on iPad, you can easily record lectures, song ideas, meetings, and more. Your recordings appear automatically on your other devices signed in to the same Apple Account, and you can edit them, view and search transcripts, and share or export them.

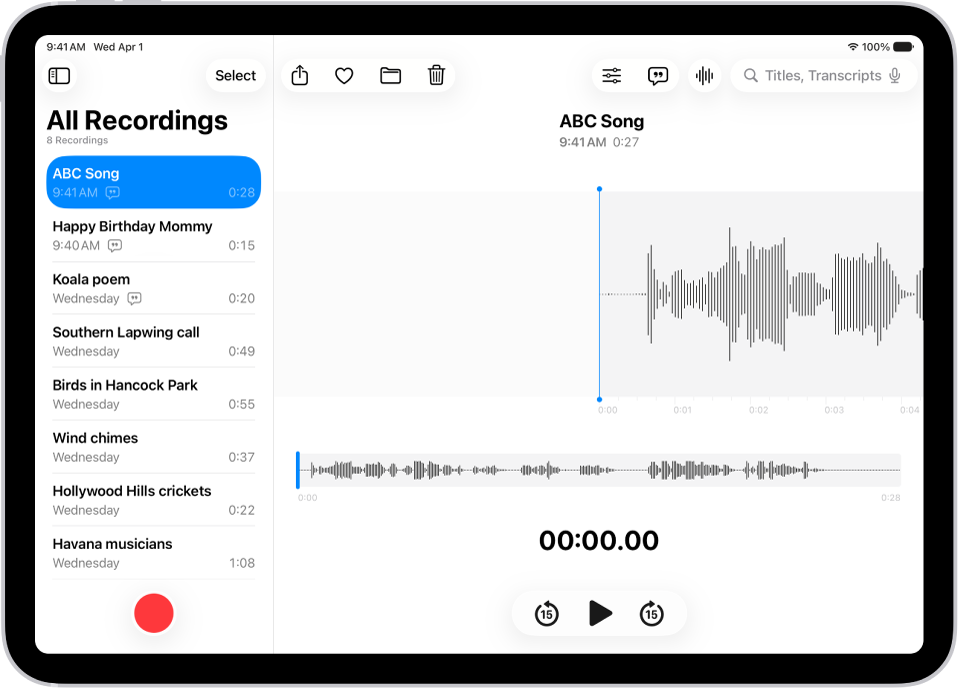
A recording made in Voice Memos. The list of recordings is on the left, with a selected recording at the top. On the right, the waveform has a playhead, which you can drag to go to a specific place in the recording. Above the waveform are the Share, Favorite, Move, Delete, Playback Options, Transcription, and Edit buttons. Below the timeline are the Playback controls.

Record with a single tap

To begin recording, just tap the Record button.

As long as Voice Memos is on in iCloud settings and you’re signed in to the same Apple Account, your audio recordings show up automatically on your iPhone, iPad, Mac, and Apple Vision Pro.

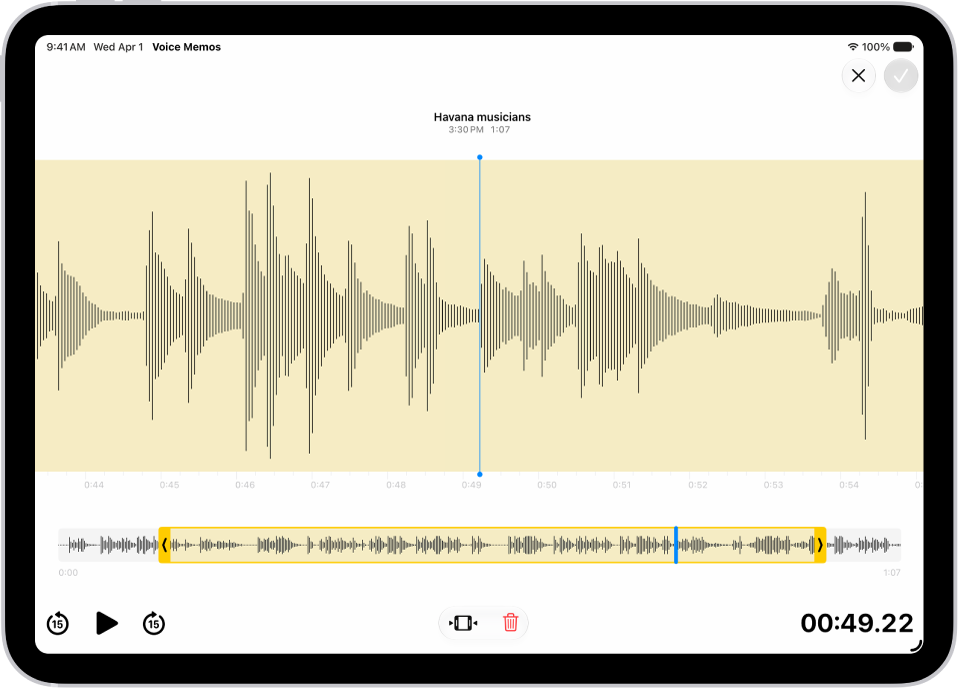
A recording is being edited, with the yellow trim handles enclosing a portion of the audio waveform at the bottom of the screen. To the left of the Playback controls are the Trim button (for deleting the part of the recording outside the handles) and the Delete button (for deleting the part of the recording outside the handles).

Fine-tune your recordings

Whether you capture a recording on your iPad, iPhone, Mac, Apple Watch, or Apple Vision Pro, you can edit it easily, right on your iPad. Select the recording in the recordings list, tap the Edit button, then tap the trim button at the top right to begin editing.

A recording made in Voice Memos. The list of recordings is on the left, with a selected recording at the top. On the right, the waveform has a playhead, which you can drag to go to a specific place in the recording. Above the waveform are the Share, Favorite, Move, Delete, Playback Settings, Transcription, and Edit buttons. Below the timeline are the Playback controls.

View and search audio transcripts

You can view transcripts of your recordings in Voice Memos, either live while you’re recording or after. Transcripts are searchable, so you can find just the moment you’re looking for. To see the transcript of the selected recording, tap the Transcription button at the top right. To search for specific text, enter it in the search field above the list of recordings. The list shows only recordings with that text.

A recording made in Voice Memos. The list of recordings is on the left, with a selected recording at the top. On the right, the waveform has a playhead, which you can drag to go to a specific place in the recording. Above the waveform are the Share, Favorite, Move, Delete, Playback Settings, Transcription, and Edit buttons. To see the transcript, tap the Transcription button.

Share or export a recording

You can share a recording with friends, or export it to Logic Pro to enhance it with professional editing tools. To share, tap the recording, then tap the Share button. Tap Options, choose whether to share as a rendered or editable file, then tap the Done button. Choose a sharing option, or to export, swipe up, then tap Save to Files.

For more on Voice Memos, here’s where to head next:

You can fine-tune your recordings using the editing tools. Remove parts, record over parts, or replace an entire recording.

You can trim a recording to keep or delete a section, and save the edited version as a new recording, so the original stays as it was. You can also delete a recording, and recover or erase a deleted one later.

Here’s how to edit or delete a recording in Voice Memos on iPad.

Edit a voice recording

  1. Go to the Voice Memos app on your iPad.
  2. In the list of recordings, tap the recording you want to edit and then tap Edit at the top right.
  3. Tap the Trim button at the top right. Then drag the yellow trim handles to enclose the section you want to keep or delete.

    You can pinch open to zoom in on the waveform for more precise editing.

    To check your selection, tap the Play button.

  4. To keep the selection (and delete the rest of the recording), tap Trim, or to delete the selection, tap Delete.
  5. Tap Apply and then tap Done.
  6. Tap Save Recording to overwrite the original recording, or tap Save as New Recording to save the edited version as a new recording (leaving the original as it was).

Replace a recording

  1. Start the Voice Memos app on your iPad.
  2. In the list of recordings, tap the recording you want to replace and then tap Edit at the top right.
  3. Drag the waveform to position the playhead where you want to start recording new audio.

    You can pinch open to zoom in on the waveform for more precise placement.

  4. Tap Replace to begin recording (the waveform turns red as you record).

    Tap the Pause button to pause; tap Resume to continue.

  5. To check your recording, tap the Play button.
  6. Tap Done and tap Save Recording to replace the original recording, or tap Save as New Recording to save the changes as a new recording (leaving the original as it was).

Delete a recording

  1. Start the Voice Memos app on your iPad.
  2. Do any of the following:
    • In the list of recordings, tap the recording you want to delete, then tap the Delete button.
    • Tap Edit above the list of recordings, select one or more recordings, then tap Delete.

Deleted recordings move to the Recently Deleted folder, where they’re kept for 30 days by default. To change how long deleted recordings are kept, go to Settings > Apps > Voice Memos > Clear Deleted, then select an option.

Recover or erase a deleted recording

  1. Start the Voice Memos app on your iPad.
  2. Tap the Recently Deleted folder. Then tap the recording you want to recover or erase.
  3. Do any of the following:
    • Recover the selected recording: Tap Recover.
    • Delete the selected recording: Tap Delete.
    • Recover everything in the Recently Deleted folder: Tap Edit above the Recently Deleted list, then tap Recover All.
    • Delete everything in the Recently Deleted folder: Tap Edit above the Recently Deleted list. Tap Delete All.

See also

With Visual Look Up, you can identify and learn about architectural landmarks, popular statues, famous art, plants, pets, books, and more that appear in photos and images. It can also identify food and suggest related recipes, and you can use it in Photos, Safari, Quick Look, and more.

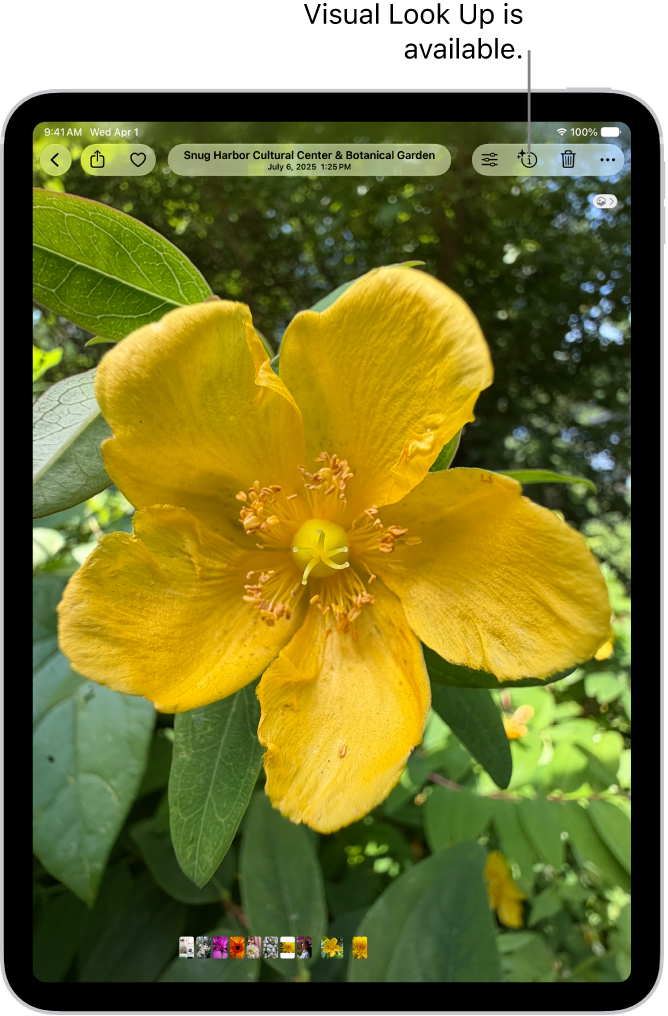
When the Info button shows a symbol with stars, Visual Look Up is available. You can also interact with content in a photo or video, and lift a subject from the photo or video background.

A photo is open in the Photos app library. At the top of the screen, the Info button displays an icon indicating that Visual Look Up information is available. The button is selected and the Visual Look Up results appear on the screen.

  1. Open a photo or image in full screen, or pause a video on any frame.

    If the Info button displays a symbol with stars such as the Fork Knife Circle Badge Sparkles button or the Dog Circle Badge Sparkles button, Visual Look Up is available.

  2. Tap the starred Info button and then tap Look Up at the top of the photo information to view the Visual Look Up results.
  3. Tap the screen anywhere outside the Visual Look Up results box to close it and tap the Close button to close the photo or video info box.

Apple says Visual Look Up isn’t available in all regions or languages.

See also

Tag: Photos

Live Text recognizes text within your photos, videos, and images you find online. You can select text to copy, share, or translate, or use quick actions to make a phone call, open a website, or convert currencies.

You can use Live Text in Safari, Photos, Camera, Quick Look, and more, and you’ll want to make sure it’s turned on for all supported languages first. You can also look up the meaning of text, search the web for it, or share it with AirDrop, Messages, or Mail.

Note: Live Text isn’t supported on iPad (8th generation), and it isn’t available in all regions or languages.

A photo of a recipe in Spanish is shown. Within the photo, text is highlighted. Near the bottom, from left to right, are buttons for Translate, converting grams, converting Celsius, and the Detect Text button.

Turn on Live Text

Before you start using Live Text, make sure it’s turned on for all supported languages.

  1. Open the Settings app on your iPad.
  2. Tap General and tap Language & Region.
  3. Turn on Live Text.

Copy, translate, and look up text in a photo or video

  1. Open a photo or pause a video that contains text.
  2. Tap the Detect Text button and then touch and hold the selected text.
  3. Use the grab points to select specific text. Then do any of the following:
    • Copy Text: Copy text to paste into another app such as Notes or Messages.
    • Select All: Select all the text within the frame.
    • Look Up: Show personalized web suggestions.
    • Translate: Translate text.
    • Search the web: Look up the selected text on the web.
    • Share: Share text using AirDrop, Messages, Mail, or other available options.
  4. Tap the Detect Text button to return to the photo or video.

Perform tasks within a photo or video with quick actions

Depending on the content of the photo or video, you can tap a quick action at the bottom of the screen to do things like make a phone call, get directions, translate languages, convert currencies, and more.

  1. Open a photo or pause a video that contains text.
  2. Tap the Detect Text button.
  3. Tap a quick action at the bottom of the screen.
  4. Tap the Detect Text button to return to the photo or video.

See also

Tag: Photos

With Live Text on supported models, you can use your iPad camera to copy, share, look up, and translate text that appears within the camera frame. Camera also provides quick actions to easily call phone numbers, visit websites, convert currencies, and more, based on the text that appears in the frame.

You can select specific text or all of it, and you’re able to search the web for it or share it using AirDrop, Messages, Mail, or other available options.

  1. Open Camera on your iPad.
  2. Position your iPad so the text appears within the camera frame.
  3. After the yellow frame appears around detected text, tap the Live Text button.
  4. Touch and hold the text. Use the grab points to select specific text and perform any of the actions below:

    • Copy: Copy text to paste into another app such as Notes or Messages.
    • Select All: Select all the text within the frame.
    • Look Up: Show personalized web suggestions.
    • Translate: Translate text.
    • Search Web: Look up the selected text on the web.
    • Share: Share text using AirDrop, Messages, Mail, or other available options.

      Tip: Depending on the content, you can tap a quick action at the bottom of the screen to do things like make a phone call, visit a website, start an email, convert currencies, and more.

  5. Tap the Live Text On button to return to Camera.

To turn off Live Text on your iPad camera, go to Settings > Camera, then turn off Show Detected Text.

Note: Live Text isn’t available in all regions or languages.

See also

Tag: camera

You can select alternative, third-party apps—for email, messaging, calling, call filtering, web browsing, passwords, or keyboards—as defaults to launch instead of the built-in Apple apps.

Make sure the app you want to switch to supports this feature, and if you aren’t sure, contact the app developer. You can also change the default app used to translate text, or the app that opens links on the web. Some app categories, like Maps, Camera, and Music, can’t be changed.

Note: Some app categories, like Maps, Camera, and Music, aren’t in Default Apps, so they can’t be set to a different default.

Change your default apps

  1. Open the Settings app on your iPad.

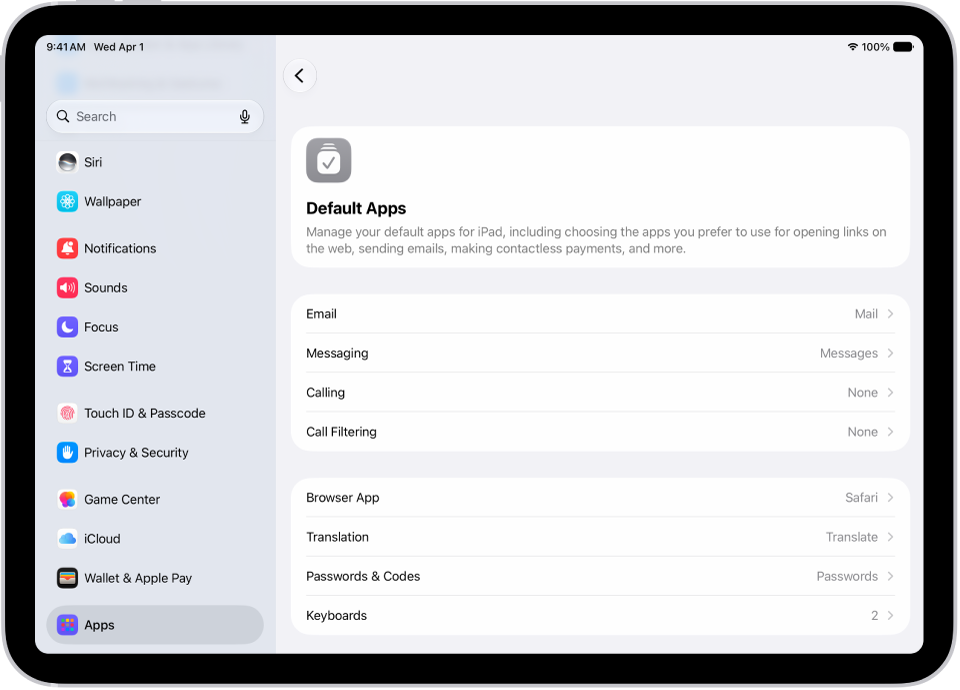
    The screen for changing your default apps for sending email, browsing the web, and more.

  2. Tap Apps, tap Default App, and tap any of the following:

    • Email: To change the default app for sending and receiving email.
    • Messaging: To change the default app for sending and receiving messages.
    • Calling: To change the default app for making and receiving calls.
    • Call Filtering: To turn on or off call blocking and identification options.
    • Browser App: To change the default app to open links on the web.
    • Translation: To change the default app used to translate text.
    • Passwords & Codes: This section allows you to turn on or off AutoFill Passwords and Passkeys for apps and websites, and password, passkey, and code-generation and verification apps.
    • Keyboards: To add or delete keyboards and third-party keyboard apps.
    • Media Sharing Extension: To change the default app for sending audio and video to compatible devices.
  3. Select the app you want to use as the default.

To change the default search engine Safari and Spotlight use, read our guide, Change your default search engine.

See also

Spotlight on iPad finds apps and contacts, content in apps like Mail and Messages, and even text in your photos using Live Text. It’s also where you’ll check stock and currency information, and open webpages, apps, and images from your photo library.

When you search for an app, shortcuts for your most likely next action appear in the Top Hit. If you search for Photos, for example, you’ll get a shortcut to the Favorites album. You can even take quick action right from your search, like starting a timer, turning on a Focus, or finding the name of a song with Shazam.

When you turn on Siri AI (Beta)* on supported iPad models, Spotlight becomes where you start a conversation with Siri: ask for personal context, get broad world knowledge, or take actions across your app, all from the same place. See Get started with Siri AI on iPad.

Note: Siri AI is available in beta on iPadOS 27 or later on an Apple Intelligence-enabled iPad mini (A17 Pro) or iPad model with M1 or later set to a supported language. Available in English to start. Siri AI will not initially be available in the EU on iPadOS. Usage limits may apply.

Search with iPad

  1. Go to the Home Screen or the Lock Screen.
  2. Swipe down from the middle of the screen.
  3. Enter what you’re looking for in the search field.
  4. Do any of the following:
    • Initiate your search: Tap Go or Search.
    • Open a suggested app: Tap the app.
    • Take quick action: Start a timer, turn on a Focus, find the name of a song with Shazam, run any shortcut, and more. Search for an app’s name to see shortcuts available for the app, or create your own using the Shortcuts app.
    • Check a suggested website: Tap it.
    • Get more information about a search suggestion: Tap it. Tap one of the results to open it.
    • Start a new search: Tap the Clear Text button in the search field.

Note: Third-party app content appears in search results only if the app supports Spotlight indexing. When something you’re looking for doesn’t appear, the app might not support Spotlight search.

Choose which apps and content to include in Search

  1. Start the Settings app on your iPad.
  2. Tap Search and scroll down. Tap an app.
  3. Turn Show App in Search or Show Content in Search on or off.

Turn off Location-Based Suggestions

Spotlight may use your location to refine suggestions when Location Services is on, though you can turn off Location-Based Suggestions.

  1. Start the Settings app on your iPad.
  2. Tap Privacy & Security and then tap Location Services.
  3. Tap System Services, then turn off Suggestions & Search.

Search in apps

To help you find something within the app, many apps include a search field or a search button. In the Maps app, for example, you can search for a specific location.

  1. In an app, tap the search field or the Search button (if there is one).

    If you don’t see a search field or button, swipe down from the top.

  2. Type your search and then tap Search.

Add a dictionary

If you add dictionaries on iPad, they can be used in searches.

  1. Start the Settings app on your iPad.
  2. Tap General and tap Dictionary. Select a dictionary.

*Apple Intelligence is available with Siri and device language set to Chinese (Simplified), Chinese (Traditional), Danish, Dutch, English, French, German, Italian, Japanese, Korean, Norwegian, Portuguese, Spanish, Swedish, Turkish, or Vietnamese. Some features may not be available in all regions or languages. Some devices may not be available in all regions. Siri AI is available in beta in iOS 27, iPadOS 27, macOS 27, watchOS 27, and visionOS 27 and requires an Apple Intelligence–enabled device set to a supported language. Available in English to start. Siri AI will not be initially available in the EU on iOS, iPadOS, and watchOS. Certain Apple Intelligence features that rely on server-side models are subject to daily usage limits, including but not limited to Siri AI, Intelligent Photo Editing Tools, Image Playground, and AFM 3 Cloud models in Shortcuts. Daily limits may vary by feature, request complexity, system demand, system policies, and other factors. Expanded access to such features will be available for a fee in the future. Use of these features is subject to the Apple Intelligence Terms and Conditions.

See also

Tag: iPadOS

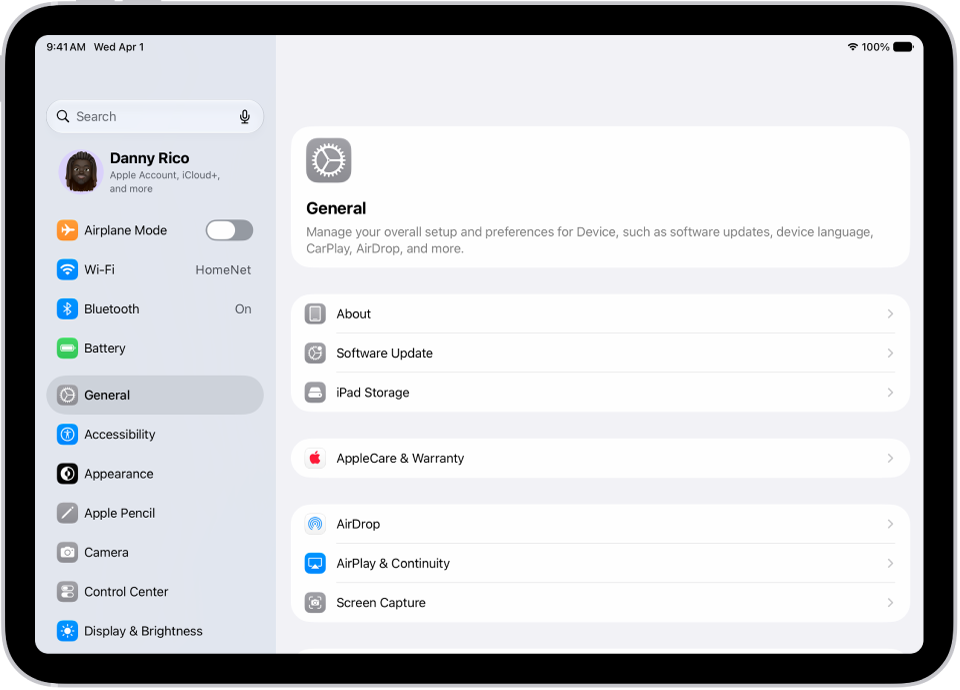
In the Settings app, you can search for iPad settings you want to change, such as your passcode, notification sounds, and more. Each section covers a different area of iPad, and depending on your iPad model, you may see different sections. Settings can even be searched from the Home Screen or Lock Screen.

Search for a setting

  1. Start the Settings app on your iPad.

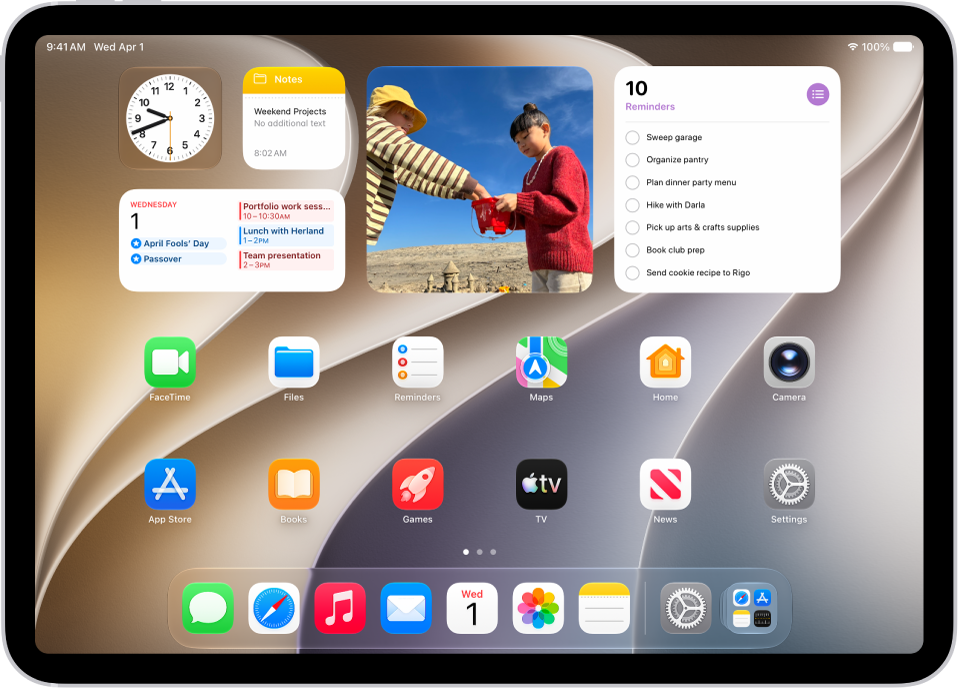
    The iPad Home Screen with several app icons, including the Settings app icon, which you can tap to change your iPad sound volume, screen brightness, and more.

  2. Tap the search field (at the top left), enter a term—”volume,” for example—then tap a setting on the left side of the screen.

    The iPad Home Screen with several app icons, including the Settings app icon, which you can tap to change your iPad sound volume, screen brightness, and more.

Quick tip: From the Home Screen or Lock Screen, you can also search for settings.

What’s in Settings

Settings is organized into sections. Each covers a different area of iPad, and the sections you see may vary depending on your iPad model.

Section Description
Your name Apple Account, iCloud storage and sync, subscriptions, Find My
Airplane Mode Turn Airplane Mode on or off
Wi-Fi Join and manage Wi-Fi networks, password sharing, Connectivity Assist
Bluetooth Connect and manage Bluetooth devices
Cellular On supported models, turn cellular data on or off, roaming, per-app data usage
Personal Hotspot Share your internet connection with other devices
Battery Battery percentage, battery usage by app, Low Power Mode, and Charge Limit on supported models
General Software update, date and time, language and region, keyboard, VPN, device management, transfer or reset iPad, and more
Accessibility Vision, physical and motor, hearing, speech, and accessibility features including VoiceOver, Zoom, and AssistiveTouch
Appearance Light or Dark Mode, text size, display appearance, and Liquid Glass settings
Apple Pencil Draw with Apple Pencil, Scribble, and Pencil Gestures
Camera Photo and video format, resolution, grid, and other camera options
Control Center Access Control Center within apps and reset Control Center
Display & Brightness Screen brightness, Night Shift, Auto-Lock
Home Screen & App Library Choose where newly downloaded apps are added, show Search on the Home Screen, notification badges in App Library
Multitasking & Gestures Stage Manager, Slide Over, Split View, and gesture settings
Search Spotlight search suggestions and which apps appear in search results
Siri Configure voice, language, and app suggestions
Wallpaper Change your Lock Screen and Home Screen wallpaper
Notifications Choose which apps can send notifications, notification sounds, scheduled summary
Sounds Ringtone, text tone, volume, vibration, lock sound, keyboard sound, headphone safety, and personalized audio
Focus Set up Do Not Disturb and Focus modes to reduce distractions
Screen Time App limits, downtime, content restrictions, parental controls
Face ID & Passcode or Touch ID & Passcode Set up Face ID or Touch ID, change passcode, allow access when locked
Privacy & Security App permissions, location services, and tracking
Game Center Game Center account, friends, and nearby players
iCloud iCloud storage, sync settings, and connected apps
Wallet & Apple Pay Payment cards, passes, and Apple Pay settings
Apps Settings for individual apps—Mail, Safari, Messages, Photos, and more

See also

After you set up iCloud Drive, you can share individual files and folders with friends and colleagues. When you change a shared file or folder, others see your changes automatically, and if you let people edit, their changes show up for you, too.

You can share a file or folder so only the people you choose can open it, or anyone with the link. And you can let them make changes, or restrict them to viewing only.

These are important characteristics of files and folders shared in iCloud Drive:

  • If you collaborate on a folder, all items added to that folder by you or other participants are automatically shared.
  • The link to a shared file includes its name. If the name or content is confidential, be sure to ask recipients not to forward the link to anyone else.
  • If you move a shared file to another folder or location, the link no longer works, and people lose access to the item.
  • Depending on the app, users might need to reopen a file or tap the original link to see the latest changes.

Share or collaborate on a file or folder

You can invite others to view or collaborate on the contents of a file or folder you own in iCloud Drive.

A file or folder can be shared so it opens only for people you choose, or for anyone with the link.

The contents of a file or folder can be open to changes, or you can restrict access so they’re view-only.

  1. Go to the Files app on your iPad.
  2. Go to a location and then touch and hold the file or folder you want to share.
  3. Tap the Share button, tap the menu under the item’s title, and tap Share a Link.
  4. To change who can access the file or folder and whether they can edit or just view and download, tap People you choose can edit and then do any of the following:

    • Only allow people you invite or approve to access the file or folder: Tap People you choose.

      Note: When you select “People you choose,” you can turn on Access Requests, which lets other people with the link ask you to approve their access.

    • Allow anyone with the link to access the file or folder: Tap Anyone with the link.
  5. Under New Participants Can, choose whether participants can edit or view and download only.
  6. Choose how you want to send your invitation.

Send a copy of a file or folder

  1. Start the Files app on your iPad.
  2. Go to a location and then touch and hold the file or folder you want to share.
  3. Tap the Share button and tap the menu under the item’s title. Then tap Send a Copy.
  4. Choose how you want to send your copy.

Invite more people to collaborate on a folder or file

If its access is set to “People you choose,” you can share a folder or file you’ve already shared with more people.

  1. Start the Files app on your iPad.
  2. Tap Shared at the top of the screen.
  3. Touch and hold the folder or file you want to share.
  4. Tap Manage Shared Folder or Manage Shared File.
  5. Tap Add Participant and choose a method for sending the link.
  6. Enter any other requested information. Send or post the invitation.

Share a folder or file with more people using a link

With access to a shared folder or file set to “Anyone with the link,” anyone who has the link can share it with others.

  1. Start the Files app on your iPad.
  2. Tap Shared at the top of the screen.
  3. Touch and hold the folder or file you want to share.
  4. Tap Manage Shared Folder or Manage Shared File. Then tap Copy Link.
  5. Choose a method for sending the link, enter any other requested information, and send or post the invitation.

Change access and permission settings for everyone

You can change the access of a shared folder or file you own at any time, and the change affects everyone you’ve shared the link with.

  1. Start the Files app on your iPad.
  2. Touch and hold the folder or file whose permissions you want to change.
  3. Tap Manage Shared Folder or Manage Shared File, then tap Sharing Options.
  4. Change either or both of the options.
    • Access option: When you change the access option from Anyone with the link to People you choose, the original link no longer works for anyone, and only people who receive a new invitation from you can open the folder or file.
    • Permission option: When you change the permission option, everyone who has the file open when you change the permission sees an alert. New settings take effect when the alert is dismissed.

Change access and permission settings for one person

For a shared folder or file you own with access set to “People you choose,” one person’s permission can change without affecting others’ permissions, and you can also remove the person’s access.

  1. Start the Files app on your iPad.
  2. Touch and hold the folder or file whose permissions you want to change.
  3. Tap Manage Shared Folder or Manage Shared File.
  4. Tap the person’s name, then select an option.

Stop sharing a folder or file

If you’re the owner of a shared folder or file, you can stop sharing it.

  1. Start the Files app on your iPad.
  2. Open the location of the folder or file you want to stop sharing.
  3. Touch and hold the folder or file. Tap Manage Shared Folder or Manage Shared File.
  4. Tap Stop Sharing.

When you stop sharing a file, anyone who has it open sees an alert. Dismissing the alert closes the item, removes the file from the person’s iCloud Drive, and stops the link from working. If you later share the item again with access set to “Anyone with the link,” the original link works. With “People you choose,” the original link works again, but only for the people you reinvite to share the item.

See also

Tags: Files, iCloud