Got a tip for us?

iPhone

The iPhone is a smartphone from Apple that runs the iOS mobile operating system. Between its apps, communication features, the camera, mobile internet access, and other functionalities, the iPhone has quickly become an integral part of many peoples tech lives.

If you’ve ever been duped into buying a fake iPhone charger, you know how frustrating it can be. Luckily, there are a few ways to tell if a charger is the real deal or not. In this blog post, we’ll show you how to identify a fake iPhone charger.

Introduction

If you’ve ever seen a charger that looks strikingly similar to the official Apple chargers but is much cheaper, you may be thinking: is this thing legit or not? Well, before you plug it into your iPhone, there are a few things you can do to verify its authenticity. In this guide we will show you how to identify a counterfeit or fake iPhone charger. We will show you the things you should look for that will help you in identifying if your iPhone charger is fake or real.

How to spot a fake iPhone charger

Check the Box

Apple is meticulous about its packaging, so if you still have the box your charger came in, check here first. The box may look legitimate at first glance, but there are a few areas to check.

  • Look for MFI (Made for iPhone/iPad/iPad) logo on the box packaging. All authentic Apple accessory cables have ‘Designed by Apple in California’ printed on them.
  • Check the box for typos. Fake products are usually covered with English spelling and grammar errors.

Check the Price Tag

Depending on the strength of the power adapter, you’re likely going to need to pay anywhere from $29 to $79 for a genuine product. From time to time, you may find legitimate discounted products for less than that, but always be on high alert when you see large price discrepancies.

If a deal seems too good to be true, it probably is. However, this isn’t a guarantee, as some sellers may also raise the prices of their counterfeit chargers to make it seem like they’re the real deal. That’s why it’s crucial to use price as an alert trigger and then progress to a more detailed product analysis.

Inspect the Lightning to USB cable and connector

It is also possible to check whether the Lightniing-connected end is genuine.

  • On Apple’s genuine Lightning cables the Lightning connector is made up of a single piece. On a fake cable you might find that the Lightning connect is made up of more than one pieces.
  • Apple-certified Lightning to USB cables have a grey/metallic faceplate insert, White or Black faceplate inserts mean fake.
  • An original Apple charger has a consistent length of 7.7mm x 12mm. Varying width, length, or thickness is sign of counterfeit Lightning cable.
  • The contact points on genuine cables are rounded with smooth contacts and are always gold-plated. Rough or inconsistent finish is an indication of a fake apple charger.
  • An Apple Lightning to USB cable has “Designed by Apple in California” and either “Assembled in China,” “Assembled in Vietnam,” or “Indústria Brasileira” on the cable about seven inches from the USB connector. You’ll see a 12-digit serial number at the end of this text.

Inspect the USB connector end

  • The interlocks on USB shell of a genuine Apple charger are trapezoidal. Moreover, the interlocks are equally spaced from edge. On the other hand, the USB shell interlocks of fake Apple chargers have right angles. In addition, the interlocks are inconsistently spaced.
  • The USB contacts of genuine Apple chargers are gold-plated. If the USB contacts are silver-plated, for example, you may be dealing with a counterfeit.
  • The surface of the USB shell is smooth and consistent. In contrast, USB surface of a fake iPhone charging cable is rough or grainy.
  • The surface of the insulator for the USB connection is uniform and flat. Meanwhile, insulator for a fake iPhone charger has notches or indents.

Check the Text on the Charging Adapter

Apple genuine chargers have ‘Designed by Apple and Assembled in China’ printed on them. If the charging adapter doesn’t have that information, then it’s fake.

Inspect the charger for spelling mistakes. If you see any typos in spellings on the charging adaptor, then it’s fake.

Verify the Apple Logo on the Adapter

Genuine Apple power adapters will have the Apple logo engraved on the product. It’s not a sticker or a printing—it’s a tangible engraving. Fakes will mimic this branding, too, but sometimes they’ll get details wrong with the logo sizing and minutiae.

Common fake iPhone chargers on the market

When shopping for an iPhone charger, be sure to look for the correct type. Many fake iPhone chargers are sold with branding that is similar, but not identical to authentic chargers. Additionally, many counterfeit iPhone chargers do not have proper insulation or arcing protection and may overheat or even catch fire.

How to avoid buying a fake iPhone charger

When shopping for an iPhone charger, it is important to be aware of the signs that a charger may be fake. Here are a few tips to help you avoid purchasing a fake iPhone charger:

  • First and foremost, always purchase your iPhone charger from an authorized Apple retailer. If you are unsure of where to find an authorized Apple retailer, search for a store locator online.
  • Always check the authenticity of the charger by checking the Apple logo. If the logo is not genuine, the charger is likely fake.
  • Always check the voltage rating of the charger. A fake iPhone charger may have a lower voltage rating than an authentic charger, which could damage your iPhone.
  • Always check the plug type of the charger. A fake iPhone charger may have a different plug type than an authentic charger, which could prevent your iPhone from charging.
  • Always check the quality of the materials used. A fake iPhone charger may be made of cheap plastic or metal, which may not hold up to regular use.
  • Always look for markings that do not match those on a genuine iPhone charger. A fake iPhone charger may have markings that are incorrect or copied from the genuine iPhone charger.
  • Test the charger before you buy it. Plug in your iPhone and see if it works. If it doesn’t, it’s likely a fake iPhone charger.

What to do if you’ve already bought a fake iPhone charger

If you’ve determined your charger isn’t a legitimate Apple product, what do you do now? This mostly depends on where you bought the counterfeit charger from.

Was your purchase from an Amazon seller? In many cases, you can return your product for a full refund as long as it is undamaged, and you’re not outside the return window. Other retailers like eBay offer some buyer protection, but it varies on many factors.

If you can’t get a refund, you’re probably out of luck. That said, if you’re reading this before buying a suspicious charger, hopefully you know enough to make sure you’re getting what you pay for.

Conclusion

If you’re uncertain whether an iPhone charger is genuine, there are a few things to look for. Firstly, the adapter should have a Apple Logo or symbol on it – if it doesn’t, it’s likely fake. Secondly, the connector pins should be gold-plated rather than copper – if they’re not, the charger may be counterfeit. Finally, make sure that the size and shape of the outlet matches that of an authentic iPhone charger – if not, it’s most likely a knockoff.

If you’re unsure about whether or not your iPhone charger is fake, leave a comment below and we’ll help you out. Remember, it’s important to be careful when purchasing chargers online – only buy from trusted sources to avoid being scammed.

Do you have an iPhone? Do you wish your case was more durable, stylish, and eco-friendly? We feel your pain. Being eco-friendly and sustainable is a lifestyle we all should aim for (personality-wise): cutting down our carbon footprint, saving money, and being kind to mother nature.

Thankfully there are many great options to help you switch from plastic to sustainable materials that are less harmful to the environment.

What Makes an iPhone Case Sustainable Or Eco-Friendly?

The term “sustainable” refers to products made with materials that can be reused or recycled, so they don’t end up in landfills. These materials are often from renewable resources like wood, bamboo, or cotton.

Eco-friendly phone cases are made with materials that have less of an impact on the environment than other materials used in their construction. For example, they may be biodegradable or recyclable. They may also contain no PVC plastics (which are difficult to recycle) or only use recycled polymers in their construction.

iPhone Cases For People With Personality [Top 8]

It’s important to choose eco-friendly accessories and products for our daily lives as they’re better for our health and our planet because they don’t contain toxic chemicals like BPA or phthalates. They’re also usually more durable and last longer than their non-green counterparts.

Based on your personality type, here are some of the most crucial aspects you should look for when in the market to buy a sustainable iPhone case.

1. Environmentalists

The best way to ensure your case is sustainable is to choose one made of bioplastics, which are made from plants such as sugar cane or corn starch. These materials are renewable, biodegradable, and compostable. It also doesn’t hurt that they’re more affordable than other options!

To make sure your new case doesn’t contain harmful chemicals, look for one with a low VOC (volatile organic compound) rating — typically below 50 ppm (parts per million). It means that the product does not emit harmful chemicals into the air or water supply during the production or disposal phases of its lifecycle.

2. Nature Lovers

If you love nature and want to protect it, too, you should look for an eco-friendly case manufactured using recycled plastic bottles or bamboo leaves! These materials are biodegradable and do not release harmful chemicals into the ground, air, or water supply.

Nature lovers should buy iPhone cases in a color that matches their favorite flower or animal. It will be a constant reminder of why they love nature so much.

3. Minimalist

If you like to keep things simple, you will want a case that does not add too much bulk to your phone. Many people love thin cases because they look more stylish and sleek than bulky ones.

4. Clumsy People

Do you tend to drop your phone a lot? Then you’ll need to choose a case that can withstand the shock of impact.

You need something that’s going to be able to protect your phone from getting damaged or cracked when it’s dropped and durable enough so it doesn’t break easily. Look for an iPhone case with a lot of protection around the edges of the screen because those are usually the parts that get damaged first when dropped.

5. Art Lover

If you are an Art Lover, you should look for a case that matches your interests, whether painting, drawing, or photography.

If you like abstract art or watercolors, go for a case with some bright colors. You can also get instances with landscape paintings or portraits of famous artists like Van Gogh or Monet.

Doodlers who love drawing want something more colorful than black and white. They might want something with bold colors and fun patterns or designs on them so they can show off their sense of humor with their phone case design!

6. Germaphobes

Germaphobes should look for cases made from natural materials like wool felt or bamboo, which are sustainable, antibacterial, and anti-fungal. The antibacterial feature helps prevent germs from spreading while you’re on the go, while the anti-fungal properties avoid mold and mildew from forming on your phone.

Look for a case made with food-grade silicone that can be washed off with soap and water. The case should also have an anti-dust plug at the bottom to keep dirt out while charging and air vents on the back that allow heat to escape so your phone won’t overheat while charging, thus preventing germs from culture.

7. Adventurer

If you’re an adventurer at heart, you probably have a lot of photos from your travels on your phone. You might have a picture of yourself surfing in Hawaii or hiking through the mountains in Nepal. If so, you should get an iPhone case with similar designs.

Look for waterproof cases that can survive water up to 3 feet deep for 30 minutes or more. The iPhone case should also be designed with shock-absorbing materials that help protect your phone from falls of up to 6 feet. If you’re worried about dust getting in your case, choose one that comes with an anti-microbial seal. It will prevent germs from growing inside your case and later causing odor problems or allergies.

8. Globetrotter

Globetrotters should be looking for a case that will last, one that is environmentally friendly and offers a great look.

If you spend money on an item, you want it to last as long as possible. You do not want to replace your phone case every few months because they break or tear easily, mainly because of rough usage when traveling. You want something that can withstand damage and still look good after years of use.

Final thoughts

The moral of the story is that there’s a case out there for everyone if you’re willing to do a little searching. And while they may not be as cheap as non-sustainable options, they still tend to be less expensive than high-end models.

There are plenty of convincing reasons to get a wireless charger for your iPhone. In this article, we look at the best advantages of wireless charger for iPhone.

If you’re looking for a way to upgrade your iPhone experience, picking up a wireless charger could be a great option for you. Choosing wireless charging and finally ditching the cord on your iPhone is easier than ever. If you’ve picked up a new iPhone in the last couple of years, it more than likely already supports wireless charging. And unlike the early days of wireless charging, you don’t have to make a big sacrifice when it comes to charging speed.

Now, for those with iPhones compatible with wireless charging, we’ll discuss the benefits of wireless charging.

Advantages of wireless charger for iPhone

Here are ten advantages of getting a wireless charger for your iPhone:

1. Wireless Charging Has Gotten a Lot Faster

Although many Android phones had wireless charging for years already, Apple didn’t bring it to the iPhone until 2017 with the release of the iPhone 8. Even though wireless charging was a long-awaited feature for the iPhone, it didn’t catch on like a lot of people thought it would.

That’s because when compared to traditional wired charging, wireless charging was a lot slower. To make things worse, even though 7.5W fast-charging Qi wireless chargers were already on the market, at launch the iPhone 8 was limited to only 5W of power when using a wireless charger. It wasn’t until later that software updates finally let the iPhone 8 access a full 7.5W wireless charge.

These days, Apple’s entire iPhone lineup supports standard Qi wireless charging, and there are tons of wireless chargers to choose from. On top of that, with the iPhone 12 series Apple brought MagSafe from the MacBook to the iPhone.

Unlike the MagSafe MacBook chargers, MagSafe for iPhones is completely wireless. Better yet, MagSafe is the fastest way to charge your iPhone wirelessly. MagSafe can deliver up to 15W of charging speed directly to your iPhone. That’s double the power of a Qi charger.

2. It’s Perfect for Your Desk or Nightstand

One of the best places for a wireless charger is at your office or workspace. There are tons of wireless chargers specifically designed for your desk. Many of them even prop your iPhone up, so it’s easy to glance at incoming alerts and notifications. Better yet, because your iPhone isn’t tied down with a cable, you can quickly grab it when you need to get up to chat with clients or make a personal call.

Equipping your nightstand or bedside table with a wireless charger can add another layer of convenience to your life. It means the end of waking up to a dead phone because you forgot to plug it in before you dozed off.

Having a wireless charger on your desk or nightstand can help you make your workspace more organized, and it means the end of having to hunt down your iPhone’s charging cable in the dark.

As almost no cabling is required, cable clutters are not present. This in turn provide you more space and electrical hygiene.

3. It Also Works With Your iPhone’s Accessories

Even though the original AirPods debuted without wireless charging, a wireless charging case was brought out as an optional extra for the AirPods 2. Since then, every version of AirPods has shipped with standard wireless charging that’s MagSafe compatible. That means a wireless charger for your iPhone also works with your AirPods.

AirPods aren’t the only iPhone accessories that you can charge wirelessly. If you’ve got an Apple Watch Series 6 or newer, you’ll be thrilled to know it’s also got wireless charging built in.

4. Convenience

Another benefit of having wireless charging is that you will not have to deal with cords again. It leaves the need of messy cords and makes it much simpler by just letting you drop your iPhone at the charging station.

How many times do you charge your device in a day? Probably at least two times in the case of a smartphone, depending on its age. It’s no secret that smartphone batteries have a short life. But since that is a given at the moment, you can at least make the process of juicing up your device less frustrating. And that’s where you’ll appreciate the convenience of wireless chargers.

Even though wireless chargers are slower, they offer a different kind of convenience: they’re dead simple to use. Just drop your phone onto the charging pad and it’ll start charging. I love having a wireless charger at my desk and in the kitchen, two places where I know I’ll pick up my phone to glance at it a lot. Instead of having to physically unplug the phone every single time, I can just pick it up and put it back when I’m done. As a bonus, stand-style Qi chargers let me see notifications or check recipes at a glance when I don’t have a free hand.

No more hunting down cables, fiddling with them, a wireless charger saves you all of this trouble by only requiring you to just drop and go. It’s that simple. Forget about fumbling with cords and adaptors when you need some power—wireless chargers are as intuitive to use as they are easy to set up.

While wireless charging is not (yet) truly wireless as you would expect from its name, it’s still way more convenient than regular cables. Of course, you still have to connect the charging dock to a power outlet, but that’s nothing compared to the struggle of untangling cables.

5. Charge Multiple Devices Simultaneously

One of the best advantages of wireless chargers is the ability to charge multiple devices at once. This is all thanks to the ability of certain charging docks to support two or three devices simultaneously.

Such functionality is becoming standard for charging pads and mats where you can charge your Apple Watch, AirPods, and iPhone all at once. With this, you can reduce the amount of cables and international power adapters at your home and workplace.

6. MagSafe Might Make You Ditch Cables Altogether

One of the biggest reasons wireless charging hasn’t taken over the world quite yet is the speed. When compared to wired charging, most wireless chargers just can’t keep up. But that’s changing quickly. If you’re using a standard Qi charger, iPhones can only support up to 7.5W, but if you pick up a MagSafe charger, that speed can be amped up to 15W.

Advances in fast-charging technology mean that a MagSafe wireless charger can actually charge your iPhone faster than using a lightning cable with a 5W charging brick.

While the fastest charging solution for your iPhone is still going to be a 20W charging brick paired with a USB-C to Lightning charging cable, MagSafe isn’t far behind. Depending on your needs, the convenience factor that comes with MagSafe might make it worth the slightly slower charging speed.

7. No Wear and Tear

You may not know it yet but wear and tear is one of the reasons you’re constantly shopping for charging cables. Naturally, cables wear and tear over time. Heck, even charging ports, too. And good genuine cables don’t come cheap, especially iPhone cables.

Because iPhone wireless charging does not require frequent plugging and unplugging of the charging cable, the wear and tear of the data interface of the iPhone will be reduced a lot. At the same time, the coil for wireless charging of iPhones is not exposed to the air, which can also reduce the oxidation and corrosion of the charging unit. The wired charging is often plugged and unplugged, which will easily lead to wear and tear, and the interface is exposed, which is prone to oxidation and corrosion.

Since using frayed cables isn’t an option due to the different risks they pose to your device, a sure-fire way to stay out of this trouble is to get a wireless charger. Unlike with charging cables, you only place your device atop the charging dock, and that’s it.

8. Wireless Charging Is the Future

Back in the day, when you bought a new iPhone it was a given that it would come with a few accessories, most importantly a charger. That all changed in 2020, when Apple controversially decided to start shipping new iPhones without any accessories at all. iPhones now come without earbuds and without a charger.

The iPhone has always been a tribute to minimalism, and Apple hasn’t been shy about cutting out features to achieve its vision of a perfect phone. Just like how Apple removed the headphone jack from the iPhone 7, rumors are circulating that the next leap forward might mean getting rid of the Lightning port altogether.

Although we haven’t seen a portless iPhone just yet, it’s possible we might see one in the near future. Picking up a wireless charger means you’ll be able to charge your iPhone now, and you’ll be ready for a portless future, whenever it does come. And, who knows, with the speed and convenience of MagSafe wireless charging, you might not miss the lightning port at all.

9. It is more safer than conventional charging

As there is less cabling involved, and that too need not to be in open space, the chances of common electrical hazards like low insulation, cable wear and tear or cable cut, sparks etc are very low. Hence, it can be said that the absence of open cabling reduces the chances of electrical accidents.

10. Faster to connect and disconnect

It is faster to connect and disconnect your iPhone from charging as you only have to place/lift your phone on/from the charging pod. No need to connect jacks or plugs.

Benefits of Wireless Charging on iPhone

Wireless charging has many advantages. First, wireless charging has no wear and tear. Additionally, it allows you to charge several devices simultaneously, helps you maintain a clean desk environment, and is very convenient. While it has its disadvantages, these reasons are good enough for you to switch to the wireless side.

No one is perfect in the world. If God cannot make a perfect creature, how can humans? Everything in the world has its advantages and disadvantages. there are a lot of people who love iPhones but there are also many who would never like to own an iOS device due to some of its most annoying drawbacks. In this article, we are going to talk about the Disadvantages Of iPhones.

The vast majority of people dislike iPhones. Mostly it’s because of the few options of hardware and software customization that they have. If you happen to ask someone to recommend a good smartphone for you, they will probably ask you to buy another type of phone apart from an iPhone. So the big question is, what are the disadvantages of iPhone? In this article, i’m going to explain 21 disadvantages of buying an iPhone in 2026.

If you traverse across the Internet, you are likely to come across loads of Apple lovers making some pretty good things about iPhone. But frivolous altercation aside, what are the disadvantages of iPhone?

The short answer: The iPhone is expensive, have few apps in Apple Store, lack of headphone jack and more.

Top 21 disAdvantages of an iPhone

The disadvantages of using an iPhone are mostly subjective to an individual’s needs, but the general ones are as follows.

1. iPhones are expensive

iPhones are exorbitantly priced. Even a two-year-old iPhone is more expensive than a new high-end smartphone. Yes, the user interface and hardware integration with the apps on the iPhone are superior to those on other smartphones. However, this does not excuse the exorbitant iPhone costs.

2. Few free apps and games in Apple store

On iPhone, you can only install applications from Apple’s App Store. If Apple doesn’t want to approve an app or they have removed it from the app store, you just can’t use it. For example, Apple store do not allow video games emulators, BitTorrent clients and many other types of apps that they consider controversial.

3. Radio is not in-built

Unlike devices running on other platforms, Apple phones do not come with radio pre-loaded on them. Users wanting to listen to radio on the iPhones have to do so by downloading radio apps.

4. iPhone apps are usually big, consuming too much space.

With specific features and characteristics made specifically for the iPhone, apps made for the platform become very heavy, taking up a lot of storage space of the device. Thus, when you want to play games on the device using an iPhone, you have to make way for apps that come in several gigabytes.

5. Limited widgets even after upgrades on iPhone

With minimal variation in user interface and design, the platform offers very little to look forward to in terms of trending designs in upgrades. Even when the users buy a higher version with the same icons as before, Home screen continues to look the same. Those looking for an exciting new look have to stay satisfied with the previous look and feel of the platform.

6. Too simple and doesn’t support computer work as in other devices

When using the iPhone, the platform has its limitations in terms of offering a computer -like experience. As compared to other platforms, iPhone offers comparatively simpler performance options.

7. Lack of Headphone Jack

If you have ever used an iPhone, I know there is time you have gone to insert a pair of headphones into your phone only to realize that you have forgotten your headphone dongle somewhere. This feels so bad because an iPhone can’t be connected with standard headphone due to absence of headphone jack. Thus the absence of headphone jack is one of the major disadvantages of the iPhone.

8. Use of iTunes is a bloated mess.

Apple is a pioneer of hardware and software design, but iTunes – which is required to transfer music between your iPhone and computer – is a bloated mess. Uninstalling it is a nightmare, to the extent that Apple publishes an extensive guide for how to fully remove iTunes from your PC.

9. Absence of physical back button

Physical back button allows you to go back from one application to another seamlessly. Like if you hit a link in Facebook and get transported to the Chrome browser, you can return to the social media app when you hit the back button. This is not the same case in iPhone because there is no back button, however, you can get contextual back buttons within apps or a back button that appears when you click a link that takes you from one app to another.

10. limited Launcher

With minimal variation in user interface and design, the platform offers very little to look forward to in terms of trending designs in upgrades. Home screen continue to look the same even when users buy higher versions with the same icons as before. Those looking for an exciting new look have to stay satisfied with the previous look and feel of the platform.

11. Expensive Accessories.

It goes without saying that iPhone accessories are expensive. Airpods, phone cases, Apple pencils, lightning cables, and anything else made by Apple is expensive.

12. No External Storage.

The iPhone does not support SD cards. There is no SD card slot on any iPhone. Even if you attach an SD card reader to your iPhone and insert an SD card, your iPhone will only allow you to move images and not other documents or media files.

13. Overheating

One of the most common problems in iPhones is overheating. Sometimes an iPhone will just feel a little warmer than it should, and other times the back of the iPhone will be too hot and it feels like it might burn your hand. Either way, if you have got a hot iPhone, it means there’s something wrong.

14. Limited storage

Apple only offered iPhone users 5GB of free iCloud storage, which is enough space for about 1,500 photos. While that may sound like a lot, most users found themselves burning through their 5GB allotment within one year of device ownership. And to make matters worse, Apple only supply’s 5GB of free space for each iCloud account, rather than for each device you own. So you could be taking photos and videos on your iPhone, creating iWork documents on your iPad, and storing important files on your Mac with iCloud Drive, and you’d still be supplied with just 5GB of space.

15. Apple Ecosystem

The Apple Ecosystem is mostly a curse. Once you get in, it’s really difficult to get out. The ecosystem is essentially there to make consumers purchase more Apple products. You’re likely to purchase a MacBook if you have an iPhone rather than a windows laptop. This way you won’t be able to see if other brands have better devices and you’ll have to wait until Apple makes one or updates the previous model.

16. Battery Life

The iPhone battery life is not that great when compared to other smartphones. While many people will be happy with the performance of their batteries, especially if it lasts all day long, some may find this a problem for them.

17. Less choices in iPhone Hardware

When it comes to Apple, it releases a maximum of four types of iPhone in every generation in a year. That is iPhone Pro Max, iPhone Pro, iPhone and iPhone mini. You will only be needed to choose between the four types in that year.

18. Lightening cable charger is hard to find

The chip inside lightening cable charger is encryption protected. Third-party manufacturers also need to authorize MFI and other technical certification to allow production, thus making it hard to be found and when found it becomes expensive.

19. No customization

iOS supported devices are not customizable and all the code is private. You have to jailbreak your phone to make it customizable. But if you jailbreak your iPhone then the privacy of your phone comes at a risk.

20. No multitasking

Multitasking is achieved by splitting the screen and using two apps simultaneously. For example, you can be watching a YouTube video and replying to your WhatsApp messages at the same time. It’s unclear why Apple hasn’t added this feature to the iPhone yet, but perhaps it has something to do with the size of the app windows on the iPhone’s display as compared with the larger iPad.

You can argue iOS does multi-tasking all you want. And it’s true, you can do multiple things at once by switching apps back and forth, but that doesn’t even come close to the level of multi-tasking some devices offer.

21. No sideloading of Apps

Sideloading of Apps means, installing apps from outside the authorised place to bypass some restrictions. Apple does not let you do that on an iPhone. It has even faced criticism and pressure from regulators for this, but Apple has always maintained its stance that its iPhone is secure this way. Thus you can not install an app that is not in the Apple Store.

Disadvantages of an iPhone? Now you know!

With numerous disadvantages of having an iPhone, it’s easy to figure out why iPhones are not preferred more. Before buying an iPhone, it’s good to read the above cons of iPhone.

Don’t know when to say goodbye to your current iPhone and get a newer one? Maybe we can give you the nudge you need.

When you buy a new iPhone, you expect it to last—a high-quality phone should be useful for several years, at least. As times goes on, however, you may notice a few glitches here and there, but never give them a second thought. Why should you? Technology always comes with a few idiosyncrasies you take in stride.

While the issues on your iPhone may not be bothersome to you, they may indicate your device needs updating or replacing. How do you know when it’s time for a trade-in? Here are several major signs that it’s time for you to upgrade your iPhone to something better.

Battery Runs Down Quickly

The main reason for this is simple chemistry. Over time, the chemical components of your battery start to degrade, meaning they’ll hold less and less charge. After several hundred recharge “cycles” (roughly a year or two), the battery may have lost a fifth or more of its ability to hold a charge.

That’s why it’s important to avoid overnight charging to limit the number of unnecessary recharges.

Over time you will find yourself tethered to an outlet. Yes, there are actions you can take when your iPhone battery is draining in the hopes of extending the life of your mobile device. However, if your battery doesn’t hold its charge like it used to, but you still use it in the same way, save yourself the frustration and get a new iPhone ASAP.

You can’t get iOS updates any longer

Apple does a better job than any other phone maker of supporting old hardware with new versions of its operating system. iOS 15 is supported by iPhones going all the way back to the iPhone 6s (released in 2015). That’s six years old!

Even if you can live without the new features in the latest verison of iOS, you shouldn’t forego its security updates.

And Apple even put special effort into making iOS 15 run better on older devices that earlier versions of iOS. It’s a difference you can feel immediately.

If you can’t run iOS 15, it’s definitely time to upgrade. Not only are earlier versions of iOS missing important features, but there are critical security updates in every iOS release, too.

If you can’t upgrade to iOS 15, consider your old iPhone end-of-life and put it to pasture.

You’re embarrassed by your photos

When you bought your iPhone, you were amazed by the photos and videos you took. Now, every time you and your friend are taking photos of the same thing, you’re shocked by how good theirs looks and embarrassed by how bad yours looks.

iPhone cameras get better every year, and Apple’s always pushing the envelope. That doesn’t mean you have to get a new phone every year, but it does mean that the photos taken by an iPhone just three or four years old are going to look way worse than a new one.

Along with a new iPhone comes a better camera. Stop capturing grainy, low-resolution moments and start collecting crisp, clear, high-resolution memories.

You can’t find accessories for it anymore

You need a screen protector, but you can’t find one made for your iPhone model. It’s time for a new case, but the stores have only one or two to choose from. You were going to buy that car mount, but it’s made for iPhones of a different size, and yours doesn’t fit right.

Generally speaking, iPhones are so popular that you can find accessories for your particular model at major retailers for years. That’s definitely not true in the Android world; The collective Android market is huge, but no one model is popular enough to continue supporting for very long.

So if you can’t find accessories that fit or work with your iPhone, it’s definitely time to move on.

And if you have an iPhone with a 30-pin connector, you should have upgraded a few years ago.

You’re always out of storage space

You’ve tried everything. You store your photos and videos online. You have Optimize iPhone Storage enabled in the Photos section of the Settings app. You deleted all the apps you don’t really use. You’ve done everything you can to reduce Other storage.

Yet you still run out of space on your iPhone. You can’t download that app you want. You get a warning when you try to take photos. You get a warning when you try to update iOS.

You never want your iPhone storage to become completely full.

At some point, you have to face the facts—as operating systems and apps do more, they get bigger. As you take more photos, even the thumbnails and indices for them get bigger. The 16GB of space that was “just fine” when you bought your iPhone a few years ago now feels like trying to squeeze a fleet of SUVs into two-car garage.

You can’t upgrade your iPhone’s storage space. You can only get a new iPhone. And if storage limits are preventing you from using your iPhone the way you want to, maybe it’s time to consider that. You may not want to get the minimum storage space this time, for fear of being back in this boat again in a few years.

What’s the Best iPhone to Buy in 2022?

Now that you know whether you’re ready for a new iPhone, lets talk about the best iPhone to buy in 2022.

Best iPhone for most people

iPhone 14

In terms of upgrades, the iPhone 14 is expected to come with an in-display fingerprint sensor in 2022 alongside the Face ID unlocking feature. As per Kuo, the new models  could retain the facial recognising TrueDepth Camera system for Face ID or not, or will have both the features to unlock the device.

Rumors Apple’s 2022 iPhone 14 will feature a notchless display with a hole-punch camera, A16 chip, flush rear cameras and more.

Best iPhone overall

iPhone 14 Pro

The iPhone 14 Pro is Apple’s smaller premium iPhone with a 6.1-inch screen size. It’s expected to have in-display fingerprint sensor and 48MP main camera on the back.

Some of the rumored upgrades in the camera department include a 48-megapixel lens on the pro models, a major jump from the usual 12MP. The pro models might also have 8K recording capabilities, an improvement from the current 4K limit on the iPhone 13 series.

Best iPhone value

iPhone 13

Out of the four phones in Apple’s iPhone 13 series, the regular 13’s spot is a bit overshadowed by its siblings. But if you look closely, you’ll realize it’s basically the iPhone 13 Pro with a $170 price cut. They have the same design, the same insanely fast A15 Bionic chip, the same 5G support, the same support for MagSafe charging, and the same selfie, wide and ultrawide cameras.

Best battery life

iPhone 14 Pro Max

iPhone 14 Pro Max, the top-end iPhone model of the 2022 series, is said to have the best battery ever.

According to DSCC’s Ross Young, the iPhone 14 Pro Max will have largest battery, boosting capacity and powering more features.

Using a cell phone has become our primary use of communication that it is hard to live without it. Millions have come to depend on their cell phone operating at the peak of their powers. Even as we speak, the way we use our phones is evolving. Apple, a popular cellphone brand, is constantly innovating its features and designs. Here are 5 of the most notable ways this is happening.

1. Cameras Are Giving You Much More Depth

One of the most exciting new AI trends 2021 has to offer has to do with the way you use your phone to take photos. In the old days, cell phone cameras were pretty touch-and-go. In fact, they really weren’t much better than the Polaroid snaps cameras took in the 1970s.

Things are swiftly taking a turn for the better. iPhone cameras are getting smarter, more accurate, and even more virtual than ever before. You can now use your camera to take pics that give you a full map of the landscape around you through a panorama feature. Apple’s most recent models for the iPhone 13 have three lenses allowing you to take super far away and close up photos without having to worry about pictures being out of focus. You can even use them to help you find items you are looking for in a store.

2. Improved iPhone Batteries Yield a Much Longer Life

The battery in your cell phone is an incredibly advanced piece of tech. Even so, there has always been plenty of room for improvement. As 2022 approaches, you should note that cell phone batteries are getting more efficient and reliable than ever before. Apple has announced that their iPhone 13 models will have an improved battery life compared to the iPhone 12, integrating an A15 bionic chip. This means you can expect to enjoy a much longer service life.

3. Deep Machine Learning Will Become More Prevalent

One of the chief ways in which the way you use your phone will change will have to do with deep machine learning. This is because phones are getting smarter all the time. They are being packed with more AI that gives them the ability to learn and respond. This allows them to function in a normal, real-time fashion.

Deep machine learning of this type is making your phone the handiest thing to have around you in the event of an incident. This means that your phone will become ever more indispensable as a means of ensuring your knowledge and your safety.

Apple is taking advantage of deep machine learning with the iPhone 13 by using a 16-core neural engine. This will allow it to complete faster machine learning computations than ever before. This will drastically improve the capabilities of Siri.

4. Your iPhone Will Gain a Modular Design

One of the handiest and overdue changes that your phone may undergo will have to do with the way that it is designed. At the moment, phones do seem to be getting wider rather than slimmer. There is so much info to be uploaded and only so much space to store it all in. As a result, they are outgrowing your pocket.

This is where a new round of phones that feature a 21st-century style of modular design may come to your rescue. The idea behind a modular design is a simple but very effective one. Modular means that all of the info is there in your phone, which can be bent over to fit your pocket. It’s a semi-return to the old flip phone.

5. Phones Can Soon Enter a Virtual Reality

One of the most exciting new developments that your phone can soon undergo is the transition to even more depth and realism. This is due to being able to enter a sort of virtual reality mode. We’re not quite talking about entering a fully-fledged alternate universe just yet. But the picture is getting better.

For example, the later-day cell phone models have been getting more and more realistic. Motion lag and other discrepancies that take us out of the moment are being slowly but surely done away. We are able more than ever to immerse into a new reality that is turning more concrete and less virtual as time goes on.

Apple is currently working on creating its own AR/VR headset, but due to its complex design, it may be years away. It is unclear whether it will be separate from your iPhone, or have its own integrated console, but it will come at a hefty price tag. Apple hopes that it will take not only in the gaming market but also for remote-based work.

Change is a Natural Part of Communication

In and of itself, change is not something that should be feared. You should look at it as a natural part of the way that things evolve. In the case of being able to communicate with the world, this is something you should welcome. The new round of changes is helping you talk to the world more effectively than ever. Over the years, Apple has made many groundbreaking changes that have changed the way we communicate, work, and live our lives. As technology continues to evolve our lives will continue to change, and create a better, and productive society.

iPhone 13 Pro Camera

If you just purchased a new iPhone 13 or iPhone 13 Pro, here are the best iPhone 13 and iPhone 13 Pro camera tips, tricks, and settings you must know for better photos.
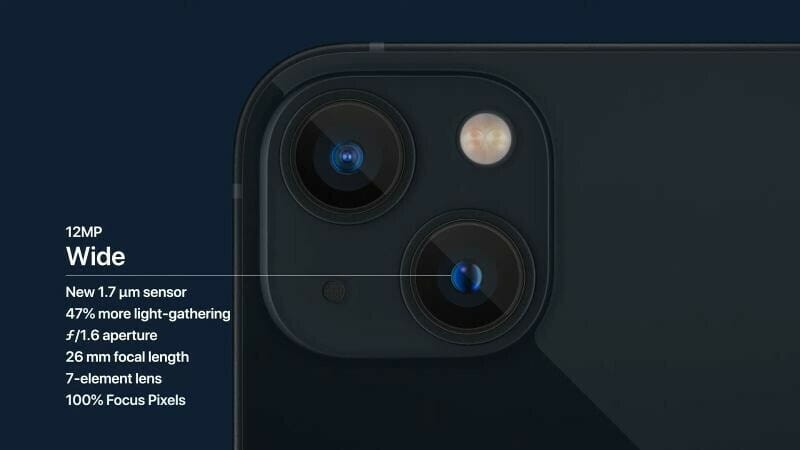
Best iPhone 13 and iPhone 13 Pro camera tips and tricks

Apple has made a number of improvements to the iPhone 13 series camera. On paper, the camera specs of iPhone 13 series might not be that different from the iPhone 12 series but under the hood, there are a lot of improvements and changes. Apple has also added a number of new camera features and settings to the iPhone 13 lineup. Check out the best iPhone 13 and iPhone 13 Pro camera tips and tricks to amp up your photography game.

See also: 30 Best iPhone 13 and iPhone 13 Pro Tips and Tricks

With a next-level smartphone like the iPhone 13, you have everything you need to shoot, edit and share incredible social content quickly and affordably. So if you’d like to shoot better photos with your new iPhone, keep reading. We’re going to introduce you to several iPhone 13 and iPhone 13 Pro camera tips and tricks you need to know about.
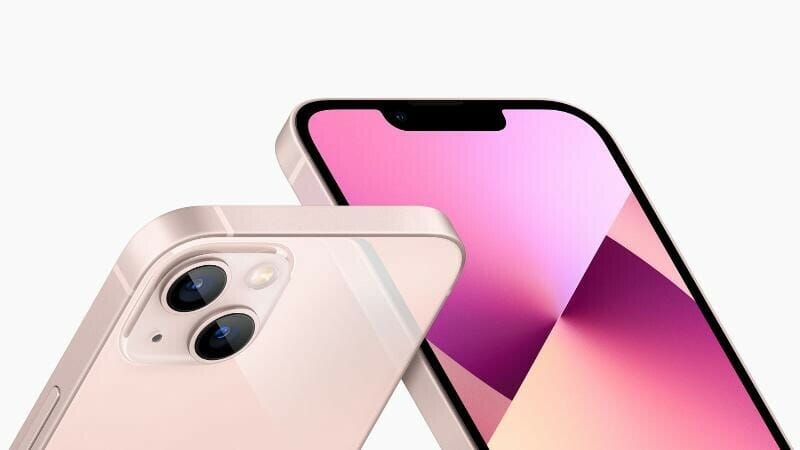
Best iPhone 13 and iPhone 13 Pro camera tips and tricks

Best iPhone 13 and iPhone 13 Pro Camera tips and tricks to Know About

without further ado, here are 20 best iPhone 13 and iPhone 13 Pro camera tips and tricks you should know in 2021:

1. Understanding What Is Cinematic Mode
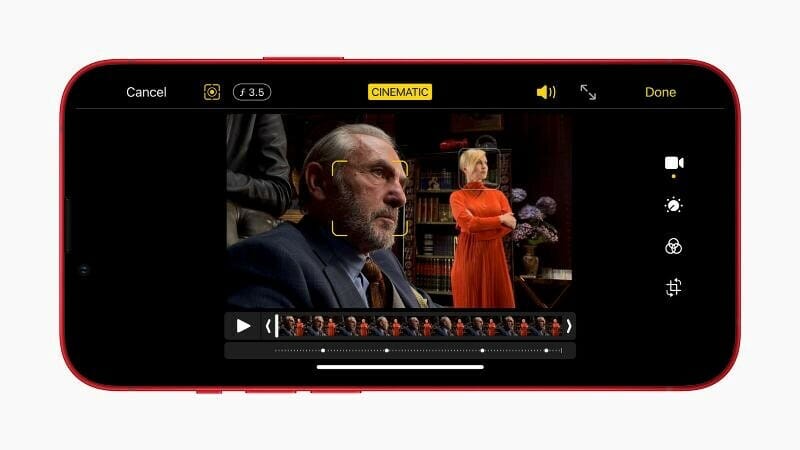
Best iPhone 13 and iPhone 13 Pro camera tips and tricks: Cinematic Mode

Cinematic mode is designed to bring a depth-of-field effect to your iPhone 13 videos by leveraging its A15 Bionic chip and advanced computational algorithms. Just as important, Cinematic mode can provide automatic focus changes when there’s multiple subjects in the frame. The iPhone 13 is even smart enough to switch from one subject to another if, say, one person turns their head towards another.

The goal of Cinematic mode is to make your iPhone 13 videos look more immersive and dynamic. And while the iPhone 13 can switch focus between subjects automatically, you can tap on subjects as you shoot to direct where you want the focus to be. In addition, you can tweak the depth-of-field effect and the level of bokeh after you record in editing.

2. Shoot Videos in Cinematic Mode

It’s incredibly easy to start using Cinematic mode on your iPhone 13 or iPhone 13 Pro. All you need to do is launch the camera app and slide over to spots to the left where it says Cinematic. From there you just tap Record button.

I would suggest that you try to position the iPhone 13 camera in front of your subject or subjects in such a way that you’ll see the bokeh effect in action before you start shooting. You’ll see a live preview of what your Cinematic mode footage will look like as you move your iPhone 13 around.

3. What Are Photographic Styles?

Another iPhone 13 camera trick that seems to have sent the shutterbug for a blitzkrieg is “Photographic Styles.” Photographic Styles consist of a series of subtle filter-like adjustments that you can enable before you’ve taken any photos, allowing you to bring a stylistic effect to your shots beforehand that won’t affect the skin tone of your subjects. These styles come in four presets:

  • Vibrant
  • Rich Contrast
  • Warm
  • Cool

Vibrant captures the shot in bright, vivid, yet natural-looking colors, while Rich Contrast adds a more dramatic look that makes shadows darker and increases color and contrast. Warm adds a summery golden undertone to subjects, and cool uses blue undertones to achieve its signature cool look.

These styles work more intelligently than filters, since they capture certain elements of the photo as it’s taken, rather than applying changes in post-processing.

You have two controls for every Photographic Style: Tone and Warmth.

Bringing the tone up, makes a photo brighter and more vivid, while bringing it down increases the contrast and adds more shadows.

Bringing the warmth up, enhances golden tonalities in a photo, while bringing it down actually enhances blue tonalities.

The changes will also be saved and can be reused later on, so that you can easily take every photo with your personal style. Photographic Styles can be used with the front-facing camera, too, so you can style up your selfies. Bear in mind though that a style can’t be removed from a photo once it’s shot.

4. How to Use Photographic Styles on iPhone 13

  1. Start the Camera app on your ‌iPhone 13‌.
  2. If you’ve not used Photographic Styles before, or you previously chose the Standard mode, swipe the horizontal menu below the viewfinder so that Photo mode is selected, then swipe up from the bottom of the viewfinder and tap the Photographic Styles icon (it looks like three cards lined up in a row).
  3. Swipe through the four presets (in addition to the Standard option) and you can preview each one applied to the scene currently in the viewfinder.
  4. Use the optional Tone and Warmth sliders below the viewfinder to adjust the look to your preferences.
  5. When you’re ready, hit the Shutter button.
  6. Now that your style is active, you’ll see the Photographic Style icon appear in the top-right corner of the Camera interface. Tap it to change the style at any time.

By default, the Photographic Style you select will remain active the next time you launch the Camera app until you select another one or return to the Standard style. You can also change which Photographic Style is active using the Settings app.

In Settings, tap Camera, then under ”Photo Capture” select Photographic Styles.

5. Take Macro Photos on iPhone 13 Pro

Another iPhone 13 Pro camera trick is the ability to capture macro photos and videos with the ultra-wide camera. With Macro mode enabled, you can take pictures or video of subjects that are as close as 2cm to your iPhone’s camera lens, which means you can now take shots of flowers, textures, insects, or pretty much anything small or at close distance, with accurate focus, rich detail, and no blurring.

Here’s how to use the Macro mode feature on ‌iPhone 13 Pro‌ and ‌iPhone 13 Pro‌ Max.

  1. Launch the Camera app on your ‌iPhone 13 Pro‌.
  2. Make sure Photo mode is highlighted in the camera mode menu. If you’re shooting video, swipe to Video mode instead.
  3. Line up your close-up subject in the viewfinder and allow the camera to switch to the wide-angle lens. Move in closer – the subject can be as close as 2cm away from the lens (you can use the zoom if necessary).
  4. Hold the phone steady. Once the lens has focused on the subject, tap the shutter to take the shot or begin capturing video. If you’re shooting video, tap the shutter button again to finish.

6. Take a Video While You’re in Photo Mode

Want to record a video on the iPhone 13 quickly? When you find the perfect moment for a video, you don’t always have time to switch between Photo and Video mode on your iPhone. Simply hold down the shutter button or volume button while using the Photo mode of the Camera app, then capture video until you release the button. You can even slide the on-screen shutter button over to lock in video mode on the spot.

7. Turn Off Automatic Night Mode

When using the Camera app on iPhones, the ‌Night Mode‌ feature comes on automatically when the camera sensor registers an indoor or outdoor scene that is dark enough to warrant brightening, resulting in natural colors and reduced noise. The reality is that ‌Night Mode‌ won’t always capture the kind of nighttime image that you want. If you’re aiming to shoot an authentic evening scene in which any sources of light remain subdued, for example, it’s better to turn off ‌Night Mode‌ to prevent extreme light exposure and a blown out picture.

If you don’t want ‌‌Night Mode‌‌ engaged when you’re shooting in low light environments, you can turn it off by tapping the yellow ‌‌Night Mode‌‌ button when it appears at the top of the viewfinder. The problem is, when you open the Camera app again and the sensor detects low light, ‌Night Mode‌ will automatically enable itself again.

In iOS 14, there’s no way to disable ‌Night Mode‌ for good – you have to manually switch ‌Night Mode‌ off every time you relaunch the Camera. In iOS 15, however, you can turn off ‌Night Mode‌ and ensure it stays off. Here’s how.

  1. Start the Settings app on your iPhone and tap Camera.
  2. Tap Preserve Settings.
  3. Toggle the Night Mode switch to the green ON position.

Turning on this switch makes the Camera remember that you disabled ‌Night Mode‌ last time you were shooting. You can still manually enable ‌Night Mode‌ in the Camera app in the usual way, but now you’re in control of when it’s active.

8. Prioritize Faster Shooting

This iPhone 13 camera trick is designed to modify how images are processed. It plays a key role in helping you to capture more photos when you rapidly tap the Shutter button. Depending on your needs, you can enable/disable Prioritize Faster Shooting feature.

  1. Start the Settings app on your iPhone.
  2. Scroll down and select Camera.
  3. Scroll down and enable or disable Prioritize Faster Shooting.

If you disable Prioritize Faster Shooting, your iPhone 13 will take higher quality pictures but it won’t take pictures as quickly as before. You’ll need to test it around and decide whether you prefer quality over quantity.

9. Test Apple ProRAW

Another iPhone 13 camera trick is Apple ProRAW. It’s basically a type of image file that’s completely raw, with little to no edits from the camera software.
This means you can completely edit your pictures however you want, making it easier for you to give them the look you want. Of course, this takes more time and effort, but if you’re into photography you have to try this feature.
Here’s how you can enable Apple ProRaw on your iPhone 13 series:

  1. Start the Settings app on your iPhone.
  2. Scroll down and tap Camera.
  3. Select Formats.
  4. Enable Apple ProRAW.
  5. After you enable it, you can turn ProRAW on and of on the Camera app, by tapping on the RAW button on the top right corner of your screen.
    Keep in mind that Apple ProRAW files take much more space on your iPhone, and they won’t be as edited as your regular picture, so this feature isn’t the most ideal if you just want to take casual pictures. Still, it’s worth giving it a shot if you already have an iPhone 13 model.

10. Turn Lens Correction off and on

The Lens Correction setting adjusts photos taken with the front camera or Ultra Wide camera for more natural-looking results.
On iPhone 13 and iPhone 13 Pro, lens Correction is enabled by default. To turn off Lens Correction, head over to Settings > Camera, then turn off Lens Correction.

11. Take Control of Scene Detection Setting

The Scene Detection setting can identify what you’re taking a photo of and apply a tailored look to bring out the best qualities in the scene. While there is no denying the fact that it’s a great iPhone 13 camera trick, I don’t think pros would want to let the Scene Detection setting have its way without any control.

Start the Settings app on your iPhone and go to Camera and then turn off/on Scene Detection based on your needs.

12. Take Advantage of the iPhone Camera Timer

If you enjoy taking selfies, it’s the perfect tool. Instead of trying to do acrobatics with your arm to fit everyone in the shot, you can use a nearby ledge, line up the photo, and still have plenty of time to get yourself into position.

To use the timer, tap on the Arrow icon in the bar at the top of the camera window, then hit the Stopwatch button that appears at the bottom. You have the choice of a three or 10-second timer. Make your selection and compose your image. The timer won’t start until you press the shutter button.

13. Mirror Front-Facing Camera

The front-facing camera on your iPhone 13 can be a bit weird when taking selfies. You see, when you’re taking a selfie, you’ll see yourself as if you’re looking in a mirror. But when you check the picture in the Photos app, you’ll see it the other way around.
For instance, if you take a selfie holding your right hand up, the Camera app will show you a mirror version of yourself. But once you see the picture, you’ll see it as if you’re holding your left hand up.
You can actually change this so your selfies show a mirror version of yourself. Here’s how you can do it:

  1. Start the Settings app on your iPhone.
  2. Scroll down and go to Camera.
  3. Under Composition enable Mirror Front Camera.

14. Enable Grid Lines

Most people who enjoy photography are familiar with the Rule of Thirds. It’s one of the essential rules to follow when you’re composing a photograph.

Put simply, it dictates that you should place the subject of a shot in one of the four intersections of lines on a 3×3 grid.

However, in order to get the most out of the rule, you’ll need to enable an on-screen grid so you can see the four intersections. Gridlines are also useful for other composition issues, such as keeping the horizon level or making sure walls and buildings are at precisely 90 degrees

To turn these gridlines on, go to Settings > Camera > Grid and slide the toggle into the On position.

15. Turn View Outside the Frame off and on

On iPhone 13 models, the camera preview displays content outside the frame to show you what can be captured by using another lens in the camera system with a wider field of view. While this is a great feature, you may want to have manual control over it. To do so, start the Settings app on your iPhone and go to Camera and then turn off/on View Outside the Frame toggle.

16. Burst Mode

Have you ever tried to take a picture of a fast-moving object on your iPhone?

Often, the object in question is long gone before your phone can process the image. And even if you manage to get the shot, your subject will often be blurry and distorted.

The trick is to use Burst Mode. This takes a rapid-fire series of shots that’ll give you a selection of photos to choose from. You can keep the best and discard the rest.

To use Burst Mode, head over to Settings > Camera and enable Use Volume Up for Burst. Then keep your finger pressed on the Volume Up button while taking a shot. Burst Mode will automatically engage and continue until you release your finger.

17. Preserve Camera Settings

Do you have a favorite filter or camera mode? If so, it’s frustrating to have to select it afresh every time you open your camera app. By the time you’ve got your camera set up, the fleeting moment you wanted to capture could have vanished forever.

The trick is to use the iPhone 13 Preserve Settings feature.

To set it up, start the Settings app on your iPhone 13 and go to Camera > Preserve Settings and then customize the settings to your heart’s liking.

18. Adjust Depth Control in Portrait mode

Before taking your Portrait photo, you might want to edit the depth-of-field setting to change how blurry the background is.

To get started, launch the Camera app on your iPhone and then choose Portrait mode. After that, frame your subject and then tap the f button in the top-right corner of the camera, then move the slider at the bottom of the screen.

This slider relates to the f-stop of the camera. The lower the number, the greater the depth of field, which means the background is more blurry. If you want to make the background less blurry, select a higher f-stop number. You might want to do this if the edges of your subject start to go blurry.

Next, tap the Shutter button to take the shot. You can also change the depth of field from the editing options after taking a Portrait mode photo.

19. Adjust Portrait Lighting Effects in Portrait Mode

Portrait mode on the iPhone 13 creates a depth-of-field effect that blurs the background of your photo while keeping the subject in sharp focus. You can use lighting effects to further enhance your Portrait mode iPhone 13 photos. These effects use software algorithms to create different lighting options on your subject’s face, based on popular lighting setups in photography studios.

Simply choose the Portrait mode in the Camera app. After that, drag the Portrait Lighting control to choose between the following lighting effects:

  • Natural Light: No additional lighting effects are added.
  • Studio Light: Facial features brighten to mimic photo studio lights.
  • Contour Light: Sharper lighting creates dramatic highlights and lowlights.
  • Stage Light: Imitate a spotlight and plunge the background into darkness.
  • Stage Light Mono: The same as Stage Light, but in black and white.
  • High-Key Light Mono: Create a white background with a black and white subject.

Next, tap on the Portrait Control button that appears at the top of the screen. The Portrait Lighting slider shows below the frame.
Now, drag the slider to the right or left to fine-tune the effect.
Once you have fine-tuned the portrait lighting effect, hit the Shutter button to take the shot. Now, check out the image to ensure it’s in line with your taste. If you aren’t pleased with the portrait image, get into the edit mode and then use the Portrait Lighting slider to further adjust the lighting effect.

20. Learn to Use Auto FPS

If you like taking videos at night, you might have noticed that your video files aren’t as clear as they should. Some of the footage might look a bit washed out at night. If that’s the case for you, that’s probably your iPhone trying to help you by using Auto FPS.
Auto FPS is a feature that can reduce the frame rate of your video to improve low light. Although it may be useful on some occasions, it’s best to learn how to turn it off when needed.

  1. Start the Settings app on your iPhone.
  2. Scroll down and tap on Camera.
  3. Tap on Record Video.
  4. Scroll down and tap on Auto FPS.
  5. Select Off.

You can play around with this feature to find when you should use Auto FPS and when you shouldn’t.

See also: 30 Best iOS 15 Tips and Tricks to Try First

Your favorite iPhone 13 and iPhone 13 Pro camera tips and tricks?

There you go! So, these are the best camera tips and tricks for iPhone 13 and 13 Pro. Hopefully, the features and tricks we’ve covered introduced you to some iPhone 13 camera tips and tricks that you weren’t aware of previously.

While it’s all well and good to know these iPhone 13 and iPhone 13 Pro Camera tips and tricks, that won’t get you very far in the real world. The only way to really supercharge your photo skills is to get out there and practice. While you are into it, do tell us about your favorite iPhone 13 and iPhone 13 Pro camera tips and tricks in the comments section below.


Ready to check out the best iPhone 15 Pro and iPhone 15 Pro Max tips and tricks? From the new smart display mode to health features, interactive widgets to a new Action Button experience, Live Voicemail to offline Apple Maps, and more, here are the top 15 iPhone 15 Pro and iPhone 15 Pro Max tips and tricks you should try out first.

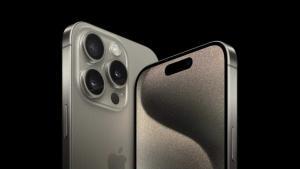
The iPhone 15 Pro and iPhone 15 Pro Max in the natural titanium finish.

KEY POINTS

  • The iPhone 15 Pro and iPhone 15 Pro Max have a ton of tips and tricks that you’ll want to take advantage of if you’ve just purchased the device.
  • The Action Button is among the biggest features on the iPhone 15 Pro and Pro Max.
  • There are plenty of iPhone 15 Pro tricks, such as deleting duplicate verification codes automatically or cross-fading between songs in Apple Music, that will work on any iPhone running iOS 17.

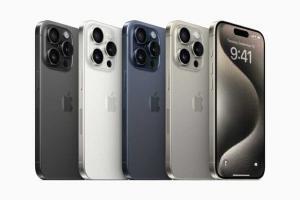
iPhone 15 Pro in black titanium, white titanium, blue titanium, and natural titanium finishes.

If you’re upgrading from a much older iPhone model, there’s going to be a bit of a learning curve when it comes to navigating your brand-new iPhone 15 Pro or iPhone 15 Pro Max.

If you just bought the the iPhone 15 Pro or Pro Max, you may be wondering what an Action Button is (that little button at the left side of your phone). If you bought any of the iPhone 15 models, you’ll want to know what visual lookup is and how to use it. There are also hidden iPhone 15 Pro hacks you should know about, such as StandBy mode, which i’m using all the time and can really come in handy.

Here are the best iPhone 15 Pro and iPhone 15 Pro Max tips and tricks to get you started.

Best iPhone 15 Pro tips and tricks to try first

1. Customize Action Button

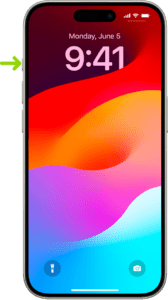
A screen showing that the Action button is located on the left edge of the iPhone 15 Pro. You can customize the function of the button in Settings > Action Button.  

The iPhone has had a ring/silence switch since the very beginning, and the iPhone 15 Pro and iPhone 15 Pro Max finally changes that. The switch has been replaced with the Action button.

By default, just press and hold the button to toggle between ring and silence, just like the switch used to do. You’ll get a haptic response and animation in the Dynamic Island. But there are a number of other modes available, too. You can set the button to launch the camera, start a voice recording, activate an accessibility feature like launching the Magnifier or flashlight, or running a Shortcut.

That last one is especially exciting, as it means you can quickly perform complex actions, or even just launch any app you want.

Should you want to take advantage of all iPhone 15 Pro Action Button tips and tricks, the Settings app is where to go. Open the app and scroll down until you find the Action Button tab.

The first thing you will notice is how different the user interface looks compared to other settings on the iPhone. There’s a fancy animation of the Action Button as you swipe through the programmable functions.

Your options include Silent Mode (default), Focus, Camera, Flashlight, Voice Memo, Accessibility, Shortcut, and Translate (arriving later this year).

Apple allows you to map a specific function with the broader categories. For example, a drop-down box on the Camera slide gives you the options of Photo, Selfie, Video, Portrait, and Portrait Selfie.

2. Turn on Face ID for Private Browsing in Safari

Safari has added several new privacy settings on iOS 17: You can now choose a different search engine like [DuckDuckGo when privately browsing, automatically strip all tracking information from URLs, and securely share passwords with friends and family. And you can even lock your private browsing tabs in Safari — but you’ll need to toggle this setting on before you can use it.

In Settings, go to Safari and toggle on Require Face ID to Unlock Private Browsing. That’s all you need to do! If you want to test out the feature, open the Safari web browser and make your way to Private Browsing. If you attempt to browse privately, you’ll be asked to use Face ID to access your private tabs.

3. Automatically delete your verification codes

This iPhone 15 Pro trick cleans up the clutter of verification codes in your text messages, and it’s somewhat hidden in your settings. And oh yeah, it’s not enabled by default, so it’s up to you to turn it on.

In the Settings app, go to Passwords > Password Options and toggle on Clean Up Automatically. Now, when you receive authentication notifications in Messages (or even in Mail), they’ll be automatically deleted from their respective applications — as long as you use the verification code with the autofill feature at the top of your keyboard. If you don’t use the autofill feature, the verification code will stay in your messages or emails.

4. Enable the level in your camera

If you want to take better photos, or at least straighter photos, then this iPhone 15 Pro trick is for you. The native Camera application on your iPhone has a new, somewhat hidden feature that adds a virtual horizontal level as you snap a photo. You’ll know the shot is level with the ground when it turns yellow and you feel the haptic feedback.

This feature is once again, not enabled by default, so go to Settings > Camera and toggle on Level under the _Composition_section. Now when you take a photo, you should see a broken straight line in the middle of your screen — this is the level. Adjust your phone to make it yellow, signifying that it’s now level to the ground.

5. Use Apple Maps offline to navigate

You might be surprised to learn this, but you’ve never been able to use Apple Maps offline. Instead, you’d have to be connected to the internet, which is useless if you need to find your way back home when you’re out in the wilderness or in an area with no connection. In iOS 17, you can finally download an offline map to grab directions even when you don’t have service.

In Maps, tap your profile photo in the top right of the navigation window and go into Offline Maps. Depending on where you drive most, you may see a suggested map to download, along with the size of the map, in case you don’t have much storage. You can also just hit Download New Map, type a city, manually adjust the map if needed and download it to your iPhone.

6. Crop your photos using the zoom feature in Photos

Cropping a screenshot or picture in the Photos app is a relatively easy process, but Apple has made it even easier on iPhone 15 Pro.

Now, when you’re viewing a photo and you zoom in on it, a new Crop button will appear in the top-right. This will automatically take you into edit mode and allow you to then adjust the crop even more, or you can simply hit Done to finish the crop. You must act quick though, as the crop button appears for only a few seconds after you zoom in to a photo.

7. Use Visual Look Up to figure out laundry codes

You grab a shirt and look at the tag. It’s filled with symbols that are supposed to help you figure out how to wash this specific article of clothing — maybe it can only be washed in cold water, or it might require a dry cleaning. Unfortunately, you might not know how to read these laundry symbols. But your iPhone 15 Pro can.

With this iPhone 15 Pro trick, you can now use the Visual Look Up feature, which can identify words and objects in your photos, to decipher what these laundry codes say. All you have to do is take a clear photo of your laundry symbols, go into the **Photos **app, find the image of the laundry symbols, swipe up and tap on Look Up Laundry Care. The results will show you what each of the recognized laundry symbols mean.

8. Use Crossfade for smoother transitions in Music app

If you’re in charge of playing music at a friend’s party or in the car, you can use an iPhone 15 Pro trick to cross-fade effect between songs in Apple Music.

In the Settings app, go to Music and toggle on Crossfade. Once the setting is enabled, you can choose how long you want the cross-fade to be: Choose between one second and 12 seconds, in second intervals. If you choose five seconds, for example, the next song in the playlist/album will begin to slowly play in the background five seconds before the current song ends.

9. Interact with certain widgets on your home screen

The widgets that live on your home screen are no longer there just for looks. Apple has brought interactive widgets to the iPhone, allowing you to control applications from your home screen, much like you would from the control center.

For now, the number of interactive widgets is limited, but if you want to add one to your home screen, press down on an empty space on your home screen to enter edit mode, tap the plus sign in the top right, and scroll through the list of widgets. A few interactive widgets available include Podcast, Home, Notes and Music.

For example, in Music you can play or pause music, while in Home, you can turn any connected devices off and on, such as a smart light bulb or a thermostat.

10. Change Siri volume and speaking rate

With iOS 17, you can change how loudly, softly, or quickly Siri speaks on your iPhone 15 Pro.

Change Siri’s speaking volume on your iPhone 15 Pro

To change Siri volume on your iPhone15 Pro, just activate the assistant then say "Speak louder" or "Speak quieter."

Change Siri’s speaking speed on iPhone 15 Pro

To change how quickly or slowly Siri speaks on your iPhone 15 Pro, follow the steps below:

  1. Open the Settings app and tap Accessibility.
  2. Tap Siri.
  3. Slide the Speaking Rate slider toward the right for faster speech, toward the left for slower speech.

What do you think about iPhone 15 Pro? Are there any other useful but subtle tips and tricks that I missed? Let me know in the comments below.

11. Use StandBy Mode

StandBy is a new customizable Lock Screen mode in iOS 17 that activates when an ‌iPhone‌ is charging and positioned on its side. Think of it as a kind of smart display for your ‌‌iPhone‌‌ that offers fast access to different screens of glanceable information that can be viewed at a distance, when your device is charging on a kitchen, desk, or nightstand, for example.

  1. With your iPhone 15 Pro screen locked, place it in landscape on an upright charger (the mode won’t work on flat or low-angle chargers or when your screen is unlocked – and it must be charging)
  2. iPhone StandBy will automatically appear – the feature is enabled by default.
  3. The classic analog clock plus calendar widget on the right is the default StandBy view, swipe up on either to change them. Press and hold on either one to add or remove widgets.
  4. On the first StandBy view, do a big swipe from right to left to change views
  5. Press and hold on the other StandBy views to customize them.

You can tweak StandBy settings by heading to Settings > StandBy.

12. Create Your Own Contact Poster

Contact Posters allow you to customize how you’re represented when you give people a call. You can use photos and emoji to personalize your Contact Poster, which appears on a person’s ‌iPhone‌ when you phone them. And like the ‌iPhone‌ Lock Screen, you can match images with eye-catching typography.

But your Contact Poster doesn’t just show up in calls. It’s also part of your contact card in the Contacts app, giving consistency in the places where you communicate and share. The following steps show you how it’s done:

  1. Open the Contacts app and tap on your own name.
  2. Tap the Contact Photo & Poster option.
  3. Tap Edit, then tap Customize.
  4. Tap Poster.
  5. Use the buttons at the bottom of the screen to take a photo, choose a photo you want to use from your library, pick a Memoji, or add a simple Monogram of your initials.
  6. To go along with your chosen image, you can optionally customize the font size, style, and color. (Note that you cannot change your name from this interface – that needs to be done by changing your contact info.)
  7. Swipe across the poster to preview a selection of filters, including black and white, duotone, and color wash in the color of your choice.
  8. When you’re ready, tap Done to preview what a person sees when you call them. If you’re happy with the look, tap Continue.
  9. Now you can opt to edit the crop of your Contact Photo, choose a different photo to use, or Skip this step.

13. Don’t read articles — listen to them

If you’re a fan of podcasts, you’ll probably enjoy a hidden iPhone 15 Pro trick that lets you ask Siri to read news articles, informational sites or anything else in Safari out loud, meaning all you have to do is listen.

One way to get Siri to read the selected article to you is to hold your iPhone’s side button which will activate Siri. Then say "Read this to me." Alternatively, simply say "Siri, read this to me," hands-free. (In iOS 17, you don’t even have to prefix a command with "Hey" to invoke Siri any more.)

Siri will then begin reading the article to you out loud, and a media player panel will appear in the upper section of the screen, allowing you to rewind, fast-forward, adjust the volume, and even AirPlay the spoken audio to another device.

Another way to get Siri talking is to tap the Aa icon in the address bar, then choose the Listen to Page option in the pop-up menu. Siri will immediately begin reading the page to you.

The only difference with this method is that, unless you lock your device while Siri is reading, you won’t see a media control panel on the screen. If the article is still open in Safari, you can stop Siri reading it by tapping the Pause Listening option that replaces the "Listen to Page" option in the Aa pop-up menu.

14. Set multiple timers

Yes, for the first time ever, you can set multiple timers to run at the same time on an iPhone. Just start a timer in the Clock app as before, and then tap the sign at the top right to add a new one. You can label each timer so that you don’t get confused as to what they’re counting down to, just as you can with various alarms.

15. Live voicemail

For those who’d rather text than call, this iPhone 15 Pro trick is for you. Live Voicemail makes it easy to know if you’d like to pick up a call while someone is leaving a message without having to call them back.

The Live Voicemail feature is turned on by default on iPhone 15 Pro.

When you receive a call and let it go or send it to voicemail, you’ll see the phone and recording icon in the Dynamic Island or at the top of your iPhone
Tap the phone icon to jump to the Live Voicemail transcription
Now you can block the caller, answer the call, or let them finish leaving a voicemail – and you can swipe up from the bottom to leave Live Voicemail at any time..

Your iPhone 12 keeps dropping wi-Fi connection and you don’t know why. Your iPhone 12 can’t seem to stay connected to wi-Fi while you’re browsing the Internet. In this troubleshooting Guide, I’ll explain exactly why your iPhone 12 is dropping wi-Fi connection and show you how to fix the problem for good!

Being able to use a Wi-Fi network is pretty much an essential function of any smartphone these days, so if you find your iPhone 12 not holding Wi-Fi it can very quickly become frustrating – especially if you have limited data available on your contract and don’t want to switch to 5G, 4G or 3G in order to get a better signal.

How to fix iPhone 12 keeps dropping Wi-Fi connection issue

Here’s a few things to try if you want to find out why your iPhone 12 keeps losing internet connection and stop it from happening.

Before moving onto more complex solutions, it’s best to make sure that simple things aren’t causing the problem. Here’s a few settings and process to check at the outset.

1. Update iPhone

It’s usually* a good idea to ensure that your iphone 12 is running the latest version of iOS, as sometimes older versions can contain bugs that were subsequently fixed by updates.

To check if your iPhone 12 is running the latest version of iOS, head to Settings > General > Software Update and if you see a newer iteration is available.

If it is tap Download and Install.

2. Check your settings

It might seem obvious, but it’s also worth having a quick look at your settings to ensure that you haven’t inadvertently disabled Wi-Fi or enabled Airplane Mode, as both will make it impossible to connect to a Wi-Fi network.

To quickly check your connection status launch control centre (swipe down from the top right of your screen.

In the top left the icon for Airplane Mode should be faded out and below that the Wi-Fi icon should be blue.

Alternatively, open the Settings app and you should see controls for both of the aforementioned features at the top of the page.

Airplane mode should have its toggle switch moved to the left, grey not green, while the Wi-Fi option should show a network name rather than the word Off.

3. Check you are connected to the right Wi-Fi

Speaking of which, check that the Wi-Fi network you are connected to is the right one. If there are multiple networks in your area you may have managed to connect to a different one that perhaps you have used in the past (we know someone whose iPhone used to connect to a printer network!) Switch to the one you mean to use and follow the instructions below to permanently disconnect from the unwanted network.

4. Disable Wi-Fi assist

If your Wi-Fi is a bit temperamental you may want to stop your iPhone 12 from connecting to 4G or 3G whenever the Wi-Fi is weak.

Wi-Fi Assist was one of those useful (not useful) features Apple added years ago in iOS 9 that if it detects that the Wi-Fi network has a poor signal will ‘helpfully’ drop the signal in favour of your 4G or 3G signal.

To turn off this setting follow the steps below:

Go to Settings > Mobile Data and scroll down to the bottom where you will find the Wi-Fi Assist option.

Make sure it’s not selected.

See also: iPhone Connected to Wi-Fi But No Internet?

5. Reboot your iPhone

It’s a strange but immutable fact that many of life’s tech-related issues can be solved by simply restarting your device. There’s a reason the chaps in the TV show The IT Crowd started all tech-support queries with the mantra, “have you tried turning it off and on again?” That’s because it’s often the easiest and most effective ways of overcoming problems. If you aren’t sure how to do that here’s how to reboot your iPhone.

6. Reboot your router

If your iPhone 12 keeps dropping Wi-Fi connection, it’s a a good idea to turn the router off and on again too.

When you turn off your router you should wait 20-30 seconds before turning it on again. Or even better, unplug your router, wait a few minutes and then then plug it back in again. Now wait while your router reconnects.

7. Check it’s not your broadband provider’s fault

There is a likelihood that there are issues with your line that aren’t fixed by restarting or resetting. You could check whether there is a local outage for BT, Sky, or Virgin, for example.

We often find out Wi-Fi is at its worse when it’s raining – which could be a sign that there is a problem with your cables. It’s worth flagging with your provider.

If having tried all these steps you are still having problems with your iPhone 12 dropping the Wi-Fi connection we have some slightly more complex steps to follow below.

8. Check signal strength

If you’ve checked all the above and your iPhone 12 keeps dropping Wi-Fi connection, then the issue must be elsewhere. A good place to start your investigation is signal strength. Houses and other locations can have dead spots where the Wi-Fi network becomes unstable. Big, old houses are notorious for this problem.

Start by opening the Settings app and tap on the Wi-Fi option.

To the right of the network name you want to use, check to see how many of the three lines in the Wi-Fi symbol are black. If all three are filled in then the signal should be strong enough to maintain the connection, meaning the problem lies in another area, but if only one of the lines is black then it shows that the signal strength is low, which could cause the iPhone 12 to drop connection.

If it’s the latter, you can try moving to another part of the room, building or general area to see if the strength improves.

9. Check the password

Another common problem is either the wrong password being used or the existing one somehow becoming corrupted. For the first issue, check that the password you’re entering is using the correct upper and lower cases, as Wi-Fi passwords are sensitive to this.

10. Forget the network

If your iPhone 12 keeps dropping Wi-Fi connection after trying the above steps, you can try ‘forgetting’ the network details and starting over.

To do this, head to Settings > Wi-Fi then tap on the network name you want to use.

You’ll see the option Forget This Network. Tap this.

Next go back to the Wi-Fi section and tap on the network name once more. You’ll need to enter the details again.

11. Reset the network

If iPhone 12 keeps dropping Wi-Fi connection, then a stronger approach might be needed.

Head to Settings > Reset and select the Reset Network Settings option.

You’ll need to type in your iPhone passcode to confirm the decision, then the device will reboot.

When it’s ready, go to the Wi-Fi section, select the network, then type in the password again. Hopefully this time it will all work.

12. Reset all network connections

Should all else fail, you can take a more unilateral approach and reset all of your network connections. This will require you to enter the details of all of them afterwards, but it has been know to fix lingering connection issues. This is a destructive method though, so it might be worth backing up your iPhone before attempting it.

Head to Settings > General > Reset then select the Reset All Settings option. Again, you’ll need to enter your passcode to confirm the decision after which your iPhone will reboot.

13. Visit an Apple Genius

If you’ve performed all of the above steps and still find your iPhone 12 keeps dropping Wi-Fi connection, then there may be a technical fault with the device itself. So, it might be worth booking an appointment at the Genius bar to have one of Apple’s technicians take a look.

Tag: Wi-Fi

Recently, many Apple users have been telling us that their iPhone 12 mini keeps restarting Randomly under many specific cases – the iPhone 12 mini would keep restarting, stop working, get stuck at the Apple logo, apps crash on launch, etc. Today in this troubleshooting guide, we will focus on dealing with one of the typical problems – iPhone 12 mini freezing and restarting.

actually, the iPhone 12 mini random rebooting is one of the most common problems you may encounter after the following scenarios: updating to the newest iOS system like iOS 14, charging the iOS device while plugging the device in a headphone, or connecting to a computer.

Moreover, the iPhone 12 mini can continuously reboot due to four factors – bad update, malware attack, unstable driver and hardware issues.

If you find your iPhone 12 mini keeps freezing and restarting, what should you do? Here we offer you some basic tips below to fix this problem. All solutions can be applied to iPhone 12 or iPhone 12 Pro as well.

Why Does My iPhone 12 mini Keeps Restarting?

First of all, it’s necessary to understand why your iPhone 12 mini keeps freezing and restarting in the first place, and there are some common, if not frustrating, causes.

An Interrupted Update

Your iPhone 12 mini keeps restarting because of an interrupted update

Some of you may find your iPhone 12 mini in a reboot loop of doom after an iOS update. This can sometimes occur when a software update is interrupted for some reason, such as by a failing network connection, for example.

Malware

There are nearly two million apps in the Apple App Store, and although Apple rejects around 40% of all apps, not every app that passes is safe. Using free public wifi also puts you at greater risk. Unless you have jailbroken your iPhone, viruses are extremely rare on iOS; however, there is still a chance that some pesky malware snuck through to wreak havoc on your device.

Insufficient Storage

Overflowing iPhone storage is another cause of iPhone 12 mini boot looping. Older iPhones with smaller storage capacity tend to have this problem, but even if the day of 512 GB iPhones, you’d still rather keep hold of 60GB of podcast material that you’ll never listen to, just ‘in case.’

Damaged Hardware

You can restart your Device’s software, but the iPhone 12 mini may spontaneously reboot when there’s a hardware issue. A drop (I can not overemphasize using an iPhone case more, here), water damage, or an aging battery can cause hardware failure.

How Often Does Your iPhone 12 mini Reboot?

We can categorize the iPhone 12 mini reboot issue into three types:

1. The iPhone 12 mini restarts itself intermittently, but you still have access to the interface.

2. Your iPhone 12 mini is stuck on a restart loop, which prevents you from using the software at all.

3. Your iPhone 12 mini may restart while charging.

Whichever iPhone 12 mini restart issue you’re experiencing, follow the tips below to fix the problem:

How to Fix An iPhone 12 mini That Keeps Restarting?

When your iPhone 12 mini is in a boot loop and cannot turn on:

1. Force Restart iPhone

A restart can fix many problems as the system starts afresh. When the iPhone is in a restart loop, it’s not starting up correctly, so you have to force it to restart. It’s the quickest but most effective way to fix issues such as a frozen screen or a reboot loop.

Don’t worry; a force restart won’t erase out the data on your iPhone. To force restart your device, press and release the ‘up’ volume button, followed by the ‘down’ volume button. Finally, press and hold the side button until the Apple logo appears.

2. Eject the SIM Card

It’s possible, though not very likely that your SIM card is broken or having connection issues with the cell carrier. If the loop stops without the SIM card and comes back after putting it back in, then it’s time to visit your service provider.

3. Restore Your iPhone

If your iPhone 12 mini keeps freezing and restarting after trying the above steps, then a full restore is the next option. Sadly this will delete all your info and settings (cloud backup, anyone?) and needs to be done using a desktop computer.

First, connect your iPhone to a desktop computer via a USB cable (wifi works too, but a wireless connection is not as stable) and click the “Device” button in the iTunes app. Next, click “Summary” and “Restore.”

If this regular restore still doesn’t work, you may need to restore it in recovery mode. If you can’t put your iPhone in recovery mode because of broken buttons or the system doesn’t work, contact Apple Support.

When your iPhone 12 mini restarts from time to time:

1. Update iOS and Apps

While a system update can cause problems, it tends to fix bugs and other issues, so this should be your first port of call. Next, check and update your apps, especially those from unknown sources or apps you have recently installed.

2. Find and Remove Faulty Apps

Analyze and remove the faulty apps if your iPhone 12 mini keeps restarting

Use the built-in iOS security software or third-party ones to scan all your apps and uninstall any abnormal ones.

3. Manually Set Up Date & Time

Manually set up date and time if your iPhone 12 mini stucks in a boot loop

It’s not very clear why this tweak works, but it does the trick sometimes. Turn off “Set Automatically” and manually select the time zone or the date and time.

4. Free Up Space on Your iPhone

Remove unnecessary data, or transfer them to the cloud. When space starts to run out, the system slows down and can cause some problems.

5. Restore Your iPhone

You can either use iTunes to reset all settings or go to Settings-General-Reset-Reset All Settings on your phone.

When your iPhone 12 mini restarts while charging:

Your iPhone 12 mini may restart during charging if there is an issue with any of its hardware, including the device itself, charging cable, and charging port. Broken hardware could easily cause a short circuit or other security problems, explaining why your iPhone 12 mini keeps restarting. Most people are not aware that the charging port can often be the culprit since it’s out of sight, but taking a closer look may fix the issue. Clean the charging port with a small, clean brush if you spy something.

Damaged charging cable could also cause an issue, but if you use wireless chargers, then you are spared the hassle.

Magnetic wireless charger saves the hassle of damaged charging cable and port

iPhone 12 mini keeps restarting? Problem fixed

Many iPhone users rely on their devices for everything from communication to education. If your iPhone 12 mini keeps restarting & crashing, it’s the time to fix it by following the above solutions based on actual cases.

If you have any solutions to iPhone 12 mini keeps crashing and restarting, Drop us a comment and let us know.