Got a tip for us?

iPhone

The iPhone is a smartphone from Apple that runs the iOS mobile operating system. Between its apps, communication features, the camera, mobile internet access, and other functionalities, the iPhone has quickly become an integral part of many peoples tech lives.

With the Continuity Sketch and Continuity Camera features, you can draw a sketch, take a photo, or scan a document using your nearby iPhone and have it appear instantly on your Mac, exactly where you want it, for example, in an email, note, or folder.

You can also mark up a file on your Mac with your iPhone using Continuity Markup. Both devices need Wi-Fi and Bluetooth® turned on and the same Apple Account, and they need to be within 30 feet (10 meters) of each other.

Here’s how to insert sketches, photos, and scans from your iPhone on Mac.

Before you begin

Before you try this, check that all of the following are true:

  • Both devices have Wi-Fi and Bluetooth® turned on.
  • You’re signed in to the same Apple Account on both devices.
  • Your devices are within 30 feet (10 meters) of each other.
  • Both devices meet minimum system requirements for Continuity Camera, Continuity Sketch, and Continuity Markup.

Make sure your VPN’s configuration doesn’t prevent local networking if you’re using one, as that may interfere with some Continuity features.

Depending on where it’s inserted, you can mark up the photo or scan, or adjust other aspects, like cropping it or applying a filter.

Insert a sketch, photo, or scan from your iPhone

With Continuity Sketch, a sketch you draw on your iPhone can appear on your Mac. And with Continuity Camera, a photo you take or a document you scan on your iPhone shows up on your Mac.

  1. On your Mac, Control-click where you want to insert the sketch or photo—for example, in an open window, like a note or email message.

    You can also Control-click the desktop or a folder in a Finder window.

  2. Choose an option from the pop-up menu.

    You may need to click “Insert from iPhone or iPad” before seeing the options.

  3. Do any of the following:

    • Add a sketch: On your iPhone, draw a sketch using your finger.
    • Take a photo: On your iPhone, take a photo and tap Use Photo or Retake.
    • Scan a document: On your iPhone, scan a document. Your iPhone detects the edges of the document and autocorrects any skewing of the image. If you want to adjust the area included in the scan, drag the frame or its edges. When you’re ready, tap Keep Scan or Retake. You can continue to scan documents until you’re done, then tap Save.

The sketch, picture, or scan appears on your Mac in the location you chose in step 1. And if you added it from the desktop or a folder, it’ll show up as a file.

You may be able to mark up the photo or scan, crop it, apply a filter, or adjust other aspects, depending on where it’s inserted.

Note: Scans you take on your iPhone don’t get saved on the device.

Use your iPhone to mark up a file on your Mac

With Continuity Markup, you can use your iPhone to add text, make drawings, and rotate and crop images, PDF documents, and more on your Mac.

  1. On your Mac, click the desktop to open the Finder.
  2. Control-click the file you want to mark up and choose Quick Actions. Choose Markup.

    The file opens.

  3. In the toolbar, click the iPhone button or click the Markup button (the button may have an arrow next to it) and choose your device.
  4. Use the Markup tools to draw, add text or shapes, and more.
  5. When you’re done, tap Done on your iPhone.
  6. To save your changes, click Done on your Mac.

If Continuity Camera, Continuity Sketch, or Continuity Markup aren’t working:

  • Make sure you’re signed in to the same Apple Account on both devices.
  • Make sure that both devices have Wi-Fi and Bluetooth turned on.
  • Make sure that your devices are within 30 feet (10 meters) of one another.
  • Make sure your device meets minimum system requirements for Continuity Camera.
Tag: Photos

In Math Notes, you can insert a graph or overlay the graphs of multiple equations on the same two-dimensional grid or three-dimensional space to see how they relate.

You can graph in two dimensions or three, create a graph from an existing equation, modify a graph, and work with multiple graphs. It all starts in the Calculator app.

Here’s how to work with graphs in Math Notes in Calculator on iPhone.

Note: For written math and variable names, Math Notes relies on common mathematical symbols, select numeric systems, and the same operations as the scientific calculator.

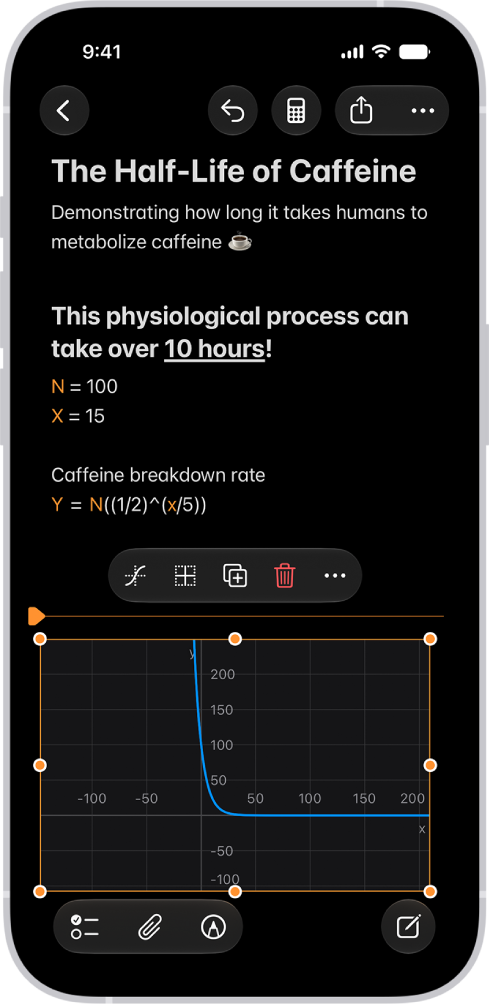
A Math Note open in Calculator, with a declared variable, an equation, and a graph.

Graph in two dimensions

  1. Start the Calculator app on your iPhone.
  2. Tap the Change Mode button and tap Math Notes.
  3. Tap to open a previous Math Note, or tap the New Note button to start a new one.
  4. Type or write an equation with exactly two undefined variables, with one on each side of the equal sign.

    You can include defined variables as well. For example, if you know a = 3, you can graph velocity = 0.5at^2. The graph’s y-axis shows velocity, and the x-axis shows t.

  5. Tap Insert Graph in the menu that appears, then, if asked, tap to assign a variable to the x-axis.
  6. Tap to select the graph and then do any of the following:

    • Reframe the graph: Swipe with two fingers to pan.
    • Zoom in or out: Pinch open and closed.
    • See coordinates: Touch and hold the graphed function. Move your finger along the line to see each point’s x- and y-value.
    • Move the graph in the note: Drag from the middle or an edge (not a handle) of the graph.

Every graph treats the equations you enter as y = f(x). That means the variable to the left of the equal sign goes on the y-axis, and the other variable goes on the x-axis.

Graph in three dimensions

  1. Start the Calculator app on your iPhone.
  2. Tap the Change Mode button and tap Math Notes.
  3. Tap to open a previous Math Note, or tap the New Note button to start a new one.
  4. Type or write an equation with a “z” on the left side of the equal sign and “x” and “y” on the right.

    For example, z = (x^3+y^3)/2.

  5. Tap Insert 3D Graph in the menu that appears, then, if asked, tap to assign variables to axes.
  6. Tap to select the graph and then do any of the following:

    • Inspect the graph from other angles: Drag from the middle of the graph.
    • Move the graph in the note: Drag the edge (not a handle) of the graph.

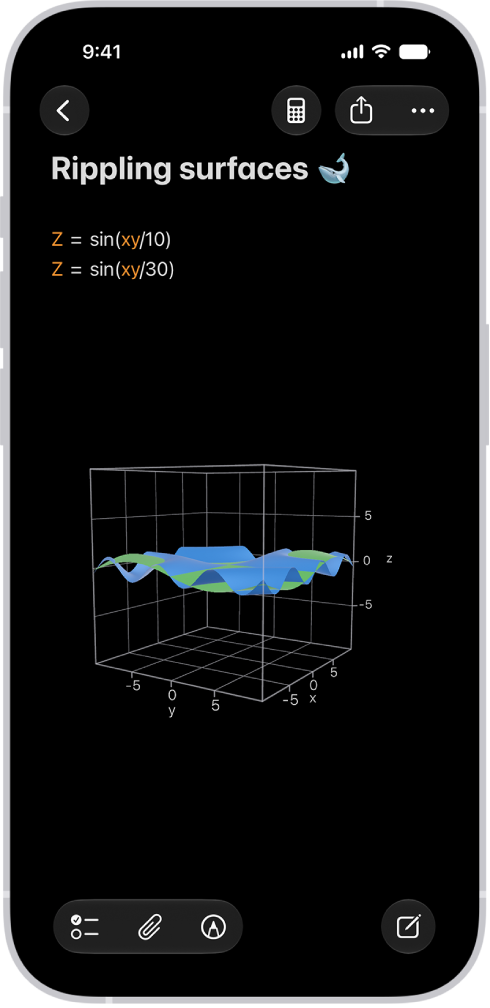
    Math Notes in Calculator on iPhone showing two intersecting 3D graphs in the same space.

Create a graph from an existing equation

  1. Start the Calculator app on your iPhone.
  2. Tap the Change Mode button, tap Math Notes, and then open a Math Note with an equation.
  3. Tap to place a cursor in the equation (without selecting text).
  4. Tap the equation again to reveal a menu above or below the equation, tap the Forward button, and then do one of the following:
    • Make a new graph: Tap Insert Graph.
    • Add an additional graph: Tap Graphs, then tap Insert Graph.

Modify a graph

  1. Start the Calculator app on your iPhone.
  2. Tap the Change Mode button, tap Math Notes, and open a Math Note with a graph.
  3. Do any of the following:
    • Change the shape of the function: Edit your equation. The graph updates automatically.
    • Resize the graph: Tap the graph and drag an edge or corner handle.
    • Adjust the axes: Tap the graph, tap the Graph Viewport button, and then swipe left or right on the numbers to make them larger or smaller, or tap Equalize Axes.
    • Zoom to the best view of the graph: Tap the graph and then tap Recenter.
    • Center the origin: Tap the Graph Viewport button and tap Center Origin.
    • Duplicate the graph: Tap the graph and tap the Duplicate button.
    • Recolor the graph: Tap the line or surface of the graph and tap the color picker to the right of the equation.

Work with multiple graphs

  1. Start the Calculator app on your iPhone.
  2. Tap the Change Mode button and tap Math Notes.
  3. Create a graph in two or three dimensions, as above.
  4. Type or write another equation and then tap Insert Graph or Add to Existing Graph.

    You can also tap an equal sign of any equation you already wrote to add it to an existing graph.

  5. Do any of the following:

    • Combine graphs in one grid or space: Tap a graph, tap the 2D Graph Settings button or the 3D Graph Settings button, and then tap the equation in the list that you want to add to the graph. A the Visibility button appears.
    • Hide a graph: Tap the graph, tap the 2D Graph Settings button or the 3D Graph Settings button, and tap the Visibility button to uncheck it.
Tag: Notes

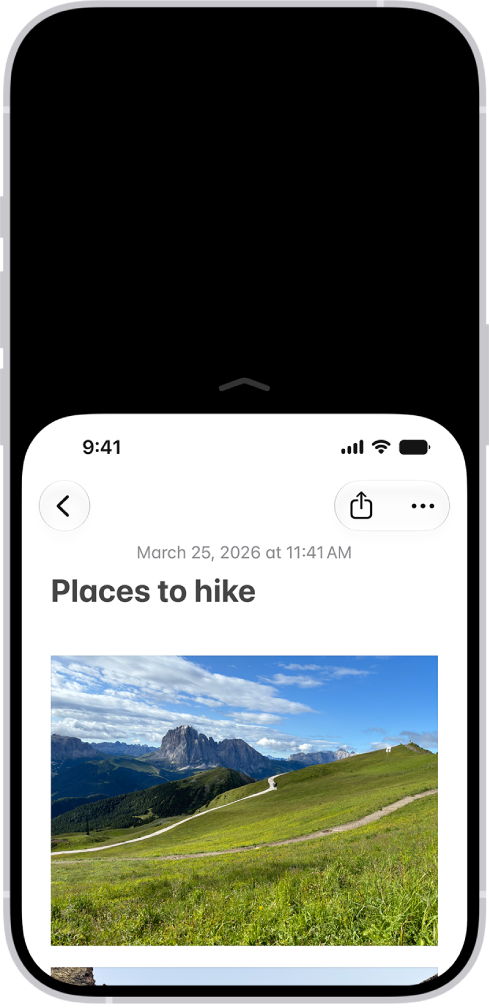
When you use iPhone with one hand in portrait orientation, you can use Reachability to lower the top half of the screen so it’s within easy reach of your thumb. It works on iPhone models with Face ID and with a Home button, and you turn it on in Accessibility settings.

The iPhone screen with Reachability activated. The top of the screen has moved down so it’s within easy reach of your thumb.

  1. Open Settings, tap Accessibility, tap Touch, and turn on Reachability.
  2. To lower the top half of the screen, do one the following:
    • On an iPhone with Face ID: Swipe down on the bottom edge of the screen.
    • On an iPhone with a Home button: Lightly double-tap the Home button.
    • While VoiceOver is on: Swipe up from the bottom of the screen with one finger, then, without lifting your finger, swipe down.
  3. To return to the full screen, tap the upper half of the screen.

There’s a set of accessibility settings for the side or Home button. You can choose the speed required to double-click or triple-click it, and whether Siri responds when you press and hold the button, and on an iPhone with Touch ID, you can even choose how it feels when you press it.

  1. Open Settings, tap Accessibility, and tap Side Button (on an iPhone with Face ID) or Home Button (on an iPhone with Touch ID).
  2. Set any of the following:
    • Click Speed: Choose the speed required to double-click or triple-click the button—Default, Slow, or Slowest.
    • Press and Hold to Speak: Choose whether Siri responds when you press and hold the button.
    • Rest Finger to Open: On an iPhone with Touch ID, you can unlock and open iPhone by resting your finger on Touch ID.
    • Home Button Haptic: On an iPhone with Touch ID, you can choose how it feels when you press it. Tap Home Button Haptic, tap an option, and then press the Home button to try it out. Tap Done when the option you like best is selected.
    • Side Button Confirmation: Choose AssistiveTouch or Switch Control to confirm payments with Face ID or anytime double-clicking the side button is required.

Instead of double-clicking the side button, you can also confirm payments with Face ID using AssistiveTouch or Switch Control on an iPhone with Face ID.

With Screen Time, you can allow or block content that’s labeled sensitive or explicit in the Music app, Apple TV app, Books app, and more. You can also allow or block built-in apps and features like AirDrop, Camera, and more.

It goes beyond apps. Screen Time can also control Siri and Apple Intelligence features, though the settings you see there may vary depending on your Siri version. All of these restrictions are in Content & Privacy Restrictions, inside Screen Time in the Settings app.

Note: You’ll need iOS 27, iPadOS 27, macOS 27, watchOS 27, or visionOS 27 or later on all your Apple devices for the latest Screen Time features. In a Family Sharing group, all devices have to be upgraded to iOS 27, iPadOS 27, macOS 27, watchOS 27, or visionOS 27 or later before you set these features up.

Set content restrictions in the Music app, Apple TV app, Books app, and more

  1. Open the Settings app on your iPhone.
  2. Tap Screen Time, tap Content & Privacy Restrictions, and allow or block any of the settings shown under Content Restrictions, like Books, Movies, TV Shows, and Music.

Block or allow built-in apps or features

  1. Open the Settings app on your iPhone.
  2. Tap Screen Time, tap Content & Privacy Restrictions and tap Other Features. Allow or block any of the settings shown, like AirDrop, Camera, and more.

Block or allow Siri and Apple Intelligence features

Note: The settings that appear here may vary depending on your Siri version. Siri AI is available in beta on iOS 27 or later on an Apple Intelligence-enabled iPhone 15 Pro, iPhone 15 Pro Max, or iPhone 16 model or later with Siri and device language set to a supported language. Available in English to start. Siri AI will not initially be available in the EU on iOS. Usage limits may apply.

Apple Intelligence on iOS 27 or later is available on an Apple Intelligence-enabled iPhone 15 Pro, iPhone 15 Pro Max, or iPhone 16 model or later. Apple Intelligence is not available in all languages or regions. Usage limits may apply.

  1. Open the Settings app on your iPhone.
  2. Tap Screen Time, tap Content & Privacy Restrictions, tap Siri, and do any of the following:
    • Block Siri: Tap Don’t Allow Siri.
    • Allow use of Siri without AI capabilities: Tap Siri (Classic Version).
    • Allow use of Siri with AI capabilities: Tap Siri AI (Beta).*
    • Allow or block specific capabilities: Select Allow or Block under any of the Siri AI capabilities, such as Image Creation, Sensitive Topics, or Explicit Language.

*Apple Intelligence is available with Siri and device language set to Chinese (Simplified), Chinese (Traditional), Danish, Dutch, English, French, German, Italian, Japanese, Korean, Norwegian, Portuguese, Spanish, Swedish, Turkish, or Vietnamese. Some features may not be available in all regions or languages. Some devices may not be available in all regions.

Siri AI is available in beta in iOS 27, iPadOS 27, macOS 27, watchOS 27, and visionOS 27 and requires an Apple Intelligence–enabled device set to a supported language. Available in English to start. Siri AI will not be initially available in the EU on iOS, iPadOS, and watchOS.

Certain Apple Intelligence features that rely on server-side models are subject to daily usage limits, including but not limited to Siri AI, Intelligent Photo Editing Tools, Image Playground, and AFM 3 Cloud models in Shortcuts. Daily limits may vary by feature, request complexity, system demand, system policies, and other factors. Expanded access to such features will be available for a fee in the future. Use of these features is subject to the Apple Intelligence Terms and Conditions.

You can use the Contacts app to create, find, share, and delete contacts.

Siri can even suggest new contacts based on what you do in Mail and Calendar. You can also search your contacts using Spotlight, and quickly reach a contact with a call, message, or email. And you can change the default phone number or email address for a contact.

Here’s how to add and use contact information on iPhone.

Siri: Siri can update information about a contact. Say something like, “Sarah Milos is my sister.”

Create a contact

  1. Open the Contacts app on your iPhone.
  2. Tap the Add button.
  3. Enter details for the contact such as name and phone number and tap the Done button.

Siri suggests new contacts based on your activity in other apps, such as Mail and Calendar. Siri also suggests adding contact information in other apps based on how you use Contacts. To turn off either feature, go to the Settings app , tap Apps, then tap Contacts. Tap Siri (or Apple Intelligence & Siri), then turn off Show Contact Suggestions or Learn from this App.

Find a contact

  1. Open the Contacts app on your iPhone.
  2. Tap the search field at the bottom of the contacts list and enter a name, address, phone number, or other contact information.

Search can also find your contacts.

Share a contact

  1. Open the Contacts app on your iPhone.
  2. Tap a contact and tap Share Contact. Then choose the fields you want to share.
  3. Tap the Done button then choose a sharing option, such as Messages or Mail.

Quickly reach a contact

  1. Open the Contacts app on your iPhone.
  2. Tap a contact.
  3. Tap a button below the contact’s name to do any of the following: start a message, make a phone call or a FaceTime call; or compose an email.

To change the default phone number or email address for a contact method, touch and hold the button for that method below the contact’s name, then tap a selection in the list.

Delete a contact

  1. Open the Contacts app on your iPhone.
  2. Go to the contact’s card and tap Edit.
  3. Scroll down, tap Delete Contact, and then tap Delete Contact again to confirm your edit.

All apps are required to ask your permission before tracking you or your iPhone across websites or apps owned by other companies for advertising or to share your information with data brokers. After you grant or deny permission to an app, you can change permission later.

You can also stop all apps from requesting permission, so they can’t even ask. The list in Tracking settings shows every app that has requested permission to track you.

Review or change an app’s permission to track you

  1. Open Settings, tap Privacy & Security, and then tap Tracking.

    The list shows the apps that requested permission to track you. You can turn permission on or off for any app on the list.

  2. To stop all apps from asking permission to track you, turn off Allow Apps to Request to Track (at the top of the screen).

For more information about app tracking, tap “Learn more” near the top of the screen.

Use CarPlay to play the podcasts that are on your iPhone. You can use your vehicle’s built-in controls to open Podcasts and select a podcast to play. And to control playback, you can use the controls on your vehicle’s steering wheel and the buttons on the Now Playing screen.

Note: If you’re viewing CarPlay Dashboard, tap the Home button. All of your CarPlay apps appear on its pages, including Podcasts.

The buttons on the Now Playing screen, CarPlay Dashboard, and the controls on your vehicle’s steering wheel can all control podcast playback, too.

Button Description
Play
Pause
Jump back 15 seconds
Jump forward 30 seconds
Choose a faster or slower playback speed
Tag: carplay

With the iCloud Shared Photo Library feature, you can set up or join a shared library to share photos and videos with up to five friends or family members. You and those close to you can collaborate on the photo collection and enjoy more complete memories, all in one place. You can belong to one shared library at a time.

When you join a shared library, the photos and videos that you contribute move from your personal library to the shared library, and all members can view, edit, and delete them. Shared library photos and videos appear in the Photos app alongside your personal content, and a filter lets you quickly switch between your personal and shared libraries.

Note: The minimum system requirements for iCloud Shared Photo Library are iOS 16.1, iPadOS 16.1, macOS 13, or later. On devices with earlier versions of the software, photos and videos added to a shared library aren’t available.

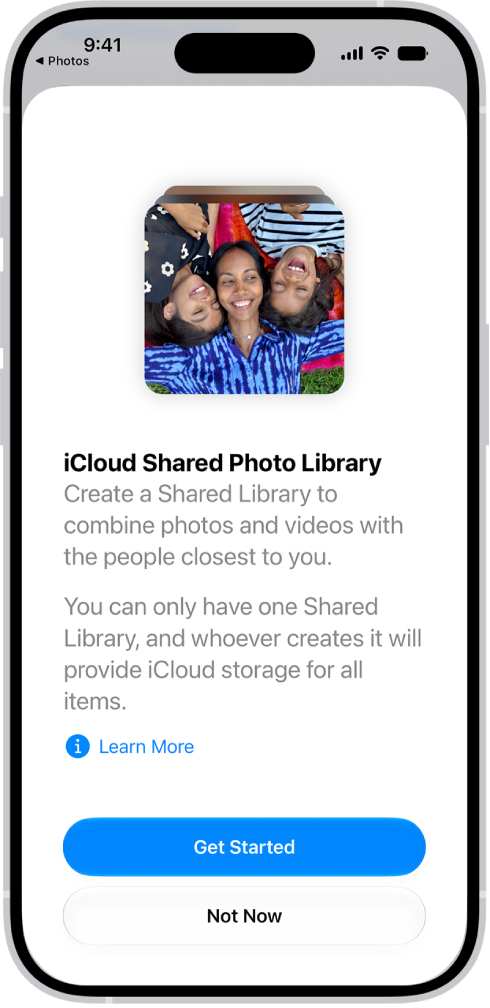
An iPhone showing the Get Started Screen for creating an iCloud Shared Photo Library.

Before you begin

Make sure iCloud Photos is turned on before you set up or join an iCloud Shared Photo Library.

  1. Start the Settings app on your iPhone.
  2. Tap your name, then tap iCloud.
  3. Tap Photos and then make sure Sync this iPhone is on.

Note: To set up a shared library, you don’t need Family Sharing turned on.

Set up an iCloud Shared Photo Library

Whoever sets up a shared library is its organizer.

  1. Start the Photos app on your iPhone.
  2. Tap Collections.
  3. Tap your account in the top-right corner.
  4. Tap Shared Library and then follow the onscreen instructions to add participants and move photos and videos into the shared library.

Note: Your personal library doesn’t show the photos and videos you add to the shared library.

Before you invite participants using Messages or a web link, you can preview and change the photos and videos you add to the shared library.

Join an iCloud Shared Photo Library

To join an iCloud Shared Photo Library, tap the invitation sent from the organizer, tap Get Started, then follow the onscreen instructions. During setup, you can add photos and videos to the shared library the same way as the organizer.

Once you’ve joined a shared library, you can add photos and videos to it in several ways and access the same content as the organizer and other participants.

Add participants to an iCloud Shared Photo Library

The organizer, the person who sets up an iCloud Shared Photo Library, can add new participants.

  1. Start the Photos app on your iPhone.
  2. Tap Collections.
  3. Tap your account in the top-right corner.
  4. Tap Manage, then tap Add Participants.

Note: Up to six participants, organizer included, can share a library, and you can only belong to one shared library at a time.

Delete or leave an iCloud Shared Photo Library

Organizers of an iCloud Shared Photo Library can delete it, while anyone who isn’t the organizer can leave the shared library.

  1. Start the Photos app on your iPhone.
  2. Tap Collections.
  3. Tap your account in the top-right corner.
  4. Tap Manage, then tap one of the following:
    • Delete Shared Library: When a shared library is deleted, participants who have been members of the shared library for more than 7 days can copy everything from the shared library into their own libraries. Participants who have been members for less than 7 days can copy only the content they contributed.
    • Leave Shared Library: When you leave a shared library, you can copy everything from the shared library into your own library, or just the content you contributed.

Everything added to a shared library counts toward the library organizer’s iCloud storage space.

Tags: iCloud, Photos

Widgets show you current information from your favorite apps at a glance. On iPhone, you can add a Mail widget and choose which mailbox it shows on your Home Screen, from recent unread emails to new emails from your VIPs or any other mailbox.

Add a Mail widget to your Home Screen

  1. Go to the Home Screen and then find the Home Screen page where you want to add the widget.
  2. Touch and hold the background until the apps begin to jiggle, tap the Edit button, and then tap Add Widget.
  3. Scroll or search to find Mail, tap it, and then swipe through the size and style options.
  4. When you see the size you want, tap Add Widget.
  5. While the apps are still jiggling, move the widget where you want it. Then tap the Done button.

Choose which mailbox the Mail widget shows

You can tap the mailbox shown in the widget, then choose a different mailbox so the messages in that mailbox are displayed in the widget. You can also change it from the widget’s options:

  1. Touch and hold the widget.
  2. Tap Edit Widget and then choose options.
  3. Tap Done.