Got a tip for us?

Apple Watch

Your Apple Watch can tune in to your heart and send notifications when something out of the ordinary occurs. For example, it can notify you if your heart rate remains above or below a chosen threshold after you’ve been inactive for at least 10 minutes. You can turn on heart rate notifications when you first open the Heart Rate app, or at any time later.

Your watch can also notify you of an irregular heart rhythm that appears to be atrial fibrillation (AFib). If you have already been diagnosed with AFib, your Apple Watch can help you understand how frequently your heart is in this arrhythmia, and you can track lifestyle factors that may influence your condition.

Receive high or low heart rate notifications
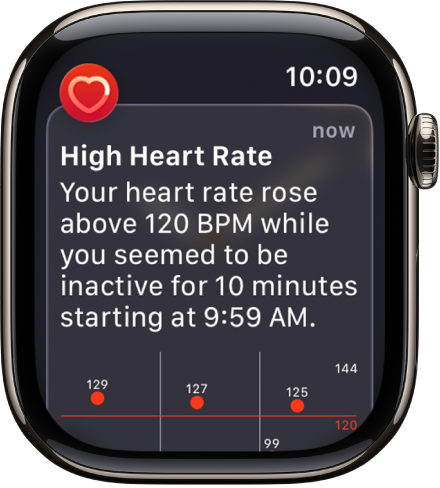
A Heart Rate alert, indicating a high heart rate.

  1. Open the Settings app on your Apple Watch and then tap Heart.
  2. Tap High Heart Rate Notifications or Low Heart Rate Notifications. Set a heart rate threshold.

You can also open the Apple Watch app on your iPhone, tap My Watch, then tap Heart. Tap High Heart Rate or Low Heart Rate, then set a threshold.

Set up irregular heart rhythm notifications (not available in all countries or regions)

You can receive a notification if Apple Watch has identified an irregular heart rhythm that appears to be atrial fibrillation (AFib).

  1. Open the Apple Watch app on your iPhone.
  2. Tap My Watch, tap Apps, tap Heart, and then tap Set Up Irregular Rhythm Notifications in Health.
  3. In the Health app, tap Set Up and then follow the onscreen instructions.

Show AFib history (not available in all countries or regions)

If you’ve been diagnosed with AFib, do the following:

  1. Open the Health app on your iPhone.
  2. Tap Browse, tap Heart, tap AFib History, tap Set Up, and follow the onscreen instructions.
  3. To show your AFib history, open the Health app, tap Browse and tap Heart. Then tap AFib History.

Every Monday, if you’ve worn your watch for at least 5 of 7 days (12 hours a day), you may receive a notification with an estimate of the time you spent in AFib during the previous calendar week.

Set up low cardio fitness notifications

During an outdoor walk, run, or hike, Apple Watch can measure how hard your heart and lungs are working to provide cardio fitness estimates, and it can notify you when your cardio fitness level is low. Your cardio fitness falls into one of four ranges based on your age and sex: Low, Below Average, Above Average, or High. A cardio fitness level in the Low range brings a notification on your Apple Watch, and if it stays low, you’ll get another notification every 4 months.
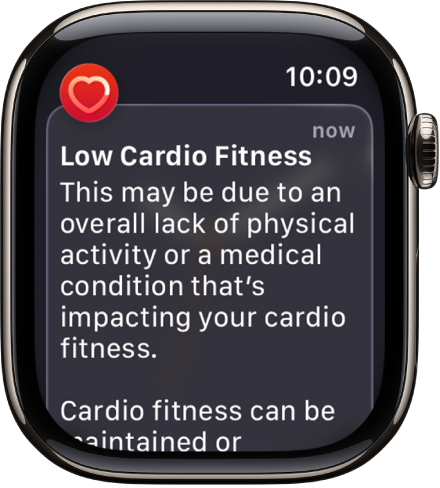
A Heart Rate alert, indicating low cardio fitness.

  1. Open the Apple Watch app on your iPhone.
  2. Tap My Watch, tap Apps and tap Heart. Then turn on Cardio Fitness Notifications.

Look in the Cardio Fitness section of the Health app to see your cardio fitness measurements and the range they fall into. Tap Show All Cardio Fitness Levels for more information.

See also

Tag: Health

You can wear Apple Watch to analyze your heart data, which can be used to detect signs of possible hypertension (available on supported models; not available in all countries or regions).

If your Apple Watch detects patterns of hypertension, you receive a notification to discuss with your healthcare provider. You’re also prompted to use a third-party blood pressure cuff to take measurements over a 7-day period, and you can set up reminders for the morning and evening. Then you can log your blood pressure in the Health app.

A Heart Rate notification, indicating possible hypertension.

Important: Your Apple Watch is not a medical device and is not intended to replace talking with your doctor for diagnosis, treatment, or monitoring of hypertension. Apple Watch cannot detect a heart attack or identify every instance of hypertension. Hypertension notifications are not intended for use if you have diagnosed hypertension, or are under 22 years old. Hypertension notifications should also not be used during pregnancy.

Set up hypertension notifications

  1. Open the Health app on your iPhone.
  2. Tap your picture or initials at the top right.
  3. Tap Health Checklist, tap Set Up below Hypertension Notifications, and follow the onscreen instructions.

Set up a Blood Pressure Log

When you receive a hypertension notification, you’re prompted to get a blood pressure cuff and log your blood pressure twice a day for 7 days.

  1. Open the Health app on your iPhone.
  2. Tap Browse, tap Heart, and then tap Blood Pressure.
  3. Tap Blood Pressure, tap Get Started below Blood Pressure Log, and follow the onscreen instructions.

    You’re asked to schedule reminders to log your blood pressure after you wake up and right before bedtime.

Log your blood pressure

To measure your blood pressure, put the cuff on your arm, then follow the instructions. After you measure your blood pressure, you can log it in the Health app on your iPhone.

  1. Open the Health app on your iPhone.
  2. Tap Browse, tap Heart, and then tap Blood Pressure.
  3. Tap Blood Pressure and tap Add a Measurement below Blood Pressure Log.
  4. Do the following:
    • Change the date and time: Tap the date and time and then make a change.
    • Enter systolic and diastolic values: Tap the text field next to Systolic and Diastolic and then enter a value.
  5. When you’re finished, tap the Done button.

Turn off hypertension notifications

  1. Open the Health app on your iPhone.
  2. Tap your picture or initials at the top right.
  3. Tap Health Checklist, tap Hypertension Notifications, and turn Hypertension Notifications off.

See also

Tag: Health

With the Camera Remote app, you can use your Apple Watch as a viewfinder for your iPhone camera and take photos and videos from a distance. You can even control the flash, set a shutter timer, and review your shots right on Apple Watch.

To work as a camera remote, your Apple Watch needs to be within normal Bluetooth range of your iPhone, about 33 feet or 10 meters. By default, each shot is taken with a 3-second timer, and the photo is saved in the Photos app on your iPhone.

Quick tip: For the best results, keep your iPhone steady during remote shooting by placing it on a stable surface or using a tripod. Opening your iPhone camera brings up a hint at the bottom of your Apple Watch face; tap it to open the Smart Stack, and then tap Camera Remote.

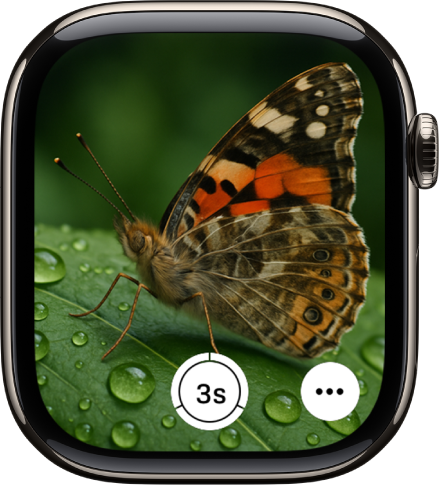
The Apple Watch screen showing what’s in the iPhone camera’s view. The shutter button is at the bottom center. The More Options button is at the bottom right.

Take a photo using your iPhone camera

  1. Open the Camera Remote app on your Apple Watch.
  2. Do any of the following:

    • Frame the shot: Use your Apple Watch as a viewfinder.
    • Zoom: Turn the Digital Crown.
    • Adjust exposure: Tap the key area of the shot in the preview image.
    • Take the photo: Tap the Shutter button.

      By default, the shot is taken with a 3-second timer. Tap the More Options button to turn off the timer or change other settings.

The Camera Remote app lets you review the photo, and it’s saved in the Photos app on your iPhone.

Record video using your iPhone camera

With the Camera Remote app on Apple Watch, you can record video using your iPhone.

  1. Open the Camera Remote app on your Apple Watch.
  2. Position your iPhone to frame the shot using your Apple Watch as a viewfinder.

    To zoom, turn the Digital Crown.

  3. Touch and hold the Shutter button until the recording begins.
  4. Tap the Stop button to end the recording.

Review the video in the Camera Remote app afterward. It’s saved in the Photos app on your iPhone.

Review your shots

  1. Open the Camera Remote app on your Apple Watch.
  2. Tap the thumbnail at the bottom left.
  3. Do any of the following:
    • View more shots: Swipe left or right.
    • Zoom: Turn the Digital Crown.
    • Pan: Drag a zoomed photo.
    • Fill the screen: Double-tap the photo.
    • Show or hide the controls: Tap the screen.
  4. When you’re finished, tap the Close button.

Switch the camera and adjust settings

  1. Open the Camera Remote app on your Apple Watch.
  2. Tap the More Options button. Then set any of the following:
    • Timer: Turn the 3-second timer on or off.
    • Camera: Choose Front or Rear.
    • Flash: Choose Auto, On, or Off.
    • Live Photo: Choose Auto, On, or Off.

See also

Tag: camera

The Smart Stack suggests helpful information or actions that you can take depending on your context—like the time of day, your location, or recent activity. The Smart Stack also shows Live Activities for real-time updates on workouts, timers, and more.

When the Smart Stack has an immediately useful suggestion, Apple Watch gently taps your wrist with a hint. You can open the hint right away, or mute it for 24 hours.

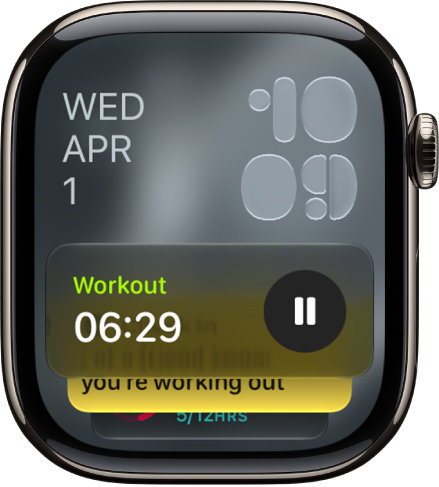
The Smart Stack on Apple Watch showing Live Activities and widgets.

Use tap gestures to access widgets in the Smart Stack

  1. From the watch face, open the Smart Stack with the double tap gesture.
  2. Scroll through the widgets with the double tap gesture.
  3. Open a widget with the single tap gesture.
  4. Select a button in the widget—such as play or pause music—with the single tap gesture.
  5. To close the Smart Stack and return to the watch face, perform a wrist flick.

Open the Smart Stack

  1. From the watch face, turn the Digital Crown upward or swipe up from the bottom of the screen.
  2. Scroll to the widget you want to use. Tap it to open the associated app.

    Tip: To access Music, Workouts, or Messages, scroll to the bottom of the Smart Stack.

Use Smart Stack hints

Using on-device data and trends from your daily routine, Apple Watch gently taps your wrist with a hint when the Smart Stack has a suggestion that’s immediately useful for you. A small icon appears at the bottom of the watch face.

When a hint appears, do one of the following:

  • Open the hint: Tap the Smart Stack hint at the bottom of the watch face to open the Smart Stack.

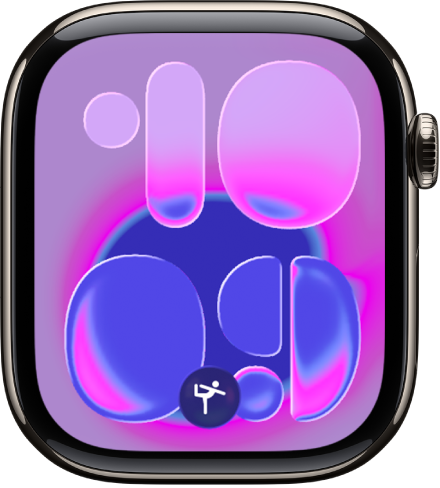
    The Apple Watch face with a Smart Stack hint at the bottom center.

  • Mute the hint for 24 hours: Swipe down on the Smart Stack hint.

Note: For suggestions like workouts, Apple Watch needs some time to learn your routine.

Customize the Smart Stack

The widgets in the Smart Stack are yours to add, remove, and rearrange. Some apps offer more than one widget, and you can customize some widgets to see what’s most important for you, like choosing a frequently used home accessory in the Home widget.

  1. Open the Smart Stack.
  2. Scroll to the bottom and tap Edit. Do any of the following:
    • Add a widget: Tap the Add Widget button, then choose a widget. With certain widgets, you can tap the Expand button for customization options.
    • Remove a widget: Tap the Delete button.
    • Pin widgets: Tap the Pin button on the right side of each widget you want to stay in a fixed position.
    • Reorder pinned widgets: Touch and hold a widget you want to move and drag it to a new position.
  3. When you’re finished, tap the Done button.

See also

Live Activities—app activities in progress such as a workout, a timer, or music—appear on the Apple Watch face and at the top of the Smart Stack.

You can see them at a glance, and choose when and how Live Activities appear.

Here’s how to view Live Activities on Apple Watch.

See Live Activities

  1. Tap the Live Activity at the top of the watch face.

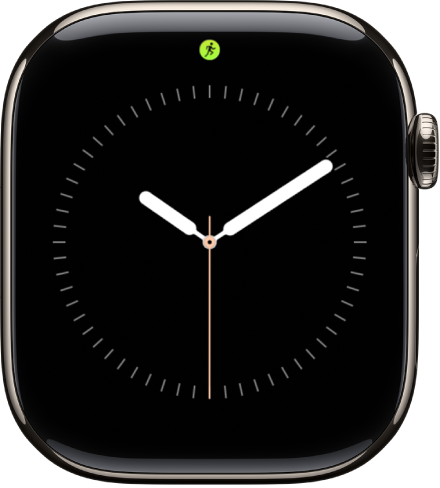
    The Apple Watch face with a Live Activity dot at the top center.

  2. To return to the watch face, press the Digital Crown.

Choose when and how Live Activities appear

  1. Start the Settings app on your Apple Watch.
  2. Tap Smart Stack and tap Live Activities. Then set any of the options.

See also

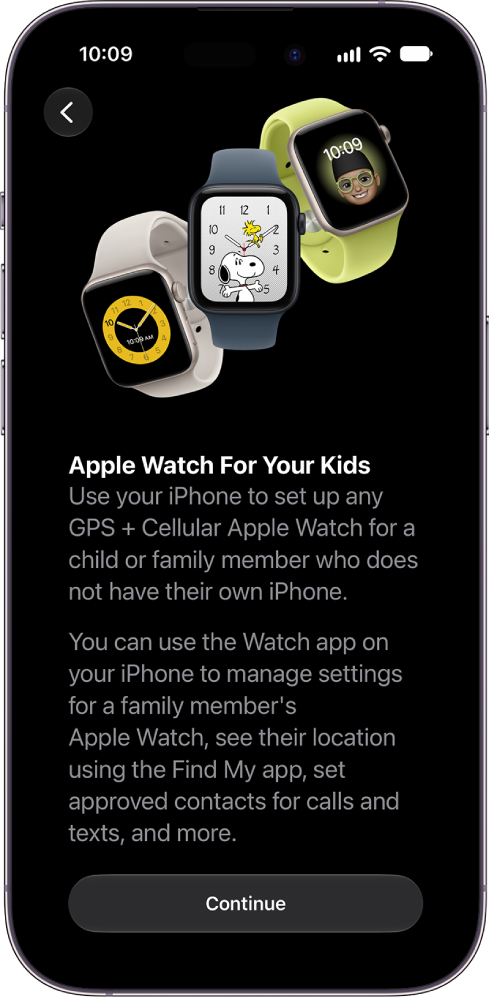
You can set up any Apple Watch with cellular for your child or family member, even if they don’t have their own iPhone. To do so, you must be the family organizer or parent/guardian in your Family Sharing group.

On watchOS 27, your child or family member must be part of your Family Sharing group and have a cellular-capable Apple Watch SE 3 or Apple Watch Series 9 or later. Their watch doesn’t have to use the same cellular carrier as the iPhone you manage it with, but the iPhone you use to pair and set up the watch must be within normal Bluetooth range (about 33 feet or 10 meters) of it to manage settings and update the software.

An iPhone showing setup details for Apple Watch For Your Kids.

Apple Watch For Your Kids is not available in all countries or regions.

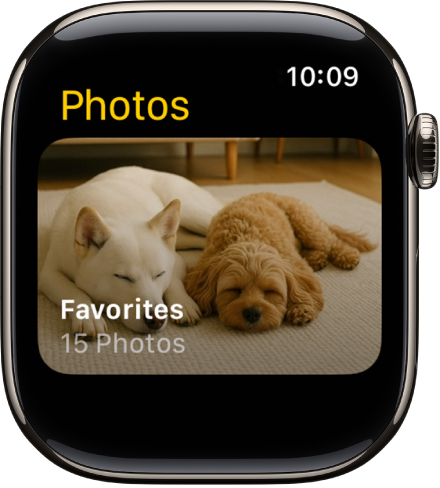
With the Photos app on your Apple Watch, you can view photos from the iPhone album of your choice, featured photos, and Memories.

At first, it shows photos from your Favorites album, but you can change the album it uses. You can also stop photo syncing, or limit photo storage on Apple Watch. It all starts in the Apple Watch app on your iPhone.

Here’s how to choose a photo album and manage storage on Apple Watch.

Choose the album to store on Apple Watch

The Photos app on Apple Watch showing an album called Favorites.

A new Apple Watch displays photos from your Favorites album, meaning the photos you tagged as favorites, though you can change the album it uses.

  1. Start the Apple Watch app on your iPhone.
  2. Tap My Watch, go to Photos, tap Sync Album, and then choose the album.

Removing a photo from Apple Watch happens in the Photos app on your iPhone, where you remove the image from the album you’ve synced.

You create a new album for Apple Watch photos in the Photos app on your iPhone.

Show featured photos and Memories on Apple Watch

Featured photos and Memories from the photos library on your iPhone can sync to your Apple Watch automatically.

  1. Start the Apple Watch app on your iPhone.
  2. Tap My Watch, tap Photos, and turn on Sync Memories and Sync Featured Photos.

Stop photo syncing

If you don’t want your iPhone to sync Memories, featured photos, or photos from an album you’ve chosen, follow these steps:

  1. Start the Apple Watch app on your iPhone.
  2. Tap My Watch and tap Photos. Then turn off Photo Syncing.

Limit photo storage on Apple Watch

Available space decides the number of photos stored on your Apple Watch, so you can limit it to save space for songs or other content.

  1. Start the Apple Watch app on your iPhone.
  2. Tap My Watch and then go to Photos and tap Photos Limit.

To see how many photos are on your Apple Watch, do one of the following:

  • Go to the Settings app on your Apple Watch, tap General, then tap About.
  • Go to the Apple Watch app on your iPhone, tap My Watch, tap General, then tap About.

To see how much space is used for your photos, go to the Settings app on your Apple Watch, tap General, then tap Storage. To do this on your iPhone, open the Apple Watch app, tap My Watch, tap General, then tap Storage.

Take a screenshot of Apple Watch

  1. Go to the Settings app on your Apple Watch, tap General, and then tap Screenshots, then turn on Enable Screenshots.
  2. Press the Digital Crown and the side button at the same time to take a picture of the screen.

Screenshots end up in Photos on your iPhone.

See also

Tag: Photos

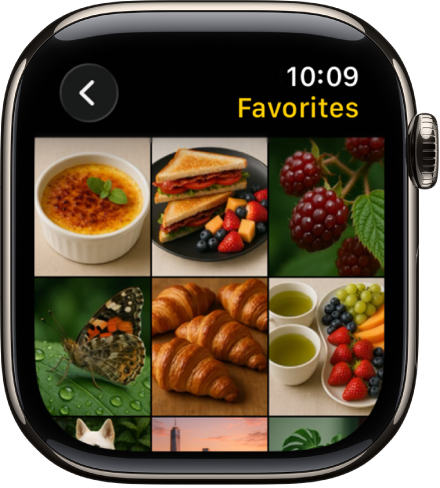
In the Photos app, you can browse your photos, view Live Photos, and share your favorite shots.

You can browse memories, Featured Photos, and albums you’ve synced to your Apple Watch, and even see an entire photo album at once.

Here’s how to view photos and Memories on Apple Watch.

The Photos app on Apple Watch showing an album called Favorites, with several photos displayed in a grid.

Browse photos in the Photos app on Apple Watch

Go to the Photos app on your Apple Watch and use these actions to browse your photos.

  1. Tap a memory, Featured Photos, or an album you’ve synced to your Apple Watch.
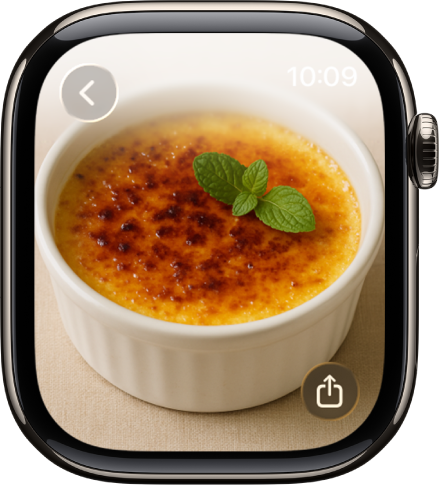
  2. Tap a photo to view it.
  3. Swipe left or right to see other photos.
    • Turn the Digital Crown to zoom, or drag to pan a photo.
    • Double-tap to fill the screen or see the entire image.
    • Zoom all the way out to see the entire photo album.

While viewing a photo, turn the Digital Crown to zoom, drag to pan, or double-tap to switch between viewing all of the photo and filling the screen. Swipe left or right to see the next photo. A Share button is on the bottom right.

View a Live Photo on Apple Watch

Look for the Live Photo symbol in the bottom-left corner of a photo, then touch and hold the photo.

Share a photo

While viewing a photo in the Photos app on your Apple Watch, tap the Action button, then choose a sharing option.

You can choose a different photo album; read our article, Choose a photo album and manage storage.

See also

Tag: Photos

Refer to the following resources to get more Apple Watch-related software and service information. They cover managing your Apple Account, using iCloud, finding your Apple Watch serial number, obtaining warranty service, and battery service. There’s more, too.

To learn about Do this
Apple Watch service and support, tips, forums, and Apple software downloads See the Apple Watch Support website.
The latest information about Apple Watch See the Apple Watch website.
Getting personalized support (not available in all countries or regions) See the Apple Support website.
Managing your Apple Account Sign in to your Apple Account.
Using iCloud See the iCloud User Guide.
Finding your Apple Watch serial number, IMEI, or ICCID You can find your Apple Watch serial number on the Apple Watch packaging. Or, on your Apple Watch, go to the Settings app, then go to General > About.
Obtaining warranty service First follow the advice in this guide, then see the Apple Watch Support website.
Viewing Apple Watch regulatory information On your Apple Watch, go to the Settings app, then go to General > Regulatory.

You can also view this information on the paired iPhone—go to the Apple Watch app on your iPhone, tap My Watch, tap General, then tap About. Scroll to the bottom and tap Legal to view Legal Notices, License, information on where to find the Warranty, and RF Exposure information.

Battery service See the Battery Service and Recycling website and the Apple Watch Service and Repair website.
Viewing the Apple Watch User Guide from the Apple Watch app Go to the Apple Watch app on your iPhone, tap Discover at the bottom-right, then tap Apple Watch User Guide.
Viewing the Apple Watch User Guide from the Tips app Go to the Tips app on your iPhone, scroll down, then tap Apple Watch below User Guides.

Use Siri to control your Apple Watch and other Apple devices with just your voice—like opening apps, adjusting settings, and locating your other Apple devices or items with AirTags. You can also control smart home accessories that you set up in the Home app.

On your watch, Siri can open apps and settings, adjust utility and accessibility settings, and contact emergency services. At home, you can ask Siri to turn on lights or adjust the thermostat, even when you’re not there, and make an announcement.

Control your Apple Watch

Siri: On your Apple Watch, activate Siri, then see the ideas below for requests you can make.

  • Open apps and settings

    • “Open the Sleep app”
    • “Open Settings”
    • “Read my notifications”
  • Adjust utility settings

    • “Turn on Airplane Mode”
  • Adjust accessibility settings

    • “Turn on VoiceOver”
  • Contact emergency services

    • “Hey Siri, call 911”
    • “Start the siren” (Apple Watch Ultra Models only)

Control your home

Siri can turn on lights, adjust the thermostat, and control the products you use in your home, even when you’re away.

Siri: On your Apple Watch, activate Siri, then see the ideas below for requests you can make.

  • Control accessories

    • “Turn on the lights”
    • “Set the temperature to 72 degrees”
  • Adjust an accessory

    • “Siri, make it cooler”
    • “Set my reading scene”
  • Control a room or zone

    • “Turn off the lights in the office.”
  • Check your home’s status

    • “Siri, is the front door locked?”
    • “Hey Siri, are the upstairs lights on?”
  • Make an announcement

    • “Hey Siri, announce upstairs ‘I’m going to the store.'”
    • “Hey Siri, tell the office ‘The movie is starting'”
    • “Siri, intercom, ‘Time for school'”
    • “Siri, it’s movie night”

See also

Tags: Home, Siri