Got a tip for us?

iPad

The iPad is a tablet computer from Apple that runs the iOS mobile operating system. Similar in functionality to the iPhone, the iPads purpose is often quite different, sometimes even serving as a general desktop computer replacement.

When a friend shares music with you in the Messages app, you can easily find it in Shared with You in the Music app. You can listen to a song, reply to whoever shared it, or add it to your library.

Note: This requires Music to be turned on in Settings > Apps > Messages > Shared with You, and also, your friend has to be in your contacts list in Contacts.

  1. Open the Music app on your iPad.
  2. Tap Home in the sidebar and swipe up to Shared with You. Do any of the following:
    • Tap a song to listen to it.
    • Tap the name of the person, people, or group that shared the song to reply to them using Messages.
    • Touch and hold the song to take other actions—for example, add it to your library, create a station, reply to the sender, or remove it.

See also

Tag: Music

You can capture photos and videos directly in the Messages app. You can also modify the photos and videos before you send them by editing the image, marking it up, or adding effects.

You can take a photo, take a video, or add an existing photo or video, then crop it, add filters, and more. Markup lets you add stickers, labels, and shapes to your photo. Smaller-sized previews of images can go out first, too, so your recipients get them right away.

Note: Attachments can have size limits set by your carrier, and when necessary, iPad may compress photo and video attachments.

Send a photo or video

  1. Start the Messages app on your iPad.
  2. In a conversation, tap the Add button.
  3. Do one of the following:

    • Take a photo: Tap Camera, then tap the Take Picture button to take a picture.

      To change the camera mode, tap Photo, then tap an option.

      To crop the photo, add filters, and more, tap Edit, then use the editing tools.

    • Take a video: Tap Camera, tap Video, tap the Record Video button to begin recording, and then tap the Stop Recording Video button to stop.

      To trim or crop the video, add filters, and more, tap Edit, then use the editing tools.

    • Add an existing photo or video: Tap Photos and swipe up to search, browse through all photos, or change albums. Then tap the images you want to send.

      To crop, add filters, or make other adjustments, tap the image in the message bubble, tap Edit, then use the editing tools.

  4. To add stickers, labels, and shapes to your photo, tap Markup, then use Markup. When you’re done, tap Save.
  5. Tap Done to add the photo or video to the message bubble, add a comment. Tap the Send button to send your message.

Another option is to send a photo or video with a Digital Touch effect, or you can record a video message in the FaceTime app.

Note: You can have your (or a family member’s) iPad receive warnings about sensitive content and warn you before it’s sent or received.

With Apple Intelligence*, you can create original images using Image Playground, or create custom emoji—called Genmoji—in Messages.

Send photos faster

Smaller-sized previews of images can go out first, so your recipients get them right away, ahead of the full-resolution images.

  1. Start the Settings app on your iPad.
  2. Tap Apps, then tap Messages.
  3. Turn on Send Low Quality Photo Previews.

With Low Data Mode on, only the preview gets sent. See our guide, Manage roaming and network options.

To remove a photo or video from the message bubble before sending it, tap the Cancel button.

Note: Attachments you send over iMessage (such as photos or videos) may be uploaded to Apple and encrypted so that no one but the sender and receiver can access them. To improve performance, your iPad may automatically upload attachments to Apple while you’re composing a message. If you decide not to send your message, the attachments are deleted from the server after several days.

*Apple Intelligence is available with Siri and device language set to Chinese (Simplified), Chinese (Traditional), Danish, Dutch, English, French, German, Italian, Japanese, Korean, Norwegian, Portuguese, Spanish, Swedish, Turkish, or Vietnamese. Some features may not be available in all regions or languages. Some devices may not be available in all regions. Siri AI is available in beta in iOS 27, iPadOS 27, macOS 27, watchOS 27, and visionOS 27 and requires an Apple Intelligence–enabled device set to a supported language. Available in English to start. Siri AI will not be initially available in the EU on iOS, iPadOS, and watchOS. Certain Apple Intelligence features that rely on server-side models are subject to daily usage limits, including but not limited to Siri AI, Intelligent Photo Editing Tools, Image Playground, and AFM 3 Cloud models in Shortcuts. Daily limits may vary by feature, request complexity, system demand, system policies, and other factors. Expanded access to such features will be available for a fee in the future. Use of these features is subject to the Apple Intelligence Terms and Conditions.

See also

You can send text messages, images, and much more. You can reply within a conversation or to specific comments in a thread, and even use Siri to listen and respond to your messages.

To start a new conversation, you send a message to one or more people, and you can choose recipients from your contacts with the Add Contact button. You can also reply inline to a specific message, and find out why some messages appear green.

Siri: Ask Siri something like, “Read my last message from Antonio.” Learn how to use Siri.

You’ll need to set up Messages to fully use all the features in the Messages app.
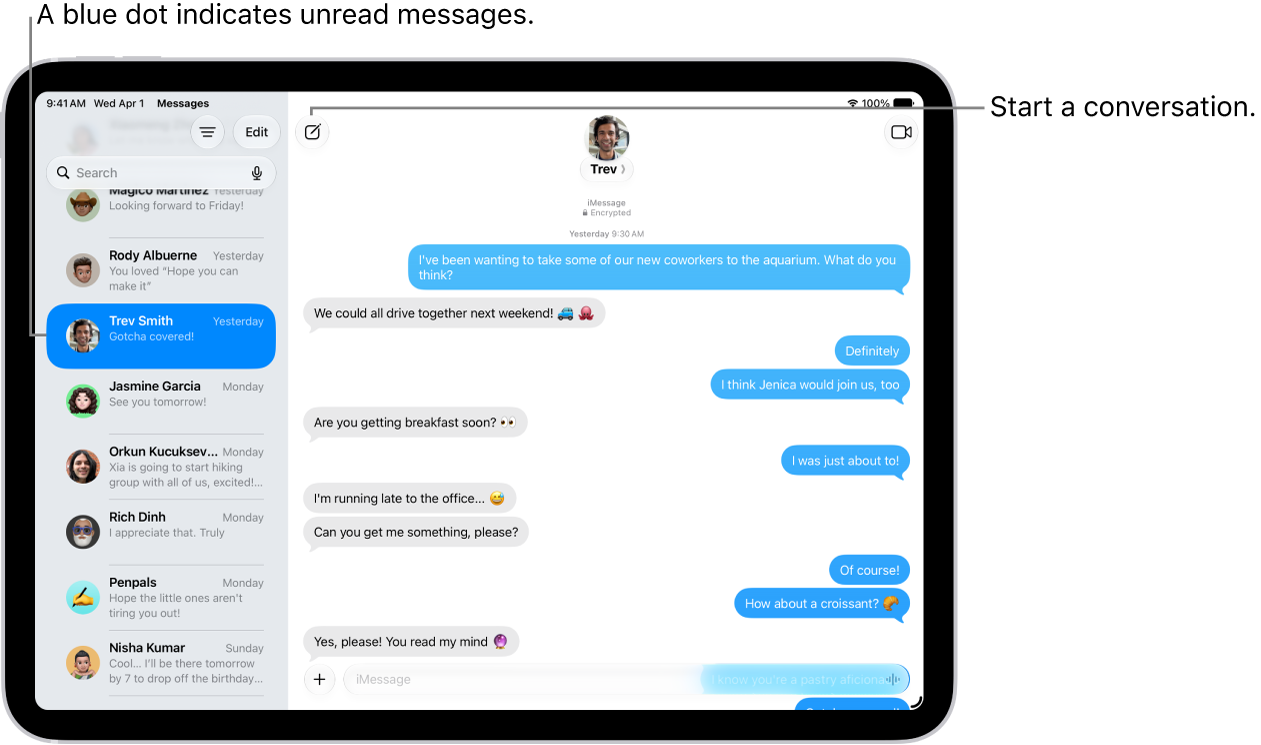
A Messages conversation list on the left and a conversation transcript on the right. An unread messages is marked with a blue dot.

Start a conversation

A new conversation starts when you send a text message to one or more people.
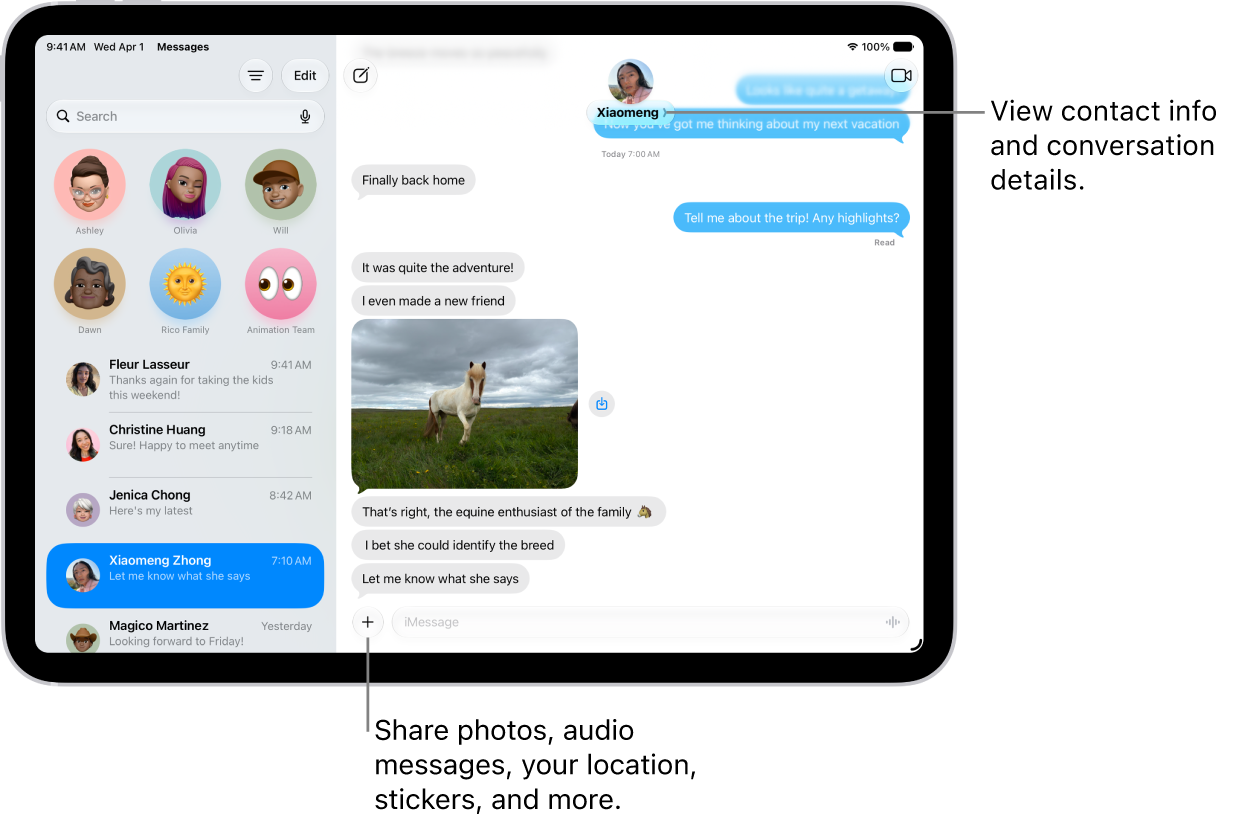
A Messages conversation list on the left and a conversation transcript on the right. At the top, tapping the contact icon opens conversation details.

  1. Open the Messages app on your iPad.
  2. Tap the Compose button at the top of the screen.
  3. Tap the To field. Enter the phone number, contact name, or Apple Account of each recipient.

    To choose recipients from your contacts, tap the Add Contact button.

  4. Do any of the following:

  5. Tap the Send button to send.

    If a message can’t be sent, an alert appears. Tap the Send Failure button to try sending the message again.

To return to the conversation list from a conversation, tap the Back button.

Reply to a message

The conversation list groups messages by conversation, and a dot shows that you haven’t yet read one or more messages in a conversation.

  1. Open the Messages app on your iPad.
  2. In the conversation list, tap the conversation that you want to participate in.
  3. Tap the text field, create your message. Then tap the Send button to send your message.

Quick tip: To see when a message was sent to you, drag its bubble to the left, and timestamps appear for all messages in the conversation.

You can quickly craft a response with Apple Intelligence. Just tap a suggested reply above the keyboard.

Note: Apple Intelligence on iPadOS 27 or later is available on an Apple Intelligence-enabled iPad mini (A17 Pro) and iPad models with M1 or later. Apple Intelligence is not available in all languages or regions. Usage limits may apply.*

Without opening Messages, you can reply to messages on your Lock Screen. Read our guide, Turn on Lock Screen features.

Reply inline to a specific message

Responding to a specific message inline quotes the message you’re responding to. That keeps a busy conversation organized, since it’s clear which response relates to which message.
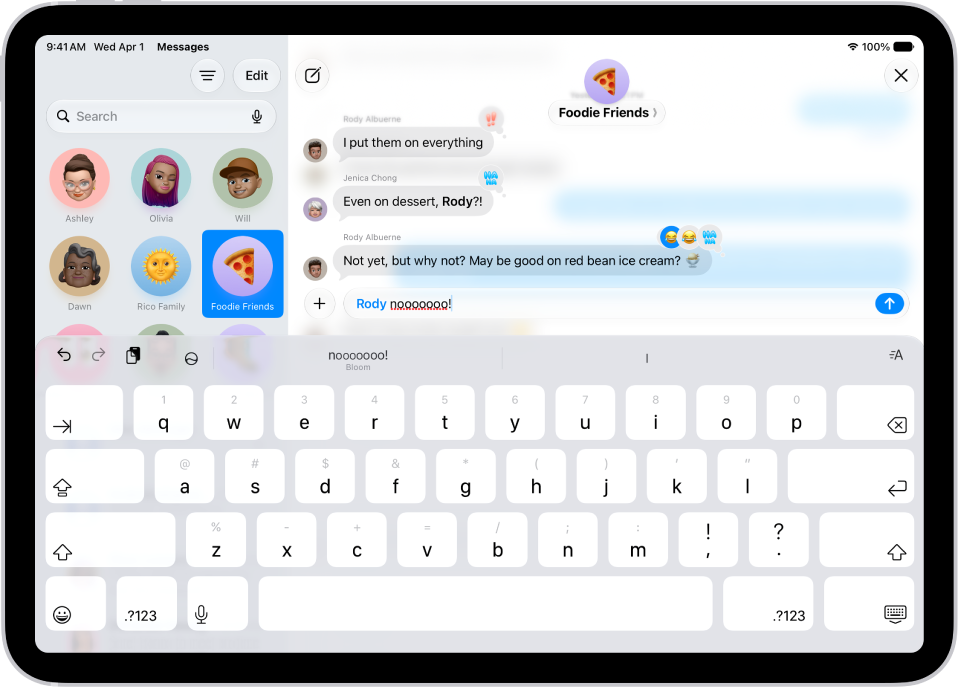
Composing an inline reply in a group conversation in Messages. Another person in the conversation is mentioned, so their name appears in blue, bold text.

  1. Open the Messages app on your iPad.
  2. In the conversation list, tap the conversation that you want to participate in.
  3. Do one of the following:

    • Swipe right on the message bubble that you want to reply to.
    • Touch and hold the message bubble that you want to reply to, then tap Reply.
  4. Enter your message and then tap the Send button.

    Note: Everyone in a group conversation can see your inline reply. To reply privately, tap the group icon at the top of the conversation, touch and hold the icon of the person you want to message privately, then tap Message.

  5. To return to the main conversation, tap the blurred background.

Touch and hold a message to react with a Tapback, such as a thumbs-up or a heart.

Quick tip: You can copy just part of a message. Touch and hold the message and tap Select, then select the text you want to copy and tap Copy.

Why are some bubbles blue and others green?

A blue Send arrow means the message can be sent using iMessage, and it appears in a blue bubble.

When a recipient isn’t using an Apple device, for example, you can’t use iMessage, but SMS, MMS, or RCS will work instead. They show up in green bubbles.

Note: Content may not appear as expected if you send messages to recipients using non-Apple devices.

*Apple Intelligence is available with Siri and device language set to Chinese (Simplified), Chinese (Traditional), Danish, Dutch, English, French, German, Italian, Japanese, Korean, Norwegian, Portuguese, Spanish, Swedish, Turkish, or Vietnamese. Some features may not be available in all regions or languages. Some devices may not be available in all regions. Siri AI is available in beta in iOS 27, iPadOS 27, macOS 27, watchOS 27, and visionOS 27 and requires an Apple Intelligence–enabled device set to a supported language. Available in English to start. Siri AI will not be initially available in the EU on iOS, iPadOS, and watchOS. Certain Apple Intelligence features that rely on server-side models are subject to daily usage limits, including but not limited to Siri AI, Intelligent Photo Editing Tools, Image Playground, and AFM 3 Cloud models in Shortcuts. Daily limits may vary by feature, request complexity, system demand, system policies, and other factors. Expanded access to such features will be available for a fee in the future. Use of these features is subject to the Apple Intelligence Terms and Conditions.

See also

You can send a group text message, name it, and assign it an icon to find it more easily. In a group conversation, you can call people’s attention to specific messages and even collaborate on projects.

You can choose group members from your contacts. You can also add someone to an existing group, or leave a group, and messages to a recipient who isn’t using iMessage appear in green bubbles instead of blue ones.

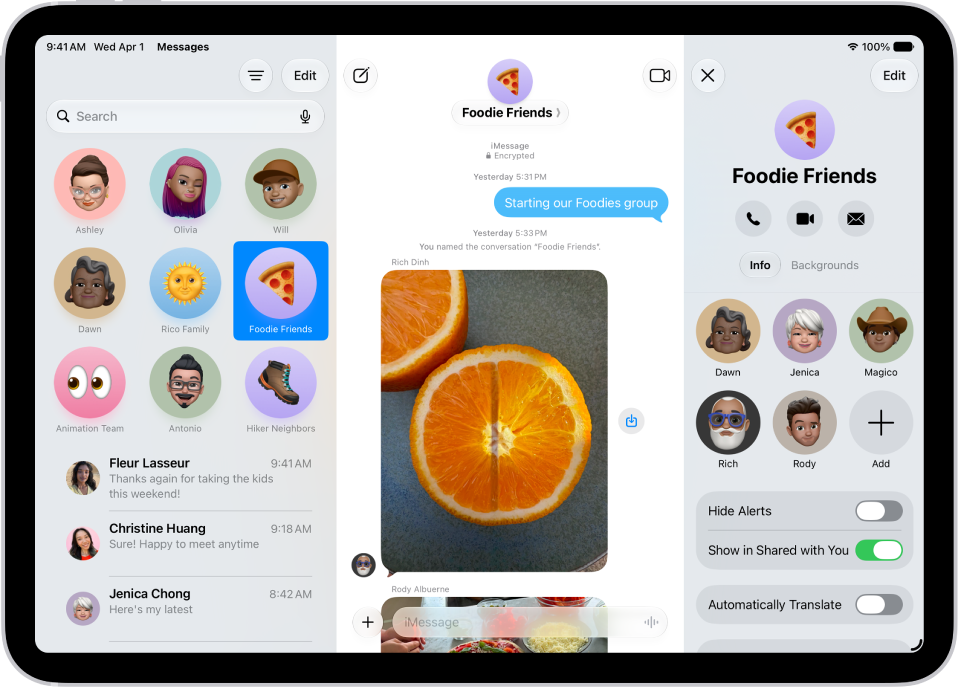
A group conversation in Messages on iPad. On the left, a pinned conversation is selected in a list of conversations. On the right, there is a conversation transcript that includes shared files.

Start a group conversation

You can send a message to multiple people to start a group conversation.

  1. Go to the Messages app on your iPad.
  2. In the conversation list, tap the Compose button at the top of the screen.
  3. Tap the To field. Enter the phone number, contact name, or Apple Account of each recipient.

    To choose group members from your contacts, tap the Add Contact button in the To field.

    Note: If one or more of your recipients isn’t using iMessage, messages appear in green bubbles instead of blue ones.

  4. Tap the text field, enter a message or tap the Add button (to the left of the text field) to send a photo, video, poll, or another item with iMessage apps.
  5. Tap the Send button.

Add someone to an existing group conversation

If you have at least two other people in a group conversation, you can add additional contacts.

  1. Open the Messages app on your iPad.
  2. Tap the group conversation you want to add someone to.
  3. Tap the group icon at the top of the conversation. Then tap Add.
  4. Enter the phone number, contact name, or Apple Account of each recipient.

    To add group members from your contacts, tap the Add Contact button in the To field.

  5. Tap the Done button to save your changes.

Note: If someone in the group hasn’t turned on iMessage, start a new group by following the onscreen instructions.

If you only have one other person in the conversation, you need to start a new group conversation to add someone else.

To remove someone from a group conversation in iMessage, touch and hold their icon, then tap Remove from Group.

You can add someone from a group conversation to your contacts, too. See our guide, Create a contact.

Leave a group conversation

You can leave a group chat if there are at least three other participants in the conversation.

  1. Open the Messages app on your iPad.
  2. Tap the group conversation you want to leave.
  3. Tap the group icon at the top of the conversation.
  4. Scroll down and tap Leave This Conversation or Delete and Block This Conversation. (Learn more about deleting and blocking conversations.)

    Blocked conversations are moved to the Recently Deleted folder, where you can recover them.

To stay in a group chat but stop receiving its notifications, mute the conversation instead.

Mention people in a group conversation

Mentioning someone by name in a group conversation calls their attention to a specific message and sends them a notification. Depending on their settings, they may get notified even if they’ve muted the conversation.

  1. Open the Messages app on your iPad.
  2. In a conversation, begin typing a contact’s name in the text field.
  3. Tap the contact’s name when it appears.

    You can also mention a contact in Messages by typing @ followed by the contact’s name.

    To change whether you get notifications when your name is mentioned in Messages, go to Settings > Apps > Messages, then turn on or off Notify Me.

Name a group conversation

You can name a group chat and choose an icon* to represent the conversation. Everyone who has turned on iMessage sees the new name and image.

  1. Open the Messages app on your iPad.
  2. Tap the group icon at the top of the conversation.
  3. Tap Edit, tap Edit Name & Photo, and then choose an option.

*Availability varies by region.

See also

You can send a poll in any iMessage conversation to decide what to eat, which movie to see, where to travel, when to meet, and more. Everyone in the conversation can contribute options and watch as votes come in.

Anyone in a poll can add other options, no matter who started it, and options are added without votes. You can also quickly create a suggested poll, and vote in a poll.

Note: To start, see, or vote in a poll, you need iMessage on one of these or later: iOS 26, iPadOS 26, macOS 26, watchOS 26, or visionOS 26.

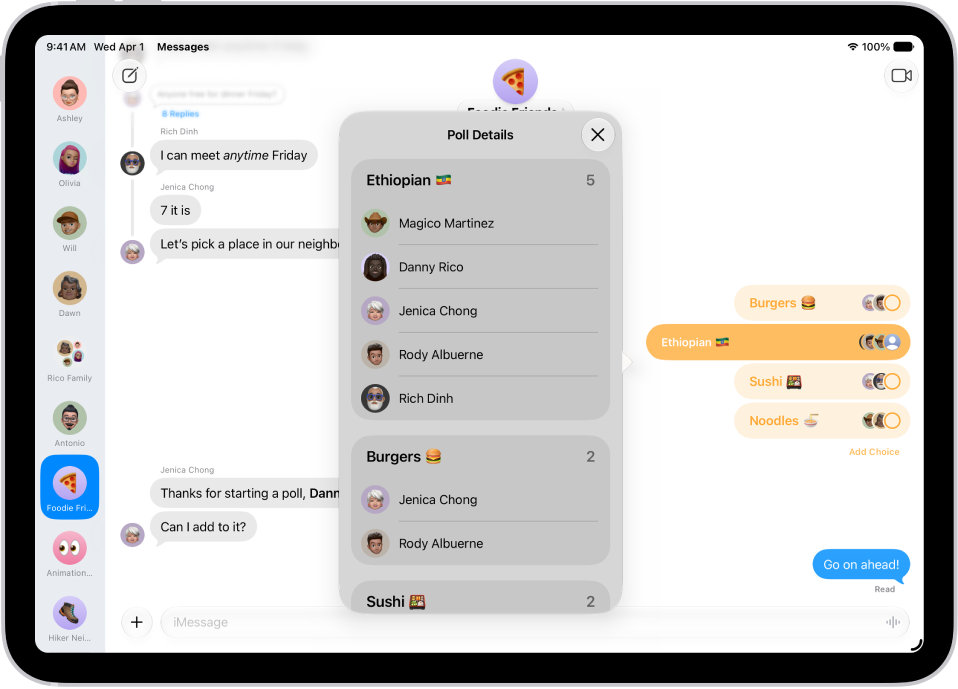
A poll in Messages.

Start a poll

  1. Go to the Messages app on your iPad.
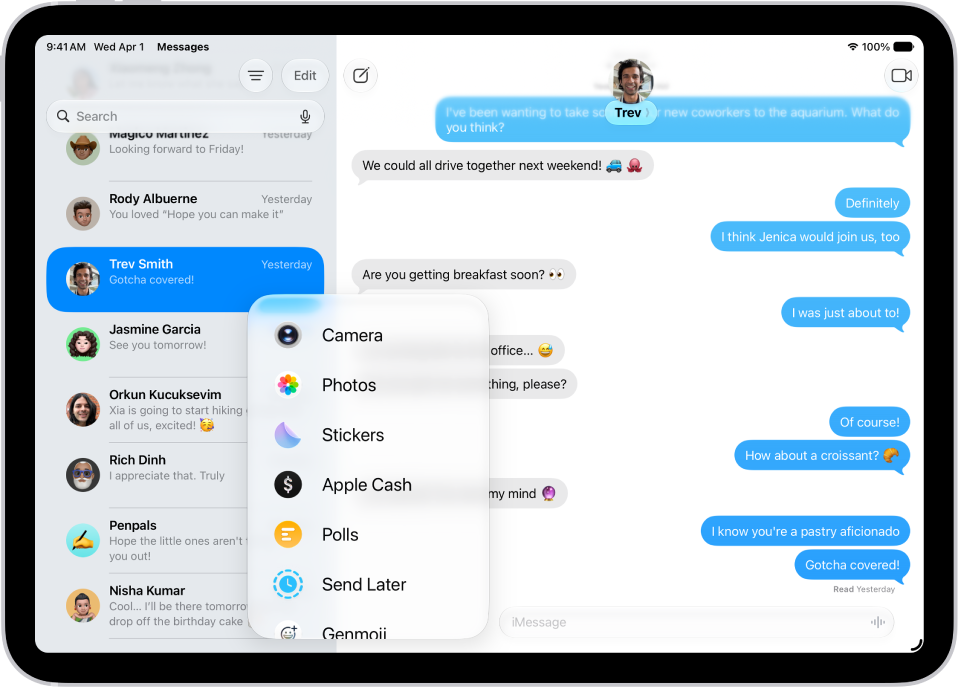
  2. In a conversation, tap the Add button, then tap Polls.
  3. Tap each row to add options. A poll can have up to 12 options.
  4. Tap the Send button.

Quickly create a suggested poll

  1. Start the Messages app on your iPad.
  2. Open a conversation or start a new message.
  3. Mention several options in the conversation. When Apple Intelligence detects that a poll might come in handy, the Create a Poll button appears—tap it to create the suggested poll.
  4. Tap the Send button to send the poll to everyone in the conversation who can participate in the poll. Those who can’t participate receive a message that you sent a poll.

Note: Apple Intelligence on iPadOS 27 or later is available on an Apple Intelligence-enabled iPad mini (A17 Pro) and iPad models with M1 or later. Apple Intelligence is not available in all languages or regions. Usage limits may apply.*

Vote in a poll

  1. Start the Messages app on your iPad.
  2. Open a conversation with a poll in it.
  3. Tap an option to add your vote. Tap again to remove your vote. You can vote for none or all of the options.

Add an option to a poll

It doesn’t matter who started the poll: anyone participating in the poll can add other options.

  1. Start the Messages app on your iPad.
  2. Open a conversation with a poll in it.
  3. Tap Add Choice, then enter another option.
  4. Tap the Send button to add the option to the poll.

    Note: Options are added without votes. Tap to vote for any option you add.

Check on the results of a poll

You can see both how people voted and who hasn’t voted yet.

  1. Start the Messages app on your iPad.
  2. Open a conversation with a poll in it.
  3. Touch and hold the poll and tap Poll Details.

*Apple Intelligence is available with Siri and device language set to Chinese (Simplified), Chinese (Traditional), Danish, Dutch, English, French, German, Italian, Japanese, Korean, Norwegian, Portuguese, Spanish, Swedish, Turkish, or Vietnamese. Some features may not be available in all regions or languages. Some devices may not be available in all regions. Siri AI is available in beta in iOS 27, iPadOS 27, macOS 27, watchOS 27, and visionOS 27 and requires an Apple Intelligence–enabled device set to a supported language. Available in English to start. Siri AI will not be initially available in the EU on iOS, iPadOS, and watchOS. Certain Apple Intelligence features that rely on server-side models are subject to daily usage limits, including but not limited to Siri AI, Intelligent Photo Editing Tools, Image Playground, and AFM 3 Cloud models in Shortcuts. Daily limits may vary by feature, request complexity, system demand, system policies, and other factors. Expanded access to such features will be available for a fee in the future. Use of these features is subject to the Apple Intelligence Terms and Conditions.

See also

You can send a poll, play a game, record audio messages, share songs, and more—all with iMessage apps—without leaving the Messages app. You can customize your list of available apps or add iMessage apps you find in the App Store.

The Messages app comes with iMessage apps for sending photos, videos, audio messages, stickers, and more, and you can rearrange them in the order you like. You can even download additional iMessage apps for more options.

The Add menu in Messages on iPad, showing iMessage options like photos, polls, and scheduled send.

Rearrange iMessage apps

  1. Open the Messages app on your iPad.
  2. In a conversation, tap the Add button.
  3. Touch and hold any app icon in the list until it shrinks a little. Then drag it to the location where you want it.

    To move the app icon to a different page, drag it to the top or bottom edge of the screen. You might need to wait a moment for the new page to appear.

Add iMessage apps

Built-in iMessage apps in the Messages app let you send photos, videos, audio messages, stickers, and more, and downloading additional iMessage apps gives you even more options.

  1. Open the Messages app on your iPad.
  2. In a conversation, tap the Add button.
  3. Tap Store to open the App Store for iMessage.
  4. Tap an app to see more details and reviews and then do one of the following:
    • Purchase an app: Tap the price. Payments are made using the method associated with your Apple Account.
    • Download a free app: Tap Get.

See also

You can let others know where you are, or find out where they are, by using location sharing in Messages.

Your location updates in real time right in the Messages conversation. You decide how long to share it, even indefinitely, and when somebody asks where you are, you can quickly share your current location. In an SMS conversation, you can send a pinned location instead.

Here’s how to share your location in Messages on iPad.

Share and update your location automatically

Share your location in a Messages conversation, and it updates in real time right there.

  1. Go to the Messages app on your iPad.
  2. In a conversation, tap the Add button.
  3. Tap Location and tap Share.
  4. Decide how long you want to share your location.

    To share your location until you manually stop sharing it, tap Indefinitely.

  5. Tap the Send button to send your location. (Or tap the Remove App from Message button if you change your mind.)

Quick tip: When somebody asks where you are, it’s quick to share your location by tapping Current Location (above the keyboard).

When you share your location to a group and later add other people to it, resharing your location lets everyone see where you are.

In an SMS conversation, a pinned location is the way to share your location.

Messages uses the Find My app when you share your location. Learn how to share your location and locate someone.

Send a pinned location

  1. Open the Messages app on your iPad.
  2. In a conversation, tap the Add button. Then tap Location.
  3. Tap the Map Pin button in the top left of the map and drag the map until the pin is in the right place.
  4. Tap Send Pin, then tap the Send button to send your pin.

Pinned locations don’t update as you move.

Ask for someone else’s location

  1. Open the Messages app on your iPad.
  2. In a conversation with one other person, do one of the following:
    • Tap the Add button, tap Location, then tap Request.
    • Send a message that ends with the question, “Where are you?” then tap Request Location (above the keyboard).
  3. Tap the Send button to send your request.

After someone shares their location with you, their location appears below their name at the top of the conversation. Tap their name to see where they are on a map. Tap the map to enlarge it.

Stop sharing your location

  1. Open the Messages app on your iPad.
  2. Open the conversation with someone you’re sharing your location with and then tap the contact icon at the top of the conversation.
  3. Tap Stop Sharing My Location.

In the conversation, the previous bubble no longer displays a map.

Note: Finding people with location sharing isn’t available in all countries or regions. If you set up location sharing and others still can’t see your location, make sure you allowed access. Go to Settings > Privacy & Security > Location Services > Find My, then choose an option. See Control the location information you share.

See also

If it’s too late at night or too important to forget, you can schedule a text message to be sent at a later time.

Messages can be scheduled as far as 14 days ahead, and your recipient won’t know the message was scheduled. It shows a dashed line until it’s time to send, and it’s delivered even if all your devices are offline. You can also change the send time, edit the message, or delete it.

Note: You must be using iMessage to schedule a message like this. Your recipient can be on any device and won’t know the message was scheduled. To reschedule, edit, or delete a scheduled message, you need to be online.

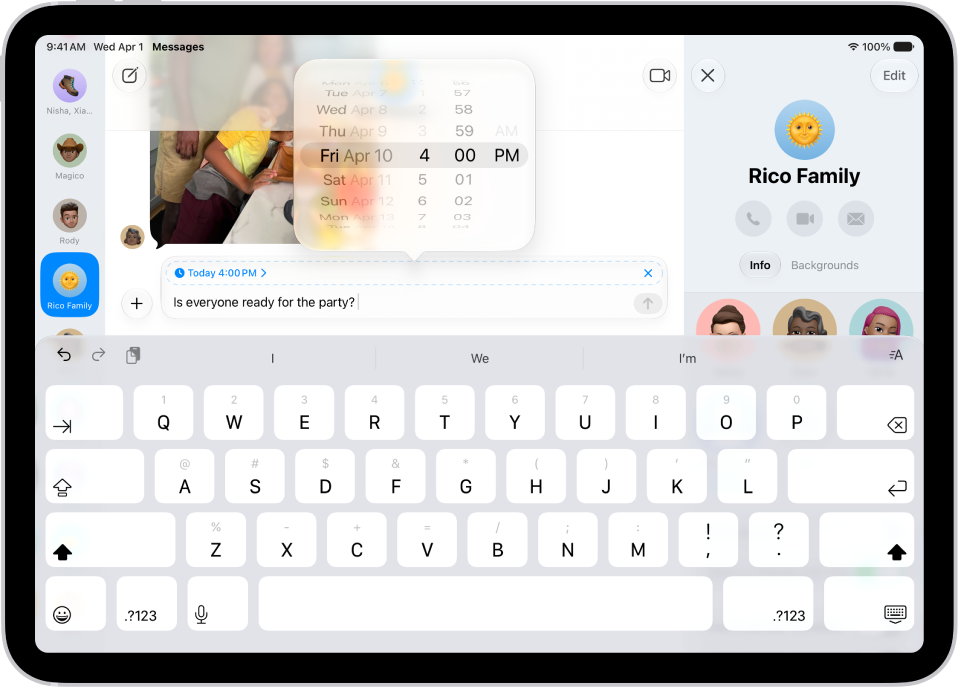
A Messages conversation with a scheduled message being entered into the text field.

Schedule a message

You can schedule a message up to 14 days into the future.

  1. Go to the Messages app on your iPad.
  2. Go to the conversation where you want to schedule a message or start a conversation.
  3. Tap the Add button, then tap Send Later.
  4. Tap the time to open the scheduler and then choose when you want to send your message.

    The border of the text field turns into a dashed line, and the time your message will be sent appears at the top of the message.

  5. Enter a message, then tap the Send button.

Until it’s time to send it, the message appears with a dashed line, and it’s delivered even if all your devices are offline.

Note: Scheduled messages are encrypted and stored on Apple servers only until they’re sent. When a message is sent, it’s removed from Apple servers, the balloon becomes a solid color, and its dashed line disappears.

Change the time to send a message

Until its delivery time, you can still reschedule a message.

  1. Open the Messages app on your iPad.
  2. Go to the conversation with the message you want to reschedule.

    If you don’t see your message, scroll down to the bottom of the conversation. Scheduled messages may appear below sent messages.

  3. Tap Edit beside the date (above your scheduled message), then do any of the following:

    • Reschedule it: Tap Edit Time and choose a new time. Then tap away from the schedule to commit the new time.
    • Send it immediately: Tap Send Message.

Edit a scheduled message

You can also edit a scheduled message up until its delivery time.

  1. Open the Messages app on your iPad.
  2. Go to the conversation with the scheduled message you want to edit.

    If you don’t see your message, scroll down to the bottom of the conversation. Scheduled messages may appear below sent messages.

  3. Touch and hold the message bubble, then tap Edit.
  4. Make any changes. Tap the Send Edit button to resend with edits or the Cancel Edit button to revert.

Delete a scheduled message

Delete a message before its scheduled time, and it’s canceled and not delivered to the recipient.

  1. Open the Messages app on your iPad.
  2. Go to the conversation with the scheduled message you want to delete.

    If you don’t see your message, scroll down to the bottom of the conversation. Scheduled messages may appear below sent messages.

  3. Touch and hold the message you want to cancel and tap Delete.

See also

You can record and send audio messages, along with transcripts of what’s said in the message. Audio messages are automatically deleted to save space on your iPad, but if you want to save them, you can.

Instead of typing, you record a message that plays right in the Messages conversation. Before you send it, you can listen to review it or keep recording to add to the end. You can also choose to always keep audio messages.

Note: Audio message transcription is available in select languages.

Record and send an audio message

You can record an audio message instead of writing a text message, and it can be played right in the Messages conversation.

  1. Go to the Messages app on your iPad.
  2. In a conversation, tap the Add button.
  3. Tap Audio, then begin speaking.
  4. Tap the Stop button to pause or end your recording. Then do any of the following to your message:

    • Send it: Tap the Send button.
    • Listen to review it: Tap the Play button.
    • Add to the end of it: Tap the Continue Recording button (with the message duration).
    • Cancel it: Tap the Close button.
  5. Tap Keep to save an incoming or outgoing audio message on your iPad.

    Otherwise, the recording is deleted from the conversation—on your iPad only—2 minutes after you send or listen to it. Recipients can play your recording any time after they receive it. To save it, they need to tap Keep within 2 minutes after listening to it.

Quick tip: Touching and holding the Record Audio button in the text field lets you send follow-up audio messages more quickly.

Transcriptions of audio messages use the language chosen in the sender’s Settings. If you’d like your outgoing messages in another language, see our article, Change the language and region.

Always keep audio messages

  1. Start the Settings app on your iPad.
  2. Tap Apps, then tap Messages.
  3. Tap Expire (below Audio Messages) and tap Never.

Listen to or reply to a recorded audio message

  1. Start the Messages app on your iPad.
  2. Open a conversation with an audio message and tap the Play button to play it.
  3. Do any of the following:

    • Slide right and left on the audio message to fast-forward or rewind.
    • Touch and hold the Play button or the Pause button to adjust the playback speed.
  4. Tap Keep to save an audio message in the conversation.

    To save the message in the Voice Memos app, touch and hold the audio message, then tap Save to Voice Memos.

Switch to FaceTime from Messages

You can quickly make an audio or video call instead of sending a message by switching to FaceTime. In a Messages conversation, tap the FaceTime button.

See also

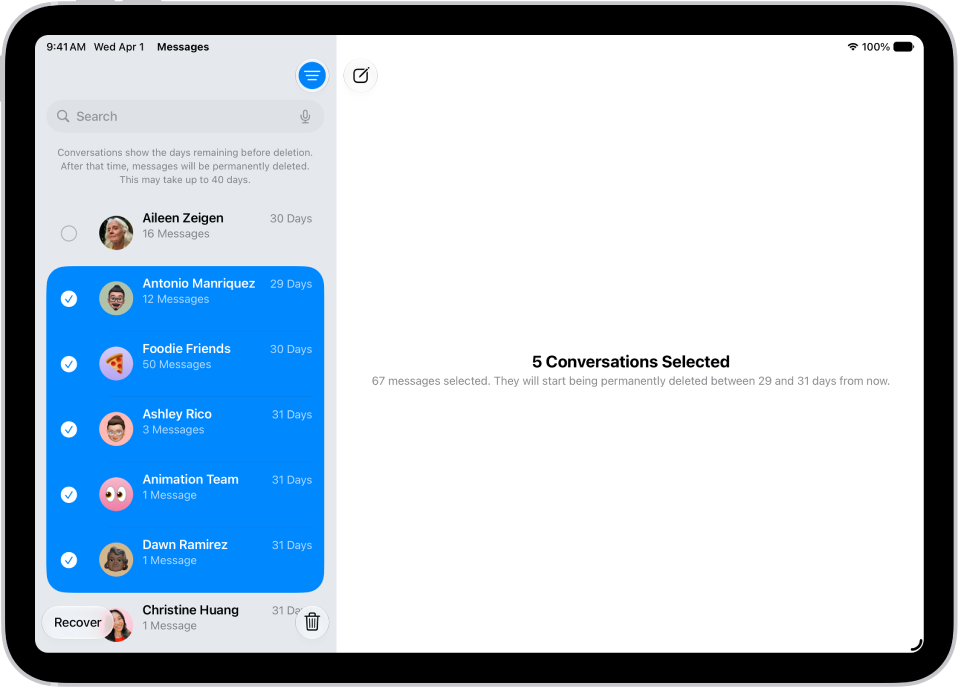
You can recover text messages you deleted on your iPad for up to 30 days. You just choose the conversations you want to restore from Recently Deleted in the Messages app, and if you use Messages in iCloud, they’re recovered on all your devices where it’s on.

Recovering several recently deleted messages.

  1. Go to the Messages app on your iPad.
  2. Tap the Filter button at the top of the conversation list. Then tap Recently Deleted.
  3. Select the conversations whose messages you want to restore and tap Recover.
  4. Tap Recover Messages.

If you use Messages in iCloud, recovering a conversation or message on your iPad recovers it on every device where Messages in iCloud is on.

Note: Deleting and recovering messages only affects the iPad you’re using and other Apple devices signed in to the same Apple Account. And you can’t recover messages, attachments, and conversations for anyone else.

Future messages from a blocked contact aren’t automatically deleted if you’ve blocked someone in a conversation with non-iMessage, deleted the conversation, and then recovered it.

If you remove a message from a conversation using Undo Send, it’s permanently deleted. Audio messages that expire before being saved aren’t recoverable, either.

See also