Got a tip for us?

iPad

The iPad is a tablet computer from Apple that runs the iOS mobile operating system. Similar in functionality to the iPhone, the iPads purpose is often quite different, sometimes even serving as a general desktop computer replacement.

Visual Voicemail shows you a list of your voicemail messages in the Phone app, so you can choose which ones to play and delete without listening to them all. When you store your voicemail messages in iCloud, they sync across your devices, and a badge on the Voicemail icon shows the number of unheard messages.

Setting up Voicemail starts with a voicemail password and your greeting, either Default or Custom.

Live Voicemail lets you see a real-time transcription as someone is leaving you a message. You can even pick up the call as they’re leaving their voicemail.

Note: Voicemail, Visual Voicemail, and Live Voicemail are available from select carriers in select countries or regions.

Set up Voicemail

The first time you tap Voicemail, you’re asked to create a voicemail password and record your voicemail greeting.

  1. Open the Phone app on your iPad.
  2. Tap Voicemail, then tap Set Up Now.
  3. Create a voicemail password.
  4. Choose a greeting—Default or Custom; if you choose Custom, you can record a new greeting.

Turn on Live Voicemail

As someone is leaving you a message, Live Voicemail automatically shows you a real-time transcription. You can even pick up the call while they’re still leaving their voicemail.

To turn on Live Voicemail, do the following:

  1. Open the Settings app on your iPad.
  2. Tap Apps, then tap Phone.
  3. Tap Live Voicemail and turn on Live Voicemail.

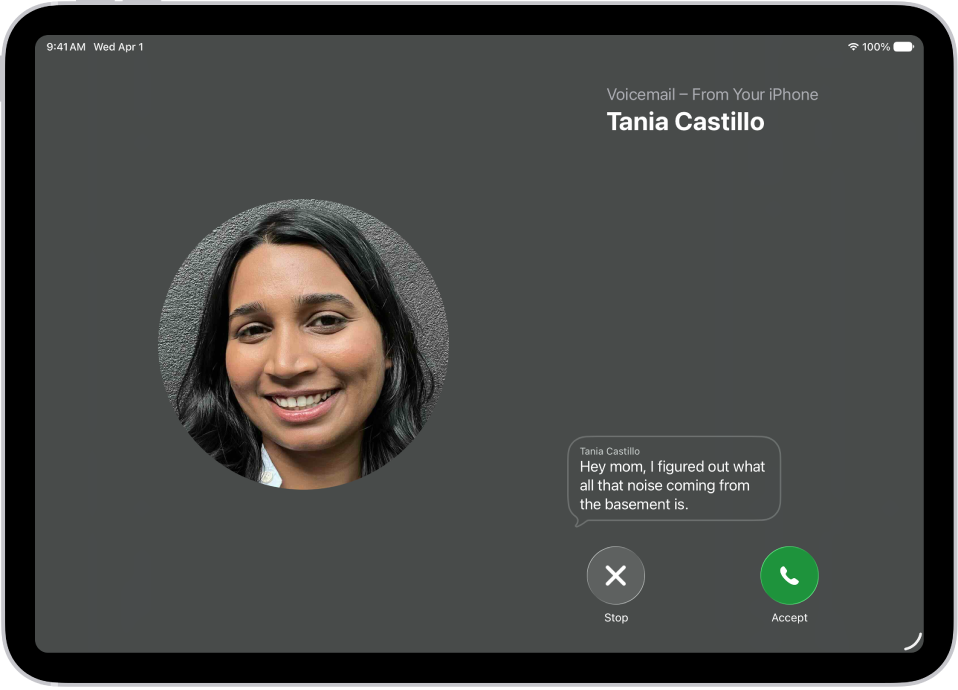
    When Live Voicemail is on and a caller is sent to voicemail, your iPad displays a transcription of the caller’s voicemail as they speak. (Calling and data rates may apply.) The caller won’t be able to hear you and you won’t be able to hear them unless you choose to answer the call. To stop the incoming voicemail without answering or blocking the call, tap Stop.

    If your iPad is turned off or is out of your carrier network’s range, the call is sent to carrier voicemail, if available.

    If you have Silence Unknown Callers turned on, unknown numbers go directly to Live Voicemail without ringing you first. Calls identified as spam by your carrier don’t go through Live Voicemail and are instead instantly declined.

Note: Live Voicemail isn’t available in all countries, regions, or languages.

A call screen showing a Live Voicemail from a contact. Below the transcribed text are Stop and Accept buttons for the call.

Store Voicemail in iCloud

You’re able to store and sync your Live Voicemail and Carrier Voicemail in iCloud.

  1. Open the Settings app on your iPad.
  2. Tap your name, then tap iCloud.
  3. Tap See All next to Saved to iCloud and then turn on Phone & FaceTime.

See also

Tags: iCloud, Phone

You can change your voicemail greeting, password, and alert sounds.

You can record a custom greeting in the Phone app on your iPad, though recording isn’t supported by all carriers or in all countries and regions. You can also change your voicemail password, and choose a new alert sound for new voicemail from the list or purchase one from the Tone Store. And you can change your Contact Photo & Poster, too.

Change your voicemail greeting

  1. Start the Phone app on your iPad.
  2. Tap the Filter button and tap Voicemails.
  3. Tap Edit and then tap Edit Voicemail Greeting.
  4. Tap Custom and tap Record (not supported by all carriers or in all countries and regions).

Change your voicemail password

  1. Start the Settings app on your iPad.
  2. Tap Apps, then tap Phone.
  3. Tap Change Voicemail Password, then enter the new password.

Change your voicemail alert sound

  1. Start the Settings app on your iPad.
  2. Tap Sounds and tap New Voicemail.
  3. Tap a new alert sound from the list, or tap Tone Store to purchase one.

Note: For changing your Contact Photo & Poster, see our guide, Add or edit your avatar and poster.

See also

Tag: Phone

You can assign distinctive ringtones to certain people, and turn the ringer on or off. Clock alarms still play in Silent mode. To temporarily silence incoming calls, you can turn on or schedule a Focus, and you can also change the default sound that plays for a call, text, voicemail, email, reminder, or other notification.

Assign a different ringtone to a contact

  1. Open the Contacts app on your iPad.
  2. Select a contact, tap Edit, tap Ringtone, and then choose a ringtone.

Turn the ringer on or off

  • Open Control Center, then tap the Mute Switch button.

Clock alarms still play when Silent mode is on.

To temporarily silence incoming calls, turn on or schedule a Focus.

It’s also possible to change the default sound that plays when a call, text, voicemail, email, reminder, or other notification comes in. Read our guide, Change ringtone settings, to learn more about ringtones.

See also

To keep your contact information up to date across all your devices where you’re signed in to your Apple Account, you can use iCloud. With iCloud, your contacts stay up to date automatically. You can also sync the information between iPad and your Mac or Windows device instead.

  1. Open Settings, tap [your name], and then tap iCloud.
  2. Tap See All next to Saved to iCloud and turn on Contacts.

Or, sync the information between iPad and your Mac or Windows device, and it’ll stay up to date across iPad and your computer. Read our guide, Transfer files between your iPad and other devices.

You won’t see options for syncing your contacts with your computer if you use iCloud for Contacts, since they stay up to date automatically.

See also

iPad uses your Apple Account to create your contact card, called My Card, in the Contacts app. You can add or edit details—including your name, address, phone number, and birthday, as well as the Contact Poster, which you can share with people when you call or send a message to them.

When you edit My Card, your AutoFill information in Safari updates too, so online forms fill in your address automatically.

Complete or edit My Card

  1. Start the Contacts app on your iPad.
  2. Tap My Card at the top, then tap Edit.

    If you don’t see My Card, tap the Add button and enter your information, then return to the contact list, touch and hold your contact, and tap Make this My Card.

  3. Enter your contact information.

    Contacts suggests addresses and phone numbers to help you.

Add or edit your home address

  1. Start the Contacts app on your iPad.
  2. Tap My Card at the top, then tap Edit.
  3. Tap Add Address and then add your address.
  4. Tap the label that appears to the left of the address and select Home.

You can use AutoFill in Safari to automatically fill in your address for things like online shopping or online forms. When you edit your My Card, your AutoFill information automatically updates. See Fill in personal information.

Add or edit your avatar and poster

When you call or send a message to others, your avatar and poster can show up automatically if you set them.

  1. Start the Contacts app on your iPad.
  2. Tap My Card at the top, then tap Edit.
  3. Tap your contact photo and choose a style.
  4. Tap Customize to edit your avatar and poster.

Share your name and contact image

You can have your updated name, photo, and poster automatically shared with people in your contacts.

  1. Start the Contacts app on your iPad.
  2. Tap My Card at the top, tap Edit, and then tap your contact photo.
  3. Turn on Name & Photo Sharing to start sharing your contact photo and poster with others. (You may need to scroll down.)

    You can share automatically with Contacts Only, or select Always Ask to be prompted before your name, photo, and poster are shared with anyone.

Add or edit contact pronouns

You can add or edit your pronouns or another contact’s pronouns in the Contacts app.

  1. Start the Contacts app on your iPad.
  2. Tap My Card at the top to add your pronouns, or select another contact to add theirs.
  3. Tap Edit and tap add pronouns.
  4. Select your language and add the correct pronouns.

    You can also add pronouns in other languages by tapping Add Pronouns again.

  5. Tap Add.

Note: Your pronouns stay private by default when you share your contact information through Contacts or NameDrop, and another contact’s pronouns are never shared when you share their information.

See also

Use the Contacts app to keep phone numbers, email addresses, birthdays, and more, all in one place. You can create a contact, add contacts from accounts like iCloud, Google, or Yahoo, share a contact by choosing the fields you want to include, and keep your contacts in sync.

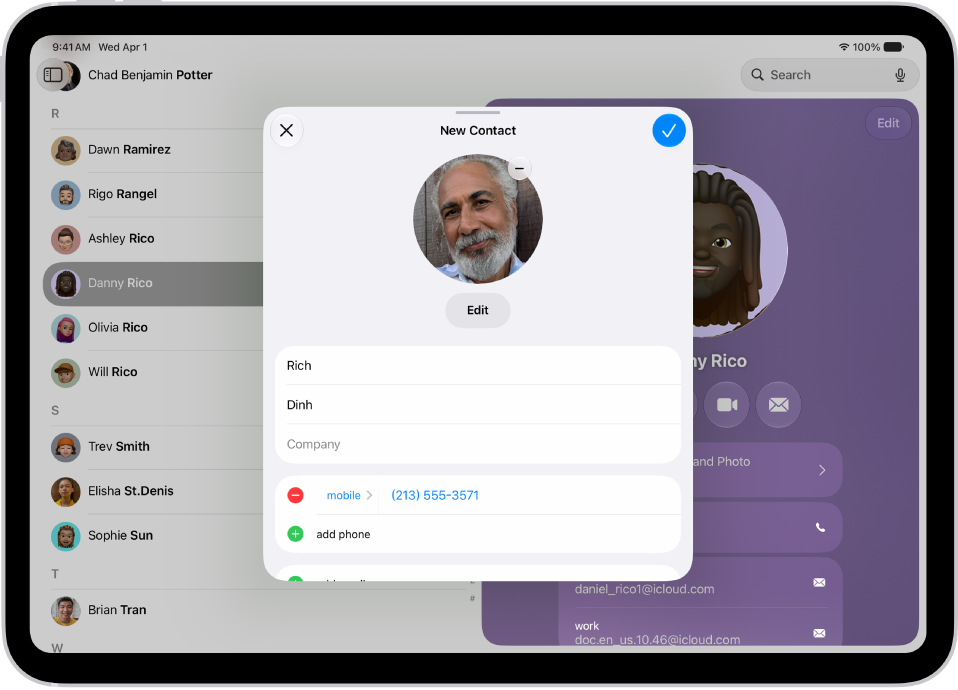
The New Contact window in the Contacts app.

Create a contact

To create a contact, go to the Contacts app, tap the Add button, add the contact’s details, then tap the Done button.

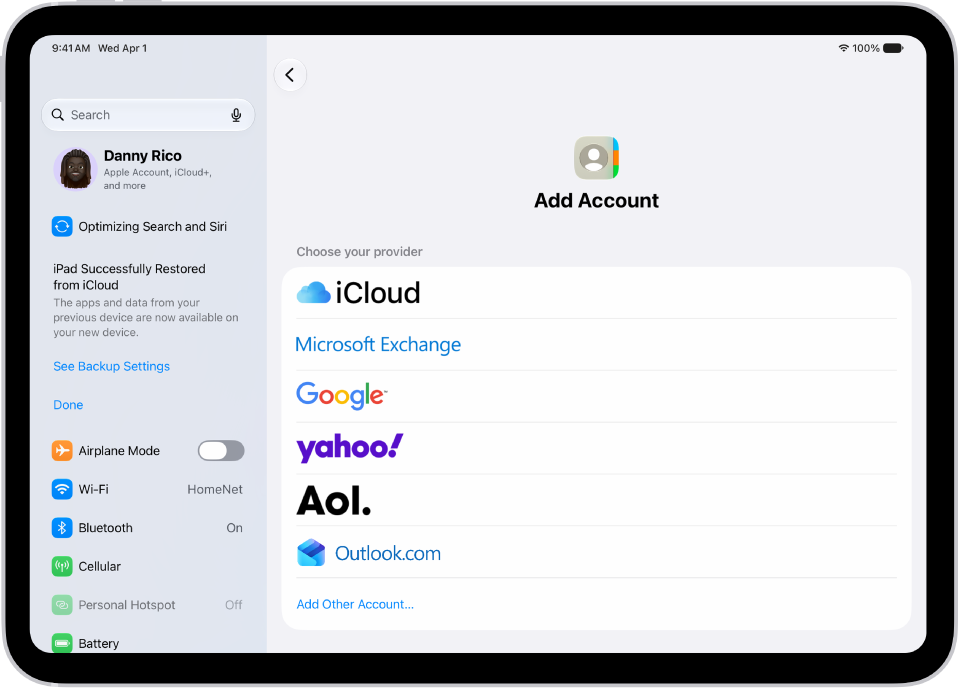
The Add Account screen showing different contacts services.

Add other accounts

If you have contacts saved in other accounts like iCloud, Google, or Yahoo, you can add them to the Contacts app to see all your contacts in one place. Go to Settings > Apps > Contacts, tap Contacts Accounts, then tap Add Account.

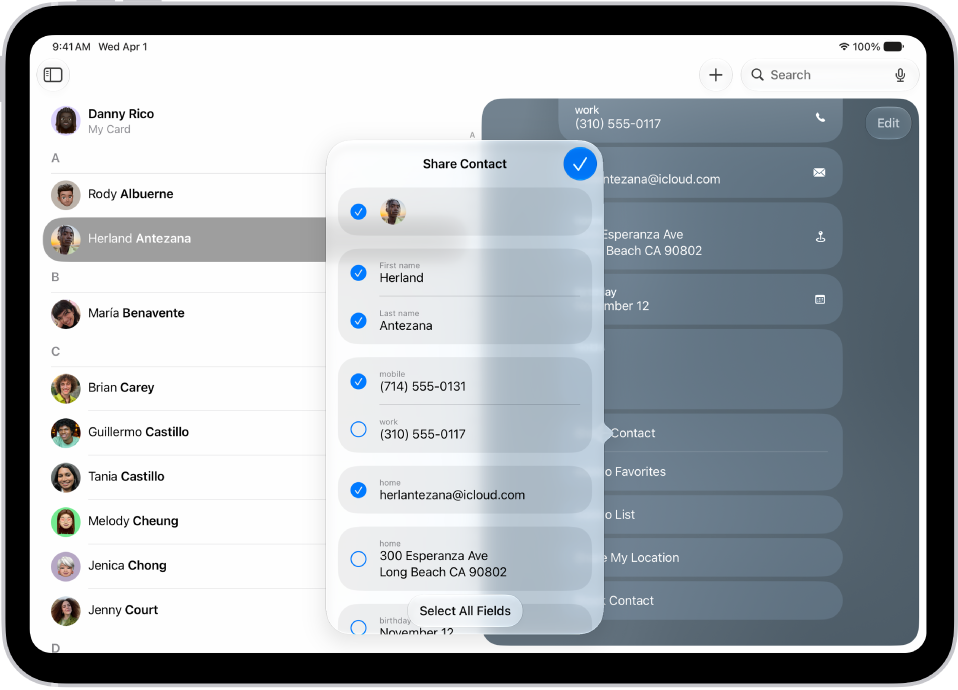
The Share Contact window in the Contacts app.

Share a contact

It’s easy to share a contact. Select a contact, then tap Share Contact. Choose the fields you want to share, tap the Done button, then choose a sharing option such as Messages or Mail.

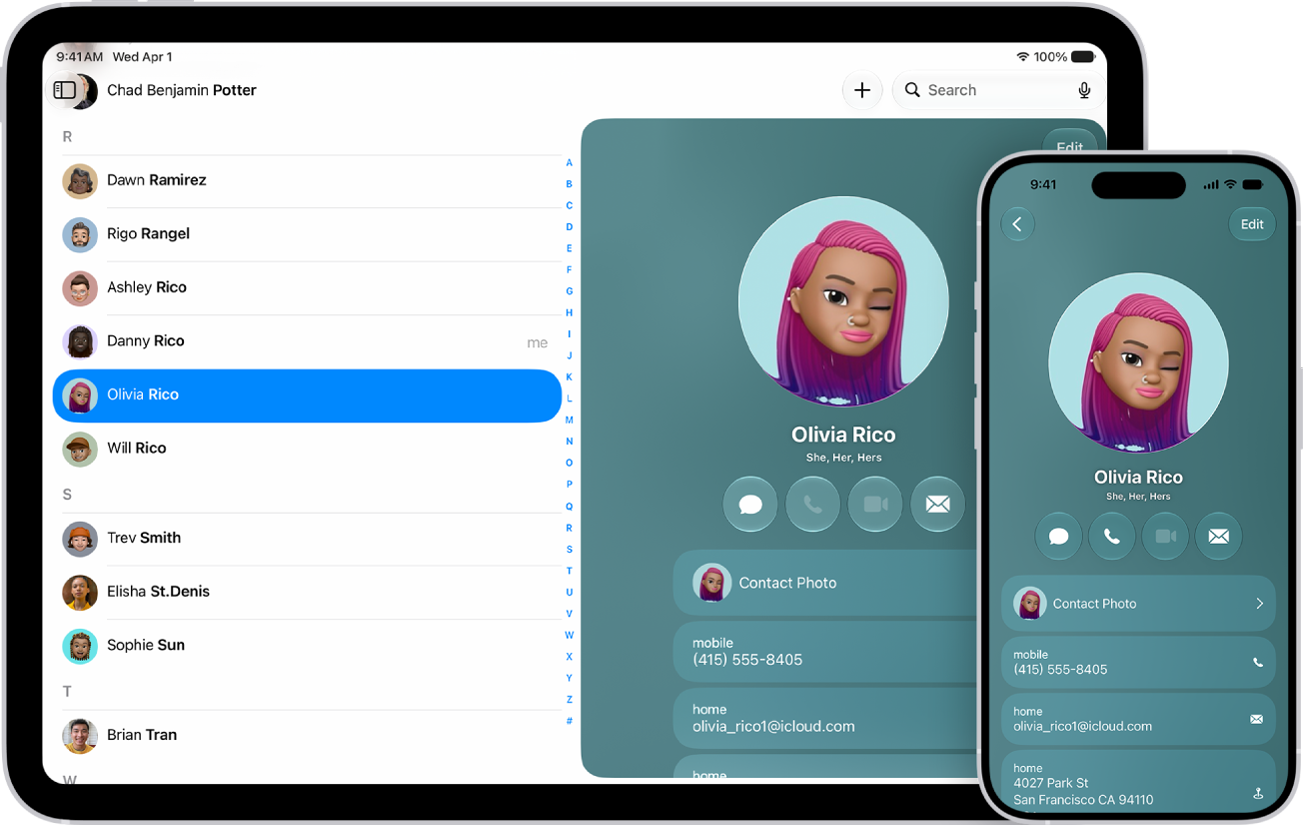
A contacts list on iPad and a contact card on iPhone

Sync your contacts

See your contacts on your other Apple devices when you’re signed in to the same Apple Account. Go to Settings > [your name] > iCloud. Tap See All next to Saved to iCloud, then turn on Contacts.

For more on managing your contacts, check out these guides:

In the Contacts app, you can assign a photo to a contact, add a pronunciation and pronouns, change a label, add a birthday, and more. You just open a contact, then enter or update the contact’s information. You can also add or edit your own contact info and photo.

  1. Go to the Contacts app on your iPad.
  2. Tap a contact, then tap Edit.
  3. Enter or update the contact’s information.
  4. When you’re finished, tap the Done button.

To change how your contacts are sorted and displayed, go to Settings > Apps > Contacts.

See also

In the Contacts app, you can add multiple accounts—such as iCloud, Microsoft Exchange, Google, and Yahoo. You can choose a default account, set up LDAP or CardDAV accounts, show or hide accounts, and delete accounts.

Third-party apps can add contacts, too, though those contacts are managed by the app and can’t be edited in Contacts. For accounts that don’t support Push, you can set a Fetch schedule instead.

Here’s how to add or remove accounts in Contacts on iPad.

Add your iCloud contacts

  1. Start the Settings app on your iPad.
  2. Tap [your name], then tap iCloud.
  3. Tap See All next to Saved to iCloud and turn on Contacts.

Add your contacts from other accounts

You can manage contacts from other accounts, like Yahoo, Microsoft Exchange, and Google, right in the Contacts app.

  1. Start the Settings app on your iPad.
  2. Tap Apps, then tap Contacts.
  3. Tap Contacts Accounts and tap Add Account.
  4. Choose an account, sign in to it, then turn on Contacts.

Note: For an account without Push notification support, a Fetch schedule keeps your contacts from that account updated. Go to Settings > Apps > Contacts and tap Contacts Accounts, then tap Fetch New Data, and choose a schedule under Fetch. If you choose Automatically, your iPad downloads new data while it’s charging and connected to Wi-Fi.

Add contacts from contacts provider apps

If you allow it, third-party apps can add contacts to the Contacts app. The third-party app manages those contacts, and they can’t be edited in the Contacts app.

  1. Start the Settings app on your iPad.
  2. Tap Apps, then tap Contacts.
  3. Tap Providers, then turn on the option for an app.

Choose your default account

You can select a default account where new contacts are automatically added.

  1. Start the Settings app on your iPad.
  2. Tap Apps, then tap Contacts.
  3. Tap Default Account and tap the account you want to make your default.

Set up an LDAP or CardDAV account to access business or school directories

  1. Start the Settings app on your iPad.
  2. Tap Apps, then tap Contacts.
  3. Tap Contacts Accounts and tap Add Account.
  4. Tap Add Other Account and then tap Add LDAP Account or CardDAV Account.
  5. Enter the account information.

Remove a contact account

Remove an account, and its contacts leave your iPad. They’re still in your internet account (for example, iCloud.com or Google) and on any other devices you’d already set up.

  • Turn off iCloud contacts: Go to Settings > [your name] > iCloud. Tap See All next to Saved to iCloud, then turn off Contacts.

    You can choose to keep or delete the previously synced iCloud contacts on your iPad.

  • Temporarily stop using an account: Go to Settings > Apps > Contacts > Contacts Accounts, tap the account, then turn off Contacts.

    To view the contacts in that account on your iPad again, turn on Contacts.

  • Delete an account: Go to Settings > Apps > Contacts > Contacts Accounts, tap the account, then tap Delete Account.

    If you don’t see Sign Out or Delete Account, your account may be managed by your organization. See an administrator for removal instructions.

See also

Your notification settings let you choose when and how notifications appear, which apps can send them, and what sounds they make, and you can also set up location-based alerts.

Many notification settings apply to all app notifications, while others can be customized for individual apps. You can decide where an app’s notifications show up, from the Lock Screen to banners, and allow time-sensitive notifications. If an app supports it, you can choose its notification sound, too.

Here’s how to change notification settings on iPad.

Customize notifications for an app

  1. Start the Settings app on your iPad.
  2. Tap Notifications, then tap an app below Notification Style.
  3. Do any of the following:
    • Turn off notifications for the app: Turn off Allow Notifications.
    • Allow time-sensitive notifications: If the app supports it, turn on Time Sensitive Notifications.
    • Choose where notifications appear: Under Alerts, choose whether notifications appear on the Lock Screen, in Notification Center, or as banners.
    • Choose a notification sound: If the app supports it, tap Sounds and then select a sound.
    • Show a badge on the app icon: Turn on Badges.
    • Customize the Lock Screen appearance: Under Lock Screen Appearance, set how previews appear and how notifications are grouped.
    • Prioritize notifications from the app: If you use Priority Notifications, turn Prioritize Notifications on or off under Lock Screen Appearance. See Summarize notifications and reduce interruptions with Apple Intelligence on iPad.
    • Choose when notifications are delivered: If you use Scheduled Summary, under Notification Delivery choose Immediate Delivery or Scheduled Summary.
    • Customize notification types: If the app supports it, tap Customize Notifications to choose which types of notifications to receive from the app.
    • Change notification settings in the app: For some apps, tap App Name Notification Settings at the bottom of the screen to open the app’s own notification settings.

Change the appearance of notifications

  1. Start the Settings app on your iPad.
  2. Tap Notifications and choose how you want notifications displayed on the Lock Screen:

    • View just the number of notifications: Tap Count.
    • View the notifications grouped into stacks by app: Tap Stack.
    • View the notifications in a list: Tap List.

    When notifications arrive, you can change the layout by pinching the notifications on the Lock Screen.

Change the frequency of notifications

To cut down on interruptions throughout the day, schedule a notification summary covering several apps at once.

  1. Start the Settings app on your iPad.
  2. Tap Notifications, tap Scheduled Summary, turn on Scheduled Summary, and tap Continue (if it appears).
  3. Schedule times for the notification summary.
  4. Tap A to Z, turn on the apps you want to appear in your Scheduled Summary, and tap the Back button at the top of the screen.
  5. To choose when you want notification previews to appear, tap Show Previews, select an option, and tap the Back button at the top of the screen.

    Previews can include things like text (from Messages and Mail) and invitation details (from Calendar). You can override this setting for individual apps.

Focus delays notifications on iPad to prevent interruptions, and you can schedule a time to receive a summary of the ones you missed. Check out our article, Schedule a Focus to turn on or off, to see how.

Prevent notification previews from appearing on the Lock Screen

You can choose when to have notification previews from an app appear on your Lock Screen.

Note: Not all apps support notification previews.

  1. Start the Settings app on your iPad.
  2. Tap Notifications, then tap an app below Notification Style.
  3. Scroll down, tap Show Previews, and select one of the following:
    • Always
    • When Unlocked
    • Never

Show or hide notifications during screen sharing

Notifications are allowed by default when you share your screen using SharePlay or Screen Mirroring. If you’d rather they not appear, you can turn them off.

  1. Start the Settings app on your iPad.
  2. Tap Notifications, then tap Screen Sharing.
  3. Turn Allow Notifications on or off.

Use Apple Intelligence to summarize notifications and prioritize time-sensitive ones

Apple Intelligence can summarize long or stacked notifications so they’re easier to understand at a glance, and it can prioritize time-sensitive notifications to help you catch up on what you may have missed. Read our guide, Summarize notifications and reduce interruptions with Apple Intelligence, to find out more.

Note: Apple Intelligence on iPadOS 27 or later is available on an Apple Intelligence-enabled iPad mini (A17 Pro) and iPad models with M1 or later. Apple Intelligence is not available in all languages or regions. Usage limits may apply.*

Turn off location-based alerts

Some apps send relevant alerts based on where you are, using your location. The Weather app might do this, for example.

If you don’t want to see these types of alerts, you can turn them off.

  1. Start the Settings app on your iPad.
  2. Tap Privacy & Security and tap Location Services. Turn on Location Services.
  3. Tap an app (if any appear in the list) and choose whether you want to share your location while using that app.

*Apple Intelligence is available with Siri and device language set to Chinese (Simplified), Chinese (Traditional), Danish, Dutch, English, French, German, Italian, Japanese, Korean, Norwegian, Portuguese, Spanish, Swedish, Turkish, or Vietnamese. Some features may not be available in all regions or languages. Some devices may not be available in all regions. Siri AI is available in beta in iOS 27, iPadOS 27, macOS 27, watchOS 27, and visionOS 27 and requires an Apple Intelligence–enabled device set to a supported language. Available in English to start. Siri AI will not be initially available in the EU on iOS, iPadOS, and watchOS. Certain Apple Intelligence features that rely on server-side models are subject to daily usage limits, including but not limited to Siri AI, Intelligent Photo Editing Tools, Image Playground, and AFM 3 Cloud models in Shortcuts. Daily limits may vary by feature, request complexity, system demand, system policies, and other factors. Expanded access to such features will be available for a fee in the future. Use of these features is subject to the Apple Intelligence Terms and Conditions.

See also

With its deep understanding of language, Apple Intelligence can help condense the information most important to you. Notifications are summarized so you can scan them for key details, such as when a group chat is particularly active.

Your iPad can also determine which notifications have priority over others, and those appear at the top of the stack. And the Reduce Interruptions Focus shows you only the notifications that might need immediate attention, like a text about an early pickup from daycare, while it silences the ones that are less important.

Note: Apple Intelligence on iPadOS 27 or later is available on an Apple Intelligence-enabled iPad mini (A17 Pro) and iPad models with M1 or later. Apple Intelligence is not available in all languages or regions. Usage limits may apply.*

Customize notification summaries

Long or stacked notifications are easier to understand at a glance when your iPad summarizes them.

  1. Start the Settings app on your iPad.
  2. Tap Notifications.
  3. Tap Summarize Notifications, turn on Summarize Notifications, and then tap Choose Notifications to Summarize.
  4. Tap the notifications you want to summarize and tap Summarize Selected Notifications.

To change which notifications you want to summarize, tap the button next to an app.

Turn notification summaries on or off

  1. Start the Settings app on your iPad.
  2. Tap Notifications.
  3. Tap Summarize Notifications. Turn Summarize Notifications on or off.

Turn priority notifications on

Your iPad can determine which notifications have priority over others, and those priority notifications appear at the top of the stack to help you catch up on what you may have missed.

  1. Start the Settings app on your iPad.
  2. Tap Notifications.
  3. Tap Prioritize Notifications, then turn Prioritize Notifications on.

    To turn off priority notifications, turn Prioritize Notifications off.

To change which notifications you want to prioritize, tap the button next to an app.

You can also change settings when you get a priority notification on the Lock Screen. When one appears, do one of the following:

  • Turn off Priority Notifications for a specific app: Swipe left, tap Options, then tap Turn Off All [app] Notifications.
  • Turn off all Priority Notifications: Swipe left, tap Options, then tap Turn Off Prioritization.

Use the Reduce Interruptions Focus

Because it understands the content of your notifications, the Reduce Interruptions Focus shows you the most important ones and silences notifications that are less important.

You can customize a Reduce Interruptions Focus.

  1. Start the Settings app on your iPad.
  2. Tap Focus.
  3. Tap the Add button at the top right. Then tap Reduce Interruptions.
  4. Tap Customize Focus and tap People or Apps.

Note: Once you turn on Intelligent Breakthrough & Silencing for any Focus, any notifications you’ve specifically allowed or silenced keep being allowed or silenced.

*Apple Intelligence is available with Siri and device language set to Chinese (Simplified), Chinese (Traditional), Danish, Dutch, English, French, German, Italian, Japanese, Korean, Norwegian, Portuguese, Spanish, Swedish, Turkish, or Vietnamese. Some features may not be available in all regions or languages. Some devices may not be available in all regions. Siri AI is available in beta in iOS 27, iPadOS 27, macOS 27, watchOS 27, and visionOS 27 and requires an Apple Intelligence–enabled device set to a supported language. Available in English to start. Siri AI will not be initially available in the EU on iOS, iPadOS, and watchOS. Certain Apple Intelligence features that rely on server-side models are subject to daily usage limits, including but not limited to Siri AI, Intelligent Photo Editing Tools, Image Playground, and AFM 3 Cloud models in Shortcuts. Daily limits may vary by feature, request complexity, system demand, system policies, and other factors. Expanded access to such features will be available for a fee in the future. Use of these features is subject to the Apple Intelligence Terms and Conditions.

See also