Got a tip for us?

iPhone

The iPhone is a smartphone from Apple that runs the iOS mobile operating system. Between its apps, communication features, the camera, mobile internet access, and other functionalities, the iPhone has quickly become an integral part of many peoples tech lives.

Apple iPhone 13 Pro Max

Congratulations on your brand new iPhone 13 Pro Max! Now you’ve given so much money over to Apple, you’re going to want to make the most out of your handset, and we’re here to guide you through some of its best features and how to use them. Now, check out some of the best iPhone 13 Pro Max tips and tricks to unlock the full potential of your new phone.

Some of the tips and tricks we’ve listed apply specifically to the iPhone 13 Pro Max, while others are tied to the iOS 15 update that Apple just pushed out (and so should work on older phones too). Check out the best iPhone 13 Pro Max tips and tricks below.

Best iPhone 13 Pro Max Tips and Tricks

Here’s a list of the best iPhone 13 Pro Max tips and tricks to try first:

1. iPhone 13 Pro Max Tips and Tricks: Share items with Siri

One of the best features in iPhone 13 Pro Max, you can share items onscreen like photos, web pages, content from Apple Music or Apple Podcasts, Apple News stories, Maps locations, and more. For example, just say “Send this to Filipe” and Siri will send it. If the item cannot be shared, Siri will offer to send a screenshot instead.

2. iPhone 13 Pro Max Tips and Tricks: Understand 5G Icons

The iPhone 13 Pro Max comes with improved 5G connectivity over the iPhone 12. That allows for incredible download and upload speeds of up to 4.0 Gbps and 200 Mbps, respectively.

When you’re in an area with 5G coverage for your carrier and your 5G cellular plan has been activated, you’ll see a 5G icon in the status bar of your iPhone 13 Pro Max. There are three different status icons that you may want to keep an eye out on — 5G, 5G , 5GUW, and 5G UC.

5G — Indicated normal 5G network availability.
5G / 5GUW / 5G UC— Indicated faster high-frequency 5G network availability.

3. iPhone 13 Pro Max Tips and Tricks: Manage Smart Data Mode

5G is great. But it can also reduce your iPhone’s battery life. To address this, Apple has included Smart Data Mode feature on iPhone 13 Pro Max, a functionality that switches between 5G and 4G depending on network activity.

For example, you won’t need 5G while scrolling down your Twitter and Facebook timelines. Smart Data Mode will make your iPhone use 4G in those instances. But if you choose to download a video on Apple TV, your iPhone 13 Pro automatically takes advantage of faster 5G.

To manage Smart Data Mode on your iPhone 13 Pro Max, go to Settings > Cellular > Voice & Data. Select 5G Auto to enable Smart Data Mode or 5G On to disable the functionality — 5G On always uses 5G network when it’s available but it can reduce your iPhone’s battery life.

4. iPhone 13 Pro Max Tips and Tricks: Restrict 5G

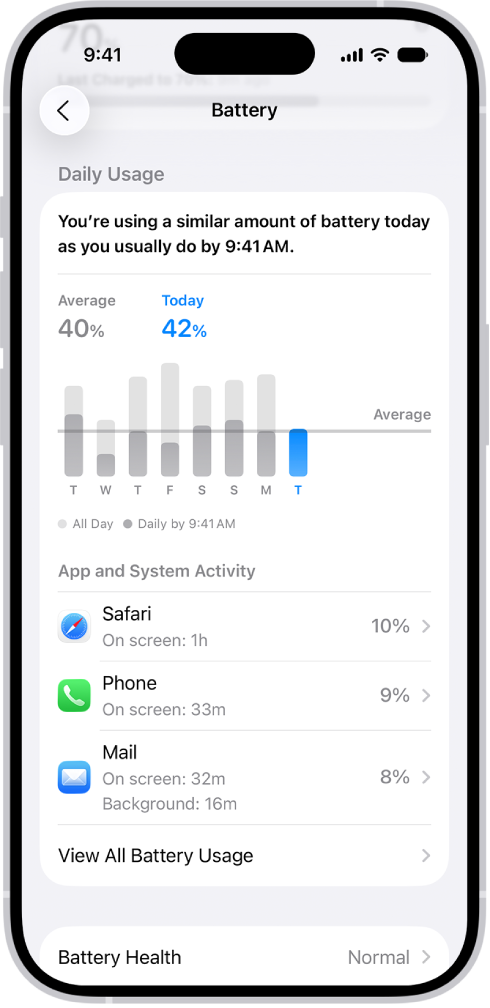
You can use Low Data Mode to reduce Wi-Fi and cellular-data usage by pausing automatic updates and background tasks on your iPhone 12 Pro Max. Go to Settings > Battery to turn it on. Alternatively, you can enable Low Data Mode from the Control Center.

5. iPhone 13 Pro Max Tips and Tricks: Buy 20W USB-C Power Adapter

The iPhone 13 Pro Max doesn’t come with a charging adapter in the box. There is only one cable included in the box — a USB-C to Lightning cable. Therefore, you need an USB-C charging adapter. Using a USB-C cable and USB-C charging adapter will allow the iPhone to charge at faster speeds. Using USB-C, you can charge the iPhone to 50% in about half an hour. The highest wattage the iPhone 13 Pro Max will use is around 22 watts, so a 20 watt or 30 watt charger will result in the about same charging speed. But basically any USB-C charger will be significantly faster than the old USB-A chargers.

6. iPhone 13 Pro Max Tips and Tricks: Get a MagSafe Charger

The iPhone 13 Pro Max features a magnetic area on the back of the device, called MagSafe. MagSafe is essentially a better version of Qi as the magnets auto-align with the case. Using the secure magnetic attachment, Apple enables up to 15 watt charging for MagSafe chargers. So for the best wireless charging, choose MagSafe over Qi … but the USB-C cable is still the fastest overall.

7. iPhone 13 Pro Max Tips and Tricks: Install iOS Updates Over 5G

The 5G connectivity on the iPhone 13 Pro Max unlocks the ability to download iOS updates over 5G. You can enable this by going to Settings > Cellular > Data Mode and select Allow More Data on 5G.

8. iPhone 13 Pro Max Tips and Tricks: FaceTime HD Calls

Another advantage of 5G is the ability to perform FaceTime video calls in 1080p HD on your iPhone 13 Pro Max. You can enable this by going to Settings > Cellular > Data Mode and select Allow More Data on 5G to FaceTime in HD over 5G. Alternatively, use WiFi to perform FaceTime HD calls.

9. iPhone 13 Pro Max Tips and Tricks: FaceTime Eye Contact

You can complement FaceTime HD on the iPhone 13 Pro Max with Eye Contact to improve your experience with FaceTime video calls. Essentially, the Eye Contact feature augments the FaceTime call to make it look like you are looking at the person, rather than at the screen. You can enable this by going to Settings > FaceTime and enable the toggle next to Eye Contact.

10. iPhone 13 Pro Max Tips and Tricks: Night Mode for All Cameras

All iPhone 13 Pro Max camera sensors include Night mode feature. This lets you take Night mode shots using the telephoto as well as the ultra-wide camera in low-light scenarios.

11. iPhone 13 Pro Max Tips and Tricks: View Image Metadata

The Photos app on the iPhone 13 Pro Max has a much-needed feature with the new iOS 15 software update. It can now display the image metadata or EXIF data for photos shot and stored on your iPhone. To do this, start the Photos app and tap the photo you want to view the metadata for. Next, tap on the info ‘i’ button to view the camera used, lens type, focal length, shutter speed, image resolution, file size,, location and more.

12. iPhone 13 Pro Max Tips and Tricks: Use iCloud Private Relay

When Private Relay is enabled, all of your browsing activity in Safari will be routed through two internet “hops,” or relays. Your data is encrypted and then sent to Apple, so your ISP can’t see any of your web browsing requests.

Please note: iCloud Private Relay is only available for paid iCloud users. To enable this, go to Settings > iCloud > Private Relay menu.

13. iPhone 13 Pro Max Tips and Tricks: Drag and Drop Content Across Apps

This iPhone 13 Pro Max trick lets you drag and drop text, photos, links, videos, documents, audio files, PDFs, and more. To do this, simply long-press any image/video/file from one app, open another app, and drop it there. Without lifting your finger off the screen, exit the app and open another app with another finger and drop the content.

This new drag and drop trick for copy/pasting texts, photos, and other files, is pretty useful and makes moving things much faster. It’s just one of the many new features in iOS 15 that has, and will make life easier for many users. You can try it out in your favorite apps to see if it works, but not to worry if it doesn’t. We’re sure most apps will support the feature in due course.

14. iPhone 13 Pro Max Tips and Tricks: Shoot Videos in Dolby Vision

The iPhone 12 was the first smartphone in the world last year to allow shooting videos in Dolby Vision. However, the non-Pro models were limited to 4K30fps. There’s no such limitation this time around, so if you have the iPhone 13 mini or iPhone 13, you can now shoot stunning 4k60fps Dolby Vision videos and edit them straight off your iPhone.

15. iPhone 13 Pro Max tips and tricks: Use your iPhone’s camera to scan any text

Have you ever wished you could point your iPhone’s camera at a sign or piece of paper and have it automatically identify then copy the text into an email or a document? That’s where Live Text comes in – this new iPhone 13 Pro Max trick lets you scan and copy text from photos and your iPhone camera, even if it’s handwritten. And once you’ve pulled the text, you can paste it into any text field. It’s great for quickly sharing addresses, phone numbers, and anything else you don’t want to type out manually.

To use the iPhone 13 Pro Max new scan text feature, long-press inside a text field as if you are going to use the copy and paste prompt. Only, you’ll now see a Scan Text button. You may also see a button that uses just the scan icon, which looks like a piece of paper with brackets around it.

Tap the button, which will then replace your keyboard with your iPhone camera’s viewfinder. Point your camera at whatever you want to scan, and then follow the prompts on the screen. For instance, if you’re moving the camera too fast, you’ll see a “Slow Down” message flash on the screen.

As you’re lining up the camera and text just right, you’ll see a live preview of the text your iPhone is identifying and ready to place in your document. Tap the Insert button when you’re ready.

16. iPhone 13 Pro Max Tips and Tricks: Turn Off Night Mode

The iPhone 13 Pro Max will automatically enable Night mode in low-light scenarios for the best possible photos. If you don’t want ‌‌Night Mode‌‌ engaged when you’re shooting in low light environments, you can turn it off by tapping the yellow ‌‌Night Mode‌‌ button when it appears at the top of the viewfinder. The problem is, when you open the Camera app again and the sensor detects low light, ‌Night Mode‌ will automatically enable itself again. In iOS 15, you can turn off ‌Night Mode‌ and ensure it stays off. Go to Settings -> Camera -> Preserve Settings and enable the Night Mode toggle.

17. iPhone 13 Pro Max Tips and Tricks: Shoot Macro Photos

The iPhone 13 Pro Max can take ultra close-up photos with a new macro mode. Simply open the camera app and tap on the 0.5X button to use the ultra-wide lens, and the moment you point your iPhone 13 Pro Max towards an up-and-close object (macro mode works from 2cm distance), the phone will automatically know and capture a macro photo.

18. iPhone 13 Pro Max Tips and Tricks: Record Macro Videos

iPhone 13 Pro Max can now also shoot macro videos! Simply Open the ultra-wide camera. Get your iPhone 13 Pro Max up and close to an object and macro mode will work automatically.

19. iPhone 13 Pro Max Tips and Tricks: Shoot Cinematic Videos

Cinematic mode is designed to act like a virtual focus puller. Cinematic mode mimics professional videography techniques by adding on-the-fly depth of field effects to recognized subjects. Software algorithms are used to detect and focus on people, pets and objects, which are made to stand out against blurred backgrounds. Be sure to record Cinematic Videos on your iPhone 13 Pro Max if you want to take your videos to the next level.

20. iPhone 13 Pro Max Tips and Tricks: AirPlay 4K HDR Content

If you have a second-gen Apple TV or an AirPlay 2-enabled smart TV, you can AirPlay 4K HDR content using your iPhone 13 Pro Max. Once your Mac gets the macOS Monterey support, you’ll also be able to AirPlay videos to it.

21. iPhone 13 Pro Max Tips and Tricks: Quick Take Videos

To capture a QuickTake video, just press and hold the Shutter button.. Release the button to stop recording. Swipe your finger to the right if you want to switch to video recording completely.

22. iPhone 13 Pro Max Tips and Tricks: Shoot in Apple ProRAW

ProRAW means you no longer needed an expensive DSLR to capture stunning professional-level pictures — now you can capture them on your iPhone 13 Pro Max.

To use Apple ProRAW, the first thing you need to make sure you do is enable the feature. Here’s how you do that:

Open the Settings app and go to Camera > Formats. Toggle Apple ProRAW on. The next time you go into the Camera app, you should see a button to turn Apple ProRAW on and off.

23. iPhone 13 Pro Max Tips and Tricks: Get the MagSafe Wallet Case with Find My Support

If you are someone who tends to lose or misplace their iPhone frequently, get the new MagSafe Wallet case from Apple. The case can come in handy if you are unable to track your iPhone directly. You can instead try to locate your wallet case. Alongside the iPhone 13, Apple launched an updated MagSafe Wallet case with Find My functionality built in. That means if you accidentally lose your wallet when it becomes unattached from your iPhone, you can launch the Find My app to locate it as you can with other Apple devices or items attached to your Apple AirTags.

In this case, the MagSafe leather wallet will notify you of the last known location where the wallet was separated from the phone. It will not, however, provide real-time tracking.

24. iPhone 13 Pro Max Tips and Tricks: Watch Videos in Picture-in-Picture Mode

Picture in Picture lets you watch videos or view FaceTime calls in a corner of your screen while continuing to use other apps. It works on any iOS 15-compatible phone but obviously benefits from the larger screen size of newer phones like the iPhone 13 Pro Max.

Most of the major video apps support PiP, as well as browser videos through Safari. Swipe up while watching a video in full-screen mode, and you should see the video show up in a floating PiP pane automatically.

25. iPhone 13 Pro Max Tips and Tricks: Change Default Browser

The default browser on your iPhone 13 Pro Max can be changed by following a few simple steps. By changing it, any URL or web-based file you tap on will open in your browser of choice, as long as your phone supports it.

To change the default browser on your iPhone 13 Pro Max, open the Settings app and select the app that you want to make the default. Then, tap Default Browser App and specify the app as the default.

26. iPhone 13 Pro Max Tips and Tricks: Track Your iPhone Even When Switched Off

Thanks to iOS 15, you can now find a lost or missing iPhone 13 Pro Max in Find My — even if it’s powered off or factory reset. This can help you locate a missing iPhone 13 Pro Max that was low on battery power or that may have been turned off by a thief.

Your Favorite iPhone 13 Pro Max Tips and Trick?

So these were some of the best iPhone 13 Pro Max tips and tricks you would love to try today. surely plenty more hidden iPhone 13 Pro Max tips and tricks to discover, so I’ll keep tapping, swiping and noting anything I find. Did we miss out on something important that needs to be added to the list? Which are your favorite iPhone 13 Pro Max tips and tricks? Let me know in the comments section below. Meanwhile, you may want to check our list of 30+ Best iOS 15 Tips and Tricks to help you master your new iPhone better.

In the backdrop of the COVID-19 outbreak, remote working has become order of the day. And in this testing time,Zoom a video conferencing app – has proved to be a very helpful tool for professionals tohold online meetings. through video calling, seamless screen sharing, and instant meeting right from the comfort of the couch. If this Video Conferencing App has caught your attention as well, follow me as I teach you how to use Zoom app on your iPhone and iPad like a pro.

How to Set up Zoom App on iPhone and iPad

While there are a number of notable alternatives, very few of them are as easy-to-use as Zoom. This video conferencing app has a easy to navigate -interface and can be set up in a few easy taps. And even better, it allows you to join a meeting even without having to sign in (simply tap the gear icon to access all the basic settings).

What kind of Permissions Are Requested By Zoom app?

Before you can use Zoom app on iPhone, you may be asked to authorize access to several essential features like camera, microphone, calendar, photos, and more. It’s up to your discretion to allow or disallow the app to use these features.

Zoom Will Request for the Following Permissions:

  • Contacts: Grant the app permission to access your Contacts app to allow you to conduct a video/audio call.
  • Location: The app will request access to your location so that it can generate an Emergency Response Location. It will help you when dialing emergency services from the Zoom phone.
  • Calendars: It helps Zoom to add a meeting as an event in the stock calendar app.
  • Microphone: Grant the app permission to use the microphone of your iPhone so that you can join a meeting or webinar.
  • Camera: Grant the app permission to use the camera of your iPhone so that you can share your video in a meeting or webinar.
  • Photos: Grant the app access to the Photos app so that it can add images to chat messages, or for screen sharing during a meeting or webinar.
  • Background App Refresh: Offers the app the ability to send notifications for Meeting invites when the app is closed or not running actively.
  • Notifications: It allows the app to display notifications for chat messages, upcoming meetings, and much more.
  • Siri & Search: Allows the app to add Siri Shortcuts such as Join the Next Meeting, View Today’s Meetings, Start My Personal Meeting.

How to Start an Instant Meeting Using PMI or Meeting ID in Zoom App

You can start a meeting as the host using your host key. So, whenever you want to get started with a conference call, it will only take a few easy taps.

  1. To get started, tap on the Meet & Chat tab located at the bottom of the screen.
  2. Next, tap on the New Meeting tab located at the top of the screen.
  3. Next on, if you want to use a personal meeting ID (PMI), turn on the switch next to it.
  4. Lastly, tap the Start a Meeting button and you are all set!
  5. You will see a pop-up asking you to join audio so that you can hear others. Tap on Call Using Internet Audio.

You can switch between selfie and rear camera using the camera switch button located at the top left corner.

During the conference call, you can view the participants, mute/unmute them, send messages to everyone, and even invite others to join you.

If you want to share content, tap on the Share Content tab. You will see a pop-up from the bottom with multiple options such as Photos, iCloud Drive, Box, Google Drive, Screen (more on this later), Microsoft OneDrive, Website URL, and Bookmark. In case you want to share files saved in particular cloud storage, tap on it and then go to the folders. Select the file and share it.

By the same token, you can share a website URL as well as saved bookmarks.

If you’d like to stop video but wish to continue with the audio call, tap on the Stop Video button located at the bottom.

If you wish to leave the meeting, tap on the End button located at the top right hand corner, and choose Leave Meeting. To close the meeting, hit the End meeting button.

Note:

  • Zoom includes a phone feature that you can use to call a number or contact using your direct phone number or company number.
  • If you want to view your call log, simply head over to the Phone tab > history section. Answered, missed, and recorded calls will be available on this screen.
  • Also, there is a Voicemail tab where you can play and delete voicemail messages.

How to Join a Meeting Using the Meeting ID in Zoom App

Joining a meeting on iPhone or iPad is quick and easy. Apart from using an iPhone or iPad to join a meeting, you can also use an Android Smartphone, a web browser, Zoom desktop app for Mac/PC, a landline, an H.323 or SIP device.

Keep in mind, every meeting has a unique nine, ten, or eleven-digit number referred to as meeting ID which you can use to join a Zoom meeting.

Note:

  • If you want to join a meeting through telephone; you’ll be required to use the teleconferencing number provided in the invite.
  • Zoom app also offers you an option to invite others to your PMI using text messages or emails. Alternatively, you can simply copy the meeting details and paste them into a calendar invite.

How to Change Backgrounds in Zoom App on iOS

One cool reason why people prefer to use the Zoom app on iPhone or iPad is the ability to use a virtual background. The app set a beautiful ocean background for me, which I really liked. In addition, you can select your own background, if you are not comfortable with the predefined option.

  1. During the meeting, simply tap the More button located at the bottom right hand corner of the screen.
  2. Next, tap “Virtual Background” in the menu.
  3. Next on, choose the virtual background option given by the app.

If you prefer to choose your own background, tap on the “+” button and then browse you’re your favorite background from the camera roll. Next, tap Done. Next on, tap Close to go back to the main screen.

If you wish to remove the virtual background, hit the More button, hit virtual backgrounds and tap on Remove located at the bottom left hand corner of the display. Then, hit Close.

Note: Inside the More menu, there are a number of useful options such as Chat, Meeting Settings, Minimize Meeting, as well as disconnect audio.

How to Schedule a One-Time or Recurring Meeting with Zoom App

You can use the Zoom app to host either a one-time or recurring meeting. Again, you can host it from an iPhone, iPad, Android phones, Zoom desktop client, or web portal.

It’s worth noting that a non-recurring meeting ID will expire after 30 days. However, you have the option to restart the same meeting ID within the 30-day period.

As far as the recurring meeting ID is concern, it will expire after 365 days. The app allows you to re-use the meeting ID for future events.

In addition, the app gives you an option to start a scheduled meeting at any time before the scheduled time.

The links remain valid for 30/365 days. It’s worth noting that an instant meeting link will automatically expire once the meeting is over.

  1. To start off, launch the Zoom app on your iPhone or iPad > Meet & Chat tab located at the bottom of the screen.
  2. Next, hit the Schedule button tab located at the top of the screen.
  3. Next on, go ahead and schedule the meeting according to your needs.

Note:

  • Use personal meeting ID: Switch it on, if you wish to use your Personal Meeting ID. If it’s not selected, a random meeting ID will be created.
  • Host Video On when starting: Select this option if you want the host video to turn on by default when joining the meeting.
  • Attendee Video On when joining: Choose this option if you want the attendee video to get enabled by default when joining the meeting.
  • Audio Option: Choose this option to allow users to call in via Device audio, Telephone, or Both.
  • Meeting Password: If you want participants to enter a password before joining a scheduled meeting, set a password.

Tap Advanced Options in case you want to use the advanced meeting options.

Allow join before host: Choose this option if you want to allow the participants to join your meeting before you. It’s worthing noting that the meeting will automatically end after 40-minutes for Basic (free) users if three or more people join the meeting.

Record the meeting automatically: Select this option if you want to automatically record the meeting.

Schedule for: In the event you have the scheduling privilege for another Zoom user, you can choose whom you want to schedule the meeting for.

Alternative Hosts: It lets you choose users in the same group to let them start the meeting in your absence.

After you have scheduled the meeting, hit Done to confirm.

Note:

A popup to add the meeting to your iOS calendar will appear, where you can invite others to join the scheduled meeting.
In the event you are not able to add the meeting to the stock calendar app, go to Settings > Privacy > Calendars. Here, make sure to enable Zoom.
Inside the Meeting tab, all the scheduled meetings will show up. You can start any meeting right from there. And even better, you will be presented with an option to send an invitation as well as edit your personal meeting ID.

How to Share Screen in Zoom App on iOS

Zoom makes use of ultrasonic sound proximity detection to generate an ultrasonic signal for a seamless screen sharing. If the app senses the signal in a Zoom Room, it automatically connects to the Zoom Room when the attendee tap on the Share Screen button.

In the event the proximity detection is not available, participants can enable direct sharing by typing in a Sharing Key that is made up of a string of letters.

  1. Launch the Zoom app on your iPhone or iPad.
  2. Next, tap on the Meet & Chat tab located at the bottom left hand corner of the screen.
  3. Next on, Hit Share Screen.
  4. Next up, type in the sharing key and tap on OK.
  5. After doing so, you can choose to turn ON or OFF the microphone. Then, tap on start recording.

Boom! Zoom Rooms will start displaying the shared screen on the Zoom Rooms display. Everything that appears on the screen including notifications will be recorded. You can turn on Do Not Disturb (Settings app > Do Not Disturb) to stop receiving notifications during screen sharing.

It’s also easy to share the screen during the meeting. Just tap on the Share Content tab at the bottom > Screen and then proceed with the screen sharing.

When you want to stop sharing the screen, hit the red button and then tap on Stop in the pop-up that appears. Now, the recorded video will be saved to your photo library.

How to Use Your Personal Chat Space in Zoom App

Another Zoom feature worth noting is the “Personal Chat Space” where you can store private notes and files.

  1. Open the Zoom app on your iPhone or iPad > Meet & Chat tab at the bottom.
  2. Next, hit the star icon located at the top left hand corner of the screen.
  3. Next on , choose your name in the Shared list.
  4. Next up, input your notes and tap on Enter to save them by sending the notes to yourself.

Hit the “+” button located at the bottom left hand corner and then select the option to send photos, files or even snap a photo. Since the video-conferencing app is incorporated with many cloud services, you can easily access files saved in those cloud services and send them.

Note:

  • To access all the images, content, and starred messages, hit the “i” (info button) located at the top right hand corner. Then, go to a particular section.
  • If you want to clear all the Zoom chat history, hit the info button located at the top right hand corner of the screen and then tap on Clear Chat History and confirm the action.
  • To edit or delete any sent/received message, touch and hold it down. a menu will pop-up with a number of options such as: reply, share, star message, edit and delete. Select your preferred option.
  • Alternatively, you can hit the star button located at the top right hand corner of the display and then tap on All Files to dive into all the personal or entire files. Check out the filter option located at the top right hand corner of the screen and then select the None or Images option to filter files.

How to Create Channels in Zoom App on iOS

Channels can play an important role by allowing you to stay connected with your colleagues. Thankfully, it’s really easy to create a channel or join an already existing one on this Video-Conferencing app.

  1. On your iPhone or iPad, Open the Zoom app > Contacts tab at the bottom.
  2. Next, hit the “+” button located at the top right hand corner of the screen.
  3. Select “Create a New Channel” or “Join a Public Channel” and then set it up normally.

You can access all of your channels through the Channels tab at the top center.

How to Add an App to Zoom Using App Marketplace

One good thing about Zoom is the incorporation of a super handy app marketplace from where you can install your favorite apps to improve your productivity. From Trello to GitHub to Twitter, the app marketplace has got a range of apps to suit your various needs.

  1. Launch the Zoom app on your iPhone or iPad > Contacts tab.
  2. Next, hit the “+” button located at the top right hand corner of the screen.
  3. Next on, hit Add an app in the menu.
  4. The app will take you to the App Marketplace. Here, go through all the available options and install the ones that suits your needs.

How to Customize Zoom Settings on iOS

When you use Zoom app on your iPhone or iPad, you can customize its settings according to your needs. The app includes multiple features that you can personalize to improve your experience.

  1. On your iOS device, Open the Zoom app.
  2. Next, hit the Settings tap located at the bottom right hand corner of the display.
  3. Next on, you will be presented with a range of options to personalize.

Edit Zoom Profile

If you wish to edit your zoom profile, tap on the profile photo. Here, you can change your profile photo, display name, job title, location, default call-in country or region. In addition, the app offers you an option to add a personal note and get a custom meeting ID (for pro version).

Customize Zoom Meeting Settings

One thing that separates the Zoom app from the pack is the ability to offer a more personalized meeting experience. With a dozens of useful features to choose from, you can easily adjust everything to take full control of the meeting.

To do this, hit Meetings and then set up all the features as per your liking. For example, you can auto-copy the meeting link, always show meetings controls, sync Zoom meetings from Calendars app, and touch your appearance.

In addition, you can keep the virtual background for all meetings or current meetings only and even choose a fantastic reaction skin tone.

Personalize Zoom Chat Settings

It’s easy to fine-tune the Zoom chat settings. And depending on your liking, you can set it up to stay tuned in with your friends and colleagues at your own pace.

Hit Chats and then you can include or exclude link preview, configure the app to receive only given notifications, select where unread messages should appear, and when to alert you. Moreover, the app allows you to choose whether to receive push notifications when Do Not Disturb is enabled.

Blur Snapshot on Task Switcher

Zoom also allows you to hide sensitive information from the snapshot of the Zoom’s main window. The snapshot shows up as the preview screen in the iOS task switcher when many apps are running. To do so, hit General. Then, enable the switch next to Blur snapshot on the task switcher.

In addition, there is an option to enable incorporated calling to receive incoming calls on your lock screen. The app will allow you to show your zoom calls in the system’s call history. Other recording apps will not function when a Zoom’s call is enabled.

Use Zoom Siri Shortcuts

Another great feature on Zoom is the ability to work with Siri. So, in case you like using nifty Siri Shortcuts, there is a high possibility that you will find Zoom Siri Shortcuts quite useful. In addition, you can use Siri Shortcuts to join a meeting, view today’s meeting, and even kickstart your personal meeting effortlessly.

Signing off…

And that covers everything about how to use Zoom app on iPhone to remain in touch with your friends and colleagues. As the video-conferencing app is quite easy to use, I trust you have got a good hang of it.

What are some of the things you’ve found striking about the Zoom app? Let us know your thoughts and experiences in the comments section below.

One of the things I have always admired about Apple products because of the Continuity and Syncing features, they become usable in combinations when you have more then one device. Having an iPhone, an iPad and an Mac all logged into the same Apple ID account creates a collaboration of sorts, with many features able to work together in ways that provide more functionality. Features like making or answering phone calls from any device. Using AirDrop for moving files or folders to other Apple devices. Sending a text message or placing a phone call right from my Mac. Even syncing Contacts and Reminders, in addition to using iCloud Drive to collaborate across devices, there are many ways to make use of the environment that is created when you have more than one Apple device.

How does Apple continuity work

Apples continuity feature allows users to Sync Contacts, Messages, Calendar, Reminders and more, throughiCloud. While you’re working on your iPhone or Mac, your data remains in real time sync across your Apple devices through iCloud. This can help you to stay on the same page with all your Apple devices. It is very cool being able to add or change a Contact, then have it automatically updated to your other devices through iCloud. Using SIRI to send messages or place phone calls works consistently from any device, because all of Contacts are auto-synced. Syncing Reminders is also very handy, because it will alert you from any nearby device.
Another great thing with Apple Continuity feature is that you can leave one document available for editing on the fly, no matter where you are, as long as it is being synced. When you open it on your Mac, all the typed text will be there.

Apple Continuity requirements

For Apple Continuity features to work, you need two things:

  • Make sure that Wi-Fi, Bluetooth and Handoff are all turned on your device’s settings.
  • Make sure that all of your devices are signed in with the same Apple ID.

Handoff

Apple Handoffis a feature that mainly works between iPhone/iPad and a Mac, but there is a use case with the HomePod smart speaker. If you are using a Handoff compatible app such as Safari, Messages and many of the other Apple native apps, then an app icon will show up to the left of the app ‘Dock’ on the Mac. Alternatively, if you’re using an app on Mac and you want to launch it on iPhone, a shortcut to switch into the iPhone version of the app will be available at the bottom of the screen in the multitasking menu. To launch the app on iPad you’ll see it appear on the right side of the iPad’s app Dock.
You can also handoff audio from Apple Music and Podcasts to the HomePod by tapping it to the top of the device. You can tap it again and get the sound to begin playing back on your phone.

How to enable HandOff on your iPhone and Mac:

  • On your Mac: Head over to System Preferences>General, check the item, “Allow Handoff between this Mac and your iCloud devices.”
  • On your iPhone or iPad, head over to Settings>General>HandOff, to enable this feature.

Universal Clipboard

Universal Clipboard is by far the most useful Apple Continuity feature, and the vast majority of people don’t know how to use it. Universal Clipboard let’s you copy and paste text from one device to another. For this to work, the two devices must be close to each other. It’s as easy as that. You simply turn on the Settings and you can copy text, images and other content and paste it on your other device.

iPhone Cellular Calls

iPhone Cellular Calls allows users to answer or make phone calls on your Mac or iPad. For this feature to work, the two devices must be connected to the same Wi-Fi network and have all of the Handoff settings turned on. Then when you get a call, it will appear as a notification on your Mac or iPad so you can answer it without reaching for your iPhone. If you want to make a call from a Mac or iPad, you need to make sure your iPhone is near. Then you can simply click on a phone number on the web or in the Contacts app to place a call.

Text Message Forwarding

Text message forwarding let’s users view their text messages on messages app on Mac or iPad provided that your iPhone is nearby. This is one Handoff feature that I’ve had problems with, thankfully, i was able to fix this issue by signing out of my Apple ID, restarting my devices, and re-signing in. This feature has to be enabled from the Messages section in your iPhone’s Settings app too.

Auto Unlock

If you have anApple Watch, you can use it to keep you Mac unlocked when you’re close to it. To turn on this setting, simply go to the ‘Security & Privacy’ section of your Mac’s Settings. Then head over to the General section and if you own an Apple Watch, an option to enable using your Apple Watch as the key to unlock your Mac will be available.

AirDrop

Another popular continuity feature isAirDrop. This let’s users quickly send photos, videos and other files to the nearby apple devices. One great thing about Apple AirDrop is the ability to send files to other peoples Apple device as well as your own.

What else

Other Continuity features are:

  • Continuity Camera,
  • Continuity Markup
  • and

  • Continuity Sketch.

These features let’s you use your iPhones to add items to documents. The camera allows users to trigger your iPhone camera to capture a photo to insert in your note or Pages document. Markup allows users to draw in the document and Sketch allows users to insert a drawing from an iPhone into a document or note.
There’s also SideCar, which is a new feature that was introduced with the launch of MacOS Catalina and iPadOS. It allows users to have their iPad act as a secondary display.
The last selection is an extension of Apple Pay. This feature let’s users shop online on their Mac and then use Apple Pay to check out. For added security, users can make their computer trigger their iPhone to require FaceID or TouchID to complete their purchase.

Troubleshooting for the Continuity features

Apple continuity not working? no problem. You can fix this problem in a few simple steps. First of all, ensure that all of your devices are on the same wifi network, have BlueTooth turned on, have HandOff enabled and are signed into the same iCloud account.

The following are some of the troubleshooting steps:

  • Log out of iCloud on all devices, then back in again with the same Apple ID and password
  • Disable Bluetooth, Wifi, and HandOff on all devices, then reenable them back again.
  • Lastly, after everything else, power off your devices completely, not just putting them to sleep. Then power them back on again.

Getting the Final Word

Well, there are definitely multiple ways you can use apple Continuity features through various devices. You can make and answer phone calls from any Apple device. You can text or call phone numbers on your screen by right-clicking on them. You can even work on the same document from two different Apple devices at the same time.
We hope you’ve enjoyed reading this Apple Continuity guide. Let us know if you have any problems with setting up Continuity features by leaving a comment below and we’ll be happy to help you out! We also have plenty of other articles that I suggest you check right now.

Apple’s Family Sharing is a way to make your apps, movies, subscriptions, and more available to all the people in your family. You can also use it to control the screen time or content restrictions for your children’s devices. Even better, it can even let you monitor the location of all your loved ones.

Here’s a complete guide that explain everything you need to know about setting up and using Apple’s Family Sharing service.
Let’s get started.
Apple family sharing, everything you need to know

What Is Family Sharing?

Family Sharing allows users to connect up to six different Apple ID accounts together. These accounts constitute your Family Sharing group, which you can use to save money by sharing a wide range of Apple purchases and services, such as:

  • Apps, movies, TV shows, songs, and books
  • Apple Music family plan subscriptions
  • Apple Arcade, Apple News+, and Apple TV channel subscriptions
  • iCloud storage

Because every user has their own account, you don’t need to share your password with anyone. You can also access content in your Family Sharing group from all devices you use with your Apple ID i.e. iPhone, iPad, Mac, Apple TV, as well as Windows PC.

Besides shared purchases and services, Family Sharing can automatically create a shared reminders list, shared calendar, and shared photo album for everyone in family sharing group to use. With permission, you can use Family sharing to see the location of everyone in your group, together with all their Apple devices.

Lastly, through Family Sharing, parents or guardians can even manage the Screen Time or Content & Privacy Restrictions for any child who is below 18 years in the group. With Ask to Buy feature enabled, they can also approve or deny App Store and iTunes purchases their children want to make.

You Can’t Share Everything

Unfortunately, you cannot share everything with family sharing. Before purchasing an app, scroll down to the Information section in the App Store to find out if it supports Family Sharing.

Keep in mind, you cannot share in-app purchases or subscriptions for non-Apple services.

How to Set Up Family Sharing

The person who creates the Family Sharing group becomes the Family Organizer. He/she chooses who is and isn’t allowed in the group, and also chooses which services or purchases you share with Family Sharing.

If the Family Organizer chooses to share App Store and iTunes purchases, they must also agree to pay for new purchases that anyone in the Family Sharing group makes.

Apple has made it pretty easy to set up Family Sharing from an iPhone running iOS 8 or later, or mac with OS X Yosemitey or later.

Set Up Family Sharing on an iPhone, iPad, or iPod touch

  1. Start the Settings app and tap [Your Name] at the top of the screen. If you don’t see your name, choose to Sign in to your [device] using your Apple ID account.
  2. Now, tap on Set Up Family Sharing, then select Get Started and choose the first feature you want to use with Family Sharing. You may need to add a payment method to your Apple ID account if you haven’t already.
  3. Follow the onscreen instructions to finish the setup and Invite Family Members through iMessage or by requesting them to sign in on your device.
  4. After creating your group, the Family Sharing settings should show up next to your name. You can also tap Add Family Member to add more people to your family.

Set Up Family Sharing on a Mac

Launch the Apple menu and head over to System Preferences > Family Sharing.
Instructions to Set up Family Sharing will be available on this screen; click Next and follow the onscreen instructions to finish the setup. You may need to add a payment method to your Apple ID account if you haven’t already.
After you are done with the setup, click Add Family Member and type in the name, email address, or Game Center nickname of the first family member you want to add.
You can edit the various Family Sharing settings from the sidebar in System Preferences. Head over to Family to add more people to your Family Sharing group.

Set Up a Child’s Account in Family Sharing

Children below 13 years cannot create their own Apple ID accounts. Thankfully, with Family Sharing, the Family Organizer can create a child’s account for them. Apple limits the apps and media based on your child’s age and automatically turns on Ask to Buy. Consequently, they can’t download or purchase anything without permission, even if it’s free.

It’s easy to create a child’s account. Simply launch the Family Sharing settings on your device and follow the onscreen instructions to add a new family member. Choose the option to Create a Child Account. Then create an iCloud email address, a password, as well as security answers for your kid.

The Family Organizer i.e. parent/guardian in the Family Sharing group can remotely approve or deny App Store and iTunes purchases. Moreover, you can track your child’s Screen Time, or edit the Content & Privacy Restrictions for your child’s device.

Apple’s Family Sharing Features Explained

Once you create your Family Sharing group, various features and services you can choose to use with it will become available. At first, these options can appear a bit confusing, therefore, we’ve explained every Family Sharing feature below.

Purchase Sharing

For you to share apps, movies, TV shows, songs, and books in your Family Sharing group, you need to turn on Purchase Sharing. For this to work, the Family Organizer must agree to pay for any future purchases people in your Family Sharing group make.

Family members will continue to keep their purchases after leaving the Family Sharing group, even if the payment was made by the Family Organizer.

If you want to see another person’s purchases, simply launch the App Store or iTunes Store app and head over to the Purchases section. You should see each of your family members’ names; tap one to view or download their purchases.

Purchase Sharing allows your family to access everything you’ve ever purchased or downloaded, even if you did so before joining the Family Sharing group. You can also hide a specific purchase from your family. To do so, simply swipe on that purchase and choose to Hide it.

iCloud Storage

Apple offers everybody 5GB of free storage upon creating a newApple ID account. Individual family member can choose toupgrade their iCloud storage plan for a small monthly fee, or you can opt to share a single storage plan across your Family Sharing group.

If you want to share iCloud storage with Family Sharing, you are limited to either 200GB or 2TB plan. When a family member decides to share iCloud storage, Apple doesn’t add their free 5GB to the shared plan.

Location Sharing

If you turn on Location Sharing in Family Sharing, you can use the Find My app on your iPhone, iPad, or Mac to check the location of your other family members. In addition, you can use Find My to locate your family members’ missing Apple devices.
Individual family member can choose to share their location from the Family Sharing settings on their device or not.

Note: When Location Sharing is turned on, members in your Family Sharing group can easily use the Find My app to mark your devices as lost or remotely erase them. Read also: How To Track a Lost iPhone, iPad, or Mac With Find My

Screen Time

If you turn on Screen Time, you’ll be able to monitor any child in your Family Sharing group under 18 years. There are options to set App Limits, Communication Limits, Downtime, and Content & Privacy Restrictions on your children’s devices.

Family Sharing also provides you with regular usage reports so you can keep track of how much time your children spend on their devices.

Apple Music, TV Channels, Apple Arcade, and Apple News+

Apple now offers multiple subscription services. And apart fromApple Music (which requires a family plan), you can easily share any of these subscriptions with your Family Sharing group at no additional cost.

For instance, if you subscribe to Apple Arcade, all the members of your Family Sharing group can also access Apple Arcade games without having to sign up for their own subscription.

If you want to share Apple Music, you need to pay a few extra bucks to get a Family Sharing plan. Ideally, it’s far much cheaper than paying individually.

How to share Apple Music

For each person in the family to have access to the Apple Music library on a single subscription — while keeping their own private account with personal music library — family Organizer needs to do the following:

  • Either sign up for Apple Music family subscription, if new to Apple Music, or
  • Change their individual subscription to a family one — then each person in the family sharing group will automatically gain access to Apple Music as well

To change individual subscription to a family Apple Music subscription, simply follow these steps:

  1. On your iPhone, iPad, or iPod touch, launch the Settings app.
  2. Tap your name at the top of the screen.
  3. Tap Subscriptions.
  4. Tap Apple Music subscription
  5. Change your subscription to family.
  1. On your Mac, head over to System Preferences and click Family Sharing
  2. Click Apple Music
  3. Change your subscription to Family.

how to use Apple’s Family Sharing service? Now you know

We trust this post has helped you to set up and use the Family Sharing feature on your Apple devices. With Family Sharing enabled, you can share Apple Books, and App Store purchases, an Apple Music family plan, and an iCloud storage plan with up to 5 family members. Your family can also locate each other’s missing devices using Find My App.
If you have any question or comment, we would love to hear in the comments section below. We also have plenty of other articles that I suggest you check right now.

Have you just switched from Android to iPhone? If yes, you may be wondering about how to transfer Android contacts to iPhone. Don’t worry. If you have recently switched from Android to iPhone, there are a few simple steps which you need to follow to transfer Android contacts to iPhone.

One of the most essential data on your iPhone are yourcontacts. Therefore, it’s important to know all the ways to transfer Android contacts to iPhone. In this article I’ll show you:

  1. How to transfer Android Contacts To iPhone Using Apple’s Move to iOS App
  2. How to transfer Android Contacts To iPhone using a SIM card
  3. and

  4. How to transfer Android Contacts To iPhone using Google.

Without any further ado, let’s dive into it.

Method #1: How to transfer Android Contacts To iPhone Using Apple’s Move to iOS App

TheApple Move to iOS app has made transferring contacts from Android to iPhone pretty easy. You can Download Move to iOS app on play store for free One good thing about Move to iOS app is that it not only transfers contacts but can also be used to transfer Android text messages, photos, videos, accounts, calendar, as well as website bookmarks over Wi-Fi to an iPhone. Sounds good, right?

Note: the Move to iOS app only transfers your data and not the Apps, but suggests the applications you have installed on your Android device.

Note: if you are running Android 4.0 or higher (smartphone or tablet) and iPhone with iOS 9.3, you need to download Move on your iPhone from Google Play.

Method #2: How to transfer Android Contacts To iPhone Using SIM Card

Want to just transfer your contacts from Android to iPhone? Try the famous method of using the SIM card in your Android device to move contacts to iPhone. Simply back up your contacts on SIM card and transfer them to iPhone.

Note: If you no longer have access to your Android device but already have the contacts saved on your SIM card, then skip to step 6 onwards.

Simply follow these steps:

  1. Launch the ‘Contacts’ app on your Android smartphone
  2. Tap on ‘Menu’ and then ‘Settings’
  3. Tap ‘Import/Export’ settings
  4. Tap ‘Export’ and export to the ‘SIM Card
  5. Wait till the process is completed
  6. Eject the SIM and insert into your iPhone.
  7. Launch the ‘Settings’ app on your iPhone
  8. Scroll downand tap on ‘Contacts’ (Mail, Contacts Calendars for older iOS versions
  9. Choose ‘Import SIM Contacts

Boom! All of your contacts will appear in your iPhone

Method #3: How to transfer Android Contacts To iPhone Using Google:

In this method, you can use the cloud to transfer Android contacts to iPhone. To do so, use your Google account. Why? Because both iPhone and Android support Google account. Simply follow these steps to transfer Android Contacts To iPhone Using Google:

Head over to Settings > Accounts pick the Google account you want to sync to

Turn ‘Sync Contacts’ on.

Add your Google account to iPhone and enable contact syncing.

To add your Google account to iPhone, head over to Settings > Passwords & Accounts and tap the Gmail account. Type in your Google account credentials.

Once the account has been added, turn On the switch next to contacts (it will turn green). Your contacts added to the Google account will sync to your iOS device.

If your Google account is already added on your iPhone, you can access it by heading over to Settings > Passwords & Accounts > Gmail account and enable toggle for Contacts.

Note: Any changes made on your iPhone address book will sync to Google account.

how to transfer android contacts to iPhone? Now you know

We trust this article has helped you to transfer android contacts to iPhone.

Questions?let us know in the comments section below.

Let’s accept one fact, virtually everyone has experienced the situation when we put our apple devices on charging only to realize later that iPhone won’t charge or turn on. There is a possibility that you didn’t plug iPhone in properly, or there is some problem with you’re iPhone’s battery.

If you’re experiencing the above issue: iPhone won’t charge, but it says it’s charging, there are a few simple steps which you need to follow to fix the problem.

How To Fix iPhone won’t charge, but it says it’s charging issue

Below are the solutions forfixing iPhone won’t charge issue. One of these fixes will surely solve iPhone won’t charge, but it says it’s charging problem within no time.

Solution #1: Hard Reset iPhone:

A hard reset means that it forces a quick restart of your iPhone that can help fix a software glitch on your device. In addition, if your iPhone is crashed and makes the screen turn black, it gives the appearance that your phone is not charging.

Reset iPhone 8 and newer models:

  1. Quickly press and release Volume Up button.
  2. Quickly press and release Volume Down.
  3. Press and hold the side button to turn off the screen and then turn it back on. Release the side button once the Apple logo appear on the screen.

The above steps applies to iPhone 8 or newer including iPhone 11.

Reset iPhone 7 and 7 Plus:

– [ ] If you are running iPhone 7 or 7+:

  • Press and hold the Sleep/Wake button and Volume Down button at the same time. Wait until the screen turns black and the Apple logo appears on the screen then release the buttons.

Reset iPhone 6 and previous models:

For these models:

  • Press and hold the Sleep/Wake button at the same time until the Apple logo appears on the screen then release the buttons.

Solution #2: Clean the Charging Port:

If you are still experiencing iPhone not charging when plugged in issue, try to clean the charging port. I recommend that you use an anti-static brush for this purpose. If you don’t have one, you can use a clean toothbrush as an alternate. Simply brush back and forth to get rid of the gunk, dust or debris which may be hiding in your charging port.

Solution #3: Try a different Lightning Cable:

Another reason why you might be experiencing iPhone not charging when plugged in problem is due to faulty lightning cable. Try using a different lightning cable and a different power source such as a wall charger, USB port or car charger.

Solution #4: Put Your iPhone In DFU Mode

The DFU restore is a deep restore that can fix so many iPhone problems. Before youput your iPhone in DFU mode, make sure you have back up all your data.

Solution #5: Consider Repair Options:

If you are still experiencing iPhone charging problem, you may need to repair your iPhone. In such a situation, you can take your iPhone to the Apple store. Make sure you have set up anApple genius bar appointment before making a visit. Or request a third party technician to visit your place and fix your device. If the cost of repair is high, consider buying a new iPhone.

iPhone showing charging but battery percentage not increasing? Problem fixed

There you have it! Were you able to solve iPhone won’t charge but it says it’s charging issue? We would love to know what worked for you in the comments section below. Share this article with your friends and family and help them resolve iPhone won’t charge issue. We Also Have plenty of other articles that i suggest you check right now.

Is your iphone battery draining fast all of a sudden? No problem. In this article, i’ll give you reasons why iPhone battery dies quickly and offer you possible solutions to fix the issue.
There is this constant issue with iPhones battery life users always have to grapple with even after purchasing the flagship iOS device. This is because after a while, your iPhones battery life starts to drop rapidly and it’ll struggle to make it through a day (on a full day).

Your current iPhone might still offer you great battery life, but as you continue to use, you will notice a gradual decline in battery life. Also, Apple does not make the whole thing easy since it does not provide users an easy access to their
iPhones battery
This makes replacing these batteries when their life spans drop, a daunting task.

Reasons why iPhone battery dies quickly

Here are the reasons why iPhone battery dies fast and what you can do to fix the issue.

1. Constantly Recharging Your iPhone Battery

According to
Battery University, lithium battery starts to degrade after undergoing between 300 and 500 discharge/charge cycles. A charge cycle is a charge of a battery from 0% to 100%. Therefore, for instance, charging your iPhone from 50% to 100% twice will translate to a complete charge cycle.

To prevent your iPhone battery from degrading faster, you should minimize charge cycles of your device.

2. Too Many Applications Running on the background

I understand that iPhones are preferred for their multitasking capabilities and this is one of the reasons why most people chose to use iPhones in the first place. While this is great, running multiple apps simultaneously can immensely reduce your iPhones battery life. Always remember to quit all apps which you are not using to save its battery.

There are a couple of indicators you get when your battery is under heavy usage. The common one, however, is your iPhone getting extremely hot. Another solution to stop battery drainage is to quit apps running in the background.

3. Using unauthorized Charges

Another reason why iPhone battery dies fast is due to use of unauthorized chargers. It’s a bad idea to use charges that aren’t made by Apple. It’s understandable that these chargers are quite cheap, however, you should note that original iPhones chargers are designed to act as adaptors, to convert direct circuit (DC) power to a level the iPhone requires to charge healthily. Anything above the required current and voltage can damage your iphones’ battery thereby reducing its life span.

4. Screen Brightness Level is Always Very High

Another major reason why iPhone battery dies quickly is high brightness. iPhones screen is one component that probably drains the most power. Keeping your screen brightness to the maximum at all times also reduces your iPhones battery life. Always lower the screen brightness of your iPhone when it is not necessary to have it very bright.

Related article
How To Improve iOS 13 Battery Life on iPhone: 17 Tips and Tricks You Need to Know.

Why iPhone battery dies quickly? Now you know

Despite the fact that batteries have a natural life span, your iPhone battery can still last for a longtime – at least more than a day. For this to happen, you should endeavor to create a battery maintenance culture. In this regard, keep in mind to follow the above-recommended tips and avoid this battery draining features as much as possible.

Tag: Battery

Wondering how you can reduce data usage on a wi-fi network while using your iPhone or iPad? You have come to the right place.

Depending on where you live, Internet may or may not be costly. If you live in US, there’s a possibility you’re paying a higher bill for your broadband connection and cellular data compared to one of your friends living in Europe or Asia. If internet bills are hurting your pocket, you might want to reduce your data usage. With the launch of iOS 13, Apple included a nifty feature called “Low Data Mode” that claims to reduce Wi-Fi data use when enabled, and a similar feature exist for cellular data users. Most people have limited data when they’re using their home internet use (or a cellular network) to browse the internet, so this feature is very useful when you’re about to hit your data limit, or you just want to reduce the bandwidth used by iPhone or iPad on a wi-fi network.

If you want to enable low data mode for Wi-Fi networks on iPhone or iPad to conserve your monthly data usage while on a wireless network, there are a few simple steps which you need to follow.
Here is the step-by-step guide which will show you how you can turn the low data mode feature on for Wi-Fi networks.

Part of how this feature works is that it aims to limit your data use by preventing automatic updates as well as other background tasks, hence reducing the amount of data used on the iPhone or iPad. Simply follow these steps.

How to Enable Low Data Mode for Wi-Fi Networks on iPhone & iPad

If your problem isn’t cellular data usage but rather skyrocketing broadband bills, you may need to use as less data as possible over Wi-Fi. Don’t worry, simply follow these simple steps to turn on low-data mode for a wireless network:

  1. Start the “Settings” app on your iPhone or iPad and tap on “Wi-Fi”.
  2. Next, tap on the “i” icon next to the Wi-Fi network name that you’re incurring high charges on, as you can see in the screenshot below.
    How to enable low data mode on iPhone
  3. you’ll see the option to enable Low Data Mode. Just tap once on the switch to turn it on.

There you have it. You have configured your iPhone or iPad to use less data.

As you can see, it takes just a few taps to enable or disable the feature.

This mode is very useful if you have a low data cap on your broadband connection, in addition to lowering your bills. By restricting background activities on your iPhone or iPad from consuming your internet data while you’re not using your device, you could use the spare data to do more important stuff at the full bandwidth.

Keep in mind, this method applies to using Low Data Mode on wi-fi, whereas you have a separate setting for using low data mode on iPhone with cellular data, which is what you’d want to use when you’re out roaming around.

While the benefits are numerous, Low Data mode has a couple of drawbacks. Since it prevents automatic updates and background activities as mentioned earlier, your iPhone and iPad data wouldn’t be automatically backed up to the cloud. If you aren’t aware, when your iPhone or iPad is powered on and plugged to a power source, iOS automatically backs up documents, photos, contacts and other files to iCloud. So, you may need to perform a manual backup to iCloud or you may risk losing data permanently.

Well, what’s your take on the new Low Data Mode features on iOS 13? Did it help you save a lot of valuable data and consequently save some cash? We’d love to know your thoughts and experiences in The comment section below.

What are haptics? Haptics are a tactile way for your iPhone to respond to touch, pressure, or both, in the form of a small vibration. In case you are wondering how to turn off haptic touch on your iPhone or iPad, you have come to the right place.
Haptic Touch uses the Taptic Engine and delivers haptic feedback when the screen is pressed on latest Apple devices. . A Haptic Touch is a touch and
hold gesture, and it can be used across the
iOS 13
operating system.

What’s the difference between haptic touch and 3D touch?

The difference between Haptic Touch and3D touch is that 3D touch responds to different levels of pressure with different responses and features while haptic touch does not have various level of pressure
but rather the length of a finger press. This call and response is determined by the pressure sensitivity built into the iPhone screen, so depending on which
iPhone model you own, you will get one or the other or both. 3D Touch is a hardware-based feature because it is paired with pressure-sensitive screens.
Haptic Touch is software-based.
For example, the new
iPhone 11
and
iPhone 11 Pro
substitute 3D Touch with Haptic Touch. As on the iPhone XR, the haptic feedback consists of a subtle vibration in response to the long press. Older models
with touch-sensitive glass may still retain the original 3D Touch feature.
Regardless of whether the touch response is 3D or haptic, some people hate both equally, and could never find or get the hang of the feature’s light-medium-firm
press subtlety, or did not find the results edifying. If you want to turn off haptic touch, there are a few simple steps which you need to follow.
Here are the step-by-step instructions for how to disable haptic touch on iPhone and iPad running iOS 13 and iPadOS 13.

How to turn off Haptic Touch:

Follow these steps to turn off Haptic Touch:

  1. Start the Settings app on your iPhone.
  2. Tap Sounds and Haptics.
  3. Scroll down and toggle off system haptics.
    Turn off haptic touch on iPhone system haptics

That’s pretty much it. You have disabled haptic touch on your iPhone or iPad. For step-by-step instructions on how to turn off 3D Touch on your iPhone, check out our step by step guide How to turn off 3D Touch on an iPhone

Signing off

In case you have been wondering how can haptic touch be turned off on iPhone and iPad running iOS 13, there you have it.
Questions?
Let us know in the comment section below. We also have plenty of other articles that I suggest you check right now.

Apple’s AirPods can help you hear better. An accessibility feature called “Live Listen” lets you use AirPods as hearing aids.
This is how you can use AirPods as hearing aidsApple AirPods are among the most stylish iPhone accessories you can buy right now. Besides listening to music and podcasts, you can use them as hearing aids by enabling “Live Listen” feature which amplifies sounds around your immediate environment.
The AirPods Live Listen feature uses iPhones Mic which is used to capture and transfer the audio straight to your AirPods. As such, should you be hard of hearing, you can simply lay your iPhone on a table — or even hold it close to someone’s mouth — and the AirPods will amplify what’s being spoken rather than asking someone to raise their voice.
The feature works perfectly and you can even use it to spy on other peoples conversations. This is because your iPhone can transfer audio to your AirPods even when you are a few yards away from your iPhone as long as the AirPods remain connected to your iPhone via the Bluetooth. If you want to activate and use the AirPods Live Listen feature, there are a few simple steps you need to follow.
Here is the step by step guide which can help you set up and use live listen feature on your iOS device.

Steps to Use AirPods as Hearing Aids Using Live Listen

Follow these steps to turn on and use The Live Listen feature in your iPhone or iPad:

  1. Start Settings app on your iPhone.
  2. Tap on Control Center.
  3. Tap on Customize Controls.
  4. Tap the green + button next to Hearing to add it to control center.

Now, you can enable Live Listen feature on control center.

How to use Live Listen on your iPhoneor iPad with AirPods

Now that you have the feature enabled on your iPhone or iPad, you can start using Live Listen with yourAirPods:

  1. Pop your AirPods in your ears.
  2. on an iPhone X or newer, swipe down from the top-right of your home screen to launch control center.
  3. on an iPhone 8 or earlier,swipe up from the bottom of your home screen to launch control center.
  4. Next, tap on the ear icon.
  5. Finally, tap the “Live Listen” option to turn it on.

Now, you can lay your iPhone on a table and you’ll be able to hear their conversation from your AirPods. To test the feature, put your
iPhone on the table while people are having a conversation at the table and walk out of the room.
That’s pretty much it. You can turn on live listen feature on the Control Center any time you want to use it. When you are done using the feature, keep in mind to turn it off to avoid distorting your music or podcast.

Want to know what else AirPods can do? Check out my
AirPods tips and tricks guide
and
AirPods Pro tips and tricks guide
questions?
Let us know in the comment section below. We also have plenty of other articles that I suggest you check right now.