Got a tip for us?

Kentex Cargo, a logistics and freight forwarding company has come under intense scrutiny from customers, with many voicing dissatisfaction over delays, hidden charges, lost items, and poor customer service. According to complaintsboard, Kentex Cargo’s has a 1.2-star rating from 16 reviews, showing that the majority of customers are dissatisfied with shipping services. Below is a compilation of reviews from verified customers, quoted in their own words, as published on ComplaintsBoard:


“Unprofessional and Inconvenient Experience with Kentex Cargo”

— O. Franecki (Verified Customer)

“I had an unfortunate experience with Kentex Cargo when I used their services to ship my belongings in mid July. Although I was hoping for a timely delivery, it is now the end of August and their latest estimate indicates an additional 21 days are required. Such a prolonged delay and uncertainty surrounding my shipment is certainly frustrating and inconvenient.

One of the most disappointing aspects of Kentex Cargo is that they don’t offer an easy way to track your shipment online, which means that you have to keep following up with their customer service team through lengthy emails and laborious phone calls. It’s even more frustrating that their customer care agents can be rude at times, which can add unnecessary stress to an already challenging situation.

I must admit, I regret choosing Kentex Cargo as alternative shipper, especially when my usual shipping company stopped shipping goods by air for a temporary period. Their promises for delivering efficient worldwide shipping don’t live up to the reputation. Overall, I would not recommend using Kentex Cargo’s services and suggest looking for other shipping companies if you want a stress-free, timely, and professional shipping experience.”


“Mixed Experience with Kentex Cargo: Need for More Transparency in Fees and Costs”

— A. Wilderman (Verified Customer)

“As a first-time user of Kentex Cargo, I was eager to try their services and see what they had to offer. From beginning to end, my experience was mixed. On one hand, I appreciated the ease of their online ordering process and the timely manner in which my item was shipped. However, I was disappointed to learn that there were additional fees not included in my initial invoice that I was required to pay at the time of delivery.

While I understand that some additional charges may be unavoidable, I would have preferred to have had this information disclosed upfront so that I could have made an informed decision about whether or not to proceed with my purchase. It’s important to me to have transparency and honesty when dealing with any business, especially when it comes to finances.

As a result of my experience, I have decided not to use Kentex Cargo again. I will be looking for a company that is more transparent about all costs associated with my orders so that I can make more informed purchasing decisions in the future. While I appreciate the convenience and quality of their services, I value honesty and transparency above all else.”


“Kentex Cargo Failed to Deliver: Missing Items and Unsatisfactory Customer Service”

— R. Feest (Verified Customer)

“As someone who’s previously shipped with Kentex Cargo, I was pretty satisfied with their services. However, I recently had a particularly unpleasant experience that left me very disappointed and dissatisfied. I often send shipments of goods to my family back home in Kenya, but on this particular occasion, when my parents received the package, they discovered that TWO of the items I’d sent were missing! I was appalled!

The missing items included a brand new shirt I’d purchased and a pair of American flag shorts – items that were very important to me, and I was quite upset to learn that they’d been stolen from my package. As a client of Kentex Cargo, I’d trusted them to deliver my goods safely and securely, and I couldn’t understand why anyone would steal from a shipment. This incident has left me feeling very disillusioned about their services, and I’m not sure if I can trust them with my packages in the future.

To add insult to injury, the shipment ended up taking longer than expected. I recently reached out to Kentex Cargo to express my disappointment, but I didn’t receive any satisfactory resolution to the problem. The whole experience has left a sour taste in my mouth, and I’m afraid that this will be where my shipping with them will end.

Overall, I would have to say that I’m very upset with my latest experience with Kentex Cargo. As a customer, I expect professional and reliable services, and unfortunately, this company has failed to deliver on their promises. The loss of my two items and the delay of the shipment, coupled with the lack of any satisfactory response from the company, has left me with no choice but to discontinue my use of their services.”


“Avoid Kentex Cargo for Hassle-free Deliveries: A Review”

— J. Mraz (Verified Customer)

“If you’re looking for a shipping company to handle your deliveries, Kentex Cargo may not be the best choice. We had a terrible experience with them when we shipped an item in early December 2020 and have yet to receive it even now in mid January 2021. Unfortunately, our experience with them has been nothing short of frustrating.

The worst part of our experience with Kentex Cargo was when we visited their Westlands office to inquire about the status of our delivery. They informed us that our items were in their Mombasa road office, even though they had called us to inform us to pick up our items at Mombasa road. This was a complete waste of our time and money, not to mention the hassle of making two trips to their different offices.

But what really left us frustrated was when they suggested that we get our items delivered via courier on our own bill. This was a complete shock to us as we expected them to take full responsibility for their mistake and promptly deliver our items to us.

In light of our experience, we strongly recommend finding alternative shipping companies to handle your deliveries. While we cannot speak for the experiences of others, we would caution against using Kentex Cargo if you want your items to be delivered in a timely and hassle-free manner.”


“Terrible Experience with Kentex Cargo: Poor Communication and Delayed Delivery”

— D. Mills (Verified Customer)

“I recently used Kentex Cargo to send a package to Kenya, and I have to say that my experience was less than satisfactory. The entire process was frustrating and confusing, and I felt like I was constantly in the dark about what was happening with my shipment.

First of all, the communication from Kentex Cargo was terrible. I had to constantly follow up with them to get updates on my package, and even then, the information I received was often inaccurate or incomplete. It was incredibly frustrating to feel like I had no idea where my package was or when it would arrive.

When my package finally did arrive, it was weeks later than I had been told to expect. This caused a lot of stress and inconvenience for both myself and the person who was receiving the package.

Overall, I would not recommend Kentex Cargo to anyone. The poor communication and delayed delivery were just too much to deal with, and I will definitely be looking for a more reliable shipping company in the future.”


“Disappointed with Kentex Cargo: Delays and Hidden Charges”

— S. Kassulke (Verified Customer)

“I was excited to use Kentex Cargo for the first time to send some items to my family in Kenya. However, my experience with them has been nothing short of disappointing. Firstly, the delivery time was much longer than what they had advertised. I was told my package would arrive within two weeks, but it took over a month.

What frustrated me even more were the hidden charges that I was not informed about when I first made the order. I ended up paying much more than I had anticipated, and when I contacted customer service to ask for an explanation, they were not helpful at all.

I believe that businesses should be honest and transparent with their customers, and Kentex Cargo has failed in this regard. I will not be using their services again and would advise others to be cautious when considering them for their shipping needs.”


“Kentex Cargo Experience Was a Nightmare: Lost Items and Zero Accountability”

— T. Nader (Verified Customer)

“This is by far the worst shipping experience I’ve had. I sent several valuable items with Kentex Cargo to Nairobi, and not only did my shipment arrive two weeks late, but some of the items were also missing.

When I reached out to the customer service team, they were dismissive and rude. They offered no help, no compensation, and no apology for the lost items. It felt like they didn’t care at all about their customers or the goods they are entrusted with.

I trusted Kentex Cargo with my shipment because of the positive things I’d heard in the past, but clearly, the quality of their service has declined. The lack of accountability and the way they treat customers is unacceptable. I strongly discourage anyone from using their services.”


“Unprofessional Staff and Extremely Poor Service”

— L. Veum (Verified Customer)

“I have never been so disappointed with a company as I am with Kentex Cargo. The staff were extremely unprofessional, from the way they handled my call to the way they responded to my questions when I went to their office.

I was shocked at how disorganized they were. They couldn’t even locate my package for two days, and when they finally did, some items were damaged. There was no apology or explanation.

If you’re thinking of using Kentex, I suggest you look elsewhere unless you want to deal with disrespectful staff, delayed shipments, and damaged goods.”


“Lack of Transparency and Poor Tracking”

— C. Stroman (Verified Customer)

“My main issue with Kentex Cargo is that there is no proper tracking system. I kept having to call their office just to get basic information about where my package was. Each time, I got different answers from different people.

On top of that, the final bill included several charges that were not part of the initial quote. When I asked for a breakdown, the staff were evasive and couldn’t explain the charges clearly.

This experience has made me lose trust in their business. I expected professionalism and transparency, but got confusion and dishonesty instead.”


“Beware of Kentex Cargo’s Misleading Pricing and Unreasonable Payment Demands: A Frustrating Experience”

— C. Russel (Verified Customer)

“I recently had a frustrating experience with Kentex Cargo, a Texas-based franchise that offers cargo services. Although their website seemed promising, my attempts to reach them via phone were met with unanswered calls and unreturned voicemails. When I finally did manage to speak with someone, they directed me to their account system, which proved to be unhelpful and difficult to navigate.

To make matters worse, the information I received regarding pricing was misleading. I was quoted a rate of $15 per kilo, with additional insurance costs. However, after sending my parcel to the company, I was hit with an unexpected airfreight parcel charge of $49, as well as a handling fee of $129. These fees were not mentioned on their website or when I spoke with their representative, so I felt cheated and deceived.

Adding insult to injury, Kentex Cargo only accepts bank wire transfers or Mempasa, a Kenyan-only payment system, and payment is expected within two days of the invoice. I found this policy to be unreasonable, as it is not standard practice in the US to require bank wire transfers unless it’s an international transaction. It felt like an unnecessary inconvenience and added expense for me as a customer.

I believe Kentex Cargo needs to be held accountable for their business practices. They should be investigated by the Better Business Bureau and the Texas State Attorney’s office to address the fraudulent handling fees and unfair payment demands. It’s important for customers to have reliable and trustworthy cargo services to depend on, and unfortunately, Kentex Cargo is far from that standard.”


“Disappointing Experience with Kentex Cargo: Incomplete Package Delivery and Poor Customer Service”

— S. Ratke (Verified Customer)

“As a customer of Kentex Cargo (Kentex Cargo), I was disappointed with my experience. I had hoped to take advantage of their package consolidation service, but out of the five tracking numbers I listed, only four of my packages were delivered in two separate shipments. I was informed that the remaining two were being couriered for me to collect, but upon arrival, I found that only one package was available and one was still missing. I have been attempting to rectify the situation by calling their office multiple times today, but have been left waiting on hold by the recorded answering service without any assistance. Despite paying two separate courier fees and making two trips to collect my packages, I still have not received all my goods, since they arrived at the warehouse in the states on April 25th and 26th and yet remain missing. This has been massively inconvenient and disorganized, to say the least, and has left me with a negative impression of Kentex Cargo. I am deeply dissatisfied and unimpressed with their services and will not be using them again. In my opinion, their self-promotion advertising is completely misleading and customers are not receiving the promised benefits.”


“Outstanding Service and Promptness: Kentex Cargo Review”

— V. Gusikowski (Verified Customer)

“I recently used Kentex Cargo and I must say, the experience was truly outstanding! From the communication to the service, everything was top-notch. What impressed me the most was their promptness. Any query I had was answered in no time!

Furthermore, their service was fast and efficient. From the moment I reached out to them, they took charge of everything. Their team of professionals ensured that my shipment was delivered safely and on time.

Overall, I would highly recommend Kentex Cargo to anyone looking for a hassle-free and reliable shipping service. They surpassed my expectations and I am very satisfied with their service. If you are someone who values excellent communication, efficient service, and promptness, then Kentex Cargo is your go-to shipping service!”


“Not Recommended: My Disappointing Experience with Kentex Cargo”

— G. Friesen (Verified Customer)

“Unfortunately, my experience with Kentex Cargo was less than satisfactory and I cannot recommend their services to others. While the initial process of shipping my goods to Kenya went smoothly, I was shocked to receive a phone call notifying me of an additional 5% charge on each good upon arrival in Kenya. This charge was never communicated early on in the process and came as a surprise – not to mention an additional financial burden that I was not prepared for. Needless to say, this left a sour taste in my mouth and I am extremely disappointed with the lack of transparency and communication on Kentex Cargo’s part. As a customer, I value honesty and clear communication, and unfortunately, Kentex Cargo did not meet these expectations. I will not be utilizing their services again in the future.”


“Kentex Cargo Review: A Terrible and Unreliable Shipping Company to Avoid”

— N. Kassulke (Verified Customer)

“If you’re looking for a reliable and trustworthy cargo company to handle your shipping needs, Kentex Cargo (Kentex Cargo) is definitely not the one for you. Their service is nothing short of terrible, with a multitude of issues ranging from hidden fees, delays in delivery, and even damaged goods.

Furthermore, once your package reaches Kenya, you can expect to be coerced into paying a bribe just to receive it. This is completely unacceptable and illegal, but unfortunately, it seems to be a common occurrence with Kentex Cargo.

To make matters worse, their spam text and email messages are relentless and seem to never stop, even after requesting to discontinue contact. It’s also been reported that private information is being sold by this company, which is a serious breach of trust.

In short, it’s strongly advised that you avoid Kentex Cargo at all costs. It’s clear that they are nothing more than a scam, and using their services will only lead to frustration, disappointment, and potentially even financial loss.”


“Mixed Review of Kentex Cargo Services: Delivery Delay and Lack of Communication”

— Anonymous (Verified Customer)

“I recently had an experience with Kentex Cargo, and unfortunately, I cannot say that I would highly recommend their services. While they do have some positive aspects, I found that there were some significant drawbacks that ultimately impacted my overall opinion of the company.

One of the biggest issues I had with Kentex Cargo was their delivery times. According to their website, goods are typically supposed to take between 10-14 business days to arrive. However, my experience was different – it took them over 25 business days to deliver my shipment. This was a significant delay and caused me a lot of inconvenience, as I was counting on receiving my goods within the expected timeframe.

To make matters worse, Kentex Cargo didn’t communicate with me about the delay until I reached out to them. It was frustrating to have to chase them down to find out what was happening with my shipment, especially since they had already missed the expected delivery date. When I finally did hear from them, they told me that they were having some issues with that particular shipment and were working to sort it out. While it was better that they at least reached out with an explanation, I would have appreciated hearing about the delay earlier on so that I could plan accordingly.

That being said, there were some good things about Kentex Cargo’s services. They did eventually deliver my goods, and everything arrived safely and in good condition. Additionally, their website was easy to use and navigate, and their rates were fairly competitive.

All in all, I would say that my experience with Kentex Cargo was mixed. While they did eventually deliver my shipment and their website was user-friendly, the significant delay and lack of communication were not ideal. If you do decide to use their services, I would recommend keeping an eye on your delivery dates and staying in touch with their customer service team to ensure that everything goes smoothly.”


“Beware of Kentex Cargo: My Frustrating and Unreliable Experience”

— C. Hagenes (Verified Customer)

“I had an incredibly frustrating experience with Kentex Cargo (Kentex Cargo) and I feel the need to warn others in case they are considering using their services. I sent a package with them back in July, and shockingly, I still have not received it by the end of September. Needless to say, this situation is unacceptable and speaks to the inefficiency and unreliability of Kentex Cargo.

The worst part of this whole ordeal was the complete lack of transparency regarding the status of my package. Despite my repeated attempts to contact them, they made it nearly impossible to track the location of my shipment or understand what could have gone wrong. Even more disconcerting was their refusal to respond to my inquiries, which has left me feeling completely powerless and cheated.

I highly recommend that you steer clear of Kentex Cargo and instead choose a reputable and reliable company that values integrity and customer satisfaction. There are many high-quality delivery services out there that will provide you with the peace of mind that your package will not only be delivered on time but also treated with the care and attention that it deserves.”


“Beware of Kentex Cargo’s Online Purchase Services: My Experience with Overcharging and Poor Communication”

— K. Larkin (Verified Customer)

“As a customer of Kentex Cargo, I had some less than satisfactory experiences when utilizing their online purchase services to procure goods from the United States. After receiving my order, I realized that the estimated shipping charge, which was predicted to be Ksh. 11,865/-, ended up being almost doubled, totaling Ksh. 24,312/-. This discrepancy is of great concern to me and I have made several attempts to communicate with the company about this issue, but unfortunately, have not heard back from them.

I feel that it is important to share my experience with others out there to prevent people from encountering similar experiences and losing hard-earned money. I strongly suggest that any one considering using this company for shipping to exercise caution and exercise due diligence to avoid being scammed and overcharged as I was.

It is unfortunate that my overall experience with Kentex Cargo has been less than favorable. I had high hopes that the company would provide seamless services, considering the positive reviews I had come across previously. However, my experience has taught me the valuable lesson that even the most reputable service providers can disappoint their customers.

In conclusion, I cannot recommend Kentex Cargo to anyone else, and I advise other potential customers to weigh their options carefully when looking for a shipping company. Hopefully, my experience will help people avoid falling into the same trap I did.”

Overview of Kentex Cargo complaint handling

Kentex Cargo reviews first appeared on Complaints Board on May 10, 2023. The latest review Unprofessional and Inconvenient Experience with Kentex Cargo: A Review was posted on May 20, 2023. Kentex Cargo has an average consumer rating of 1 stars from 16 reviews. Kentex Cargo has resolved 0 complaints.

Tag: Reviews

There’s nothing quite like the sinking feeling when you’re standing at a register, the line behind you growing longer by the second, frantically patting your pockets only to realize—you left your wallet at home. It’s in these moments that digital payment systems like Apple Pay feel like nothing short of magic. Just tap your phone and you’re on your way! But wait…Is it safe to use Apple Pay?

If you’ve found yourself wondering about the safety of Apple Pay while hovering your iPhone over a payment terminal, you’re not alone. With digital payments becoming as common as carrying cash once was, it’s worth taking a closer look at what happens when you use Apple Pay and whether your financial information remains secure in the process.

What Exactly Is Apple Pay?

Apple Pay is a mobile payment and digital wallet service created by Apple. It allows users to make payments using their Apple devices—iPhones, Apple Watches, iPads, and even Macs for online shopping. Launched in 2014, it has since expanded to dozens of countries and regions worldwide.

Think of Apple Pay as a digital version of your physical wallet, minus the bulk and the risk of dropping your credit cards between couch cushions. It stores your credit, debit, and prepaid card information, allowing you to make contactless payments, in-app purchases, and web transactions without physically having your cards present.

How Does Apple Pay Work?

The magic behind Apple Pay isn’t really magic at all—it’s a combination of several sophisticated technologies working together:

Near Field Communication (NFC) enables the contactless communication between your device and the payment terminal when you’re checking out at a store. This is that little chip in your phone that activates when you hold it near a payment reader.

Secure Element is a dedicated chip in your Apple device that stores and protects your payment information. It’s isolated from the rest of your device’s system, which means even if your phone gets hacked, this part remains secure.

Tokenization replaces your actual card details with a randomly generated number (token) that’s useless to potential thieves. Your real card number is never stored on your device or shared with merchants.

When you hold your iPhone near a payment terminal, the Secure Element communicates with the terminal via NFC. The transaction is authenticated using Face ID, Touch ID, or your passcode, and payment is completed without ever revealing your actual card number.

Honestly, it’s a bit like having a secret handshake with your bank that changes every time you use it.

The Technical Side: What Happens When You Add a Card

When you add a credit, debit, or prepaid card to Apple Pay, there’s a fascinating dance of encryption happening behind the scenes:

  1. The information you enter (or scan with your camera) is immediately encrypted on your device. If you use your camera to capture card details, that information is never saved to your device or photo library.

  2. This encrypted data travels to Apple’s servers, where it’s briefly decrypted so Apple can determine your card’s payment network.

  3. Apple then re-encrypts your data with a special key that only your payment network or card issuer can unlock.

  4. Here’s something most people don’t know—Apple may actually look at certain device settings and usage patterns as part of this process. Things like how often your device is in motion and your approximate weekly call volume might be analyzed to determine your eligibility for Apple Pay and prevent fraud. This helps ensure that it’s really you setting up the card.

  5. After your card is approved, your bank creates a device-specific "Device Account Number" that replaces your actual card number. This number is stored in the Secure Element chip, not in iOS or on Apple’s servers, and it’s never backed up to iCloud.

Unlike your actual card number, this Device Account Number can’t be used for transactions over the phone or with magnetic stripe readers—it only works with Apple Pay. And Apple only stores a portion of this number along with a portion of your actual card number—never the whole thing.

The Big Question: How Safe Is Apple Pay?

Let’s cut to the chase: Apple Pay is generally considered more secure than using a physical credit card. Here’s why:

Your Card Numbers Stay Hidden

When you use a regular credit card, your card number is exposed to the merchant and potentially to anyone who might be watching or who has access to the merchant’s systems later on. With Apple Pay, merchants never see your credit card number.

Instead, they receive what’s called a Device Account Number—a unique, encrypted code specific to your device and that particular card. This means if a store’s payment system gets hacked (which happens more often than we’d like to think), your actual card details aren’t compromised.

Biometric Authentication Adds a Layer of Protection

Using Apple Pay requires authentication through Face ID, Touch ID, or your device passcode. This means even if someone steals your phone, they can’t use Apple Pay without your unique biometric data or passcode. Try doing that with a stolen physical credit card!

Remember those videos of thieves going on spending sprees with stolen cards? That’s much harder to do with Apple Pay.

Transactions Are Encrypted

All the data transmitted during an Apple Pay transaction is encrypted and secure. The payment information isn’t stored in clear text anywhere—not on your device, not in Apple’s servers, and not with the merchants.

Each transaction uses a unique, one-time dynamic security code, which serves as an additional security layer. Your bank or card issuer can verify this code to ensure the transaction is coming from your device and hasn’t been intercepted or altered.

This encryption process scrambles your data so that even if someone intercepts it, they can’t read or use it. It’s like sending a letter in a language only your bank understands.

Limited Transaction Data Stored by Apple

While Apple doesn’t keep detailed records of your purchases, they do collect some anonymous transaction information, including:

  • Approximate purchase amounts
  • App developer and app name (for in-app purchases)
  • Approximate date and time
  • Whether the transaction completed successfully

Apple uses this data to improve Apple Pay and other services, but importantly, this information isn’t linked to you personally. Your detailed transaction history is only available through your bank or credit card company’s app or website, just like with physical card purchases.

How iCloud Fits Into the Picture

Your Apple Pay data doesn’t exist in isolation—some of it interacts with iCloud, Apple’s cloud storage service. Here’s how that works:

iCloud securely stores your Wallet data—including passes and transaction information—by encrypting it during transmission over the internet and keeping it encrypted on Apple’s servers. This means your payment information stays protected even when it’s synced across your devices.

If you’re concerned about this, you can actually disable iCloud support for Wallet. Just go to Settings > [your name] > iCloud, tap "See All" next to "Saved to iCloud," and turn off Wallet. This gives you more control over where your payment information is stored.

Web and App Payments: Extra Security Measures

When you use Apple Pay to make purchases within apps or on websites, there are additional security precautions in place:

Domain Verification for Websites

Before a website can offer Apple Pay as a payment option, Apple requires it to verify its domain. This prevents fraudulent sites from impersonating legitimate retailers and stealing your payment information.

You can manage which apps and websites can check if you have Apple Pay enabled in Settings > Apps > Safari > Advanced on your iPhone or iPad, or in Safari settings on your Mac.

Developer-Specific Encryption

When you make a payment in an app or on a website, Apple re-encrypts your transaction information with a key specific to that developer or website before sending it along. This ensures that only the legitimate merchant can access your payment details.

Apple also requires all apps and websites that use Apple Pay to have a privacy policy that governs how they use your data. This adds another layer of accountability.

But Nothing’s Perfect: Potential Vulnerabilities

Despite these robust security measures, no system is completely foolproof. Here are some potential vulnerabilities to be aware of:

Social Engineering Attacks

The weakest link in any security system is often the human element. Scammers might try to trick you into adding their fraudulent cards to your Apple Pay wallet or sharing verification codes.

For example, someone might call pretending to be from your bank, claiming there’s a problem with your Apple Pay setup and asking for verification details. Your bank will never do this—they don’t need to ask you for information they already have.

Device Security Matters

If your iPhone or Apple Watch isn’t secure, neither is your Apple Pay. Using weak passcodes, sharing your passcode with others, or not using Face ID or Touch ID weakens the security of Apple Pay.

Think about it—if someone can easily unlock your phone, they potentially have access to your wallet too. It’s like leaving your front door wide open and expecting thieves to respect your privacy.

Lost or Stolen Devices

If your device is lost or stolen, there’s a window of vulnerability until you take action. While biometric authentication provides protection, a determined thief might find ways around it, especially if you use a simple passcode.

That’s why Apple created Find My iPhone, which allows you to remotely lock or wipe your device if it falls into the wrong hands. You can also remove cards from Apple Pay via iCloud.

If you’ve enabled Find My, you have another option: instead of immediately canceling all your cards, you can put your device in Lost Mode, which temporarily suspends Apple Pay. If you find your device, you can simply reenable Apple Pay without the hassle of setting up all your cards again.

Apple Cash: Sending Money to Friends and Family

In the U.S., Apple Pay includes a feature called Apple Cash that lets you send and receive money with friends and family through Messages or Wallet. This service works a bit differently than regular Apple Pay transactions.

Here’s what you might not know: Apple Cash isn’t actually operated directly by Apple. It’s a service provided by Green Dot Bank (member FDIC), with a company called Apple Payments Inc. (a wholly owned subsidiary of Apple) acting as an intermediary.

This structure exists specifically to protect your privacy. Your Apple Cash account information—including your name, address, balance, and transaction details—is stored separately by Apple Payments Inc. in a way that the rest of Apple doesn’t have access to.

When you set up Apple Cash, you might be asked to provide identity verification information, which could include your name, address, Social Security number, or date of birth. While your name and address are securely stored by both the partner bank and Apple Payments Inc., any additional identification information can’t be read by Apple.

It’s worth noting that Apple, Apple Payments Inc., and Green Dot Bank may use information about how frequently you communicate with people you send money to—but importantly, not the content of those communications—to help prevent fraud.

Express Transit: Pay-and-Go for Public Transport

For commuters, Apple Pay offers a nifty feature called Express Transit. When you designate a transit card as an Express Transit card, you can simply tap and go without needing to authenticate with Face ID, Touch ID, or your passcode first.

This makes perfect sense for public transit, where speed is essential—you don’t want to be the person holding up the line while your face is scanned! You can manage Express Transit settings on your iPhone in Settings > Wallet & Apple Pay, or on your Apple Watch through the Apple Watch app.

If you lose your device, you can temporarily suspend transit cards by putting your device in Lost Mode through Find My. Just remember that this only works if your device is online—if it’s offline, you’ll need to contact your transit card issuer directly.

Real-World Testing: Has Apple Pay Been Hacked?

You might be wondering if Apple Pay has faced any major security breaches since its launch. The answer is: not directly.

While there have been reports of fraudulent transactions occurring through Apple Pay, these almost always stem from the underlying credit cards being compromised before they were added to Apple Pay, or from social engineering scams rather than technical vulnerabilities in the Apple Pay system itself.

In the early days of Apple Pay, there was an issue with banks not properly verifying cards before they were added to Apple Pay wallets. This allowed fraudsters to add stolen card details to their own Apple Pay accounts. However, banks quickly improved their verification processes to address this loophole.

Practical Tips to Keep Your Apple Pay Extra Secure

Security is a shared responsibility. Here are some practical steps you can take to maximize the safety of your Apple Pay experience:

Strengthen Your Device Security

  • Use a strong, unique passcode for your device—not something easily guessed like "1234" or your birth year
  • Enable Face ID or Touch ID for faster, more secure authentication
  • Keep your device’s operating system updated to benefit from the latest security patches
  • Enable Find My iPhone so you can locate, lock, or wipe your device if it’s lost or stolen

Be Vigilant About Card Addition

  • When adding cards to Apple Pay, check that the verification process includes steps that would be difficult for a fraudster to complete
  • Verify that the card appears correctly in your Apple Wallet after adding it
  • Only add cards from banks and financial institutions you trust

Monitor Your Accounts

  • Regularly check your credit card and bank statements for unauthorized transactions
  • Set up transaction alerts with your bank so you’re notified immediately of any activity
  • Report suspicious transactions to your bank immediately

Watch Out for Phishing Attempts

  • Be skeptical of emails, texts, or calls asking for Apple ID, banking information, or verification codes
  • Remember that Apple and your bank will never call and ask for your passcode or full card details
  • When in doubt, hang up and call the institution directly using the number on their official website

Consider Your iCloud Settings

  • Decide whether you want your Wallet data backed up to iCloud
  • If you’re particularly security-conscious, you might prefer to disable iCloud for Wallet

Apple Pay vs. Other Payment Methods: A Safety Comparison

How does Apple Pay stack up against other payment methods when it comes to security? Let’s compare:

Physical Credit Cards

Traditional magnetic stripe cards are the least secure option, as the data can be easily skimmed and replicated.

Chip cards (EMV) are more secure than magnetic stripe, but still display your card number, which can be copied.

Apple Pay is generally more secure than both these options because it doesn’t expose your card number and requires biometric authentication.

Other Digital Wallets

Google Pay and Samsung Pay operate on similar security principles to Apple Pay, including tokenization and device-specific security.

PayPal offers strong security for online transactions but doesn’t have the same biometric authentication requirements for in-person payments that Apple Pay has.

The main security advantage Apple has over some competitors is its tightly controlled ecosystem and the Secure Enclave hardware that exists in all its devices.

Cash

Cash is anonymous and can’t be hacked, but it can be stolen with no recourse. It also doesn’t provide purchase protection or rewards.

Apple Pay offers the convenience of digital payments with security that in many ways exceeds that of physical cash.

Special Considerations for Different Types of Transactions

The security considerations for Apple Pay vary slightly depending on how you’re using it:

In-Store Payments

These are generally the most secure form of Apple Pay transactions because they require your physical device and your biometric authentication or passcode. The tokenization process means your card details are never shared with the store.

In-App Purchases

When you use Apple Pay within apps, you get the same security benefits—tokenization and biometric authentication—plus the convenience of not having to enter your credit card details for each purchase. This helps protect you from app developers who might otherwise store your card information on their potentially less-secure servers.

Web Transactions

Using Apple Pay on websites offers similar protections to in-app purchases. Instead of filling out lengthy payment forms and trusting various websites with your card details, you can use Apple Pay with just a touch or glance.

Remember that websites must verify their domain with Apple before they can offer Apple Pay, adding another layer of protection against fraudulent sites.

Person-to-Person Payments

Apple Cash (Apple’s person-to-person payment service that works with Apple Pay) uses the same security infrastructure as other Apple Pay transactions, making it more secure than many other P2P payment options.

The Future of Apple Pay Security

As technology evolves, so do security threats and protections. Here’s what we might expect for the future of Apple Pay security:

Continuous Improvement

Apple regularly updates its security protocols and features. With each iOS update, security enhancements are implemented to address emerging threats.

Expanded Biometric Capabilities

As biometric technology advances, we might see new forms of authentication integrated into Apple Pay, potentially including behavioral biometrics that analyze how you interact with your device.

Blockchain Integration?

While Apple hasn’t announced plans to integrate blockchain technology with Apple Pay, the decentralized and immutable nature of blockchain could potentially provide additional security layers in the future.

When Should You Think Twice About Using Apple Pay?

Despite its strong security features, there are situations where you might want to be extra cautious with Apple Pay:

Unfamiliar Merchants

If you’re dealing with a merchant you don’t trust, using Apple Pay still provides more protection than a physical card, but you might want to use a credit card (rather than a debit card) through Apple Pay for additional purchase protections.

When Traveling Internationally

Check whether Apple Pay is widely accepted in your destination country. In some places, you might still need physical cards or local payment methods as backups.

If Your Device Is Acting Strangely

If your iPhone or Apple Watch is behaving unusually—crashing frequently, running hot, or showing other signs of potential malware—it might be wise to avoid using Apple Pay until you’ve resolved the issues.

The Bottom Line: Is Apple Pay Worth Using?

Taking everything into account, Apple Pay stands as one of the most secure payment methods available today. Its combination of hardware security, tokenization, biometric authentication, and encryption provides multiple layers of protection that significantly reduce the risk of fraud compared to traditional payment methods.

The convenience factor is undeniable—no more fumbling for cards or carrying a bulky wallet. But perhaps the most compelling reason to use Apple Pay is the peace of mind knowing that your financial information remains protected even as it becomes easier to spend money.

Like any technology, using it wisely requires understanding both its benefits and limitations. By following the security best practices outlined in this article and staying alert to potential scams, you can enjoy the convenience of Apple Pay while minimizing the associated risks.

So next time you’re standing at that register, phone in hand, you can tap with confidence knowing exactly what’s happening behind the scenes to keep your information safe.

Frequently Asked Questions About Apple Pay Security

Can Apple Pay be hacked?

While no system is 100% secure, Apple Pay has multiple security layers that make it extremely difficult to hack. Most security issues have come from social engineering rather than technical vulnerabilities.

What happens if someone steals my phone?

They won’t be able to use Apple Pay without your Face ID, Touch ID, or passcode. You can also remotely disable Apple Pay by putting your device in Lost Mode through Find My iPhone.

Do I need an internet connection to use Apple Pay?

For in-store purchases, no. Apple Pay works without an internet connection once your cards are set up. However, you’ll need an internet connection for initial setup and for some transaction types.

Can I use Apple Pay if my physical card is canceled?

If your physical card is canceled and replaced, you’ll typically need to remove the old card from Apple Pay and add the new one. Some banks automatically update this information.

Is there a transaction limit for Apple Pay?

This depends on the merchant and your bank rather than Apple Pay itself. Some retailers or banks may impose their own limits on contactless transactions.

How can I disable Apple Pay if I don’t want to use it?

You can remove individual cards from your Apple Wallet at any time. If you want to completely disable Apple Pay functionality, you can remove all cards from your wallet or manage this through your Apple Account page.


Remember that financial security isn’t just about the technology you use but also about staying informed and vigilant. By understanding how Apple Pay works and taking basic precautions, you can enjoy both convenience and confidence in your digital payment experience.

Messaging on my iPhone has been acting up in the strangest way recently. When chatting with Android users, their messages come through as RCS, complete with the familiar typing indicators. Yet, when I reply, my messages are inexplicably sent as SMS instead of RCS. Oddly, this issue seems to affect only one contact. When she messages me, it’s sent as RCS, but my responses always revert to SMS.

What’s even more baffling is that when I use a Pixel device, messages to the same contact go through as RCS, but her replies from an iPhone are received as Text. This inconsistency makes conversations frustratingly disjointed. To make matters worse, there are moments throughout the day when my messages get stuck in the "sending" phase, with notifications telling me they’ll be delivered when I "come back online." Despite this, I’m still able to send other RCS messages to the same contact without issue during those times. However, I’m usually stuck receiving her replies as plain Text messages.

What is RCS Messaging?

RCS (Rich Communication Services) is a modern upgrade to traditional SMS messaging, offering enhanced features for users who don’t use iMessage. RCS text messages can be sent to non-Apple devices as well as another iPhone or another Apple device with Text Message Forwarding turned on. With RCS, you can send texts, high resolution photos and videos, links, and more. RCS also supports delivery and read receipts and typing indicators. RCS messages appear in green text bubbles on your device.

Apple’s implementation of RCS is based on the industry’s standard. RCS messages aren’t end-to-end encrypted, which means they’re not protected from a third-party reading them while they’re sent between devices.

RCS is a carrier-provided service. When your device connects to your cellular network, it communicates with your carrier and their partners to set up RCS. User identifiers are exchanged for your carrier and their partners to authenticate your device and provide a connection. These identifiers could include but are not limited to your IMEI, IMSI, current IP address, and phone number. Your current IP address might also be shared with other RCS users.

To use RCS, you need iOS 18 and a text-messaging plan from a carrier that supports RCS on iPhone. To check or modify your RCS settings, go to Settings > Apps > Messages > RCS Messaging. For more information about compatibility and setup, contact your wireless carrier.

Note: There may be a delay of a few hours in activating RCS.

Potential Fixes for the iPhone RCS Messaging Issue

  1. Toggle RCS Messaging off and on
    • Go to Settings > Apps > Messages > RCS Messaging and toggle OFF RCS messaging.
    • Turn your phone off.
    • After it’s powered back on, go to Settings > Apps > Messages > RCS Messaging and toggle RCS back on.
  2. Update to the Latest iOS Version
    • Ensure your iPhone is running the latest iOS version. Since the Messages app is part of the iOS software, this update will also ensure the app is up to date and functioning properly. Go to Settings > General > Software Update. If an update is available, follow the onscreen instructions to update your iPhone.
  3. Reset Network Settings
    • Open the Settings app.
    • Select General.
    • Tap Transfer or Reset iPhone.
    • Choose Reset Network Settings.
    • Enter your passcode if prompted.
    • Confirm by selecting Reset Network Settings again.

Note: When you reset network settings, all your network-related configurations will be erased. This includes saved Wi-Fi passwords, paired Bluetooth devices, VPN settings, and cellular preferences. Make sure to have this information handy before proceeding.

This problem is a network issue. We also previously explained how you can fix cellular data issues. If this article does not help, check that article for more detailed solutions.

Tags: Messages, RCS

If you’re in China and think the deal on the iPhone 16 you’re seeing just can’t be beaten, you might want to think again.

iPhone 16

In a feature published recently, GeeksChalk examined the differences between a real iPhone 16 from Apple and a counterfeit iPhone 16 one of its staff bought in China for just $100. And although the price alone might be enough to make you realize it’s a fake, GeeksChalk found that the devices are strikingly similar.

When they broke the fake iPhone 16 out of the box, they quickly discovered that it “has the same form factor.” The fake handset comes with the same design, the same side buttons, and even uses a USB-C port that works. Whoever designed the fake phone even used the same pentalobe screws Apple employs to make it harder to break into the smartphone and tweak things.

Moving to the packaging, GeeksChalk said that it was nearly identical to Apple’s own packaging. It used the same material and even said “Designed by Apple in California.”

So, if the hardware looks the same, has all the same features, and comes in a nearly identical box, how can you tell it’s a fake? According to GeeksChalk, it’s revealed in the software.

When you turn on the handset, you’ll quickly find that it doesn’t actually come with a Dynamic Island. Instead, the counterfeit creators designed a software Dynamic Island that looks like the real deal but is actually running on its operating system. And although the operating system comes with apps you’d typically see in an iPhone, they’ve been skinned and are actually repurposed Google apps.

GeeksChalk said that the “App Store” on the fake phone crashes often. But when a warning comes up to tell you what happened, it says that the “Google Play Store” had crashed. And although Apple Maps is there, it opens Google Maps. Try the Podcasts app and you’ll see YouTube.

Arguably the most concerning difference, however, is the hackability of the device. GeeksChalk reported that the device comes with “backdoors and malicious apps” out of the box. Sharing information on the handset, then, would be a really bad idea.

Apple and other companies have pressed China to stop counterfeit goods and the Chinese government has cracked down. But the sheer number of counterfeit goods makes it difficult, if not impossible, to stop. And when they’re as close to the real thing as the iPhone GeeksChalk has, it can be even more difficult to stop it.

So, if you’re in China and looking for a cheap iPhone, beware. Chances are, it’s not what you think.

Tag: Fakes

Is the Notes app not working on your iPhone after iOS 18 update?

With Notes, you can capture a quick thought, create checklists, sketch ideas, and more. And with iCloud, you can keep your notes updated across all your devices. In iOS 18, Notes gets the same access to writing tools powered by Apple Intelligence available to other apps running on an iPhone 15 Pro or iPhone 15 Pro Max such as summaries and suggested tones. But the real story with Notes on iOS 18 comes from the more widely available additions that strengthen Notes’ claim as the only app you really need when it comes to organizing your thoughts.

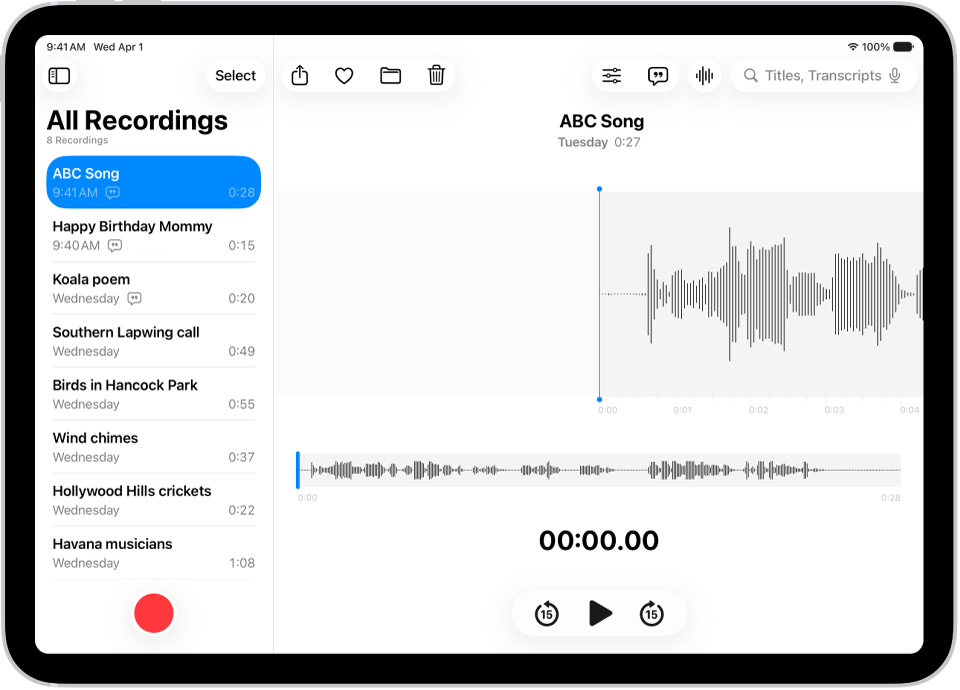
In iOS 18, Notes includes a feature for capturing audio recordings and putting out a live transcript along with a summary of what’s included.

Math Notes, a built-in feature in the Notes app, allows you to solve equations, so you can do things like add up a monthly budget or figure out a split for a restaurant bill. It can solve all kinds of math problems, and generates totals when you add in an equals sign.

iOS 18 Notes app

You can also now highlight text in notes, with Apple providing five colors to choose from.

If you’re having the problem of Notes app not working after iOS 18 update, here are some solutions you can try to fix the issue.

How to Fix Notes App Not Working After iOS 18 Update

1. Close And Reopen The Notes App

Closing and reopening the Notes app can fix a potential software crash that has caused Notes app to stop working. First, open the app switcher, where you can view all the apps currently open on your iPhone.

If your iPhone has Face ID, swipe up from the bottom to the center of the screen and hold your finger there until the app switcher opens. If your iPhone doesn’t have Face ID, double-press the Home button.

Now that the app switcher is open, swipe Notes up and off the top of the screen. It wouldn’t hurt to close your other apps too, just in case one of them has crashed. You’ll know your apps are closed when they no longer appear in the app switcher.

2. Restart Your iPhone

A simple way to help correct a software problem on your iPhone is to restart the phone. It may sound like a silly thing to try, but some magic goes on when you restart your iPhone. It’s one of the most recommended troubleshooting solutions for iPhones, and it happens to work more often than not. Just give it a try! You’d be amazed how this simple step will quickly fix Notes app problem on your iPhone!

To restart your iPhone, hold down the power button. That’s on the upper right-hand side of your iPhone. Hold it for a few seconds until the screen changes. Then, slide your finger across the part that says slide to power off. Once your iPhone is off, count to 10 and then push the power button again to restart it.

If you have an iPhone with Face ID, simultaneously press and hold the side button and either volume button until slide to power off shows up on the screen. Then, swipe the power icon from left to right. Wait about 20 seconds, then press and hold the side button to reboot your iPhone.

3. Update Your iPhone to The Latest iOS 18 Version

The next troubleshooting step to try if Notes app is still not working on your iPhone is to update your software to the latest iOS 18 version. While being an update or two behind usually won’t cause any issues, apps may stop working correctly if you’re several updates behind. This is especially the case with more significant updates that make big changes in the way things work within the inbuilt apps. It’s always a good practice to keep your apps as up-to-date as possible. Since Notes is a native iOS app, the only way to update it is to update your iPhone software.

Start the Settings app on your iPhone then go into General > Software Update. Tap Download and Install or Install Now if an iOS update is available.

4. Set up Notes with iCloud

You can use iCloud to update your notes across all of your devices. To set up Notes with iCloud, go to Settings > [your name] > iCloud > Show All, then turn on Notes. You’ll see your notes on all of your Apple devices that you’re signed in to with the same Apple Account.

5. Turn iCloud Notes Off and On

From my experience, i know that sometimes an iCloud glitch may cause this issue. If you notice the Notes app not opening, instantly crashing, or freezing after iOS 18 update, simply toggle iCloud Notes off and back on. This is an easy fix. The steps below describe turning iCloud off and on for Notes. You will not lose any Notes. Here is how:

  1. Start the Settings app on your iPhone and tap on your name at the top of the screen.
  2. Go to iCloud.
  3. Under the Apps Using iCloud section, tap See All.
  4. Find Notes and toggle off the iCloud switch for Notes.
  5. When you turn it off, you will be asked what you want to do with the iCloud data, and a popup will appear with two options: Keep on My iPhone or Delete from My iPhone.
  6. Choose the Keep option. Do not choose the Delete option (of course, unless you want to delete). The Keep option will save the data on your iPhone.
  7. Wait for the process to complete. It may take up to a minute.
  8. Now, toggle on the switch again. Since we selected the Keep option, you will be asked what you want to do with the saved iCloud data. A popup saying “Existing Local Notes” will ask if you want to Merge. Choose Merge to avoid losing Notes.
  9. Now close Settings, open Notes, and check if it’s working properly.

6. Reset All Settings On Your iPhone

If Notes app is still not working on your iPhone, reset all your phone settings. Reset All Settings restores your iPhone’s settings to factory defaults, but it doesn’t delete any of your apps or personal information. your iPhone Doing so should hopefully fix the Notes app problem on your iPhone.

To reset all settings on your iPhone, go to Settings > General > Transfer Or Reset iPhone > Reset > Reset All Settings, enter your passcode, and tap Reset All Settings.

Notes app widget not working After iOS 18 Update?

Is the Notes app widget on the iPhone Home Screen or Lock Screen not displaying the notes and instead shows Folder No Longer Available or some similar error? It’s pretty easy to fix this problem, just touch and hold the Notes widget, tap Remove Widget and then tap Remove again to confirm.

Now add the Notes Widget again. Once you do that, the Notes app widget should start working again.

Fixed Notes app Not Working After iOS 18 Update!

You’ve fixed the problem with the Notes app on your iPhone and you can now capture a quick thought, create checklists, sketch ideas, and more. Make sure to share this article on social media to teach your friends and family what to do when Notes is not working on their iPhones after iOS 18 update. Leave a comment down below if you have any other questions about your iPhone or Notes app.

Tag: Notes

Do you need a more powerful PDF editor than your Mac’s Preview app or other free alternatives? UPDF for Mac is one such tool that offers more power and convenience in a premium package.

What is UPDF? Why should you download it?

UPDF is a PDF editor, markup tool, organizer, and reader with a clean UI that emphasizes content. Though many of us can get away with free PDF apps like Preview, some require more powerful tools for annotation, sharing, editing, and signing PDFs. That’s where premium apps like UPDF kicks in.

Editing PDFs on Mac is Never So Easy

UPDF for Mac is a fast, full-featured PDF editing tool that’s particularly easy to use because it’s designed with a simple and clear user interface that won’t confuse anybody.

Drag. Drop. Edit. That’s it!

Edit PDF

UPDF for Mac offers comprehensive PDF editing tools that give you the power to do just about anything to your PDF files. It’s as easy as drag and drop.

  • Edit Text: UPDF for Mac provides a range of text editing tools, including font styles, sizes, and formatting options.
  • Edit Image: UPDF can edit the images in your PDF. You can rotate, crop, or replace the images in your PDF. The app can resize, shrink, and stretch your images.
  • Edit Links: The software allows users to edit links within PDFs, making it easy to update URLs or add new links.
  • Edit Headers & Footers: Users can customize headers and footers across PDFs, including adding text, images, or logos.
  • Edit Watermarks & Backgrounds: UPDF for Mac offers advanced watermark and background editing tools, enabling users to add custom designs or remove existing ones.
  • Organize Pages: The software provides tools to organize PDF pages, including rearranging, deleting, or merging pages.

Explore the Power of Generative AI Right Inside UPDF on Mac

UPDF AI

UPDF for Mac integrates AI technology to enhance productivity and creativity. Users can leverage AI-powered features such as:

  • Translate PDF: Translate any language to what you need with UPDF Mac PDF editor.
  • Summarize PDF: Summarize long PDFs or simplify complex data charts in seconds.
  • Ask PDF: Chat and ask any questions on PDF content. Get explanations for selected text.
  • Chat: The UPDF AI chat function extends beyond topics found in the document. It’s an AI chatbot that interacts with PDF documents, answers questions, and provides insights in a conversational manner for improved productivity. Ask about any topic and the AI can answer.

Your Go-to for PDF Reading and Annotating

UPDF makes it very easy to read PDF files on Mac. Alongside reading your PDF files, you can also write PDF on Mac using a variety of tools.

  • Cloud Storage: 10 GB of cloud storage. This makes it incredibly easy to securely store and sync your PDF files and make them available across all the platforms.
  • Markup Tools: 14 markup tools to review PDFs. You can underline, strikethrough, and add text boxes, stamps, shapes, stickers, and more.
  • Page Display Modes: 5 page display modes to view PDFs flexibly.
  • Light / Dark Read Modes: Options for light and dark read modes.

Simplify Your Workflow on Mac with Smart PDF Tools

UPDF for Mac provides tools to streamline your workflow, including:

  • Create fillable PDFs: Create fillable forms with text fields, checkboxes, radio buttons, lists, drop-down lists and buttons.

  • Fill Forms: When the PDF document is sent, the recipient can easily fill out the pre-defined text fields and mark the appropriate entries in forms.

  • Sign PDFs: Add your signature with a keyboard, mouse, or a trackpad. Furthermore, you can customize the signature to your liking by adjusting its stroke and color.

  • Protect PDFs: Protect PDFs with passwords, permissions, or encryption so only the intended recipient can access your sensitive information.

  • Redact: Redact sensitive information from PDFs.

  • Bates Numbering: Add Bates numbering to PDFs for easy referencing.

Convert PDF with OCR Effortlessly

OCR PDF reader

If you want to do OCR PDF on Mac, UPDF has you covered. The software has OCR technology for converting scanned documents to editable PDFs. The software supports:

  • 14 formats: Convert PDFs to or from 14 popular formats including Word, Excel, and PowerPoint.
  • 38 languages: Recognize and extract text from images or scanned PDFs in 38 languages.

Should I Buy UPDF?

Free apps typically don’t cover all the bases, and premium apps often cost too much. That’s what makes UPDF so great. It’s in the sweet spot of doing a lot and costing a little.

When you chose UPDF Editor, you get a full-featured PDF editor with OCR and AI tools you won’t find in other PDF editors. Despite having more features and a universal license, UPDF is intuitive, user-friendly, and it’s available at a much lower price.

When a PDF editor is an all-in-one app that can accomplish all of your tasks, it simplifies the workflow. It could become your go-to PDF editing solution.

If you need to find an AI PDF tool that is lightweight and easy to use, then UPDF is a very good choice. If you have any other questions about this software, leave a comment down below.

Tag: PDF
  • To fix the "iPhone Unavailable" with no timer issue, you need to erase your device and restore it from your most recent backup.
  • To avoid triggering the "iPhone Unavailable" screen in the future, be careful when entering your passcode and ensure Face ID or Touch ID is working properly. Regularly backup your iPhone using iCloud or macOS/iTunes for Windows.

You’ve reached out for your iPhone to make a call only to be greeted with an error that says "iPhone unavailable" with no timer. As frustrating as it can be to have the “iPhone Unavailable” without a timer, rest assured that there are several tips and tricks that can help you fix this issue.

Why Does iPhone Say iPhone Unavailable with no time limit?

The iPhone Unavailable with no time limit appears when the iPhone passcode has been entered incorrectly ten times in a row. This is a great safety tool to keep your device away from prying eyes and to ensure someone doesn’t randomly guess your password through multiple sign in attempts.

In most cases, you will see a timer beneath the message informing you of how long you need to wait before your iPhone becomes available again. After five incorrect attempts, the timer is set to a minute, with the delay increasing to five, 15, and 60 minutes with each subsequent attempt.

After 10 incorrect passcode attempts your iPhone will be permanently locked, with no timer displayed.

If you don’t see a timer and instead your iPhone simply displays an "iPhone Unavailable" message then this means that no amount of waiting will fix the issue. Your iPhone is permanently locked and will need to be erased and restored from scratch again.

How to Fix iPhone Unavailable with no timer

iPhone Unavailable without a timer issue may seem scary at first, however, there are quick ways to fix the problem and get back to scrolling through Twitter or Reddit without much downtime. Here’s how:

Method 1: Fix iPhone Unavailable No Timer Using the Erase Option

Any time you encounter this problem, you can use your Apple ID and password to erase and reset your phone. This is the best method to fix iPhone Unavailable with no timer issue. It’s also the best method to fix iPhone Unavailable without computer.

Before you begin, you’ll need to ensure your iPhone is running iOS 15.2 or later and is connected to a cellular or Wi-Fi network. You’ll also need the Apple ID and password you used to set up your iPhone.

Step 1: From the "iPhone Unavailable" screen, tap on the Erase iPhone option (iOS 15/16) or Forgot Passcode? (iOS 17 or newer).

Step 2: On the Security Lockout screen, tap on Erase iPhone or Forgot Passcode? again to confirm.

Step 3: Enter your Apple ID password to sign out of your Apple ID on your iPhone.

Step 4: Tap on Erase iPhone to confirm.

Your device will erase itself, removing everything including the iPhone Unavailable message. When your iPhone restart, follow the onscreen instructions to set up your device again, restore your data and setting from a backup, and set a new passcode.

If you can’t follow these steps, or if you can’t see the Erase iPhone option, use a computer to get rid of iPhone Unavailable message.

Method 2: Fix iPhone Unavailable No Timer With iTunes or Finder

Another way to get rid of iPhone Unavailable screen when there’s no timer is to restore your phone using in recovery mode. Recovery mode allows you to erase the iPhone, giving you access to set it up again.

After you erase your iPhone, you can restore your data and settings from a backup. If you didn’t back up your iPhone, you can set it up as a new device and then download any data that you have in iCloud.

On PC and Mac that runs macOS Mojave and earlier, use iTunes to fix the iPhone Unavailable screen. While on Mac running macOS Catalina and later, use Finder instead.

Step 1: Open iTunes (Mac/PC) or open the Finder (Mac), but don’t connect your device just yet.

Step 2: Turn off your iPhone

Depending on your iPhone model, follow the steps below:

  • iPhone 8, iPhone 8 Plus, iPhone X and later, including iPhone SE (2nd and 3rd generation): Press and hold both the side button and the Volume down button until you see the power off slider. Drag the slider from left to right to turn off your iPhone.

  • iPhone 7, iPhone 7 Plus, iPhone 6s, and iPhone 6: Press and hold the side button until you see the power off slider. Drag the slider from left to right to turn off your iPhone.

  • iPhone SE (1st generation), iPhone 5s, and earlier: Press and hold the top button until you see the power off slider. Drag the slider from left to right to turn off your iPhone.

Step 3: Put your iPhone in recovery mode

  • For the iPhone 8, iPhone 8 Plus, iPhone X and later, including iPhone SE (2nd and 3rd generation,) press the side button while immediately connecting your iPhone to a computer.

  • For the iPhone 7 and iPhone 7 Plus, press the Volume down button while immediately connecting your iPhone to a computer.

  • For the iPhone SE (1st generation), and iPhone 6s and earlier, press the Home button while immediately connecting your iPhone to a computer.

Continue to hold the appropriate button while the Apple logo appears, and don’t release the button until the image of a computer and cable appears.

If you see the passcode screen, you need to turn off your iPhone and start again.

Step 4: Restore your iPhone with your Mac or PC

Locate your iPhone in the Finder, or in iTunes or the Apple Devices app if you connect to a PC.

When the option to Restore or Update appears, choose Restore. Your computer will download software for your iPhone and begin the restore process. If the download takes more than 15 minutes and your device exits the recovery mode screen, let the download finish, then turn off your iPhone and start again.

To restore and update your iPhone with your computer, you must tap Restore and Update to confirm.

Wait for the process to finish. When the process finishes, your device will restart and show a setup screen.
At this point, the iPhone Unavailable message is gone. Simply disconnect your iPhone from the computer, then set up and use your iPhone.

Method 3: Fix iPhone Unavailable No Timer Via iCloud

As long as you’ve enabled Find My iPhone, which should be on by default, you can get rid of iPhone Unavailable message by erasing your device from the iCloud web page. Here’s how:

Step 1: Go to iCloud.com on another device and sign in with your Apple ID and password.

Step 2: Select Find My, and sign in if you’re prompted.

Step 3: When you see a map and list of your devices, choose the iPhone you need to unlock and select Erase This Device.

Once your iPhone has been fully erased, it will restart in an out-of-the-box configuration and you’ll have to go through the setup process again. Once you’ve done that, you can complete the setup process and choose to restore a backup from iCloud or your computer or set your iPhone up as brand new if you prefer to do that instead.

Method 4: Fix iPhone Unavailable No Timer With Find My app

Whenever your iPhone says “iPhone Unavailable" with no timer, you can fix it with the Find My app. Much like the other methods on this list, this will erase your iPhone’s data. Here’s how:

Step 1: Open the Find My app on another iPhone or iPad.

Step 2: Tap Devices at the bottom of the screen, then select your iPhone.

Step 3: Tap Erase This Device, then tap Continue.

Step 4: Tap Erase.

Step 5: Enter your Apple ID password, then tap Erase again.

After your iPhone is erased, the iPhone Unavailable error will be removed, and you can follow the directions to restore the iPhone with a recent backup.

How to Fix iPhone Unavailable Without Losing Data

If your iphone says iPhone Unavailable and there’s no timer, the only way to fix the problem is to erase everything on your iPhone and return it to factory settings. The good news is that if you have a recent backup — either in iCloud or on your Mac or PC — you can be up and running again in a couple of hours. While your device backup contains all of your important data, it doesn’t include your device passcode, so you can set a new one after restoring it.

Avoiding a iPhone Unavailable message

The best way to get rid of iPhone Unavailable error message is to avoid getting one in the first place. There are a number of strategies you can use to prevent accidental lockouts.

Tip #1: Set a numeric passcode that is easy to remember and that no one else knows or is likely to guess. No mistakes mean no error messages.

Tip #2: Use Touch ID (for iPhones with home buttons, from 5S through iPhone SE 2022) or Face ID (for iPhone X and later and iPad Pro models).

Even with these unlock options, your device still has a passcode — you just don’t need to worry about entering it as often. Instead, just look at your phone screen or tap and hold your finger and your device unlocks.

Keep in mind that biometric security options are about convenience, not security. Anybody can still unlock your iPhone with a standard passcode, and your iPhone will prompt you to enter your passcode once in a while for extra security and to ensure that you don’t forget it. However, since you won’t need to enter it nearly as often, you can choose a more complex passcode or even an alphanumeric password — just be sure it’s something you remember, as you’ll still need to enter it sometimes, and your Face ID and Touch ID won’t help if you’ve forgotten it.

Tip #3: While it’s pretty uncommon for other things touching your screen to result in lockouts, you can avoid this entirely by disabling the "Tap to Wake" and "Raise to Wake" settings that automatically turn on your screen. Here’s how to find these settings:

  • Go to Settings > Accessibility > Touch and switch off Tap or Swipe to wake.
  • Go to Settings > Display & brightness and switch off Raise to wake.

Easily Fixed iPhone Unavailable No Timer Issue

Figuring out how to fix iPhone unavailable without a timer issue can be a challenge. Thankfully, Apple enables you to achieve this goal, making it incredibly easy to get your iPhone out of unavailable mode and regain access to your device.

If you can’t complete any of these steps or if you need any other assistance, contact Apple Support.

  • If your iPhone says iPhone Unavailable and don’t have a computer nearby, you can still unlock it.
  • If your iPhone displays an "iPhone Unavailable" error with a timer, wait for the timer to expire and enter your passcode correctly.
  • You can also use iCloud or Find My app to erase data to remove the iPhone Unavailable message.

You’ve pulled your iPhone out of your pocket only to be greeted with an error that says "iPhone unavailable" with seemingly no solution. As frustrating as it can be to have the “iPhone Unavailable” error, rest assured that there are several tips and tricks that can help you fix this issue.

While you most likely triggered the iPhone Unavailable screen through your own actions, it’s possible someone else did it without your knowledge. Whatever the reason, we’ll show you how to fix the iPhone Unavailable error without a computer, either for yourself or someone else—and possibly even save a life.

What Does “iPhone Unavailable” Mean?

The “iPhone Unavailable” screen pops up when there have been several unsuccessful password attempts. This is Apple’s way of guarding against brute force attacks, where someone tries multiple passcodes to break into your phone.

In most cases, you will see a timer beneath the message informing you of how long you need to wait before your iPhone becomes available again. After five incorrect attempts, the timer is set to a minute, with the delay increasing to five, 15, and 60 minutes with each subsequent attempt.

After 10 incorrect passcode attempts your iPhone will be permanently locked, with no timer displayed. Below, we’ll show you how to fix iPhone Unavailable without computer, including using the Erase iPhone option, iCloud, and the Find My app. Let’s jump into details.

How to fix “iPhone Unavailable” without computer

Fix “iPhone Unavailable” by Waiting It Out

If your iPhone is flashing an “iPhone Unavailable” screen with a countdown, don’t fret – just hang in there. Once the timer runs down, you can get back to your phone using the right passcode. Be very careful when doing this, since entering the wrong passcode will increase the timer again (for example, from one minute to five on the second attempt).

Fix “iPhone Unavailable” by Restoring Your iPhone

If your iPhone says “iPhone Unavailable” and there’s no timer, it means the waiting game won’t do the trick. Sadly, your iPhone is locked for good and you’ll need to erase and restore it from scratch. After entering the wrong passcode a few times, you’ll get an "Erase iPhone" option in the bottom corner of the lock screen. This lets you reset it right from there, no computer needed.

To erase your iPhone and remove the iPhone Unavailable message without using a computer, follow these steps:

  1. On the iPhone Unavailable screen, select Erase iPhone.
  2. Enter your Apple ID password to log out of your Apple account.
  3. Press Erase iPhone again, and your iPhone will reset.

Get rid of iPhone Unavailable With iCloud

As long as you’ve enabled Find My iPhone, which should be on by default, you can use iCloud to remotely erase your device and remove the iPhone Unavailable message. Here’s how to do it:

  1. Using any web browser, visit iCloud.com and log in with your Apple ID and password.
  2. Select the Find My option.
  3. Choose your phone from the list and select Erase This iPhone.

Your device will erase itself remotely, removing everything including the iPhone Unavailable message. Note that this doesn’t disable the Activation Lock feature, so you will need to enter your Apple ID and passcode before setting up your iPhone to confirm that you’re the actual owner. Once you’ve done that, you can complete the setup process and choose to restore a backup from iCloud or set your iPhone up as brand new if you prefer to do that instead.

Use Find My app

If you have another iPhone or iPad, you can use the Find My app to wipe your iPhone and start over fresh at any point after the "iPhone Unavailable" screen first appears and bypass the requirement for any other tools like a computer or web browser.

  1. Open the Find My app.
  2. Tap Devices” tap.
  3. Select the phone that says “iPhone Unavailable.”
  4. Press “Erase This Device.”
  5. Tap “Continue.”
  6. Tap “Erase.”
  7. Enter your Apple ID Password.
  8. Tap “Erase” to confirm.

Remember to Always Back Up Your Devices

Now that you’ve successfully fixed iPhone Unavailable problem without a computer, you’re back into your iPhone. To avoid this happening again, it might be a good idea to make a note of your iPhone’s passcode somewhere.

And, as an extra safety precaution, make sure to regularly back up your iPhone in case you ever experience the iPhone Unavailable notification again. But don’t just back up your iPhone to your computer, store it on an external device for added security.

This article explains how you can fix macOS Sequoia beta update problem. More specifically, the focus of this article is on what you can do to fix the problem when you can’t install macOS Sequoia beta on your Mac.

Apple at WWDC 2024 announced macOS 15 Sequoia, the next version of its Mac operating system featuring several new AI capabilities, in addition to a new Password app, a major Safari update, and a new Continuity feature called ‌iPhone‌ Mirroring. A number of Mac owners have rushed to get the macOS 15 beta for testing. Unfortunately, the software update has either failed or got stuck for many. If you have also run into the same probate and are unable to download and install macOS 15 Sequoia beta, this guide is for you.

How to install the developer beta of macOS Sequoia

First, let’s go through the steps to download and install macOS Sequoia beta on Mac.

It is important that you back up your Mac before you do anything.

After backing up your Mac, here’s how you can install the beta:

  1. Open the System Settings
  2. Go to General ⇾ Software Update
  3. Click the ‘i’ icon next to Beta Updates
  4. From the dropdown menu in the top-right, select the macOS Developer Beta
  5. Hit ‘Done’
  6. The update will then prompt you to install it.

How to Fix macOS 15 Sequoia Beta Stuck on Downloading Issue

Please try the tips below if you are unable to install macOS Sequoia beta on your Mac:

  • Installing macOS Sequoia beta may take many hours. Just waiting may fix your problem. Do not put your Mac to sleep or closing its lid. Also ensure than your Macbook, if it is a Macbook, it is plugged it into AC power.
  • Not all models can support macOS Sequoia. Is your Mac compatible? You can install macOS Sequoia on the following Mac models:
    • iMac 2019 and later
    • iMac Pro 2017 and later
    • Mac Studio 2022
    • MacBook Air 2020 and later
    • Mac mini 2018 and later
    • MacBook Pro 2018 and later
    • Mac Pro 2019 and later
  • Make sure there is enough space to download and install macOS Sequoia beta update. If not, you may see error messages. To see if your computer has enough room to store the update, choose Apple menu  > System Settings, click General in the sidebar, then click Storage on the right. If you need more space, you may want to delete old and unused apps, empty Trash, compress large files, etc. This will also speed up your Mac.
  • Make sure that your Mac has a working and stable internet connection to install macOS Sequoia beta.
  • Restart your Mac (Apple  menu > Shut Down) and then press the Power button to turn it back on. After restarting, check if you can download macOS Sequoia beta now. If not, go to the next step.
  • If the update does not complete, your computer may seem stuck or frozen, for an extended time, try to restart your computer by pressing and holding the power button on your Mac for up to 10 seconds.
  • If you have any external hard drives or peripherals connected to your Mac, try removing them. And try to update now.
  • It is possible that your Mac may unable to reach the update server. There could be two reasons for this:
    • You may have a slow internet connection. You may want to restart your router and modem to fix this problem. If you are using a Wi-Fi connection, try a wired connection, if possible.
    • Or there could be issues with Apple servers. It is possible that Apple servers are overloaded as a lot of people may be trying to update. You can check if Apple servers are experiencing issues.

If you are still having issues downloading macOS Sequoia beta, then you may try the following:

Install in safe mode

Install macOS Sequoia beta while your Mac is started up in safe mode. Here’s how:

  1. Shut down your Mac.
  2. Turn on your Mac and continue to press and hold the power button until you see the startup options window.
  3. Select your startup disk, then press and hold the Shift key while clicking “Continue in Safe Mode.”
  4. Log in to your Mac. You might be asked to log in again.
  5. Now your computer is in safe mode. Try to update now.
  6. Then exit safe mode when you are done (in either case). To exit safe mode, restart your Mac normally, without pressing the Shift key.

Delete macOS 15 Beta and Start Afresh

Many a time you can resolve the macOS software update stuck downloading problem by deleting the software update and starting afresh.

On your Mac, dive into the System Settings app -> General -> Storage -> Find the macOS beta and delete it.
After that, restart your Mac and try downloading the software from scratch.

watchOS 11 was announced at WWDC 2024. While the latest software won’t launch officially until later this year, you can get your hands on the beta now — although we don’t recommend it for everyone.

watchOS 11 compatible Apple Watch models

To install the watchOS 11 developer beta on your Apple Watch, you must have one of the following Apple Watch models:

  • Apple Watch Series 5
  • Apple Watch Series 6
  • Apple Watch Series 7
  • Apple Watch Series 8
  • Apple Watch Series 9
  • Apple Watch Ultra
  • Apple Watch Ultra 2

HOW TO DOWNLOAD THE WATCHOS 11 BETA

To install watchOS 11 developer beta on Apple Watch, you’ll need to:

  • Ensure your Apple Watch has at least a 50 percent of battery power.
  • Ensure your iPhone is connected to Wi-Fi.
  • Keep your iPhone next to your Apple Watch to make sure they’re in range.
  • Make sure your iPhone is running the latest iOS 18 beta.

Here’s how to install watchOS 11 beta on your Apple Watch:

  1. Open the Apple Watch app on your iPhone.
  2. Tap My Watch.
  3. Tap General.
  4. Tap Software Update.
  5. Tap Beta updates.
  6. Choose watchOS 11 Developer Beta.
  7. If prompted for your iPhone passcode or Apple Watch passcode, enter the passcode.
  8. Wait for the Apple logo and progress bar to appear. When the update is done, your Apple Watch will restart.

Final Thoughts

Whether we’re talking about phone or watches, beta updates can be full of bugs in unlikely places. They’re primarily for developers and early adopters, and there are processes in place for reporting bugs and improve your iOS and watchOS experiences. See Apple’s Beta Software Program site for more details.

watchOS 11 is going to be a significant update, so if it does take a long time to install, don’t worry, this is normal. Likewise with the iOS 18 beta software. However, after this lengthy process is complete, you’ll gain access to all of the new features on watchOS 11 and iOS 18 earlier than anyone else.

As the official launch in September draws nearer, you can expect to see fewer bugs as things get ironed out. We have no idea exactly what sort of bugs you can expect to see – but that’s part of the ‘fun’ of beta testing.

If you are set on downloading Apple’s beta software across all platforms, then you might also be interested in how to download the macOS Sequoia beta on your Mac.