While Apple has added dozens of unique capabilities to Siri during the past few years, many are hidden under the surface, or just not very well known.
To that end, here are ten Siri tips and tricks that will help you get the most out of Apple’s digital Assistant.
Best Siri tips and tricks
1. Restart your iPhone using Siri
Thanks to iOS 16, you can now tell Siri to restart the iPhone, a feature that previously required holding a combination of buttons, or digging into the phone’s Settings. Those still work, but we often go for the easier route to get things done.
Simply tell Siri to “restart iPhone,” and the digital assistant will get the job done as long as your phone is unlocked.
2. Use Siri to hang up calls on iPhone
Another cool Siri trick to remember while you’re using your iPhone is the command to hang up a call. It might not sound like a big deal, and your friends and family at the end of the line will hear you tell Siri to hang up. They also might make fun of you for some time to come.
This Siri trick can come in handy when you’re driving and the phone is on speaker. Or anytime the phone is on speaker or you’re using Bluetooth earbuds and you’re not close to the device.
3. Hidden Siri trick: Convert text to emoji
Another hidden Siri trick that can prove useful while driving is using the iPhone assistant to turn text into emojis. All you have to do is dictate your text as you’d typically do with Siri. When you need to add an emoji, just say the emoji name followed by the word “emoji.” That should be enough for Siri to turn the text into emoji.
You need an iPhone XS or newer running iOS 16 or later to take advantage of this Siri trick.
4. Enable automatic message sending for Siri
Another hidden Siri trick lets you send a message automatically, which means you won’t have to manually confirm that you want the message to go through. To enable this setting, follow the steps below:
Head to Settings.
Select Siri & Search.
Tap Automatically Send Messages
Enable Automatically Send Messages toggle.
From there, you can choose where to have messages sent with Siri automatically. You can mix and match three options: CarPlay, headphones, and hearing devices.
5. Use Siri even when iPhone is face down or covered
iPhones have a feature called Facedown Detection, which prevents Siri from listening to the “Hey Siri” hot phrase when the phone is facedown on a table or its front is covered with cushions or a flip cover (unless connected to power). This trick makes it possible to temporarily prevent Siri from responding to the hot phrase without changing any settings or turning Siri off completely.
Open the Settings app on your iPhone.
Go to Accessibility.
Select Siri.
Slide the switch for ‘Always Listen for Hey Siri‘ to the ON position.
Now, iOS will always listen for the “Hey Siri” wake-up phrase, even when your iPhone is facing down, or its front has been covered with something.
6. Announce notifications on hearing devices
Another cool Siri trick makes it possible for you Announce Notifications on Speaker. You can activate the feature by following the steps below:
Go to Settings.
Tap Accessibility.
Select Siri.
But the feature has an even better accessibility tool for people who are hearing impaired. You can have Siri announce notifications on Made for iPhone hearing devices. Just follow the steps below to enable this setting:
Go to Settings.
Tap Siri & Search.
Select Announce Notifications.
Please note, this setting will only show up if you have hearing aids connected to your iPhone.
As you can see above, the Siri Accessibility menu is another place where you can customize some of the Siri skills in this post.
7. Run iPhone Shortcuts with your voice
Another neat Siri trick available to iPhone and iPad users who are running iOS 16 and iPadOS 16 is the ability to run premade shortcuts from your apps. If developers preload apps with shortcuts you can use them right after installing the apps. Just tell Siri to run them.
All you need to do is invoke Siri by voice or via the iPhone’s side button. Then ask the digital assistant to run whichever shortcut you want.
8. Silence Siri on your iPhone
If you can’t always receive spoken responses from Siri or don’t like the experience, you can switch things up in iOS 16. Follow the steps below:
Go to Settings.
Tap Siri & Search.
Tap Siri Responses.
Choose Prefer Silent Responses.
9. Take a screenshot on your iPhone using Siri
One of cooler Siri trick is its ability to to take a screenshot on iPhone. If you ever come across something that you need to capture as a screenshot, just bring up the Assistant and say “take a screenshot.”
10. share items using Siri
The iPhone offers many intuitive ways to share everything from photos to web links, and even if that doesn’t work for the app you’re using, you can still take a screenshot and share your content that way.
This still involves multiple steps, however, but the good news is you can make the whole process a lot smoother just by asking Siri to help you out.
If you’re using an app that supports direct sharing, such as Safari, Apple News, Music, or Photos, you can instead have Siri share a link to the actual web page or article that you’re reading, or the photo that you’re looking at.
On your iPhone, open a webpage, news article, song, or photo that you want to share.
Hold down the Side Button to activate Siri, or say Hey Siri.
Say “Share this with,” and the name of the contact you’d like to share the current screen with. For example, “Share this with John”
A new Messages window will open with the shared item attached, addressed to your intended recipient.
Siri will ask if you’re ready to send it. Either say “Yes” or tap the Send button to send the screenshot without further comment.
Alternatively, you can tap in the Add Comment box if you would like to type a message to go along with the screenshot, and then tap Send when done to send it on its way.
Apps that support direct sharing include Safari, Music, Podcasts, Photos, TV, News, and Maps.
I have been using an iPhone for over 10 years now, and even though I am a massive fan of the device, I was a heavy Android user during my early years.
I was not a big fan of the iPhone or iOS back then and used to even strongly suggest my friends and family members choose Android over iOS.
There were a few reasons why I used to be an Android fanboy.
Back in the day, Android phones were much more affordable than iPhones and had more customization options and features.
But now, the price gap between Android and iOS flagships is pretty narrow, and most features you find on Android are also available on iPhones.
Besides, Apple has made many improvements to its software and hardware over the years and is now one of the best in the industry in terms of performance, battery life, software support, etc.
Despite a few reasons like the choice of devices, affordability, and fast charging, if you are in the market for a smartphone that’s easier to use, it makes much more sense to go with an iPhone than an Android phone.
In this post, I will explain why iPhone is user friendly than Android phone.
Why is the iPhone the easiest phone to use?
This is going to hurt a little, Android fanboys. One of iOS’ biggest selling points is just how intuitive it is. From kids all the way up to senior citizens, many people love iOS simply because it is pretty straightforward to use.
Despite all the promises by Android phone makers to streamline their skins, the iPhone remains the easiest phone to use by far. Some may lament the lack of change in the look and feel of iOS over the years, but I consider it a plus that it works pretty much the same as it did way back in 2007. Pick it up, turn it on, touch the app to open.
All the apps in iOS are displayed right on the home screen, so you’ve got quick access to everything on your phone without delving into hidden menus. And all of Apple’s standard apps, like Weather and Mail, are top-notch, and most people don’t feel the need to download other versions. You can’t say the same thing for Android, where phones from different manufacturers often ship with a completely different set of stock apps with varying degrees of quality.
Apple knows people love iOS because it’s simple, and there have been times when it has been criticized for not giving users enough options to personalize their experience. But even though some might say it’s too simplified, what iOS lacks in customization, it more than makes up for in usability.
Android features an open platform that accommodates full-on customization. You’ll have total control over your smartphone’s settings, and you can use the broad scope of apps on Google Play to execute them.
However, this level of customization also creates a steep learning curve. You’ll need some technical proficiency and customization experience to utilize Android’s platform, which not all smartphone users have.
On the contrary, iOS devices have a straightforward, user-friendly interface. They come with various pre-installed, out-of-the-box features, so you can start using them right from the get-go. You wouldn’t need much time to learn an iOS interface.
Conclusion
This one is definitely down to personal preference, but as someone who has jumped back and forth between iOS and Android, i can confidently say that iPhone is easier to use than Android.
Apple phones are known for their ease of use. Their usability comes from simple operating logic: all the apps are launched from the home screen. All the settings, for example, can be found under one menu. And even if you upgrade your iPhone to the newest model, the operating system still works the same way and taking it into use is easy.
An android phone can be modified and customised in various ways, but the basic features of its operating system are much more complicated and confusing than the iOS system. If you value an easy to use and good smartphone for basic use, an iPhone is the obvious choice.
Here are all the reasons we think an Apple iPad is better than a Samsung, Lenovo, Amazon, Microsoft, or any other tablet.
iPads have been around for a while now, and in that time they’ve cemented themselves as some of the most popular tablets on the market. They’re well-designed, easy to use, and come with some great features. But why are they so popular? And more importantly, why are they better than Android-based tablets?
In this article, we’ll explore ten reasons why we think Apple tablets are better than the competition, touching on everything from durability to ease of purchase, and more.
Top 10 Reasons Why iPads are Better than other tablets
1. The Immersive Experience
The first reason why iPads are better than the competition is their high-quality audio, video, and typing experiences, which makes them more immersive devices as a whole. Here’s what we mean:
The Retina Display has a higher pixel density than most Android tablet screen, which makes everything appear sharper. Only very high-end Android tablets come with the comparable display quality.
The Magic keyboard for iPad uses scissor-switch keys, so the key travel and spacing make it very comfortable to type on, not finicky like most Android keyboards.
iPad speakers are way ahead of the competition and sound far better than almost every non-Apple tablet.
The iPad offers various forms of input; touch, pencil, and mouse. As a result, you can use an iPad as a tablet, laptop, and notepad—all at the same time. You can use it just like a regular tablet, then use the Apple Pencil to write anything you wish. Foe example, you can use your iPad to take note during a meeting which is actually better for remembering them compared to typing them out.
But when you have to type up a long document, you can connect a physical keyboard to the iPad to make writing process more seamless. iPads have become versatile products, rather than just tablets. The iPad can adapt to your needs or any situation and be the device you need to get most of your work done.
2. Design and portability
Let’s face it: iPads are cool. They have a sleek design that other tablet brands try (and fail) to copy and Apple has spent years building its brand’s social status as premium and creative.
People see you with an iPad and are likely to think you’re creative, stylish, and probably successful. Of course, you can be all of those things with any type of tablet. But there’s no denying that iPads offer a certain social cachet that other tablets just don’t have.
One big advantages of iPads over other tablets is that iPads are incredibly thin and light. The refreshed design with minimal bezels makes them even more portable, allowing you to easily take one out during outdoor activities or put it in a backpack. Since iPads are very light, they won’t add much weight to your bag, which is excellent since you could be carrying other staff at the same time.
3. iPads works beautifully with Apple Pencil
The Apple Pencil is one of the best accessories of the iPad. The Apple Pencil provides a smooth, responsive writing experience that is unlike any other tablet on the market.
If you purchase an iPad Air, iPad Pro, or iPad Mini, you will have the option to buy the second-generation Apple Pencil. The second-generation Apple Pencil is arguably one of the best digital writing experiences on a tablet. If you you ever need to create graphics, the iPad and Apple Pencil will surely make your work easier. In addition to that, you can find several apps that are great for the Apple Pencil. Most tablets from other brands today don’t create Digital pencil, as their focus is on other utilities.
4. iPads support Cellular Connection
Another huge advantage of an iPad over other tablets is that you can use an iPad over cellular data. This lets you perform tasks that requires internet connection even when you don’t have wi-fi access. Apple laptops don’t have built-in cellular, and using a phone hotspot can be tedious and drain your phone’s battery quickly. However, you can buy the iPad Air, iPad Pro, and iPad mini with 5G cellular capabilities. Unlike other tablets, you don’t have to carry another device to connect an iPad to the internet if Wi-Fi is unavailable.
The major carriers in the US also offer plans for iPads. You can also purchase an iPad on an installment plan through carriers such as AT&T and Verizon if you prefer to pay for the device monthly.
5. iPadOS and Apps
Another big selling point for iPads is the operating system. Apple tablets come with iPadOS, Apple’s operating system, which is a highly stable and user-friendly platform, built especially for Apple’s tablets. Many people find it easier to use iPadOS compared to Android.
Moreover, it comes with a variety of built-in iPad applications that are designed to work well with, again, all your other Apple products. The App Store is also filled with more high-quality apps that are perfect for productivity, creativity, and entertainment.
6. iPads have High-Quality Cameras
Another advantage of iPads is that they feature exceptional cameras for all the things you may need them for. Your video calls will look crispy clear, unlike mediocre android tablet webcams, and you’ll be able to show people what you can see with the forward-facing camera. In addition, you can use the high-quality primary cameras on the iPad to scan documents onto your device effortlessly. This feature can be beneficial to your daily tasks.
7. Ease of Purchase
There are two reasons why iPads are easier to purchase.
Firstly, they only come in three kinds—iPad Air, iPad mini, and iPad Pro—each with different target markets. This shortened list of options makes choosing the best tablet for you easier. Compare this to other brands, like Samsung, who have tons of varieties of the same tablets, with undecipherable names.
Secondly, Apple’s online store is well-organized and easy to navigate, and the company’s retail locations are dotted all across the globe, packed with knowledgeable staff to help you make your purchase. In contrast, many other tablet manufacturers’ websites can be difficult to navigate, and their retail locations can be cluttered and overwhelming.
8. The Apple Ecosystem
The Apple ecosystem comprises of all the hardware and software that Apple designs and puts out. Almost all Apple devices, apps, and operating systems are a part of the ecosystem: iPhone, iPad, Apple TV, Apple Watch, Mac, iCloud, Apple Music, and so on.
So, when people talk about the Apple ecosystem, they’re actually referring to how well all these products work together. It’s the ecosystem that makes it possible for you to start a task (like creating a note on your iPad and then pick up right where you left off on your iPhone or Mac.
The ability to seamlessly move between Apple devices is one of the reasons why iPads are better than other tablets. Other tablet manufacturers have tried to create their own ecosystems, but none of them have been as successful as Apple. As a result, iPads tend to offer a more integrated and seamless experience than other tablets.
9. Quality and Durability
Not only are Apple tablets packed with industry-leading hardware, but they’re also high-quality and durable. With regular, moderate care, an iPad can easily last you five years or more. All you need to do is learn how to take care of your iPad properly.
Though many tablets compete strongly in this area, iPads take the lead. They have a strong aluminum and steel frame around their body, which makes them sturdy and significantly more resistant to wear and tear (unless you drop and dent them, of course). And even if anything does go wrong, Apple covers every product with a one-year warranty and it’s easy to book a repair at your nearest Apple Store.
10. Longevity and Resale Value
One of the greatest advantages of iPads over other tablets is their longevity and value-retention. While many tablets can last you several years (or more), iPads are the only tablet that will still look stylish after all that time and still fetch a good price on the second-hand market.
As time goes on, apps grow bigger and all tablets start slowing down. But Apple is one of the best companies around for continually supporting old devices with new software updates. Not only does this keep you secure against the latest online threats, but it means you can also keep getting new features on your iPad as it ages.
Perhaps this longevity is the reason why iPads retain their value so well. You can usually sell a three-year-old iPad for around 50% of its original price. But a three-year-old Android tablet? You’ll be lucky to get 25% of its original value.
Is It All Rainbows and Butterflies?
From their longevity and resale value to their design and portability, there are plenty of reasons to choose an iPad over another type of tablet, like Android devices. When you factor in ease of purchase and the a huge library of apps, it’s clear why iPads are industry-leading products.
But, iPad still have some drawbacks. Depending on what you want to use your tablet for, the iPad may just not suit you.
Here are all the advantages of Apple Music over Spotify in 2023.
When it comes to choosing a service, it’s a close race between Spotify Premium and Apple Music, but Apple Music has several benefits over Spotify premium. This is thanks to hi-res lossless and spatial audio albums, and the deep integration with Apple ecosystem. Let’s check all the advantages of Apple Music over Spotify in details.
Advantages of Apple Music Over Spotify
Here are 10 reasons why Apple’s audio service has a lot of big advantages over Spotify and other popular competitors:
1. Advantages of Apple Music over Spotify: Music library
One hundred million songs — it’s a number that will continue to grow and exponentially multiply. But it’s more than just a number, representing something much more significant — the tectonic shift in the business of music making and distribution over these past two decades.
2. Advantages of Apple Music over Spotify: Lossless Audio
One area where Apple Music has big advantage over Spotify is in sound quality. Apple Music offers Lossless Audio. Spotify doesn’t.
There’s a difference in terms of quality for listening to that music if you look at bitrates. Spotify’s apps offer an Ogg Vorbis stream quality equivalent to 160kbps for free users, while its premium service goes up to 320kbps.
Apple Music’s standard bitrate is lower at 256kbps for AAC streams, but it’s not the end of the story. There’s Lossless to take into account.
Apple launched Lossless as its high-definition audio option, which offers music at a higher fidelity than normal. This includes two quality levels: 24-bit/48kHz Lossless and 24-bit/192kHz Hi-Res Lossless.
To chuck around these higher quantities of bits means a higher amount of bandwidth is required. For Apple Music Lossless, that means a bitrate of up to 1,411kbps, much higher than usual.
The major caveat here is that you need the proper hardware to listen to Lossless audio. Lossless doesn’t work over Bluetooth, and even Apple admits that even its super-expensive AirPods Max headphones won’t support it, even when connected with a wire. That said, even when listening primarily on wireless earbuds while using an iPhone, I found that most songs sounded louder and brighter on Apple Music compared to Spotify.
Spotify did say it would introduce a similar high-fidelity service, named Spotify HiFi, but it failed to launch despite its promotion, and it was delayed indefinitely.
3. Advantages of Apple Music Over Spotify: Spatial Audio
Another advantage of Apple Music over Spotify is Spatial Audio. Apple Music offers Spatial Audio. Spotify doesn’t.
This works like a surround sound system in your earbuds, with the audio mapped out in the physical space around you. Apple is working with artists to specifically engineer their songs to take full advantage of the vast soundscape provided by the clever tech. Spatial Audio with Dolby Atmos is included at no extra cost and automatically kicks-in whenever you’re listening with a Spatial Audio-compatible device, including the new third-generation AirPods, AirPods Pro, AirPods Pro 2, and AirPods Max.
4. Advantages of Apple Music Over Spotify: Cloud locker
Apple Music’s biggest special feature is the iCloud Music Library, accessed through iTunes, which allows collectors to access their libraries of tracks in AAC 256kbps wherever they go when signed in with the same Apple ID. Apple Music has a key advantage over Spotify in that you can combine the songs you already own with the Apple Music streaming catalog.
If you turn on iCloud Music Library within Apple Music, you can access your personal library of tunes across all your devices (from the PC to the phone). This feature “matches” songs in your library with those in the iTunes catalog, or uploads them if the song isn’t available, so you can listen to your music wherever you’re signed in with your Apple ID. You can store up to 100,000 songs.
Note that iTunes Match is also available even without an Apple Music subscription for $25 a year.
Spotify also lets you play music from your device in the Spotify app, but it only works for local files so they aren’t stored in the cloud. So it’s a less elegant solution.
5. Advantages of Apple Music over Spotify: Cool ways to dive deep on an artist
While Spotify is pretty easier to navigate than Apple Music, the Apple Music app has few advantages that will make your inner music nerd happy. Certain album pages feature animated artwork, and some are even accompanied by a full article that provides a deeper dive on the music straight from the artist. When browsing an artist’s catalog, you’ll also see links to any Apple Music Radio shows they’ve been featured on.
Speaking of which, Apple Music Radio is one of the service’s best features. You’ll get live radio shows from top industry personalities like Zane Lowe and Ebro as well as no shortage of on-demand interviews to discover from artists big and small. Spotify offers auto-generated radio stations based on specific artists and genres as well as prerecorded podcasts with songs mixed in, but it doesn’t quite have the same type of live content — or the same big names.
6. Advantages of Apple Music Over Spotify: Apple Music is a good value
Apple Music starts at $9.99 per month, which is pretty standard for a music streaming service. But it’s an especially great value if you get an Apple One bundle, which gets you Apple Music, Apple TV , Apple Arcade and iCloud with 50GB of storage for $14.99. If you own an Apple device and plan on using the company’s various subscription services, it’s a no-brainer.
Apple Music and Spotify’s family plans are generally comparable, letting up to six users share an account for $15 to $16 per month. But if you want more than just music for your money, Apple’s got the best deal out right now.
7. Advantages of Apple Music Over Spotify: Videos
Apple does a lot more with video, offering music videos alongside tracks, documentaries, and other content. Spotify does provide limited video, such as video podcast playback and some exclusive content, but it’s certainly not as far along as Apple’s offering.
8. Advantages of Apple Music Over Spotify: Integration with Apple’s ecosystem
As you would expect, Siri works with Apple Music so you can ask her to play today’s hits and she will do just that. You can ask Siri to “play the top songs from 2021”, “play more songs like this”, “add the new Drake album to my library”, “play all songs by Drake” (to listen to all of Drake’s music, even if it’s not in your library), and “play my music by Drake” (to hear Drake’s songs that you have saved to your library). You can also ask Siri to shuffle the songs in an album or playlist. There are also a new range of playlists coming that can be controlled via Siri. For these, you could ask Siri to plan music for a dinner party, for example.
While Siri does work with Spotify, Siri is part of iOS, and can thus take advantage of iOS and all aspects of it.
Aside from the aforementioned Siri support, Apple Music provides a relatively large collection of features that could benefit users.
The deep integration with Apple’s ecosystem also helps the service a lot, such as enabling Siri queries to play back anything in the catalog. Accessing the music across all Apple devices, and to hand off between items, such as an iPhone to a HomePod mini, gives even more control over how a user listens to their music.
9. Advantages of Apple Music over Spotify: Social sharing
Both services let you follow your favorite artists to keep up to date with their posts and latest releases.
You can also follow friends. On Spotify, you can see what song your pals are listening to in real-time (if they choose to share this detail) on the desktop app.
Spotify Codes are a way to share tracks, albums and playlists among friends. It’s kind of like a custom QR code that you can scan with the camera in Spotify if you’re listening in the same location, or share through messages if you’re apart.
Many popular musicians seem to be more active in posting updates on Apple Music and it’s easier to find that content than it is on Spotify.
Naturally, you can also follow your friends and see what they’re up to across both platforms. While it’s much easier to find profiles on Apple Music than it is on Spotify, you do have to already have your friends in your contacts list (or on Facebook) to follow them.
10. Advantages of Apple Music Over Spotify: Music Discovery
Everyone has heard big things about Spotify’s algorithm that helps its users to discover new music. It’s been a huge hit amongst its users and results in new playlists every week that are tailor-made around the listening habits of a particular user.
However, Apple Music has another approach in which instead of using an algorithm to create playlists for you, it employs real people to do the hard work.
This may well appeal to those of us out there who prefer a human touch when it comes to having our music selected for us.
Apple Music is proud that the curated playlists that they provide have been designed by actual people instead of machine learning algorithms and it’s clear that many users prefer their method.
Conclusion
Apple Music has many advantages over Spotify. Apple has a huge music catalog and integrates seamlessly with other music libraries, has an enormous subscriber community, and delivers a great sound quality.
If you’re an Apple user with lots of music in your library, Apple Music offers a great experience and you’ll prefer the continuity in interface.
Today, freelance iOS developers are gaining a lot of attention. Many companies are looking for software engineers. The benefits of working as a freelance iOS developer make it a wise career choice.
You can set your hours and focus on your work as a software freelancer. It means you can have a work-life balance. Despite this, you still earn more than you would be working for someone else as a regular employee.
Getting clients is only one component of becoming a successful freelance developer. Another aspect that aids a freelancer’s growth is using SaaS development services. Software dev may provide SaaS apps to their clients. It contains Google Workspace, Dropbox, Salesforce, Cisco WebEx, Concur, and GoToMeeting.
Why Work as a freelance iOS developer?
Many people, especially the younger generation, find freelancing more beneficial. Even so, the difficulties faced by independent software developers are complex and overwhelming. Here are seven motivators for independent software developers.
1. If You Strive for Excellent Work
Excellence means you appreciate difficulties. It is true that waiting for your boss to assign you tasks while seated at your desk might be tedious. Become a freelance iOS developer if you like discoveries and challenges.
A software engineer must create future-proof solutions. Nothing beats the satisfaction of figuring out how to fix a long-standing problem. In your role as a software developer, you address consumers’ issues. It’s for you to resolve significant technical and strategic problems.
As a result, striving for excellence will increase your motivation. It will help you to develop enthusiasm to find a project. Furthermore, the software developer can provide remarkable results to current and prospective consumers.
2. If You Wish to Choose the Projects
As a freelance iOS developer, you can work with companies that share the same values as you. It is a great decision to select projects that will help you grow more knowledgeable and an expert. Remember, your project will determine your success and longevity in the industry.
To gain clients, you must take advantage of the ongoing advancement of technology. Even said, working alone allows you to choose whom you want to collaborate with and which tasks you want to do. Provide results that will entice every firm to become a long-term client. Work as a freelancer if you wish to expand your expertise through various activities.
3. If You Want Flexible Working Hours
The freedom to establish one’s schedule is a definite perk for some. It’s up to you if you choose to work on a Saturday instead of going out. When you work for yourself as a freelancer, you choose your schedule and work from wherever you like.
You can also opt to work in an office building or the comfort of your own home or studio. Working as a freelancer, the freedom to work when and where you want is possible. But ensure to meet all the project’s requirements before the due date.
4. If You Want to Improve Your Self-Management Skills
Every part of how you manage things and make other decisions as a freelancer is up to you. You should ensure that you please your clients. You may find that controlling things requires more effort than typical.
For those who work alone, self-management abilities are essential. Your scope includes activities such as managing, tracking, and scheduling. Being a freelance iOS developer will prove your management skills.
5. If You Want a High Possibility of Financial Success
Competitive pressures influence rates and the volume of work to some extent. But, through portfolios and a solid reputation, freelancers can raise their rates. freelance iOS developers have complete control over pricing and earning money.
Avoid losing potential clients because your prices are too high. Ensure your demands are reasonable. As a freelancer, you need to make a portfolio that clients will think is worth what you charge. You can achieve high financial success if you ensure your clients are happy.
6. If You Wish to Build Your Brand
Many developers want to have a stellar reputation in the technology industry. The good news is that freelancers have a lot of leeway in developing their brand presence. Many factors can contribute to achieving successful branding.
A freelancer has the potential to evolve into a full-fledged firm. It is because freelancers supply their services to a vast number of clients. Work exposure with exceptional branding can result in successful business marketing.
Besides, cutting-edge technologies offer some effective techniques. For example, some create books to showcase their skills. They also make extensive use of social media sites. Building their brand and visibility in public is vital. It has a significant impact on a freelance iOS developer’s successful brand.
7. If You Enjoy Working with Multiple Clients
Most programmers are working hard to improve their skills and expertise. Thus, freelance iOS developers appreciate working with multiple clients with different values. They find it more challenging and intriguing to interact with people from various business areas.
Freelancers can work for more clients and have more freedom each year. A wide range of experiences lets you learn about different business processes. Also, you can learn how to handle different kinds of projects. It can lead to a better idea of how the industry works.
Takeaway
It’s understandable why so many people choose to freelance, given its many benefits. Additionally, the tech industry is a vibrant and expanding one. It offers a wide range of opportunities for those seeking to shift careers.
Gaining more experience as a freelance iOS developer is crucial. It is because technology careers are fascinating and fulfilling. Freelancers will have many opportunities for advancement in the coming years. You can become a successful freelance iOS developer if you master the fundamentals.
In this article, you’ll be excited to learn that there are several new hidden features that could completely change how you use your iPhone.
Now running the 16th major release of iOS, the iPhone is packed with so many features that mastering them all is no less complicated than learning all the nuances in Windows or MacOS. If you want to get the most out of your iPhone and learn the best tips and tricks for using your phone, here are 14 of the best lesser-known features in Apple’s mobile pocket-sized computer.
If you want to take a closer look at some of the hidden iPhone features, like password-protected photo albums and easily accessible Wi-Fi passwords, here’s what you need to know.
1. Hide apps you don’t use without deleting them
It doesn’t take long to accumulate so many apps that they become hard to manage and organize. If you have apps you rarely use but don’t want to delete them entirely, you can hide them from the Home screen. They’ll still show up in Siri search and you can find them in the App Library (that last page on your iPhone when you keep swiping left). This also comes in handy for hiding built-in apps that Apple doesn’t let you delete.
Just tap and hold the app icon until the pop-up menu appears, then tap Remove App. Instead of tapping Delete App, tap Remove from Home Screen.
2. Automatically close old Safari tabs
If you’re like most people, you may have countless Safari tabs open. But it’s surprisingly easy to tame Safari using this hidden iPhone feature. Start the Settings app and then tap Safari. In the Tabs section, tap Close Tabs. Here you can specify when your iPhone should automatically clean house by closing old tabs — you can choose After One Day, After One Week, After One Month, or Manually, which leaves them open until you close them yourself.
3. Change the iPhone’s default browser
Not a fan of Safari? Perhaps you are a dedicated Chrome or Firefox fan on your desktop computer, and would rather use one of those browsers on your iPhone as well. With this iPhone hidden feature,changing your default browser is easily done. Start the Settings app and then tap Safari. Tap Default Browser App and choose whichever installed browser app you prefer.
4. Lock your camera’s focus and exposure
Digital SLR and mirrorless camera photographers know how easy it is to lock the focus and exposure settings — usually just by pressing a button near the shutter release — so they can reframe and recompose the photo. Thanks to this hidden iPhone feature, you can do the same thing on your phone. Start the Camera app and then tap and hold the screen where you want to lock the focus and exposure. After a moment, you’ll see the AE/AF Lock message at the top of the screen; as you recompose the shot, the focus point and exposure setting will stay fixed until you take the picture. You can drag your finger up or down to manually adjust the exposure. To cancel the lock, tap anywhere on the screen.
5. Set a sleep timer for any media
Want to play music or a show at bedtime so the phone shuts off after a set time? You can easily enable a sleep timer using this hidden iPhone feature. Start the Clock app and tap Timer at the bottom. Set the amount of time you want the music to play and then tap When Timer Ends. In the pop-up menu, choose Stop Playing, then Set. Now you can start your timer and the Music app will stop playing automatically.
6. Reply to a specific message in Messages
Did someone send you a long string of messages, and you want to respond to something from a particular message way up in the conversation? Simply use this hidden iPhone feature. In the Message app, tap and hold the message you want to respond to, then tap Reply. Now you can write a message and it’ll appear in the Message app attached to the original message so it’s clear what you are referring to.
7. Tag contacts in group messages
If you’ve been in a group chat you probably know that it’s sometimes hard to get a specific person’s attention, especially if not everyone is closely following the conversation. If you are group chatting in the Messages app, you can use this hidden iPhone feature to tag a specific contact so they get a notification when you send the message. In the Messages app, open a group message and type the @ symbol followed by someone in the chat’s name, like @dave. When you press Space or add punctuation, the @ symbol will disappear and you’ll see a subtle animation effect on the name. When you send the message, that person will get a notification.
8. View and share saved Wi-Fi passwords
In Settings, go to Wi-Fi and tap the tiny information icon to the right of the network you want the password for. To view the network password, tap the Password section and then use Face ID or enter your passcode to view it. You can then tap Copy to copy the password into your clipboard and share it.
9. Use the Space bar as a mouse
It can be infuriatingly difficult to position the cursor at a specific place on the screen when correcting a typo or moving the cursor somewhere else in a document. Thankfully, Apple has given you a sort-of-secret way to easily move the cursor as if your phone had a built-in mouse or touchpad. Simply tap and hold the keyboard’s Space bar. After a moment, the keyboard will turn blank. Now the entire keyboard area is a large touchpad — just move your finger around to reposition the cursor.
10. Compress the keyboard for one-handed typing
The iPhone keyboard has more secrets hiding in plain sight. If you frequently type one-handed, you can compress the keyboard and slide it to the left or right, depending upon which hand you prefer to type with. To do this, tap and hold the Globe or emoji icon at the bottom left until the pop-up menu appears. In the menu, tap the right- or left-justified keyboard icon. To cancel the compressed keyboard and go back to the ordinary one, tap the arrow to the left or right of the keyboard.
11. Find and remove duplicate photos and videos
Maybe you’ve saved the same photo multiple times or downloaded a video more than once, resulting in duplicates littering up your photo album. It may not be a problem if you’ve got storage to spare, but you’re running out of space, you can now remove every single duplicate easily with this hidden iPhone feature.
In Photos > Albums, you should see a new Duplicates album under Utilities. Apple scans through all of your photos and shows you any photo or video you’ve saved more than once in that album. From there, you can either delete any duplicates, or simply press Merge, which will keep the photo with the highest quality (and relevant data) and then move the others to the trash.
12. Bring haptic feedback to your keyboard
With this hidden iPhone feature, you can enable a slight vibration for every single key you type in. Go to Settings > Sounds & Haptics > Keyboard Feedback and toggle on Haptic. The sound option you see is the loud and annoying clacking sound you might hear when you type in something and your phone isn’t on silent mode, so you can keep that disabled.
13. Hidden and Recently Deleted albums are now password protected
Thanks to this hidden iPhone feature, you can now lock the Hidden album. You don’t actually need to do anything to toggle this feature on. If you want to check it out, launch the Photos app and go to the Albums tab at the bottom of the screen. If you scroll down, you’ll see a tiny lock next to the Hidden and Recently Deleted albums. To view the contents of those albums, you’ll need to use Face ID or your passcode.
14. Pin your favorite tabs in Safari
Safari caps your open tabs at 500, and if you’re nearing that limit, it might be pretty darn hard to find the exact tab you’re looking for. You could scroll endlessly, but with this hidden iPhone feature, you can easily find the exact tab you’re looking for.
In Safari, if you press down on an open tab, you will see an option to hit Pin Tab. This will move that tab to the top of Safari, where it will exist as a tiny tab preview, permanently pinned there, which you can then tap to view.
Why you should get dirty in Apple’s walled garden.
It wasn’t my plan to betray Google’s mobile platform for iOS. I’ve always enjoyed Android — it’s customizable and “open,” encouraging competition between handset makers and app developers that leads to better products for consumers. If you told me a year ago that I’d be writing a story about buying my first iPhone, I would have called you insane. After all, I’ve been on Team Samsung Galaxy for almost 10 years.
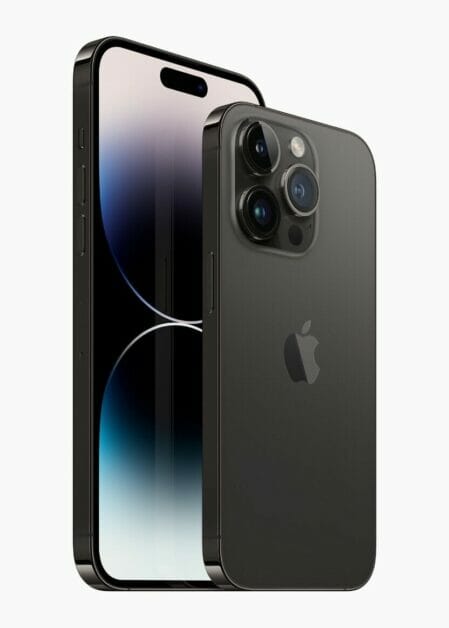
But here I am, the proud owner of a brand new iPhone 14 Pro Max. It’s a little hard to believe given my long relationship with Galaxy phones. But this is real, and let me tell you, I’m glad I made the switch.
But why did I ditch Android for Apple? I was all but ready to get the Samsung Galaxy S22 Ultra only a few short weeks ago. As I’ll detail below, though, the time was right for me to make the jump from Android to iPhone. And while I’m still getting acquainted with my new device, I already know it’s one of the best investments I’ve made. I may even be in love.
Apple does not approve this message
First things first: This assessment was not written using a review unit provided by Apple. I bought this iPhone 14 Pro Max using an upgrade available on my family’s Verizon account and I’ve been using it as my primary handset for about 14 days.
Please also note: this isn’t an iPhone vs Android opinion piece. I deal with enough console war nonsense on Twitter to jump into another Big Brand debate. The purpose of this op-ed is to share my story and to let Android users know what it’s like moving from that platform to Apple. It may be the best decision you could make — it has been for me.
Here’s why I switched from Android to iPhone and why I’m never going back.
iOS provides a smoother experience over Android
As a tech nerd, I’ve had the chance to review Android and Apple products such as the Samsung Galaxy Tab S8 Ultra and iPad Air 5, respectively. I’ve also used the MacBook Pro 14-inch at various times. The latter was my first real experience with macOS and it was somewhat of an eye-opening encounter.
Reviewing Android and Apple devices has revealed how clunky the Android interface actually is. I’ve heard this complaint many times in the past but, since I’ve mostly only used Android devices (Samsung’s phones and tablets), I didn’t see a problem with Android. Now I understand what people have been telling me all this time.
For example, my Android phone and tablets would occasionally lock up or randomly restart. Apps could also become unresponsive and sometimes require me to uninstall and reinstall them. I’m a Windows user and face these same issues on PC. Android’s hiccups seemed perfectly normal. Operating systems are naturally messy, no?
Maybe I was being willfully ignorant, but looking back, I haven’t faced these issues on Apple devices. While being a computing writer has let me become more familiar with Apple, I’m not completely unaware of the company’s devices. I used the first generation iPod touch for many years and also own the 7th Gen iPad released in 2019. Both provided smooth and seamless experiences.
These Apple products just worked, which is something I couldn’t always say about my Galaxy phones and tablets. In retrospect, I knew the iPad 7 was superior to the Galaxy Tab A. As an Android user, I just didn’t want to admit it.
The iPhone experience
Acclimating to iOS 16 wasn’t hard. In fact, it has been a natural transition since I’m already so familiar with the operating system’s basic functions. Aside from downloading and logging in to all the apps I had on my old Android phone, it didn’t take long for me to use the iPhone 14 Pro Max as if I’ve owned an Apple phone for years. Then there are the new (or new to me) features that have enhanced the iPhone experience.
FaceID is easily my favorite iPhone 14 Pro Max feature. Instead of manually entering a password to unlock my phone or to log in to apps, I can just look at my phone. I’m surprised how well this feature works. In fact, it’s kind of scary. FaceID has worked when I’m checking my phone at night with the lights off, while wearing a mask, and even when I’m glancing off to the side. The technology is borderline magic.
MagSafe is another “how the hell did I live my life without this?” feature. I bought Anker’s MagSafe charger and I love how it magnetically locks to the back of the iPhone 14 Pro Max. Best of all, I don’t have to remove my Spigen Tough Armor case for MagSafe to function. I’m glad this is a viable charging option because, for reasons unknown, iPhones still use Lighting cables… but I won’t rant about that here. I also like using the Spigen MagSafe wallet. While it only holds three cards, it’s a great accessory that spares me from having to carry both a wallet and a phone.
Presently, I only have two complaints with the iPhone. Apps aren’t listed alphabetically like they are on Android. Moving apps around on the phone screen is surprisingly cumbersome. Doing so feels like playing one of those sliding puzzle games from when you were a kid, only more annoying.
I also wish there was a blinking light that told me if I had notifications. But considering how I’m no longer distracted by a constant notification light, perhaps I shouldn’t complain.
Customization? I don’t need it
One of the main reasons people prefer Android over iPhone is customization. Where Apple keeps its ecosystem under a tight leash, Android allows for a deep level of customization. In all honestly, I’ve only ever used Android’s basic features. I have no inclination to manually install programs not found on the Google Play Store or to dive into the operating system and tweak things. Apple’s operating systems being restrictive isn’t an issue for me.
With that said, it’s not like I wasn’t able to tailor the iPhone experience to my liking. I use Google’s various platforms for work and my personal life. The first thing I did with my new phone was to install every Google app I needed, such as Google, Chrome, Drive, Maps, Photos and so on. I removed Safari, Apple News, and the built-in calendar from the home screen and replaced them with Google’s equivalents.
Goodbye, Android
I’ve owned an iPhone for just shy of two weeks but I can safely say I won’t be going back to Android phones any time soon. Though Android is a perfectly viable platform that continues to improve, it still isn’t up to par with Apple’s operating systems. And as I said, I don’t care about customization. I just want a device that works and doesn’t give me headaches.
Before I go, I want to apologize to all of the iPhone users I’ve texted over the years. I shouldn’t have subjected you to those garish-looking green text bubbles. Sorry for making you put up with that.
If you’ve just purchased a new iPhone 14 Pro or iPhone 14 Pro Max, you may be slightly overwhelmed or simply interested in what new tips and tricks you should try out. To try and help, we’ve outlined forty of the best iPhone 14 Pro and iPhone 14 Pro Max tips and tricks that will help you to get the most out of your new device.
If you haven’t heard yet, Dynamic Island and Always-On-Display are two of the big-ticket features on the iPhone 14 Pro and iPhone 14 Pro Max, but those items are just the beginning. You’ll be excited to learn that there are several new hidden iPhone 14 Pro and iPhone 14 Pro Max tips and tricks that could completely change how you use your phone.
If you want to take a closer look at some of the hidden iPhone 14 Pro and iPhone 14 Pro Max tips and tricks, like using Emergency SOS via satellite, here’s what you need to know.
Best iPhone 14 Pro and iPhone 14 Pro Max tips and tricks
Here is a list of the Best iPhone 14 Pro and iPhone 14 Pro Max Tips and Tricks you need to try first:
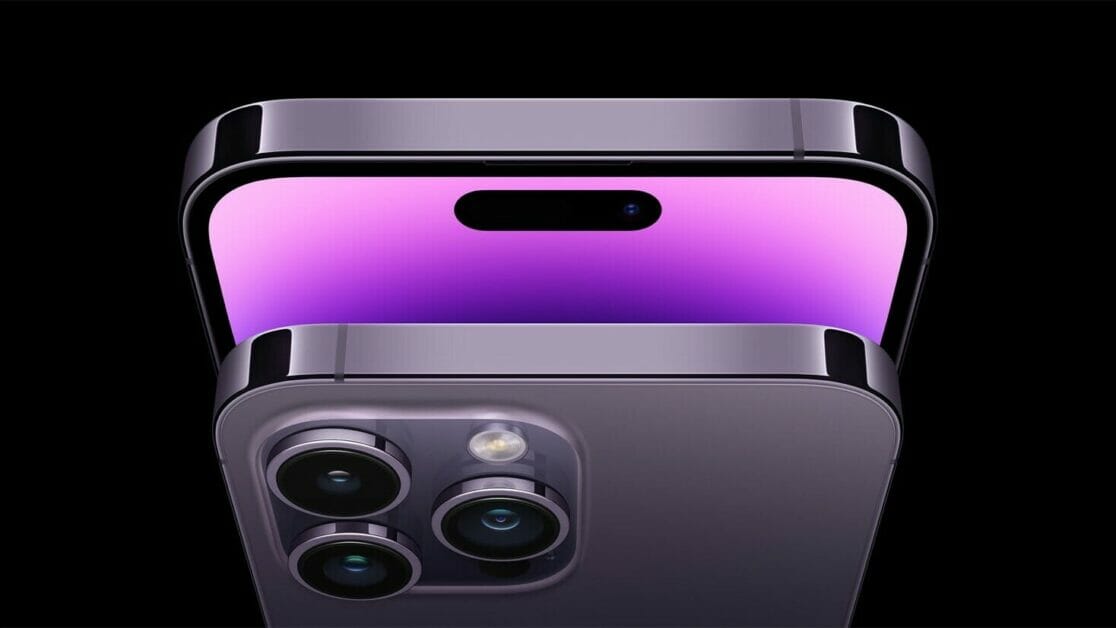
1. Use Apple’s Dynamic Island Feature
Dynamic Island is Apple’s new “notch” for the iPhone 14 Pro and iPhone 14 Pro Max. Instead of looking like a blacked-out dead space at the top of the screen, it can morph into different shapes and sizes. You can even interact with it. It can change to show you incoming calls, alerts, notifications, Face ID authentication, turn-by-turn navigation, music playing, and so on. You can tap or long press on the area to access different functions or launch apps. Think of it as a multi-tasking shortcut – one that still hides iPhone’s TrueDepth front camera as well as the sensors that enable Face ID.
Dynamic Island isn’t just limited to notifications or alerts, but also ongoing activities such as directions in the Maps app, music that might be playing, or how much is left in your timer. Those remain visible at the top of your phone in Dynamic Island, and they’re interactive, so you can tap, swipe, or long-press. Say you order a Lyft and then proceed to browse the web or play a game. The Dynamic Island will show your Lyft ride’s estimated time of arrival at the top of your screen as you use other apps. At any time if you want to open Lyft, tap Dynamic Island. Or, say you’re in an ongoing call and then minimise it, Dynamic Island will elongate horizontally and show the call duration on the left with a voice waveform on the right.
If you have two apps running in the background, Dynamic Island can split into two sections, so you’ll see a smaller pill on the left for one app and a small circle on the right for another app. For instance, if you have a song playing from the Music app and a timer set on the Clock app, you’ll see the song’s art on the left pill and the timer icon inside the circle on the right. You can only see a maximum of two apps appear on Dynamic Island when they’re running in the background.
The most impressive thing about Apple’s Dynamic Island feature is how it can intuitively morph into different shapes to display all sorts of glanceable info. For instance, when you put your phone on silent, connect your AirPods, access Face ID, or plug your charger, the cutout will expand and display the activity and then immediately go back to normal.
Also, if there’s an ongoing background activity, such as a call, playlist, podcast, or timer, the cutout will stay expanded until it ends. You can tap it to go to the app or long-press it to explore options, allowing for better multitasking.
For instance, if you get a call while scrolling through your Instagram feed, the cutout will expand to show you who’s calling and the option to accept or deny it. Once you pick up the call, the cutout will stay expanded during the duration of the call. You can long-press the cutout to access various options to cut the call, switch to FaceTime, mute yourself, and more.
Similarly, if you’re listening to music while reading an e-book, you can long-press the cutout to see options to pause the song, skip forward or back, or jump to a particular part in the song. And if there are multiple ongoing background activities, the iPhone 14 Pro’s Dynamic Island will form a new circular bubble beside the pill-shaped cutout. All of this without leaving the app you’re in.
2. Use Always-On display with your iPhone 14 Pro or iPhone 14 Pro Max
With Always-On display, your iPhone 14 Pro or iPhone 14 Pro Max dims the Lock Screen while still showing helpful information, like the time, widgets, and wallpaper, all while using new technologies that make the display incredibly power efficient.
This can be useful when you just want to glance at the time or see relevant information from your Lock Screen widgets without unlocking your iPhone and going directly into an app.
The display always remains on by intelligently lowering its brightness and refresh rate to as low as 1Hz to save battery life. Always-On display is on by default on iPhone 14 Pro and iPhone 14 Pro Max. To turn Always-On display off or on, follow these steps:
Go to Settings > Display & Brightness.
Scroll down to Always On and turn Always-On display off or on.
3. Capture steadier video with Action mode
With Action mode on iPhone 14 Pro and iPhone 14 Pro models, you can capture smooth hand-held video even when you’re moving around a lot.
Open the Camera app and swipe to Video mode.
Tap the button to turn on Action mode.
Tap the Shutter button and record your video.
Action mode works best with lots of light, and the Camera will show “More light required” if things are too dark. You can change your settings to use Action mode in lower light.
In the Settings app, tap Camera.
Tap Record Video.
Turn on Action Mode Lower Light.
Action mode can capture video at either 1080p or 2.8k resolution up to 60 frames per second. It supports Dolby Vision HDR or, on iPhone 14 Pro models, Apple ProRes video formats.
4. Manage Crash Detection on your iPhone 14 Pro
When your iPhone 14 Pro detects a severe car crash, it will display an alert and will automatically initiate an emergency phone call after 20 seconds unless you cancel. If you are unresponsive, your iPhone will play an audio message for emergency services, which informs them that you’ve been in a severe crash and gives them your latitudinal and longitudinal coordinates with an approximate search radius.
When a crash is detected, Crash Detection won’t override any existing emergency calls placed by other means.
Crash Detection is on by default. You can turn off alerts and automatic emergency calls from Apple after a severe car crash in Settings > Emergency SOS, then turn off Call After Severe Crash. If you have third-party apps registered to detect crashes on your device, they will still be notified.
5. Use Emergency SOS via satellite on your iPhone 14 Pro
With this iPhone 14 Pro trick, you can use Emergency SOS via satellite to text emergency services when you’re out of cellular and Wi-Fi coverage.
Emergency SOS via satellite can help you connect with emergency services under exceptional circumstances when no other means of reaching emergency services are available. If you call or text emergency services and can’t connect because you’re outside the range of cellular and Wi-Fi coverage, your iPhone tries to connect you via satellite to the help that you need.
If you need to contact emergency services, follow these tips to help connect your iPhone to a satellite:
Hold your phone naturally in your hand. You don’t need to raise your arm or hold your phone up, but don’t put it in a pocket or backpack.
Make sure that you’re outside with a clear view of the sky and the horizon.
Be aware that trees with light foliage might slow down the connection, and dense foliage might block it. Hills or mountains, canyons, and tall structures can also block the connection.
In case you need to turn left or right or move to avoid a blocked signal, your iPhone provides guidance—just follow the onscreen instructions.
To text emergency services via satellite
First, try calling emergency services. Even if your normal cellular carrier network isn’t available, you might be able to make the call.
If your call won’t connect, you can text emergency services via satellite:
Tap Emergency Text via Satellite.
You can also go to Messages to text 911 or SOS, then tap Emergency Services.
Tap Report Emergency.
Using simple taps, answer the emergency questions to best describe your situation.
You can also choose to notify your emergency contacts that you contacted emergency services, along with your location and the nature of your emergency.
To connect to a satellite, follow the onscreen instructions.
After you’re connected, continue following the onscreen instructions to stay connected while you send your message to emergency services.
Once you’re connected, your iPhone starts a text conversation with emergency responders by sharing critical information like your Medical ID and emergency contact information (if you have set them up), the emergency questionnaire answers, your location (including elevation), and remaining battery life for your iPhone.
6. Hidden and Recently Deleted albums protection
The Hidden album in the Photos app is clearly not hidden, seeing as you can easily find it, making it impractical for adequately hiding private photos and videos. While Apple does have an option to make the Hidden album “invisible,” anyone with access to your phone can make it visible again and view everything inside.
Thanks to an iPhone 14 Pro trick, you can now lock the Hidden album. You don’t actually need to do anything to toggle this feature on. If you want to check it out, launch the Photos app and go to the Albums tab at the bottom of the screen. If you scroll down, you’ll see a tiny lock next to the Hidden and Recently Deleted albums. To view what’s inside, use Face ID or your passcode.
7. View and share saved Wi-Fi passwords
Apple has allowed iOS users to share Wi-Fi passwords for a while now, but only by placing two Apple devices near each other. And if that feature didn’t automatically work, you couldn’t just dig out the password from your settings. Plus if you wanted to share a saved Wi-Fi password with someone else, like an Android user or someone on a computer, you had to know the password. Until now.
In Settings, go to Wi-Fi and tap the tiny information icon to the right of the network you want the password for. To view the network password, tap the Password section and then use Face ID or enter your passcode to view it. You can then tap Copy to copy the password into your clipboard and share it.
8. Find and remove any duplicate photos and videos
Maybe you’ve saved the same photo multiple times or downloaded a video more than once, and so you’ve got duplicates littered in your photo album. It may not be a problem if you’ve got the storage to spare, but if not, it might be a good idea to go back and remove every single duplicate — which is now easy to do thanks to an iPhone 14 Pro trick.
In Photos > Albums, you should now see a new Duplicates album under Utilities, where Apple scans through all of your photos and shows you any photo or video you’ve saved more than once. From there, you can either delete any duplicates, or simply press Merge, which will keep the photo with the highest quality (and relevant data) and then move the others to the trash.
Although you’ll probably want to go through each set of duplicates, to ensure that they’re actually exact copies and not similar photos, you can also hit Select > Select All > Merge to remove every single photo and video that Apple thinks is a duplicate, all at once.
9. Pin your favorite tabs in Safari
Safari caps your open tabs at 500, and if you’re nearing that limit, it might be pretty darn hard to find the exact tab you’re looking for. You could scroll endlessly, but there’s now an easier way to find the exact tab you’re looking for.
In Safari, if you press down on an open tab, you now have the option to hit Pin Tab. This will move that tab to the top of Safari, where it will exist as a tiny tab preview, permanently pinned there, which you can then tap to view.
If you press down and unpin a tab, it will move to first in your grid of open tabs.
10. Pair Nintendo Switch Joy-Cons with your iPhone
Apple has long allowed you to pair third-party controllers, like the PS5 Sony DualSense and Xbox Core Controller, to your iPhone and iPad, in order to more comfortably play mobile video games like the Apple Arcade library, Minecraft and Call of Duty. And you can add another console controller to that list.
If you own a Nintendo Switch, you can now pair your Joy-Con controllers to your iPhone 14 Pro. To start, hold down the little black pairing button on the Joy-Con, until the green lights start running back and forth. This means the device is in pairing mode. Next, open your iPhone and go to Settings > Bluetooth and select the Joy-Con from the list. Repeat this step with the other Joy-Con.
11. Recover recently Deleted Chats in Message
If you have the habit of deleting messages in the Message app and happen to require them at a later point in time, you can recover the deleted messages on your iPhone 14 Pro. The deleted messages are moved to the Recently Deleted folder in the Message app itself. Here’s how to access the Recently Deleted folder in Message,
Open the Messages app.
Tap the Edit button at the top left.
Select the Recently Deleted folder.
Select the chat you want to Recover the messages from.
Note: Deleted messages will be available in the Recently Deleted folder for 30 days, after which the messages will be deleted permanently.
12. Easily Delete contacts
With previous versions of iOS, deleting a contact on iPhone was a tiresome process. You had to go to the detailed information of the contact, select the Edit option, and then scroll down all the way to finally select the Delete Contact option. Apple has finally heard the requests of its users as it has made the process of deleting a contact easier in iOS 16. You can now simply tap and hold on a particular contact to delete it from your list.
13. Disable ‘Lock to End Call’
One of the quirks that iPhone users (especially the new users who switch from Android) complain about is that pressing the lock button ends the call. You can finally disable the ‘Lock to End Call’ feature with this iPhone 14 Pro trick.
Open the Settings app.
Go to Accessibility.
Select Touch.
Toggle off Lock to End Call.
14. End call using Siri
With iPhone 14 Pro, other than tapping the on-screen end call button or side button of the device to end a call, you can have your virtual assistant, Siri, hang up a call for you in a very high-handed way. While you are on a call, just say “Hey Siri, hang up” and the assistant will do it for you.
While this is a convenient and hands-free way to end a call, it is recommended to use it with caution as the caller on the other end will be able to hear your command to Siri.
15. Restart your iPhone 14 Pro with Siri
Another iPhone 14 Pro trick is rebooting your device with Siri. Just wake your assistant up with a “Hey Siri” call and say “reboot ” or “restart”. When Siri asks for confirmation, reply with a “Yes” or “No” and that’s it! You don’t even have to unlock your device to complete the action using Siri, so it can be done entirely remotely.
16. Dictate emojis with Siri
You could previously dictate texts with Siri, but if you’re the type who thinks emojis are worth a thousand words, your iPhone’s digital assistant couldn’t really helped you. Dictate a lovely message to your sweetie that ends with a heart emoji, and Siri will quite literally type “heart emoji” in the text. It really kills the mood.
iOS 16 makes Siri smarter about dictated emojis, and now, telling the assistant “heart emoji” will yield a nice red heart right there in your text message.
17. Skip Siri confirmation
Previously, if you ask Siri to send a message to a contact and dictate the content, it asks for confirmation. The positive side is that you can check if Siri has transcribed your message correctly.
Nonetheless, it is another added step and takes more time. With this iPhone 14 Pro trick, you can turn it off and send messages automatically with Siri. Here’s how,
Open the Settings app.
Go to Siri & Search.
Tap Automatically Send Messages.
Toggle onAutomatically Send Messages.
18. Make Siri listen longer
While we’re on the subject of Siri improvements, let’s talk about an accessibility feature that Apple actually revealed back in May, a month before its iOS 16 preview. Back then, Apple promised a host of accessibility features was coming to the iPhone, and one of the promised additions that caught my eye was the ability to the adjust Siri’s pause time.
Adjusting the pause time will make the digital assistant wait longer before responding to your request. It’s ideal for anyone with impaired speech, but really if you find yourself rushing to complete a Siri command before the assistant leaps into action, you’ll appreciate this iOS 16 addition as well.
Go to Settings.
Tap Accessibility.
Tap Siri.
19. Merge Duplicate Contacts
If your Contacts app is riddled with duplicates that you haven’t been able to fix, then this iPhone 14 Pro trick is for you. The update includes a dedicated feature for merging duplicate contacts, solving problems with multiple contacts once and for all.
In the iOS 16 Contacts app, if you have more than one contact card for the same person, the app will automatically detect the duplicate and let you know that duplicates were found.
The “Duplicates Found” interface is at the top of the app, and if you tap it, the Contacts app is able to merge all of the duplicate contact cards into one.
Prior to now, there was no built-in way to quickly manage duplicate contacts in the iOS Contacts app, so the new iOS 16 feature should be a relief for those dealing with Contacts issues. This feature did previously exist on the Mac, but it was not available on iOS devices.
20. Copy and Paste Photo Edits
Want all of your photos to have the same aesthetic, or have improvements you want to make to an entire batch of images? That’s possible with this iPhone 14 Pro trick, which lets you copy edits from one photo and apply them to another photo with a tap. Here’s how:
Open Photos and select the edited image.
Tap the Three Dots at the top right.
Tap Copy Edits.
Go to the image you want to paste the edit and tap the Three Dots at the top right.
Tap Paste Edits and done.
The same edits are now applied to the selected image too.
21. Sort Playlists in Apple Music
Playlists are great, but in Apple Music, they’re fixed in the order you created them. If you want to change things up, you’ll have to open the editor and do it by hand. Now, with this hidden iPhone 14 Pro trick, you can easily sort Playlists by title, artist, album, or release date.
22. Use Face ID in Landscape Mode
The iPhone 14 Pro models support Face ID in landscape mode, making it easier to unlock the iPhone when it’s not held in the standard portrait orientation.
23. Lock Notes with a Passcode
Rather than creating a new password for a note, you can now simply use your device passcode or Face ID/Touch ID to lock a note, which is much easier.
Open the Notes app.
Tap and Hold the note you want to lock.
Select Lock Note.
Tap Use iPhone Passcode.
24. Enable haptic feedback on the Keyboard
There’s a keyboard setting in iPhone 14 Pro that lets you enable haptic feedback that can be felt when you’re typing. The vibrations are for each key tap, offering users a physical confirmation that a letter has been pressed. Here’s how to enable it:
Go to Settings.
Tap Sounds & Haptics.
Select Keyboard Feedback.
Toggle on Haptic.
25. Add Quick Note to Control Center
Apple introduced Quick Note as one of the best new iPadOS 15 features earlier last year. What makes this a useful feature is its ability to let you start taking notes from anywhere on your device. So whenever an interesting idea strikes, or if you wish to pen down important points in a meeting, you need not open the Apple Notes app and use the Quick Notes instead. Now, with the release of iOS 16, Apple has extended this productivity-centric feature to provide a quick and simplified note-taking experience on iPhone as well. Here’s how to add this tile to your Control Center:
First, open the Settings app on your iPhone and select “Control Center“.
Under the “More Controls” section, find “Quick Note” and tap the green “ ” button next to it. That’s it! The Quick Note icon will now show up in the control center.
Note: If you want the Quick Note icon to appear higher in the control center, touch and hold the three horizontal lines next to Quick Note to drag the icon to your desired location in the Control Center.
Once the Quick Note icon is available in your device’s Control Center, taking a Quick Note is merely a tap away. Here’s how it works:
First, bring up the control center on your iPhone.
Then, tap on the Quick Note icon (sticky note with a squiggly line).
Now, a Quick Note window will appear on the iPhone screen to let you jot down your thoughts or anything that you want to take note of. Since it provides all the familiar formatting tools and features, including a document scanner and markup, so you can take notes with the desired efficiency. Make sure to tap “Save” at the top-right corner to save your note.
26. Schedule Emails in the Mail App
Have you ever tried to remember to email someone about something on a particular date in the not-so-distant future, but ended up forgetting to send it when the day eventually came around? If that sounds familiar, scheduling emails could be the perfect way to ensure it doesn’t happen again.
Whether it’s a birthday or other celebration, or maybe something business-related that you need to bring up on a specific future date, This iPhone 14 Pro trick offers you the ability to schedule emails ahead of time. Here’s how to schedule emails in the Mail app,
Open Mail app.
Tap Add New icon located at the bottom right corner and draft your mail.
Press and hold the Upwards Arrow, representing Send.
27. Convert currency through the Camera
Currency conversion is a convenient tool to save your pocket from taking any heavy losses in over-priced deals especially if you travel abroad a lot. Usually, we browse the web to convert currency. Following this method can get hectic, especially if you’re traveling abroad. However, with this hidden iPhone 14 Pro trick, you can convert currency directly from your Camera and no longer need to manually enter the currency values online.
Here’s how to convert currency directly through your iPhone’s camera:
Open the Camera and point it to the text.
Tap the Scan icon at the bottom right corner.
When done, tap the Convert icon at the bottom left.
You can now see the currency value converted!
28. Get Translations Directly From the Camera App
Apple in iOS 16 has brought its system wide translate feature to the Camera app, allowing the iPhone to be used to translate signs, packaging, and more in real time.
Using the translate feature is as simple as opening up the Camera app and pointing it at the text you want to translate. Tap on the text selection button in the app to select the detected text, and then choose the translate option to get an instant translation.
You can pause the view to get translations overlaid on text, and zoom in for a closer look. It’s a useful feature that’s perfect for signs and other wording that you might not understand when you’re traveling.
29. Edit messages in iMessage
I think it’s safe to say that everyone has relied too much on autocorrect when sending an iMessage, leading to potentially embarrassing typos. Prior to iOS 16, you had to own the mistake and accept that it would exist on the recipient’s phone, forever. However, with this iPhone 14 Pro trick, you have the ability to edit a message within 15 minutes after it was sent.
You’ll need to act fast after you realize your mistake. But once you do and you’re still within the 15-minute window, all you need to do is long-press on the message, then select Edit from the list of options.
The text field will show back up, letting you fix your error and then save it.
On the recipient’s end, if they’re using iOS 16 as well, a small “Edited” label will appear below the message that no longer shows any signs of wrongdoing.
For those on older versions of iOS, they’ll receive a second message with the corrected text.
30. Unsend messages in iMessage
The process for completely deleting a message you’ve sent within the last 2 minutes — helpful if you send it to the wrong contact or thread — is nearly identical to editing a message.
Once you realize the error of your ways, long-press on the message until you see a menu pop up. From that menu, tap Undo Send. There’s a small animation that shows the message disappearing, followed by a line of text in the thread letting everyone know a message was removed.
Easy-peasy, right?
31. Create a sticker from images
With this iPhone 14 Pro trick, you can create stickers from images and share these stickers with other applications. It is shared as a sticker in iMessage and as a PNG image in other instant messaging services. Here’s how to do it,
Open the Photos app.
Select the image you want to create as a sticker.
Tap and Hold the image.
You can copy the image and paste it as a sticker in iMessage or any other service you want. Or you can share the image from the same page. You can also save the sticker in notes.
32. Personalize Lock Screen
One of the things you look at the most on your iPhone is the lock screen. iOS 16 brings the most substantial update to the iPhone’s lock screen yet. Press and hold to edit your lock screen. You can swipe to try out several different styles. Each style changes the color filter for the background photo and the font on the lock screen so everything complements each other. This feels a bit like Apple’s take on Google’s Material You, which launched with Android 12.
You can also customize the fonts for the time and date, and add lock screen widgets like temperature, activity rings and a calendar. The widgets are akin to complications on the Apple Watch lock screen.
You can even set up multiple customized lock screens with different widgets and easily swipe to switch between them. There’s also a photo shuffle option that automatically changes the pictures on your lock screen.
33. Skip CAPTCHAs using Private Access Tokens
The CAPTCHA — which stands for Completely Automated Public Turing test to tell Computers and Humans Apart — has been a necessary evil across the internet. CAPTCHAs are designed to make sure that a person is accessing a website or service, and not a bot. I find them annoying, as they often involve reading strangely written letters or having to find all the images that have a truck. Tapping on images of traffic lights or deciphering squiggly text to prove you are human is now a much less common nuisance for iPhone users, as this iPhone 14 Pro trick lets you bypass CAPTCHAs in supported apps and websites.
This cool iPhone 14 Pro trick can be found in the Settings app under Apple ID > Password & Security > Automatic Verification. When enabled, Apple says iCloud will automatically and privately verify your device and Apple ID account in the background, eliminating the need for apps and websites to present you with a CAPTCHA verification prompt.
34. Transfer an eSIM Between iPhones via Bluetooth
This iOS 16 trick allows an eSIM to be transferred between iPhones via Bluetooth while setting up cellular service.
In the Settings app on an iPhone running iOS 16, tapping on ”Set up eSIM” brings up an option to transfer an eSIM and its associated phone number from another iPhone via Bluetooth. To transfer an eSIM from another iPhone, Apple says to make sure the other iPhone is nearby, unlocked, has Bluetooth turned on, and is running iOS 16 or later.
Open the Settings app on your new iPhone.
Tap Cellular.
Above the Cellular Data section, tap the Set Up eSIM button.
When prompted, tap the Transfer From Another iPhone button.
From there, you’ll be prompted to the next screen which provides the following message: “To transfer a phone number from another iPhone, make sure your other iPhone is passcode protected, nearby, unlocked, has Bluetooth turned on, and is running iOS 16 or later.
35. Use Spotlight on the Home Screen
This hidden iPhone 14 Pro trick lets you access Spotlight search from the Home Screen without swiping down or left. You’ll find it right above the dock, which makes it easier to search for apps, contacts, documents, images, and more. Spotlight can fetch results using the information from images stored in Messages, Notes, and Files, like text, objects, people, and so on.
36. Set a Reminder to Check Emails Later
At times, you might want to check an important email later. With this iPhone 14 Pro trick, you can add a reminder to check messages in the future. Simply swipe right on an email and select Later. Ask the Mail app to remind in an hour, tonight, tomorrow, or later.
37. Drag and Drop Subjects With Visual Lookup
Apple’s updated Visual Lookup feature in iOS 16 can separate subjects from the background of an image with a simple long-press action. You can use it to grab an object from a picture and drop it as a sticker into the Messages app, for example. Thanks to machine learning, you no longer need to spend time drawing outlines using third-party apps to get a sticker you want.
38. Use Live Text in video
Live Text was already great with iOS 15. You could grab information from a photo by selecting the text available, a telephone or address, for example.
Now, with Live Text in videos, text is completely interactive in paused video frames, so you can use functions like copy and paste, lookup, and translate.
In addition, Live Text with iOS 16 adds recognition of Japanese, Korean, and Ukrainian text. Last but not least, data detected in photos and videos is actionable with a single tap. Track flights or shipments, translate foreign languages, convert currencies, and more.
Here’s how to use Live Text in a video:
Open the Photos app and open the preferred video.
Scroll the video to the point where you want to extract the text.
Pause the video, tap and hold on to the text on video.
Live Text will automatically recognize text and show you the following options copy, select all, look up, translate, search web and more.
Tap on the desired option to use the text as needed.
Also, the Live Text feature can be used over Map to copy the address.
39. Add the battery percentage to the status bar
With this iPhone 14 Pro trick, you can add the battery percentage back to the status bar. Simply go into Settings, then choose Battery, then toggle on the new Battery Percentage option. It might even be enabled by default, but that only appears to be the case for some users.
40. Track your orders in Apple Pay
Let’s wrap up by highlighting some features in Apple’s existing apps that have gotten overshadowed by other changes. For instance, in the Wallet app, the big change brought about by iOS 16 is Apple Pay Later, in which you can divvy up your purchase into four installment payments. But that’s not the only new capability available when you buy things with Apple Pay in iOS 16.
You’ll also be able to track orders of your Apple Pay purchases directly from within the Wallet app. The feature only works with participating merchants, but considering how widespread Apple Pay has become since Apple introduced it in 2014, you’d imagine that there will be a lot of retailers providing order tracking info to you via Wallet.
Your favorite iPhone 14 Pro and iPhone 14 Pro Max tips and tricks
So these were some of the best iPhone 14 Pro and iPhone 14 Pro Max tips and tricks you would love to try today. My favorite iPhone 14 Pro and iPhone 14 Pro Max tips and tricks include using dynamic island, ability to edit/delete messages, ability to end calls with Siri, and ability to schedule emails in Mail. There’s surely plenty more hidden iPhone 14 Pro and iPhone 14 Pro Max tips and tricks to discover, so I’ll keep tapping, swiping and noting anything I find. Did we miss out on something important that needs to be added to the list? Which are your favorite iPhone 14 Pro and iPhone 14 Pro Max tips and tricks? Share your thoughts in the comment section below.
The AirPods Pro 2 are here, three years after the original launched, sporting an updated feature set and all-new charging case. In this article, I’ll explain all the best hidden Airpods Pro 2 features.
The new AirPods Pro 2nd Gen, while still among the top true wireless earbuds on the market, deliver some big upgrades in terms of both functionality and audio performance, with Apple clearly setting its sights on offering some of the best audio experiences on the market. So, if you were holding off on purchasing a new pair of wireless earbuds, check out all the major new features that the AirPods Pro 2 bring to the table.
The Best AirPods Pro Features
1. Improved Sound Quality and ANC
Thanks to its latest H2 chip, a new low-distortion audio driver, and a custom amplifier, the second-gen AirPods Pro delivers notably better sound quality and Active Noise Cancellation (ANC).
Apple claims the new earbuds cancel up to twice the amount of noise compared to the outgoing model. The bass is also richer, with a wider sound stage that helps improve the overall clarity.
2. Better In-Ear Fit
What’s the point of great sound quality if the earbuds keep falling from your ears? It looks like the company has heard some of your complaints, as the new AirPods Pro comes with an additional set of XS-sized ear tips to help provide a better in-ear fit for people with small ear canals.
This will allow the earbuds to passively block more noise, indirectly boosting the ANC performance and sound quality. The better fit will also help if you use the AirPods Pro to help hear conversations better.
3. Adaptive Transparency
The second-generation AirPods Pro takes the existing Transparency mode to the next level with Adaptive Transparency. Voice processing happens so much more naturally now, with it possible to hold a conversation without even realizing you’re wearing Apple’s new earbuds – although you might seem tremendously rude.
Apple is also claiming that, thanks to the H2 chip, it can offer ‘Adaptive Transparency’ automatically. So if you’re using Transparency when walking down the road and a vehicle with a siren goes past, the AirPods Pro will automatically tune down the sound without getting rid of it completely (in case you need to hear it as a warning).
4. New Charging Case With Find My Integration
The new charging case of the second-generation AirPods Pro is dust and water-resistant, just like the earbuds. There’s a lanyard loop, too, for extra convenience. If you order the AirPods Pro 2 online through the Apple Store, you can even engrave your favorite Memoji on the charging case.
Another highlight of the new charging case is Find My integration and a built-in speaker. If you have an iPhone with a U1 chip, you can use the Precision Finding feature in the Find My app to get the exact location of the AirPods Pro. And the built-in speaker on the charging case will play a loud tone so that you can locate it quickly.
5. Longer Battery Life
The final improvement to the AirPods Pro comes with the battery life: thanks mostly to the more efficient H2 chip (compared to the original H1 in the older AirPods) the Pro 2 earbuds can last six hours off a single charge when using ANC, and seven hours without.
The case can charge the AirPods Pro 2 five times, so you’ve got 30 hours’ use in ANC mode – which is a big jump over the 24 hours’ use previously.
And you’re able to charge the case in a new way too: using an Apple Watch charger. This is something that makes so much sense, especially given Apple is so intent on getting people to think of the AirPods as a key part of owning a Watch, as you can easily listen to and control music from the screen on your wrist.
6. Touch Control
Unlike the original AirPods Pro, you don’t need to press the stem to adjust the music playback or volume. The stems pack a new feature: finally, you can control the volume of your music from your AirPods Pro. While gripping the stalks, slide a finger up or down the ridge, which can register your touch through the new capacitive surface. This allows you to adjust the volume with a light swipe up or down. And to accept phone calls or control music playback, you need to press the stem lightly.
Apple has also upgraded the skin detection sensor, so the earbuds will more accurately detect when to resume or stop music playback.
These are the best AirPods Pro 2 features
You might think that the new AirPods Pro 2 seem very similar to the original AirPods Pro – but there’s a lot going on here that means these true wireless headphones are going to be a big draw for so many people.
Whether it’s the new and massively improved noise cancellation, the extra speakers in the case so it’s much harder to lose them, or the improved transparency mode to chat to your pals, there are many AirPods Pro 2 features to be excited about.
Are you in a dilemma of asking yourself if you should or should not buy an Apple TV? The answer is yes, you should. The Market is huge and very competitive with various brands from different companies. But Apple TV is exceptional, it can do a lot that your other TV can’t do or perform better than any other TV. Here’s a look at some of the top benefits of Apple TV.
Apple TV 4K and Apple TV HD can be plugged into your TV and your favourite live shows or apps like Netflix, Amazon prime video and many more other Apps will stream. But if you have a smart TV, the operating system tvOS will be able to operate on your Apple TV. Checked out some of the top benefits of Apple TV below.
Advantages of Apple TV
Here are some of the main benefits of Apple TV in 2023:
1. Apple TV has a great remote – the Siri Remote
One great benefit of having the Apple TV is that the remote control comes integrated with Siri. You can use your voice to find anything you want to watch on your Apple TV. Siri Remote brings precise control on your Apple TV. It is all touch enabled clickpad with gesture support. With just a single click, it will take you to TV shows and movies, while a swipe will move you through a long list of contents. Also you can fast forward or rewind through your movies and shows with a swipe across your Remote.
Siri Remote second generation is compatible with both first and second generation Apple TV 4K and Apple TV HD.
2. The Smart Home Advantage
Another advantage of Apple TV is that you can easily have a smart home. A smart home allows you to organise, control and manage multiple accessories on your home with remote or with the help of Siri at the same time.
With HomeApp in your Apple TV, you can control your smart home from anywhere you are. Imagine, you are on your way home from work and the climate is a bit chilly. All you need to do is to open Siri on your iPhone and command it to heat up your room. Apple TV being always on in your home will take the command and your room will start to warm up before you arrive.
3. Screen mirroring with AirPlay
Apple TV allows you to see your TV as a second display. Screen mirroring allows you to view streaming Apps or any other Apps on your Apple device in your TV screen. You can stream your iPhone, iPad or MacBook with AirPlay.
You can be watching an interesting clip or a movie on your Apple device, and you need to share it with your family members or your friends. You will just need to screen your Apple device with your Apple TV for everyone to see on the screen. For screen mirroring to occur, your Apple TV and your Apple device should be connected to the same Wi-Fi or wired network.
4. Apple TV supports a huge range of Apps
Another great Apple TV 4K and Apple TV HD benefits is that you can download an array of apps. If you like watching movies you can download apps like Netflix or Amazon prime video. Further, you can subscribe to Hulu and many more other Apps. The games lovers can download ESPN to enjoy football and many other games.
The Apple TV also comes with the in build Apps. Like photos which you can use to browse through pictures, Apple music to watch or listen to music. Also with Apple TV you can enjoy thousands of live channels or TV shows through subscription.
5. The multi user experience
Apple TV saves one profile based on personal preference. You can be a family of many people, those who like to watch action series, horror movies, Apple music or animation and cartoons for children. Thus everyone has a different taste from the other. Apple TV with time is able to detect everyone’s taste and will be able to switch between profiles and offer personalised experience based on one’s personal preferences.
6. Fabulous screensavers
When your Apple TV is idle or it’s not in use for some minutes, it displays some screen savers. The screen savers are Aerial and are displayed on your screen through beautiful slow motion videos of places and things around the world.
Aerial videos on the Screen savers can be downloaded on your Apple TV at your own interest and control how your TV looks when it’s not in use. Also you can view information about the location shown on the TV screen and change to as many locations as you desire.
7. Access to Apple TV Plus
One of the Apple TV benefits is access to Apple TV Plus. Apple TV is a streaming service that features Apple’s originals like series, dramas, documentaries, kids entertainments and many more. You can ultimately experience the Apple TV with Apple 4K HDY and Dolby Atmos sounds.
You can get different offers depending on which choice you choose on the subscription of your Apple TV . Although Apple gives you a free three months offer for your Apple TV if you purchase an Apple device, you need to subscribe monthly for you to enjoy your Apple TV . You can share your Apple TV subscription with upto five family members.
8. Apple TV is portable
You may not think of portability as a major benefit of Apple TV. However, it’s quite a point to note when you own one. You can be travelling or camping and you need some entertainment with you. Apple TV 4K or Apple TV HB box with 32GB storage space or more is easy to carry anywhere you want to go. You can connect with Wi-Fi or wired networks to download apps or view live shows on your Apple TV anywhere you are.
9. Connect to your AirPods
Another benefit of Apple TV is that you can connect it to your AirPods, AirPods Pro or AirPods Max and listen to your TV privately. If your AirPods share the same Apple ID with your Apple TV, they will connect automatically. Or you can hold the Play button on your remote and a drop down will let you connect with the Apple TV.
10. Easy to set up
Apple has made it easy to set up their device. Every device comes with understandable steps to follow step by step until the set up is complete. In addition, the Apple support is always there to guide you though the full process. Apple TV is not exceptional, you will have the instructions to follow to connect your Apple TV and even how to connect with other Apple Devices.
Advantages of Apple TV. Now you know
From supporting a wide range variety of Apps, connectivity with AirPods, fabulous screensavers and many more advantages discussed above. The Apple TV is worth buying.