Got a tip for us?

iPad

The iPad is a tablet computer from Apple that runs the iOS mobile operating system. Similar in functionality to the iPhone, the iPads purpose is often quite different, sometimes even serving as a general desktop computer replacement.

You can add, delete, rotate, reorder, or crop pages in a PDF in the Preview app on your iPad.

You can insert a blank page, insert a PDF or image, or insert a scanned document, and you can delete the selected page. You can also rotate a page left or right, move a page above or below another one, and crop a page to the area you select. And if you change your mind, you can undo a change.
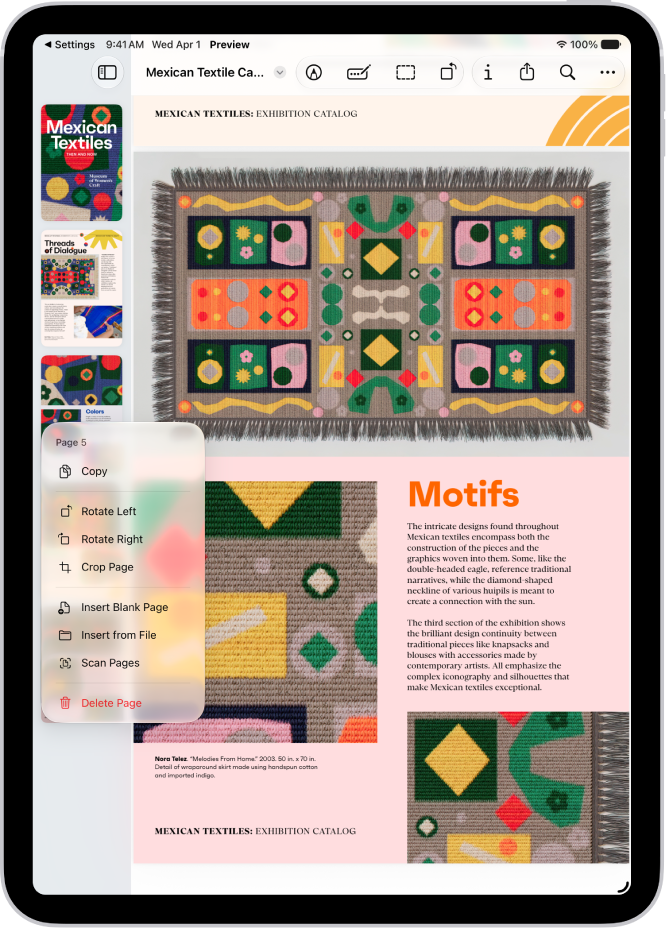
Thumbnail view of PDF with page options visible.

Add or delete pages

  1. Start the Preview app on your iPad.
  2. Open a PDF.
  3. Tap the Toggle Sidebar button and then touch and hold a thumbnail.
  4. Do any of the following:
    • Insert a blank page: Tap Insert Blank Page.
    • Insert a PDF or image: Tap Insert from File.
    • Insert a scanned document: Tap Scan Pages, scan the document, then tap the Done button. See Scan text and documents.
    • Delete the selected page: Tap Delete Page.

Rotate a page

  1. Start the Preview app on your iPad.
  2. Open a PDF.
  3. Tap the Rotate Left button in the toolbar. You can also tap the More button. Then choose Rotate Left or Rotate Right.

Move a page

  1. Start the Preview app on your iPad.
  2. Open a PDF.
  3. Tap the Toggle Sidebar button and touch and hold a thumbnail until menu options appear. Drag the page thumbnail above or below another one.

Crop a page

  1. Start the Preview app on your iPad.
  2. Open a PDF.
  3. Select a page and tap the Crop button.
  4. Drag the blue handles to select an area and tap within the selected area. Then tap Crop.

To undo a change, tap the More button, then tap Undo.

See also

Tag: Preview
You can print a PDF or image from the Preview app on your iPad. You just open a PDF or image, select a printer, and print it, and you can also annotate a PDF or image or manage PDFs and images in Preview.

  1. Go to the Preview app on your iPad.
  2. Open a PDF or image.
  3. Tap the Actions Menu button next to the filename. Then tap Print.
  4. Select a printer, then tap the Print button.

See also

Tag: Preview

Learn how to use the Preview app to fill out and sign PDF forms, scan documents, and make changes to PDF documents and images. You’ll scan document pages with the iPad camera to create a PDF file. You can also fill out a form with AutoFill, and remove the background from an image to focus on what’s important.

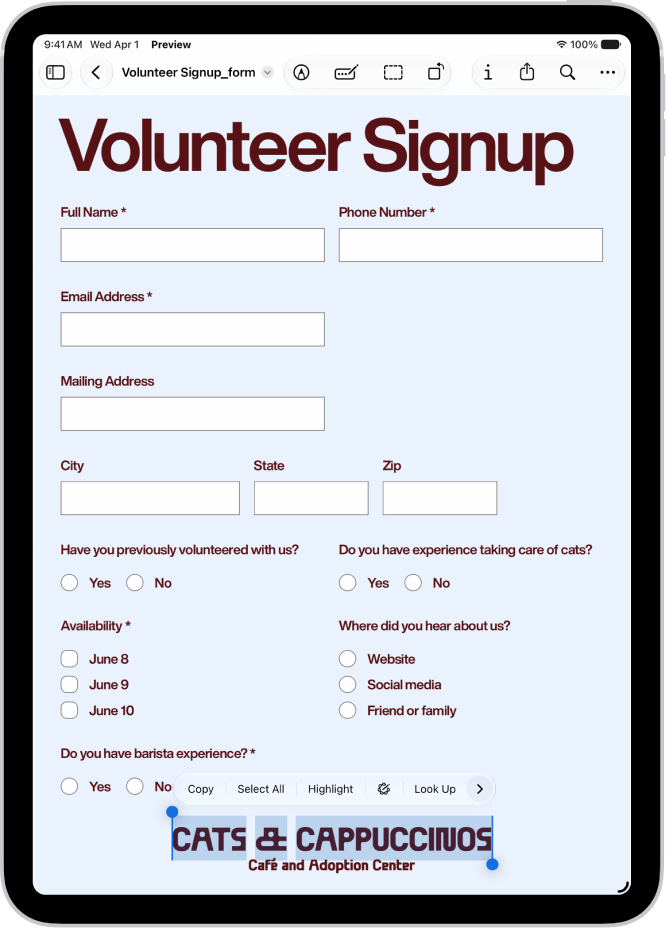
A screen showing a PDF form with fillable fields highlighted. At the bottom of the screen are the Add Annotation, Markup, AutoFill, Crop, Info, Share, and Search buttons. The AutoFill button is selected.

Fill out PDF forms

To fill out a PDF form in Preview, tap the AutoFill button at the top of the screen, then select a field. Enter text, or tap a suggestion that appears above the onscreen keyboard. Use your finger or Apple Pencil to add a signature.

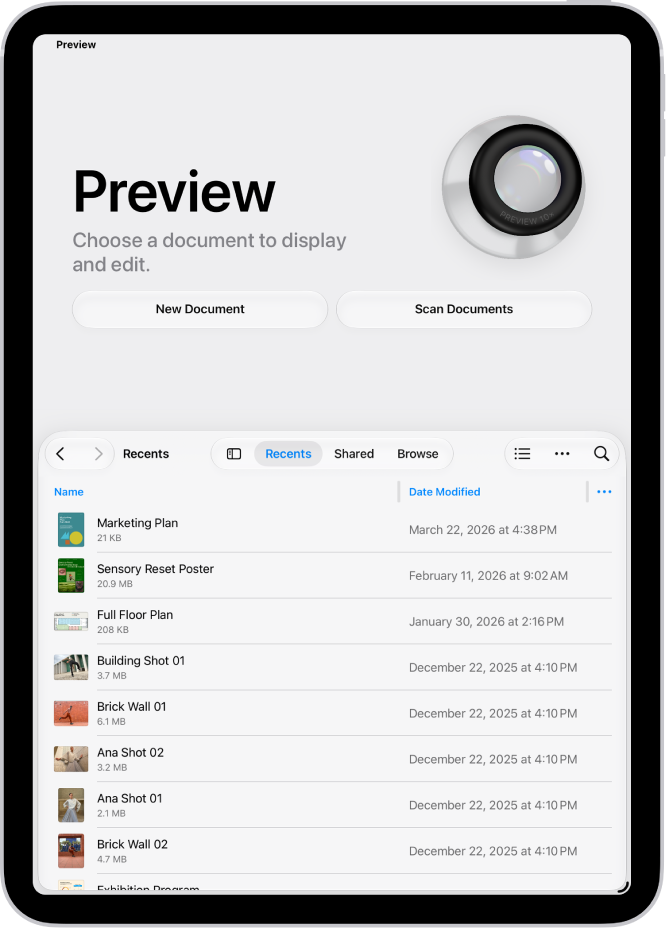
The main screen of the Preview app. The New Document and Scan Documents buttons are in the middle of the screen. Toward the bottom of the screen are the Recents, Shared, and Browse tabs.

Scan and save documents to create a PDF file

Tap Scan Documents, then position the iPad camera to capture document pages. You can crop, rotate, and adjust colors before saving the scanned document as a searchable PDF.

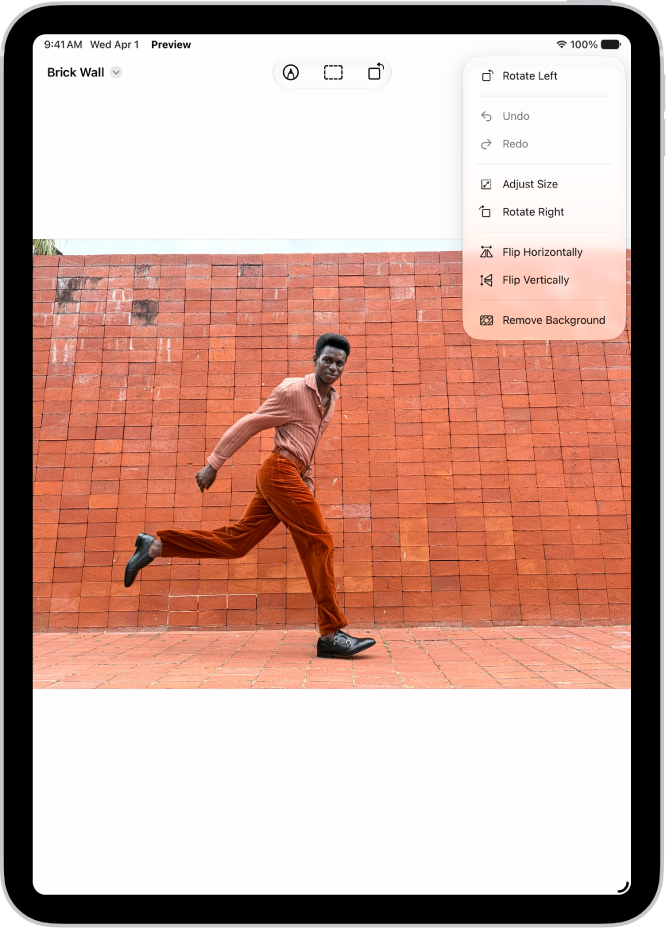
The Preview app showing a photo. A hand holding a bunch of grapes is in the foreground. The sky and ocean are in the background.

Remove the background from an image

You can remove image backgrounds to focus on what’s important. Tap the More button at the top of the screen, then choose Remove Background.

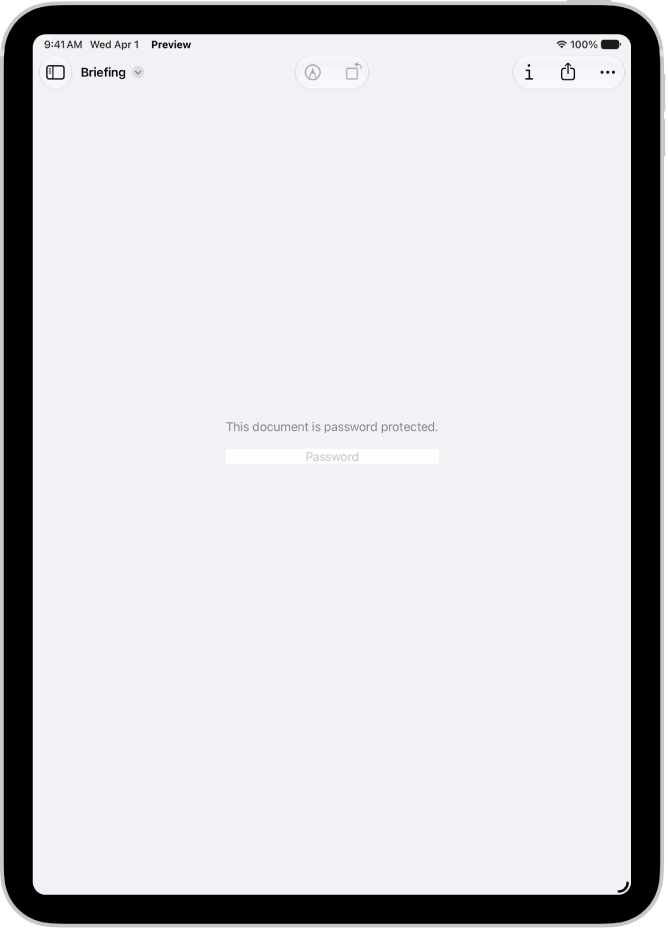
A locked PDF form in the Preview app showing a password field. At the bottom of the screen are the Markup, Info, and Share buttons.

Protect a PDF document with a password

You can lock a PDF with a password. Open a PDF, tap the Actions Menu button next to the filename, then tap Lock. Turn on Require Password, then enter a password in the Password and Verify fields.

A service agreement PDF in the Preview app with text highlighted and struck through. Highlight, Underline, and Strike Through buttons are shown below the text.

Highlight, underline, or strike through text

You can highlight, underline, or strike through text in a PDF. Open a PDF, then select text. Tap Highlight, then tap a highlight color, the underline button, or the strike through button.

There’s much more Preview can do, as these guides show:

Tag: Preview

You can lock a PDF document with a password to prevent others from editing or deleting your work. You just lock it in the Preview app, and to keep a copy that’s not password-protected, you can duplicate it first. You can also open and view PDFs and images in Preview.

Screenshot of lock options.

  1. Go to the Preview app on your iPad.
  2. Open a PDF.

    Important: To keep a copy that’s not password-protected, tap the Actions Menu button, then tap Duplicate.

  3. Tap the Actions Menu button next to the filename and tap Lock.
  4. Turn on Require Password. Enter the same password in the Password and Verify fields.
  5. Tap Done.

See also

Tag: Preview

You can fill out and sign PDF forms in the Preview app on your iPad. You just enter information in a blue field, or select contact information in the bar above the onscreen keyboard, then add a signature or a text box. You can create a signature with an Apple Pencil or draw with your finger.

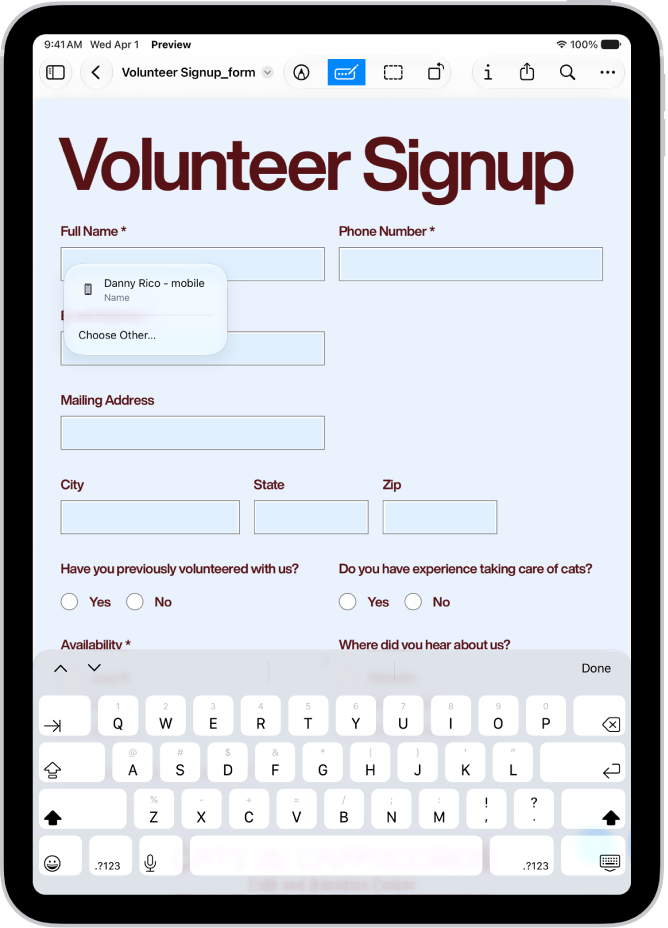
A screen showing a PDF form in the Preview app with fillable fields highlighted. At the bottom of the screen are the Add Annotation, Markup, AutoFill, Crop, Info, Share, and Search buttons. The AutoFill button is selected.

  1. Start the Preview app on your iPad.
  2. Open a PDF form.
  3. Tap the Form Fill button.
  4. Tap a blue field and then enter information (or select contact information in the bar above the onscreen keyboard).
  5. Tap the Add button to add a signature or a text box.

    Tip: You can use an Apple Pencil (with a compatible iPad) or draw with your finger to create a signature. See Apple Pencil compatibility with iPad models.

See also

Tag: Preview

In Preview, you can browse and open PDFs and images directly, without opening the Files app first. You’ll find files you opened recently in Recents. Once a file is open, you can find text in a PDF, view information about the PDF or image, and view an Apple Reference Image.

The main screen of the Preview app, showing PDFs and images. Toward the bottom of the screen are the Recents, Shared, and Browse tabs.

Open a PDF or image

You can browse and open PDFs and images directly in Preview, with no need to open the Files app first.

  1. Start the Preview app on your iPad.
  2. Do any of the following to find a file:
    • View files you opened recently: Tap Recents.
    • View shared files: Tap Shared.
    • Browse available files: Tap Browse.
    • Choose a location to browse: Tap the Toggle Sidebar button, then tap an option under Locations in the sidebar.
    • Browse by tag: Tap the Toggle Sidebar button, then tap an option under Tags in the sidebar.
  3. Optionally, tap the More button. Then select how items appear (icons or list) or how items are sorted.
  4. Tap a file to open it.

Quick tip: When someone emails you a PDF form to fill out, tap the attached file in the Mail app, and you can open and complete the form in Preview. Then reply to the sender with the completed form attached. Read our guide, Reply to an email with a PDF attachment.

View a PDF or image

  1. Start the Preview app on your iPad.
  2. Open the PDF or image that you want to view.
  3. Do any of the following:
    • Zoom in or out: Pinch two fingers open or closed on a page or image.
    • Open or close thumbnail view for a PDF: Tap the Toggle Sidebar button.
    • Scroll pages in a PDF: Swipe up or down.
    • Go to a specific page in a PDF: Tap the More button and tap Go to Page. Enter a page number and tap Go.

View an Apple Reference Image

For a photo that includes an Apple Reference Image, Preview can display the reference image and its information, letting you verify whether the photo has been altered or edited.

  1. Start the Preview app on your iPad.
  2. Open the PDF or image that includes an Apple Reference Image.
  3. Tap the Info button and then tap Reference Image to view the unedited image.
  4. Tap the Info button again to see the information about the Reference Image data.

Find text in a PDF

  1. Start the Preview app on your iPad.
  2. Open a PDF you want to search.
  3. Tap the Search button.
  4. Optionally, tap the Search Options button in the search field and do any of the following:

    • Exclude matches where the search text is part of another word: Select Whole Word.
    • Only include results that match the capitalization of the search text: Select Match Case.
  5. Enter a word or phrase in the search field.

    If you enter a phrase, Preview searches for that exact phrase.

  6. Tap the Next Result button or the Previous Result button to go to the next or previous search result.
  7. Tap the Done button to close the search results.

View information about a PDF or image

The Preview app can give you information about PDF documents and images, like creation date, filename, and more. And if location information is available for a photo, you can view the latitude and longitude where it was taken.

  1. Start the Preview app on your iPad.
  2. Open a PDF or image.
  3. Tap the Info button to view information about the file.
  4. To add or change a caption, tap Add a Caption (or the current text), enter text, and then tap the Done button on the keyboard.
  5. Tap the Info button to close the Info window.

See also

Tag: Preview

You can copy, highlight, underline, or strike through text in a PDF file. You can also annotate a PDF or image with stickers, signatures, shapes, or text.

You can draw with an Apple Pencil on a compatible iPad, or with your finger. Any change can be undone, too, and text you copy can be pasted into another document or app.

Here’s how to annotate a PDF or image in Preview on iPad.

Select and copy text

  1. Start the Preview app on your iPad.
  2. Open a PDF.
  3. To select text, touch and hold the first word and then move the grab points.
  4. To copy the selection, tap Copy.

    You can then paste the text into another document or app. See Select, cut, copy, and paste text.

Highlight, underline, or strike through text

A PDF in the Preview app showing highlighted text, available highlight colors, and the underline and strike through tools.

  1. Start the Preview app on your iPad.
  2. Open a PDF.
  3. Drag to select text and then tap Highlight.
  4. Choose a highlight color, or tap the underline or strike through button.

Add an annotation

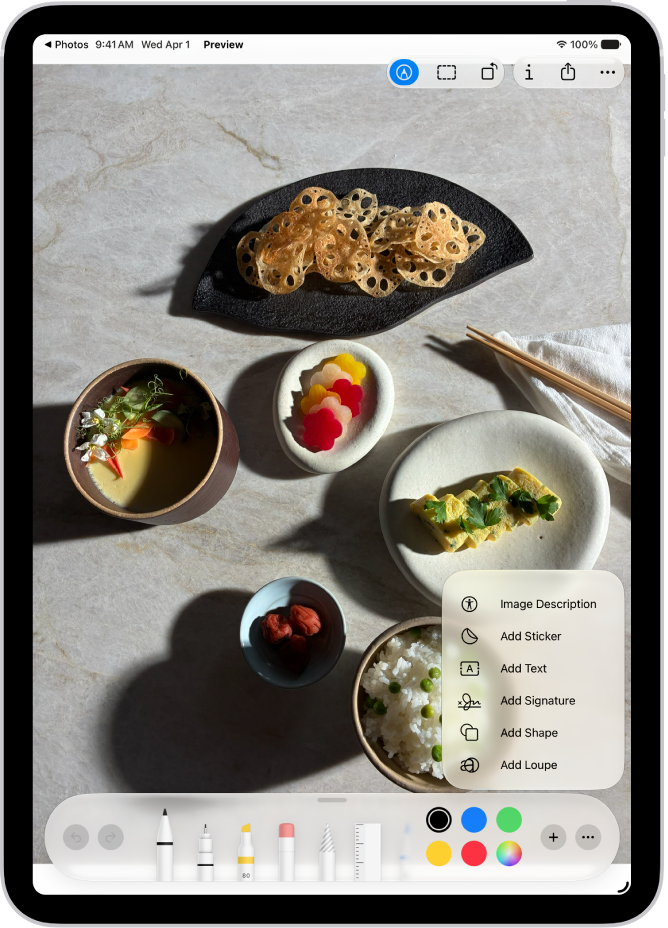
An image open in the Preview app. A menu shows options that can be added to it, such as stickers and text. The Markup, Info, Share, and More buttons appear at the top of the screen, and annotation tools appear at the bottom of the screen.

  1. Start the Preview app on your iPad.
  2. Open a PDF or image.
  3. Tap the Markup button at the top of the screen and tap the Add button at the bottom of the screen. Choose an option, such as a sticker, signature, shape, or text. For images, you can also add an image description or a loupe.

    Tip: You can use an Apple Pencil (with a compatible iPad) or draw with your finger. See Apple Pencil compatibility with iPad models.

To undo a change, tap the Undo button to the left of the annotation tools.

See also

Tag: Preview

You can provide ratings and photos of places you visit to help other Maps users. Your ratings and photos appear everywhere you’re signed in to the same Apple Account.

You can edit your ratings later if you change your mind, share your photos publicly, and edit the photos you’ve added. To upload photos to Apple, you need an Apple Account.

Here’s how to rate places and add photos in Maps on iPad.

Note: The Apple Ratings and Photos feature isn’t available in all countries or regions.

Rate a place

  1. Go to the Maps app on your iPad.
  2. Tap a place on the map or a search result, then tap the Like button.
  3. Tap the Like button or the Dislike button for the available categories. Then tap the Done button.

Changed your mind? You can edit your ratings later.

Add photos for a place

  1. Start the Maps app on your iPad.
  2. Tap a place on the map or a search result, then tap the More button.
  3. Tap Add Your Photos and then follow the onscreen instructions.

    To upload your photos to Apple, you need to have an Apple Account.

    Note: If you don’t see ratings categories or the Rate button, you can’t add a photo.

  4. To credit yourself for the photos you contribute, using either your name or a nickname, tap Photo Credit and then turn on Show Credit. If desired, you can enter a nickname for yourself. (The photo credit option you choose applies to all photos you previously submitted and continue to submit.)

Share your photos publicly

It’s up to you to allow companies to use the photos you add to Maps for their own products and services.

  1. Start the Settings app on your iPad.
  2. Tap Apps, then tap Maps.
  3. Turn on Allow Photo Providers to Use Your Photos.

Photos you share include location data, but not your identity. If you turn this setting off, photo providers may no longer use your photos. (It may take a few days to take effect.)

Edit your photos for a place

Besides photos, your photo credit is something you can add or remove, and you can provide a nickname for your photo credit.

  1. Start the Maps app on your iPad.
  2. Tap Places.
  3. Tap the place whose photos you want to edit. Then tap Your Photos.
  4. Do one of the following:
    • Submit another photo: Tap Add Photo.
    • Remove a photo: Tap the More Options button. Tap Delete Your Photo.
    • Change your photo credit: Tap the More Options button. Tap Change Photo Credit. The photo credit option you choose applies to all photos you previously submitted and continue to submit.

Stop getting ratings and photos suggestions

You may receive suggestions in Maps to submit a rating or photo if you recently visited or took a photo of a point of interest. These suggestions use on-device processing and can’t be read by Apple. If you don’t want to receive these suggestions, you can turn them off.

  1. Start the Settings app on your iPad.
  2. Tap Apps, then tap Maps.
  3. Turn off Show Ratings and Photos Suggestions.

See also

Tag: Maps

You can find street addresses and other information about places that appear on maps.

A place card can show its street address, phone number, website, and customer reviews. Many restaurants and other businesses even offer App Clips that let you order or make a reservation. You can get a route to the location, save information about a place, and stop sending restaurant notifications.

Here’s how to get information about places in Maps on iPad.

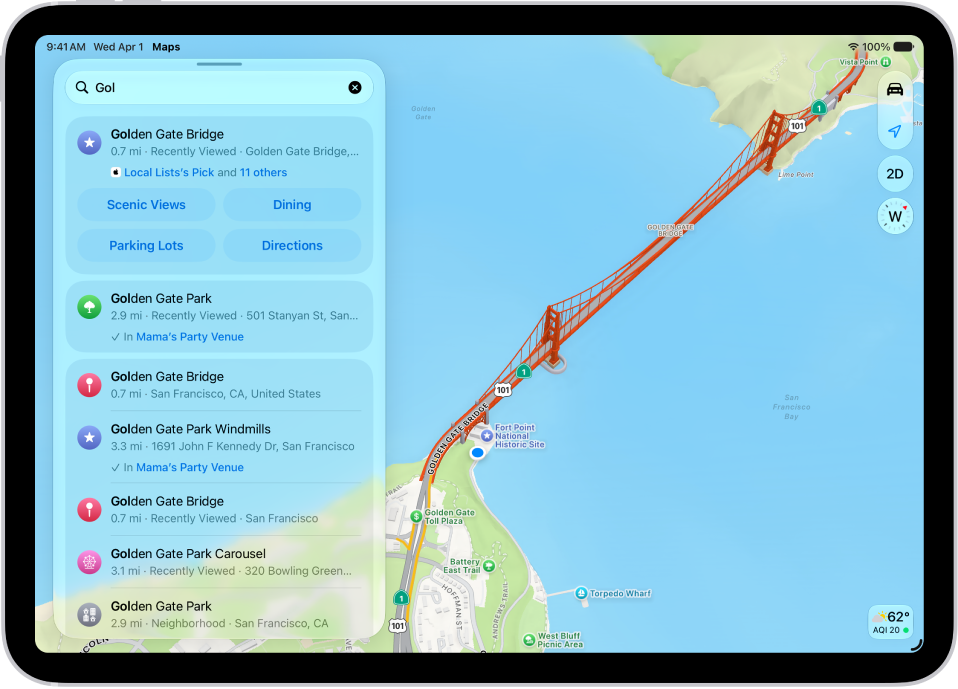
The Maps app showing a map of an area. The search field is in the top left, with results from a search query listed below.

Get information about a place

  1. Go to the Maps app on your iPad.
  2. Tap a place (for example, a city or landmark on a map, a spot that you marked with a pin, or a search result in Maps). Do any of the following:

    • Get a route to the location: Tap the directions button.
    • View more information: Scroll down in the place card.

      The information might include the street address, a phone number, a webpage link, customer reviews, and more. Many restaurants and other businesses offer App Clips that allow you to order or make a reservation by tapping buttons on their place cards.

Save information about a place

You can save a place or add it as a pin to one of your custom guides, or as one of your contacts.

  1. Open the Maps app on your iPad.
  2. Tap a place on a map or a search result in Maps, tap the More button, and then choose an option.

Stop sending restaurant names to a third party

If you install an app with a table-booking extension, it can help you make reservations at restaurants, too. If you’d rather not send it the names of restaurants you view, you can stop that.

  1. Open the Settings app on your iPad.
  2. Tap Apps, then tap Maps.
  3. Tap Restaurant Booking, then turn off the app extension.

See also

Tag: Maps

You can find nearby attractions, services, and more in the Maps app. You can search by a category like Grocery Stores or Restaurants, or enter something like “playgrounds” or “parks,” and Siri can help, too. In select U.S. cities, you can even see Local Lists, with suggestions based on what people view, share, and interact with most.

Note: Nearby suggestions aren’t available in all countries or regions.

Find a nearby attraction, restaurant, or service

Siri: Ask Siri something like, “Find coffee near me.” Learn how to use Siri.

Or without using Siri:

  1. Go to the Maps app on your iPad.
  2. Tap the search field and then do one of the following:

    • Tap a category like Grocery Stores or Restaurants below Find Nearby.
    • Enter something like “playgrounds” or “parks” in the search field, then tap the Search Nearby result.
    • In select U.S. cities, enter “Local Lists” in the search field, tap Guides, then tap a collection, such as restaurants or kid-friendly spots. Suggestions are based on what people view, share, and interact with most on Apple Maps.

    Tip: You can also touch and hold the Maps app icon on the Home Screen, then tap Search Nearby. See Perform quick actions.

    Depending on what you’re looking for, you may be able to apply more search criteria, tap a suggestion to get additional information, and more.

  3. To change the nearby area, drag the map.

For recommendations on where to eat, shop, and explore in great spots around the world, see our guide, Explore places with guides.

See also

Tag: Maps