Got a tip for us?

iPad

The iPad is a tablet computer from Apple that runs the iOS mobile operating system. Similar in functionality to the iPhone, the iPads purpose is often quite different, sometimes even serving as a general desktop computer replacement.

While you’re following driving, cycling, or walking directions, you can share your estimated time of arrival (ETA) to let friends and family know when you’re likely to arrive.

Your ETA updates automatically if there are major delays, so you don’t have to send follow-up messages along the way. You can share your ETA with more than one contact, and even ask Siri to share it.

Here’s how to share your estimated time of arrival in Maps on iPad.

Note: Not all features are available in all countries or regions. Some Maps features on iPad models with Wi-Fi + Cellular require a cellular data plan and Cellular Data turned on in Settings > Apps > Maps. Standard carrier data and text rates may apply. See View or change your cellular data.

Share your estimated time of arrival (ETA)

Siri: Ask Siri something like, “Share my ETA.” Learn how to use Siri.

Or without using Siri:

  1. Go to the Maps app on your iPad.
  2. Search for the place you want to go and then tap Go.
  3. Tap the route card at the bottom of the screen. Then tap Share ETA.

    If you don’t see Share ETA, make sure you turned it on in Settings > Apps > Maps.

  4. Choose one or more suggested contacts, or tap Open Contacts to find a contact.
  5. To share your ETA with more contacts, tap Sharing with at the bottom of the screen. Then tap Open Contacts.

The Messages, Find My, and Contacts apps can share your location with others, too. For the steps, see our article for each app: Share your location in Messages, Share your location in Find My, or Edit contacts.

Stop sharing your ETA

  1. Start the Maps app on your iPad.
  2. Open the route card for a trip in progress.
  3. Tap Sharing with at the bottom of the screen. Then tap Stop Sharing ETA below each contact’s name.

Automatically share your ETA to a pin

A contact you add to a pinned place in your Places automatically gets your ETA when you start turn-by-turn navigation to that location.

  1. Start the Maps app on your iPad.
  2. Tap Places, then tap Pinned. See Add a pin to your Places.
  3. Tap the Information button and tap Add Person.
  4. Search for a contact, tap to add them and then tap the Done button.
  5. Tap the pinned location. Then tap Go to start sharing your ETA.

Until you arrive, your location, route, and ETA remain viewable.

Turn off ETA sharing

  1. Start the Settings app on your iPad.
  2. Tap Apps, then tap Maps.
  3. Scroll down, then turn off Share ETA.

With iPadOS 13.1, iOS 13.1, or later, people get a Maps notification with your ETA and can track your progress in Maps. Earlier versions get the notification through iMessage instead, and other mobile devices receive an SMS message.

See also

Tag: Maps

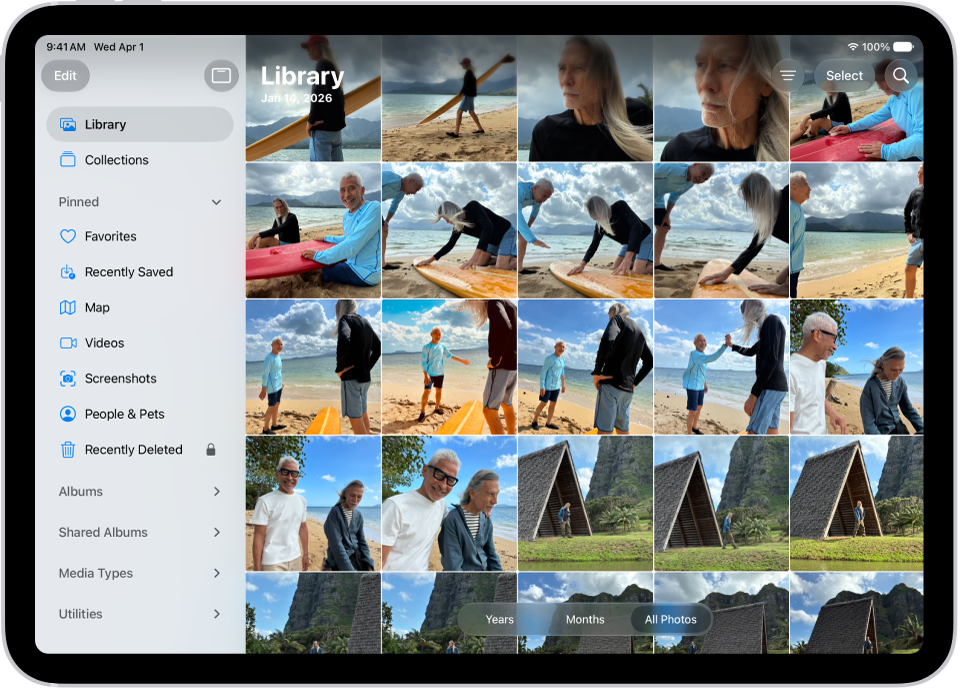
Use Photos on your iPad to find your photos, enjoy your memories, and share your best shots. The Library tab shows all your photos organized by date, and memories turn your photos and videos into personalized collections set to music. You can also adjust light and color, crop, and add filters or styles.

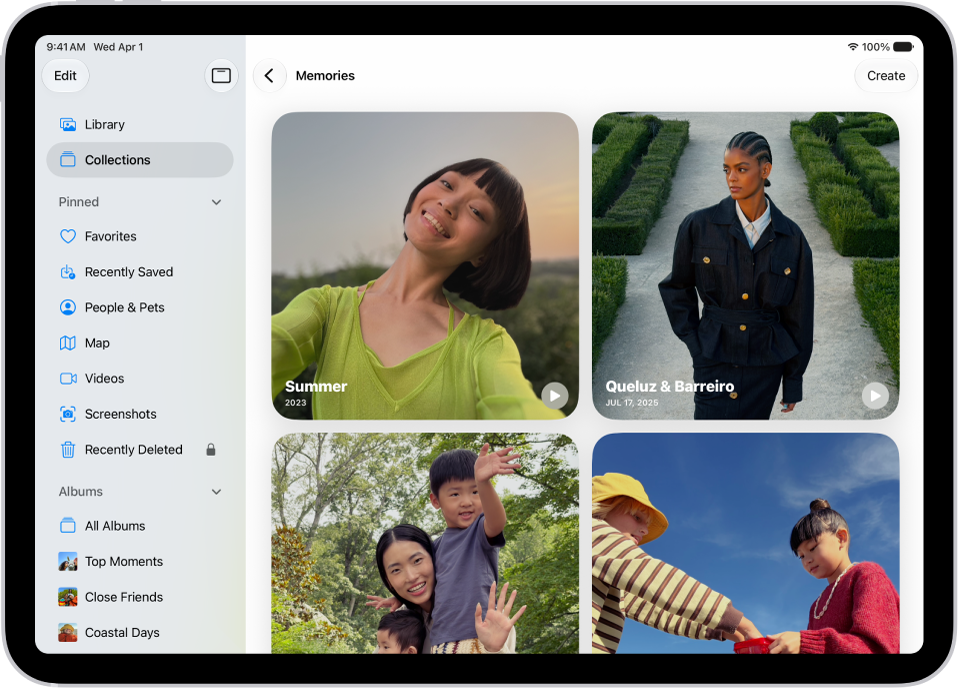
Each memory centers on a theme, like a person, pet, place, event, or activity. You can share photos with Mail, Messages, or AirDrop, or share all the photos and videos in a collection.

The Photos app is open and the Library tab is selected in the sidebar.

Browse your photos

To get started viewing your photos and videos, go to the Photos app. The Library tab shows all your photos organized by date. To view collections of photos—like Albums, People & Pets, and more—tap the Collections tab.

The Photos app is open and the Collections tab is selected in the sidebar.

Enjoy your memories

Relive your favorite memories with personalized collections of photos and videos that are set to music and play like a movie. Tap Collections, tap Memories, then tap a memory. Each memory features photos from your library curated around a theme—like a person, pet, place, event, or activity.

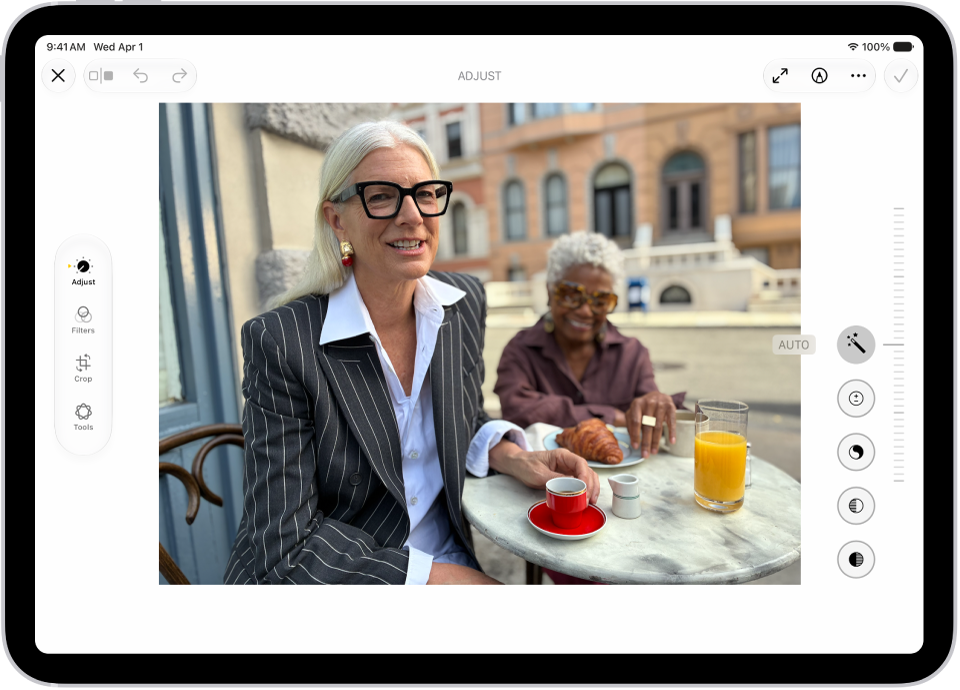
The Edit screen of the Photos app showing a photo in the center. To the left of the photo are the Style, Adjust, Crop, and Clean Up buttons; Adjust is selected. To the right of the photo are buttons for editing effects and a slider to adjust each effect level.

Edit your photos

Make your photos stand out by adjusting light and color, cropping, rotating, adding filters or styles, and more. Open a photo or video, then tap the Edit button to start editing.

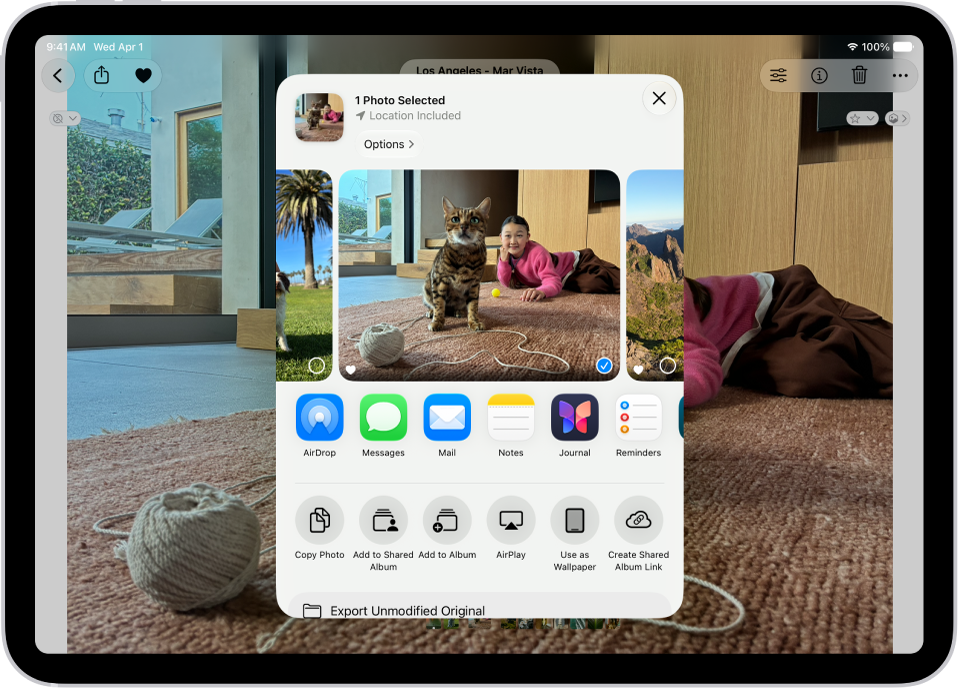
A photo is open in the Photos app and the share options are displayed in the middle of the screen.

Share your photos

Open a photo or video, tap the Share button, then choose a sharing option like Mail, Messages, or AirDrop. To share all the photos and videos in a collection, tap the More button, then tap Share.

There’s a lot more you can do in Photos, and these guides explain how:

Tag: Photos

With an Apple News+ subscription, you can download issues to read when you’re not connected to the internet.

You can download an issue from My Magazines, from a magazine channel you follow, or from search, and download multiple issues at once. You can read a downloaded issue anytime, and remove downloaded issues when you’re done with them. When you remove an issue from My Magazines, its cover and content are removed from iPad and from your other devices where News is turned on in iCloud settings.

Here’s how to manually download Apple News+ issues on iPad.

Note: Apple News and Apple News+ aren’t available in all countries or regions.

Download an Apple News+ issue

  1. Start the News app on your iPad.
  2. Do any of the following:
    • Tap Today in the sidebar or tab bar, then swipe to My Magazines.
    • Tap News+ in the sidebar or tab bar, then tap My Magazines. You can also tap Catalog near the top of the screen, then tap a stack of magazines.
    • In the sidebar, tap a magazine channel you follow.
    • Tap the Search button in the sidebar or tab bar, enter the channel name in the search field, then tap the channel.
  3. When you find the issue you want, tap the More button below the issue cover (or touch and hold the cover) and then tap Download Issue.

To download multiple issues, tap News+, tap My Magazines, tap the More button, then tap Select. Tap the issues you want to download, then tap the Download button.

Read a downloaded issue

  1. Start the News app on your iPad.
  2. Tap News+ in the sidebar or tab bar.
  3. Tap Downloaded near the top of the screen and tap an issue.

Remove downloaded issues

  1. Start the News app on your iPad.
  2. Tap News+ in the sidebar or tab bar. Then tap Downloaded near the top of the screen.
  3. Tap the More button, tap Select and tap the issues you want to remove. Then tap the Delete button.

An issue you remove from the Downloaded tab is still easy to access again in My Magazines.

Remove an issue from My Magazines

  1. Start the News app on your iPad.
  2. Tap News+ in the sidebar or tab bar. Then tap My Magazines.
  3. Tap the More button below the issue cover (or touch and hold the cover), tap Remove, and tap Remove from My Magazines.

The issue’s cover and content disappear from iPad, and the same goes for every other device where you’re signed in to the same Apple Account, provided News is turned on in iCloud settings.

See also

Tag: News

You can share an audio recording with others (or send it to your Mac or another device) using AirDrop, Messages, Mail, and more.

You can share it as a rendered .m4a file with all audio effects and layers mixed in, or as an editable file that lets someone with a compatible device configure the effects and layers. You can share more than one recording at a time, too, from the list of recordings.

Share a recording

  1. Go to the Voice Memos app on your iPad.
  2. Tap the recording you want to share and tap the Share button.
  3. Tap Share. Tap Options and choose one of the following:
    • Rendered: Create a single .m4a file with all audio effects and layers mixed in.
    • Editable: Share a file that lets a recipient with a compatible device and software update configure effects and layers.
  4. Choose a sharing option, select or enter a recipient, and tap the Done button or the Send button.

Share more than one recording

  1. Open the Voice Memos app on your iPad.
  2. Tap Select above the list of recordings and then select the recordings you want to share.
  3. Tap the Share button, tap Options, and then choose a file option (Rendered or Editable.)
  4. Choose a sharing option, select or enter a recipient, and tap the Done button or the Send button.

See also

In the iTunes Store app, you can purchase ringtones, text tones, and other alert tones for clock alarms and more.

Tones you bought on another device can be downloaded again with your Apple Account, and you also have the option to permanently download them to a compatible device.

Redownload tones purchased with your Apple Account

If you bought tones on another device, you can download them again.

  1. Open Settings and then tap Sounds.
  2. Below Sounds, tap Ringtone.
  3. Tap Download All Purchased Tones. You might not see this option if you already downloaded all the tones that you purchased or if you haven’t purchased any tones.

When you purchase access to movies, TV shows, music, music videos, ebooks, audiobooks, or ringtones from Apple, you also have the option to permanently download these items to a compatible iPhone, iPad, Mac, or PC. Apple cannot revoke your downloaded content, and you can always access your downloaded content without an internet connection.

See also

In the Photos app, you can create a slideshow to view a selection of photos and videos that you choose from your library. You can also turn any album or collection into a slideshow. Slideshows are automatically formatted and set to music.

You can change the transition style, speed, and time per slide, choose a song, or mute the music while the slideshow plays.

Here’s how to make a slideshow on iPad.

Make a slideshow from selected photos

  1. Start the Photos app on your iPad.
  2. Tap Library.
  3. Tap Select and tap each item you want to include.
  4. Tap the More button, then tap Start Slideshow.
  5. As the slideshow plays, tap the screen to do any of the following:
    • Change the transition style, speed, and time per slide: Tap Customize and tap Transition & Duration.
    • Choose a song: Tap Customize, tap Music, and then tap Choose Song.
    • Mute the song: Tap the Mute button.
    • Play on loop: Tap Customize and tap Loop.
    • Share: Tap the More button, tap Share, and select a sharing option such as Messages or Mail.
    • Play on a connected AirPlay device: Tap the More button, tap AirPlay, then select a device.

Make a slideshow from an album or collection

  1. Start the Photos app on your iPad.
  2. Tap to Collections.
  3. Open any album or collection and tap the More button. Tap Start Slideshow.

See also

Tag: Photos

When you update to the latest version of iPadOS, your data and settings remain unchanged. You can also automatically install system file updates to improve the features of your iPad without updating iPadOS.

Before you update, you can set up iPad to back up automatically, or back up your iPad manually. Updates can install automatically overnight while iPad is charging and connected to Wi-Fi, and you’re notified before an update is installed. You can also update iPad manually, or with your computer.

Update iPad automatically

If you didn’t turn on automatic updates when you first set up your iPad, do the following:

  1. Open the Settings app on your iPad.
  2. Tap General and tap Software Update. Tap Automatic Updates.
  3. Turn on one of the following:
    • Automatically Install: When an update is available, iPad downloads and installs it overnight while charging and connected to Wi-Fi. You’re notified before an update is installed.
    • Automatically Download: Downloads an update automatically when your iPad is connected to Wi-Fi, charging, and locked so you can install the update later. To see this option, first turn off Automatically Install.

Update iPad manually

At any time, you can check for and install software updates.

  1. Open the Settings app on your iPad.
  2. Tap General, then tap Software Update.

    The currently installed version of iPadOS is shown, and whether an update is available.

  3. If an update is available, tap Download and Install, then follow the onscreen instructions.

Update using your computer

  1. Connect iPad and your computer with a cable.
  2. Do one of the following:
    • On a Mac (macOS 10.15 or later): In the Finder sidebar, select your iPad. Then click General at the top of the window.
    • On a Mac (macOS 10.14 or earlier) or a Windows device: Open the iTunes app, click the button resembling an iPad near the top left of the iTunes window, and then click Summary.
  3. Click Check for Update.
  4. To install an available update, click Update.

Automatically update system files only

Without updating iPadOS, iPad can automatically download and install system file updates that improve iPad features.

  1. Open the Settings app on your iPad.
  2. Tap General and tap Software Update. Tap Automatic Updates.
  3. Under iPadOS Updates, turn off Automatically Install.
  4. Under System Files, turn on Automatically Install.
Tag: iPadOS

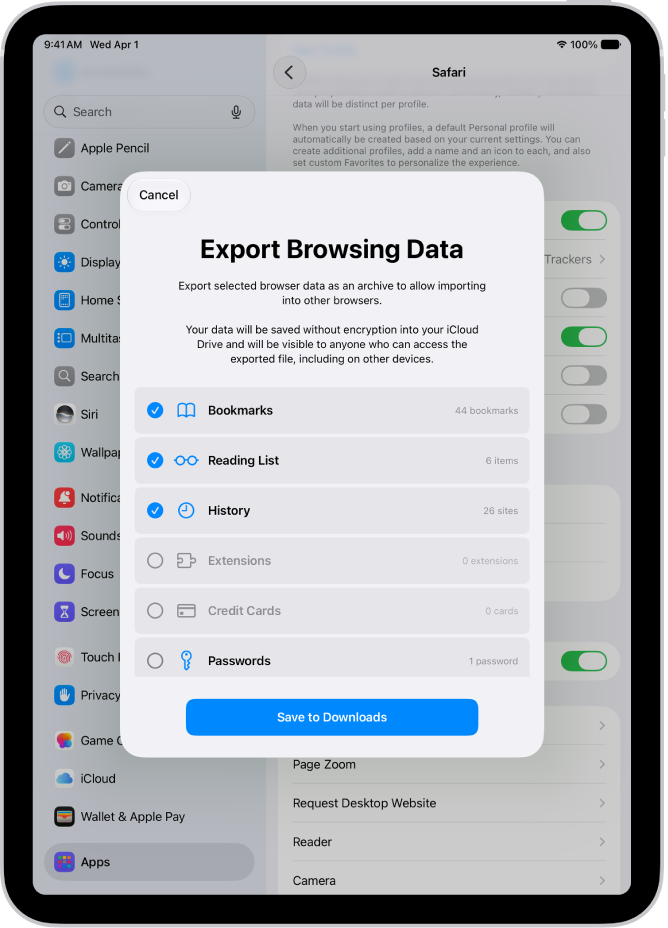
You can export selected data from Safari, and then import that data into another browser on iPad. If you created profiles in Safari, you can export data from one profile or all of them, and it’s saved as a .zip file in your Downloads folder.

You can export the following data from Safari:

  • Bookmarks
  • History
  • Extensions
  • Credit cards
  • Passwords

WARNING: Your exported data is not encrypted and is visible to anyone who can access the file. After you import the data into another browser, delete the file you exported.

The Export Browsing Data screen, showing the data you can export from Safari to another browser.

  1. Open the Settings app on your iPad.
  2. Tap Apps, then tap Safari.
  3. Below History and Website Data, tap Export.
  4. Select the data to export.

    If you created profiles for your browsing in Safari, choose the profile you want to export data from, or choose All Profiles.

    Each profile has its own history and extensions data. The data for bookmarks, credit cards, and passwords is the same across all profiles.

  5. Tap Save to Downloads.
  6. Tap Done.

See also

Tag: Safari

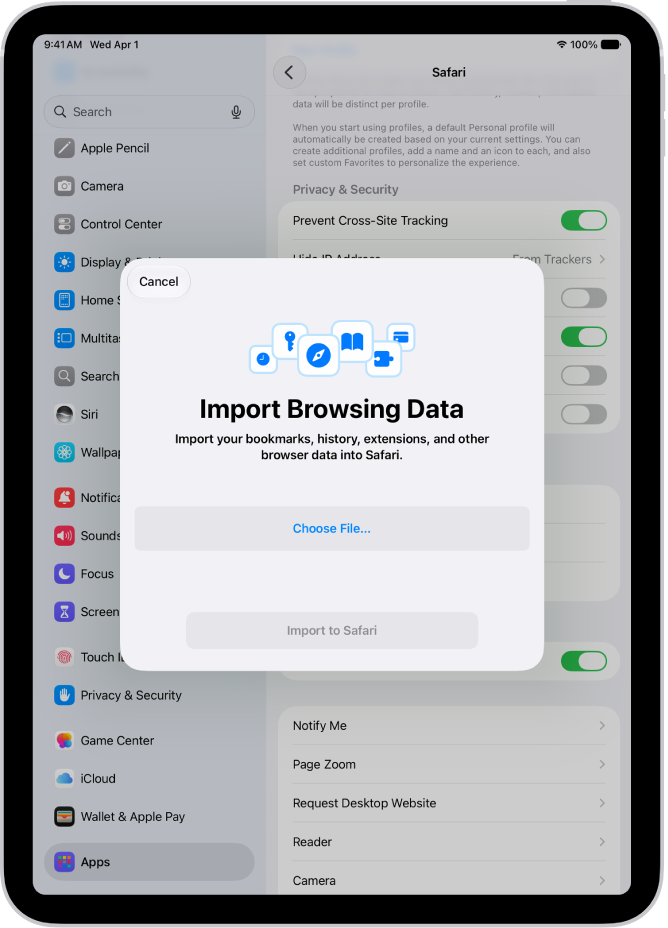
You can import data into Safari that you exported from another browser. Browser data can include bookmarks, history, extensions, credit cards, and passwords.

The data can come as a ZIP file, and there might be individual files for each piece of browsing data, like bookmarks or history. After you import it, a description of the browser data appears, and any passwords go into the Passwords app. For security, you’ll want to delete the file or folder you imported, since it may include unencrypted data.

The Import Browsing Data screen, showing the data from another browser to be imported into Safari.

  1. Open the Settings app on your iPad.
  2. Tap Apps, then tap Safari.
  3. Below History and Website Data, tap Import.
  4. Tap Choose File and then choose a file (or a ZIP file of files) to import.

    Individual files might be available for each piece of browsing data, such as bookmarks or history.

  5. Tap Import to Safari.

    A description of the browser data you imported appears.

    Note: Any passwords you import go into the Passwords app.

  6. Tap Done.

    WARNING: For security, delete the file or folder you imported. It may include unencrypted data and could be visible to anyone who can access it.

See also

Tag: Safari

Getting iPad ready for a new owner takes a backup, signing out of iCloud, and erasing all content and settings, which also removes Activation Lock if you turned on Find My. Before you sell, give away, or trade in your iPad, be sure to perform the following tasks:

  • Back up iPad. If you replace one iPad with another, you can use the setup assistant to restore the backup to your new iPad.

    If you’re replacing your iPad with another one you have on hand, you can use extra free storage in iCloud to move your apps and data from one iPad to another. Go to Settings > General > Transfer or Reset iPad > Get Started, then follow the onscreen instructions.

  • Sign out of iCloud, the iTunes Store, and the App Store. Go to Settings > [your name], scroll down, tap Sign Out, then follow the onscreen instructions.
  • Erase all content and settings that contain personal information. If you previously turned on Find My for your iPad, Activation Lock is removed when you erase iPad, making it ready for a new owner.
Tag: iPadOS