Got a tip for us?

iPhone

The iPhone is a smartphone from Apple that runs the iOS mobile operating system. Between its apps, communication features, the camera, mobile internet access, and other functionalities, the iPhone has quickly become an integral part of many peoples tech lives.

You can search for recordings or rename any recording in Voice Memos. A new recording is first named New Recording or the name of your location, and you can even search a transcript for a word or phrase.

Here’s how to search for or rename a recording in Voice Memos on iPhone.

Search for a recording

  1. Start the Voice Memos app (in the Utilities folder) on your iPhone.
  2. Swipe down from the middle of the list of recordings to reveal the search field.
  3. Tap the search field, enter part or all of the recording name, and then tap Search.

Note: Enter a word or phrase in this field, and you can search for it in a transcript, too.

Rename a recording

A recording is initially saved with the name New Recording or the name of your location, if Location Services is turned on in Settings > Privacy & Security. You can change the name.

  1. Start the Voice Memos app (in the Utilities folder) on your iPhone.
  2. Tap the recording and tap the name. Type a new one.

Visual Voicemail shows you a list of your voicemail messages in the Phone app. You can choose which ones to play and delete without listening to them all, and a badge on the Voicemail icon shows the number of unheard messages.

When you store your voicemail messages in iCloud, they sync across your devices. Live Voicemail lets you see a real-time transcription as someone is leaving you a message, and you can even pick up the call as they’re leaving their voicemail.

Note: Voicemail, Visual Voicemail, and Live Voicemail are available from select carriers in select countries or regions.

Set up Voicemail

The first time you tap Voicemail, you’re asked to create a voicemail password and record your voicemail greeting.

  1. Start the Phone app on your iPhone.
  2. Do one of the following, depending on which Phone app layout you’re using:
    • Unified layout: Tap the Filter button, tap Voicemails, tap Edit, and then tap Edit Voicemail Greeting.
    • Classic layout: Tap Voicemail, then tap Greeting.
  3. Choose a greeting—Default or Custom; if you choose Custom, you can record a new greeting.

Turn on Live Voicemail

When a caller is sent to voicemail, your iPhone can display a transcription of the caller’s voicemail as they speak. (Calling and data rates may apply.) To turn on Live Voicemail, do the following:

  1. Start the Settings app on your iPhone.
  2. Tap Apps, then tap Phone.
  3. Turn on Live Voicemail.

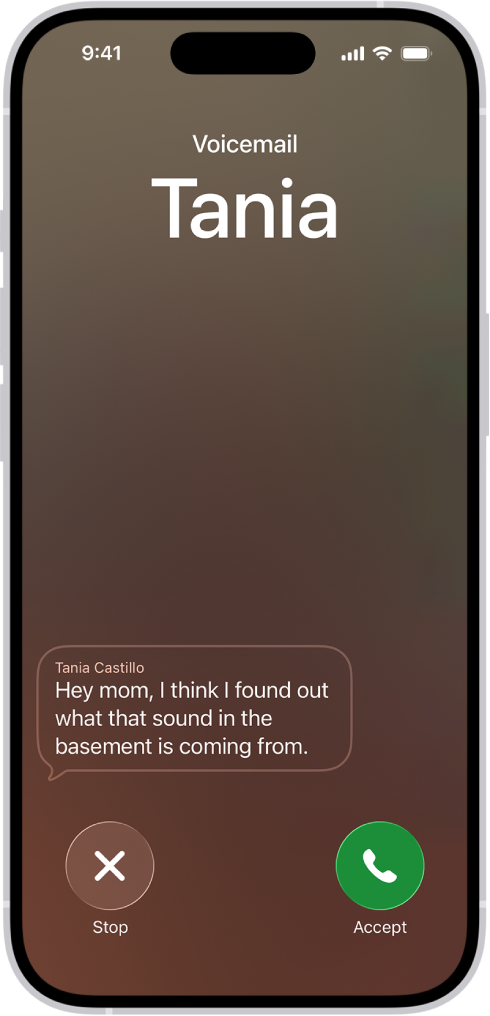
The caller won’t be able to hear you and you won’t be able to hear them unless you choose to answer the call. To stop the incoming voicemail without answering or blocking the call, tap Stop. If your iPhone is turned off or is out of your carrier network’s range, the call is sent to carrier voicemail, if available. If you have Silence Unknown Callers turned on, unknown numbers go directly to Live Voicemail without ringing you first. Calls identified as spam by your carrier don’t go through Live Voicemail and are instead instantly declined.

Note: Live Voicemail isn’t available in all countries, regions, or languages.

A call screen showing a Live Voicemail from a contact. Below the transcribed text are the Stop and Accept buttons for the call.

Store Voicemail in iCloud

iCloud can store and sync your Live Voicemail and Carrier Voicemail.

  1. Start the Settings app on your iPhone.
  2. Tap your name, then tap iCloud.
  3. Tap See All next to Saved to iCloud and then turn on Phone & FaceTime.
Tags: iCloud, Mail

If you want to share an item that’s paired with an AirTag, or a third-party item that works with Find My, you can share it in Find My so the borrower can see it on a map and find it. If it’s nearby, Find My can play a sound, and if you’re using a supported iPhone, you can find its precise location.

People you’re sharing items with don’t receive tracking notifications when the items are moving with them. And you can stop sharing an AirTag whenever you want.

You can share an AirTag or other item with as many as five borrowers besides you, for a total of six users per item. Just make sure you meet the following requirements:

  • Two-factor authentication must be turned on for your Apple Account.
  • The person you share with must have an Apple Account and be signed in to it. They must also use iCloud.
  • You can’t share with a child account.
  • The owner and borrowers must have iCloud Keychain turned on.
  • The owner and borrowers must be using iOS 17, iPadOS 17, macOS 14, or later.

Note: You share an AirTag and a third-party item the same way.

Share an AirTag

  1. Open the Find My app on your iPhone.
  2. Tap Items and tap the name of the AirTag or item you want to share. Tap the More button.
  3. Tap Add Person below Share AirTag (or Share This Item).
  4. Enter the Apple Account information of the person you want to add.

    To add more people, tap the Add button.

  5. Tap the name of the person you want to share with. Tap their Apple Account.

    Repeat steps 3 and 4 for each person you want to add.

  6. When you’re finished adding borrowers, tap the Done button.

A list of everyone you invited shows up on the item’s main screen, along with the status of each invitation.

When someone accepts an invitation, the shared AirTag shows up in Find My below Items, and the recipient gets a notification that an item is being shared with them. If they decline the invitation instead, their name is removed from the list and you won’t see it anymore.

Ask the owner of an AirTag to share it in Find My

If the owner of an AirTag shares it with you but doesn’t do so in Find My, you’ll receive an unknown AirTag notification and tracking notifications. To stop receiving tracking notifications for the AirTag, ask the owner to share it with you in Find My.

Note: Asking an owner to share an AirTag only works if you’re both in the same Family Sharing group.

  1. In the tracking notification you receive, tap Ask Owner to Share AirTag.
  2. Tap Ask Owner.
  3. If the owner wants to add you as a borrower, you receive an invitation to share the AirTag.

Accept or decline an invitation to share

If you’re invited to share an AirTag, you receive a notification.

To see the invitation in Find My, tap Items , then do one of the following:

  • Accept the invitation: Tap Add.

    The AirTag appears in your Items list, below [Sharer]’s Items. You stop receiving tracking notifications for as long as you borrow the AirTag.

  • Decline the invitation: Tap Don’t Add.

Stop sharing an AirTag

Owners of an AirTag who no longer want to share it can stop sharing in Find My.

  1. Open the Find My app on your iPhone.
  2. Tap Items, tap the name of the item you’re sharing, and tap the More button.
  3. Tap the name of the person you’re sharing it with.
  4. Tap Stop Sharing, then tap Stop Sharing again.

The person you were sharing with no longer sees the AirTag’s location, but may still get tracking notifications when the AirTag is moving with them.

Tag: Find My

With Dual SIM, you can use one number for business and another for personal calls, add a local data plan when you travel, or have separate voice and data plans. It’s flexible. To use two different carriers, though, your iPhone must be unlocked.

Here are some of the many ways to put Dual SIM to use:

  • Use one number for business and another number for personal calls.
  • Add a local data plan when you travel to another country or region.
  • Have separate voice and data plans.

Note: To use two different carriers, your iPhone must be unlocked.

You can set up Dual SIM with either of these combinations:

  • One physical SIM and one eSIM; supported on iPhone SE (2nd generation), iPhone XR, iPhone XS, iPhone 11, iPhone 12, iPhone 13, and iPhone 14, and later
  • Two eSIMs; supported on iPhone SE (3rd generation), iPhone 13, and later

Note: Physical SIM isn’t supported on all models. eSIM isn’t available in all countries or regions.

Set up Dual SIM

  1. Open the Settings app on your iPhone.
  2. Tap Cellular. Then make sure you have at least two lines (below SIMs).
  3. Turn on two lines—tap a line and then tap Turn On this Line.

    You can also change settings such as Cellular Plan Label, Wi-Fi Calling (if available from your carrier), Calls on Other Devices, or SIM PIN. The label appears in Phone, Messages, and Contacts.

  4. Choose the default line for cellular data—tap Cellular Data and tap a line. To use either line depending on coverage and availability, turn on Allow Cellular Data Switching.

    You may incur roaming charges if Data Roaming is on and you’re outside the country or region covered by the carrier’s network.

  5. Choose the default line for voice calls—tap Default Voice Line, then tap a line.

When using Dual SIM, note the following:

  • Wi-Fi Calling must be turned on for a line to enable that line to receive calls while the other line is in use for a call. If you receive a call on one line while the other is in use for a call, and no Wi-Fi connection is available, iPhone uses the cellular data of the line that is in use for the call to receive the other line’s call. Charges may apply. The line that is in use for the call must be permitted for data use in your Cellular Data settings (either as the default line, or as the non-default line with Allow Cellular Data Switching turned on) to receive the other line’s call.
  • If you don’t turn on Wi-Fi Calling for a line, any incoming phone calls on that line (including calls from emergency services) go directly to voicemail (if available from your carrier) when the other line is in use; you won’t receive missed call notifications. If you set up conditional call forwarding (if available from your carrier) from one line to another when a line is busy or not in service, the calls don’t go to voicemail; contact your carrier for setup information.
  • If you make a phone call from another device, such as your Mac, by relaying it through your iPhone with Dual SIM, the call is made using your default voice line.
  • If you start an SMS/MMS Messages conversation using one line, you can’t switch the conversation to your other line; you need to delete the conversation and start a new conversation using the other line. Also, you may incur additional charges if you send SMS/MMS attachments on the line that’s not selected for cellular data.
  • Instant Hotspot and Personal Hotspot use the line selected for cellular data.

Connect your iPhone to the internet by using an available Wi-Fi or cellular network. iPhone connects to your carrier’s cellular data network when Wi-Fi isn’t available.

iPhone connects in this order: the most recently used Wi-Fi network, then a Wi-Fi network you choose from the list, then your carrier’s cellular data network. It automatically joins known networks, and you can also join a hidden network by entering its name.

Here’s how to connect iPhone to the internet.

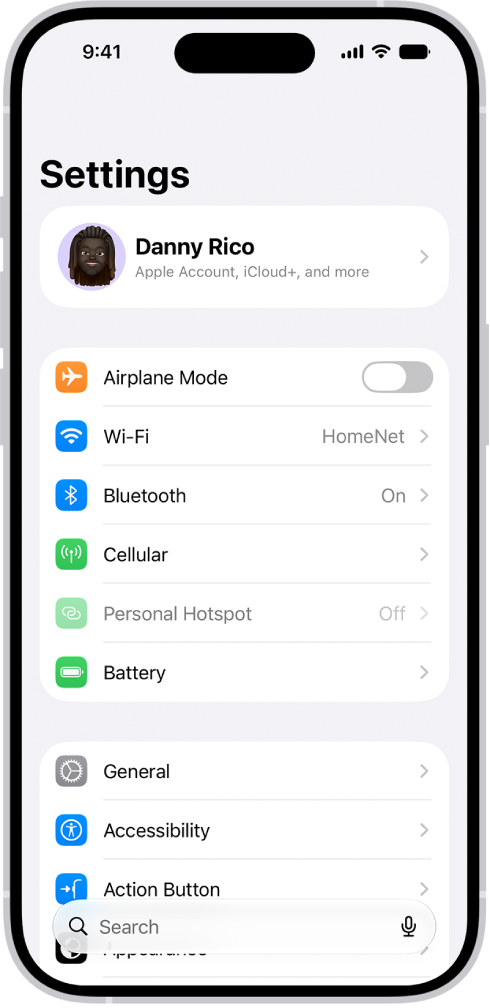
The Settings screen showing that iPhone is connected to a Wi-Fi network called HomeNet.

Connect to a Wi-Fi network

  1. Open the Settings app on your iPhone.
  2. Tap Wi-Fi and turn on Wi-Fi.

    iPhone automatically joins known networks.

  3. To join a new network, do one of the following:

    • Join an available network: Tap the name of the network. If asked, enter the password.
    • Join a hidden network: Tap Other. Then enter the name of the network, security type, and password.

Once iPhone is connected to Wi-Fi, you’ll see a blue checkmark next to the network name, along with the Wi-Fi icon.

Use Connectivity Assist on iPhone

With Connectivity Assist on, iPhone keeps your internet connection reliable by using cellular data along with Wi-Fi when Wi-Fi is weak or busy or isn’t connected to the internet. Turn it off, and iPhone uses only Wi-Fi when it’s connected to a Wi-Fi network, even if that connection is weak or busy.

Note: If you had Wi-Fi Assist turned on, Connectivity Assist is on too.

  1. Open the Settings app on your iPhone.
  2. Tap Wi-Fi.
  3. Turn Connectivity Assist on or off.

iPhone shows the amount of cellular data Connectivity Assist has used. To start a new count, tap Reset Data Usage.

Note: Connectivity Assist only uses cellular data when it’s needed to keep your connection reliable. It also stays off while you’re roaming internationally with iPhone, when cellular Low Data Mode is on, or with some apps that stream audio and video. To check your overall cellular data usage, go to the Settings app , then tap Cellular.

Join a Personal Hotspot

You can use the cellular connection of an iPhone or iPad with cellular service if it’s sharing a Personal Hotspot.

  1. Open the Settings app on your iPhone.
  2. Tap Wi-Fi. Choose the name of the device sharing the Personal Hotspot.
  3. If asked, enter the password. To see the password on the device sharing the Personal Hotspot, open the Settings app and tap Cellular Data. Then tap Personal Hotspot.

Connect to a cellular network if Wi-Fi isn’t available

Your iPhone automatically connects to your carrier’s cellular data network if a Wi-Fi network isn’t available. If iPhone doesn’t connect, check the following:

  1. Verify that your SIM is activated and unlocked.
  2. Open the Settings app on your iPhone and then tap Cellular.
  3. Verify that Cellular Data is turned on. If you’re using Dual SIM, tap Cellular Data, then verify the selected line. (You can choose only one line for cellular data.)
Tag: Wi-Fi

In addition to the apps that come with iPhone and that you use with iCloud, iPhone works with Microsoft Exchange and many of the most popular internet-based mail, contacts, and calendar services. You can set up accounts for these services.

You can set up a mail account, a contacts account, or a calendar account, and for a mail account, it starts with entering your email address.

Here’s how to set up mail, contacts, and calendar accounts on iPhone.

Set up a mail account

  1. Start the Settings app on your iPhone.
  2. Tap Apps and then tap Mail.
  3. Tap Mail Accounts, then tap Add Account.
  4. Enter your email address, tap Next, and enter your email account information.

You can also tap “choose from a list” under the email address field to select the email service you want to use—for example, iCloud, Microsoft Exchange, or Gmail (Google).

If your email service isn’t listed, tap Add Other Account, tap Mail Account, then enter your email account information.

Set up a contacts account

  1. Start the Settings app on your iPhone.
  2. Tap Apps, then tap Contacts.
  3. Tap Contact Accounts and then tap Add Account.
  4. Do one of the following:
    • Tap a provider—for example, iCloud or Microsoft Exchange—then enter your account information.
    • Tap Other, tap Add LDAP Account or Add CardDAV Account (if your organization supports it), then enter the server and account information.

Set up a calendar account

  1. Start the Settings app on your iPhone.
  2. Tap Apps and then tap Calendar.
  3. Tap Calendar Accounts and then tap Add Account.
  4. Do one of the following:
    • Choose a provider: Tap a provider—for example, iCloud or Microsoft Exchange—then enter your account information.
    • Add a CalDAV, CardDav, or LDAP account: Tap Add Other Account, choose an option, and then enter your server and account information.
    • Subscribe to iCal (.ics) calendars: Tap Other, tap Add Subscribed Calendar, and then enter the URL of the .ics file to subscribe to; or import an .ics file from Mail.

Turn on iCloud Keychain on your iPhone, and your accounts stay up to date on all your devices where it’s turned on.

Tag: Mail

You can reduce the number of unwanted text messages you receive when you screen and filter messages from unknown senders and turn off business alerts.

Messages from unknown senders are filtered into another folder, so they can’t text you directly, and you don’t get notified. You can also set up additional spam filtering for unknown SMS, MMS, and RCS messages, and review the messages that were filtered. Filters cover promotions and transactions, too.

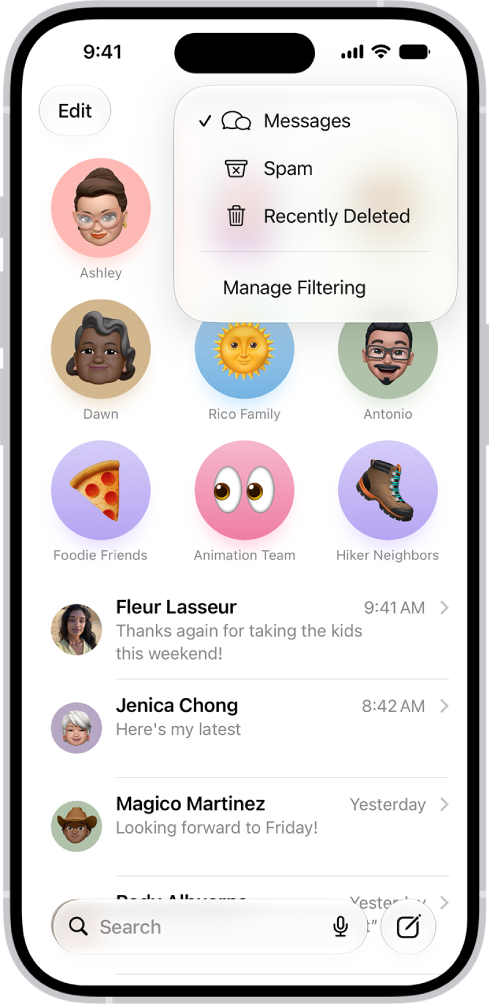
A conversation list in Messages. All messages are shown, because no filter is selected in the Filter menu.

Screen and filter messages from unknown senders

You can stop unknown senders from texting you directly. Instead, their messages land in another folder, and you won’t get notified about them unless you want to be.

  1. Open the Messages app on your iPhone.
  2. In the conversation list, tap the Filter button and tap Manage Filtering.
  3. Turn on Screen Unknown Senders.
  4. To get notifications from some unknown senders—for example, for time-sensitive texts, like verification codes—tap Allow Notifications. Then turn on the categories you want to allow. (Options vary by country and region.)
  5. To detect and filter SMS, MMS, and RCS messages from unknown senders into folders for Transactions and Promotions, tap the Back button, tap Text Message Filter. Then turn on Text Message Filter and any third-party message filtering extensions you may have installed.

Note: Filters cover promotions and transactions, plus anything your third-party message filtering extension offers. Text message filtering stops applying once you’ve replied to a sender three times or more. Try blocking or reporting those senders instead.

Review messages from unknown senders and mark them as known

At any time, you can review messages filtered to the Unknown Senders folder. If a sender turns out to be legitimate, mark them as known or add them to Contacts. Their messages then move into your conversation list, and you can open links and view any blurred images they’ve sent.

  1. Open the Messages app on your iPhone.
  2. In the conversation list, tap the Filter button and tap Unknown Senders.
  3. Do any of the following:
    • Tap the message from the sender whose messages you want to see in your conversation list, then tap Mark as Known.
    • Tap the sender’s email address or phone number at the top of the conversation, then tap Create New Contact.

Any future messages from a sender are filtered to Unknown Senders until you mark them as known or add them as a contact.

Turn off business alerts

Some businesses send alerts and updates about your orders and other transactions, but you can turn them off.

  1. Open the Settings app on your iPhone.
  2. Tap Apps, then tap Messages.
  3. Turn off any of the following:
    • RCS Business Messages: Tap RCS Messaging, then turn RCS Business Messages off. (Availability varies by carrier and country.)
    • Apple Messages for Business: Tap Messages for Business and turn Business Updates off.

You can also report spam messages when you receive them.

Quick tip: To prevent unwanted messages, you can also allow messages only from your contacts with Screen Time.

With iPhone and a computer, you can transfer files using an external storage device, a file server, or a cloud storage service like iCloud, Box, or Dropbox.

An external storage device can be a USB drive or SD card, and you can access it and change its formatting. You can also connect to a computer or file server instead.

Here’s how to transfer files from iPhone to a storage device, a server, or the cloud.

Transfer files with an external storage device

  1. Connect your iPhone or computer to an external storage device, such as a USB drive or SD card.

    To connect to iPhone, you might need a cable adapter.

    Note: If an alert appears on iPhone asking whether to trust this computer, select Trust.

  2. Use a supported app (like Files or Pages) to copy files to the storage device.
  3. Disconnect the storage device and then connect it to the device where you want the copied files to appear.
  4. Copy the files to the connected device.

Access an external storage device

For a connected external storage device, you can rename it, erase it, and get information about it.

  1. Start the Files app on your iPhone.
  2. Tap Browse.
  3. Touch and hold the name of the storage device below Locations and then do any of the following:
    • Rename the storage device: Tap Rename [device].
    • Erase the storage device: Tap Erase.
    • Get information about the storage device: Tap Get Info.

Change the formatting of an external storage device

On iPhone models with a USB-C port, the Files app can quickly change an external drive’s format to ExFAT, MS-DOS (FAT), or APFS (Apple File System).

  1. Start the Files app on your iPhone.
  2. Tap Browse.
  3. Touch and hold the name of the storage device below Locations. Tap Erase.
  4. Select a format for the device—for example, APFS, ExFAT, or MS-DOS (FAT)— then tap Erase again.

Connect to a computer or file server

  1. Start the Files app on your iPhone.
  2. Tap Browse.
  3. Tap the More button.
  4. Tap Connect to Server.
  5. Enter a local hostname or a network address, then tap Connect.

    Tip: After you connect to a computer or file server, it appears in the Recent Servers list on the Connect to Server screen. To connect to a recent server, tap its name.

  6. Select how you want to connect:

    • Guest: You can connect as a Guest user if the shared computer permits guest access.
    • Registered User: If you select Registered User, enter your user name and password.
  7. Tap Next and then select the server volume or shared folder in the Browse sidebar (below Shared).

To disconnect from the file server, tap the Eject button next to the server in the Browse sidebar.

Transfer files with a cloud storage service like Box or Dropbox

Note: Subscription fees might apply.

  1. On your iPhone or computer, follow the instructions from your cloud storage service to upload the files you want to share.
  2. To access your shared files on iPhone, open the Files app, tap Browse at the bottom of the screen, and then tap the name of the storage service below Locations.

To access the shared files on a computer, follow the service’s instructions.

Keep selected files downloaded

If there are files you always want to be able to access on your iPhone, you can keep them downloaded. Any changes you make to them while offline sync with iCloud once you’re back online.

  1. Start the Files app on your iPhone.
  2. Locate a file you want to keep downloaded.
  3. Touch and hold the file you want to keep downloaded. Then tap Keep Downloaded in the menu that opens.

When Keep Downloaded doesn’t appear in the menu, that means the file is already on your iPhone.

Tag: Files

In the Reminders app, you can use iCloud to share to-do lists. You can collaborate and assign tasks to other people who also use iCloud.

People who accept the invitation can add and edit items, and everyone sees the changes. Once a list is shared, you can assign items in it to people, and turn notifications on or off for the shared list.

Here’s how to share lists and collaborate in Reminders on iPhone.

Note: With updated reminders in iCloud, all the Reminders features described in this guide are available. Some aren’t when you use other accounts.

Collaborate on a list using iCloud

People who use iCloud can work on a list with you once you share it. Anyone who accepts the invitation can add and edit items and mark items as completed, and all participants see everyone’s changes. To collaborate, everyone needs to be signed in to their Apple Account, with Reminders turned on in iCloud settings.

  1. Open the Reminders app on your iPhone.
  2. View the list you want to share. Then tap the Share button.

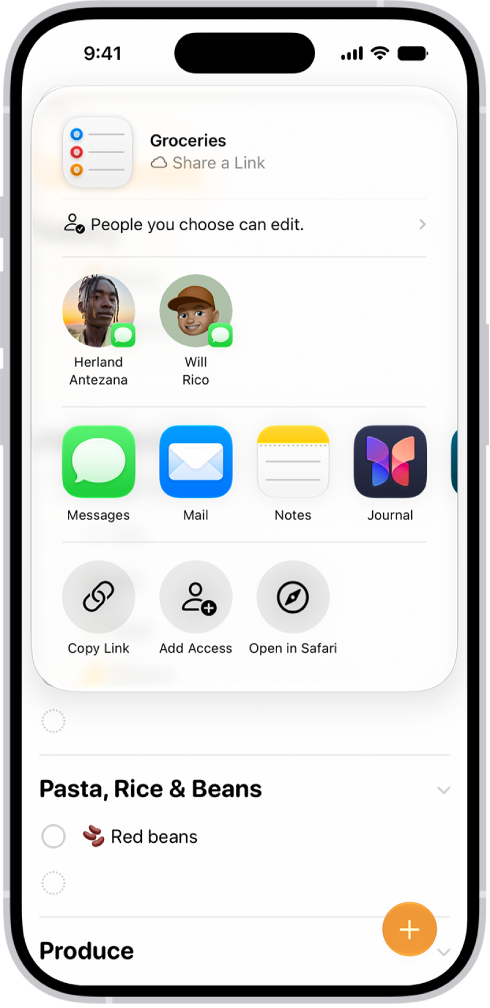
    A Reminders screen showing a grocery list with options for sharing at the bottom.

  3. By default, participants on the list can invite other people. To restrict sharing, tap People you invite can add others and then turn off Allow others to invite.
  4. Choose how to send your invitation (for example, using Messages or Mail).

If you send the invitation in Messages, you get activity updates in the Messages conversation when someone makes changes in the shared list. Tap the updates to go to the shared list.

Assign items in a shared list

You can assign a task to any person on the list, including yourself.

  1. Open the Reminders app on your iPhone.
  2. In the shared list, create or edit a reminder, then do either of the following:
    • Type @ followed by the person’s name or choose a person from the menu above the keyboard.
    • Tap the Person button, then choose a person.

Quick tip: Use the Assigned to Me Smart List to see all items assigned to you at a glance.

Turn notifications on or off for a shared list

  1. Open the Reminders app on your iPhone.
  2. In the shared list, tap the Collaborate button and tap Manage Shared List.
  3. Below Notify When, turn on or off any of the following:
    • Adding Items: Receive an alert when someone adds an item to the list.
    • Completing Items: Receive an alert when someone completes an item on the list.

Express yourself by adding stickers that match your personality and mood to your text messages. It all starts with the Add button in a conversation.

You can send Live Stickers you or a friend made, emoji, and Memoji, and even place stickers on a conversation, then move, resize, or delete them. You can also create Live Stickers and save other people’s Live Stickers.

Here’s how to send stickers in Messages on iPhone.
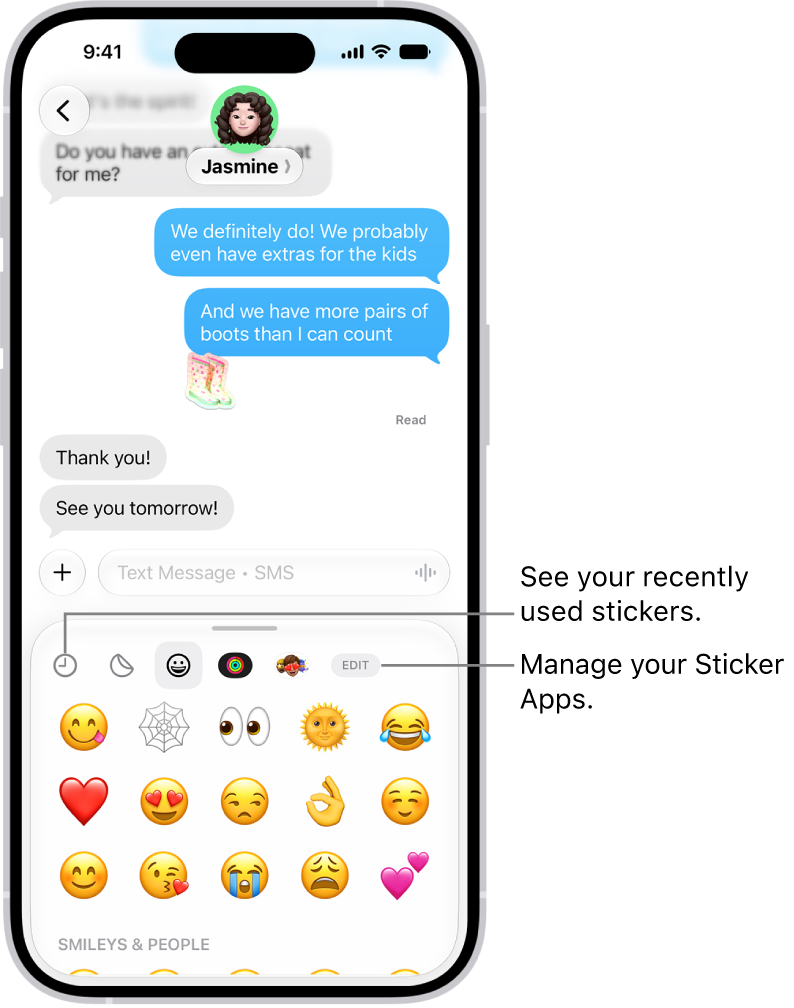
Stickers appear below a conversation. Each button across the top of the card opens a sticker pack.

Send a sticker in a message

  1. Open the Messages app on your iPhone.
  2. In a conversation, tap the Add button.
  3. Tap Stickers and then tap the icon for any of the following sticker packs:

    • Live Stickers you or a friend made: Tap the Live Stickers button.

      See Create Live Stickers and Save other people’s Live Stickers, below.

    • Emoji: Tap the Emoji button.
    • Memoji: Tap the Memoji Stickers button, tap a Memoji in the top row to view the stickers in the sticker pack, and then choose a pose or expression.
    • Stickers from other creators: Download a sticker app from the App Store.
  4. Add a message (optional), then tap the Send button.

From the emoji keyboard, you can send stickers, too.

Place stickers on a conversation

On message bubbles in conversations, you can add stickers, angle them, or make them different sizes. One sticker can even go on top of another.

  1. Open the Messages app on your iPhone.
  2. In a conversation, tap the Add button.
  3. Tap Stickers. Then tap an icon—such as the Live Stickers button, the Emoji button, or the Memoji Stickers button—in the top row to browse a sticker pack.
  4. Drag a sticker onto a bubble. Do any of the following:
    • Adjust the angle: Rotate a second finger around the finger dragging the sticker.
    • Adjust the size: Move a second finger closer to or away from the finger dragging the sticker.

As soon as you place a sticker on a message, your recipients see it.

To find out who sent a sticker in a conversation, touch and hold the sticker, then tap Sticker Details.

Quick tip: Adding stickers to messages is quick: Touch and hold a message, tap Attach Sticker, and then choose a sticker for a corner of that message bubble.

Move, resize, or delete stickers

Once a sticker is on top of message bubbles in conversations, you can still change it.

Do any of the following:

  • Move or resize a sticker: Touch and hold the sticker, then make any changes.
  • Delete a sticker: Touch and hold the message bubble, tap Sticker Details, swipe left on the sticker you want to delete (on your iPhone only), then tap the Delete button.
  • See any text covered by a sticker: Double-tap the message bubble.

Note: To see these updates to stickers, you and your recipients need iOS 17.2, iPadOS 17.2, macOS 14.1, visionOS 1, watchOS 10.2, or later.

Create Live Stickers

By lifting subjects from photos and adding effects that help bring them to life, you can create your own Live Stickers to use in messages.

  1. Open the Messages app on your iPhone.
  2. In a conversation, tap the Add button. Then tap Stickers.
  3. Tap the Live Stickers button and then tap the Add button.
  4. Tap a photo and then tap the Add button.

    Tip: To create a Live Sticker that moves, use a Live Photo.

  5. To add an effect, tap Add Effect and choose an option (such as Comic or Shiny). Then tap the Done button.

Save other people’s Live Stickers

Like a Live Sticker someone sent you? Save it to reuse later.

  1. Open the Messages app on your iPhone.
  2. Open a conversation with a sticker you want to save.
  3. Touch and hold the sticker. Do one of the following:
    • For a sticker sent in a message: Tap Save to Stickers.
    • For a sticker placed on a message bubble: Tap Sticker Details and then tap Save.