Got a tip for us?

It’s no doubt Apple Vision Pro is extremely expensive. So, Why is it so pricey? Lets find out

During the June 2023 WWDC event, Apple made jaws drop when it announced that its newest product, the Vision Pro AR/VR "mixed reality" headset, would start at $3,499.00.

At $3,499, Apple’s Vision Pro costs more than three weeks worth of pay for the average American, according to Bureau of Labor Statistics data. The Vision Pro is also far more expensive than rival headsets, such as Meta’s $499.99 Quest 3, and the $999.99 Meta Quest Pro.

It tops many other Apple products in terms of price too. Buying an iPhone 14 Pro Max, a 12.9-inch iPad Pro and an Apple Watch Ultra would still be cheaper than an Apple Vision Pro (although it comes fairly close.) Shipments of virtual and augmented reality headsets also plummeted in 2022, according to International Data Corporation statistics published in March, adding to the skepticism.

A close-up of Apple Vision Pro.  

In an interview with ABC News’ Good Morning America, Apple CEO Tim Cook acknowledged the headset’s price when asked if the average person would be able to afford it.

"I think people will make different choices depending upon their current financial situation," he said.

To call Apple’s new headset expensive may be an understatement. But once you step back and look at the larger picture beyond the initial sticker shock, that eye-watering price starts to make a little sense.

The $3,499 price tag is leading many Apple fans to question: “Why does Apple Vision Pro cost so much?”

Reasons Why Apple Vision Pro Is So Expensive

High-Quality Hardware

One of the biggest factors contributing to the cost of the Vision Pro is the hardware. The device is packed with state-of-the-art components, each contributing to the overall user experience. From the high-resolution display and powerful processor to the advanced sensors and the cutting-edge haptic feedback system, each piece of hardware plays a crucial role in providing a seamless and immersive experience. These components are not cheap to produce, and their high cost is reflected in the price of the Vision Pro.

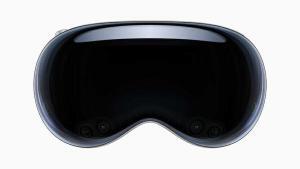
The first thing you’ll notice about the Vision Pro is the chassis, which evokes a pair of high-end ski goggles. A tinted, continuous front panel wraps around the wearer’s eyes, acting as a lens and concealing a fan that draws air through the headset to cool the electronics inside.

Around the back of the Vision Pro, there’s a band that can be easily swapped out, and a dial for adjusting the tightness of the headset. Zeiss worked in partnership with Apple to create magnetic lenses for prescription wearers.

Unlike some AR headsets on the market, the Vision Pro’s battery pack isn’t built into the device itself. A wire running from the rear connects to a battery pack, which provides up to two hours of use. Or Vision Pro wearers can plug into the wall for an extended experience.

One presumes that the displays suck up most of the power. The Vision Pro has two (plus an external panel), one for each eye, with 23 million pixels across both. A custom 3D lens ensures that the UI always remains within view, while features like HDR and “wide color” deliver an ostensibly superior image.

IR cameras inside of the Vision Pro track your eyes, while downward-facing cameras on the exterior of the chassis track hands. A third set of sensors — lidar sensors — sense objects around the Vision Pro in real time, tracking their positions.

All of the Vision Pro’s sensors — 23 in total, including a dozen cameras, five sensors and six mics — feed into the R1, a new Apple-originated chip designed to “eliminate lag” and stream images to the headset’s display “eight times faster than the blink of an eye” (as per Apple PR).

The R1 also enables EyeSight, a feature of the Vision Pro that projects a live feed of the wearer’s eyes to the aforementioned external display. It has the effect of making the headset look transparent — at least in pre-recorded videos.

Expensive Research and Development

Years of research and development are also likely reflected in Vision Pro’s price. Since it’s an entirely different type of computer compared to the Mac, iPhone or iPad, Apple had to develop new technologies such as the R1 chip, which processes data from the headset’s 12 cameras, five sensors and six microphones.

Apple has spent over $100 billion in research and development over the last five years. At least $20 billion has probably gone to the new device.

This means consulting new specialists, testing things it didn’t previously have facilities for, and many more underlying logistical factors.

Mike Rockwell, vice president of Apple’s technology development group, even said during the WWDC keynote that the.company filed over 5,000 patents related to the Vision Pro. Cook also said during the Good Morning America interview. "You’ve got more than a 4K experience in each eye. And, of course, it doesn’t come for free. It costs something to do that. " Of course, these R&D expenses will inflate the cost of the Vision Pro.

Many New Innovative Technologies

The Vision Pro boasts an impressive array of cutting-edge technology. It uses **a pair of micro-OLED displays **in its gasket, with 23 million pixels between them. That’s the same as having a 4K TV for each of your eyes.

There are a ton of cameras built in. There are at least 10 external cameras (oriented with two main forward facing cameras, four pointing downward, 2 TrueDepth cameras for establishing depth, and two pointing sideways to capture the periphery of your view and room), as well as at least four IR cameras for working in the dark areas inside the headset, as well as some on the outside.

There are a lot of sensors in the Apple Vision Pro too. There is a LiDAR sensor for measuring distance and 3D mapping of spaces, and accelerometers and gyroscopes to track movement.

Based on the above features, the price is high for a reason. The Vision Pro undoubtedly costs a fortune to produce. With an M2 and a new R1 chip inside, a dozen cameras, and a bunch of sensors, it surely costs Apple quite a bit of money to make this beast.

Software and Ecosystem Integration

An often-overlooked aspect of Apple’s pricing strategy is the investment in software development and ecosystem integration. The Vision Pro is more than just a standalone device; it’s a part of the larger Apple ecosystem.

The software powering the Vision Pro is visionOS, which Apple describes as “the first OS designed for the ground up for spatial computing” — “spatial computing” being Apple’s phrase of choice for AR and virtual reality experiences. At the architecture level, visionOS shares core blocks in common with MacOS and iOS but adds a “real-time subsystem” for processing interactive visuals on the Vision Pro.

Vision Pro support’s Apple’s Continuity features to allow you to work inside the headset, alongside your Mac. You can add multiple virtual displays to a MacBook, turning a single screen device into a multi-display workstation.

Apple Vision Pro makes use of your iCloud account to make sure that everything you do on the headset is synced with your more traditional devices, like the iPhone and Mac.

The seamless integration with other Apple products and services, such as the iPhone, Mac, and iCloud, is a significant part of the Vision Pro’s appeal. This integration requires a substantial investment in software development, another factor contributing to the device’s price.

Industry-Leading Privacy and Security

Apple Vision Pro is built on a strong foundation of privacy and security, and keeps users in control of their data.
Optic ID is a new secure authentication system that analyzes a user’s iris under various invisible LED light exposures, and then compares it to the enrolled Optic ID data that is protected by the Secure Enclave to instantly unlock Apple Vision Pro. A user’s Optic ID data is fully encrypted, is not accessible to apps, and never leaves their device, meaning it is not stored on Apple servers.
Where a user looks stays private while navigating Apple Vision Pro, and eye tracking information is not shared with Apple, third-party apps, or websites. Additionally, data from the camera and other sensors is processed at the system level, so individual apps do not need to see a user’s surroundings to enable spatial experiences. EyeSight also includes a visual indicator that makes it clear to others when a user is capturing a spatial photo or video.

These advanced privacy and Security features come at a cost, as the development and manufacturing of such technology require substantial investment which is reflected in the high price tag of the Vision Pro.

Vision Pro vs. Meta Quest 2: A Comparison

Some critics argue that the Vision Pro is overpriced when compared to the Meta Quest 2, which is available at a fraction of the cost. However, it is crucial to consider the significant differences in features and capabilities between the two headsets. The Vision Pro surpasses the Meta Quest 2 in terms of display resolution, field of view, processing power, and additional features like eye tracking and hand tracking. These advancements justify the higher price point of the Vision Pro.

Is the Vision Pro worth the price?

With a clear understanding of why Apple Vision Pro is so expensive, the next question is: Is it worth it? The answer largely depends on individual needs and circumstances.

For avid tech enthusiasts and professionals who rely heavily on VR and AR for their work, the Vision Pro may well be worth the investment. Its advanced features, superior performance, and seamless integration with the Apple ecosystem offer a level of convenience and functionality that cannot be matched by cheaper alternatives. However, if you are primarily interested in gaming and entertainment and are on a limited budget, there are more affordable options available in the market.

The Apple Vision Pro’s high price point can certainly be justified by a range of notable features. The headset boasts 12 cameras, five sensors, and six microphones. It also incorporates two powerful chips, including the M2 chip, which is also found in high-end laptops like the Apple MacBook Pro 13-inch, and a newly introduced chip R1. Moreover, the Vision Pro’s control system, relying entirely on your eyes, hands, and voice, is a testament to Apple’s innovation and a big leap towards a more intuitive, user-friendly digital experience.

The Vision Pro’s price is also justifiable when considering its potential to replace multiple devices. It functions as a tablet, 4K television, game console, and computer all in one, with added benefits that are exclusive to this device. For instance, it provides the capability to expand your workspace beyond the physical boundaries of your room or to bring your memories to life in 3D.

Still, for many customers, Apple’s characterization of a $3,499 mixed-reality headset as "great value" might seem out of touch, especially in the midst of a cost-of-living crisis.

However, Apple’s positioning also indicates the company’s target audience for the new device. The headset is not aimed at the average tech enthusiast but rather at developers and affluent early adopters who will play a crucial role in paving the way for a consumer-ready version.

Will the price of the Vision Pro come down in the future?

Apple has a history of making its products more affordable over time. As technology progresses, manufacturing processes improve, and economies of scale kick in, it is likely that the price of the Vision Pro will decrease. However, the timeline for price reductions may vary, and it is ultimately determined by market demand and advancements in the augmented reality industry.

See also: 6 Best Apple Vision Pro Tips, Tricks & Hidden Gestures You Should Know

Conclusion

While the Vision Pro may initially appear overpriced compared to other VR/AR headsets, its advanced technology, potential applications, and Apple’s pricing strategy make it a unique offering. Apple aims to cater to early adopters and pave the way for broader adoption of augmented reality. As the industry progresses and demand grows, it is likely that the price of the Vision Pro will become more accessible, just as we have seen with previous Apple products. Ultimately, the Vision Pro represents Apple’s vision of the future of augmented reality and its potential to transform various aspects of our lives.

Are you wondering how you can clean your MacBook Pro keyboard? Even if you’re not that serious about cleanliness, maybe one specific keycap got stuck and isn’t working, or perhaps your keyboard is feeling sticky and full of oils and debris.

The updated 13-inch MacBook Pro is shown.

The good news is that cleaning your MacBook Pro keyboard is actually very easy. In this article, I’ll explain how to clean your MacBook Pro keyboard, step-by-step.

MacBooks are susceptible to dust, crumbs from delicious snacks, and general dirt that can build up over time. Taking a moment to give your keyboard a quick clean will help improve your laptop’s lifespan and hopefully keep your typing experience feeling smooth.

In this guide, we’ll walk you through how to clean your MacBook Pro keyboard effectively using compressed air and microfiber cloth. We’ll also be looking at what Apple recommends for getting rid of that nasty buildup – as well as what to avoid.

How to clean your MacBook Pro keyboard: quick steps

  • Wipe down the keyboard with your microfiber cloth
  • Hold your computer at an angle
  • Use the compressed air to spray the keyboard, going in a left-to-right motion
  • Rotate your computer a few times while doing this to ensure a thorough clean

What you’ll need

Compressed air: A compressed air can will help blow away debris that might be lodged under the keys. It’s also safe for your laptop’s keyboard. You can find this online, or at an office supplies store.

A damp microfiber cloth: Microfiber is a soft type of cloth that is typically used in cleaning electronics. It can pick up dust and debris that could be in between your keys. Be sure to lightly dampen the cloth with water (not soak it) so it’ll be extra easy to pick up dust.

Isopropyl alcohol: This agent is great for disinfecting surfaces and killing germs. It can also remove the sticky feeling from a dirty keyboard. It’s also safer than water on electronics. Make sure it’s rated at 70%, which is safe for electronics at the surface level.

Cottom ball or cotton swabs: You can use these in combination with the alcohol to swab down spots on your keyboard. Make sure to not soak them through, and just lightly dip these materials in the liquid.

Step by step guide

1. How to prep your MacBook Pro before cleaning

Regardless of the model you own, whether it’s an old-school 2016 MacBook Pro or a M2 MacBook Pro, you’ll be able to use this advice across devices with no issue. It’ll also work for external keyboards or other Apple laptops, not just MacBook Pros.

But first, you’ll need to get yourself a can of compressed air, which can easily be found on Amazon for just a few bucks. Once you’ve get your compressed air ready, you can then shut down and unplug your MacBook Pro and give the keyboard an initial wipe down with the microfiber cloth to dislodge any larger pieces of debris.

2. Position your MacBook Pro

Right! Now time for the fun part.

Tilt your MacBook Pro so it’s not flat but also not exactly vertical, at about a 75-degree angle. The straw nozzle of the compressed air canister should be just under an inch away from the keyboard when you spray; not close enough to touch the actual keys, but not too far as to be completely ineffectual.

Don’t turn the nozzle of the can at any strange angles, and avoid turning the can upside down or bending the straw in any way.

Start spraying

Once you’ve got everything angled up, let it rip!

You’re going to want to use the compressed air in steady left-to-right ‘zig-zag’ motions, doing one half of the keyboard at a time. Once you’ve done this you can then rotate your MacBook to its right side and spray the keyboard again from left to right.

Repeat this with the laptop turned onto its left side, then finally upside-down, so you’re blasting the keys from every angle. That’s it – you’re done!

Conclusion

If you have a particularly sticky key or a really grimy build-up that might need a bit more work, Apple also suggests use wiping the keyboard with 70% isopropyl alcohol or 75% ethyl alcohol, or even a disinfecting wipe. Just be sure you’re not using anything with bleach in it, as this could damage and discolor the keycaps.

Other general tips from Apple to avoid damaging your MacBook include not wiping too aggressively, not holding the compressed air nozzle too close, and making sure you don’t get any moisture into openings (like the charging port) when wiping it down.

Here’s how the new feature of WhatsApp could help you take control of spam callers on your iPhone.

Called Silence Unknown Callers, the feature does just that — it silences unfamiliar WhatsApp callers. Perfect for handling robocalls and the like. Without doubt, it’s a great WhatsApp feature that’s easy to miss. So with that in mind, let’s take a closer look.

When enabled, Silence Unknown Callers checks whether an incoming call is from a number that’s in your address book. If an incoming number is completely unknown, the call won’t ring on your phone but will be visible in your call logs afterwards.

The ability to silence unknown numbers on WhatsApp is a smart, effective feature — but it’s not enabled by default.

How to Silence Unknown Callers in WhatsApp on iPhone

Follow the steps below to silence unknown callers in WhatsApp on iPhone:

  1. Launch WhatsApp.
  2. Tap Settings.
  3. Tap Privacy.
  4. Tap Calls.
  5. Enable Silence Unknown Callers.

The feature will be available if you’re running the latest version of WhatsApp, which most iPhone users are by now.

If you’re worried about missing important WhatsApp calls, don’t fret. Silence Unknown Callers works by auto-declining calls from unknown numbers while still making them visible in the Call list.

While Silence Unknown Callers is great, it’s also worth noting that if you’re waiting to receive an important WhatsApp call from an unknown number — like a hospital — it may be wise to disable the feature, at least temporarily. Fortunately, activating and deactivating Silence Unknown Callers on WhatsApp is as simple as toggling a button.

So if you’re frequently plagued by cold callers, activate this feature and put a stop to the spammers once and for all!

The terms Apple Store and Apple App Store are often used interchangeably, but they serve distinct functions in the Apple ecosystem. If you’ve ever wondered what differentiates these two, then you’re in the right place. Let’s demystify the Apple lingo and dive into the nuances between the Apple Store and the Apple App Store.

What is the Apple Store?

The Apple Store is essentially the place where you can purchase Apple hardware and accessories. It’s akin to a marketplace where you can buy products such as iPhones, MacBooks, iPads, and all the fancy accessories that go with them.

The Apple Store also organizes free workshops and events to learn new skills, discover new apps, and meet other creative people who share your interests.

Furthermore, you can trade in your old Apple devices regardless of their condition–for credit towards a new one or recycle them for free.

There are two types of Apple Stores: brick-and-mortar and online.

Brick-and-Mortar Apple Store

The physical Apple Stores are a haven for Apple enthusiasts. You can walk into these sleek, minimalist stores to experience Apple products firsthand. Whether it’s getting the feel of the latest iPhone or getting a tutorial on how to use a Mac, the physical store has got it all.

Moreover, these stores often have a Genius Bar – a section where you can get technical support, advice, and repair services for your Apple products.

The majority of U.S. stores operate within indoor shopping malls, while some stores are standalone locations along busy streets or shopping areas. Apple also has a number of flagship stores worldwide, considered by many to be architectural wonders, including its iconic Fifth Avenue glass cube in New York City, Tower Theater location in Los Angeles, and Regent Street store in London, England.

Online Apple Store

If you’re someone who prefers shopping from the comfort of your home, the online Apple Store is for you. It’s accessible through the web at apple.com or through the Apple Store app. Here, you can purchase products, customize configurations (like choosing the memory size for your MacBook), and even get customer support.

What is the Apple App Store?

The Apple App Store, on the other hand, is a digital distribution platform. This is where you download and manage applications for your Apple devices, such as iPhones, iPads, and Macs.

For over a decade, the App Store has proved to be a safe and trusted place to discover and download apps. From productivity tools, social media apps, games, to virtually any type of app, the Apple App Store is a treasure trove of software that can augment your Apple device’s capabilities. And it’s not just third-party apps; Apple also offers cool services to improve your experience.

For example, Apple Arcade gives users unlimited access to exclusive games that are completely ad-free and free from microtransactions. Other Apple services you can get via App Store with an Apple One subscription include Apple TV , Apple Music, Apple News , and Apple Fitness .

Features of the Apple App Store

  • Discoverability: With categories, featured apps, and recommendations, finding new apps is a breeze.
  • Purchases and In-App Purchases: You can buy paid apps or make in-app purchases for additional features or content.
  • Updates: The App Store is where you get the latest updates for your apps, ensuring security and new features.
  • Family Sharing: Share purchases with up to six family members while keeping each person’s account separate and private.

The Common Thread

Though different, the Apple Store and the Apple App Store share a common goal: providing you with quality products and services to enrich your Apple experience.

In a Nutshell

  • Apple Store is a physical and online marketplace to purchase products exclusively made and featured by Apple.
  • Apple App Store is a digital marketplace for downloading and managing apps on your Apple devices.

Conclusion

So, there you have it! The Apple Store is your go-to destination for Apple hardware, while the Apple App Store breathes life into these devices with a myriad of apps. Both play a critical role in making the most out of your Apple products.

The next time you hear someone using these terms interchangeably, you can now kindly enlighten them on the differences between the Apple Store and the Apple App Store. Happy Apple adventuring! 🍏

Some iPhone 14 Pro users have been waking up to dead iPhones. It seems that sometimes when an iPhone 14 Pro has been left to charge at night, it dies unexpectedly. In this article, I will show you how to fix this problem for good!

Note: information in this article apply to iPhone 14, iPhone 14 Plus, iPhone 14 Pro and iPhone 14 Pro Max.

Some of the features of this problem include:

  • The iPhone 14 Pro has been charging for hours but won’t turn on.
  • The iPhone 14 Pro appears dead and not charging.
  • The iPhone 14 Pro died overnight while charging.
  • The iPhone 14 Pro displays a black screen.
  • Pressing and holding the Side button does not turn on the iPhone 14 Pro.

This problem can be a great inconvenience. Some users rely on their iPhone alarm to wake them in the morning and have slept in because of this. Most people also use their phones for important communication tasks, and until you figure out how to resurrect your iPhone, you won’t be able to make calls or text. In this article, we will tell you what you can do to get your iPhone 14 Pro up and going again and discuss why this problem may have occurred.

How to fix iPhone 14 Pro dead after charging for hours

Try the following to resuscitate your iPhone 14 Pro.

1. Try Turning on your iPhone

Press and hold the Side button until you see the Apple logo on the screen.

2. Force Restart your iPhone

Make sure your iPhone is not connected to your computer via a USB cable.
Perform the following button presses; one followed quickly by the next.

  1. Press and quickly release the volume up button.
  2. Press and quickly release the volume down button.
  3. Press and hold the Side button until the Apple logo appears. This may take longer than you expect. Keep the Side button pressed.

3. If the Force Restart hasn’t woken your iPhone

If you have another charging cable/charging brick that you can use, try using that instead. Plug your iPhone into power and leave it there for an hour. Then try again to turn on your phone by pressing the Side button or doing a Force Restart.

4. Use recovery mode with your iPhone

There are two different things you can do with recovery mode, Update and Restore:

  • Updating your iPhone using recovery mode will not erase your iPhone.
  • Restoring your iPhone using recovery mode will erase your iPhone.

Follow the instructions below to put your iPhone 14 Pro in recovery mode:

  1. Connect your iPhone to your Mac or PC with a Lightning cable
  2. Select Trust on your iPhone screen to allow the connection to your computer, then open Finder in macOS Catalina and later or iTunes for PCs/macOS Mojave and earlier
  3. Press and quickly release the volume up button
  4. Press and quickly release the volume down button
  5. Press and hold the side button until you see the recovery mode screen (computer cable icon)
  6. Select your iPhone in the left-hand sidebar of the Finder window.
  7. Choose Update. If this fails to fix the problem, you can try to Restore your iPhone. If you restore your iPhone, you will need to set it up again using a backup (you can check for iCloud or Finder/iTunes backups) or set it up as new.

5. Contact Apple Support

If none of the above has fixed the problem, you can contact Apple Support. You can chat with Apple online, have Apple Support call you or make a Genius Bar reservation at a nearby Apple Store.

Why did your iPhone 14 Pro die while charging at night?

Although we can’t be sure, there are some theories about why this happens. Most users are experiencing this issue after updating their iPhone 14 Pro to iOS 17. Many have said that their iPhone 14 Pro was set to update overnight, but that failed, and instead, their iPhone was dead when they woke.

Several iPhone 14 Pro users have reported that they are encountering a "Charging on Hold" error. Here’s what you can do to continue charging your device.

Information in this article apply to iPhone 14, iPhone 14 Plus, iPhone 14 Pro, and iPhone 14 Pro Max.

Starting with iOS 16, Apple introduced a new feature that puts your iPhone’s charging on hold when it gets too hot or cold to protect its battery from possible permanent damage.

However, if the "Charging on Hold" alert constantly keeps popping up on your iPhone 14 Pro even when your phone’s temperature feels normal, there’s either something wrong with your iPhone or the charger you’re using.

Fortunately, there are several things you can do to get rid of this annoying notification. Below, I’ll explain how to fix the Charging on Hold error on your iPhone 14 Pro for good!

1. Close Apps Running in the Background

One of the reasons your iPhone 14 Pro keeps showing the Charging On Hold alert could be the power-intensive apps running in the background. Even though most apps running in the background remain in a suspended state, some apps, such as music players or news apps, keep refreshing in the background and fetch new data.

Force closing these apps may help cool down your iPhone and resume charging. To force quit an app, swipe up from the bottom of the screen and then swipe up on each app in the App Switcher to force close it.

Under normal circumstances, you shouldn’t constantly close apps on your iPhone since it does more damage to the battery life than good. However, force-quitting apps is an easy troubleshooting step in cases such as this one.

You can also turn off Background App Refresh to prevent apps from consuming system resources in the background, which can help cool down your iPhone 14 Pro and stop it from showing Charging On Hold error. To turn it off, go into your iPhone Settings, then tap General followed by Background App Refresh. Tap the name of the feature again, located at the top of that screen, and then choose Off.

2. Uninstall Suspicious Apps

It’s possible that an app that you recently downloaded carries a bug that’s triggering the Charging On Hold feature. There are a few signs that suggest that an app carries a bug, such as when the app keeps crashing or slows down your iPhone 14 Pro significantly while you’re using it. Uninstalling the app from your iPhone will likely solve this issue.

To uninstall an app, long-press on its icon. Tap Remove App from the menu that appears. Then, choose Delete App to uninstall the app from your iPhone permanently.

3. Don’t Use Your iPhone While Charging

Although it’s generally safe to use your iPhone while charging, prolonged heavy use may overheat your phone’s battery, slowing down the charging rate and eventually putting it on hold.

Therefore, it’s best to keep your iPhone aside for a while and let it fully charge before using it again.

4. Turn Off Your iPhone for a While

Even if you think your iPhone isn’t abnormally hot to the touch, it’s likely the battery and internal components are overheating due to several reasons. Apple recommends turning off your device for a while and letting it cool down before turning it on again and putting it on charge.

To turn off an iPhone 14 Pro, press and hold the Side and Volume Up (or Volume Down) buttons simultaneously.

5. Turn Off Optimized Battery Charging

The Optimized Battery Charging feature reduces the wear and tear on your iPhone’s battery by controlling how quickly it charges and significantly slowing down charging once it reaches 80%. In some cases, the Charging On Hold alert may appear once the battery has charged up to 80%, after which the battery stops charging no matter how long you leave the device connected to power.

This could be due to a bug in the Optimized Battery Charging feature. So, we recommend disabling it temporarily by going to Settings > Battery > Battery Health & Charging and toggling off Optimized Battery Charging.

6. Turn On Airplane Mode

Being constantly connected to the internet can be the source of the problem you’re experiencing. If that’s the case, turning on airplane mode can help reduce the load on the battery and prevent it from overheating, which might solve the Charging On Hold issue.

To turn on Airplane Mode, swipe down from the top-right corner of your screen to reveal the Control Center. Find the Airplane toggle in Control Center and tap it. The icon should turn orange, indicating it has been enabled.

7. Update Your iPhone

Make sure you’re always running the latest version of iOS, as it comes with performance improvements that can prevent your iPhone 14 Pro from experiencing “Charging on hold” error.

If you’re still using an older iOS version, it’s possible that a bug may have crept into your phone’s system that keeps giving you the Charging On Hold alert even though there’s no need for it. Installing the latest iOS software may fix this bug and solve the problem.

To update your iPhone, head over to Settings > General > Software Update. Tap Download and Install if a new update is available. Also, make sure Automatic Updates are enabled so you don’t have to manually check for updates every time.

8. Switch to an official Apple charger

Some off-brand chargers are cheaper than Apple official ones. But that’s because the charger isn’t precisely made to feed the amount of power required. So it may be overloading your iPhone 14 Pro thereby triggering “Charging on hold” error. Swapping that out for a charger from Apple might help here. But before you toss it into the bin and head to the store for a replacement, there are a few things that you can do that might help.

  • Unplug your charger from the power source, wait for a few minutes, and then plug the charger back in. You can also try using a different USB port or power outlet to see if that makes any difference.
  • It’s also possible that the adapter and cable you’re using to charge your iPhone are of low quality. In that case, try charging your iPhone with a high-quality MFI-certified lightning cable and adapter.
  • If the problem persists, opt for slow charging for a while. Fast charging generates more heat than slow charging, which may be why your iPhone 14 Pro is getting hot and giving you the Charging On Hold notification. Connecting your iPhone to an adapter with a low rating might help solve the issue.
  • lighting to usb-c charging cable  

9. Reset your iPhone

If you find that your iPhone 14 Pro still giving charging on hold notification after trying the steps mentioned above, you should try resetting the phone to return it to its factory settings.

This will delete all apps and customized settings, but it could potentially help you troubleshoot the problem you are experiencing. Go to settings > General > Transfer or Reset iPhone > Reset > Reset All Settings.

Quick tip: Make sure to back up your iPhone using iCloud or a computer before performing the factory reset to save your data and restore it later.

10. Get your iPhone repaired

Sending your iPhone in for repairs should be the last resort after trying all of the steps above, and your iPhone 14 Pro is still throwing “Charging on hold” notifications. You could potentially have a hardware problem that requires an expert to open your phone up to fix.

The best way to do this is to contact Apple support for assistance so they can schedule you for an appointment at your nearest Genius Bar.

Successfully Fixed Charging On Hold iPhone 14 Pro Error

The Charging On Hold notification is useful only when it’s working properly. If you keep getting the notification every time you charge your iPhone 14 Pro, you’re either using a low-quality charger or your device is sending a false alert.

It’s also possible that your iPhone is actually getting hot due to heavy-duty apps working in the background or because you’re using it while charging. The troubleshooting methods we discussed should resolve the issue, but if none of them helped, it’s best to contact Apple Support for further help.

Apple Vision Pro, a revolutionary spatial computer that seamlessly blends digital content with the physical world, while allowing users to stay present and connected to others. Vision Pro creates an infinite canvas for apps that scales beyond the boundaries of a traditional display and introduces a fully three-dimensional user interface controlled by the most natural and intuitive inputs possible — a user’s eyes, hands, and voice. Featuring visionOS, the world’s first spatial operating system, Vision Pro lets users interact with digital content in a way that feels like it is physically present in their space.

Follow along to learn the best Apple Vision Pro tips, tricks and hidden gestures to help you navigate visionOS like a pro.

A close-up of Apple Vision Pro.  

Hand gestures in visionOS work in tandem with eye tracking. Your eyes provide targeting and intent, and gestures trigger specific actions. The Vision Pro features front, side, and bottom-mounted cameras for hand tracking, and infrared sensors inside the headset track your eyes.

You look at an onscreen item–like a button–to highlight it or hold your gaze to expand the underlying contextual menu or reveal a tooltip. With the selection made, perform a gesture like pinching to act on it. Because the external cameras cover a wide field of view, you can perform gestures while resting your hand comfortably in your lap to avoid strain.

Apple has outlined six common types of hand gestures for visionOS in a WWDC23 developer talk about designing hand and eye interactions for spatial input. Coupled with eyes for targeting, these hand gestures let you control apps and interactions across the system.

The Best Apple Vision Pro’ tips and tricks

Tap

Pinching your fingers together will perform the default action on the selected item. Think of pinching in terms of tapping the iPhone’s screen or clicking your Mac’s mouse or trackpad. Some visionOS features, such as air typing on the virtual keyboard, don’t require the tap gesture.

Double Tap

Pinch your thumb and index finger together twice in quick succession to perform the equivalent of the double-tap gesture in touch-first operating systems like iOS and iPadOS.

Pinch and Hold

Bring your thumb and index finger together and hold them momentarily to trigger this gesture. Pinch and hold in visionOS works similarly to the long-press (tap and hold) gesture on your iPhone for highlighting text or bringing up the contextual menu.

Move your pinched fingers to move windows and other UI elements in visionOS. If Safari is in front of you, you can also hold your hand in the air and just flick your finger to scroll.

Pinch and Drag

The pinch and drag gesture is used for scrolling. Just bring your fingers together and flick your wrist. You can scroll up, down, left, or right by dragging your hand in any direction.

The faster you move your hand, the faster you’ll scroll. You can scroll webpages in Safari, emails in Mail, documents in Pages, spreadsheets in Excel, etc. You can use the pinch and drag gesture to scroll content in any window on visionOS that supports scrolling.

Zoom

For zooming in Safari, Photos, and other apps, pinch the thumb and index fingers on both hands together, then move each outwards. You can use this gesture to bring a window in visionOS farther or closer, enlarge images, and more. In the Photos app, you can look at a specific part of an image when performing the zoom gesture to zoom in on it.

Rotate

To rotate an item, pinch your fingers with both hands close together, then move one hand upwards and the other downwards. You can use this gesture to rotate 3D objects in Quick Look, images in the Photos app, illustrations in documents, and so on.

Eye and Hand Tracking "Just Works" on the Vision Pro

Like on the iPhone, Apple provides a basic gestural language for navigating the entirety of the visionOS user interface and augmented reality apps. Third-party developers can leverage Apple’s official APIs for visionOS to create and add gestural input to their apps.

Apple doesn’t recommend creating custom gestures that clash with the system ones or those that aren’t easy to understand, perform, or memorize.

Eye and hand tracking in virtual, augmented, and mixed reality applications are not new features. However, the Vision Pro headset implements these features in Apple’s trademark manner. As a result, navigating visionOS with your eyes and hands is seamless and effortless.

macOS Sonoma has features you’ll benefit from immediately.

macOS Sonoma displayed on MacBook Air, the 27-inch iMac, and MacBook Pro.  

Whether you have a new Mac or just got around to updating your old one, macOS Sonoma has a lot of new features to get to know. Regardless of whether you’re a veteran or a new Mac user, these new macOS Sonoma features are ones you’ll want to take advantage of. Here are eight of them that your Mac will be better off using.

Can my Mac run macOS Sonoma?

According to Apple’s very own website, which highlights the features of macOS Sonoma, these are the Macs that are compatible with the latest desktop operating system:

  • iMac 2019 and later
  • Mac Pro 2019 and later
  • iMac Pro 2017
  • Mac Studio 2022 and later
  • MacBook Air 2018 and later
  • Mac mini 2018 and later
  • MacBook Pro 2018 and later

What’s new in macOS Sonoma?

There are a few enhancements and new features in macOS Sonoma that will improve the overall usability of your Mac, while also focusing on things like gaming and privacy. Here’s a quick rundown of what to expect:

1. New screensavers

macOS Sonoma brings stunning screen savers featuring slow-motion videos of various locations worldwide, such as the sweeping skyline of Hong Kong, the sandstone buttes of Monument Valley in Arizona, and the rolling hills of Sonoma in Northern California. This rich graphical and photographic imagery enhances the Mac experience by shuffling through Landscape, Earth, Underwater, or Cityscape themes. The login experience is now repositioned at the bottom of the screen, making space for the new screen savers, which seamlessly transition into the desktop.

2. Game Mode

With the power of Apple silicon, users experience incredible graphics performance on every Mac. And now, tens of millions of Macs with Apple silicon can run demanding games with great performance, long battery life, and breathtaking visuals. Developers continue to take advantage of Metal 3, bringing exciting new titles to Mac, including DEATH STRANDING DIRECTOR’S CUT, Stray, Fort Solis, World of Warcraft: Dragonflight, HUMANKIND, Resident Evil Village: Winters’ Expansion, The Medium, ELEX II, Firmament, SnowRunner, Disney Dreamlight Valley, No Man’s Sky, Dragonheir: Silent Gods, and Layers of Fear. To make it easier to port games from other platforms to Mac, Metal introduces a new game porting toolkit, eliminating months of upfront work and enabling developers to see how well their existing game could run on Mac in just a few days. It also dramatically simplifies the process of converting the game’s shaders and graphics code to take full advantage of Apple silicon performance, significantly reducing the total development time.

macOS Sonoma also introduces Game Mode, giving players an edge when performance is measured in precious milliseconds. Game Mode delivers an optimized gaming experience with smoother and more consistent frame rates, by ensuring games get the highest priority on the CPU and GPU. Game Mode also makes gaming on Mac even more immersive — dramatically lowering audio latency with AirPods, and significantly reducing input latency with popular game controllers like those for Xbox and PlayStation by doubling the Bluetooth sampling rate. Game Mode works with any game, including all of the recent and upcoming Mac games.

3. Video conferencing

macOS Sonoma brings enhanced video conferencing features that enable users to present and share their work more effectively within any video conferencing app. Presenter Overlay, a new video effect, elevates a user’s presence by displaying them on top of the content they are sharing. Additionally, Reactions allow users to share how they feel by seamlessly adding balloons, confetti, hearts, and more into the video, which can also be triggered with a hand gesture. The improved Screen Sharing picker simplifies the process of sharing apps during video calls. Users can simply click the green button in the top-left corner of an app and choose to share it in the call, allowing for easy content sharing from their currently open windows.

4. Safari upgrades in macOS Sonoma

Safari, the world’s fastest browser, introduces new features to enhance the browsing experience for Mac users. This year brings a significant update to Private Browsing, which provides even greater protection during browsing both from trackers and from people who might have access to the user’s device. Advanced tracking and fingerprinting protections in Private Browsing go even further to help prevent websites from tracking or identifying the user. Private Browsing windows also lock when users are not using them, allowing them to keep tabs open even when they step away from their device.

The new profiles feature in Safari displayed on MacBook Pro.

Additionally, profiles help users stay organized by offering a way to separate browsing between topics, while also keeping cookies, history, extensions, Tab Groups, and Favorites separate. Users can sign in to the same site with both work and personal accounts — and quickly switch between them — ensuring a smooth browsing experience. Safari also enables the creation of web apps that behave like normal apps, putting users’ favorite sites at their fingertips and providing a simplified toolbar for an app-like experience.

5. Shared Password Groups

If you share a specific set of passwords, macOS Sonoma provides a better way to store them in a shared vault through iCloud Keychain.

You can create a group specifically for sharing passwords. Everyone will have access to the passwords, and they can add new or edit existing ones.

6. Web Apps in the Dock

macOS Sonoma has a new excellent feature that enables easier access to favorite websites directly from the Dock. You can add any website to the Dock and access it directly in an app-like window.

Adding a website to the Dock allows you to access it like any other macOS app with support for Stage Manager and Mission Control. Web apps can also send notifications.

7. Enhanced Accessibility Features

macOS Sonoma introduces several accessibility features that make Mac even more customizable for all users. For users with hearing disabilities, Made for iPhone hearing devices can connect to their Mac for calls and media consumption,1 while users who are nonspeaking can use Live Speech to type and vocalize their thoughts during calls and conversations. For users with physical and motor disabilities, phonetic suggestions appear when dictating and editing text with Voice Control on Mac. To assist users with cognitive disabilities, animated images like GIFs can be automatically paused in Messages and Safari. Additionally, users who are blind or have low vision can easily customize text size across Mac apps, and utilize Xcode with VoiceOver, Apple’s industry-leading screen reader.

8. Interactive Widgets

Like on iOS and iPadOS, macOS is finally getting widgets. You can place app widgets on the desktop, a major improvement from macOS Ventura, where widgets were nicely tucked away in the Notification Center.

And with their interactive nature, widgets in macOS Sonoma make it convenient to access certain features inside an app without fully opening it. For example, you can check off reminders, control music, and control your smart home devices without opening the appropriate app.

Through Continuity, you can access a wide array of widgets in macOS Sonoma that are already available on iPhone. All widgets in macOS Sonoma can be accessed via a dedicated widget gallery.

Other changes

There are a few changes in this release that are less specific to macOS but apply to Apple’s platforms in general. One of them is support for filling PDFs. macOS can recognize text fields in PDFs and make them fillable, including real-life documents scanned with a camera. PDFs can also now be viewed inline inside Notes, so you can view notes related to a certain document right on the same page.

In the Messages app, Apple has introduced a new stickers experience, along with improvements to search, replies, groups, and syncing. Meanwhile, the Reminders app now creates intelligent grocery lists to make shopping trips easier, and it’s now possible to organize lists into sections.

The keyboard experience has also been improved with more accurate corrections in autocorrect and inline completions that make it easier to finish a sentence. Dictation is also more accurate now. Finally, privacy enhancements include expanded support for Communication Safety in surfaces like AirDrop, the Photos picker, and incoming calls. There’s also a sensitive content warning in places like AirDrop and Messages, so you don’t have to be exposed to anything you don’t want to see. This also gives you the option to block a contact if needed.

Here are some watchOS 10 features you might have heard about.

Five Apple Watch devices show features in watchOS 10, including a new Smart Stack and two additional watch faces.  

With watchOS 10, Apple introduced a number of headline new features like redesigned apps, new watch faces, new Smart Stack, and more. But it also made a number of smaller yet notable changes and additions that make your Apple Watch more functional and convenient to use.

In this article, we’ve listed 10 best hidden watchOS 10 features and enhancements, some of which may have gone under your radar. Bear in mind that ‌watchOS 10‌ requires Apple Watch Series 4 or later and an iPhone running iOS 17.

Best watchOS 10 hidden features

Here are some watchOS 10 hidden features you might not have heard about.

1. Redesigned interface

With watchOS 10, redesigned apps provide more information at a glance, and there are new ways to navigate and quickly access content.

The home screen uses machine learning to show you relevant information at the right time of day. Early in the morning? You get meetings and weather information, while later on, you’ll be served other (unspecified) information, probably a traffic report or something similar. Something like a timer will jump to the top of the list when it’s active.

2. Smart Stack

A new Smart Stack contains widgets that display timely information that adapts to the user’s context and can be revealed with a simple turn of the Digital Crown from any watch face. For example, at the beginning of the day, Weather will show the forecast, or, when traveling, the Smart Stack will show boarding passes from Wallet. Calendar and Reminders will reshuffle to the top to display upcoming meetings or tasks, and apps that are running, such as Podcasts, will also move up so they are readily available. Smart Stack also enables users to enjoy a beautiful watch face, like Portraits, while still offering a way to quickly access information they care about.

Apple Watch Series 8 shows the new Smart Stack with currently playing music displayed on top.

3. Two new watch faces

New Watch Faces
watchOS 10 introduces two new artistic and joyful watch faces: Palette and Snoopy. The Palette face depicts time in a wide variety of colors using three distinct overlapping layers, and as the time changes, the colors on the display also shift.

Apple Watch Series 8 shows the new Palette watch face in iris.

Additionally, the beloved comic strip Peanuts comes to life on Apple Watch with a new watch face featuring Snoopy and Woodstock. The characters interact and play with the watch hands, react to the weather conditions in the area, or even get active when the user does a workout.

Apple Watch Series 8 shows the new Palette watch face in emerald.

4. Cycling

Apple Watch is a great device for cyclists, with features including automatic Workout reminders, calorimetry for e-biking, and Fall Detection. watchOS 10 takes this popular activity even further with advanced new metrics, views, and experiences.

When a cycling workout is started from Apple Watch in watchOS 10, it will automatically show up as a Live Activity on iPhone and, when tapped, will utilize the full screen. Workout Views, such as Heart Rate Zones, Elevation, Race Route, Custom Workouts, and a new Cycling Speed view, have been optimized for the display size of iPhone, which can be mounted to a bike for convenient, easy viewing during a ride.

An Apple Watch user is shown riding a bicycle with Apple Watch on their wrist and iPhone mounted to the bike’s handlebars.

Apple Watch can now automatically connect to Bluetooth-enabled cycling accessories, such as power meters, speed sensors, and cadence sensors. This enables brand-new metrics, including cycling power (watts) and cadence (RPM), and additional Workout Views, including Power Zones. Bluetooth connection is supported for Indoor and Outdoor cycling workouts, as well as GymKit.

New algorithms combining sensor data from Apple Watch and connected power meters can estimate Functional Threshold Power (FTP), the highest level of cycling intensity that a rider could theoretically maintain for an hour. Using FTP, Apple Watch calculates personalized Power Zones, used to easily see the current zone and track how long is spent in each, which is an effective and popular way of improving performance.

5. Hiking

The Compass app on Apple Watch is a helpful tool for exploring the great outdoors. With watchOS 10, Compass automatically generates two new waypoints: A Last Cellular Connection Waypoint will estimate the last place with cellular reception, which may be useful for checking messages or making a call. In case of emergencies, a Last Emergency Call Waypoint will estimate where on the route their device had the last connection to any available carrier’s network so that an emergency call can be made.

When preparing routes, a new Elevation view uses altimeter data, offering a three-dimensional view of saved waypoints. And starting in the U.S., Apple Maps displays a new topographic map featuring contour lines, hill shading, elevation details, and points of interest. Users can also search for nearby trails and trailheads, with place cards that include detailed information, like trail length, type, and difficulty.

6. Mental Health monitoring

Mental health is as important as physical health, and research shows that reflecting on state of mind can help build emotional awareness and resilience. With the Mindfulness app in watchOS 10, users can discreetly and conveniently log their momentary emotions and daily moods. Users can turn the Digital Crown to scroll through engaging, multidimensional shapes to choose how they are feeling, select what is having the biggest impact on them, and describe their feelings.

In the Health app in iOS 17 and iPadOS 17, users can see valuable insights to identify what might be contributing to their state of mind — whether it’s associations or lifestyle factors, like sleep or exercise. Additionally, depression and anxiety assessments often used in clinics are now easily accessible in the Health app and can help users determine their risk level, connect to resources available in their region, and create a PDF to share with their doctor.

7. Daylight Sensitivity

Apple is concerned about children developing myopia, or near-sightedness, and says that it’s less likely to develop if children spend at least 80 minutes or more in daylight. Apple Watch can now measure the time spent outside using the ambient light sensor, and parents can monitor it in the Health app. It comes as Screen Distance is being used across other devices to help people avoid holding their iPhones and iPads too close, which can be another cause of issues while children are developing, apparently.

Time spent in daylight can provide additional benefits to physical and mental health for all ages. And children who do not have their own iPhone can use Family Setup to pair their Apple Watch to their parent’s iPhone, giving parents visibility into the amount of time their kids are spending in daylight with Health Sharing.

The new Screen Distance feature uses the same TrueDepth camera that powers Face ID in iPad and iPhone to encourage users to move their device farther away after holding it closer than 12 inches for an extended period of time.

When a device is locked with a passcode, Touch ID, or Face ID, all Health app data, including mental health and vision health data, is encrypted.

8. Widgets

Apple has revamped and improved its old Glances system into all-new widgets, which sit at the forefront of the watchOS 10 design ethos. The aim is to allow you to open up your watch and use it instantly by scrolling through your favorite widgets with the Digital Crown rather than picking through the polka-dot Where’s Waldo? cloud of apps.

Widgets enable you to access some of your most-often functionalities such as weather (which got a big redesign), workout metrics, stock tickers, timers and more. The timer, for example, can be activated via the Complications widget with a simple press of the crown, and then you can check the timer simply by scrolling up from your watch face.

9. Enterprise

Apple Watch offers enterprise customers features to enhance productivity and safety in the office or in the field, such as hands-free communication and responding to notifications on the go, or Fall Detection on a job site. watchOS 10 introduces support for Mobile Device Management (MDM), enabling enterprise customers to remotely and centrally install apps and configure accounts on a fleet of devices, with features such as passcode enforcement, and configuring Wi-Fi and VPN settings. With this update, Apple Watch can further help improve employee wellness, productivity and health, and safety monitoring.

10. APIs for Workout App Developers

watchOS 10 includes new APIs for workout app developers that will allow them to create compelling new experiences. The powerful motion sensors on both Apple Watch Series 8 and Apple Watch Ultra can detect rapid changes in velocity and acceleration, such as when swinging a golf club or a tennis racket. Now, developers will have access to this high-frequency motion data, so apps like SwingVision can analyze serve pronation, which is the twisting motion of the forearm, wrist, and hand, and Golfshot can detect small wrist movements to refine a golf swing.

watchOS 10 supported devices

The big news here is that Apple is dropping support for the Apple Watch Series 3. The 2018 model will no longer get updates and will miss out on watchOS 10. If you have an Apple Watch Series 4 or above paired with iPhone Xs or later, you are eligible for the update.

Here’s a list of Apple Watch models that are compatible with watchOS 10:

  • Apple Watch Series 4
  • Apple Watch Series 5
  • Apple Watch SE (Both models)
  • Apple Watch Series 6
  • Apple Watch Series 7
  • Apple Watch Series 8
  • Apple Watch Ultra

Enjoy All the New watchOS 10 Features

While not getting a lot of attention, these lesser-known improvements in watchOS 10 continue to make the experience even better.

Whether you’re using widgets, Watch Faces, enjoying cycling features, or something else, Apple Watch is a great way to enjoy the Apple experience on a wearable device.

If your physical Apple Card gets lost or stolen, it’s essential to know the steps to take to prevent unauthorized use and request a replacement.

The Apple Card, available exclusively to iPhone users, is a virtual credit card issued by Goldman Sachs. The card is designed to be primarily used digitally through the Wallet app, although you can request a physical titanium card as well. The virtual and physical cards have separate card numbers. This distinction is important because it determines the steps you’ll need to take if your card gets lost or stolen.

Here are step-by-step instructions for what you should do if your Apple Card gets lost or stolen.

How to lock your titanium Apple Card

If your Apple Card is lost or stolen, the first step is to lock the card to prevent unauthorized use. To do this, follow the steps below:

  1. Open the Wallet app and tap on ‘Apple Card’.
  2. Tap the More button , then tap Card Details
  3. Scroll down to the ‘Titanium Card’ section and tap on it.
  4. Toggle the switch next to ‘Lock Card’.

iPhone showing a colorful image of Apple Card.  

When your card is locked, no one can use it to make purchases. This gives you an added layer of protection while you wait for your new card.

How to Unlock Your Titanium Apple Card

If you’ve previously locked your Apple Card to prevent unauthorized use and have found your card, you will need to unlock your card.

  1. Open the Wallet app on your iPhone.
  2. Tap ‘Apple Card’.
  3. Tap the More button , then tap Card Details.
  4. Scroll down to the ‘Titanium Card’ section and tap on it.
  5. Toggle the switch next to Unlock Card, then follow the onscreen instructions.

Your Apple Card will now be unlocked and ready to use again.

How to request a replacement Apple card on iPhone and iPad

If your Apple Card is lost or stolen, but you still have your iPhone or iPad, you can use your device to request a replacement card

On your iPhone:

  1. Open the Wallet app on your iPhone.
  2. Tap on ‘Apple Card’.
  3. Tap the More button then tap Card Details
  4. Tap on ‘Request Replacement Card’.
  5. Select the reasons: Lost, Stolen, Damaged, or Other reasons.
  6. Tap on ‘Next’ and follow on-screen instructions to complete the process.

On your iPad:

  1. Launch the Settings App.
  2. Scroll down and select Wallet & Apple Pay.
  3. Tap Apple Card.
  4. Under Titanium Card, tap Request Replacement Card, then follow the instructions on your screen.

Apple will deactivate your lost or stolen card and issue you a new one. Once you’ve completed this process, no one can use the lost or stolen card, protecting you from unauthorized charges.

How to lock a participant’s titanium Apple Card

Locking a participant’s Apple Card refers to a situation where an Apple Card Family participant (either a co-owner or a participant under age 18) loses their physical Apple Card, and you, as the Apple Card Family organizer or co-owner, need to lock their card to prevent unauthorized use.

Here’s how to lock a participant’s Apple Card:

  1. Open the Wallet app on your iPhone.
  2. Tap ‘Apple Card’.
  3. Tap the More button , then tap Card Details
  4. Tap the participant’s name.
    Scroll down to Titanium Card and tap Lock Card.

This will prevent any use of the physical card until you unlock it again. Note that the participant can still use their digital Apple Card for transactions, including Apple Pay.

How to unlock a participant’s titanium Apple Card

If you use Apple Card Family and you’re the account owner or co-owner, you can unlock a participant’s titanium Apple Card.

Follow these steps to unlock a participant’s Apple Card:

  1. Open the Wallet app on your iPhone.
  2. Tap ‘Apple Card’.
  3. Tap the More button , then tap Card Details
  4. Tap the participant’s name.
  5. Scroll down to Titanium Card and tap Unlock Card, then follow the onscreen instructions.

The participant’s card is now unlocked and can be used for physical transactions again.

What to do if your iPhone and titanium Apple Card are both lost or stolen

If your iPhone and titanium Apple Card are both missing or stolen, you can call Goldman Sachs for a replacement Apple Card:

  • [(877) 255-5923](tel:(877) 255-5923)