An app can create a lot of value for a business. Developing an app can create new possibilities for your business. You can offer new features to your customers and connect more easily with them. But it’s important to consider whether your business is ready before investing in an app. Read more here.
There are many advantages to having an app. If you have a loyal customer base, it’s much easier to connect with them through an app. An app makes you able to offer your customers new and convenient features. A strong brand is completely built on good communication with your customers. For this, an app can be a valuable asset. Customers that use your app can easily set their own preferences which allow you to meet their needs and demands. It will also give you a better basis for targeted ads. If you want to start developing an app, you can find different softwares that can help.
But even though there are many advantages of having an app, the timing for it needs to be right. Developing an app is an investment that takes a lot of time and money. If you’re not ready for an app, it can be a better idea to build a receptive website. Read more about when to build an app for your business here.
1. If you have a loyal customer base
One of the best things to look at when deciding whether or not to build an app is your customer base. If you already have a loyal customer base, you can be pretty confident that they will make use of the new possibilities that an app brings to your business. If you’re still in the early days and building your customer base, it might be a bit too soon to invest in the development of an app.
2. Your business requires a smartphone feature
If you are sure that your business needs a smartphone feature to grow, developing an app is usually a good idea. If your products or services are elevated with the use of a smartphone feature, this is a good indication. This could be the use of a GPS location or a camera. Think about how much value this will create for your business and your customer. If you find that it will create a sufficient amount of value, an app could be worth the investment.
3. If you need an interactive feature
As mentioned, interacting with your customers is the essence of creating a successful business. So even if you don’t necessarily need a smartphone feature, an increased interaction with your customer can be grounds enough for building an app. An app can be a good way to introduce new interactive features to elevate your business’ service or product. The same thing goes if your platform has an interactive content-based involvement with customers, an app can be a valuable asset. If you do decide to build an app, you also need to have the time and money to maintain it and optimize it for SEO.
Most of us rely on our phones for everything, including waking up in the morning. So it can be quite an inconvenience when your iPhone 13 Pro alarm is not working. After all, you might not have a traditional alarm clock or a smartwatch, or other devices to use instead. But don’t worry, I’ve got some solutions to help you out. Try the below tips to fix the iPhone 13 Pro alarm not working.
Note: information in this article apply to iPhone 13, iPhone 13 mini, iPhone 13 Pro, and iPhone 13 Pro Max.
What To Do if iPhone 13 Pro Alarms Won’t Work
If your iPhone 13 Pro alarms won’t work, follow the steps below to fix the problem:
Double-check Your Ringer Volume
This is the most common reason why your iPhone 13 Pro alarms won’t work, as the alarm actually went off when it was supposed to, but you didn’t hear the sound. This can happen if you accidentally turned the sound of your notifications down, which would include the ringer for your alarm.
Open the Settings app.
Scroll down and tap Sounds & Haptics.
Under the Ringer and Alerts section, move the volume slider all the way to the right.
You might also want to toggle the Change with Buttons option to the On position.
Once you’ve adjusted the volume, you can jump into the Clock app and create a quick alarm to make sure that everything is back in working order.
Double-check the alarm settings
Unfortunately, most of the time when an iPhone 13 Pro alarm doesn’t go off when you expect, the root cause is user error — you probably simply set the alarm incorrectly. The most common errors? Choosing PM instead of AM (or the other way around) or believing the alarm was set to recurring when in fact it was a one-time alarm.
To check, start the Clock app, tap the Alarm tab at the bottom of the page, and find the alarm that didn’t work the way you expected. Check for the proper time, AM/PM setting, and see if it’s set to recur on the days of the week you want. If not, tap it and make the necessary changes.
Use an Apple Watch? Check your settings there
If you use an Apple Watch in conjunction with your phone’s Clock app, certain settings on your watch can interfere with the watch’s ability to gently wake you in the morning when the alarm is scheduled to go off.
First, make sure your Apple Watch isn’t locked. If necessary, enter your passcode on the watch so you can gain access to your watch apps. Then swipe up from the bottom to see the Settings screen and make sure that it is not set to Mute, Theater mode, or Airplane mode. If any of those three icons are selected, tap them to turn them off.
Make sure your phone isn’t connected to a Bluetooth device
Another way your alarm might sound but still not get your attention: The audio might be playing through a connected audio device, like headphones, earbuds, or a portable speaker that’s in another room. You can ensure there are no connected Bluetooth devices, or simply toggle Bluetooth off and then turn it back on again. Any devices will disconnect and the alarm should play through the iPhone’s speaker.
To do that, swipe up from the bottom of the screen to see the Control Center. Tap the Bluetooth icon in the top left, then wait about five seconds. Then you can turn Bluetooth back on again (or, if you prefer, simply leave it off).
Restart Your iPhone
iPhone 13 Pro Alarms Won’t Work – Restart your phone.
For one reason or another, we’ve found that a simple restart of your iPhone can fix any issues that you may experience. At the end of the day, our smartphones are just really fast computers, and there might be some software cruft that is wreaking havoc. Here’s how you can restart your iPhone:
Press and hold the Side Button with either the Volume Up or Volume Down buttons at the same time.
Once the Slide to Power Off slider appears, slide the toggle to turn off your iPhone.
When you perform a “regular” restart of your iPhone, this allows iOS to go through its traditional shutdown safety nets. But if you want to really knock out any potential cobwebs, then you might want to try a force restart.
Quickly press the Volume Up button and release.
Quickly press the Volume Down button and release.
Press and hold the Side button for 10-15 seconds until your iPhone reboots.
Once your iPhone is finished booting back up, log back in, and then head into the Clock app to set a quick alarm. This should give you an idea as to whether everything is back in working order or not.
Pick A Different Alarm Sound
Another issue that we’ve run into in the past is that the default sound for the iPhone doesn’t actually work. It’s one of the weirdest bugs, but it’s happened off and on over the years, even after iOS updates claim to fix the bug. Here’s how you can swap out the alarm noises if your iPhone 13 Pro alarms won’t work:
Open the Clock app on your iPhone.
Tap Alarm in the bottom toolbar.
In the top right corner, tap Edit.
Select the alarm that you want to change.
Tap Sound.
Pick a Ringtone or Song that you want to use.
Tap Vibration.
Select one of the options provided.
Tap < Sound in the top right corner.
Tap < Back in the top right corner.
In the top left corner, tap Save.
Repeat the steps for all of your pertinent alarms
If you want to be on the safe side, you can always restart your iPhone after you’ve updated your alarms. This could help to knock out any of the kinks that have been preventing alarms from going off.
Check For An iOS Update
Apple has been feverishly updating its lineup of devices, at a more rapid pace than we’ve seen in the past. Chances are, you might have an update waiting for you, but it just hasn’t prompted you to install it yet. If you want to be on the safe side, you can quickly and easily check for an update.
Open the Settings app on your iPhone.
Tap General.
Select Software Update.
If there is an update available, tap the Download and Install button.
After the update is finished downloading, your iPhone will prompt you to begin the installation. During this time, you will be unable to use your iPhone, so make sure you have a few minutes to spare.
Reset All Settings
The last method we recommend trying if your iPhone 13 Pro alarms won’t work essentially resets all of the preferences that you might have tweaked over the duration of owning your iPhone. This literally means that if you’ve tapped a toggle to turn something on or changed an alarm, performing this reset will put things back to the way that they were when you first took the iPhone 13 Pro out of the box.
Open the Settings app on your iPhone.
Tap General.
Scroll to the bottom and tap Transfer or Reset iPhone.
Tap the Reset button at the bottom of the page.
Tap Reset All Settings.
Enter your passcode if prompted.
As you might expect, following the steps above will also require you to go back into the Clock app and set up all of your alarms again. Obviously, this is a rather cumbersome solution, but it’s better than waking up later than you need to be.
Download a different Alarm App
There’s really nothing wrong with Apple’s Clock app. It has much of the functionality that you need, along with a few added benefits thanks to Bedtime Mode. But for some, Apple’s app just won’t wake you up when you need to get up. Thanks to the wonder that is the App Store, there are quite a few alternatives that you can try out. Here are three of our favorites.
Sleep Cycle – By using Sleep Cycle to track your sleep and find your perfect wake-up window, we believe you’ll be part of that change, for the benefit of better health.
Alarmy – Joyful Alarm clock – Alarmy makes your BODY get out of bed first and then makes you get to the place like a bathroom where you have no other choices but to wake up. Alarm will keep ringing until you prove the fact that you arrived at the place through taking a “Photo” or scanning a “Barcode”.
Alarm Clock for Me – Wake up and go to sleep to your favorite music, get your own collection of exclusive designer clocks, know weather conditions in your area, and light up the darkness with a powerful built-in flashlight!
Alarm not working on iPhone 13 Pro: fixed!
Alarm is something that we use a lot, as it’s a great feature to to make sure we wake up on time. Well, these tips should solve your iPhone 13 Pro alarm issues in most situations. If we missed something, let us know in the comments section below.
Be warned that there are many fake Apple TV for sale and while clones or fakes are becoming increasingly more popular you can still tell the difference. The last thing you want is to buy an Apple TV clone. So if you are worried that you may buy a fake Apple TV or a Clone Apple TV then this comprehensive guide is for you. Here is the step-by-step guide which will help you to spot a fake Apple TV and distinguish it from the original.
How to identify a fake Apple TV
1. How to tell if your Apple TV is fake: check the Serial number
Serial Number makes it easier for Apple consumers to check the authenticity of their Apple products. Serial Numbers are unique to each model of the Apple products. Your Apple TV still have that unique Serial Number.
Apple runs a website that lets users check if their products are still under warranty. This is great for checking real products, of course, but it also has the added benefit of telling you when you’re using a fake product.
To use the site, you’ll just need your Apple TV’ serial number. You can find this number in various ways.
Check in Settings: For you to check the Serial Number of your Apple TV you should go to Settings > General > About.
Check the bottom of your Apple TV: Serial number of the Apple TV can also be found at the bottom of your TV. You can use light to check it out because the numbers are a bit reflective.
Find the Serial Number with your Apple ID: On your Apple Device that is signed in with your Apple ID, you can find the Serial Number of your Apple TV. If you have an iPad, iPhone or iPod touch, go to Settings > Your Name, then scroll down and tap your Apple TV to see the Serial Number. If you have a MacBook you can go to your Apple ID account page and find the Serial Number of your Apple TV.
Once you have the Apple TV’ serial number, head to the Check Coverage website and enter it into the field at the top, then fill out the CAPTCHA and click Continue.
If you’re brought to either a page that asks you to enter the purchase date, or one that tells you what warranty options you have available, your Apple TV is probably legit. But if you instead get an error message saying that Apple is “unable to check coverage for this serial number,” it’s almost definitely fake.
Quick tip: Systems like this are why you should always keep your serial numbers private. Leaking your number online makes it easier for companies to make fake Apple TV with real serial numbers, which makes it harder to detect fakes.
2. How to spot a fake Apple TV: Packaging
Apple has pretty high production standards, and fake Apple TV manufacturers rarely meet them. Minimalist, intelligent, and clean — these are the perfect words to describe the boxes that come with Apple products. Anyone who knows a thing or two about tech brands also knows how much Apple pays attention to the details, even when it comes to the packaging.
Because of this, counterfeit manufacturers seem to have a harder time producing high-quality packaging than the Apple TV itself.
Different counterfeit Apple TVs come from different manufacturers. This means that some manufacturers could have gotten parts of packaging right that other manufacturers haven’t.
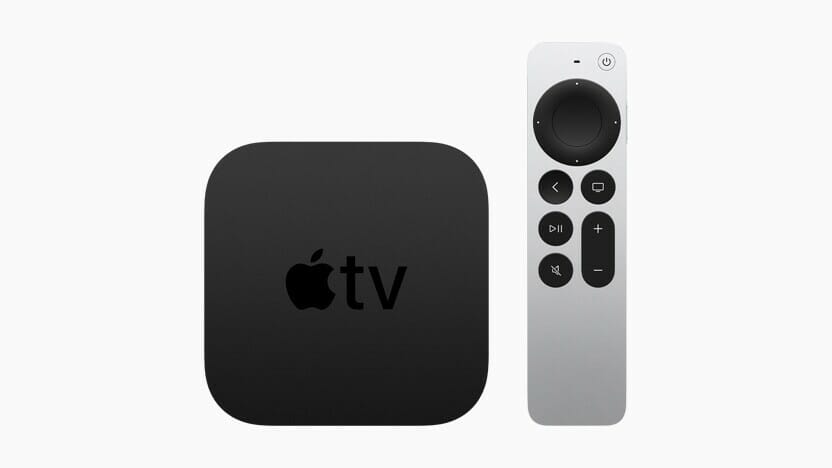
The packaging of an original Apple TV is exquisite. It’s absolutely gorgeous and the colour is eye popping. The box has a unique “Apple TV 4K or Apple TV HD” word marked with a black colour. In the box you’ll find the Apple TV, the Siri Remote, a power cable, and Lightning cable, which is used to charge the remote.
If you look carefully, you can find signs that Apple TV is fake on the packaging:
Information: Although we don’t actually read the technical specs or any of the information on the packaging. It might actually be extremely useful when it comes to figuring out if you have fake Apple TV. Since the packaging is usually made in non-English speaking countries, there are bound to be a few spelling errors. In fact, if the text is in Chinese, then it’s a dead giveaway.
Color: Packaging for the Apple TV comes in a nice, clean white, while knock-off brands usually look off-white or yellowish.
Labeling: The Apple TV 4K and Apple TV HD both come with distinct labeling that is uniform everywhere in the world. If you find that your box doesn’t have the same labels as the original ones, then it’s most likely fake. For example, if you find weird stickers or labels that refer to giveaway, then you’re dealing with a fake.
Serial number: This is a huge one. If your packaging doesn’t have a serial number or if it’s been tampered with, then there is a good chance you’re dealing with fake Apple TV. So be sure to inspect it thoroughly. Use apple TV serial number check to know if it is fake or not. Note that some fake Apple TV with real serial numbers. So use the first tip on this guide to know how to check if Apple TV is real by serial number.
3. How to Spot Fake Apple TV: Pricing
Apple products are known worldwide for their high prices compared to any other products. Of course, we acknowledge the existence of deals and promos across the board that could have possibly let you buy an authentic Apple TV for dirt-cheap. So just because you got your Apple TV for $100 or less doesn’t necessarily mean it’s fake – although it’s likely.
You can get Apple TV 32GB for $179 or Apple TV 64GB for $199 from any Apple store.
If you got your pair brand-new for under $100 from a Black Friday sale or some other super-low discount price, then either you’re lucky, or your Apple TV, unfortunately, may not be authentic.
The same goes for new “Apple TV” that you got for under the $100 range. If you got a brand-new set for $50 or less, then you can probably already tell that it’s fake since you most likely won’t be getting the best build quality at $50 or less.
4. How to spot Apple TV: Operating system
Original Apple TV comes with tvOS installed. This is not something you’ll find on fake Apple TV. Usually, the installed operating system is free or open access such as Android rather than tvOS. This is a complete dead giveaway of a fake Apple TV.
5. How to Tell If Apple TV is Fake: Check it’s ability to connect with other Apple Devices
Apple TV connects with other Apple Devices well. You can connect your HomePod or HomePod Mini with your Apple TV for speakers. You can connect your Apple TV to be used as your HomeKit to control your Smart Home. AirPods can also be connected with Apple TV for Private listening. so if your Apple TV does not connect to your Apple Devices, just know that you are looking at a fake Apple TV.
6. How to Tell If Apple TV is Fake: Try to Use Siri
Another reliable way to tell if Apple TV is fake is by doing something only authentic Apple TV can do.
Siri is a virtual assistant that is part of the tvOS operating system. Siri is available in both Apple TV 4K and Apple TV HD.
Siri is one thing that counterfeit manufacturers have never been able to fake. Try asking Siri for things like movies, TV Shows or Apps. If Siri doesn’t respond to your commandds, we’re sorry to tell you, but your Apple TV is fake.
7. How to Spot Fake Apple TV: Build Quality
If you look at the physical hardware of fake Vs fake Apple TV, the differences are quite difficult to discern. You have to nitpick and look at the smallest details to identify the fake.
Apple’s tolerances on hardware are second-to-none. You shouldn’t see any seams in the plastic, the ports and connectors are tight and sturdy, and the color of Apple products (like MacApple TV) is clean and bright. If your Apple TV seem a little low quality, the pieces are loose, or the color isn’t perfect, you might have knock-off Apple TV.
If ever doubt, you should simply open up a schematic or an image of the authentic Apple TV on your computer and compare it to yours. 90% of the time the clone manufacturers tend to cut corners on the design.
8. Bring it to an authorised reseller
If you are not at ease of being in possession of a fake Apple TV, you can take it to your nearest Apple store. Apple stores have their own engineers and experts that can help you to identify if your Apple TV is original or fake. There is nothing you can do if they find out that your Apple TV is fake because you have purchased it from a fake agent. To avoid all the messes of buying a fake Apple TV, it’s advisable to buy from Apple Authorised Resellers. If you are buying Apple TV online through platforms such as Amazon, make sure that you are buying from their official Apple Store.
Spotting Apple TV Clone – Final Thoughts
At first glance, it is quite easy to mistake a clone for an original Apple TV, as the makers pay high attention, especially to the TV appearance. If you look closely using the methods below, you can spot a fake from a genuine Apple TV:
Be warned that there are many fake MacBook Pro for sale and while clones or fakes are becoming increasingly more popular you can still tell the difference. The last thing you want is to buy MacBook Pro clone. So if you are worried that you may buy a fake MacBook Pro or a Clone MacBook Pro then this comprehensive guide is for you. Here is the step-by-step guide which will help you to spot a fake MacBook Pro and distinguish it from the original.
Note: the tips explain in this article can be used to spot a fake MacBook Air as well.
How to identify a fake MacBook Pro
Here’s how you can find out if your MacBook Pro is fake or not:
1. How to Tell If MacBook Pro is Fake: Check the Serial Number
The Serial Number is the fingerprint of a product. It is a combination of numbers and letters assigned only to a specific unit produced.
You can use your Serial Number to check if your MacBook Pro is fake or original. Apple has an online to check a product’s warranty status. Just enter the MacBook’ serial number and, if you find it there, it’s the real deal. If you don’t, you’ve spotted fake MacBook Pro.
So, to spot fake MacBook Pro using this trick, follow these steps:
First, find the Serial Number of your MacBook Pro. Here’s how:
In About This Mac: From the Apple Menu in the corner of your screen, choose About This Mac. You should see an overview of your Mac including the Serial Number.
In system information: The System Information App also shows your Mac serial Number. Open the app, then select Hardware on the left side of the system information window. The Serial Number appears on the right.
On the packaging of your MacBook Pro: You can also check the Serial Number on your packaging of the MacBook Pro. It is printed on the outside of your MacBook Pro package.
Now, the most foolproof way to tell if MacBook Pro is fake is to go directly to the source: Apple.
Enter the serial number, the CAPTCHA, and click Continue.
If the tool returns information for that serial number (especially a valid purchased date), the MacBook Pro is real.
2. How to Spot Fake MacBook Pro: Build Quality
Apple is famous for the very high quality of its devices. You shouldn’t see any seams in the plastic, the ports and connectors are tight and sturdy, and the color of Apple products (like MacBook Pro) is clean and bright. If your MacBook Pro seem a little low quality, the pieces are loose, or the color isn’t perfect, you might have knock-off MacBook Pro.
3. How to Spot Fake MacBook Pro: Pricing
Prices of Apple products are a bit high compared to products of other companies. Counterfeit sellers take this as an advantage to sell fake Apple products at a reduced price to attract more buyers. At the end the buyer will end up with a fake Apple product.
MacBook Pro comes in three different designs, that is 13 inch, 14 inch and 16 inch with each having a different price. The starting retail price for MacBook Pro 13 inch is $1299, while MacBook Pro 14 inch is $1999, and MacBook Pro 16 inch is $ 2499.
As you can see, Apple products aren’t cheap. If you paid much less than that—say, $500 for MacBook Pro—they might not be real.
4. How to Spot Fake MacBook Pro: Packaging
When it comes to packaging, Apple takes the lead. Their packaging is of high quality which makes it hard for counterfeit manufacturers to fake it. Although some fake MacBook Pros are being produced and packed the same as Apple packs, it’s hard for them to fake it all.
The packaging of a MacBook Pro comes in a box which is white in colour and at the top of the box, a MacBook Pro is smartly drawn there. When you open the box, you will find the only plastic used in the outer layer to protect any dust from entering inside the box. The rest of the materials are of high quality and unique cardboard that protect the MacBook pro. Inside the box you will find a power adapter, a cable, Apple stickers and some paperwork for guide and warranty.
Just like the build quality of Apple products is high, so is the packaging quality. The boxes’ fit is tight, the quality of the printing high, the placement of stickers perfect. Apple’s quality control for its products is exacting, so if your MacBook Pro doesn’t meet that mark, it could be fake.
5. Check the Operating system
Original MacBook Pro comes with macOS installed. This is not something you’ll find on fake MacBook Pro. Usually, the installed operating system is free or open access such as Windows or Linux rather than macOS. This is a complete dead giveaway of a fake MacBook Pro.
6. How to Tell If MacBook Pro is Fake: Try to Use Siri
Another reliable way to tell if MacBook Pro is fake is by doing something only authentic MacBook can do.
Siri is your intelligent personal assistant, helping you to multitask and get things done on your MacBook Pro. For example you can be working on a document on your MacBook Pro and you need to send a message to your friend. You don’t have to close the document and open the messages to write your friend a message. You can command Siri to send the message to your friend without you having to stop what you are doing by closing the document.
Siri is one thing that counterfeit manufacturers have never been able to fake. If you try to use Siri but don’t see the feature on your device, we’re sorry to tell you, but your MacBook Pro is a crone one.
7. How to Tell If MacBook Pro is Fake: Check it’s ability to connect with other Apple Devices
The Apple Ecosystem is the best Ecosystem that there has ever been. Apple products connect smoothly with each other. MacBook Pro, also being one of Apple products should connect well with other Apple Devices.
If you have logged in your MacBook Pro with the same Apple ID as your other Apple Devices they should connect seamlessly. For example you can be typing on your MacBook Pro and the battery dies. You don’t have to wait for your MacBook Pro to get charged for you to continue with your work. You can take either your iPhone, iPad or iPod touch to continue what you were trying with your MacBook. That is called continuity in Apple. It’s no doubt copycats will never  forge this magical feature. If your MacBook Pro doesn’t connect with other Apple Devices, it might be a fake.
8. Take your MacBook Pro to Apple reseller store to check if it’s fake
Apple reseller stores are available in many countries all over the world. You can check the nearest Apple store on Apple’s website. If you have purchased or you are in possession of a MacBook Pro and you need it to be validated to know if it’s genuine, you can take it to any Apple reseller store. They have qualified engineers and technicians who can check your MacBook if it’s genuine or fake.
Even if your MacBook Pro is found to be fake, you can not get a refund of your money or your fake MacBook Pro can’t be exchanged with an original one because Apple is not responsible for any purchase of any clone Apple products.
To avoid such mistakes, it is advised when you are purchasing any Apple product, just buy it from a recognized Apple Reseller store. If you are doing purchases online make sure you are buying from a genuine Apple store App.
Conclusion
Authenticating MacBook Pro is as tricky as ever. With the things we discussed above, though, you should be properly armed to take on the challenge. Now, you won’t be easily fooled by those who want to take advantage of you. The only thing left for you to do is to go get that MacBook Pro! Before you go, check out our article on how to spot a fake Apple Watch.
The Apple TV has always been an excellent option for people already in the Apple ecosystem. The seamless integration that Apple offers is something that you can’t find elsewhere.
But, things are changing. Apple TV has partnered with most major TV manufacturers to make its best apps, like HomeKit, iTunes, and AirPlay, available to everyone.
At the same time, the complaints from tech enthusiasts still stand. Apple is too restrictive when it comes to streaming local content. Plus, there is no support for external storage or 3D gaming.
As an Apple enthusiast, that should make you wonder what else is out there. What does the world of Android TV, which is slowly evolving into Google TV, look like?
Guess What! Things Are Changing In The Android World Too
Chromecast is no longer a lonely little dongle. It has an accompanying remote. Also, you get features like 4K, Dolby Vision, and Dolby ATMOS. You can even use it to play games from the cloud and on a local device. Local storage and audio/video calls are also supported. Do you notice all the changes?
If you are looking for the best android tv box, we have had an undisputed champion for a very long time. NVIDIA Shield has been the preferred choice among tech experts since its release in 2019.
It is a very easy-to-use device and comes with Amazon Alexa and Google Home support. The only gripe has been its price. At $150, it was one of the most expensive options.
Priced at only $50, Chromecast is about to offer stiff competition.
The Beginnings
Google launched Chromecast in 2013 and priced it at a mere $35. It has been an excellent option to play content from your mobile devices on the big screen. It kept things simple. It was nothing more than a wireless display adapter, not a media player.
Chromecast has evolved since its launch. Over the years, it added support for various Android apps. Also, it added 4K capabilities, and the latest version comes with a brand new user interface.
Google TV
It is the new interface on Chromecast devices. Google TV acts as a skin on top of Android TV. The concept is similar to what Android phone makers do for their devices.
Google TV will start replacing Android TVs everywhere. Google TV is available as an app on Google Play and has replaced Play Movies and Play TV. All of this means is that it is capable of doing everything Android TV can do and much more.
How Does It Stack Up Against the Competition?
A Firestick is pretty inexpensive. However, it doesn’t support native play or dongles. It also gives you Fire OS, which isn’t the best version of Android.
There are a plethora of Chinese-made Android TV boxes. They look quite futuristic, but their software leaves a lot to be desired. After-sales support and spare parts aren’t readily available.
TiVo Stream 4k comes closest in comparison to the new Chromecast. The pricing and hardware capabilities are similar to Chromecast. But it also comes with an older processor and worse software.
Then there’s Nvidia Shield. It is quite capable. The AI up-scaling tech is an industry leader, not to mention the low latency gaming power. However, you could get three Chromecasts for that price. And that’s just the starting price.
The Experience
The new Google TV user interface feels like Apple TV, Amazon, and Roku. It offers content by pooling it from various streaming services. You can jump into a movie directly from the home screen.
You can use Google’s voice assistant for all these functions. It will also teach Google about your content preferences.
The Design
Chromecast retains its old shape. But you get to choose from 3 different designs. And as mentioned before, it also comes with a remote. The port has been upgraded to USB C. That’s the port you will use for plugging in other supported.
These include an Ethernet adapter, as well as external storage. You can play video files and Blu-ray rips from a hard drive. You can also plug in a video camera for calls with a USB pass-through.
Gaming
This is one aspect where the Chromecast might fall short. The 4 GB storage isn’t enough to load a lot of gaming content. The performance of the games isn’t the smoothest either. This, however, has a lot to do with the strength of your internet connection. Streaming games locally from the PC shouldn’t be a problem.
So, what do you think of the new Chromecast? A lot of the features that seem rather obvious to Android users might make your jaw drop. Do you still think purchasing an Apple TV makes a lot of sense?
Apple TV has come a long way since it was first launched in March 2007. With more than a decade under its belt, and some major improvements over the years, now there’s definitely an argument for Apple users to buy an Apple TV.
There are also some great tips and tricks within Apple TV to help you get the most out of it.
From connecting Bluetooth devices to controlling smart home with Apple TV, we’ve got an assortment of Apple TV tips and tricks you probably didn’t know your tvOS device could do. These Apple TV Tips and Tricks will have you showing off your abilities to your friends and having them ask you where you learned it all – you can link them here and share the knowledge, of course!
Without any further ado, here are the 16 best Apple TV tips and tricks you should try today.
Editor’s note: Some of the tips and tricks in this article were put together using Apple TV 4K (2nd generation), Apple TV 4K (1st generation), and Apple TV HD. Keep in mind some of these tricks might be different for you, depending on your hardware and software.
Best Apple TV tips and tricks
Here is a list of the Best Apple TV Tips and Tricks in 2022:
1. Connect Bluetooth devices to your Apple TV
You may need to connect your Bluetooth devices to your Apple TV to either reduce noise or to play games. These include: iPhone, iPad, MacBook, wireless keyboard, Sony playstation, Microsoft Xbox or any other compatible controller accessory.
If your Apple AirPods share the same Apple ID with your Apple TV, it will connect automatically
Steps to follow to connect your Bluetooth compatible accessory to Apple TV
Open Settings on your Apple TV
Go to Remote and Devices
Select Bluetooth
If you are connecting a game controller, select How to pair Game Controller and follow the onscreen instructions
For the Bluetooth devices, select the device in the Other Device List
2. You can set the TV button
Pressing your Siri Remote at the TV button once, it will take you to Up Next in the Apple TV, and pressing it again will take you to the home screen. You can change the settings so that when you press the TV button once, it will take you directly to Home Screen
Steps to follow to change the TV button
Open Settings on your Apple TV
Go to Remote and Device
Select TV Button
Then select either Home screen or Apple TV.
3. Restart your Apple TV
If your Apple TV is not responding, you can restart it to clear the errors
Steps to follow to restart your Apple TV
Press and hold the back and **TV/Control Center** buttons. Let go when the light on your device flashes
Alternatively, open Settings on your Apple TV
Go to System and select Restart
If the Settings menu and your remote don’t restart your device, disconnect your Apple TV from the power outlet. Wait for about five seconds to reconnect your Apple TV back
4. Updating your Apple TV Software
After some time, your Apple TV will need to update its Software. You can either set up your Apple TV to update automatically or when an update is available you will see a message on your Apple TV
Steps to follow to check Software update on Apple TV
Open Settings on your Apple TV
Go to System
Select Software update
If an update is available, click Download and Install to start the download
If you need to set up your Apple TV to automatically update Software you can do so by setting it up.
Steps to follow to set automatic software update on Apple TV:
Open Settings
Go to System
Select Software Update
Then select Automatically Update
5. Use VoiceOver on Apple TV
Without seeing your screen, you can control your Apple TV with VoiceOver. On the Touch Surface of your Siri Remote, you can use a simple gesture to move around the screen, and listen as VoiceOver speaks each time you highlight.
VoiceOver has two modes that are Navigation and Exploration. Navigation, speaks selected items on the screen as you navigate them using the Siri Remote. While Exploration, holds the currently selected items so that you can browse the screen with the Siri Remote. This lets you hear items and text elsewhere on the screen before selecting them.
Steps to follow to turn on or off VoiceOver on Apple TV:
Open Settings on your Apple TV
Go to Accessibility
Select VoiceOver
Choose either VoiceOver on or VoiceOver off.
6. Input AirPlay security on Apple TV
This Apple TV trick lets you insert a password on your AirPlay to prevent unwanted guests from streaming their own videos on your TV.
Steps to follow to set AirPlay security on Apple TV:
Open Settings
Go to AirPlay
Select Security
Click Password and set your desired password.
7. Customise the Apple TV home screen
You can customise your Apple TV home screen in various ways. With this Apple TV trick, you can rearrange apps, create a folder for apps, delete apps from the app store that you no longer use, or change the background appearance of your Screen
Steps to follow to delete an App on Apple TV:
Select the app you want to delete
Press and hold the clickpad center of your remote
until the App starts to jinggle
Click the play or pause button for more options
Choose Delete
Steps to follow to rearrange apps on Apple TV
Select an App on your Apple TV
Press and hold the clickpad center until the App starts to jingle
Drag the App to a new location on the Home Screen
Repeat the above process for the Apps you need to change
Press the clickpad center to save the new arrangements
8. Add more Accounts to your Apple TV
You can add multiple Apple ID accounts to your Apple TV. This Apple TV trick will enable you and your family members or friends to switch between accounts smoothly.
Steps to follow to add apple account on Apple TV
Open the Apple TV App on your device
Go to Settings
Select Account
Click Add New Account
Follow the instructions to either sign in using your iPhone, iPad, MacBook or you can sign in manually
9. Use Family sharing on Apple TV
You can either Start a family members group, join a family members group or invite family members to join your group. You can share with upto six family members. This Apple TV trick lets you share Pictures, movies, live TV shows, music, Podcasts and more with your family members.
For you to activate family sharing on Apple TV, you must set it on a Mac, iPhone or iPad because Apple TV does not support the activation directly.
Steps to follow when you want to set up family sharing on your iPhone, iPad or Mac
Go to Settings
Tap your name
Select Family Sharing
Click Add Member
Follow the instructions to set up and invite your family members
10. Control your Smart Home with Apple TV
While you are away from your home, you need a HomeHub to control your HomeKit accessories. Apple TV being an Apple product, it works well to control your home when connected as a HomeHub.
Steps to follow to set up your Apple TV as a HomeHub:
Go to Settings on your Apple TV
Select Accounts ( make sure that your Apple TV is connected with the same Apple ID as your Apple devices)
Once you have signed it will automatically connect with your Home Hub
11. Setting up parental control on your Apple TV
With a lot of live shows and many apps in Apple TV, it’s more likely you can find a show or an App that is not suitable for children who are under age. Thankfully, this Apple TV trick allows you to input passcode on such channels and Apps.
Steps to follow to set up parental control on Apple TV:
Go to Settings
Select General
Press on Restrictions and input the password.
12. Activate Dark mode on Apple TV
You can be a movie lover and you watch either during the day or during the night. During the day it will be harder for you to notice the high contrast on your Apple TV than during the night. The high light during the night can damage your eyes. This Apple TV trick allows you to set your TV in Dark mode thus reducing the amount of light. You can also set both light and dark modes. When it’s day time it will show light mode and when darkness starts it will automatically change to Dark mode.
Steps to follow to set up Dark mode on Apple TV:
Open Settings on your Apple TV
Go to General
Open Appearance
Select Dark for dark mode ( also you can select Automatic to set up light mode during the day and Dark mode during the night)
13. Quick switch between the Apps on Apple TV
You don’t have to return to Home Screen to open the App that you had previously opened. With this Apple TV Trick, you just need to switch between different Apps to open the App that you need. This is like multitasking on an iPhone, iPad or Mac.
Steps to follow to switch between apps on Apple TV:between Apps
On your Siri Remote, press the TV button twice quickly
In App switcher view, navigate to a different App in the center of the screen
If you want to leave the App, press the Back button
14. Change Apple TV remote sensitivity
Your Apple TV Remote can be a bit sensitive to unnecessary touch. Thankfully, this Apple TV trick lets you avoid that by letting you cuddle the clippad to match your particular control style.
Steps to follow to change Apple TV Remote sensitivity:
Open Settings on your Apple TV
Go to Remote and Devices
Select Touch Surface Tracking
Choose Fast to make smaller thumb movements faster on your Apple TV screen. Select Slow to reduce tracking sensitivity.
15. Control what’s playing on your Apple TV
When you are watching your favorite TV shows or music, this Apple TV trick lets you control what is playing like a pro. You can either pause, play forward or backward your video.
To play or pause or pause a TV show or a movie on Apple TV, you will need to press the clickpad center press the Play or Pause button on your Siri Remote. To rewind or fast forward a video or a movie, you can either, first skip backward or fast forward 10 seconds by pressing right or left on the clippad ring and pressing again to skip 10 seconds. Second you can continuouslyrewind or fast forward by pressing and holding left or right on your clippad ring then press right or leftrepeatedly to cycle through rewind or fast forward speed action . The press the clickpad centeror play or pause button to resume playback
16. Put your Apple TV to sleep
Your Apple TV after being inactive for some period, it will automatically go to sleep. You can still select Sleep Now in Settings or you can put your Apple TV to Sleep with your Siri Remote
Steps to follow to put your Apple TV to sleep:
Press and hold the power button on your Siri Remote
Press and hold control center for three seconds to bring up control center
Then select Sleep and your Apple TV will go to sleep.
You need to wake your Apple TV, you can press the menu or control center on your remote and you are set to go.
Your Favorites Apple TV Tips and Tricks
So these were some of the best Apple TV tips and tricks you would love to try today. My favorite Apple TV tips and tricks include the ability to control smart home with Apple TV, ability to customize Apple TV screen and family sharing. There’s surely plenty more hidden Apple TV tips and tricks to discover, so I’ll keep tapping, swiping and noting anything I find. Did we miss out on something important that needs to be added to the list? Which are your favorite Apple TV tips and tricks? Let me know in the comments section below.
Are you in a dilemma of asking yourself if you should or should not buy an Apple TV? The answer is yes, you should. The Market is huge and very competitive with various brands from different companies. But Apple TV is exceptional, it can do a lot that your other TV can’t do or perform better than any other TV. Here’s a look at some of the top benefits of Apple TV.
Apple TV 4K and Apple TV HD can be plugged into your TV and your favourite live shows or apps like Netflix, Amazon prime video and many more other Apps will stream. But if you have a smart TV, the operating system tvOS will be able to operate on your Apple TV. Checked out some of the top benefits of Apple TV below.
Advantages of Apple TV
Here are some of the main benefits of Apple TV in 2023:
1. Apple TV has a great remote – the Siri Remote
One great benefit of having the Apple TV is that the remote control comes integrated with Siri. You can use your voice to find anything you want to watch on your Apple TV. Siri Remote brings precise control on your Apple TV. It is all touch enabled clickpad with gesture support. With just a single click, it will take you to TV shows and movies, while a swipe will move you through a long list of contents. Also you can fast forward or rewind through your movies and shows with a swipe across your Remote.
Siri Remote second generation is compatible with both first and second generation Apple TV 4K and Apple TV HD.
2. The Smart Home Advantage
Another advantage of Apple TV is that you can easily have a smart home. A smart home allows you to organise, control and manage multiple accessories on your home with remote or with the help of Siri at the same time.
With HomeApp in your Apple TV, you can control your smart home from anywhere you are. Imagine, you are on your way home from work and the climate is a bit chilly. All you need to do is to open Siri on your iPhone and command it to heat up your room. Apple TV being always on in your home will take the command and your room will start to warm up before you arrive.
3. Screen mirroring with AirPlay
Apple TV allows you to see your TV as a second display. Screen mirroring allows you to view streaming Apps or any other Apps on your Apple device in your TV screen. You can stream your iPhone, iPad or MacBook with AirPlay.
You can be watching an interesting clip or a movie on your Apple device, and you need to share it with your family members or your friends. You will just need to screen your Apple device with your Apple TV for everyone to see on the screen. For screen mirroring to occur, your Apple TV and your Apple device should be connected to the same Wi-Fi or wired network.
4. Apple TV supports a huge range of Apps
Another great Apple TV 4K and Apple TV HD benefits is that you can download an array of apps. If you like watching movies you can download apps like Netflix or Amazon prime video. Further, you can subscribe to Hulu and many more other Apps. The games lovers can download ESPN to enjoy football and many other games.
The Apple TV also comes with the in build Apps. Like photos which you can use to browse through pictures, Apple music to watch or listen to music. Also with Apple TV you can enjoy thousands of live channels or TV shows through subscription.
5. The multi user experience
Apple TV saves one profile based on personal preference. You can be a family of many people, those who like to watch action series, horror movies, Apple music or animation and cartoons for children. Thus everyone has a different taste from the other. Apple TV with time is able to detect everyone’s taste and will be able to switch between profiles and offer personalised experience based on one’s personal preferences.
6. Fabulous screensavers
When your Apple TV is idle or it’s not in use for some minutes, it displays some screen savers. The screen savers are Aerial and are displayed on your screen through beautiful slow motion videos of places and things around the world.
Aerial videos on the Screen savers can be downloaded on your Apple TV at your own interest and control how your TV looks when it’s not in use. Also you can view information about the location shown on the TV screen and change to as many locations as you desire.
7. Access to Apple TV Plus
One of the Apple TV benefits is access to Apple TV Plus. Apple TV is a streaming service that features Apple’s originals like series, dramas, documentaries, kids entertainments and many more. You can ultimately experience the Apple TV with Apple 4K HDY and Dolby Atmos sounds.
You can get different offers depending on which choice you choose on the subscription of your Apple TV . Although Apple gives you a free three months offer for your Apple TV if you purchase an Apple device, you need to subscribe monthly for you to enjoy your Apple TV . You can share your Apple TV subscription with upto five family members.
8. Apple TV is portable
You may not think of portability as a major benefit of Apple TV. However, it’s quite a point to note when you own one. You can be travelling or camping and you need some entertainment with you. Apple TV 4K or Apple TV HB box with 32GB storage space or more is easy to carry anywhere you want to go. You can connect with Wi-Fi or wired networks to download apps or view live shows on your Apple TV anywhere you are.
9. Connect to your AirPods
Another benefit of Apple TV is that you can connect it to your AirPods, AirPods Pro or AirPods Max and listen to your TV privately. If your AirPods share the same Apple ID with your Apple TV, they will connect automatically. Or you can hold the Play button on your remote and a drop down will let you connect with the Apple TV.
10. Easy to set up
Apple has made it easy to set up their device. Every device comes with understandable steps to follow step by step until the set up is complete. In addition, the Apple support is always there to guide you though the full process. Apple TV is not exceptional, you will have the instructions to follow to connect your Apple TV and even how to connect with other Apple Devices.
Advantages of Apple TV. Now you know
From supporting a wide range variety of Apps, connectivity with AirPods, fabulous screensavers and many more advantages discussed above. The Apple TV is worth buying.
Is your LTE not working on iPhone 13? Here is what you can do to fix it.
Has your LTE connection been letting you down lately? Or stopped working altogether? Don’t worry! You can try various fixes before blowing up your cell carrier’s customer support line.
Note: information in this article apply to iPhone 13, iPhone 13 mini, iPhone 13 Pro, and iPhone 13 Pro Max.
How to fix LTE not working on iPhone 13
1. Turn airplane mode on and off
Sometimes the most obvious fix is the most reliable one. If your mobile data is giving you trouble, one of the first things you should try is turning airplane mode on and off. You can do this simply by dragging down the control center and tapping on the airplane icon, or you can do it through Settings.
You can enable Airplane mode by going to Settings –> Airplane mode. Turn it on for at least a couple of seconds, then disable it. In a lot of cases, your iPhone 13 LTE connection issues will be gone.
2. Restart your iPhone
Sometimes temporary problems can prevent LTE from working on your iPhone 13. You can fix this by simply turning off your iPhone and turning it back on. Press and hold the Side and either of the volume buttons and then drag the power of slider. Wait a couple of seconds and turn it back on. Check your status icon and test the speed of your LTE connection by opening some websites or downloading some smaller apps.
3. Check if you have data allowance
Before moving to the remaining solutions, make sure you have data allowance for the day, month, or billing cycle. You can use your carrier’s official app or call customer support to know your data balance. In case you have some pending bills, clear that, and your internet should be restored soon.
4. Turn off VPN
Are you using a Virtual Private Network (VPN) app on your iPhone? If yes, open it and turn off VPN. Once you do that, LTE connection should work fine.
5. Make sure the correct network mode is enabled
Depending on your carrier, you should have at least three connection types – 2G, 3G, and 4G LTE or just LTE. Usually, your device will try to connect to the fastest option. Still, if you’ve been tinkering with your settings or recently installed an update, that might need to be adjusted manually. Here is how to do it:
Go to Settings, then tap on Cellular.
Tap Cellular Data Options.
Select Voice & Data. A pop-up list of preferred modes will appear.
Tap on the LTE or 4G.
6. Take out and readjust your SIM card
If none of the steps above fixed the problem of LTE not working on iPhone 13, the problem might lie in an ill-positioned SIM card. Eject it and carefully reposition it in its tray. Be careful when inserting it back into your device. Once you’re done, your LTE connection should be back to normal. If you see other SIM card issues, it’s best to contact your network carrier and get a replacement SIM.
7. Update Carrier Settings
The iPhoneGeeks recommend that you update carrier settings immediately after they become available because outdated settings may lead to connectivity issues between your iPhone and your wireless carrier’s network.
Some potential issues include having poor LTE connection.
Make sure that your iPhone is connected to a Wi-Fi network, or that Cellular Data is turned on.
Open the Settings app.
Go to General.
Tap About.
After a few seconds, if a carrier settings update is available, you’ll see a pop-up on the screen of your iPhone which says, ”New settings are available. Would you like to update them now?”
Tap Update.
8. Update Your iPhone Software In Settings
Are you using an outdated version of iOS on your iPhone 13? If yes, LTE may not work due to a bug. Updating iOS can fix the problem of LTE not working on iPhone 13.
Open the Settings app.
Tap General.
Tap Software Update.
Tap Download and Install or Install Now.
Enter your passcode if prompted.
The update will begin once it has been verified.
The update is complete after your iPhone restarts.
9. Reset network settings
If you tried all of the above but nothing changed, it’s time to take a slightly more drastic step. Resetting your network settings. Here is how you can do it:
Open the Settings app.
Tap General.
Scroll down and tap Transfer Or Reset iPhone.
Tap Reset.
Tap Reset Network Settings.
Enter your passcode if prompted.
Your iPhone will shut down, reset, and turn itself on again when the reset is complete.
10. Contact your cell carrier
If you’ve tried everything else on the list and nothing seemed to fix your LTE not working on iPhone 13 problem, it’s time to contact your cell carrier. You can always do so on social media, but sometimes a good old-fashioned call might address your concerns better. Here are the customer support numbers of the major US providers:
Verizon Wireless: 800-922-0204
AT&T: 611 from an AT&T phone or 800-331-0500
T-Mobile: 611 from a T-Mobile phone or 1-877-746-0909 from another phone
U.S. Cellular: 611 from a U.S. Cellular phone or 1-888-944-9400 from another phone
11. Get your iPhone checked out for hardware problems
Sometimes, LTE not working on iPhone 13 is the fault of hardware. If you’ve recently dropped your device, that could have damaged internal components. Take it to an authorized repair shop to get it checked out. If your iPhone 13 is brand new, on the other hand, but still experiencing consistent connection issues, you might have a faulty unit.
Contact Apple Support or carrier you bought it from immediately. You will have to send in your device to get it checked out in most cases. Make sure you back it up before handing it in. If faulty, you should get a replacement unit in a reasonable amount of time in most cases.
Fixed LTE not working on iPhone 13
These are our tips and tricks on fixing your LTE not working on iPhone 13. Did we manage to help you solve your issue? Let us know in the comments below.
Our phones have become such a multipurpose tool that we sometimes forget what they were originally designed for. Imagine this scenario – you’re was well into the afternoon before you realized that your iPhone wasn’t able to dial out. You’ve been heavily relying on data and WiFi, using a variety of texting apps, checking your email, and searching the internet for a whole slew of unimportant trivia before even noticing the glitch. If your iPhone SE 2022 won’t make calls, use these troubleshooting steps to fix it.
Are you unable to get in touch with friends and family because your iPhone SE 3 won’t make phone calls? You probably find that you can’t hear the outgoing dial tone or the call attempt ends abruptly. Your screen may also show an error message, saying Call Failed. Whatever the cause, here are all the different ways to fix your iPhone SE 2022 when it won’t let you make phone calls.
How To Fix iPhone SE 2022 Not Making Calls Issue: 11 Ways
Here are some of the best troubleshooting tips you can try out to fix the iPhone SE 3 not making calls problem:
1. Toggle Airplane Mode
When Airplane mode is enabled on your iPhone, the feature disables both incoming and outgoing texts and calls. This is important to prevent interference if you’re on a plane. But if you don’t need to use Airplane mode right now, make sure it is turned off by accessing your iPhone’s Control Center and tapping the Airplane Mode icon.
Toggling Airplane Mode on and off can also fix seemingly unrelated calling issues.
2. Check Your Mobile Plan
To make a call using your iPhone’s Phone app, you need an active mobile plan with sufficient credit or minutes. Check with your network to see if your mobile plan has expired or if there’s insufficient credit left. If this is the case, simply reload your account and you should be able to start making calls again.
3. Check Your Phone Signal
If you’re at a remote outdoor location, or if it’s raining or snowing in your area, you may experience poor cell reception. Check the cell signal icon in your iPhone’s status bar to find out. If there’s only one vertical bar filled in, you can try moving to another location to get a stronger signal in order to make a call. For example, if you’re in your bedroom, simply going to other areas in your house such as the kitchen or garden may get you the signal you need.
If there are no bars at all, or If Your iPhone SE 2022 Says No Service in the status bar, visit your network provider’s website and look for a coverage map to find out if you’re supposed to get any signal in your current location.
4. Check for a Carrier Settings Update
To check if your carrier provider has network-related updates, first connect your iPhone to Wi-Fi or enable cellular data. Then, go to the Settings app. Select General and tap About. If an update is available, you’ll see a Carrier Settings Update prompt. Tap Update to begin the installation.
5. Restart Your iPhone
A common but effective fix for most tech issues is to simply restart your device.
6. Remove and Reinsert Your iPhone’s SIM Card
The SIM card tray is located on the side of your iPhone. To eject the tray, you can use the SIM-eject tool that is included in your iPhone box (or a straightened paperclip). To avoid causing damage to your device in the process, you can refer to our detailed tutorial on how to safely remove the SIM card from your iPhone.
After removing the SIM card, gently wipe it with a soft, lint-free cloth. Then, place the SIM card back into the tray and slide it carefully into your iPhone.
7. Update Your iPhone’s iOS
Updates to iOS often come with bug fixes and the like. Sometimes, you can resolve your iPhone SE 3 not making call issue by simply keeping your device’s iOS up to date. Go to Settings > General > Software Update to look for new updates.
8. Reset Network Settings
Your iPhone SE 2022 won’t make calls if there are network-related problems. So, the next solution is to reset network settings on your iPhone.
Rest assured that this is not a factory reset. It simply deletes network data, such as Wi-Fi passwords and Bluetooth device connections—all of which can be easily set up again later on. All the content on your iPhone should be totally fine—like your apps, photos, and music.
To reset network settings on your iPhone, go to Settings > General > Transfer or Reset iPhone > Reset > Reset Network Settings. Then, tap Reset Network Settings when the confirmation alert appears on the display. Your iPhone will reset and turn back on once it’s finished.
9. Reset All Settings
The last solution you can attempt if your iPhone SE 2022 won’t make calls is to reset all the settings on your phone. As long as you follow the guided steps correctly, you still won’t lose any data from resetting your iPhone. Just make sure you don’t choose the option to Erase All Content and Settings.
However, this process can take a long time if you have a lot of data on your device. Before trying this solution, remember to consider whether the problem could actually be with the person you’re trying to call. You may want to find another way to reach out to them to ensure their phone is working before spending more time resetting settings on your own device.
To reset all settings on your iPhone, go to Settings > General > Transfer or Reset iPhone > Reset > Reset all Settings. Then, tap Reset all Settings when the confirmation alert appears on the display. Your iPhone will reset and turn back on once it’s finished.
10. Contact Your Wireless Carrier
It’s time to get in touch with your wireless carrier if your iPhone SE 2022 still won’t make phone calls. Even if your signal looks good, there could be an issue with your cell phone plan.
We recommend contacting your wireless carrier before Apple. If you go to an Apple Store and tell them your iPhone is not making calls, they’ll probably tell you to go talk your wireless carrier first!
11. Visit The Apple Store
If you’ve contacted your wireless carrier and they can’t help you, your next step would be to take your phone to a nearest Apple Store so the Genius Bar can conduct some troubleshooting. In rare cases, an iPhone SE 2022 may stop making calls because of damage to one of its antennas.
Your iPhone May Not Be the Problem
There are a few reasons why your target recipient’s device may be unable to receive your call. For example, they may have poor signal, even if you don’t. Or perhaps they put their phone into Do Not Disturb mode to block all calls.
There’s a quick way to confirm whether the problem lies with your iPhone’s functionality. You can try calling someone in the same room as you, or someone else whom you know is available to pick up your test call. If the call goes through successfully, this shows that your iPhone can make an outgoing call without issues, so the problem must be with the other person you’re trying to call.
Alternative Ways to Call Someone
If you suspect the problem is with your device, the Phone app isn’t your only option when you need to call someone. Here are some alternatives you can use to make a call from your iPhone.
Use FaceTime
Try using the FaceTime app to call your contact instead of the Phone app. Whether you enable video or not, this will force your iPhone to make a call over your internet connection—instead of your cell network—which may allow it to go through.
Use Third-Party Apps
If you can connect to a Wi-Fi network, you can make a call using third-party apps, such as WhatsApp and Messenger instead. These apps enable you to make free calls over an internet connection. However, the limitation is that your contact must be a user of that app as well. Also, they need to have Wi-Fi or cellular data enabled on their device to receive the incoming call notification.
Use Another Phone
Another option is to simply borrow another person’s phone to make a call. If they’re using a different carrier, they may have a stronger cell signal than you do. Be mindful of your call length and the potential cost of the call, though. You don’t want to end up with your friend receiving high call charges after they let you use their phone!
Solved: iPhone SE 2022 not making calls
We hope this list of fixes and suggestions has helped you to fix any phone call problems you were experiencing with your iPhone SE 3. If the issues persist, it’s better to contact your mobile carrier or Apple Support for further assistance. In the meantime, make sure that your iPhone can receive calls. This way, you can still speak to people on the phone if they call you instead.
Many people wonder Whats the use of an iPad if you have both an iPhone and a MacBook. Owning an iPad comes with a lot of benefits like multitasking, taking and editing photos and videos, portability, use of Apple Pencil to draw or write on the screen and many other benefits we are going to discuss below.
Advantages of iPad
Here are just but a few advantages of having an iPad in 2025
1. Multitasking
You can use multiple Apps on your iPad at the same time. Multitasking on an iPad is more intuitive and powerful than ever. Your iPad offers two ways of multitasking, that is, slide over and split view. Split view allows you to display two or three apps on the screen in their own resizable panes. While Slide Over lets you view two apps on the screen with one App in a narrow pane floating on the top of the other. Also you can drag and drop content between apps with touch or a trackpad.
2. Apple Ecosystem
Are you an Apple products fan? If yes, then the Apple Ecosystem is one thing to enjoy. Like, you can connect your iPhone with your iPad and transfer iCloud space and some Apps from iPhone to your ipads, connect your iPad with your Apple TV for larger screening or play some music to your HomePod by connecting your iPad with HomePod.
3. Portable
Portability in iPad is achieved in many ways. For example, you can be traveling and you need to move from location to location thus carrying your laptop with you will be tedious. So having an iPad with you it’s more advantageous because of it’s size and weight and still can perform many things like your laptop.
Also at the comfort of your house using iPad is more light and portable to move it across the house.
4. Use of Siri
Siri is among the most outrageous and creative advantages that the iPad provides. You can use the magic words “Hey Siri” to do a lot of things in your iPad. iPad user can dictate voice command that can guide in typing messages, replying to mails, play music and opening games.
5. Use of Apple pencil
The Apple Pencil allows you to take notes, draw, keep a journal, mark up documents and many other things on your iPad screen. iPad is always ready to capture your brightest ideas which you can easily share them, build on them and bring them to life. With Apple Pencil, you can write on your iPad screen and your handwriting can be just as powerful as a typed text, you copy it and paste as a typed text.
6. Easy to use
iPad has the same touchscreen features as the iPhone. This makes it easier to use. It has a larger display and bigger screen than the iPhone, thus those with sight problems don’t need to zoom in to see the screen because words and letters are big enough for them to see clearly.
7. Never leave an App again
When using an iPad, after leaving an App and opening other Apps, you don’t have to go to the homepage to open it again. You just need to scroll on the screen and find the app that u had opened earlier, this is because the Apps are saved on the screen. For example, you can be playing games and you leave the page to reply to a mail, then a Facebook notification pops in and you need to reply. After replying you want to go back again to games. So you don’t need to go to the homepage again and open the games app but you just need to flap on your screen to see the previously opened Apps and open the games App again.
8. Battery
It can be so boring having to carry your charger or power Bank anywhere you go just to charge your device when it’s out of power. But with the Apple iPad you can travel or use it for many hours without it getting out of the power. This makes it more loved by a lot of people.
9. GPS replacement
With data connectivity, you can use your iPad to show direction on your car or when you are traveling. Maps App which comes with your iPad helps you to navigate places easily due to its large display.
10. Taking and editing photos or video
You can take pictures or video using your iPad. They are of high quality because of high quality camera lenses. Also you can edit your pictures and videos using your iPad.
11. Use of e-book
Owning an iPad allows you to take your books with you and read them anywhere as e-books. E-books come in a variety of formats that might require you to use different applications in order to view and read them. E-books can be read using Apple Books, Amazon Kindle and as a PDF.
12. Better for gaming
iPad having a larger display makes it good for gaming. You can find games for action, adventures, racing, puzzles and many more in your App Store. You can also play with your friends, earn achievements, and compete on leaderboards using Game Center.
With numerous benefits of having an iPad, it’s easy to figure out why iPads are preferred more. When it comes to recommending a friend or family member if they need to buy an iPad, the answer is yes. With an iPad you can multitask, use it for games, use an e-book and many more benefits that we have discussed above.