Should you consider buying an Android smartphone rather than an iPhone? What are the advantages of Android over iPhone? Let’s find out!
See also: Top 10 Advantages of an iPhone Over Android in 2023!
Android, the operating system equivalent of a cup of water. It’s nothing special at a glance, but it’s also simple and easy to digest. Android phones have a much better user interface and better specifications, so we’ve prepared here 14 advantages Android phones have over iPhones in 2023.
Advantages of Android Over iOS
Android Phones have many software and hardware features and advantages that IPhones don’t that could be useful to you. Here is a list of those features.
Expandable storage
Some android phones come with a micro sd card slot that can be used to add extra storage to your device. This is great if you want to store lots of movies,pictures,music,and documents on a micro sd card so that your internal storage doesn’t get filled up, and can be used for more applications.
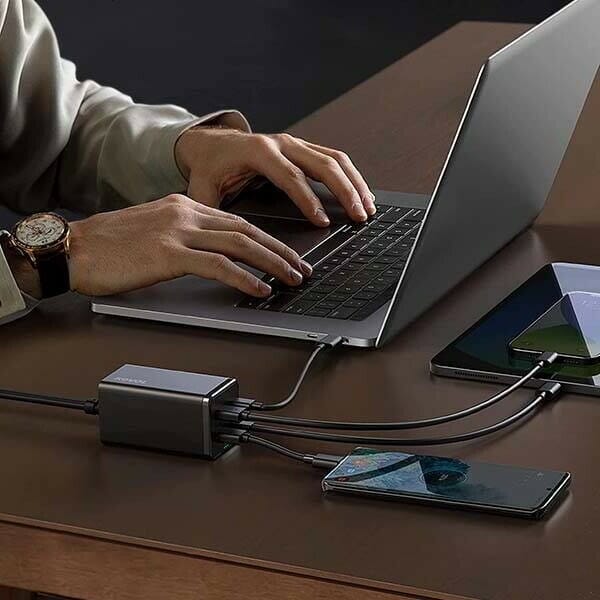
Usb type c
Most android phones that are released now have a usb type c port. IPhones still use the lightning port. What is the benefit of usb type c you might ask? Well for one, usb type c can have much faster data transfer speeds than lighting .The IPhone 13 pro still uses usb 2.0 while the galaxy s21 uses usb 3.2.Usb type c can also have greater power delivery than lightning. Another great thing about a usb type c cable is that it is capable of transmitting video signals, and they can even delivery enough power to actually power a monitor as well. Lastly, usb type c has the advantage of being a universal standard, so it can charge more devices.
Reverse wireless charging
Some android phones have reverse wireless charging, which is a hardware feature that allows you to charge another device that is capable of using wireless charging by simply placing that device on the back of your phone. Reverse wireless charging is not very fast, but I do think it could still be useful sometimes if you just want to charge accessories like watches or wireless earbuds to get a lit bit of extra battery life.
High Refresh rate displays
A lot of flagship android phones have high refresh rate displays. The reason why having a refresh rate is better is because it makes using your phone feel smoother. This is because the display is refreshing more times per second. As a result the image looks smoother. A 120hz display is going to look noticeable smoother than a 60 hz display. Also, if you have a high-end phone there are some games that can run at framerates higher than 60fps.Having a higher refresh rate screen will allow you to actually notice the higher framerate.
Higher optical and digital zoom
There are android phones that have higher optical and digital zoom than the latest iphone. For example, the galaxy s21 has 10x optical zoom and 100x digital zoom. In contrast, the iphone 13 pro max has 3x optical zoom and 15x digital zoom.
Fm radio
Some android phone still have an Fm radio. This will allow you to listen to the radio using your phone. Apple shows the biggest middle finger to its customers, by not even including an FM receiver on an iPhone.
Active cooling
Some android phones have active cooling. This is useful because it can help keep the phone cool when it’s performing a demanding task like gaming. Active cooling can prevent the components from overheating which will prevent the phone from throttling which has a negative impact on performance.
Notification led
Many android phones have a notification led which lets them know they got a notification without them having to pickup there phone and check. These notification leds can also display different colors for different types of notifications.
Full usb otg support
Usb otg is a feature that let’s user plug just about any usb peripheral into your device using the appropriate adapter. Some examples of things you can plug into your phone with usb otg are flashdrives,usb keyboards, webcams, microphones, printers, usb controllers, ethernet adapters, and usb fans. The Iphone can work with flashdrives made specifically for iphones, sd cards, and a wireless mouse, but that’s about it. Anything else you plug in to the iphone would require more power, which means the iphone would have to be plugged in.
Knox
This is a security feature that is exclusive to some Samsung phones. What knox essentially does is it allows you to isolate personal data from the rest of the operating system by creating a security layer for you to store that data. This feature is useful for storing personal information on your phone.
Customization
Android is much more customizable than ios. One simple example of how android is more customizable than ios is giving user the ability to places apps anywhere in the app grid. On ios apps have to be placed in order from top to bottom with no blank spaces. Aside from that you can install third party launchers on ios that allow you to change the actual size of the app grid, change the icon pack, the animations and much more. You can also change your gesture navigation system, add custom quick setting tiles etc. Overall android is much more customizable than ios.
File management
On ios there is no centralized filesystem. This makes file management cumbersome, and let me explain why.Apps on ios do not have direct access to the filesystem, instead apps are only allowed to directly access files in their own folder. This means that if you want an app to have direct access to a file for some reason, you would have to export that file from the file manager to the app you want to use it in. For example, let’s say I have a bunch of videos on my phone, and I want to watch them in vlc. I could go to the files app ,find the video, long press it, click share, and play it through vlc.This works, but it’s less convenient than simply accessing those videos through the app, I can’t save the last position in the video doing this, and I can’t add it to a playlist in the app. So if I want that extra convenience and functionality, vlc would have to have direct access to those files. For that to happen I would have to individually export all the videos from my files app to vlc. Then if I want to organize them into folders I would have to do that in the vlc app. This creates duplicates of those videos which takes up more storage on your phone, and makes managing files more difficult. If you wanted to edit one of those videos,and add it to the vlc app,you would have to export the edited version of that video to vlc. This is not the case with android. On android you have a centralized filesystem that apps can access directly. So on android you would simply have to grant vlc access to your filesystem, and then all the videos stored on your phone will be accessible through the vlc app.They will also be organized the same way there organized in your file manager. No need for duplicates, it’s just one place you can manage your files. Also, you can plug in your android phone to a pc ,and have access to all your files like you would with a flashdrive. On ios you can only access pictures and videos by default.
Features
There are some features on android that are still not available on ios. Here is a list of the more major features.
- Split screen: run two apps at once in a split screen screen view. For example, you can have a math assignment in pdf format open on the top of your screen, and a calculator on the bottom of the screen.
- Chatheads: Have a floating chathead on your screen allows you to be quickly notified if you receive a new message, and respond to that message in a windowed version of the messaging app.
- Multiuser accounts: This feature allows you to have separate user accounts on your phone. This similar to having a separate user account on windows. The separate account has different apps,settings, files etc. It’s the other person’s own setup. You can also put your phone into guest mode which basically how your phone looks right out of the box. The guest account does not have any of your apps or personal data. This is a good feature to utilize if a friend wants to use your phone to make a call or look something up on the internet, but you don’t want them accessing your personal information.
- Notifications: There are many features in the android notification system that can’t be found in the ios notification system. The main ones are the ability to snooze notifications, notification channels,persistent notifications, the ability to prioritize conversations, smart replies, and notification history.
- Live captions: This feature is an accessibility feature that creates captions for whatever audio is playing. It could even be a video you recorded and it will try to transcribe the audio from that videos,and create captions.
- Pin apps to share sheet: Android allows you to pin apps to the top of the share sheet. This is a good feature to use you have apps that you share to often, and want the be easily accessible.
- 2 hour grace period: on android if you purchase an app,you have 2 hours to try it out and anytime within 2 hour window you can get a guaranteed refund for the app you purchased for any reason. On Ios if you purchase an app you have to request a refund, and hope the developer refunds your money.
- Send files via Bluetooth: This one is pretty self explanatory on android you can send files via Bluetooth, while this not possible on ios. Ios does have airdrop which is much faster, but the problem with airdrop is that it’s limited to apple devices. The vast majority of devices out there are windows computers, and android phones. Also, there are third party apps that let you share files via Wi-Fi direct on android, and google is working on their own airdrop competitor called nearby share.
- Adding shortcuts to files on homescreen: on android you can add a shortcut to a specific file directly on your homescreen. This could be a document,video,picture etc. You can literally have a folder filled with videos on your homescreen, and have things setup so that when you click on a video you get to choose which video player the video plays in.
- Developer options: While these options are made developers there are somethings in developer options that can be useful to users. With developers you change the animation speed, and the duration of animations, enable usb debugging, unlock the bootloader, and more.
More diverse selection of apps
Compared to ios, android has alot of unique apps/app subgenres. The reason for this is because ios apps have less permissions compared to android apps,and because apple is more strict with the types of apps they allow in there store. Below are examples of app or app subgenres that can only be found on android.
- App cloners: These are apps that let’s you clone and run two accounts of the same app simultaneously. For example, you can have two seperate whatsapp accounts,or two seperate clash of clan accounts. You can’t find apps like these ios.
- Universal copy: This is an app that allows you to select and copy text from places you normally wouldn’t be able to. For example, the youtube comment section in the youtube app. This app can useful when you run into a situation where you want to copy something, but you can’t.
- Emulators: These are apps that you emulate game consoles. So for example you can emulate the nes, psp, ds, gamecube, wii, and even the 3ds.These apps are not available on the ios appstore because apple bans them. You can try to sideload them, but they will get revoked.
- Floating apps: These are apps that are placed of your screen. Some examples of floating apps are Fooview,lynklet browser, lynket browser, overlays, and idea note.
- Servers ultimate: This app let’s you run a plethora of different servers on your phone. There is no ios equivalent of this app
- Apk extractors: These apps allow you to extract apk files from apps on your phone. The apk is basically the download file for an android app. So even if the android app is no longer available on the playstore you can still have the download file to reinstall it. you can also share apk files with another android user.
- Hide screen: This app lets you turn on your screen while still keeping the phone awake. To turn the screen back on you simply double tap it. This is app great if you want to just put your phone in your pocket, and listen from an app that does not support background play without worry about it turn off,or if you just want a quick way to shut off your screen without putting the phone standby to ensure that the app your using doesn’t get kicked out of memory.
- Rotation control pro: This app gives you more control over the rotation controls on your phone. You can even lock your screen into to portrait or landscape mode. This sometimes works with apps that don’t support a certain screen orientation.
- Hermit lite apps: This app allows you to turn normal sized apps into smaller web-based apps that perform better, take up less space, and use less data.
- Soundwire: This app lets you use your android phone as a speaker for your pc.
- Muviz: A systemwide music visualizer that stays on your navbar.
- Autoclickers: These apps allowed to automated repeat taps on your phone.
- Touch protector: This app prevents accidental touches on your phone by allowing you to disable the touch screen.
Those are just some examples of the kinds of apps you can get on android that can’t be found on ios. I think I should also mention that you can sideload apps on android as well. One good sideload app I like on android is newpipe. Newpipe is a youtube client that let’s you download videos in up to 4k quality, play audio in the background, and play videos in a resizable pip window. It also does not use google services either. Another thing I didn’t really mention is that sometimes apps can be less functional on ios because of the restrictions. For example, third party browsers on ios can’t use there own engine. As a result you can’t use add-ons from third party browsers on ios Also, since apps on ios don’t have permission to draw over apps there are no third party screen recorders with floating toolboxes or the ability to use a face cam while recording on ios. These are two examples but I’m sure there is more. So
that pretty much sums up the advantages the android phones, and the android operating system has over iphones and ios.