Got a tip for us?

Settings

In Settings, you can customize how screenshots and screen recordings work on your iPad, including preview style, Visual Look Up features, and capture formats. Screenshots open in full screen by default, but you can switch to a temporary thumbnail preview in the lower left.

Preview screenshots as thumbnails

After you take a screenshot, it appears in full screen by default. If you prefer a temporary thumbnail preview in the lower left, do the following:

  1. Open the Settings app on your iPad.
  2. Tap General, then tap Screen Capture.
  3. Turn off Full-Screen Previews.

Use Visual Look Up in screenshots

Your iPad can spot objects and places in screenshots automatically and help you learn about them, on supported models and in some languages.

  1. Open the Settings app on your iPad.
  2. Tap General, then tap Screen Capture.
  3. Turn on Automatic Visual Look Up.

See also

You can select an alternative search engine as the default to search for content on the web. You just pick the search engine you want to set as the default. And you can also change other default apps, like your default browser or email app.

  1. Start the Settings app on your iPad.
  2. Tap Search, then tap Search Engine.
  3. Tap the search engine you want to set as the default and then tap the Back button.

To change other default apps, like your default browser or email app, see our article, Change the default apps.

See also

The volume buttons on iPad adjust media volume while audio is playing, and ringer and alert volume at other times. You can also adjust the volume in Control Center or Settings, and silence iPad.

In Settings, you can set separate volumes for alarms and timers, and for alerts and system sounds. See Set separate volumes for alarms and alerts. You can lock the alert volume, too, so the volume buttons only control media playback, and if you’d rather, Siri can turn the volume up or down for you.

WARNING: For important information about avoiding hearing loss, see Important safety information.

Adjust the volume with the volume buttons

Press the volume up or volume down button on the side of iPad. The button you press controls the volume for what’s currently playing—media, ringtones, or alerts.

Note: While audio is playing, the volume buttons control media volume, and when nothing is playing, they control ringer and alert volume.

You can also use Siri to turn the volume up or down.

Siri: Ask Siri something like, “Turn up the volume.” Learn how to use Siri.
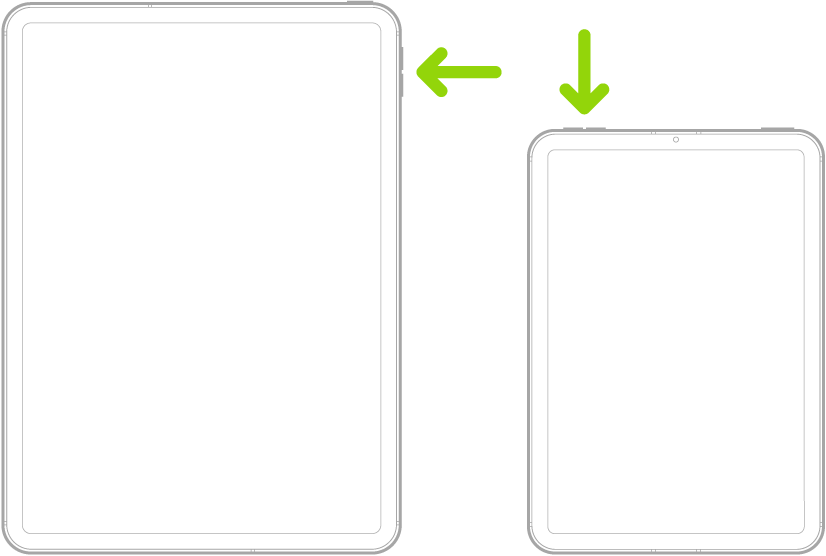
Two different iPad models shown from the front. The model on the left has the volume buttons near the upper-right side and the top button on the top right. The model on the right has the volume buttons on the top left and the top/Touch ID button on the top right.

Adjust the volume in Control Center

As you use an app, or when iPad is locked, you can adjust the volume from Control Center.

Open Control Center, then drag the volume slider.

Silence iPad

If you’d like to mute iPad quickly, do one of the following:

  • Press and hold the Volume Down button.
  • Open Control Center, then tap the Silent Mode Off button to turn on Silent mode. Tap it again to turn it off.

Note: Silent mode won’t mute audio from music, podcasts, movies, and TV shows.

A Focus lets you silence specific notifications instead of all sounds. For how to use one, check out our guide, Turn on or schedule a Focus.

Lock the alert volume

You can prevent the volume buttons from changing the volume of alerts and notifications.

  1. Start the Settings app on your iPad.
  2. Tap Sounds, then turn off Change with Buttons.

When Change with Buttons setting is off, the volume buttons only control media playback.

Limit speaker and headphone volume

You can limit the maximum volume of sound that plays through headphones or the built-in speaker on your iPad.

  1. Start the Settings app on your iPad.
  2. Tap Sounds and then do any of the following:
    • Limit speaker volume: Under Built-In Speaker, tap Volume Limit, turn on Limit Maximum Volume and then drag the slider to specify the maximum volume.
    • Soften loud sounds from the speaker: Under Built-In Speaker, turn on Reduce Loud Sounds.
    • Limit headphone volume: Under Headphones, tap Reduce Loud Audio, turn on Reduce Loud Audio. Drag the slider to set the maximum volume.

For more ways to protect your hearing from loud headphone audio, read our article, Use headphone audio-level features.

Note: Screen Time can keep a family member from changing the Reduce Loud Audio level, as long as you’ve set it up for them. Go to the Settings app on your iPad, tap Screen Time, and tap Content & Privacy Restrictions. Next, turn on Content & Privacy Restrictions, then tap Speaker Volume, Reduce Loud Audio, or Speaker Volume Limit, and select Don’t Allow.

See also

You can return your iPad settings to their defaults without erasing your content. If you want to save your settings, back up iPad before resetting it, so you can restore your previous settings from a backup if resetting doesn’t solve a problem.

Reset All Settings removes or resets things like network settings, the keyboard dictionary, location and privacy settings, and Apple Pay cards, but no data or media are deleted. You can also reset just your network settings, or erase all content and settings.

  1. Open the Settings app on your iPad.
  2. Tap General, tap Transfer or Reset iPad, and then tap Reset.

    WARNING: If you choose the Erase All Content and Settings option, all your content is removed. See Erase iPad.

  3. Choose an option:

    • Reset All Settings: All settings—including network settings, the keyboard dictionary, location settings, privacy settings, and Apple Pay cards—are removed or reset to their defaults. No data or media are deleted.
    • Reset Network Settings: All network settings are removed. In addition, the device name assigned in Settings > General > About is reset to iPad, and manually trusted certificates (such as for websites) are changed to untrusted.

      Cellular data roaming may also be turned off. (See View or change cellular data settings on iPad (Wi-Fi + Cellular models).)

      When you reset network settings, previously used networks and VPN settings that weren’t installed by a configuration profile or mobile device management (MDM) are removed. Wi-Fi is turned off and then back on, disconnecting you from any network you’re on. The Wi-Fi and Ask to Join Networks settings remain turned on.

      To remove VPN settings installed by a configuration profile, go to Settings > General > VPN & Device Management, select the configuration profile, then tap Remove Profile. This also removes other settings and accounts provided by the profile. See Install or remove configuration profiles.

      To remove network settings installed by MDM, go to Settings > General > VPN & Device Management, select the management, then tap Remove Management. This also removes other settings and certificates provided by MDM.

    • Delete All eSIMs (Wi-Fi + Cellular models): All eSIMs stored on your iPad are deleted. You will need to set up a new eSIM or physical SIM card to connect to a cellular network. See Set up cellular service on iPad (Wi-Fi + Cellular models).
    • Reset Keyboard Dictionary: You add words to the keyboard dictionary by rejecting words iPad suggests as you type. Resetting the keyboard dictionary erases only the words you’ve added.
    • Reset Handwriting Style: Resets custom handwriting preferences to their defaults.
    • Reset Home Screen Layout: Returns the built-in apps to their original layout on the Home Screen.
    • Reset Location & Privacy: Resets the location services and privacy settings to their defaults.

To completely erase your iPad, read our guide, Erase iPad using Settings. And if you need to use a computer to erase your iPad, see our article, Erase iPad using your Mac or Windows device.

You choose the language and region of your iPad during setup. If you travel or move, you can change the language or region.

You can add or remove a language, and change regional settings like the calendar format, the temperature unit (Celsius or Fahrenheit), and the measurement system (metric, US, or UK). You can also set the first day of the week, the date format, and the number format, along with Live Text, the text you can select in images to copy or to take action on.

Add or remove a language

  1. Start the Settings app on your iPad.
  2. Tap General and tap Language & Region. Do any of the following:
    • Add a language: Tap Add Language, then select a language.
    • Remove a language: Tap Edit, tap the Delete button, and tap Delete. Tap the Done button when done.

Change the regional settings

  1. Start the Settings app on your iPad.
  2. Tap General and tap Language & Region. Set the following:
    • The region
    • The calendar format
    • The temperature unit (Celsius or Fahrenheit)
    • The measurement system (metric, US, or UK)
    • The first day of the week
    • The date format
    • The number format
    • Live Text (text you can select in images to copy or take action on)

See also

You can select alternative, third-party apps—for email, messaging, calling, call filtering, web browsing, passwords, or keyboards—as defaults to launch instead of the built-in Apple apps.

Make sure the app you want to switch to supports this feature, and if you aren’t sure, contact the app developer. You can also change the default app used to translate text, or the app that opens links on the web. Some app categories, like Maps, Camera, and Music, can’t be changed.

Note: Some app categories, like Maps, Camera, and Music, aren’t in Default Apps, so they can’t be set to a different default.

Change your default apps

  1. Open the Settings app on your iPad.

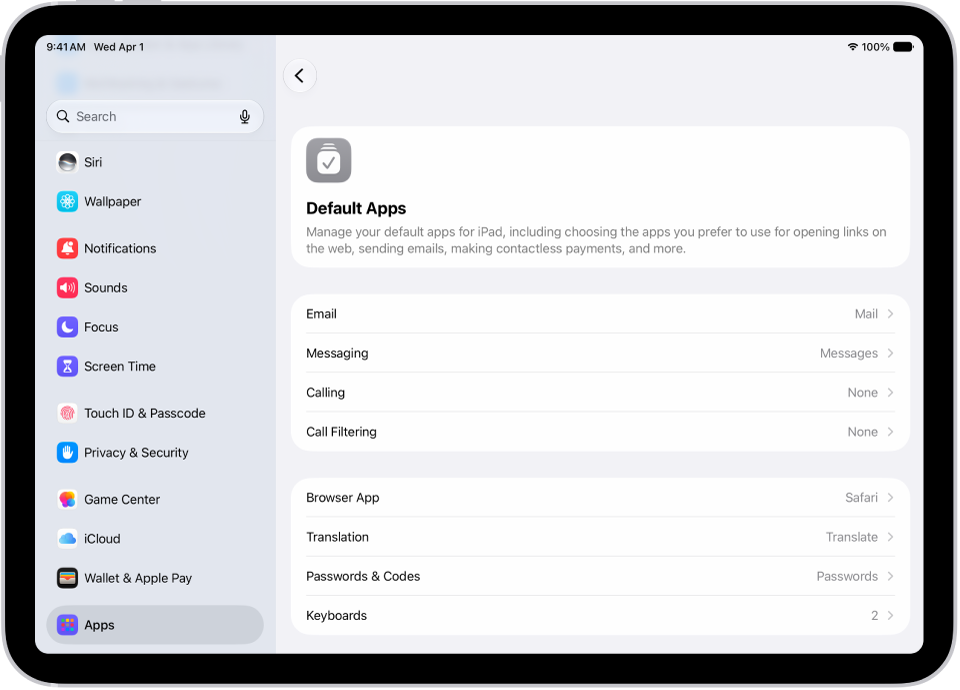
    The screen for changing your default apps for sending email, browsing the web, and more.

  2. Tap Apps, tap Default App, and tap any of the following:

    • Email: To change the default app for sending and receiving email.
    • Messaging: To change the default app for sending and receiving messages.
    • Calling: To change the default app for making and receiving calls.
    • Call Filtering: To turn on or off call blocking and identification options.
    • Browser App: To change the default app to open links on the web.
    • Translation: To change the default app used to translate text.
    • Passwords & Codes: This section allows you to turn on or off AutoFill Passwords and Passkeys for apps and websites, and password, passkey, and code-generation and verification apps.
    • Keyboards: To add or delete keyboards and third-party keyboard apps.
    • Media Sharing Extension: To change the default app for sending audio and video to compatible devices.
  3. Select the app you want to use as the default.

To change the default search engine Safari and Spotlight use, read our guide, Change your default search engine.

See also

In the Settings app, you can search for iPad settings you want to change, such as your passcode, notification sounds, and more. Each section covers a different area of iPad, and depending on your iPad model, you may see different sections. Settings can even be searched from the Home Screen or Lock Screen.

Search for a setting

  1. Start the Settings app on your iPad.

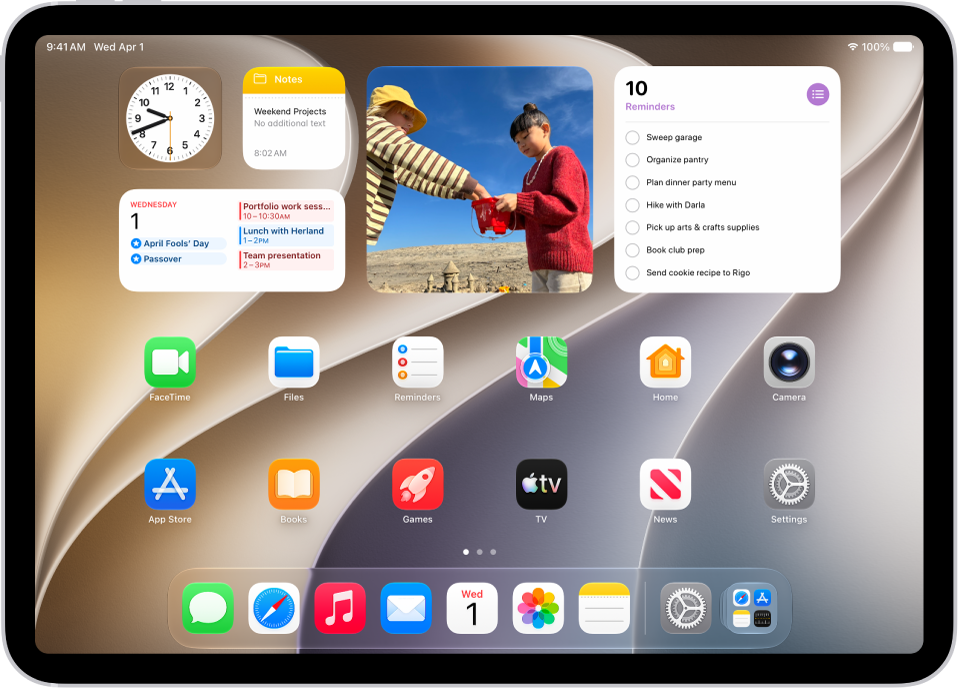
    The iPad Home Screen with several app icons, including the Settings app icon, which you can tap to change your iPad sound volume, screen brightness, and more.

  2. Tap the search field (at the top left), enter a term—”volume,” for example—then tap a setting on the left side of the screen.

    The iPad Home Screen with several app icons, including the Settings app icon, which you can tap to change your iPad sound volume, screen brightness, and more.

Quick tip: From the Home Screen or Lock Screen, you can also search for settings.

What’s in Settings

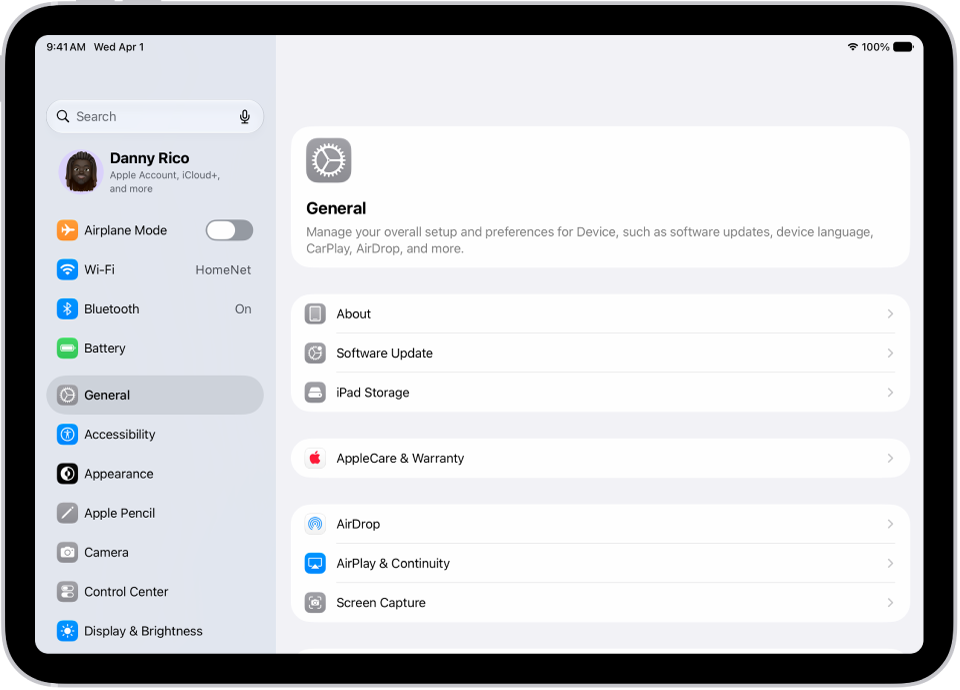
Settings is organized into sections. Each covers a different area of iPad, and the sections you see may vary depending on your iPad model.

Section Description
Your name Apple Account, iCloud storage and sync, subscriptions, Find My
Airplane Mode Turn Airplane Mode on or off
Wi-Fi Join and manage Wi-Fi networks, password sharing, Connectivity Assist
Bluetooth Connect and manage Bluetooth devices
Cellular On supported models, turn cellular data on or off, roaming, per-app data usage
Personal Hotspot Share your internet connection with other devices
Battery Battery percentage, battery usage by app, Low Power Mode, and Charge Limit on supported models
General Software update, date and time, language and region, keyboard, VPN, device management, transfer or reset iPad, and more
Accessibility Vision, physical and motor, hearing, speech, and accessibility features including VoiceOver, Zoom, and AssistiveTouch
Appearance Light or Dark Mode, text size, display appearance, and Liquid Glass settings
Apple Pencil Draw with Apple Pencil, Scribble, and Pencil Gestures
Camera Photo and video format, resolution, grid, and other camera options
Control Center Access Control Center within apps and reset Control Center
Display & Brightness Screen brightness, Night Shift, Auto-Lock
Home Screen & App Library Choose where newly downloaded apps are added, show Search on the Home Screen, notification badges in App Library
Multitasking & Gestures Stage Manager, Slide Over, Split View, and gesture settings
Search Spotlight search suggestions and which apps appear in search results
Siri Configure voice, language, and app suggestions
Wallpaper Change your Lock Screen and Home Screen wallpaper
Notifications Choose which apps can send notifications, notification sounds, scheduled summary
Sounds Ringtone, text tone, volume, vibration, lock sound, keyboard sound, headphone safety, and personalized audio
Focus Set up Do Not Disturb and Focus modes to reduce distractions
Screen Time App limits, downtime, content restrictions, parental controls
Face ID & Passcode or Touch ID & Passcode Set up Face ID or Touch ID, change passcode, allow access when locked
Privacy & Security App permissions, location services, and tracking
Game Center Game Center account, friends, and nearby players
iCloud iCloud storage, sync settings, and connected apps
Wallet & Apple Pay Payment cards, passes, and Apple Pay settings
Apps Settings for individual apps—Mail, Safari, Messages, Photos, and more

See also

On iPad, you can make your screen dimmer or brighter (dimming the screen extends battery life). You can also adjust the screen color and brightness manually or automatically with Dark Mode, True Tone, and Night Shift.

You can change it in Control Center or in Settings. iPad can also adjust brightness for current light conditions using its ambient light sensor.

Here’s how to adjust the screen brightness and color on iPad.

Adjust the screen brightness manually

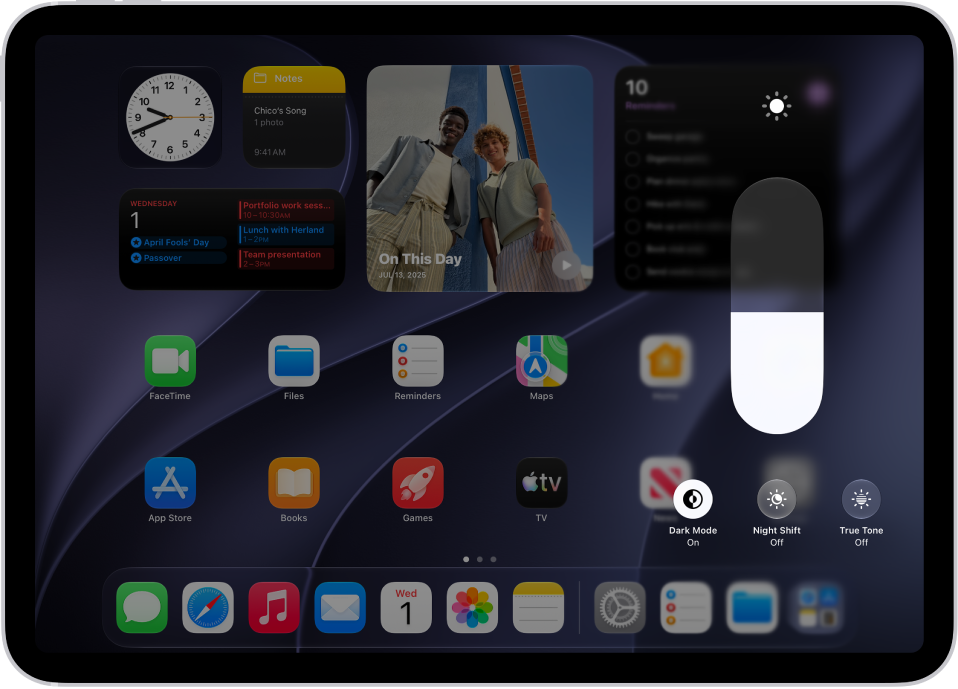
The iPad Home Screen with Dark Mode on.

To make your iPad screen dimmer or brighter, use either of the following:

  • Open Control Center, then drag the Brightness button up or down.
  • Go to the Settings app, tap Display & Brightness, then drag the slider.

Adjust the screen brightness automatically

The built-in ambient light sensor lets iPad adjust the screen brightness for current light conditions.

  1. Start the Settings app on your iPad.
  2. Tap Accessibility, then tap Display & Text Size.
  3. Turn on Auto-Brightness.

    Turning off Auto-Brightness may increase power consumption.

Turn Dark Mode on or off

Dark Mode switches the entire iPad experience to a dark color scheme, which is perfect for low-light environments. Say you’re reading in bed. With Dark Mode on, you can use your iPad without disturbing the person next to you.

You can turn Dark Mode on or off from either of these places:

  • Open Control Center, touch and hold the Brightness button, then tap the Appearance button to turn Dark Mode on or off.
  • Go to the Settings app, tap Display & Brightness, then select Dark to turn on Dark Mode or select Light to turn it off.

Schedule Dark Mode to turn on and off automatically

You can set Dark Mode to turn on automatically at night (or on a custom schedule) in Settings.

  1. Start the Settings app on your iPad.
  2. Tap Display & Brightness, turn on Automatic, and tap Options.
  3. Select either Sunset to Sunrise or Custom Schedule.

    If you choose Custom Schedule, tap the options to schedule the times you want Dark Mode to turn on and off.

    If you select Sunset to Sunrise, iPad uses the data from your clock and geolocation to determine when it’s nighttime for you.

Turn Night Shift on or off

In a darkened room during the day, it can help to turn on Night Shift manually.

Open Control Center, touch and hold the Brightness button, then tap the Night Shift button.

Schedule Night Shift to turn on and off automatically

With a Night Shift schedule, the colors in your display shift to the warmer end of the spectrum at night, making the screen easier on your eyes.

  1. Go to the Settings on your iPad.
  2. Tap Display & Brightness, tap Night Shift, and then turn on Scheduled.
  3. To adjust the color balance for Night Shift, drag the slider below Color Temperature toward the warmer or cooler end of the spectrum.
  4. Tap From and select either Sunset to Sunrise or Custom Schedule.

    If you choose Custom Schedule, tap the options to schedule the times you want Night Shift to turn on and off.

    If you select Sunset to Sunrise, iPad uses the data from your clock and geolocation to determine when it’s nighttime for you.

    Note: The Sunset to Sunrise option isn’t available if you turned off Location Services or Setting Time Zone. To turn on Location Services, go to the Settings app, tap Privacy & Security, then tap Location Services. Setting Time Zone is in System Services on that screen.

Turn True Tone on or off

To keep the display looking consistent across different environments, True Tone on supported models uses ambient light sensors, letting it adjust the screen color based on the lighting around you.

To turn True Tone on or off, use either of the following:

  • Open Control Center, touch and hold the Brightness button, then tap the True Tone button to turn True Tone on or off.
  • Go to the Settings app, tap Display & Brightness, then turn True Tone on or off.

Use Reference Mode on iPad Pro

Reference Mode tunes the display to common color standards, which helps when you’re reviewing photo and video work. It’s available on iPad Pro 11-inch (M4 and later) and iPad Pro 12.9-inch (M1 and later) models.

  1. Start the Settings app on your iPad.
  2. Tap Display & Brightness, then tap Advanced.
  3. Turn on Reference Mode.

See also

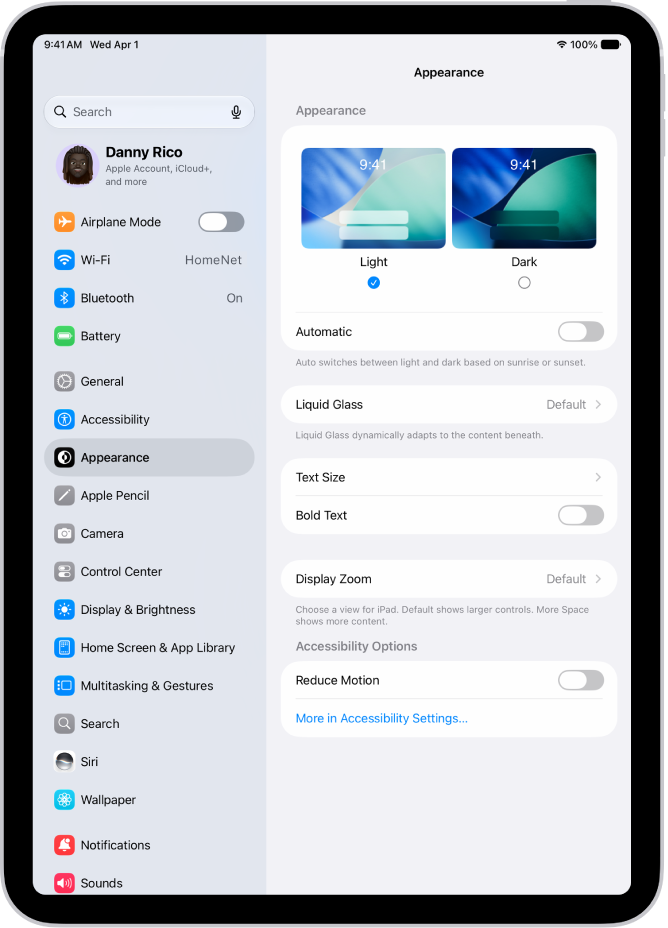
You can increase the size of text on your iPad, make the text bold, choose your preferred look for Liquid Glass, and display more content on the screen.

On supported models, Display Zoom makes text and buttons smaller, so more content fits. If you turned on Reduced Transparency or Increased Contrast, those need to be off before you can change the Liquid Glass look.

Here’s how to adjust iPad display and text settings.

The Display and Brightness screen in Settings.

Adjust the text size

  1. Open the Settings app on your iPad.
  2. Tap Appearance, then tap Text Size.
  3. Drag the slider left or right to change the text size.

Make the text bold

  1. Open the Settings app on your iPad.
  2. Tap Appearance, then turn on Bold Text.

Choose your preferred look for Liquid Glass

  1. Open the Settings app on your iPad.
  2. Tap Appearance, then tap Liquid Glass.
  3. Drag the slider to the right to increase the tint of Liquid Glass, and to the left to make Liquid Glass more clear.

    Note: If you turned on Reduced Transparency or Increased Contrast in Accessibility settings, you need to turn them off to change the look for Liquid Glass.

Fit more content on your screen

Display Zoom on supported models can make text and buttons smaller, so more content fits on your screen.

  1. Open the Settings app on your iPad.
  2. Tap Appearance, tap Display Zoom, and then tap More Space.
  3. Tap the Done button and tap Use More Space.

See also

You can change the sounds iPad plays when you get a call, message, and alert.

With Silent Mode on, iPad won’t play ringtones, alerts, or system sounds, though alarms, timers, music, and audio from videos still play. You can even change the sounds iPad plays for certain people. And you can change your ringtone, change the sound for alerts and other actions, and set separate volumes for alarms and alerts, which match your ringtone volume by default.

Turn Silent Mode on or off

Silent Mode keeps iPad from playing ringtones, alerts, or system sounds, but alarms, timers, music, and audio from videos still play.

  1. Start the Settings app on your iPad.
  2. Tap Sounds and turn Silent Mode on or off.

You can also open Control Center, then tap the Mute button.

Change ringtone settings

  1. Start the Settings app on your iPad.
  2. Tap Sounds. Do any of the following below Ringtone:
    • Change your ringtone: Tap Ringtone and tap a ringtone to preview it and select it.
    • Adjust ringer volume: Drag the volume slider.
    • Control ringer volume with buttons: Turn Change with Buttons on or off.

You can also change the sounds iPad plays for certain people. Go to the Contacts app, tap a person’s name, tap Edit, then choose a ringtone and text tone.

Change the sound for alerts and other actions

Different sounds can go with calendar alerts, text messages, AirDrop, new mail, sent mail, reminder alerts, and new voicemail.

  1. Start the Settings app on your iPad.
  2. Tap Sounds.
  3. Tap a sound category, such as Text Tone or Calendar Alerts. Tap a sound to select it.

Set separate volumes for alarms and alerts

Your ringtone volume sets the level for alarms, timers, alerts, and system sounds by default. Or set two separate volumes instead, one for alarms and timers and another for alerts and system sounds.

  1. Start the Settings app on your iPad.
  2. Tap Sounds and turn off Match Ringtone Volume under Alarms and Timers or Alerts and System Sounds.
  3. Drag the slider to set the volume.

Change other sound settings

  1. Start the Settings app on your iPad.
  2. Tap Sounds and then do any of the following:
    • Play a click when you type on the keyboard: Turn Keyboard Clicks on or off.
    • Play a sound when you lock iPad: Turn Lock Sound on or off.

See also