Mac features a built-in Voice Memos recorder app that allows users to easily record their voice, a conference, a lecture, a note, a meeting, or any
other audio. Apple has made it really easy to create these voice memos with your Macs built-in microphone, a wired or Bluetooth headphones, or a supported microphone (see this article
your microphone is not working: fix).
You can also edit (like trimming) or share your recordings. In this article, I’ll show you exactly how to use the macOS Voice Memos app.
You can also use iCloud
to sync all of your voice memos across all your Apple devices.
All MacBooks that supports macOS Mojave and higher features a built-in Voice Memos app.
How to record voice memos on MacBook
Please follow these steps:
On your Mac, launch the Voice Memos app. You can open the app in several ways:
You can use Launchpad.
You can
use Spotlight.
You can launch the Applications folder and click the Voice Memos app.
Or ask
Siri.
If you are opening this app for the first time, you will see a Welcome screen that says “Welcome to Voice Memos”. This screen gives an introduction.
Click Continue.
You might also see the following two popups:
One indicating “Voice Memos” would like to use your current location. You can click OK if you want to allow this. When you OK this, your recordings will be
named alongside the location where they are recorded. Do not worry It’s easy to change this setting by heading over to System Preferences > Security & Privacy
> Privacy > Location Services. Also, you can disable location-based naming by heading over to Voice Memos > Preferences and then uncheck the “Location-based Naming”
Box.
Also, you might see a popup stating “iCloud Syncing”. You can turn on this if you want to access your recordings across all of your Apple devices. Again,
you can change this later by heading over to System Preferences > Apple ID > iCloud.
Voice Memos iCloud.
To start a voice memo recording, click the Record button. And recording will start.
You will see a new screen. This is your recording screen.
When you are done recording, simply hit Done. If you want to pause your recording, then you can click the pause icon.
Your audio recording will be named with your location, if you enabled this setting. If not, your recording will be named as a “New Recording X”. To rename
your recordings, simply click their names.
Edit a memo
Apple provides multiple editing options:
Trim from the beginning or end
To edit an existingvoice memo, click a recording and then edit.
If you want to edit as you record, simply pause your video.
You can click the trim button.
Now, yellow handles will appear. Drag the yellow arrow. Then click Trim.
Delete a voice memo
Locate and click the voice memo you wish to erase.
Now, click Delete or right-click (control-click) and select Delete.
The deleted voice and audio files will be stored in the Recently Deleted folder for 30 days. You can change this setting by heading over to Voice Memos > Preferences.
Apple offers you multiple options to choose from:
After every thirty days.
After every seven days.
After one day.
Immediately.
Never.
Replace part of a voice memo
. Identify the recording you want to edit and hit Edit.
Now, click on the red Replace button.
After clicking the Replace button, your recording will be re-recorded.
In this article, I’m going to tell you exactly what iMessage is, how it
works and what you can do when it’s not working.
What is an iMessage?
iMessage is a free, secure encrypted messaging service for Mac, iPhone, iPad, and Apple Watch.iMessage
is Apple’s own messaging service. The Cupertino based brand introduced iMessage in 2011.
iMessage can be called an “Over The Top” (OTT) service that does not require a cellular data connection. Your messages can either be sent over cellular data or Wi-Fi connection
. If your device is not connected to a Wi-Fi network, your message will be sent over cellular data. If you use Wi-Fi to send or receive iMessages, it’s free of charge. As
such, iMessage may use your
cellular data
which will be deducted from your cellular data plan. And iMessage may consume huge amount of data particularly if you are sending photos, audio, or videos via iMessage.
Conversely, iMessages you send over cellular are not part of your monthly text message allowance if your cellular data plan sets a limit.
Regular text messages (SMS or MMS) require a cellular data plan with text-message abilities. Wireless carriers usually offers three types of text message plans as listed below:
Unlimited text plan. As the title says, you can send unlimited text messages.
Limited text plan. In this type of plan, you have a messaging allowance, usually monthly, that means, you can send a certain number of text messages.
And pay per message. Meaning your carrier will charge you for every message you send or receive.
Irrespective of your data plan, you can send unlimited number of iMessages.
How to send an iMessage
To be able to send and receive iMessage, you need to have Apple’s Messages app on your device running iOS 5 or higher, watchOS 1 or higher or OS X Mountain Lion or higher.
You and your recipient need to have a compatible Mac, iPhone, iPad, iPod touch, or Apple Watch to use iMessage.
Everything is automatic. Both the sender and the recipient just need a device that supports iMessage. On your apple device, simply launch the Messages app and type and
then send your message. Then Messages will check with Apple servers if your recipient is set up for iMessage. If yes, your message will automatically be
delivered as an iMessage. Otherwise, your message will be sent as a regular text message (SMS/MMS). Please note, iMessages appears in blue bubbles while regular text messages appears in green bubbles.
To turn on or off iMessage on your device, please follow these steps:
On your iPhone, iPad or iPod touch, Start the Settings app and go to Messages and iMessage.
On your Mac, to
turn off iMessage,
start the Messages app and then click Messages > Preferences, then click Accounts and select your iMessage account.
iMessage features
iMessage has numerous awesome features. You can send and receive text, photos, audios, video , voice messages, location, money, heartbeats etc. The following are some iMessage
features:
You can participate in group iMessage chats.
iMessage shows
read receipts.
You can
send pictures, audio or videos via iMessage.
You can send or receive cash with Apple Pay.
You can
send your location via iMessage.
You can apply
message effects.
You can use iMessage apps.
You can send a sketch, tap, or heartbeat using Digital Touch.
You can send GIFs using
#images.
You can use Messages in Cloud to sync your entire message history across all your apple devices.
How to troubleshoot iMessage problems
If iMessage is not working on your iPhone, iPad or Mac, please try the following fixes:
Make sure that your Apple device is running the latest version of iOS, iPadOS, macOS or watchOS.
To update your iPhone, iPad or iPod touch, go to Settings > General > Software Update.
To update macOS Mojave or higher, head over to System Preferences and then Software Update.
To update macOS High Sierra or older, launch the App Store on your Mac and then click the Updates tab.
Turn off iMessage (check the section above to turn on/off iMessage), then restart your device and then turn iMessage back on.
Sign out and sign in:
On your Mac: Launch Messages, select Messages > Preferences, then click Accounts and select your iMessage account. Click Sign Out. Then restart your Mac
and sign back in.
On your iPad, iPhone or iPod touch: Go to Settings > Messages > Send & Receive. Tap your Apple ID, then tap Sign Out. Then restart your device and sign back in.
Ensure that your device is connected to the Internet (a cellular data or Wi-Fi network).
In this article, I’ll explain exactly how you can set up and make FaceTime conference calls (also called group calls) on your iPhone, iPad, iPod touch or Mac. A conference
call refers to an audio or video call in which 3 or more participants converse at the same time. And you can do this using your iPhone, iPad or Mac
without buying extra software or tools. It is pretty simple and straightforward.
FaceTime Conference Call Requirements
You can conference call up to 31 people, 32 if you include yourself on FaceTime.
All of the participants need to have an Apple device:
iPhone 6s or newer, iPad Pro or newer, iPad Air 2 or newer, iPad mini 4 or newer, iPad (5th generation) or newer, or iPod touch (7th generation) or newer,
running iOS 12.1.4 or higher, or iPadOS. To check your software version and update your device, head over to Settings > General > Software Update.
Mac computers running macOS Mojave 10.14.3 or higher. To check your macOS version, click the Apple menu and About This Mac.
Obviously, all participants should have FaceTime on their devices. If you deleted the app, you canget it from the App Store.
Other users including Android users, Windows users, etc cannot participate.
How to make FaceTime conference call on iPhone,iPad or iPod Touch
You can make FaceTime conference call in two ways :
You can start a call from the FaceTime app.
You can also start a call from the Messages app.
How to make FaceTime conference call using the FaceTime app
Here is how to make FaceTime conference call using the FaceTime app:
Launch the FaceTime app.
Tap the (+) add icon (located in the top-right-hand corner of the screen).
This new screen will read “New FaceTime”. In the “To:” field, start typing the participants, you can enter names, numbers or emails. If you tap the
(+) add icon in the “To:” field, you can add participants right from your contacts.
As you type, iOS will provide you with a list of suggested participants. You will notice that some contacts will appear in blue while others will appear in gray. Only
the blue contacts can be added. Blue contacts is an indication that their devices and software support conference FaceTime.
As we’ve already pointed out, you can add up to 32 participants at a go.
When you are finished adding participants, initiate the conference call by tapping either the audio or video button.
How to make FaceTime conference call using the Messages app
Here is how to make FaceTime conference call using messages app
Launch the Messages app on your Apple device.
Create a
group message:
Tap the new message icon which is located in the upper right corner of the screen. Open an existing group conversation.
New message
Type in participants in the “To:” field. You can also tap the add button to add participants right from your contact list.
At the top of the conversation lists, you will see avatars, tap on it.
And then tap the FaceTime icon.
How to answer a conference call
So someone has given you a FaceTime conference call. Here is how you can answer it on your iPhone, iPad or iPod touch:
You will get a notification.
Now, tap the notification to answer or decline a call.
Also, you can join the call from the Messages app and FaceTime app.
How to make a FaceTime conference call on Mac
You can also start a conference FaceTime call on your Mac. Just like the iPhone and iPad, you can use the Messages app to start a call. You can
only use the FaceTime app to make the call. Here is how to make a FaceTime conference call on Mac:
Launch the FaceTime app on your Mac.
Type in the names, emails or numbers of people you want to call on the search field.
You can add up to 32 participants.
Finally, tap the Video or Audio button to start your FaceTime conference call.
Use Messages on your Mac
On your Mac, launch the Messages app.
Click on the group message.
Now, click on Details.
Finally, click the video or phone button to start your audio or video conference call.
How to answer a conference call on your Mac
So you’ve received a conference call on your Mac?
You will get a notification.
Use the notification to answer (or decline) the call.
iPhone or iPad: Head over to Settings > General > Date & Time and then enable Set Automatically.
macOS: Click the Apple menu, go to System Preferences > Date & Time > and then check the “set date and time automatically” box. You will need to click the
lock icon and type in your password for your changes to take effect.
The use ofvideo conferencing is becoming the order of the day. Almost every company out there, including WhatsApp, Google Duo, Microsoft Teams, etc., is expanding their video calling platform with new features and tweaks. Among them,FaceTime seems to be the the most preferred option for iPhone users. And why not? It’s easy to set up, offers plenty of features, and up to 32 people can join a group video call on FaceTime.
During group FaceTime video calls, Apple enlarges the tile of the person speaking to the meetup. This feature is known as Automatic Prominence, and Apple does this to highlight the speaker. While useful for small group video calling, some may find the behavior annoying when several people are speaking at the same time. With the release of iOS 13.5, Apple has added an option to disable the Automatic Prominence feature in FaceTime. Here are the steps to turn off moving faces in the FaceTime group.
Disable moving faces in FaceTime group
Step-1: Start the Settings app on the iPhone.
Step-2: Go to General -> Software Update and update to iOS 13.5.
Step-3: After a successful update, start the Settings app on your iPhone and go to the FaceTime app.
Step-4: In the FaceTime settings, you will see the Speaking option under the Automatic prominence menu.
Step-5: Uncheck the Speak option and it will disable moving faces in a Group FaceTime video call.
The contagious Coronavirus has forced us all to stay at home. But you can still keep in touch with your colleagues by trying some of the best video conferencing apps on your iPhone and iPad. Social distancing and self-quarantine are the order of the day, but work and communication need not stop.
See alsobest video conferencing apps for iPhone and iPad
Have you disabled the Automatic speak option in the Settings menu? Sound off in the comment section below.
With the release ofmacOS Catalina 10.15.5, Apple has introduced a new Battery Health management feature for macOS. Similar to what is already found in iOS, this feature aims to extend the life of your MacBook by reducing its wear.
Most people use their MacBooks for up to 5 years or even longer. The battery is usually the first to be used on older MacBooks, as the hardware is usually good enough to survive five years of intensive use. While it is possible to replace the battery on MacBooks, most consumers usually don’t because it is expensive. With the new Battery Health management feature in macOS Catalina 10.15.5, Apple hopes to extend the battery life of MacBooks depending on a person’s usage.
How does Battery Health Management work in macOS Catalina?
The Battery Health management feature in macOS Catalina 10.15.5 analyzes the usage and charging habits of your MacBook and automatically prevents it from being charged to 100% when deemed necessary. A battery that is always 100% charged and connected is not good for its life, which is why Apple introduced this feature. Many MacBook owners use their machine as a desktop replacement, which means it is almost always plugged into a power source. In such cases, the Battery Health management feature prevents your MacBook from charging to 100%, thereby extending battery life.
Enabling Battery Health management does not mean that your MacBook will stop charging the battery to 100%. The feature first analyzes your usage patterns and then makes adjustments accordingly. If you have a very erratic schedule or are always on the go, consider disabling the Battery Health Management feature as it won’t help you much. However, if you’re always near a power source and want to extend the battery life of your MacBook, keep this feature turned on.
Compatible MacBooks
All MacBook and MacBook Pro models with a Thunderbolt 3 port and launched on or after 2016 support the Battery Health Management feature. This means that all MacBooks and MacBook Pro models launched in or after 2016 are compatible with this feature. Older non-battery powered MacBooks and Macs are not compatible with this feature.
Battery Health Management is enabled by default when you update your MacBook to macOS 10.15.5. However, if you get a new MacBook out of the box with macOS Catalina 10.15.5, you will need to enable the Battery Health Management feature manually.
How to disable Battery Health Management on your MacBook
Step-1: Head over to System Preferences -> Energy Saver on your MacBook running macOS Catalina 10.15.5.
Step-2: Click on the “Battery Health” option located at the bottom of the window.
Step-3: In the dialog box that appears, you have the option to disable the battery health management feature. You must click ‘Disable’ again to confirm your selection.
What do you think of the Battery Health management feature of macOS Catalina 10.15.5? Leave a comment and let us know!
If your iPhone is disabled because you’ve forgotten the passcode and now can’t unlock your device, help is at hand! In this article, I’ll explain how to unlock a disabled iPhone without iTunes or iCloud or computer.
If you tried the wrong passcode repeatedly or your kids type randomly in the lock screen, it will cause the iPhone to be disabled. As a result, you will be informed that “iPhone is disabled connect to iTunes”. The good news is that you’ll know everything about how to unlock a disabled iPhone without iTunes or iCloud or computer in this guide.
Part 1: How to Unlock a Disabled iPhone with iTunes
Just as the iPhone message tells you, you can unlock the disabled iPhone with iTunes. With the synced iTunes on your computer (Windows/Mac), you can restore the disabled iPhone to remove the lock screen.
Step-1: Get a USB cable and connect your iPhone to the computer and open iTunes.
Step-2: To enter your iPhone, you can click the phone icon and then hit the Summary option on the left side. In this way, you can view the iPhone details and get the restore option.
Step-3: Here comes the most important step—click the Restore iPhone button. If you see a message that says “Find My iPhone must be turned off”, you can try the next way to unlock the disabled iPhone.
Step-4: Click Restore on the confirmation window. After that, just wait until the restoration process is complete. When it finishes the restoration, you can set up your iPhone again.
Part 2: How to Unlock a Disabled iPhone with iCloud
If you fail to unlock the disabled iPhone with iTunes, or if you encountered any error during the restoration process, you can make good use of the iCloud to unlock the disabled iPhone. Here are the steps.
Step-1: Open a web browser on your computer or another mobile phone and go to icloud.com.
Step-2: Sign in to iCloud with your Apple ID and passcode. It must be the Apple ID that is linked to the disabled iPhone. If you find there is two-factor authentication for your Apple ID, it means that you need to get the verification code to unlock your iPhone. The most effective way is to take out the SIM card and install it on another mobile phone to get the code. Or you can try the next method to unlock the disabled iPhone with a third-party tool.
Step-3: Once you’ve successfully sign in to iCloud, click Find My iPhone at the bottom right corner.
Step-4: In Find My iPhone interface, click the All Devices button to get the drop-down option. Then you can click the disabled iPhone and get its location.
Step-5: To unlock the disabled iPhone, simply click the Erase iPhone option and then confirm the action. Now, your iPhone will be erased and restarted like a new device. You need to activate it again as you did before.
Part 3: How to Unlock a Disabled iPhone without iTunes or iCloud
Unlock a Disabled iPhone without iTunes/iCloud using PassFab iPhone Unlocker
To unlock a disabled iPhone without iTunes or iCloud, you will need an iPhone unlocking tool like PassFab iPhone Unlocker. It allows you to unlock your iPhone, iPad, and iPod touch without the lock screen password, Face ID, or Touch ID. That’s why you can use it to unlock iPhone without passcode or Face ID easily.
PassFab iPhone Unlocker is designed to be a super simple tool that works effectively in letting you unlock a disabled iPhone without iTunes including iPhone 14, iPhone 13, iPhone 12, iPhone 11, iPhone X, iPhone 8, iPhone 8 Plus etc). The process doesn’t involve any lengthy workaround and can be done with ease.
It doesn’t matter whether you have set a 4-digit custom numeric code or 6-digit alphanumeric passcode, you can get rid of the password including Touch ID and Face ID info without any hassle.
Key Features of PassFab iPhone Unlocker
Unlock a disabled iPhone without iTunes
Remove 4/6-digit passcode, Touch ID, or Face ID
Remove iCloud from iOS device without password
Supports all iPhone models including the iPhone 14 Pro Max
Supports various iOS versions including the latest iOS 16
Factory Reset iPhone without Password
Only 3 Steps to Unlock a disabled iPhone
How to Unlock a disabled iPhone without iTunes Using PassFab iPhone Unlocker
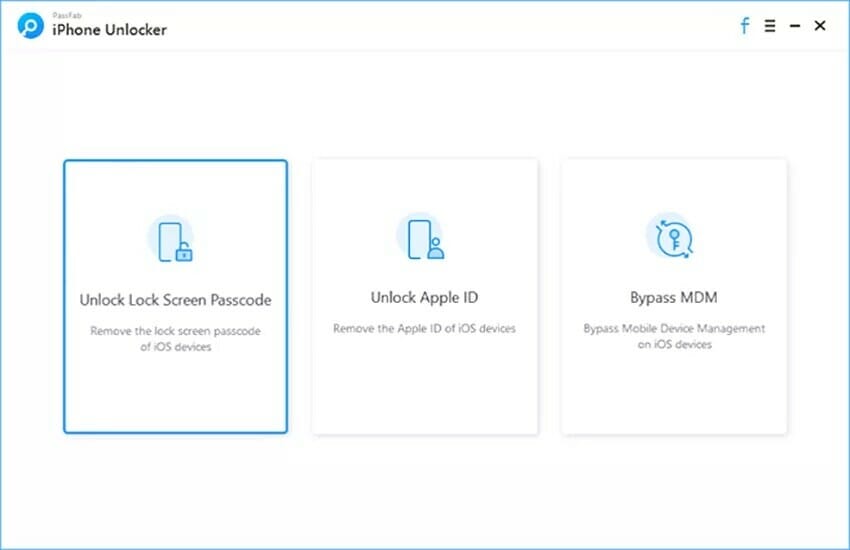
Step 1: First off, download and install PassFab iPhone Unlocker on your PC/Mac. Then, open the software on your computer and select ‘Unlock Lock Screen Passcode’.
Step 2: Now, you need to connect the disabled iPhone to the computer via USB cable.
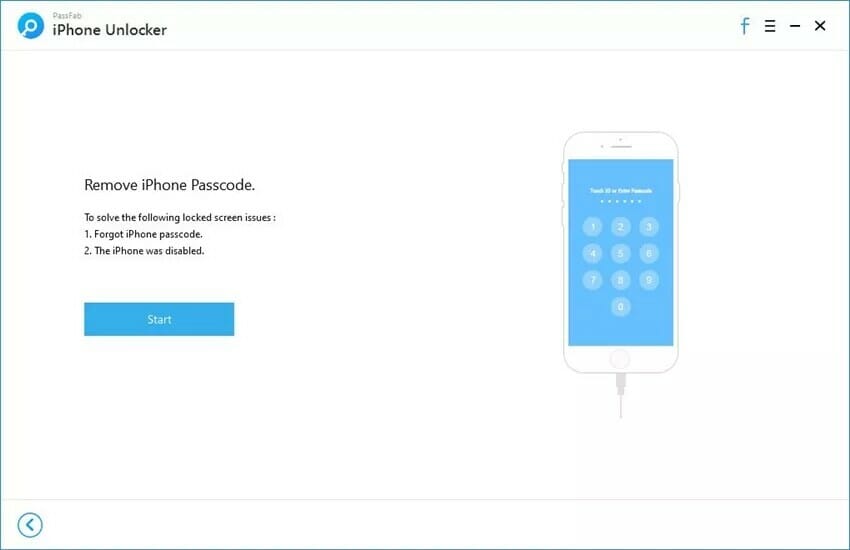
Step 3: After PassFab iPhone Unlocker has recognized your device, click ‘Start’ to remove iPhone passcode.
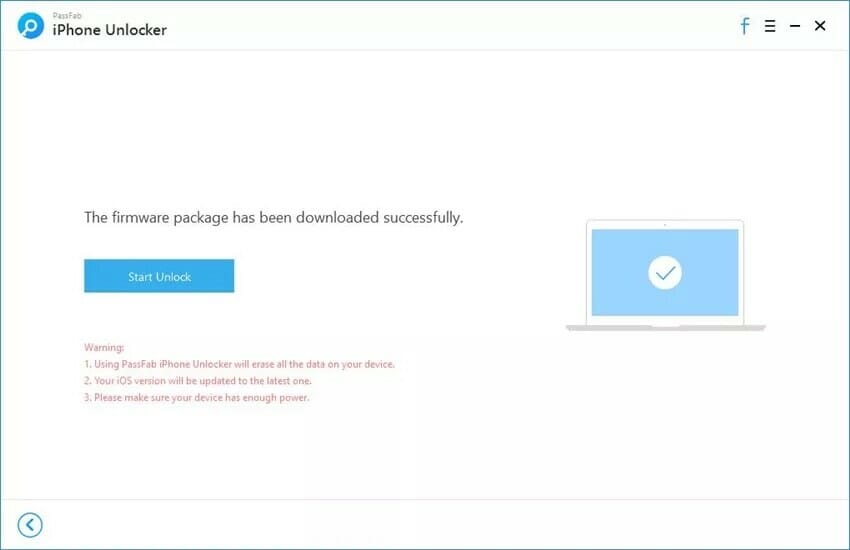
Step 4: Next up, you have to download the latest iOS firmware.
Once the firmware is downloaded click ‘Start Unlock’ to start Unlocking a disabled iPhone without iTunes.
Step 5: Up next, you have to wait for some time until the process is successfully completed. Make sure to keep your device connected to your computer.
After the process is finished, you can set up your device as new or restore it from the most recent backup.
PassFab iPhone Unlocker is right on the money when it comes to letting you unlock a disabled iPhone without iCloud or iTunes. Beyond removing lock screen, the tool also comes handy when your iPhone seems to be completely down and out and refuses to get restored via Apple’s mobile management tool.
Unlock a Disabled iPhone without iTunes/iCloud using StarzSoft KeyPass
StarzSoft KeyPass let’s you unlock a disabled iPhone without iTunes or iCloud within minutes. You can easily unlock your disabled iPhone without worrying about losing data, .
This tool can unlock various iOS devices including iPhone 14, iPhone 13, iPhone 12, iPhone 11, iPhone X, iPhone 8, iPhone 7, iPhone 6S, etc without the need for a pass code.
This tool can reset iOS device without pass code.
It’s compatible with the latest iOS version including iOS 16.
Easy to run. You don’t need to be an IT expert to run this tool.
Please follow these steps to unlock a disabled iPhone without iTunes using StarzSoft KeyPass:
Step-1: Download, install, and launch StarzSoft KeyPass on your computer
Step-2: Build a connection between the disabled iPhone and your computer via USB cable.
Step-3: quickly press the plus and minus volume buttons at the same time and then hold the power button until “connect to iTunes” flashes on the screen. StarzSoft Keypass will start to unlock your disabled iPhone without you having to restore anything or putting in any additional effort.
StatSoft KeyPass is one of the best tools available on the market, which lets users unlock their disabled iPhone without iTunes or iCloud. StatSoft KeyPass process is also much smoother than using iTunes to unlock a disabled iPhone.
The process will take less than 5 minutes and all your data will be safe and sound by the end of the process.
Unlock a Disabled iPhone without iTunes/iCloud using Tenorshare 4uKey
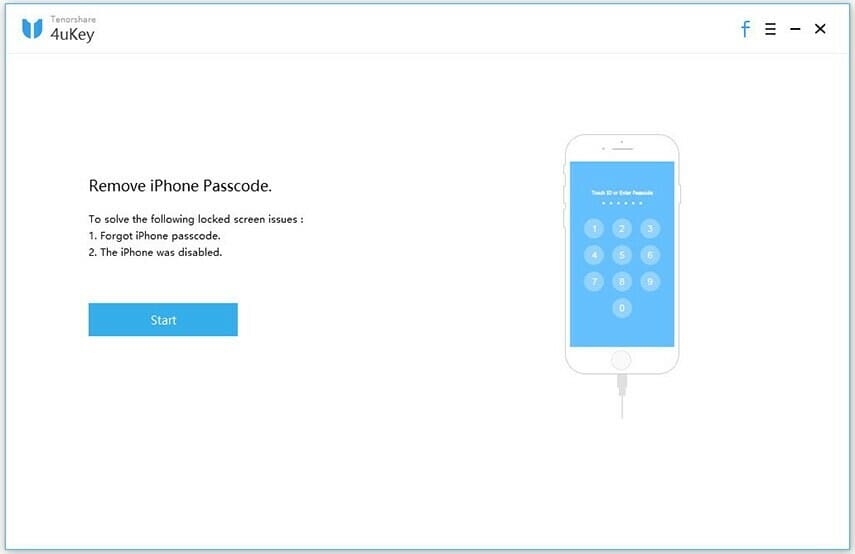
You can use Tenorshare 4uKey to remove the lock screen within few simple clicks. You do not need to have the screen lock passcode and Apple ID passcode, as well as the synced iTunes. Tenorshare creates iOS troubleshooting software for Mac and PC, and their program “4uKey” will help you bypass your iOS device’s passcode, even if it’s disabled.
Please follow these steps to unlock a disabled iPhone without iTunes using Tenorshare 4uKey:
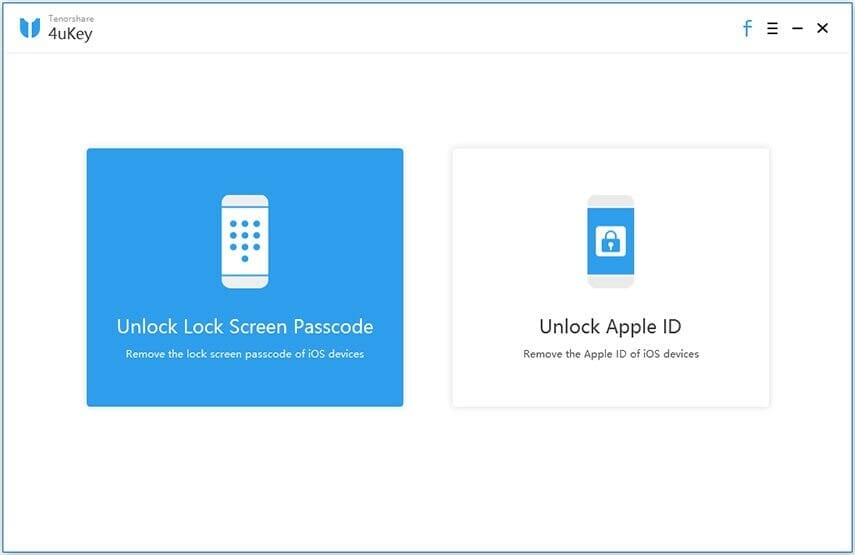
Step-1: Download, install and launch 4uKey on your Mac or Windows computer. It is necessary to sign in to the software with your registration
code. Then, select feature “Unlock Lock Screen Passcode” to get started.
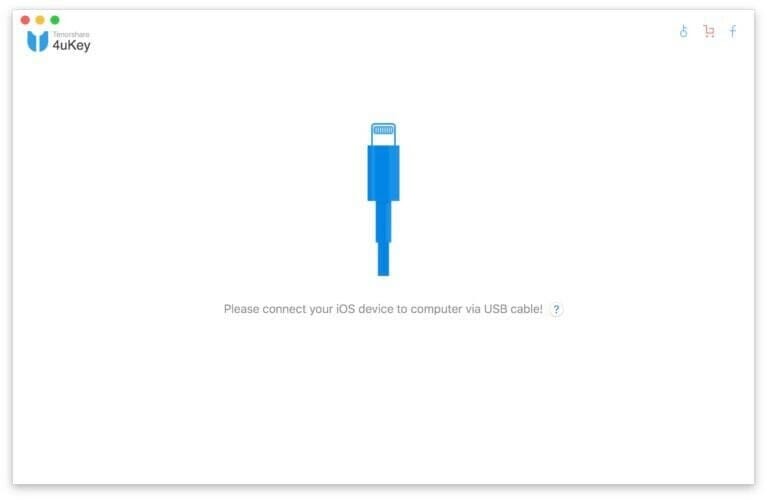
Step-2: Build the connection between the disabled iPhone and Mac or Windows computer with a USB cable. Step-3: Click the Start button on the main interface
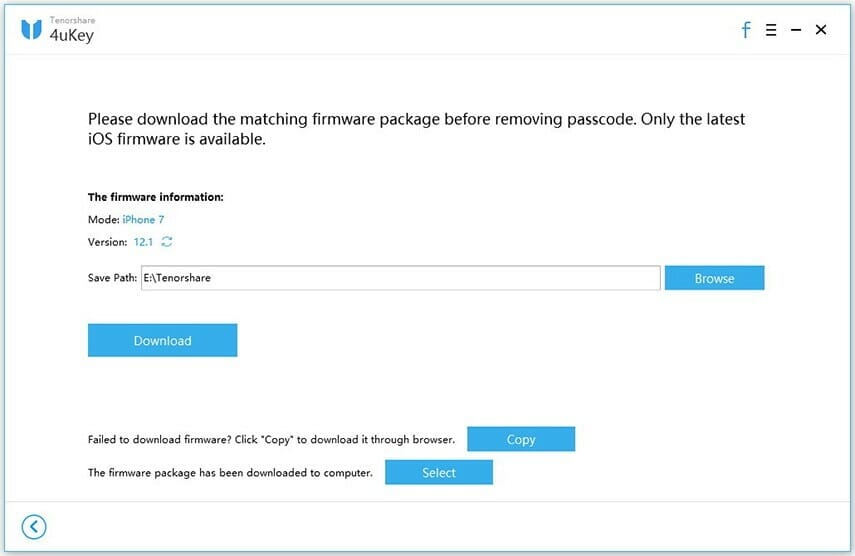
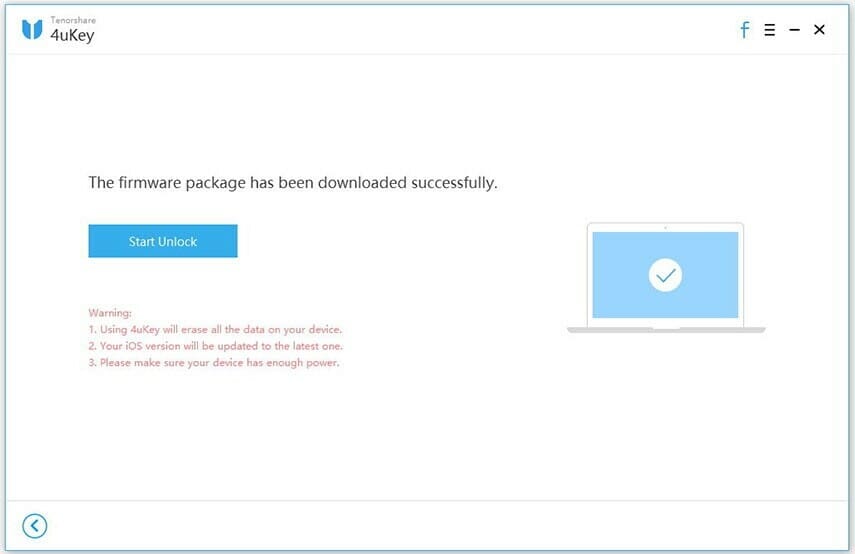
Step-4: Now, you can view that the software has detected your iPhone iOS details. And in the download firmware package online interface, you just
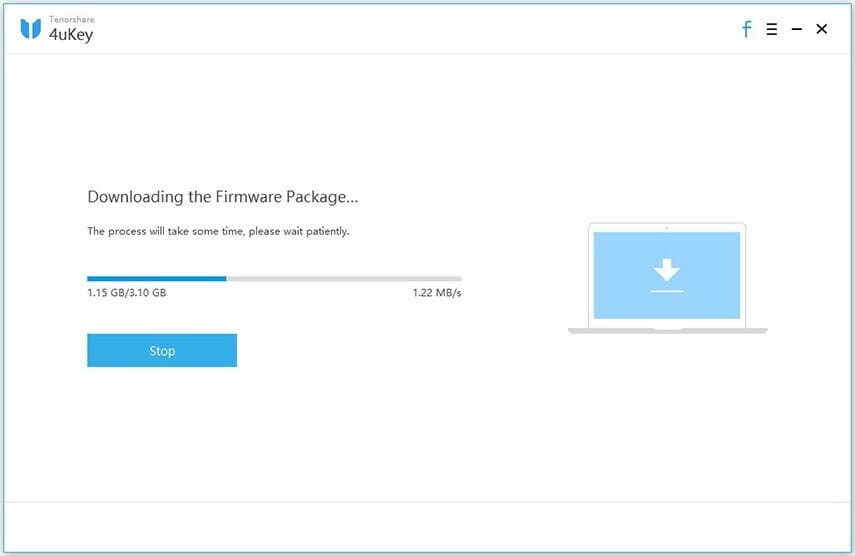
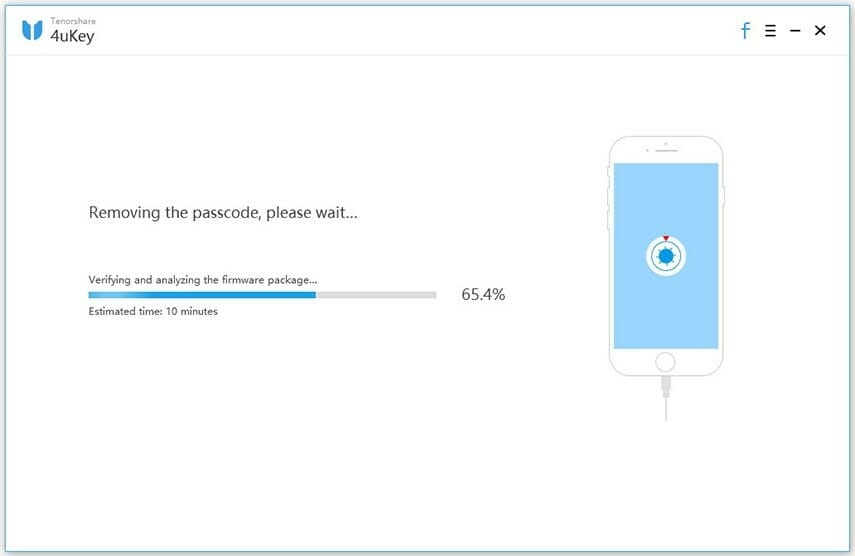
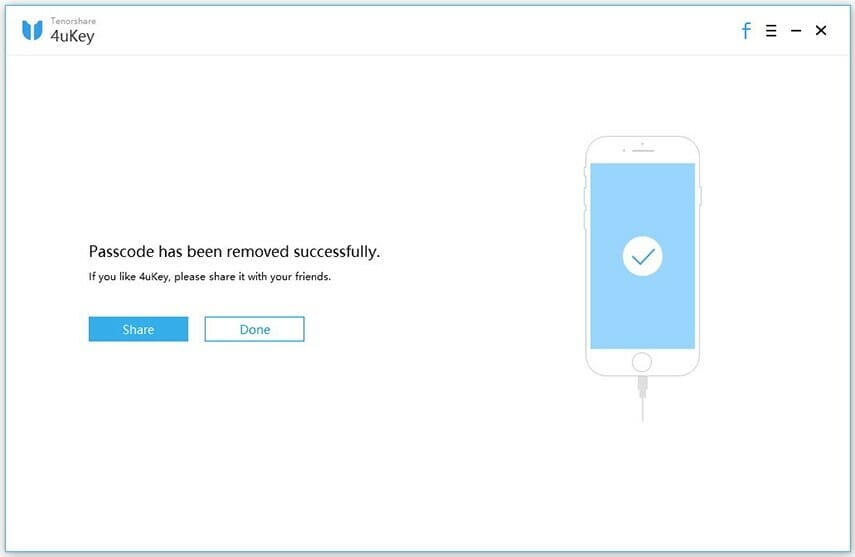
need to Choose a save path and click the Download button. Step-5: When the process completes, Tenorshare 4uKey will say that the passcode has been removed. Step-6: When iPhone passcode has been removed successfully, Follow the on-screen instructions to set up your iPhone. You can restore from an iCloud backup, iTunes backup, or set up
your iPhone as new. If you have a backup available, we recommend restoring from it so you don’t lose any of your data.
Part 4: How to Unlock a Disabled iPhone without iTunes/iCloud/ Computer
If you have no computer to utilize iTunes/iCloud/ third-party tool to unlock the disabled iPhone, what to do? You can use another accessible iPhone to unlock it with iCloud or Find My iPhone app. To unlock iPhone with iCloud, you can refer Part 2 tutorial to conduct the operation. Here we will guide you to unlock iPhone without a computer via Find My iPhone app on another iPhone.
Step-1: Get another accessible iPhone and open Find My.
Step 2: Log in with your Apple ID and password.
Step-3: Next, you will see all iOS devices which share the same iCloud account. You need to find the disabled iPhone from the list and tap it.
Step-4: Then tap on Actions at the bottom of the iPhone screen. After that, you are offered three options. Tap Erase iPhone and then you will get the disabled iPhone erased. Of course, the locked screen is removed from the iPhone.
As a matter of fact, this process is similar to unlock the disabled iPhone with iCloud. The most important part is that you need to enter the right iCloud account and password.
Are you experiencing an issue with your Apple products? Well. Apple has a range of tech
support
options for its customers. The support options ranges from phone call toonline live chat. In addition, there is
email support. However, you may need to get hands-on, personal support and help from an Apple expert, in case your problem is hardware relate.
For instance, if you are having a cracked screen problem, water damage, etc. You may have to visit your nearest Apple Store.
Apple provides tech support in each Apple Retail Store. This support is provided by the Genius Bar stations. Employees of the Genius Bar, called Geniuses,
Are experts trained to help customers with Apple hardware and software.
Before you visit the Genius Bars, you should make a reservation. You can make a genius bar reservation online. In this post, I’ve explained in details
how you can make an Apple Genius Bar appointment.
Recently, Apple has changed how genius bar reservation are made. The company has made it a little bit challenging now. It’s like Apple wants to provide support
throughonline live chat or phone calls.
What is the Genius Bar
The Genius Bar is a hands-on technical support station situated within Apple’s retail stores. If you need support or have questions related to your Apple products,
such as iPhone, iPad, Mac, Apple Watch, or Apple TV, you can get expert advice and training at the Genius Bar in any Apple Retail Store.
The Genius Bar employees, known as Geniuses, are specially trained and certified Apple experts. The central work of the Geniuses are to help their customers with
hardware and software issues. They can provide answer to your questions, offer personal supports, and fix your device. Most of the services they offer are free. They
can repair your device, however, you will need to pay for non-warranty services if your device is not covered by the
Apple warranty,
an
AppleCare plan.
You can make a Genius Bar reservation at an Apple Store in two ways:
Through the Apple Store app or,
By making a reservation via the Apple support web site.
1. iOS device / Apple Support App and Genius Bar appointments (the easiest way)
Launch the Apple Support app (if you do not haven’t downloaded it on your device, Go to the App Store and download and install it – or get it here)
Now, tap on Get Support
Next, choose your device. In this post, we selected iPhone 11 Pro and then Repairs & Physical Damage and “Buttons not working”. Note that some
problems can only allow you to get support via phone calls or live chat sessions.
Tap Bring in for Repair and choose a location and date and time and then tap Reserve. Then your reservation will be made.
You will probably see a notification saying “You don’t have any reservations”, since you are trying to make a reservation. To make a new reservation, tap Find a store
2. Genius bar appointment via the web site
If you don’t want to use the app option, you can also receive an appointment through Apple’s support page. Simply follow these steps:
Head over to Apple’s Genius Bar page. (URL:
https://www.apple.com/retail/geniusbar/)
Scroll down, you’ll see Get hardware help. Click on it.
Choose the device or the service that you need help with. In this article, we will select the iPhone option.
Now, choose Repairs and Physical and then choose your issue or select the “The topic is not listed” option. If you choose the “Topic is not listed” option,
Provide details for your issue, then hit continue.
Next, choose “Bring in for Repair”
Next on, you’ll be asked to type in your Apple ID and password
Now, choose your location. You can find your location by city, zip code, or name. Alternatively, you can browse all Apple retail stores. Find the nearest Apple Store that you
Wish to go to.
Next, choose the date and time
Now, your reservation will be confirmed.
Now you have made a Genius Bar reservation. You should also receive a confirmation email from Apple. Also, It’s easy to cancel or reschedule it if you want to. Remember to back up your devicebefore visiting the Apple store.
How to prepare for your appointment
Before your appointment, you may want to prepare for your appointment. Keep in mind toback up your device (you can use iCloud).
It’s also a good idea to bring with you all of the hardware (that you are experiencing problems with). For instant, if you are experiencing issues with your Mac, bring all of the
accessories such as your mouse, keyboard. Also, bring with you your sales receipt.
Ensure that you know your
Apple ID
password (you may need to turn off Find My).
Finally, remember to bring your ID with you.
Usually, the Genius Bar appointment lasts for about 15 minutes. If your device needs a hardware repair, the Genius will discuss with you about your available repair options including any applicable charges.
In this post, I’ll explain how you can contact Apple Support, if you experience issues relating to its products and services.
Keep in mind, depending on your locations, your support options and Apple warranties may be different.
This warranty offers hardware and software support. Most Apple devices provide a 90 day complimentary technical support warranty and an annual limited,
hardware warranty; unless you purchase extra warranties. You can extent your warranty up to a period of 2 years by buying AppleCare+.
It’s also worth noting, these warranties are in addition to rights provided by consumer law which may differ from one country to another.
Basically, Apple offers two types of support. Also, you can contact apple in a number of ways. Find the available methods for
getting support below:
Software (iOS, macOS etc) and service support (iCloud, Apple Music, Apps etc):
Telephone support
Live chat support
Twitter support
Community support (Apple user forums)
<li>Hardware repair and replacement support (components or parts of your device, keyboards, mouses etc):
Making Genius Bar Reservations
Taking your device to an Apple Certified Service Provider
Visiting an Apple Repair Center
1.Community Based Support
Apple has a support community and technical support forum. This forum provides answers through knowledge sharing. The forum is a nice place to get answers of issues you may be having with your device. Many Apple users submit questions and answers. It is very active. You can search other users posts or you can post your questions.
You don’t have to register or sign in to read the content. However, if you want to submit a question or an answer, you need to sign in. Sign in to Apple Support forums with your Apple ID. If you do not have an Apple ID, you can follow these steps to create one.
Here are the forums you can access:
Apple forums:
https://discussions.apple.com/welcome
Apple forums sign in:
https://discussions.apple.com/login
https://appleid.apple.com/account
(create an Apple ID, if you do not have one, you must create one to participate)
2. Phone Support
Apple offers phone support as well. You can either get support by calling Apple or requesting Apple to call you.
You can call Apple for support. Before you make a call, ensure that you have your product’s serial number ready. You can check your serial number on the surface of your device. Or,
on iOS devices or Apple Watch, go to Settings > General > About and on Mac go to Apple menu (upper-left corner of your screen) > About This Mac > and
then click the Overview tab. Here is the phone numbers:
You can start a support request to get a phone support. You only need to provide a phone number and Apple will call you. Note that you will need to
Type in your device’s serial number. Just select a product
and then select a topic and then select the phone support option. And even better, you can schedule a phone call so that an Apple support technician will give you a call
at your own convenient time.
3. Apple Live Chat
There is also a live chat support. Live chat is a very handy option. Apple will email you the chat transcripts so that keep an archive of
your chats which may come in handy should you face the same issue again. Through this method, your questions will be answered instantly. Here are the instructions for how tochat with Apple support team online.
Note: It may take up to nine days for your device to be fixed. You can easily check the status of your repair online.
Also, you can follow your case online.
5. Mail Support
If you are experiencing a hardware issue and don’t want to set up a reservation at an Apple Store or an Apple Authorized Service Provider; try this option. You just need to contact Apple
(you may choose any of the option listed in this article to contact Apple), request a box and mail your device to an Apple Repair Center. This option is available
for most Apple products.
6. Twitter
You can ask any question via Twitter by simply tweeting your questions to
@AppleSupport.
Apple Twitter support works daily from 5am to 8pm (PT).
7. App Store, iTunes Store, and iBooks Store billing Support
You can Check your coverage online
by simply typing in your device’s serial number. If you are out of warranty, still contact Apple. Keep in mind, you may be required to pay a service fee. So how much
will it cost? The following are Apple’s fees:
Before you contact Apple, try to restart your device to see if it resolves your issue. Also your problem may be temporary because some Apple servers might be down.
You may want to visit Apple System Status page
Finally, this is not a support request per say, but you can also
send feedback to Apple.
Apple offers different ways to provide support for your products. One of them is live chat support. Live chat lets users use instant / live (real-time) messaging to contact Apple’s
support team through its website. You get quicker response via Apple’s live chat than emails.This is because most users prefer chat assistance to
emails and phone calls. You can schedule a chat with an Apple expert who specializes in your exact question.
It’s worth noting that if you need hands-on technical support for any of your Apple device, you can get expert advice at the Genius Bar. You
can make a Genius bar reservation.
I think that the fastest and most convenient way to get support is through chat with Apple expert. Even better, Apple support chat is available 24×7.
Apple’s support team can provide you with an answer to any questions that you may have about Apple products, hardware (iPhone, iPad, etc), software (iOS, macOS, FaceTime, Pages,
etc) and services (
iCloud,
Apple Music,
iMessage,
etc.).
It’s worth noting that live chat is not available in all countries.
How to access Apple live chat support
Head over to Apple’s web site:
https://www.apple.com.
Tap Support.
Tap Contact Support (top menu bar).
Tap Talk to us. It may also read “Tell us how we can help”. Alternatively, you can directly access this page by clicking the
getsupport.apple.com.
Now select a product or service. For example, if you are having issues with your iPad, click iPad. Or if you are having an issue with your Apple
ID, click
Apple ID.
Now choose the exact iPad issue you are having, like the battery, back-up, Apple ID, or Wi-Fi issues. There is also an option to search for topics.
Now you will be asked a more specific problem that you are experiencing. If your problem is not in the list, choose the “the topic is not listed” option.
If you select this option, you will be required to describe your problem in the next screen.
Now, select how you prefer to get help. If you prefer the live chat option, simply select the “Chat”. The page will also tell you the approximate waiting period.
Here, you need to either sign in with your Apple ID and password or enter your products serial or IMEI number. How do you find your serial number? it’s easy. For instance if you are experiencing a Mac issue, you can find your Mac’s serial number by simply heading over to Apple menu > About This Mac. Or if you are experiencing
an issue with your iPhone or iPad, you can find the serial number by simply heading over to Settings > General > About.
It may take a couple of minutes before you talk to an Apple expert. The next available agent will be with you to help you fix your problems. Once you are connected,
a live chat representative will ask you to explain your problem, after you describe your issue, the representative will do everything possible to help you fix your issue.
I was able to fix most of my issues using the Apple chat option. However, in case you are not able to fix your requests, you can use other options. As I pointed out
above, Apple offers several ways which you can use to request and receive technical support. For example, you can call Apple support and visit anApple store. But
do not worry your problem will be fixed as Apple is committed to helping its customers.
Also, you can
send feedback to Apple
(a suggestion or reporting a problem). Although Apple may not provide a response, Apple read every feedback they get. Your feedback will help Apple enhance your
Experience.
If the worst happen and you need to restore your iPhone, the simplest way to do so is through iTunes. In this article, we’ll explain how to restore an
iPhone via iTunes…
If your iPhone is not working properly, or if you’re getting ready to sell it, you’ll want to restore the device. But restoring your iPhone can mess up the device
if you don’t do things in the right way.
In this article, we’ll explain what an iPhone restore is, under which circumstance you might want to do a restore, and the steps to follow when you do so.
You will need toback-up your iPhone before getting started, and the best way to do that is via iCloud or iTunes. We’ve explained both options in detail below, so read on for instructions on how to backup and restore your iPhone…
What Restoring Your iPhone Does
Restoring your iPhone is the “nuclear” version of formatting your device back to factory default. A restore will erase everything from your iPhone–settings,
apps, the OS, as well as the firmware itself.
If you want the iPhone to appear the way it was when you first opened it from the box you need to restore it.
All the methods explained here work on iPad too. Another handy tip, especially if you’ve ever thought the following:
Is to make sure you have Find Myconfigured on your iPhone or iPad.
Why You May Want To Restore Your iPhone
You want to restore your iPhone if you are planning to sell or giving it to someone, or you are having some issues with it. Always keep in mind to do a restore if you
are selling your iPhone.
Restoring your iPhone will remove everything on the device, wiping not only all your information but the existing OS and firmware from the device.
After a restore, the device will install the latest clean version of iOS.
How to Restore Your iPhone From iTunes
Restoring your iPhone can somehow be risky because if you do it wrong you can seriously mess up your device. However, it’s very rare to encounter such an issue.
What we are saying, most of the time people restore their iPhone without doing a backup first. Then when they go to restore their device, they
find they don’t have any of their data saved.
Another common issue is when people restore their iPhone without disassociating their Apple/iCloud ID from it first and then sell their device. If you don’t
disassociate your Apple/iCloud ID first, that iPhone will forever be locked to your Apple/iCloud ID, which means a future owner won’t have full access
over it.
Make sure you’re iPhone is connected to a Wi-Fi network
Head over to Settings & then tap your profile on top
Tap on iCloud
Tap iCloud Backup
> Turn on “iCloud Backup” if it’s switched off
Tap Backup Now
How to Backup iPhone or iPad in Mac on MacOS Catalina
Build a connection between your iPhone and computer via USB cable and launch Finder.
Now, click on the name of your device.
Next, click on General at the top of the Finder window and then click
Back up all of the data on your iPhone to this Mac.
Finally, click back up now.
How to back up your iPhone or iPad using iTunes on windows PC or Mac running MacOS Mojave or earlier
Launch iTunes
Connect Your iPhone To Your PC using a USB cable
Click iPhone , then summary
Click Backup Now
How to restore iPhone or iPad backup in MacOS Catalina
If your Mac is runningMacOS Catalina, you can restore your iPhone or iPad from Backup using Finder. Before you jump into it, ensure that the Find My is turned off.
Now, simply follow these steps:
Build a connection between your iPhone and Mac via a USB cable.
Now, open Finder on your Mac.
Next, click on your device from the Locations section.
Next on, click on General to reveal device settings.
Click on restore Backup
Choose the Backup data you wish to restore from the pop-up that appears on the screen.
Lastly, click Restore to initiate the restoration process.
Keep your iPhone or iPad connected after it restarts and wait for it to sync with your Mac.
How to restore iPhone or iPad Backup from iTunes
If your Mac is running MacOS Mojave or older or windows PC, iTunes will help you with the task. Before you dive into it:
Ensure that your Mac or PC is running the latest version of iTunes.
Ensure that Find My iPhone is disabled.
Now, Follow these steps to restore Your iPhone or iPad backup from iTunes
Connect your iPhone to your computer using a USB cable.
When your iPhone appears in iTunes, click on its Summary panel and then click Restore backup.
Click Restore again to confirm that you want to restore your iPhone to factory settings. All data and content will be erased.
After your iPhone restarts you’ll be asked if you want to set up the iPhone as a new device (do this if you are selling it or giving it away) or if you
want to restore it from a backup. If you want to set it up as a new device, you’re done, just follow the “Set Up As New iPhone” steps on screen when you see the
Hello screen.
If you want to restore your device from a backup you can do so from iCloud or your iTunes backup (depending on where you backed up your iPhone before
you restored it.
To restore from iCloud: After you see Hello screen follow the steps in the iOS Setup Assistant until you get to the Set-Up screen. Select Restore from iCloud
Backup. Select the backup you made.
To restore from iTunes: connect your iPhone to your Mac or PC using a USB cable. In iTunes choose File > Devices > Restore from Backup. Choose the backup
you made.
That’s all, folks.