Got a tip for us?

Apple ID

Apple has been a pioneer in technology, known for its top-notch products, impeccable design, and a relentless focus on user privacy. One essential feature that ties everything together is the Apple ID. This unique identifier is the cornerstone of an Apple user’s experience, granting access to a wide range of Apple services. While sharing an Apple ID may seem like a convenient solution for friends or family, there are numerous disadvantages of sharing Apple ID. In this comprehensive guide, we’ll dive deep into each of these downsides, so you can make an informed decision on whether or not to share your Apple ID.

Your Apple ID is your digital passport to the world of Apple services, including iCloud, iTunes, the App Store, and more. While it’s tempting to share your Apple ID with friends, family members, or colleagues to pool resources, this practice comes with significant drawbacks. In this article, we will discuss each disadvantage in detail, so you can make an informed decision about whether sharing your Apple ID is worth the risks.

1. Privacy Concerns

One of the most significant disadvantages of sharing Apple ID is the erosion of privacy. When you share your Apple ID with someone else, they have access to your:

  • Emails
  • Text messages (iMessage)
  • Contacts
  • Calendar events
  • Photos and videos
  • Notes
  • Reminders
  • And more

In short, by sharing your Apple ID, you are essentially granting access to your entire digital life. This can lead to uncomfortable situations and potential breaches of trust, as private conversations, sensitive information, and personal media files are exposed to someone else.

2. Loss of Personalization

When multiple users share a single Apple ID, the personalization that Apple’s ecosystem is known for can be compromised. Here are a few examples:

  • Music and podcast recommendations: Apple Music and Podcasts use your listening habits to suggest new content tailored to your interests. Sharing an Apple ID means your recommendations will be based on the combined listening habits of all users, diluting the accuracy of these suggestions.
  • Siri and voice recognition: Apple devices learn to recognize your voice over time, allowing Siri to better understand and respond to your commands. When multiple users share an Apple ID, Siri’s voice recognition accuracy can be compromised, leading to misinterpretations and frustrations.
  • App preferences: Many apps save user-specific settings and preferences within the app. Sharing an Apple ID may cause these preferences to be overwritten by other users, making it difficult to maintain a consistent user experience.

3. Security Risks

Sharing your Apple ID can expose you to significant security risks, including unauthorized access to your account, identity theft, and more. Here are some potential scenarios:

  • Account takeover: If someone else has your Apple ID and password, they can change your account information, lock you out, and take control of your account.

  • Identity theft: A person with access to your Apple ID can use your personal information to impersonate you or commit fraud in your name. This could include opening new lines of credit, making unauthorized purchases, or even gaining access to other accounts using password reset features.

  • Phishing and scams: When multiple people share an Apple ID, it’s easier for phishing emails and scams to slip through the cracks. Users might inadvertently click on malicious links or provide sensitive information to scammers, putting everyone’s data at risk.

  • Malware: Sharing an Apple ID increases the chances that a user may unknowingly download and install a malicious app on a device, infecting it with malware. This could lead to stolen data, compromised device functionality, or even the spreading of malware to other devices within the shared Apple ID ecosystem.

4. Purchasing and Subscription Complications

Another significant disadvantage of sharing Apple ID is the potential for complications when it comes to purchasing apps, content, and subscriptions. Here are some common issues:

  • Shared payment method: When you share an Apple ID, all users are tied to a single payment method. This can lead to disputes over who pays for what, unexpected charges, or even unauthorized purchases.
  • In-app purchases: In-app purchases made by one user will be available to all users sharing the same Apple ID, which can lead to confusion or accidental usage of paid content.
  • Subscription management: Subscription services like Apple Music, Apple News , and iCloud storage are linked to an individual Apple ID. Sharing an Apple ID means that all users will have access to the same subscriptions, making it difficult to manage and allocate costs fairly.

5. iCloud Storage Limitations

iCloud storage is an essential part of the Apple ecosystem, allowing you to back up your data, sync your devices, and access your files from anywhere. However, sharing an Apple ID can lead to iCloud storage limitations:

  • Shared storage space: All users sharing an Apple ID will be drawing from the same iCloud storage allotment. This can lead to a shortage of space, forcing users to purchase additional storage or risk losing their data.
  • Data mingling: When multiple users share an Apple ID, their data will be mingled within iCloud. This can create confusion, as files and backups from different devices become intertwined and difficult to manage.

6. Find My Device Implications

Apple’s Find My feature is designed to help you locate your lost or stolen Apple devices. However, sharing an Apple ID can lead to unintended consequences:

  • Misplaced devices: When multiple users share an Apple ID, the Find My app will display the location of all devices associated with that account. This can lead to confusion, as it may be unclear which device belongs to whom.
  • Privacy invasion: A person with access to your shared Apple ID can use the Find My feature to track your movements without your knowledge or consent, violating your privacy.

Create an Apple ID when setting up a new iPhone  

Family Sharing: A Better Alternative

Instead of sharing an Apple ID, a better solution is to use Apple’s Family Sharing feature. Family Sharing allows up to six family members to share access to Apple services, including:

  • Apple Music
  • Apple TV
  • Apple News
  • Apple Arcade
  • iCloud storage
  • App Store purchases
  • iTunes purchases

Family Sharing also includes parental controls and location sharing features, making it a safer and more practical alternative to sharing an Apple ID. You can learn more about setting up Family Sharing by visiting Apple’s official support page.

Conclusion

The disadvantages of sharing Apple ID are numerous, ranging from privacy concerns to security risks and complications with purchases and subscriptions. When you share an Apple ID, you’re exposing your personal information, diluting the personalization features of your Apple devices, and potentially putting your digital life at risk.

Instead of sharing your Apple ID, consider using Apple’s Family Sharing feature, which offers a more secure and convenient way to share access to Apple services among family members. Family Sharing preserves individual privacy, allows for personalized experiences, and provides parental controls to ensure a safer digital environment for everyone involved.

In conclusion, the risks and disadvantages of sharing Apple ID far outweigh any perceived benefits. By understanding these downsides and exploring alternatives like Family Sharing, you can protect your privacy, maintain the integrity of your personal data, and continue enjoying the seamless experience that Apple’s ecosystem has to offer.

This article explains how to unlock if your Apple ID has been locked for security reasons.

It’s save to say that security is a top priority for Apple, and if your account has been hacked it gets suspended. If this happens, you might see a notification indicating that your account has been ‘locked for security reasons’. This is terrible since your Apple ID and password are required to access Apple services. Continue reading to know how to unlock disabled Apple ID for security reasons.

How to Unlock disabled Apple ID for Security Reasons

It’s quite frustrating if your Apple account gets locked, particularly if you wanted to download a nice app from the App Store or trying to reply to an email. However, this does mean someone tried to access your Apple account, and Apple blocked them. The Apple ID gets locked when someone repeatedly enters a wrong password on an Apple device

Apple ID Disabled – Your Apple ID has been disabled for security reasons

In this article, I’ll show you what you can do to unlock a disabled Apple ID and account that was locked due to security issues.

See also: My Apple ID is Greyed Out in Settings, Check the Fix

How to know if your Apple ID is locked?

If your Apple ID got locked, you should see one of these messages on your Apple device:

  • You can’t sign in because the account was deactivated for security reasons.
  • Your Apple ID has been disabled for security reasons.
  • This Apple ID is locked for security reasons.
  • Your iCloud account has been locked for security reasons.

Here is what you can do if your Apple ID was locked:

Unlock Apple ID account that was locked for security reasons

  1. On your Mac, open Safari.
  2. To unlock your Apple ID, navigate to ‘iForgot’ Apple’s website.
  3. Type in your email, first name and last name -> click ‘Next’.
  4. If two-step verification was enabled you need to enter the recovery key. If this was not enabled proceed to the later step. Then you should print out the recovery key and save it somewhere. Type in the key number and hit ‘Next’.
  5. Next on, select the phone number that was used for two-step verification and click continue. Enter the Verification Code and select ‘Continue’.
  6. Type in the new password and confirm password field -> choose Reset Password.

And that’s all you need to do to resent your Apple ID’s password. This unlocks the disabled Apple ID / account. However, you need to use the latest password with accounts on your Apple devices

For unlocking a disabled Apple ID: Update the password on your iDevice.

Here is how you can update the password on your iOS device:

  • Go to Settings -> your profile -> Password & Security -> Change Password.

And for updating the Apple ID password in Mac OS

  1. From the Apple menu, launch System Preferences.
  2. Select iCloud -> Sign Out.
  3. Type in the new password and choose Sign In.

You would also need to enter the new password as needed in App Store, iTunes, FaceTime, and other Apple offerings. These should request the password as needed and then for later, remember the new password.

that’s all folks. Now you know what to do next time you see a message saying -“your Apple ID has been locked for security reasons”

Are you getting this error when you try to reset your Apple ID security questions:

  • We don’t have sufficient information to reset your security questions.

If you cannot reset Apple ID security questions, this troubleshooting guide will show you how you can fix the issue. This problem can be very frustrating since you may not be able to buy Apps, Music, books etc until you can answer your security questions correctly. If you cannot remember, you can reset security questions for Apple ID.
To start off, it’s worth noting that you need to verify your identity successfully before you can reset your Apple ID security questions.

Apple
takes security very seriously, as any reputable company should. Apple uses security questions as an measure to provide an additional security layer, so that your data is secure.

How to reset security questions for Apple ID

Please follow these steps to reset security questions for Apple ID:

  1. Head over to iforgot.apple.com page
  2. Type in your Apple ID
  3. Hit Continue
  4. You will be asked some questions to verify your identity. Apple wants to prove that it is really you.
  5. Now, provide the answers to the questions
  6. Next, select “I need to reset my security questions”
  7. If you cannot verify your account, you may not be able to reset your Apple ID security questions and you may get the “Cannot reset security questions. We don’t have sufficient information to reset your security questions” message.

We don’t have sufficient information to reset your security questions. Apple ID

Please do the following if you get “We don’t have sufficient information to reset your security questions” message. Ask Apples’ Account Security team to reset your security questions for you. Simply follow these steps:

  1. Head over to the Apple ID support page. (Please note, Apple also offers
    live chat support)
  2. Click “Forgot Security Questions”
  3. Various help options will appear. Please note, these help options may vary depending on your region.

Please note, if you do not remember your answers, and if Apple team may authenticate your identity (they will ask you a number of questions), they may not be
able to help you. Because they also may not access your account. They may offer you a new Apple ID but it’s worth noting that you will lose all your previous purchases.

Also, you can change Apple ID security questions any time, if you think that your security questions are challenging to remember. If you want to do this, please follow these steps:

Change Apple ID security questions

  1. Head over to Apple ID account page
  2. Navigate to the Security section
  3. Now, click Edit
  4. Lastly, click Change questions

Getting an Apple ID is easy but creating an Apple ID without a credit card or any defined payment method is a little tricky. In this article, I’ll explain exactly how you can create an Apple ID without an Apple device. In addition, I’ll show you how to create an Apple ID without credit card.

Ever wonder how to download apps without credit card info? Apple provides an all-in-one account for all devices, emails, iCloud, to purchase songs, movies and TV Shows from the iTunes or Music/TV/Books Stores and to download and purchase all types of apps from the App Store on iPhone, iPod Touch, iPad and even on your Mac. You can create an Apple ID on your Mac, iPhone, iPad, or iPod touch and your Apple ID will let you use and access all Apple services. But, can you create an Apple ID without an iPhone? The short answer is yes. You can set up Apple ID without iPhone. You just need a web browser. Also, note that you can set up an Apple ID without a credit card. This Apple ID will give you access to Pages, Numbers, and Keynote for iCloud.

Your new Apple ID will be your current email address. Unfortunately, it’s not possible to create an @icloud email address. For the @icloud email address, you need to create an Apple ID on a Mac, an iOS or iPadOS device.

How to create an Apple ID without an Apple device

Here’s how to create an Apple ID without an Apple device. Note, these steps will also apply if you want to set up an Apple Id without a credit card.

  1. On your PC computer, Android device, or non-Apple tablet; launch your favorite web browser (Chrome, Safari, Firefox etc).
  2. Now, head over to the Apple ID page: https://appleid.apple.com/.
  3. Next, click the “Create Your Apple ID” link.
  4. In the sign-up form, type in your name and password. Please provide all the necessary information that is required by Apple.
  • Your name, location and birthday in the correct fields.
  • type in your current email. This will be your Apple ID. Please provide a valid email. Apple will send a verification code to ensure that his email address belongs to you. It’s not possible to create an Apple ID without this code.
  • Password. Apple ID passwords are required to be at least 8 characters. Do not use easily guessed password such as 12345678. A strong password will prevent you from Apple ID scams.
  • Also, Apple will ask you to choose three security questions.  You will be asked to choose and answer 3 questions. Your answers will be used for password reset. You may be able to
    reset your security questions.
  • When finished, solve the captcha and hit Continue.
<li>After you click Continue, a popup will appear asking you to enter a verification code that Apple just sent to the email address you provided in the form. Check your email and enter the code. It’s worth noting, you have three hours to enter this code. The&nbsp;code will expire 3 hours after it was sent.</li>And there you go. Congratulations! You have successfully created an Apple ID without an Apple device and credit card.

You have now an Apple ID. You will be redirected to a page. This page allows you to manage your Apple ID.

If you want to use Pages, Numbers or Keynote, head over to icloud.com and sign in with your newly created Apple ID. This will let you create and open these type of documents. iCloud Drive will store your documents. This is similar to Google drive.

Since you do not have an Apple device (iPhone, iPad, iPod Touch, or Mac), your Apple ID account cannot be used to access Apple services such as
iMessage,
FaceTime,
App Store, Apple Music, and other Apple services.
And that covers everything on how to create an Apple ID without an Apple device and payment method. Now take time to share this article with your friends to teach them how to create an Apple ID without payment method and an Apple device.

Apple makes it pretty easy to remove a device from your Apple ID device list. Your Apple ID device list comprises your Apple devices; iPhone, iPad, Mac, Apple Watch, etc; that are signed in with the same Apple ID. This is also called the trusted device list. In this article, I’ll explain exactly how you can delete a device from the devices connected to your Apple account list.

It’s a good idea to remove device from Apple ID if you do not own or use it. When you do this, the removed device will lose its access to any iCloud/Apple services. This, however, does not erase the device. When you remove a device from Apple ID account, you will no longer be signed in to the device. Here is how to remove device from Apple ID account

How To Remove A Device From Your Apple ID Device List using iPhone, iPad, or iPod Touch

  1. On your iPhone, iPad or iPod touch, Launch the Settings app and tap Your Name.
  2. Now, scroll down and you will find a list of your Apple ID devices. You will see every device that is connected to your Apple account.
  3. Next, tap on any device name that you want to remove.
  4. Next on, tap Remove from Account. Then tap again to confirm your decision.

How To Remove A Device From Your Apple ID Device List Using a Mac

You can use your Mac to remove a device. Here is how to remove device from Apple ID list:

  1. Click the Apple menu on your Mac.
  2. Now, go to System Preferences.
  3. Next, click Apple ID.
  4. You will see all of your Apple ID devices from the left menu.
  5. Next on, click the device you want to remove.
  6. Finally, click the Remove from Account link.

How To Remove A Device From Your Apple ID Device List using the Apple ID account page on the Web

If you do not have access to your iOS device, then you can use the web to delete a device from Apple ID:

  1. Launch a browser and visit the Apple ID account page (
    https://appleid.apple.com/)
  2. Now, type in your Apple ID and password to sign in.
  3. Next, scroll down until you see the Devices section.
  4. Next on, select a device to remove.
  5. Finally, click the Remove from Account link.

Side notes:

  • You cannot delete a device from Apple ID on the same device you are using to remove on your iOS device.
  • As mentioned above, this does not wipe the device. To wipe the device and completely remove the device, please head over to Settings > General > Reset > Erase All Content and Settings.
  • It’s a good idea to check this list from time to time, if you see a device that you do not recognize, remove the device and then change your Apple ID password.

See also:
How To Create an Apple ID Without an Apple Device & Credit Card

Don’t want to use an Apple ID on your iPhone? no problem. Here’s how to set up your iPhone, iPad or iPod touch without an Apple ID.
How to use an iPhone without an Apple ID
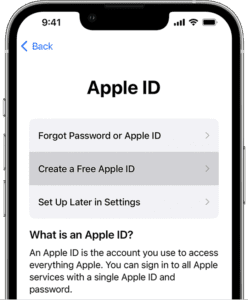
During the initial set up of your new iPhone, iPad or iPod touch, you are asked to sign in using existing Apple ID or create a new Apple ID.
Apple ID is the account that is used to sign in to all Apple services.
While an Apple ID is important, not everyone is comfortable sharing their information with Apple. Luckily, it is not obligatory to have an Apple ID, and in
this step-by-step guide, we’ll walk you through how to set up your iPhone without creating an Apple ID.
If you want to use your iPhone without an Apple ID, there are a few simple steps which you need to follow.
here is the step-by-step guide which will help you to set up your iPhone, iPad, or iPod touch without an Apple ID.

Steps to set up an iPhone without an Apple ID:

Whether you just purchased a brand-new
iPhone,iPad or iPod touch, or have erased your existing Apple device, you are required to
Set it up from the scratch upon powering it on.
Follow these steps to set up your iPhone without an Apple ID:

  1. Power on your iPhone by
    Pressing and holding down the device’s power button until the Apple logo appear.
    you’ll see hello in the first screen.
  2. choose your preferred language and select your region.
  3. Next up, you will see two options: Quick Start or set up manually. Tap Set
    Up Manually option to continue.
  4. Next on, you need to connect to a Wi-Fi network. If you have already inserted your SIM card,
    You can use cellular data to activate and continue setting up your device.
  5. You can now create a passcode, set up Face ID or touch ID. In case you don’t want to use these features, you can tap set up later in settings however, we recommend setting them up
    To unlock your iPhone and make purchases.
  6. Next up, you will see an option to restore or transfer your data from your old iPhone to your new iPhone, but since this is a new set up without an Apple ID, tap Set
    Up as New iPhone.
  7. Finally, you will see a sign in screen where you enter your Apple ID and password. Instead, tap the Forgot password or don’t have an Apple ID.?
    You will see three options:
  • Forgot password or apple id?
  • Create a Free Apple ID?
  • Set Up Later in Settings.
<li>Tap set up later in settings. A dialog box asking if you're sure you don't want to use an Apple ID will pop up. Tap Don't Use to confirm and you’ll be able to finish setting up your iPhone without an apple ID.</li>That's pretty much it, you’ll now be able to use your iPhone without an Apple ID. You can still sync data across your devices using apps

Such as: One Drive, Google Drive, Google Photos, and more.
Moreover, cloud services such as google drive can help you access your data, no matter the type of device You have.
Questions?
Let us know in the comments section below. We also have plenty of other articles that I suggest you check right now.

Your Apple ID is greyed out and you don’t know what to do. This means that when you open the Settings app on your iPhone, iPad or iPod touch, your Apple
ID shows up as greyed out, making it inaccessible. And when the Apple ID is tapped, it does not do anything because the setting is untappable. Sometimes A greyed out Apple ID may seem to be stuck on ‘Verifying’.

If you are experiencing this problem, you can no longer use your Apple ID on your iPhone or iPad. When an Apple ID is greyed out on an iPhone or iPad, it
most likely is due to an error that occurred when updating the iOS or when you change your Apple ID and password.

This is an important problem. if you are experiencing this issue, you cannot use various Apple services that require an Apple ID, like the App Store, iTunes,
FaceTime,iCloud,iMessage, etc.

You can fix also if your
Apple ID is disabled

In this article, I’ll show you exactly how to fix greyed out Apple ID on iPad and iPhone.

Check Apple system status page

Apple has a dedicated page with real-time status information for its services, like Apple ID. You can check if Apple ID services are working normally or experiencing
problems. Follow these steps:

  • Head over to
    Apple’s system status page:
    https://www.apple.com/support/systemstatus/ 
  • Find “Apple ID”.
  • If it is green, everything is working. if not, just wait, Apple will fix the problem from their end.

Restart your iPhone or iPad

Restarting your device may fix your Apple ID problem. Follow these steps to restart your device.

  • To restart iPhone X, 11 or newer and Face ID iPad models: Press and hold down the side and the volume up (or) down buttons together until the power off slider appears.
    Then drag the slider. Wait for one minute and then press and hold down the side button until you see the Apple logo.
  • To restart other iPhone and iPad models and all iPod touch models: Press and hold the top or side button until you see the power off slider and then drag the slider.
    Wait for one minute. Then press and hold the side or top button until the Apple logo appears.

Check your connections

There is a likelihood that you are having a connection problem. Make sure that your iPhone or iPad is connected to the Internet. You may connect to the
Internet using cellular service or Wi-Fi. Launch Safari and try to visit
geeksmodo.com
if you can not access our website, try the following solutions:

  • On your iPhone or iPad, turn on Airplane Mode and then wait one minute and then turn it off: Go to Settings > Airplane Mode).
  • Restart your Wi-Fi router.
  • If possible, try connecting your device to a different Wi-Fi network.
  • See also:
    Cellular not working on iPhone? Fix
  • Also, you may need to reset your network settings by going to Settings > General > Reset > Reset Network Settings. Before you do this, make sure you have your Wi-Fi password handy as doing so will remove
    all of your network settings such as your saved Wi-Fi passwords etc.

Check if restrictions are turned on on your iPhone, iPad, or iPod

There is a likelihood that Restrictions are enabled on your device. Ensure that the ability to make changes to accounts is allowed. Follow these steps:

  • Start the settings app on your iPhone, iPad or iPod touch.
  • Go to Screen Time. If asked, enter your
    Screen Time passcode.
  • Tap on content & Privacy Restrictions.
  • Scroll down until you see the Allow Changes section and tap Account Changes. Here, ensure that this setting is “Allow”.
  • If Apple iD is greyed out still, you may need to turn off Screen Time. To do this, head over to Settings > Screen Time. Then tap the red “Turn Off Screen Time”
    button.

Software update

Update your device to the latest software version. To update your iPhone or iPad, head over to Settings > General > Software Update. This will check for updates. If there is an update available,
follow the onscreen prompts to update your device.

Also, consider turning on Automatic Updates on your iPhone or iPad. To do so, head over to Settings > General > Software Update > Automatic Updates.

Alternatively, you can update your device using your computer by connecting your device to a Mac or PC.

Profiles

Sometimes, employers or schools install configuration profile on iPhone or iPad that contains settings to restrict or limit and manage
employees’ or learners devices.  On your iPhone or iPad, head over to Settings > General > Profiles, are there any profile installed? if there is, you can tap it to
see what restrictions are set. If you want, you may remove profiles by heading over to Settings > General > Profiles > Remove Profile or Delete Profile.

See also:
How To set and use iPhone without an Apple ID

If your iPhone is disabled because you’ve forgotten the passcode and now can’t unlock your device, help is at hand! In this article, I’ll explain how to unlock a disabled iPhone without iTunes or iCloud or computer.

If you tried the wrong passcode repeatedly or your kids type randomly in the lock screen, it will cause the iPhone to be disabled. As a result, you will be informed that “iPhone is disabled connect to iTunes”. The good news is that you’ll know everything about how to unlock a disabled iPhone without iTunes or iCloud or computer in this guide.


Part 1: How to Unlock a Disabled iPhone with iTunes

Just as the iPhone message tells you, you can unlock the disabled iPhone with iTunes.  With the synced iTunes on your computer (Windows/Mac), you can restore the disabled iPhone to remove the lock screen.

Step-1: Get a USB cable and connect your iPhone to the computer and open iTunes.

Step-2: To enter your iPhone, you can click the phone icon and then hit the Summary option on the left side. In this way, you can view the iPhone details and get the restore option.

Step-3: Here comes the most important step—click the Restore iPhone button. If you see a message that says “Find My iPhone must be turned off”, you can try the next way to unlock the disabled iPhone.

restore iPhone

Step-4: Click Restore on the confirmation window. After that, just wait until the restoration process is complete.  When it finishes the restoration, you can set up your iPhone again.

Part 2: How to Unlock a Disabled iPhone with iCloud

If you fail to unlock the disabled iPhone with iTunes, or if you encountered any error during the restoration process, you can make good use of the iCloud to unlock the disabled iPhone. Here are the steps.

Step-1: Open a web browser on your computer or another mobile phone and go to icloud.com.

Step-2: Sign in to iCloud with your Apple ID and passcode. It must be the Apple ID that is linked to the disabled iPhone.  If you find there is two-factor authentication for your Apple ID, it means that you need to get the verification code to unlock your iPhone. The most effective way is to take out the SIM card and install it on another mobile phone to get the code. Or you can try the next method to unlock the disabled iPhone with a third-party tool.

Step-3: Once you’ve successfully sign in to iCloud, click Find My iPhone at the bottom right corner.

Find iPhone

Step-4: In Find My iPhone interface, click the All Devices button to get the drop-down option. Then you can click the disabled iPhone and get its location.

choose the disabled iPhone

Step-5: To unlock the disabled iPhone, simply click the Erase iPhone option and then confirm the action. Now, your iPhone will be erased and restarted like a new device.  You need to activate it again as you did before.

erase iPhone

Part 3: How to Unlock a Disabled iPhone without iTunes or iCloud

Unlock a Disabled iPhone without iTunes/iCloud using PassFab iPhone Unlocker

To unlock a disabled iPhone without iTunes or iCloud, you will need an iPhone unlocking tool like PassFab iPhone Unlocker. It allows you to unlock your iPhone, iPad, and iPod touch without the lock screen password, Face ID, or Touch ID. That’s why you can use it to unlock iPhone without passcode or Face ID easily.

PassFab iPhone Unlocker is designed to be a super simple tool that works effectively in letting you unlock a disabled iPhone without iTunes including iPhone 14, iPhone 13, iPhone 12, iPhone 11, iPhone X, iPhone 8, iPhone 8 Plus etc). The process doesn’t involve any lengthy workaround and can be done with ease.

It doesn’t matter whether you have set a 4-digit custom numeric code or 6-digit alphanumeric passcode, you can get rid of the password including Touch ID and Face ID info without any hassle.

Key Features of PassFab iPhone Unlocker

  • Unlock a disabled iPhone without iTunes
  • Remove 4/6-digit passcode, Touch ID, or Face ID
  • Remove iCloud from iOS device without password
  • Supports all iPhone models including the iPhone 14 Pro Max
  • Supports various iOS versions including the latest iOS 16
  • Factory Reset iPhone without Password
  • Only 3 Steps to Unlock a disabled iPhone

How to Unlock a disabled iPhone without iTunes Using PassFab iPhone Unlocker

Step 1: First off, download and install PassFab iPhone Unlocker on your PC/Mac. Then, open the software on your computer and select ‘Unlock Lock Screen Passcode’.

Unlock a disabled iPhone using PassFab iPhone unlocker

Step 2: Now, you need to connect the disabled iPhone to the computer via USB cable.

Step 3: After PassFab iPhone Unlocker has recognized your device, click ‘Start’ to remove iPhone passcode.

start remove iphone passcode using passfab iphone unlocker  

Step 4: Next up, you have to download the latest iOS firmware.

Once the firmware is downloaded click ‘Start Unlock’ to start Unlocking a disabled iPhone without iTunes.

download firmware package using passfab iphone unlocker  

Step 5: Up next, you have to wait for some time until the process is successfully completed. Make sure to keep your device connected to your computer.

After the process is finished, you can set up your device as new or restore it from the most recent backup.

PassFab iPhone Unlocker is right on the money when it comes to letting you unlock a disabled iPhone without iCloud or iTunes. Beyond removing lock screen, the tool also comes handy when your iPhone seems to be completely down and out and refuses to get restored via Apple’s mobile management tool.

Unlock a Disabled iPhone without iTunes/iCloud using StarzSoft KeyPass

StarzSoft KeyPass let’s you unlock a disabled iPhone without iTunes or iCloud within minutes. You can easily unlock your disabled iPhone without worrying about losing data, .

  • This tool can unlock various iOS devices including iPhone 14, iPhone 13, iPhone 12, iPhone 11, iPhone X, iPhone 8, iPhone 7, iPhone 6S, etc without the need for a pass code.
  • This tool can reset iOS device without pass code.
  • It’s compatible with the latest iOS version including iOS 16.
  • Easy to run. You don’t need to be an IT expert to run this tool.

Please follow these steps to unlock a disabled iPhone without iTunes using StarzSoft KeyPass:

Step-1: Download, install, and launch StarzSoft KeyPass on your computer

Step-2: Build a connection between the disabled iPhone and your computer via USB cable.

Step-3: quickly press the plus and minus volume buttons at the same time and then hold the power button until “connect to iTunes” flashes on the screen. StarzSoft Keypass will start to unlock your disabled iPhone without you having to restore anything or putting in any additional effort.

StatSoft KeyPass is one of the best tools available on the market, which lets users unlock their disabled iPhone without iTunes or iCloud. StatSoft KeyPass process is also much smoother than using iTunes to unlock a disabled iPhone.

The process will take less than 5 minutes and all your data will be safe and sound by the end of the process.

Unlock a Disabled iPhone without iTunes/iCloud using Tenorshare 4uKey

You can use Tenorshare 4uKey to remove the lock screen within few simple clicks. You do not need to have the screen lock passcode and Apple ID passcode, as well as the synced iTunes. Tenorshare creates iOS troubleshooting software for Mac and PC, and their program “4uKey” will help you bypass your iOS device’s passcode, even if it’s disabled.
Unlock a disabled iPhone with Tenorshare 4uKey:

Please follow these steps to unlock a disabled iPhone without iTunes using Tenorshare 4uKey:
Unlock disabled iPhone with Tenorshare 4uKey

Step-1: Download, install and launch 4uKey on your Mac or Windows computer. It is necessary to sign in to the software with your registration
code.  Then, select feature “Unlock Lock Screen Passcode” to get started.

Step-2: Build the connection between the disabled iPhone and Mac or Windows computer with a USB cable.
Connect your iOS device to computer
Step-3: Click the Start button on the main interface

Step-4: Now, you can view that the software has detected your iPhone iOS details. And in the download firmware package online interface, you just
need to Choose a save path and click the Download button.
download firmware package
Downloading firmware package
firmware package downloaded successfully
Step-5: When the process completes, Tenorshare 4uKey will say that the passcode has been removed.
Removing passcode
Passcode removed successfully
Step-6: When iPhone passcode has been removed successfully, Follow the on-screen instructions to set up your iPhone. You can restore from an iCloud backup, iTunes backup, or set up
your iPhone as new. If you have a backup available, we recommend restoring from it so you don’t lose any of your data.

Part 4: How to Unlock a Disabled iPhone without iTunes/iCloud/ Computer

If you have no computer to utilize iTunes/iCloud/ third-party tool to unlock the disabled iPhone, what to do? You can use another accessible iPhone to unlock it with iCloud or Find My iPhone app.  To unlock iPhone with iCloud, you can refer Part 2 tutorial to conduct the operation. Here we will guide you to unlock iPhone without a computer via Find My iPhone app on another iPhone.

Step-1: Get another accessible iPhone and open Find My.

Step 2: Log in with your Apple ID and password.

Step-3:  Next, you will see all iOS devices which share the same iCloud account. You need to find the disabled iPhone from the list and tap it.

Step-4: Then tap on Actions at the bottom of the iPhone screen. After that, you are offered three options. Tap Erase iPhone and then you will get the disabled iPhone erased. Of course, the locked screen is removed from the iPhone.

unlock iPhone on another computer

As a matter of fact, this process is similar to unlock the disabled iPhone with iCloud. The most important part is that you need to enter the right iCloud account and password.

Have you ever picked up your iPhone to be greeted with a notification saying “iPhone is disabled” and to “try again in 1 minute” or to try again 5, 15, 60 minutes? The worst of all, the error says “iPhone is disabled connect to iTunes”, and you cannot use it until then.

So, why is the iPhone saying “iPhone is disabled connect to iTunes?” And how do you fix the issue so that you can use the iPhone again? The answers to these questions are usually easy. In this step-by-step guide, we’ll explain why your device says iPhone is disabled connect to iTunes, and most importantly, show you how to unlock so that you can reenable your iPhone and start using it again. We’ll also walk you through how to unlock a disabled iphone without itunes.
iphone disabled one minute delay

Why is My iPhone Disabled?

If you enter the wrong passcode repeatedly, your iPhone
will automatically be disabled for sometimes and it will display iPhone is disabled error notification on the screen.
The obvious fix in this situation is to hold on for a minute or two and then enter the correct passcode to unlock the iPhone and get around the disabled message. In the future, just enter the correct passcode in the first attempt and you’ll avoid this message and the lock out period.

If you enter incorrect passcode repeatedly, the iPhone will be disabled and display an error message saying “iPhone is disabled connect to iTunes”

You may want to know how many failed passcode attempts are required to disable the iPhone for a given period of time and to get the Error message, that information is as follows:

  • 5 failed passcode attempts in a row – iPhone is disabled, try again in 1 minute
  • 7 failed passcode attempts in a row – iPhone is disabled, try again in 5 minutes
  • 8 failed passcode attempts in a row – iPhone is disabled, try again in 15 minutes
  • 9 failed passcode attempts in a row – iPhone is disabled, try again in 60 minutes
  • 10 failed passcode attempts in a row – iPhone is disabled, connect to iTunes (or the iPhone erases itself of all datA IF self-destruct mode is enableD

Keep in mind that the time delays mentioned above are automatically triggered on your iPhone, and cannot be adjusted or turned off.
Being locked out for 1 minute isn’t too bad, however, bing locked out for 60 minutes is annoying, as is connecting to iTunes to enable the iPhone again. If you want to unlock a disabled iPhone,there are a few simple steps which you need to follow.
Here is the step by step guide which will help you unlock a disabled iPhone with or without iTunes.
Let’s further understand the common causes of this problem to avoid it in the future, then we’ll dive into solving iPhone is disabled connect to iTunes error.

But I didn’t try to unlock my iPhone, so why does it say it is disabled?

Under some circumstances, you didn’t actually try to unlock an iPhone and you didn’t (intentionally) enter incorrect passcode, but the iPhone says it is disabled. Here are three most common reasons why this happens:

  • pocket: Inadvertently disabling an iPhone in a pocket is very common! This mostly happens to iPhone users who keep their iPhones in a pocket that they also use for their hands, often hip coat pockets, the hoodie pouch pocket, or front pants pockets. The iPhones screens slide to unlock feature can easily trigger itself, landing your device into passcode entry area while the iPhone is in a pocket.
  • Snoopers. Friends and colleagues don’t always understand they don’t have limitless number of guesses to unlock your iPhone .
  • Kids. Kids love iPhones and they love playing with phones. Tom gets sad when the phone stop working and mom isn’t happy that her iPhone is disabled.

iPhone is disabled connect to iTunes, how to unlock

Want to unlock an iPhone stuck on the disabled screen? The most straight forward solution is to wait for the time to pass, then enter the correct passcode. For anywhere up to 9 failed passcode attempts, all you need to do is grab a cup of coffee and wait for time to elapse. (‘Try again in X minutes’ count down will be displayed on the screen therefore, you can see how long You are required to wait.)
There is nothing much you can do during this period, however, you have an option to place emergency calls by tapping the immergency button located at the bottom of the screen.

Once the waiting period is over, your iPhone’s screen will display a normal background and you’ll have a chance to try entering the passcode again. At this point, try entering your passcode carefully when given a chance. If you input the passcode wrongly one more time, you’ll be subjected to another waiting period.

As soon as you get to an hour wait, you’re approaching your final chance. Get it wrong one more time and your iPhone will be disabled until you connect to iTunes.

If you’re approaching the 10-guess limit, be careful. Do you have the right passcode penned down somewhere, or is there anyone else who knows It?
It might be prudent to jot down every attempt you make from this moment on (and any that you’re certain you’ve tried before), but this is only to help nudge the memory – however, iOS smartly counts various entries of the same wrong passcode as one wrong guess, so you should not mind about trying any guesses repeating yourself.
After 10 failed passcode attempts , you’ll have to restore your iPhone using iTunes.

How to unlock a disabled iPhone with iTunes

When your device says “iPhone is disabled connect to iTunes,” the only solution is to connect It to a computer to unlock it again. Hopefully you have a recent backup on your computer, and hopefully you remember your iPhone’s passcode, otherwise you’ll be required to wipe your device clean and lose all your data. Yes really. This is why it is important to back up your iPhone frequently.

Steps to unlock a disabled iPhone with iTunes

If you know your iPhone’s passcode and Had recently synced your device to iTunes, you are in luck. You can restore it as new without loosing data. Follow these steps to fix iPhone is disabled connect to iTunes error:

  1. Connect the iPhone to a computer it usually syncs with via a lightening cable and open iTunes
  2. Choose the iPhone (from the sidepane or from top-right of the screen
  3. Click “Sync” in iTunes and enter the correct passcode when requested to unlock the device, this will backup the iPhone to the computer
  4. Hit “Restore” to restore the iPhone from the most recent backup

If you can’t remember the iPhone passcode, the only option is to erase the iPhone completely and it will wipe all data using recovery mode.

Use Recovery Mode

Recovery Mode erases the iPhone completely. However, it can prove helpful if the above fix didn’t work.
Note, iTunes won’t allow you to restore your device if Find my iPhone is enabled on your device, even if you have synced your iPhone with a computer. In such a situation, the only solution is to restore your iPhone from recovery mode. Here’s how to put your iPhone into Recovery Mode:

  1. Connect the USB to lightening cable to your computer but don’t plug it to the iPhone yet.
  2. Open iTunes on your computer.
  3. If you are using iPhone X or newer, quickly press the Volume Up button, then quickly press the Volume Down button and then press and hold the Side button until the recovery mode screen appears.
  4. Next, connect your iPhone to the computer. A ppop up will appear on iTunes window stating “An iPhone has been detected in recovery mode. Now, proceed with the restore process.
  5. If you are using iPhone 6S or older, press and hold down the Home button and Sleep/Wake button for approximately 10 seconds until the iPhone shuts down.
  6. Release the Sleep/Wake button but keep holding the home button.
  7. Now, connect the lightening jack to your iPhone, (Don’t release the Home button yet).
  8. A pop up will appear on iTunes window stating “An iPhone has been detected in recovery mode.” Now, go ahead with the recovery process.
  9. If you are using iPhone 7 or 7 Plus, press and hold ON/OFF button and volume down button simultaneously). Keep holding both the buttons until Connect to iTunes screen appears. After connecting your iPhone to iTune, a ppop up will appear on iTunes window stating “An iPhone has been detected in recovery mode. Now go ahead with the restore process

What do you do when your iPhone is disabled and won’t connect to iTunes? In this case, check the next solution.

How to unlock a disabled iPhone without iTunes

Some iPhone users find that connecting the disabled iPhone to iTunes doesn’t fix the problem. Fear not! You can unlock disabled iPhone without iTunes using third-party tool, known as Tenorshare 4uKey with just a few simple clicks.
Unlock a disabled iPhone with Tenorshare 4uKey:

Tenorshare 4uKey is an easy tool designed to unlock iPhone screen without iTunes. Whether it’s a simple 4-digit passcode, 6-digit passcode or more complex custom numeric code and alphanumeric passcode, 4uKey offers the ability to remove an iPhone screen lock passcode in a very short amount of time.

Tenorshare 4uKey has one of the best mobile interfaces out there. Its features options are robust, but you’ll never struggle to navigate them. Tenorshare 4uKey is designed to allow you to unlock a disabled iPhone with minimal effort. It succeeds at that goal.

Unlocking a disabled iPhone works like magic. You just need to connect your iPhone to your computer, launch Tenorshare 4uKey and perform a few Clicks.

With that in mind, here is how to unlock a disabled iPhone without iTunes using Tenorshare 4uKey:
Unlock disabled iPhone with Tenorshare 4uKey

Steps to remove lock screen and unlock disabled iPhone without iTunes

Step-1: Download, install and launch 4uKey on your Mac or Windows computer. It is necessary to sign in to the software with your registration Code. Then click on Unlock Lock Screen Passcode to get started.

Step-2: Connect the disabled iPhone to your Mac or Windows computer through a USB cable.
Connect your iOS device to computer
Step-3: Click the Start button on the main interface

Step-4: The software will automatically detect all the information on your iPhone. And in the download firmware package online interface, you just need to Choose a save path and click the Download button.
download firmware packageDownloading firmware package
firmware package downloaded successfully
Step-5: When the process completes, Tenorshare 4uKey will say that the passcode has been removed successfully.
Removing passcode
Passcode removed successfully
Step-6: When iPhone passcode has been removed successfully, Follow the on-screen instructions to set up your iPhone. You can restore from an iCloud backup, iTunes backup, or set up your iPhone as new. If you have a backup available, we recommend restoring from it so you don’t lose any of your data.
Now, my disabled iPhone was unlocked successfully without any problem In just a few moments and pricing was also very low which is affordable by everyone because we need to pay a little for some great tools that make our life easier.

Some important features of Tenorshare 4uKey:

  • Ability to unlock a disabled iPhone without iTunes or iCloud
  • Support all iOS versions and devices including the latest iOS 13 and iPhone 11, iPhone 11 Pro, iPhone 11 Pro Max and iPhone SE 2020
  • Remove all kinds of iPhone passcodes: 4-digit passcode, 6-digit passcode, custom numeric code, alphanumeric passcode, Touch ID, or Face ID
  • Reset a second-hand, passcode-locked iPhone.
  • Factory reset locked iPhone without iTunes or passcode.
  • No need for specialist skills

That’s all about unlocking a disabled iPhone without iTunes or iCloud. If you have any questions, let us know in the comments section below.

Want to temporarily disable face ID on iphone 11, iPhone 11 Pro or iPhone 11 Pro Max? You are in the right place. Both Face ID and Touch ID allow users to conveniently secure their iPhone or iPad and keep snoopers from accessing their personal data. Despite the fact that
iPhone’s biometric authentication features are top-notch, they are still subject to forced unlocks. For example, attackers can physically force
you to unlock youriPhone using Touch ID or Face ID and forcefully gain access to your personal data.

Thankfully, Apple has made it easy to keep user’s data secure through use of a simple hack that we explain in this article. ReadHow to turn off 3D Touch in iOS 13
It is easy for iPhone and iPad users to swiftly disable Face ID or Touch ID security feature and deter anyone from forcefully unlocking their devices.
Disable face ID
The steps given in this guide will disable the touch ID or Face ID feature until user enter the correct passcode.

The face ID or Touch ID feature will be disabled until the user unlock their device using the correct passcode. The correct Face ID
or Touch ID scans will not be able to unlock your device in this state.
Disable touch ID on iPhone

Temporarily disable Face ID or Touch ID to prevent forced unlocks

It is easy to temporarily disable Face ID on iPhone X or later. This will also apply to the new iPhone 11, iPhone 11 Pro and iPhone 11 Pro Max users. You just need to press and
hold the power and side buttons at the same time until the slide to power off screen appears. This can be done while your device is both locked or unlocked. Immediately the power off screen shows up, Face ID will automatically be disabled until user unlock their device using the correct passcode.

To disable touch ID on iPhone 7 or earlier: Press and hold the power off button until slide to power off screen shows up on your iPhone. Immediately this happens, Touch ID will be
disabled until user unlock their device using the correct passcode.

That’s pretty much it, That’s how you can disable Face ID or Touch ID and prevent forced unlocks. This little known hack can help you with securing
your data in undesirable situations. Should you have any question as far as this tip is concern, let us know in the comments section below.