Got a tip for us?

iPad

The iPad is a tablet computer from Apple that runs the iOS mobile operating system. Similar in functionality to the iPhone, the iPads purpose is often quite different, sometimes even serving as a general desktop computer replacement.

Use the Find My app to let a friend know when your location changes. You can notify your friend when you arrive at or leave a location, and with a larger radius, they get notified when you’re near the location rather than right at it.

You can see a list of the people notified when your location changes, and stop notifying friends at any time. You can also see all the notifications about you.

Here’s how to notify a friend when your location changes in Find My on iPad.

You can also get a notification when your friend’s location changes. See Get notified when a friend’s location changes in Find My on iPad.

Notify a friend when your location changes

  1. Open the Find My app on your iPad.
  2. Tap People at the bottom-left side of the screen and then tap the name of the person you want to notify.
  3. Below Notify [your friend’s name], tap Add Location Alert.
  4. Choose whether you want to notify your friend when you arrive at or leave a location.
  5. Choose a location, or tap New Location to create a new location and set a location radius.

    With a larger radius, your friend is notified when you’re near the location instead of right at the location.

  6. Choose whether you want your friend to be notified only once or every time.
  7. Tap the Done button.

At any time, you can stop notifying friends when your location changes. Check out our guide, Change or turn off a notification you set.

See all notifications about you

  1. Open the Find My app on your iPad.
  2. Tap Me at the bottom-left side of the screen.

    A list of people who are notified when your location changes appears below Alerts on My Location.

    Note: If you don’t see the Alerts on My Location section, you aren’t notifying any friends when your location changes.

  3. Tap a name to see more details.

Turn off notifications about you

You can turn off any location notification about you, both the notifications you set and the notifications your friends create.

  1. Open the Find My app on your iPad.
  2. Tap Me at the bottom-left side of the screen.

    Below Notifications About You, you see a list of people who are notified when your location changes.

    If you don’t see the Notifications About You section, you aren’t notifying any friends when your location changes.

  3. Select a name and tap a notification.
  4. Tap Delete Notification and tap Delete Notification again.

See also

Tag: Find My

Use the Find My app to get a notification when your friend’s location changes. You can get notified when a friend arrives at a location, leaves a location, or isn’t at a location, and with a larger radius, you’re notified when they’re near it.

Your friend gets an alert after you set the notification up.

Here’s how to get notified when a friend’s location changes in Find My on iPad.

Important: In order to receive a notification when your friend’s location changes, make sure you allow notifications for the Find My app. See Change notification settings.

You can also notify friends when your location changes. For the steps, see our guide, Notify a friend when your location changes in Find My.

Get notified when your friend arrives at or leaves a location

  1. Start the Find My app on your iPad.
  2. Tap People at the bottom-left side of the screen, tap the name of the person you want to be notified about, and tap the more button.
  3. Below Notify Me, tap Add Location Alert.
  4. Choose whether you want to be notified when a friend arrives at or leaves a location.
  5. Choose a location, or tap New Location to create a new location and set a location radius.

    With a larger radius, you’re notified when your friend is near the location instead of right at the location.

  6. Choose whether you want to be notified only once or every time.
  7. Tap the Done button.

    Your friend gets an alert after you set the notification.

    If you set a recurring notification, your friend must approve it before it’s set. They get an alert asking for approval when they arrive at or leave the location you chose for the first time.

Get notified when your friend isn’t at a location

You can get a notification when your friend or family member is away from a specific location during a set schedule, like when your child isn’t at school during school hours.

  1. Start the Find My app on your iPad.
  2. Tap People at the bottom-left side of the screen, tap the name of the person you want to be notified about, and tap the more button.
  3. Below Notify Me, tap Add Location Alert.
  4. Below When, tap [your friend’s name] Is Not At.
  5. Choose a location, or tap New Location to create a new location and set a location radius.

    With a larger radius, you’re notified when your friend is near the location instead of right at the location.

  6. Select when you want to be notified.

    • Time: Select a start and end time.
    • Days: Select the days of the week.
  7. Tap the Done button.

    Your friend must approve the notification before it’s set. They get an alert asking for approval on the time and day the notifications start.

Change or turn off a notification you set

  1. Start the Find My app on your iPad.
  2. Tap People at the bottom-left side of the screen, tap the name of the person whose notification you want to change or turn off, and then tap the more button.

    This could be a notification you receive about a friend, or a notification your friend receives about you.

  3. Tap the notification.
  4. Do either of the following:

    • Change a notification: Change any details and then tap the Done button.
    • Turn off a notification: Tap Delete Notification and tap Delete Notification again.

You can create up to 25 Notify Me notifications.

Note: You can only create recurring notifications for friends who have two-factor authentication turned on.

See also

Tag: Find My

Shared password groups are an easy and secure way to share passwords and passkeys with your family and trusted contacts.

Anyone in the group can add passwords and passkeys, and when a shared password changes, it changes on everyone’s device. To create a group, you need to be signed in to your Apple Account, and the people you add must be in your contacts with an iPhone, iPad, or Mac running iOS 17, iPadOS 17, or later.

Create a group

Note: You must be signed in to your Apple Account before you can create a shared password group.

  1. Go to the Passwords app on your iPad.
  2. Tap the New Shared Group button.
  3. Enter a name for the group, then tap Add People.
  4. Type the name, email address, or phone number of the person you want to add. Tap Add.

    Note: To add someone to your group, they must be in your contacts and have an iPhone, iPad, or Mac with iOS 17, iPadOS 17, macOS 14, or later. If they can be added to the group, their contact information appears in blue. If it appears in gray, their iPad, iPhone, or Mac might not support shared password groups.

  5. Tap the Create button.
  6. Select the passwords you want to share with the group and tap Move in the top-right corner.

    If you don’t want to share any passwords yet, tap Not Now in the top-left corner.

    You can notify the people you’ve invited to the group, and they can also see the invitation in Passwords > Group Invitations.

Shared passwords go into iCloud Keychain, where you can use them like any other saved password.

Whenever anyone else is invited to the group, you get a notification.

Manage a group

Whoever creates a group can add or remove other members or delete the group. The rest of the members can’t. They can still choose to leave at any time.

  1. Start the Passwords app on your iPad.
  2. Tap the name of your group.
  3. Do any of the following:
    • Add a member to the group: Tap your name and then tap Add People.
    • Remove a member from the group: Tap the member’s name, then tap Remove From Group.
    • Remove a shared password or passkey from the group: Tap Select and select the shared account with the shared password or passkey. Then tap the Delete button.
    • Delete the group: Tap your name and tap Delete Group.
  4. When you’re finished making changes, tap the Done button.

Respond to an invitation to join a group

  1. Start the Passwords app on your iPad.
  2. Tap the invitation and then tap Accept to join the group. You can also decline the invitation.

Important: Don’t accept an invitation if you don’t recognize the sender.

See also

You can create and save passkeys to replace the passwords you use to sign in to supported websites and apps on your iPad. Passkeys are more secure than passwords, because they’re uniquely generated for every account by your own device and are less vulnerable to phishing, and they also work on all your devices where you’re signed in to the same Apple Account.

Websites and apps can also create passkeys for your account automatically, so you can use them the next time you sign in. Like passwords, passkeys are encrypted and stored in your iCloud Keychain, where they aren’t visible to anyone, including Apple.

Note: You need iCloud Keychain and two-factor authentication turned on to use passkeys.

Create and save a passkey using your iPad

Websites and apps that support passkeys let you create and save them.

Note: Steps for creating and saving a passkey can differ depending on the app, website, or browser, though they’re usually similar to the ones below.

  1. Go to the sign-in screen for a supported website or app on your iPad, and do one of the following:

    • If you’re setting up a new account: Tap the button or link for setting up new accounts, then follow the onscreen instructions.
    • If you already have an existing account: Sign in with your account name and password and then go to the account settings or management screen.
  2. When you see the option to save a passkey for the account, tap Continue.

    Your passkey is saved.

    Note: If you don’t see a passkey option, it means the website or app doesn’t currently support passkeys.

Your iPad stores the passkeys you create in the Passwords app.

A website or app can have both a passkey and a password, and you’ll find them together under the same account in the Passwords app.

You can also save a passkey to a hardware security key. Tap “Other options,” “Save on another device,” or similar (if available), then follow the onscreen instructions for saving a passkey. See Use security keys to sign in to your Apple Account.

Use a passkey to sign in to a website or app on your iPad

You can use a passkey whenever you sign in, after you create and save it for a website or app.

Note: The steps for signing in with a passkey depend on the app, website, or browser, but they’re typically similar to the ones below.

  1. Go to a website or app on your iPad, and tap the account name field on the sign-in screen.
  2. Tap the suggested account name that appears at the bottom of the screen or near the top of the keyboard. If the account name doesn’t appear, or you want to use a different one, enter it.
  3. Use Face ID or Touch ID to complete sign in. If you didn’t set up Face ID or Touch ID on your iPad, enter your device passcode (the code you use to unlock your iPad).

    The passkey you saved completes the sign-in automatically.

Use a passkey saved on your iPad to sign in on another device

With your iPad on hand, you can use the passkeys you created to sign in to websites or apps on a device not associated with your Apple Account, like a computer at a friend’s house, an internet cafe, or a public library.

Note: Using a passkey on another device can involve different instructions depending on the app, website, or browser, but you’ll usually follow steps like the ones below.

  1. On the other device, go to the website or app and enter your user name in the account name field on the sign-in screen.
  2. Select “Other options,” “Passkey from nearby device,” or similar and then follow the onscreen instructions to display a QR code on the screen.
  3. Use your iPad camera to scan the QR code.

    The passkey that’s saved to iCloud Keychain completes the sign-in automatically.

Create a passkey on a device that’s not your own

Having your iPad with you also means you can create a passkey on a device that isn’t associated with your Apple Account, such as a computer at an internet cafe, a public library, or a friend’s house, and save it to iCloud Keychain rather than to that device.

Note: Instructions for creating a passkey vary by app, website, or browser, though the steps below are typical.

  1. On the other device, go to the sign-in page for a supported website or app. Do one of the following:

    • If you’re setting up a new account: Tap the button or link for setting up new accounts. Enter a new username.
    • If you already have an account: Sign in with your account name and password and then go to the account settings or management screen.
  2. When you see the option to save a passkey for the account, select “Other options,” “Save on another device,” or similar (instead of Continue).

    Note: If you don’t see a passkey option, it means the website or app doesn’t currently support passkeys.

  3. Select Save a passkey on a device with a camera, or similar and then follow the onscreen instructions to display a QR code on the screen.
  4. Use your iPad camera to scan the QR code with your camera.

    The passkey is saved to your iPad and iCloud Keychain.

Change a passkey

If you previously shared a passkey with someone you no longer want to give access to, for example, creating a new passkey to replace the existing one may be necessary.

To change a passkey, follow the steps for an existing account in Create and save a passkey or Create a passkey on a device that’s not your own.

Delete a passkey

  1. Open the Passwords app on your iPad.
  2. Tap Passkeys and then tap the account for the passkey you want to delete.
  3. Tap Edit.
  4. Tap Delete and tap Delete Passkey to confirm.

If you delete a passkey, you can create a new one at any time.

See also

Use Face ID (on supported models) to securely and conveniently unlock iPad, authorize purchases and payments, and sign in to many third-party apps by simply glancing at your iPad.

Face ID data is encrypted, isn’t saved to iCloud, and doesn’t leave your iPad. You can add an alternate appearance, choose when to use Face ID, and temporarily disable it. You’ll need a passcode set on your iPad to use it.

To use Face ID, you must also set a passcode on your iPad.

Set up Face ID or add an alternate appearance

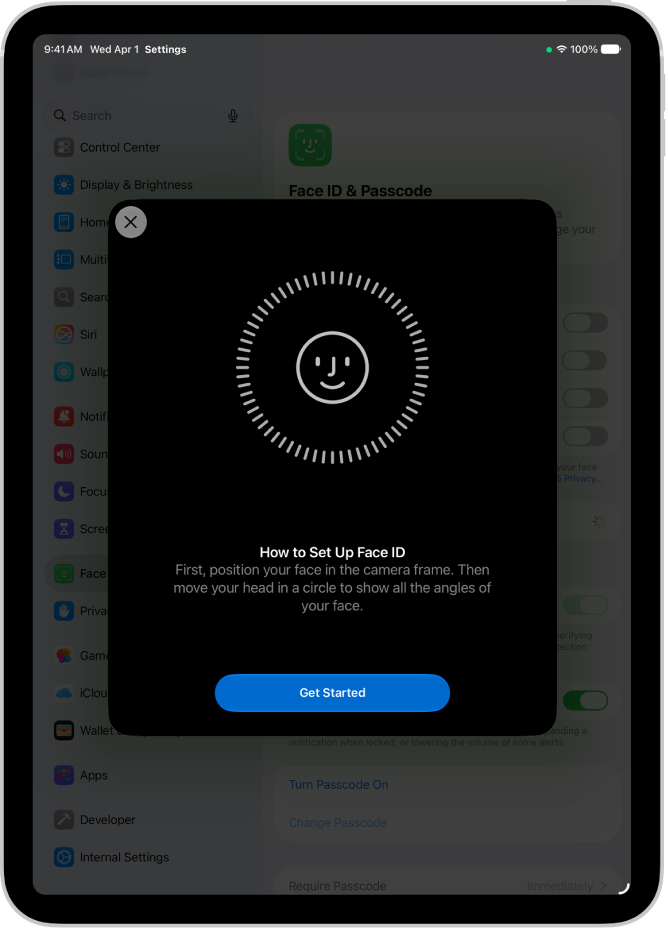
  • If you didn’t set up Face ID when you first set up your iPad, go to Settings > Face ID & Passcode > Set up Face ID, then follow the onscreen instructions.
  • To set up an additional appearance for Face ID to recognize, go to Settings > Face ID & Passcode > Set Up an Alternate Appearance, then follow the onscreen instructions.

    The Face ID recognition setup screen. A smiley face is showing on the screen, enclosed in a circle. Text below instructs the user to move their head slowly to complete the circle. A button for Get Started appears near the bottom of the screen.

Choose when to use Face ID

Use Face ID to unlock your iPad, automatically fill in passwords, authorize payments, and open password-protected apps.

Go to Settings > Face ID & Passcode, then turn on options below Use Face ID For.

Temporarily disable Face ID

You can temporarily keep Face ID from unlocking your iPad.

  1. Press and hold the top button and either volume button for 2 seconds.
  2. After the slider appears, tap Cancel to immediately lock iPad.

    iPad locks automatically if you don’t touch the screen for a minute or so.

After you next unlock iPad with your passcode, Face ID is back on.

Turn off Face ID

  1. Open Settings and then tap Face ID & Passcode.
  2. Do one of the following:
    • Turn off Face ID for specific items only: Turn off one or more of the options, such as Password AutoFill.
    • Turn off Face ID: Tap Reset Face ID.

If your device is lost or stolen, you can prevent Face ID from being used to unlock your device. See Mark a device as lost in Find My.

See also

Tag: face id

Use the Find My app to mark a missing iPhone, iPad, iPod touch, Apple Watch, Mac, supported AirPods, or iPhone Wallet with MagSafe as lost. In order to mark a device as lost, you must turn on Find My [device] before it’s lost.

When you do, a confirmation email is sent to your Apple Account email address, and you can show a message saying it’s lost and how to contact you.

What happens when you mark a device as lost?

  • A confirmation email is sent to your Apple Account email address.
  • You can create a message for the device that says it’s lost and how to contact you.
  • For an iPhone, iPad, iPod touch, Mac, or Apple Watch, your device doesn’t display alerts or make noise when you receive messages or notifications, or if any alarms go off. Your device can still receive phone calls and FaceTime calls.
  • For applicable devices, payment cards and other services are suspended.

Mark a device as lost

When a device is lost or stolen, you can put your Apple Watch, iPad, iPhone, iPod touch, iPhone Wallet with MagSafe, or supported AirPods in Lost Mode, or lock your Mac.

  1. Open the Find My app on your iPad.
  2. Tap Devices at the bottom-left side of the screen, tap the name of the lost device, and tap the More button.
  3. Tap Lost Mode.
  4. Follow the onscreen instructions, keeping the following in mind:
    • Passcode: If your iPhone, iPad, iPod touch, or Apple Watch doesn’t have a passcode, you’re asked to create one now. For a Mac, you must create a numerical passcode, even if you already have a password set up on your Mac. This passcode is distinct from your password and is only used when you mark your device as lost.
    • Contact information: For iPhone, iPad, iPod touch, Mac, or Apple Watch, the contact information and message appear on the device’s Lock Screen. For AirPods or iPhone Wallet with MagSafe, the information appears when someone tries to connect with your device.
  5. Tap Activate (for an iPhone, iPad, iPod touch, Apple Watch, AirPods, or iPhone Wallet with MagSafe) or Lock (for a Mac).

When you’ve marked the device as lost, Activated shows up below the Mark As Lost section. You see Pending instead if the device has no network connection when you mark it as lost, and Pending stays until the device goes online again.

Change the information for a lost device

You can adjust the information in the Lost Mode message after marking your iPad, iPhone, Apple Watch, iPod touch, or iPhone Wallet with MagSafe as lost.

  1. Open the Find My app on your iPad.
  2. Tap Devices at the bottom-left side of the screen, tap the name of the lost device, and tap the More button.
  3. Below Lost [device], tap Pending or Activated.
  4. Update the information, then tap Done.

Turn off Lost Mode for an iPhone, iPad, iPod touch, Apple Watch, AirPods, or iPhone Wallet with MagSafe

You can turn off Lost Mode after you find your lost device.

  1. Open the Find My app on your iPad.
  2. Tap Devices at the bottom-left side of the screen, tap the name of the device, and tap the More button.
  3. Tap Pending or Activated below Lost [device], tap Turn Off Mark As Lost, and then tap Turn Off.

Entering your passcode on an iPhone, iPad, iPod touch, or Apple Watch also turns off Lost Mode, while attaching iPhone Wallet with MagSafe to your iPhone does the same for the wallet.

Unlock a Mac

If you find your lost Mac, do one of the following:

  • Mac with Apple silicon: Enter your Apple Account password.
  • Intel-based Mac: Enter the numeric passcode on the Mac to unlock it (the one you set up when you marked your Mac as lost).

If you forget your passcode, Find Devices on iCloud.com can help you recover it.

Lost your iPad? Use Find Devices on iCloud.com to turn on Lost Mode.

See also

Tag: Find My

You can delete directions that you recently viewed in the Maps app on your iPad. You can delete a single item, or delete all recent directions at once. You can also clear your location history in Maps, and control the location information you share on iPad, along with access to information in apps.

  1. Go to the Maps app on your iPad.
  2. Scroll down to Recents and then do one of the following:
    • Delete a single item: Tap the More button and then tap Clear.
    • Delete all recent directions: Tap Recents, then tap Clear.

See also

Tag: Maps

The Maps app helps you navigate the world around you, whether you’re getting directions to a new destination, discovering local businesses, or exploring unfamiliar areas with real-time traffic updates. You can save the places you travel to and from most, find restaurants and shops nearby, and get step-by-step directions.

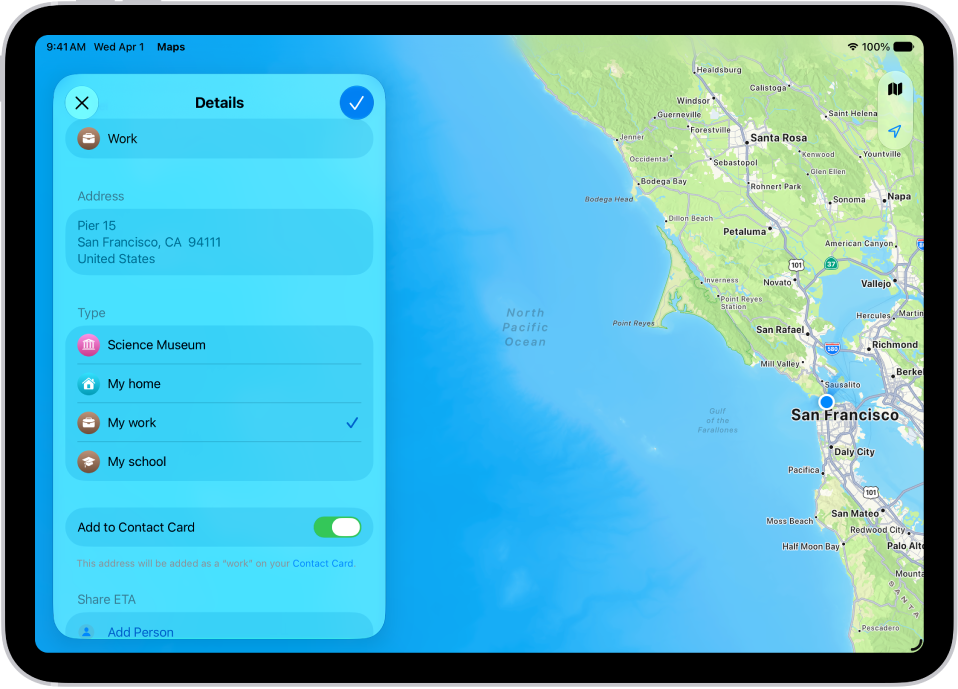
The Maps app showing the Details screen with options to set an address as home, work, or school.

Set your go-to addresses

Quickly access directions by saving the locations you travel to and from most. Below Places, tap the Add button. Tap the search field, enter an address, then tap a result. Assign it to a type—home, work, or school—then tap the Done button.

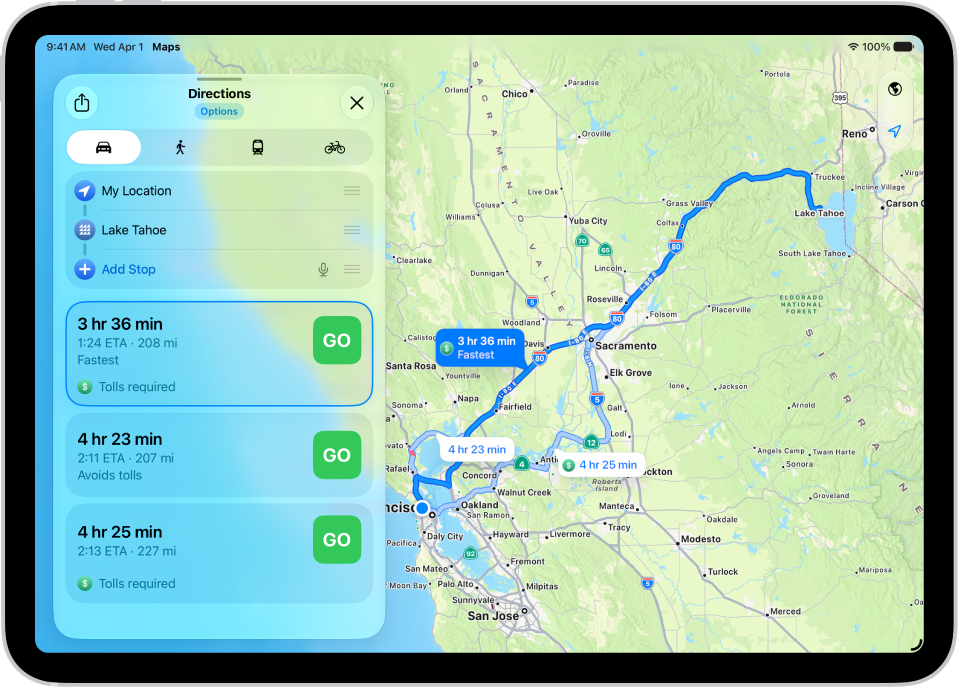
An iPad showing a map with several driving route options to the same destination. Each route shows the estimated time and distance, and a Steps button to see detailed directions. Color coding on each route indicates traffic conditions.

Navigate with ease

Get step-by-step directions to wherever you’re headed, however you want to get there. Touch and hold anywhere on the map or enter a location in the search field. Tap Directions, tap your travel mode (the Driving button, the Walking button, the Transit button, or the Cycling button), then tap Go or Steps for the route you want to take.

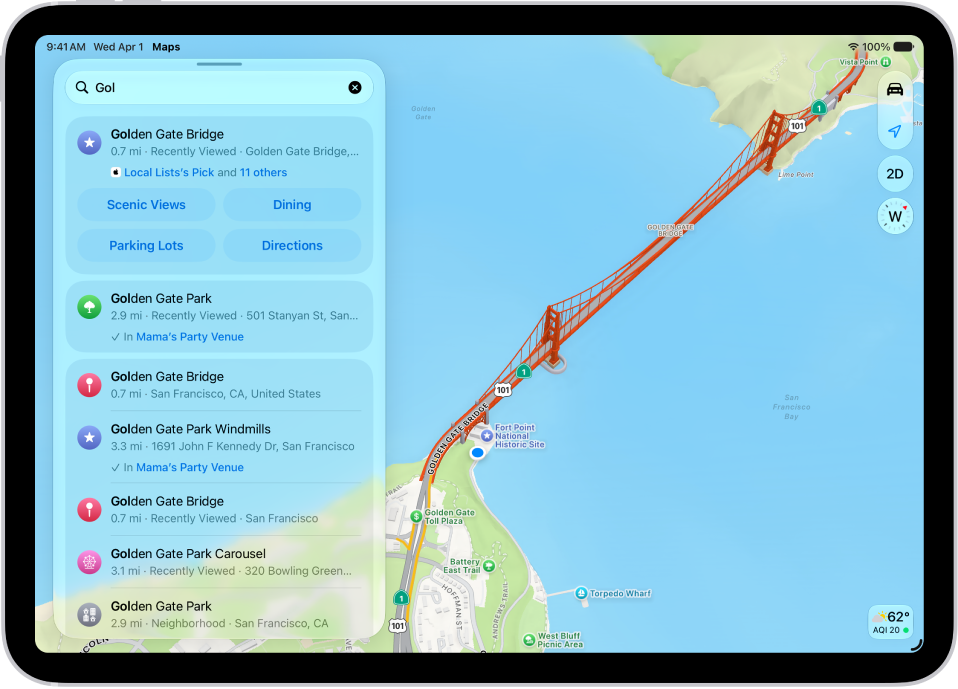
The Maps app showing a map of a downtown area. On the left is the search field, categories for nearby services, City Guides, and recommended guides.

Discover what’s nearby

When you’re in an unfamiliar area, find nearby places like restaurants, shops, or services. Tap the search field and simply start typing, or tap a category like Restaurants.

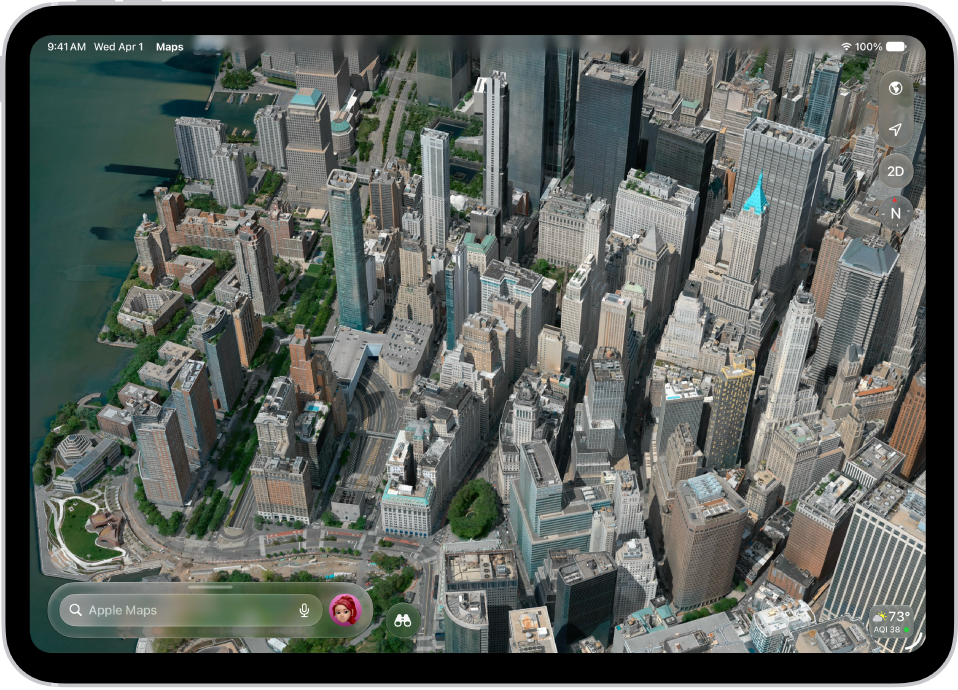
A 3D aerial flyover map of a city.

Immerse yourself in a place

Maps renders cities in sharp, true-to-life detail. Tap the Exploring Map Mode button, tap Satellite, then tap the Close button. Pinch open to zoom in, and swipe up with two fingers to see the map in 3D. When you see the Look Around button near the bottom of a map, tap it to look around with a 360-degree panoramic view.

You can get more out of Maps with these guides:

Per Apple, not all features are available in all countries or regions.

Tag: Maps

The Maps app uses information about your significant locations from Location Services to provide you with personalized services like predictive traffic routing. Your significant locations are end-to-end encrypted and can’t be read by Apple.

You can delete your significant locations at any time, for example to reset predictive traffic routing and similar services. Clearing your history removes your significant locations from everywhere you’re signed in to the same Apple Account.

  1. Start the Settings app on your iPad.
  2. Tap Privacy & Security and then tap Location Services.
  3. Tap System Services and tap Significant Locations & Routes.
  4. Tap Clear History.

    This action clears all your significant locations everywhere you’re signed in to the same Apple Account.

See also