Got a tip for us?

iPad

The iPad is a tablet computer from Apple that runs the iOS mobile operating system. Similar in functionality to the iPhone, the iPads purpose is often quite different, sometimes even serving as a general desktop computer replacement.

While exploring any location on a map, you can rotate the map to see an area with extra dimensions. In some locations, you can zoom in to see a detailed, 3D satellite view, where Maps uses aerial imagery to render cities in true-to-life detail.

On supported models and in select cities, Maps provides enhanced detail for elevation, roads, trees, buildings, and landmarks. You can also look around some locations with 360-degree panoramic views, and pan, move forward, and zoom in or out as you look around.

Note: Not all features are available in all countries or regions.

Explore a city in 3D detail

  1. Go to the Maps app on your iPad.
  2. In most cities, tap the Exploring Map Mode button and tap Satellite. Tap the Close button.
  3. Pinch open to zoom in. Then swipe up with two fingers to see the map in 3D.
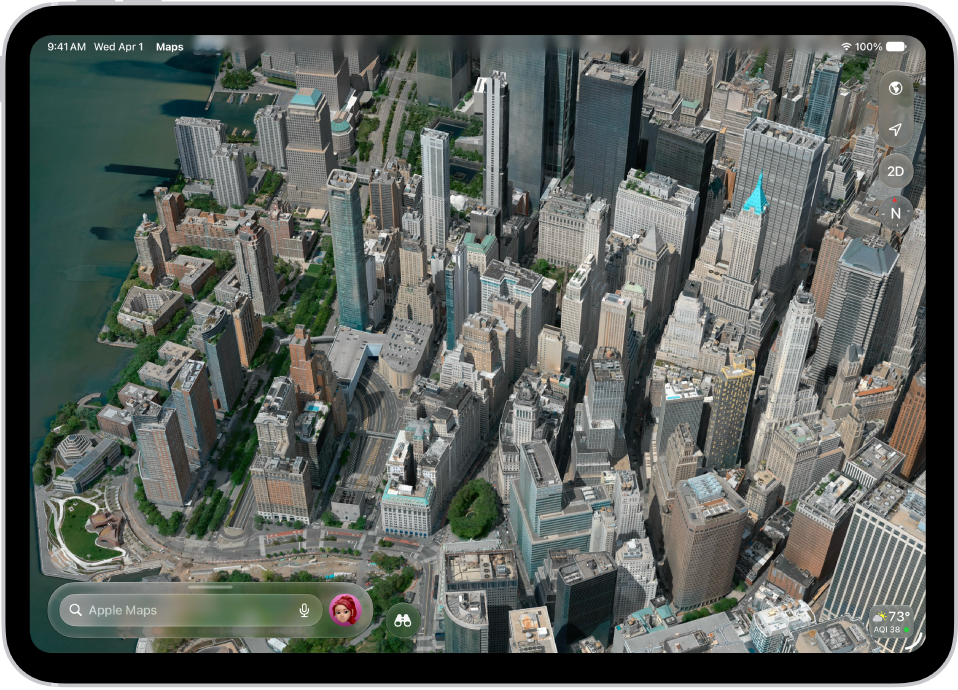
A 3D map in the Maps app, showing a city.

Look around locations

You can look around some locations with 360-degree panoramic views.
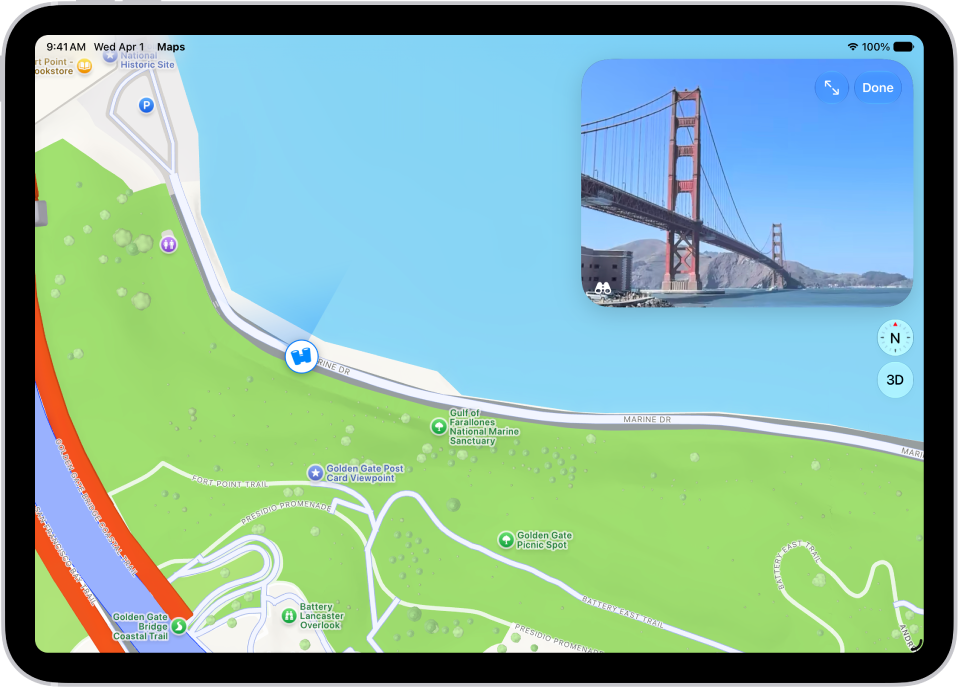
A moveable, 360-degree panoramic view appears above a map of the area marked in the Maps app. The Look Around icon overlaid on the map points in the direction of the view.

  1. Open the Maps app on your iPad.
  2. In select cities, tap the Look Around button near the bottom of a map.
  3. To change the view, do any of the following:
    • Pan: Drag a finger left or right on the scene.
    • Move forward: Tap the scene.
    • Zoom in or out: Pinch open or closed.
    • View another point of interest: Switch from full-screen view and then tap elsewhere on the map, or drag the map.
    • Switch to full-screen view: Tap the Enter Full Screen Mode button or the Exit Full Screen Mode button.
    • Remove labels in full-screen view: Swipe up from the place name near the bottom of the screen and tap Hide Labels.
  4. When finished, tap Done.

Move, zoom, or rotate a map or globe

  1. Open the Maps app on your iPad.
  2. Do any of the following:

    • Move around in a map: Drag the map.
    • Zoom in or out: Double-tap. Drag up to zoom in or drag down to zoom out. Or pinch open or closed on the map.
    • Rotate the map: Touch and hold the map with two fingers and then rotate your fingers.

      To show north at the top of the screen after you rotate the map, tap the Compass button.

View a 3D map

  1. Open the Maps app on your iPad.
  2. To turn a 2D map into a 3D map, do one of the following:
    • Drag two fingers up.
    • Tap 3D near the top right.
    • On supported models and in select cities, tap 3D near the top right.
  3. While looking at a 3D map, you can do any of the following:
    • Adjust the angle: Drag two fingers up or down.
    • See buildings and other spatial details: Zoom in.
    • View the Earth: Zoom out until the map changes to a globe. Drag the globe to rotate it, or zoom in or out (on supported models).
    • Return to a flat map: Tap 2D near the top right.

See also

Tag: Maps
You can change the map view or distance units that appear in the Find My app. The current map is for exploring or viewing from a satellite, and you can choose another map type, or change the view to 2D or 3D. That’s not available in all locations, though.

Change the map view

The button at the top right of the map shows whether the current map is for exploring or for viewing from a satellite.

  1. Start the Find My app on your iPad.
  2. To choose a different map, tap the button at the top right. Choose another map type.
  3. Tap the Close button.

You can also tap 2D or 3D at the top right to change the view (not available in all locations).

Quick tip: If 2D or 3D isn’t showing, zoom in. Or swipe up with two fingers for the 3D view.

For tips on how to interact with maps, read our guide, Set up Maps on iPad.

Change distance units

In Settings, you can change the default distance units. For details, see our article, Change the language and region on iPad.

See also

Tag: Find My

With Family Sharing, each family member joins the family group with their own Apple Account. That way you can share access to subscriptions and other features without sharing personal information like photos or documents.

The family organizer can invite family members who have an Apple Account or create a Child Account for a child who doesn’t have one yet. You can send the invitation with AirDrop, Messages, or Mail, or invite someone in person. Children under 13 need a Child Account, which is available up to age 18. And you can belong to only one Family Sharing group at a time.

Learn about types of Family Sharing members.

Add a family member

The organizer of a Family Sharing group can add any family member who has their own Apple Account.

  1. Start the Settings app on your iPad.
  2. Tap Family and tap Add Member in the upper-right corner.
  3. Tap Invite Others, then follow the onscreen instructions.

    You can send the invitation using AirDrop, Messages, or Mail. If you’re near the family member, you can also tap Invite in Person and ask the family member to enter their Apple Account email address (or phone number) and password on your device.

The people you invite find your invitation in the Family row at the top of Settings. Haven’t heard back? You can follow up with reminders.

If you’d like to join an existing Family Sharing group, the organizer has to add you. You can only belong to one Family Sharing group at a time, so leave your current group before joining a different one. For the steps, read our guide, Leave a Family Sharing group.

In a Family Sharing group, the organizer can remove members or disband the group, and family members (other than teens with parental controls or children) can remove themselves. A removed member immediately loses access to shared features, and you can’t remove a child under 13, though you can move them to another group.

If you leave a group yourself, you stop sharing your purchases and subscriptions and immediately lose access to content others shared. The organizer can’t leave the group, though, so changing the organizer means disbanding it and having another adult create a new one.

Learn about types of Family Sharing members.

Remove a member from a family group

The organizer of a Family Sharing group can remove other members, and a removed family member immediately loses access to shared subscriptions and to content purchased by other members.

  1. Open Settings and then tap Family.
  2. Tap [member’s name], then tap Remove [member’s name] from Sharing Group.

There’s no way to remove a child under 13 from your Family Sharing group, but you can still move them to another group or delete their Apple Account.

If you transfer a child under 13 from a family group, that will affect the parental controls previously set, while removing a teen under 18 means losing your previously set parental controls.

Leave a Family Sharing group

As soon as you leave a Family Sharing group, you lose access to any content family members have shared, and you stop sharing your purchases and subscriptions with them.

Note: The organizer isn’t able to leave the Family Sharing group. To change the organizer, you must disband the group, then have another adult create a new one.

  1. Open Settings and then tap Family.
  2. Tap [your name] and tap Stop Using Family Sharing.

Stop Family Sharing

If the family organizer turns off Family Sharing, every family member is removed from the group at the same time. With Family Sharing off, they all immediately lose access to the shared content and subscriptions.

Note: If a child under 13 is in the Family Sharing group, the organizer must move them to another group or delete their Apple Account before disbanding the group. Transferring a child under 13 from a family group will affect the parental controls previously set, and removing a teen under 18 will remove your previously set parental controls.

  1. Open Settings and then tap Family.
  2. Tap [your name] and tap Stop Using Family Sharing.

With Family Sharing, you and up to five other family members can share access to Apple services, eligible purchases, iCloud+ storage, and more. You can even help locate each other’s missing devices.

One adult—the organizer—invites the others, and each family member chooses the features they want to use. When they join, Family Sharing is set up on everyone’s devices automatically. Setting it up on one device is enough, since it’s then available on all your devices signed in to the same Apple Account. A Child Account is required for children under 13.

Family Sharing is available on eligible devices.

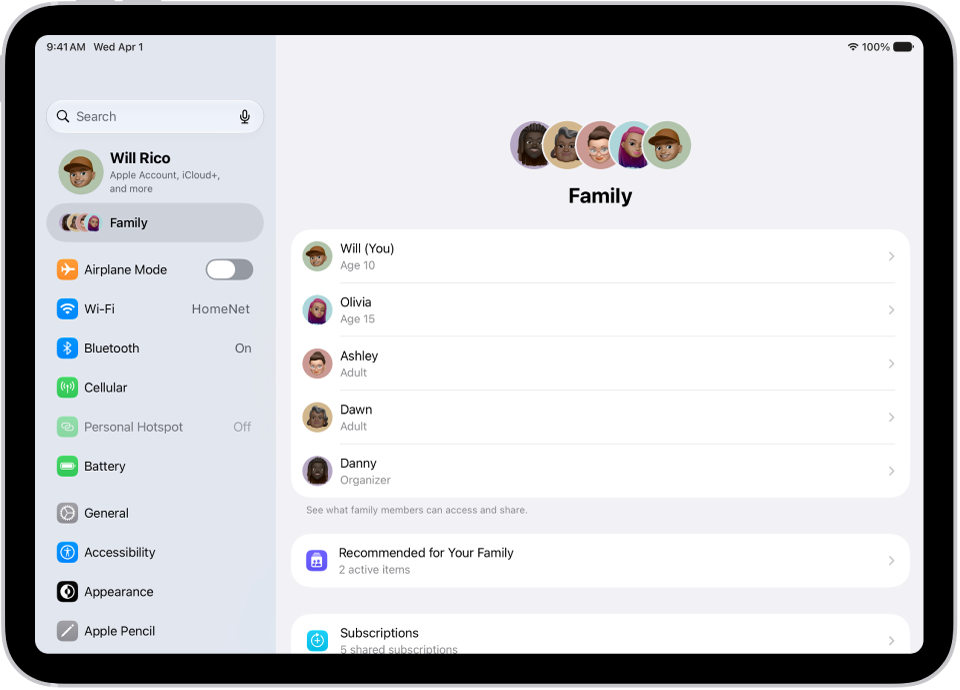
The Family screen in Settings. Up to five family members are listed above the features that are shared.

Create a Family Sharing group

You only need to set up Family Sharing on one device, since it’s then available on every device of yours signed in to the same Apple Account. The family organizer can invite family members who already have an Apple Account, or create one for a child who doesn’t have one yet.

Note: A Child Account is required for children under 13 and available for children up to 18. (This age varies by country or region.)

  1. Open the Settings app on your iPad.
  2. Tap your name, then tap Family.
  3. Follow the onscreen instructions to set up your Family Sharing group.
  4. Tap Invite next to suggested family members (if any are listed), or tap Invite Others and then do one of the following:

    • Tap Create Child Account to create a Child Account for your kid.
    • Tap Invite People, then follow the onscreen instructions to invite family members and designate added adult members as parents or guardians. Learn about types of Family Sharing members.

    You can also add family members later. See Add a member to a Family Sharing group.

  5. Tap a feature you want to set up for your Family Sharing group (for example, Subscriptions). Follow the onscreen instructions.

    To set up parental controls or Apple Cash for a child, tap their name, tap the feature, then follow the onscreen instructions.

    You can see what you’re sharing with your family and adjust sharing settings at any time.

What you can do with Family Sharing

With your Family Sharing group, you can set up or share the following:

  • Apple and App Store subscriptions: You can share Apple subscriptions, including iCloud+, and eligible App Store subscriptions. See Share Apple and App Store subscriptions with family members.
  • Purchases: You can share items purchased in the App Store, Apple Books, and Apple TV. The family organizer pays for everyone’s purchases unless they turn off Purchase Sharing or other adult family members use their own payment method to make purchases.
  • Locations: When you share your location with your Family Sharing group, all family members, including any new members added later, can use the Find My app to see your location and help locate a missing device. See Share locations with family members and locate their lost devices.
  • Passwords and passkeys: You can share passwords and passkeys with people in your family to access important accounts. See Share passwords and passkeys with people you trust.
  • Payment methods: The family organizer can set a default payment method in their Apple Account, which can be used by others in the Family Sharing group. By default, all purchases are billed to the family organizer, unless family members add their own payment method for their purchases.
  • Parental controls, Apple Card and Apple Cash, and child device set up: You can manage your children’s purchases, how they use their Apple devices, and more. You can share Apple Card with trusted members of your Family Sharing group or set up an Apple Cash Family account for a child.

See recommendations for Family Sharing features

To see suggestions to help you get the most out of Family Sharing, go to Settings > Family, then tap Recommended For Your Family.

See also

With Family Sharing, you can share your location with members of your Family Sharing group and help them find lost devices.

When the family organizer sets up location sharing, the organizer’s location is automatically shared with everyone in the family, including new members added later. Each family member decides whether to share their location, and you can stop sharing with anyone at any time. You can even get notified if a child leaves school during school hours. You can also ask a family member to share an AirTag with you.

Share your location with family members

When you share locations with your family, they’re able to see your location in Find My. If a child leaves school during school hours, for example, you can get notifications when family members’ locations change.

  1. Open Settings, tap Family, and then tap Location Sharing.
  2. Turn on Location Sharing for the family member you want to share your location with.

    You can repeat this step for each family member you want to share your location with. Each family member receives a message that you’re sharing your location and can choose to share their location with you.

    You can stop sharing your location with any family member at any time.

  3. If you want to share your location with new members that join later, turn on Automatically Share Location.

    When Automatically Share Location is turned on for a child, only parents and guardians in the family group can see the child’s location, including parents and guardians that are added to the group later.

Note: Children and teens with Screen Time turned on may not be able to change their own location sharing settings.

To share your location, you must have Location Services turned on in Settings > Privacy & Security. See Control the location information you share.

Locate a family member’s device

Members of your Family Sharing group can help locate a missing device added to the Find My app after you share your location with them.

For the steps, see our article, Locate a device in Find My.

The list puts your devices at the top and your family members’ devices below them.

Ask a family member to share an AirTag with you

When the Find My app notifies you with AirTag Detected Near You or Unknown AirTag, the family member who owns the AirTag can share it with you if you ask.

  1. In the notification, tap Ask Owner to Share AirTag.
  2. Tap Ask Owner at the bottom of the screen.

Find Devices on iCloud.com can also locate a family member’s missing device.

See also

Before you can use the Find My app to share your location with friends, you need to set up location sharing.

Once it’s set up, the device sharing your location appears next to Sharing From. You can share from another device instead, and set a label for your location, like Home or Work, to make it more meaningful. You’ll see that label next to your location, too.

Here’s how to share your location in Find My on iPad.

Note: If you set up location sharing and others still can’t see your location, make sure Location Services is on in Settings > Privacy & Security > Location Services > Find My. Location sharing isn’t available in all locations. See Control the location information you share.

Besides yourself, up to five users can share an AirTag or other item, for a total of six users per item.

Set up location sharing

  1. Start the Find My app on your iPad.
  2. Tap Me at the bottom-left side of the screen and turn on Share My Location.

    The device sharing your location appears next to Sharing From.

  3. If your iPad isn’t currently sharing your location, you can tap Use This iPad as My Location.

Note: To share your location from a different device, open Find My there and change your location to that device.

You can also change your location sharing settings in Settings > [your name] > Find My.

Set a label for your location

You can set a label for your current location to make it more meaningful (like Home or Work). When you tap Me, you see the label in addition to your location.

  1. Start the Find My app on your iPad.
  2. Tap Me at the bottom-left side of the screen. Tap Location Label.
  3. Select a label.

    To add a new label, tap Add Custom Label, enter a name, then tap the Done button.

Share your location with a friend

  1. Start the Find My app on your iPad.
  2. Tap People at the bottom-left side of the screen, tap the Add button, and then choose Share My Location.
  3. In the With field, enter the name of a friend you want to share your location with (or tap the Add Contact button, then select a contact).
  4. Tap the Done button. Then choose how long you want to share your location.

    Tip: Set a duration or an end time for your location sharing by choosing Custom and adjusting the fields.

You can also notify a friend or family member when your location changes.

If you’re in a Family Sharing group, see our article, Share your location with family members.

Stop or pause sharing your location

Pause or stop sharing your location with a specific friend, or hide it from everyone.

  • Stop sharing with a friend: Tap People at the bottom-left side of the screen, then tap the name of the person you don’t want to share your location with. Tap the More button, then tap Stop Sharing My Location.
  • Pause sharing with a friend: Tap People at the bottom of the screen, then tap the name of the person you want to pause sharing your location with. Tap the More button, then tap Hide Location.
  • Hide your location from everyone: Tap Me at the bottom-left side of the screen, then turn off Share My Location.

Respond to a location sharing request

  1. Start the Find My app on your iPad.
  2. Tap People at the bottom-left side of the screen.
  3. Tap Share below the name of the friend who sent the request and choose how long you want to share your location.

    If you don’t want to share your location, tap Cancel.

Stop receiving new location sharing requests

  1. Start the Find My app on your iPad.
  2. Tap Me at the bottom of the screen and then turn off Allow Friend Requests.

See also

Tag: Find My

In the Find My app, once you share your location with a friend, you can ask to see their location on a map. After your friend accepts your request, you can see where they are. When you remove a friend, they come off your People list, and you come off theirs.

Ask to see a friend’s location

  1. Open the Find My app on your iPad.
  2. Tap People at the bottom-left side of the screen. Tap the name of the person whose location you want to see.

    If you don’t see a person in the list, make sure you’re sharing your location with them.

  3. Tap Ask To Follow Location.

As soon as your friend receives and accepts your request, their location appears for you. Check out our guide, Respond to a location sharing request.

Note: If your friend shows up in the People list but their location doesn’t appear on the map, ask them to confirm they’re sharing their location and that Location Services is turned on in Settings > Privacy & Security > Location Services > Find My.

Remove a friend

If you remove a friend, they disappear from your People list, and you disappear from theirs.

  1. Open the Find My app on your iPad.
  2. Tap People at the bottom-left side of the screen and tap the name of the person you want to remove. Then tap the More button.
  3. Tap Remove.

See also

Tag: Find My

When a friend shares their location with you, you can use the Find My app to locate them on a map.

When your friend can’t be located, “No location found” appears below their name, and if you aren’t following them, you see “Can see your location” instead. You can also contact a friend, get directions to them, and set a label for a location.

Here’s how to locate a friend in Find My on iPad.

The Find My screen open to the People list. There are four people in the list: Ashley Rico, Olivia Rico, Dawn Ramirez, and Will Rico. Their locations are shown on a map of San Francisco.

Note: Turn on Precise Location for the Find My app if you’d like to see how far away your friends are from you. See our article, Control the location information you share.

See the location of a friend

  1. Start the Find My app on your iPad.
  2. Tap People at the bottom-left side of the screen. Then tap the name of the person you want to locate.
    • If your friend can be located: They appear on a map so you can see where they are.
    • If your friend can’t be located: You see No location found below their name.
    • If you aren’t following your friend: You see Can see your location below their name. You can ask to see a friend’s location.

Contact a friend

  1. Start the Find My app on your iPad.
  2. Tap People at the bottom-left side of the screen. Then tap the name of the person you want to contact.
  3. Tap Contact and choose how you want to contact your friend. See Add and use contact information.

Get directions to a friend

To get directions to a friend’s current location, use the Maps app.

  1. Start the Find My app on your iPad.
  2. Tap People at the bottom-left side of the screen. Tap the name of the person you want to get directions to.
  3. Tap Directions to open Maps.

For help getting there, check out our guide, Get directions in Maps.

Set a label for a friend’s location

Setting a label like Home or Work for a friend’s current location makes it more meaningful, and whenever they’re at that location, the label shows up below your friend’s name.

  1. Start the Find My app on your iPad.
  2. Tap People at the bottom-left side of the screen and tap the name of the person you want to set a location label for. Then tap the more button.
  3. Tap Edit Location Name and select a label.

    To add a new label, tap Add Custom Label, enter a name, then tap the Done button.

Mark a friend as a favorite

A star marks your favorite friends. They appear at the top of the People list.

  1. Start the Find My app on your iPad.
  2. Tap People at the bottom-left side of the screen. Find the person you want to mark as a favorite.
  3. Do one of the following:
    • Tap the name of the person, tap the more button, then tap Add to Favorites.
    • Swipe left across the person’s name, then tap the star.

To remove a friend from your Favorites, swipe left and tap the star, or tap the friend, tap the more button, then tap Remove from Favorites.

See also

Tag: Find My

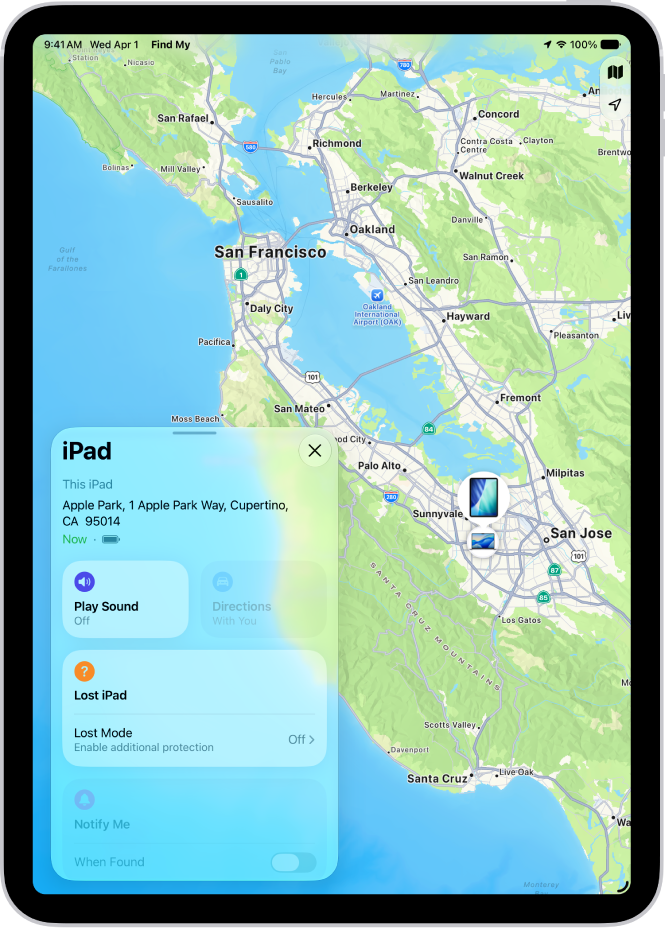
Use the Find My app on your iPad to locate lost devices, find everyday items using AirTags, and keep track of family and friends. Before you can find a missing device, though, you need to add it to Find My, and you can slip an AirTag into a gym bag or luggage.

A Find My screen showing an iPad.

Add your iPad to Find My

Before you can use the Find My app to find a missing device, you need to add the device to Find My. Go to the Settings app, tap your name, tap Find My iPad, then turn on Find My iPad. Add your other devices to Find My in the same way so you can see all of them in one place.

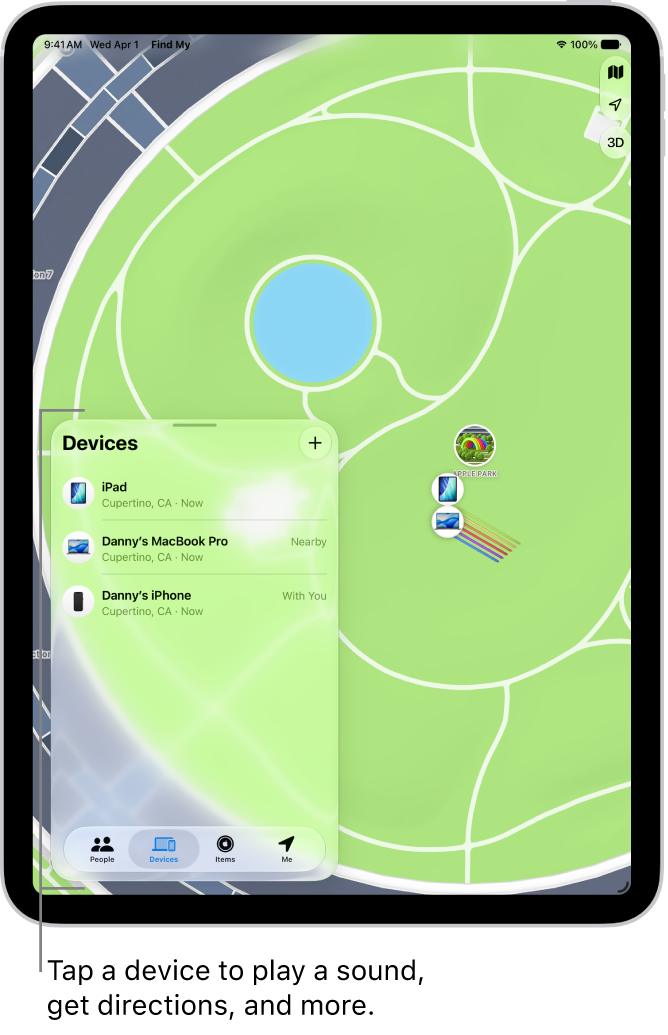
A Find My screen showing multiple devices sharing their location.

Find a missing Apple device

Go to the Find My app, tap Devices, then select the device you’re looking for. As long as it’s been added to Find My, you see it on a map, and you can play a sound on it to help narrow down your search.

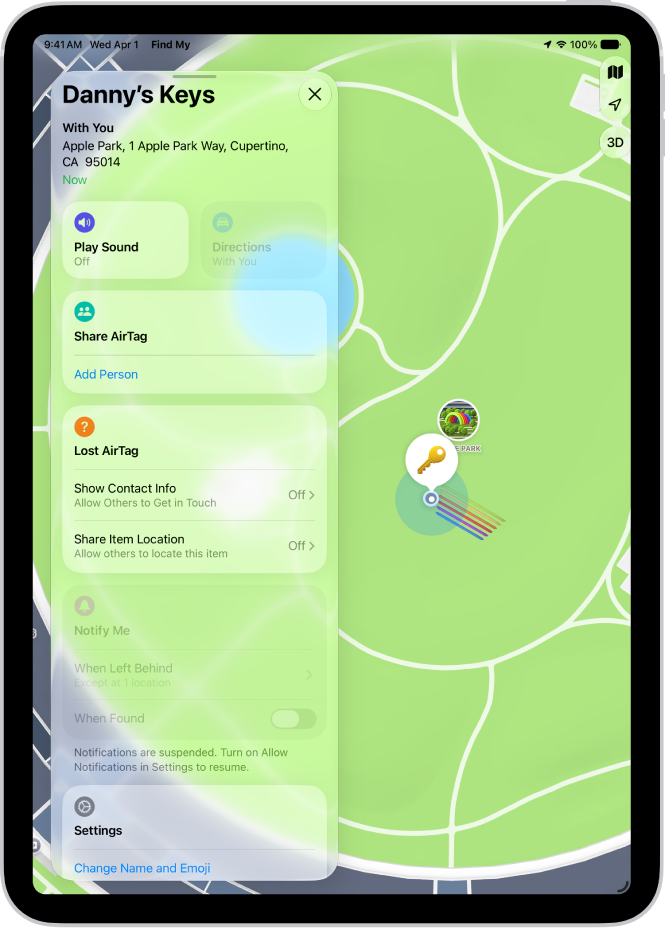
A Find My screen show an AirTags sharing their location.

Add an AirTag

You can add an AirTag to Find My, then slip it in a gym bag, backpack, or luggage in case those items go missing. Go to the Find My app, tap Items, tap the Add button, then follow the onscreen instructions. After you add an AirTag (and other compatible accessories) to Find My, they appear in the Items list, with their location visible.

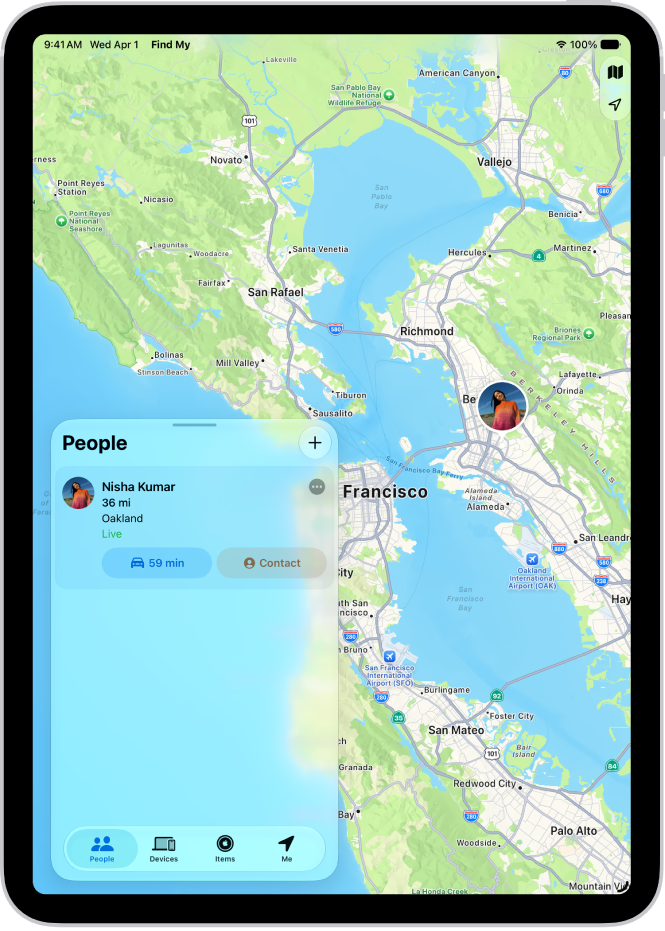
A Find My screen showing a friend’s location

Find friends

When you and your friends share your locations with each other, you can see each other in Find My. First, go to the Find My app, then tap People. Tap the Add button, tap Share My Location, then choose a contact. The People list shows friends who have shared their location with you.

To keep track of more of your stuff with Find My, take a look at these guides:

Tag: Find My