Got a tip for us?

iPhone

The iPhone is a smartphone from Apple that runs the iOS mobile operating system. Between its apps, communication features, the camera, mobile internet access, and other functionalities, the iPhone has quickly become an integral part of many peoples tech lives.

You can use read receipts to automatically let someone know when you’ve seen their text messages. When read receipts are turned on, the sender sees the word “Read” below messages they’ve sent to you. If you haven’t read their message, the sender sees “Delivered.”

You can turn on read receipts for everyone or for individual contacts. You can also get read receipts when someone else sees your messages, and turn read receipts off again for one person or for everyone.

Turn on read receipts

Turning on read receipts lets everyone know when you’ve opened their messages.

  1. Start the Settings app on your iPhone.
  2. Tap Apps, then tap Messages.
  3. Turn on Send Read Receipts.

Note: Turned off read receipts for a particular contact? You’ll have to switch the setting back on for that one contact individually. (The steps are in Turn on read receipts for one person, below.)

Turn off read receipts

To keep others from knowing you’ve opened their messages, turn off read receipts.

  1. Start the Settings app on your iPhone.
  2. Tap Apps, then tap Messages.
  3. Turn off Send Read Receipts.

Note: This only changes conversations with contacts whose read receipts you never turned on individually. (For a single contact, see Turn off read receipts for one person, below.)

Turn on read receipts for one person

Even if you turned off read receipts generally, you can turn on read receipts in a conversation so that one recipient knows when you’ve seen their incoming messages.

  1. Start the Messages app on your iPhone.
  2. Tap a conversation, then tap the contact icon at the top of the conversation.
  3. Turn on Send Read Receipts.

Turn off read receipts for one person

Turned on read receipts for an individual and want them to stop getting read receipts? You can switch the setting off for only that contact.

  1. Start the Messages app on your iPhone.
  2. Tap a conversation, then tap the contact icon at the top of the conversation.
  3. Turn off Send Read Receipts.

Get read receipts when someone else sees your messages

You can only turn on read receipts for yourself. If you’d like read receipts when your messages are opened, the recipient needs to turn them on, as covered in Turn on read receipts for one person, above.

You can increase the size of text on your iPhone, make the text bold, choose your preferred look for Liquid Glass, and magnify the entire screen.

Liquid Glass can have more tint or be more clear, though if Reduced Transparency or Increased Contrast is on, you’ll need to turn them off first. And if you want to increase text size further or bump up the contrast, there are more options in Display & Text Size, so it’s easier to read your screen.

Adjust the text size

  1. Open the Settings app on your iPhone.
  2. Tap Appearance, then tap Text Size.
  3. Drag the slider left or right to change the text size.

Make the text bold

  1. Open the Settings app on your iPhone.
  2. Tap Appearance, then turn on Bold Text.

Choose your preferred look for Liquid Glass

  1. Open the Settings app on your iPhone.
  2. Tap Appearance, then tap Liquid Glass.
  3. Drag the slider to the right to increase the tint of Liquid Glass, and to the left to make Liquid Glass more clear.

Note: You can’t change the look for Liquid Glass while Reduced Transparency or Increased Contrast is turned on in Accessibility settings, so turn them off first.

Magnify the entire iPhone screen

  1. Open the Settings app on your iPhone.
  2. Tap Appearance and tap Display Zoom. Then tap Larger Text.
  3. Tap the Done button, then tap Use Zoomed.

If you want to increase text size further, bump up the contrast, or make additional adjustments so it’s easier to read your screen, open the Settings app, tap Accessibility, then tap Display & Text Size.

Use the Find My app to mark a missing iPhone, iPad, iPod touch, Apple Watch, Mac, supported AirPods, or iPhone Wallet with MagSafe as lost. In order to mark a device as lost, you must turn on Find My [device] before it’s lost.

When you do, a confirmation email is sent to your Apple Account email address, and you can add a message to the device saying it’s lost and how to reach you.

What happens when you mark a device as lost?

  • A confirmation email is sent to your Apple Account email address.
  • You can create a message for the device that says it’s lost and how to contact you.
  • For an iPhone, iPad, iPod touch, Mac, or Apple Watch, your device doesn’t display alerts or make noise when you receive messages or notifications, or if any alarms go off. Your device can still receive phone calls and FaceTime calls.
  • For applicable devices, payment cards and other services are suspended.

Mark a device as lost

If your device is lost or stolen, you can lock your Mac or turn on Lost Mode, which works with your iPhone, iPad, iPod touch, Apple Watch, supported AirPods, and iPhone Wallet with MagSafe.

  1. Start the Find My app on your iPhone.
  2. Tap Devices and tap the name of the lost device. Then tap the More button
  3. Tap Lost Mode.
  4. Follow the onscreen instructions, keeping the following in mind:
    • Passcode: If your iPhone, iPad, iPod touch, or Apple Watch doesn’t have a passcode, you’re asked to create one now. For a Mac, you must create a numerical passcode, even if you already have a password set up on your Mac. This passcode is distinct from your password and is only used when you mark your device as lost.
    • Contact information: For iPhone, iPad, iPod touch, Mac, or Apple Watch, the contact information and message appear on the device’s Lock Screen. For AirPods or iPhone Wallet with MagSafe, the information appears when someone tries to connect with your device.
  5. Tap Activate (for an iPhone, iPad, iPod touch, Apple Watch, AirPods, or iPhone Wallet with MagSafe) or Lock (for a Mac).

Once the device is marked as lost, Activated appears below the Mark As Lost section. And if it wasn’t connected to a network when you marked it as lost, you’ll see Pending until it goes online again.

Change the information for a lost device

You can adjust the information in the Lost Mode message for your Apple Watch, iPhone, iPad, iPod touch, or iPhone Wallet with MagSafe once you’ve marked it as lost.

  1. Start the Find My app on your iPhone.
  2. Tap Devices, tap the name of the lost device, and then tap the More button.
  3. Below Lost [device], tap Pending or Activated.
  4. Update the information, then tap Done.

Turn off Lost Mode for an iPhone, iPad, iPod touch, Apple Watch, AirPods, or iPhone Wallet with MagSafe

Once you find your lost device, you can turn off Lost Mode.

  1. Start the Find My app on your iPhone.
  2. Tap Devices and tap the name of the lost device. Then tap the More button
  3. Tap Pending or Activated below Lost [device], tap Turn Off Mark As Lost, and then tap Turn Off.

On iPhone, iPad, iPod touch, or Apple Watch, entering your passcode on the device also turns off Lost Mode.

Attaching iPhone Wallet with MagSafe to your iPhone turns off its Lost Mode.

Unlock a Mac

When your lost Mac turns up, do one of the following:

  • Mac with Apple silicon: Enter your Apple Account password.
  • Intel-based Mac: Enter the numeric passcode on the Mac to unlock it (the one you set up when you marked your Mac as lost). If you forget your passcode, you can recover it using Find Devices on iCloud.com.

If you lose your iPhone, Find Devices on iCloud.com lets you turn on Lost Mode.

Tag: Find My

With Continuity Camera, you can use your iPhone as your Mac webcam or microphone, and take advantage of the powerful iPhone camera and additional video effects. You can connect wirelessly, or with a USB cable for a wired connection.

It works best with your iPhone mounted in landscape orientation near your Mac, with the rear camera facing you. You can also use your iPhone as a webcam when making a FaceTime call on Apple TV 4K. And once it’s set up as a webcam, you can use Desk View and other video effects.
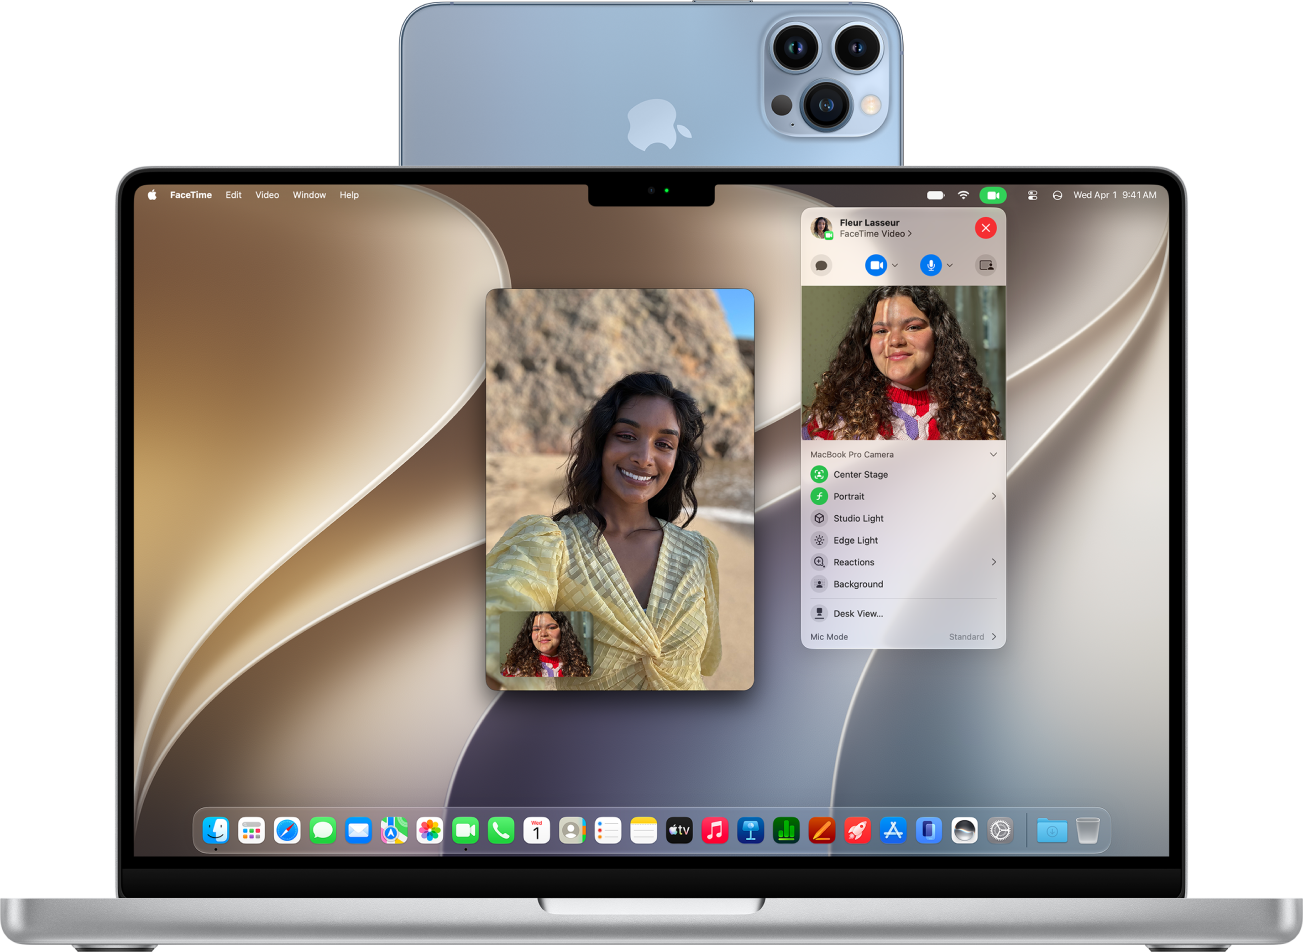
A MacBook Pro using an iPhone as a webcam and showing a FaceTime conversation.

Before you begin

Before you start, make sure your iPhone and Mac meet the following:

  • Both devices have Wi-Fi and Bluetooth® turned on.
  • You’re signed in to the same Apple Account on both devices.
  • The devices are within 30 feet (10 meters) of each other.
  • Both devices meet minimum system requirements for Continuity Camera.

If you have a VPN running, check its configuration. Settings that prevent local networking may interfere with some Continuity features.

Set up your iPhone for Continuity Camera

  1. Mount your iPhone using an iPhone-compatible mount or stand in landscape orientation. It must be near your Mac (within 30 feet) in a stable position, with its rear camera facing you.
  2. To turn on Continuity Camera, open the Settings app on your iPhone.
  3. Tap General and then tap AirPlay & Continuity.
  4. Turn on Continuity Camera.

Continuity Camera works wirelessly, but you can also connect your iPhone to your Mac with a USB cable. The cable that came with your iPhone works, or you can use another cable that matches the ports on your iPhone and Mac.

Note: If you connect your iPhone and Mac with a cable and see an alert on your iPhone that says Trust This Computer? tap Trust. You may be asked to enter your device passcode to proceed. If you see an alert on your Mac that says “Allow accessory to connect?” click Allow.

Use your iPhone as a webcam for Mac

  1. On your Mac, open any app that has access to the camera or microphone, like FaceTime or Photo Booth. You can also use this feature with many third-party apps that access the camera or microphone.
  2. In the app’s menu bar or settings, choose your iPhone as a camera.

    Note: The location of these settings can vary depending on the app. For instance, in FaceTime, click the Video button in the menu bar, then choose your iPhone. Or in Magnifier, click Camera in the menu bar, then choose your iPhone.

    Your iPhone begins streaming audio or video from the rear camera to your Mac.

  3. To control video or audio, do any of the following:

    • Pause the video or audio: On your iPhone, tap Pause. You can also unlock your iPhone to pause video or audio by swiping up.
    • Resume the video or audio: On your iPhone, tap Resume. You can also resume by locking your iPhone.
    • Stop using your iPhone as a webcam or microphone: On your Mac, quit the app.

Note: For best results, charge your iPhone with a USB cable while Continuity Camera is turned on.

You can move your iPhone and change its orientation while streaming video or audio. For the best results, though, keep your iPhone mounted and in landscape orientation.

Video effects like Center Stage, Edge Light, and Portrait mode are available when you’re using your iPhone as a webcam.

Turn on Desk View

Desk View and other video effects are available in an app that supports video, once you’ve set up your iPhone as a webcam.

  1. On your Mac, do either of the following:

    • FaceTime: Start your video call, click the More button in the bottom of the video window, and then choose Desk View.
    • Other apps that support video: Click the Video button in the menu bar. Then click the Desk View button.
  2. Click Share Desk View.

    Desk View opens, which mimics an overhead camera and shows a top-down view of your desk.

  3. Use the Desk View setup window on your Mac to align your desk with the camera. To zoom in or out, drag the onscreen control at the bottom of the window. When you’re ready to share your desk view on the video call, click Share Desk View.

    Note: To share what’s on your desk in a third-party app, use the app’s screen sharing feature to select the Desk View window for sharing. To find out how, see the developer’s instructions or explore the app’s menus and settings.

  4. To turn off Desk View, click the Close button to close the window.

Use your iPhone as a microphone for your Mac

On a Mac without a built-in or external microphone, you can use your iPhone as a microphone.

  1. On your Mac, open the System Settings app.
  2. Click Sound in the sidebar. (You may need to scroll down.)
  3. Click Input and select your iPhone in the list of sound input devices.

Note: Using your iPhone as a microphone on a Mac only works when the iPhone is in landscape orientation and stationary, with its screen turned off.

Remove your iPhone as a webcam or microphone option for your Mac

On your iPhone, tap Disconnect, then confirm that you want to disconnect.

Your iPhone is removed from the camera and microphone lists in apps, and also from the list of sound input devices in Sound settings.

To reconnect your iPhone as a webcam or microphone, connect it to your Mac with a USB cable, then follow the steps to use your iPhone as a webcam or use your iPhone as a microphone, above.

If Continuity Camera isn’t working

  • Make sure that your iPhone and Mac have Wi-Fi and Bluetooth turned on.
  • Your devices must be within 30 feet (10 meters) of one another and, for best results, your iPhone should be mounted and in landscape orientation.
  • Connect your iPhone to your Mac with a USB cable and check again. (If it’s already connected with a cable, disconnect and reconnect it.) If your iPhone asks you to trust the computer or your Mac asks you to allow the accessory, be sure to give permission.
  • Make sure that you aren’t using another Continuity feature, such as iPhone Mirroring.
  • Check that your devices meet minimum system requirements for Continuity Camera.

Shared password groups are an easy and secure way to share passwords, passkeys, and Sign in with Apple credentials with your family and trusted contacts. Anyone in the group can add passwords, passkeys, and Sign in with Apple credentials.

When a shared credential changes, it changes on everyone’s device. You can create a group, manage it, and respond to an invitation to join one.

Here’s how to share passwords and passkeys with people you trust on iPhone.

Create a group

Note: You need to be signed in to your Apple Account to create a shared password group.

  1. Open the Passwords app on your iPhone.
  2. Tap the New Shared Group button.
  3. Enter a name for the group, then tap Add People.
  4. Type the name, email address, or phone number of the person or people you want to add and tap Add. Note: To add someone to your group, they must be in your contacts and have an iPhone, iPad, or Mac with iOS 17, iPadOS 17, macOS 14, or later. If they can be added to the group, their contact information appears in blue. If it appears in gray, their iPhone, iPad, or Mac might not support shared password groups.
  5. Tap the Create button.
  6. Select the passwords you want to share with the group. Tap Move.

If you don’t want to share any passwords yet, tap the Close button. You can notify the people you’ve invited to the group, and they can also see the invitation in Passwords > Group Invitations. Your shared passwords are saved in iCloud Keychain, and you can use them like any other saved password. You receive a notification whenever anyone else is invited to the group.

Manage a group

If you created a group, only you can add or remove other members, or delete it. Other members don’t have these options, but they can leave at any time.

  1. Open the Passwords app on your iPhone.
  2. Tap the name of your group. You can add or remove other members, or delete the group.
  3. Do any of the following:
    • Add a member to the group: Tap your name and then tap Add People.
    • Remove a member from the group: Tap the member’s name, then tap Remove From Group.
    • Remove a shared password or passkey from the group: Tap Select and select the shared account with the shared password or passkey. Then tap the Delete button.
    • Delete the group: Tap your name and tap Delete Group.
  4. When you’re finished making changes, tap the Done button.

Respond to an invitation to join a group

  1. Open the Passwords app on your iPhone.
  2. Tap the invitation and then tap Accept to join the group. You can also decline the invitation.

Important: Don’t accept an invitation if you don’t recognize the sender.

You can use the Files app and other supported apps to access files stored on external devices, such as USB drives and SD cards, connected to your iPhone. Depending on your iPhone model and device, you may need an adapter. And the device must have only a single data partition.

Connect a USB drive or an SD card reader

  1. Attach the USB drive or SD card reader to the charging port on your iPhone using a compatible connector or adapter.

    You may need the Lightning to USB Camera Adapter, Lightning to USB 3 Camera Adapter, USB-C to SD Card Camera Reader, or Lightning to SD Card Camera Reader (all sold separately).

    Note: An external storage device must have only a single data partition, and it must be formatted as APFS, APFS (encrypted), macOS Extended (HFS+), exFAT (FAT64), FAT32, or FAT. To change the formatting of a storage device, use the Files app or a Mac or PC.

  2. Do any of the following:

    • Insert an SD memory card into a card reader: Don’t force the card into the slot on the reader; it fits only one way.

      Note: You can import photos and videos from the memory card directly to the Photos app.

    • View the contents of the drive or memory card: In a supported app (for example, Files), tap Browse and tap the name of the device below Locations. If you don’t see Locations, tap Browse again.
    • Disconnect the drive or card reader: Remove it from the charging port on iPhone.

    Note: External hard drives often require an external power source when used with iPhone. If an external hard drive doesn’t supply its own power, and your iPhone has a USB-C connector, you can use a powered USB hub. If your iPhone has a Lightning connector, you can use the Lightning to USB 3 Camera Adapter connected to a USB power adapter.

Tag: Files

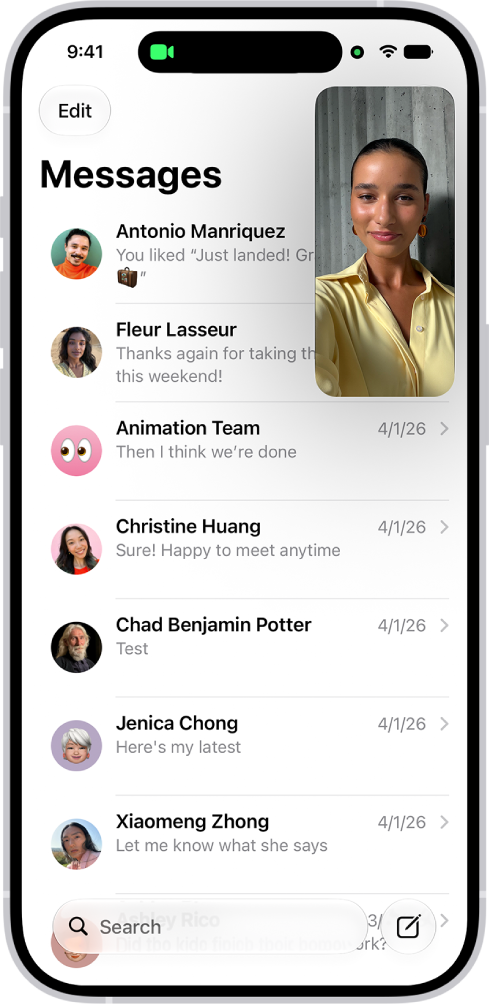
With Picture in Picture, you can watch a video or use FaceTime while you use other apps. The video window scales down to a corner of your screen, and you can resize it, move it to a different corner, hide it off the edge of the screen, or return to a full video screen.

Note: Picture in Picture only works with supported apps and videos, so if you don’t see the option, the app or video may not support it.

A FaceTime conversation taking place, while a note about kitchen decorating fills the rest of the screen.

Start Picture in Picture

While watching a video, tap the Minimize Video button in the video window.

With the video window scaled down to a corner of your screen, you can see the Home Screen and open other apps.

Manage the Picture in Picture window

When you see the video window, you can do any of the following:

  • Resize the video window: To make the small video window larger, pinch open. To shrink it again, pinch closed.
  • Show and hide controls: Tap the video window.
  • Move the video window: Drag it to a different corner of the screen.
  • Hide the video window: Drag it off the left or right edge of the screen.
  • Close the video window: Tap the Close button.
  • Return to a full video screen: Tap the Restore Full Screen button in the small video window.
Tag: iPhone

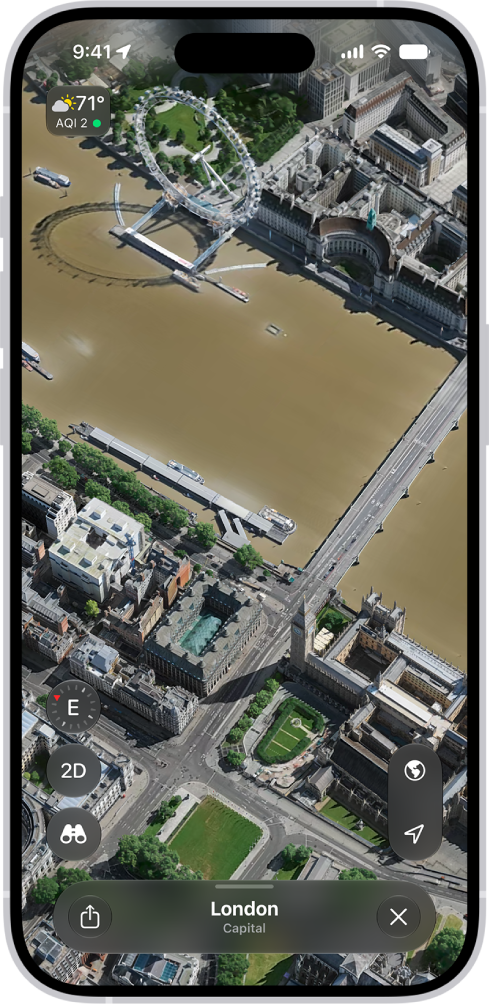
While exploring any location on a map, you can rotate the map to see an area with extra dimensions. In some locations, you can zoom in to see a detailed, 3D satellite view.

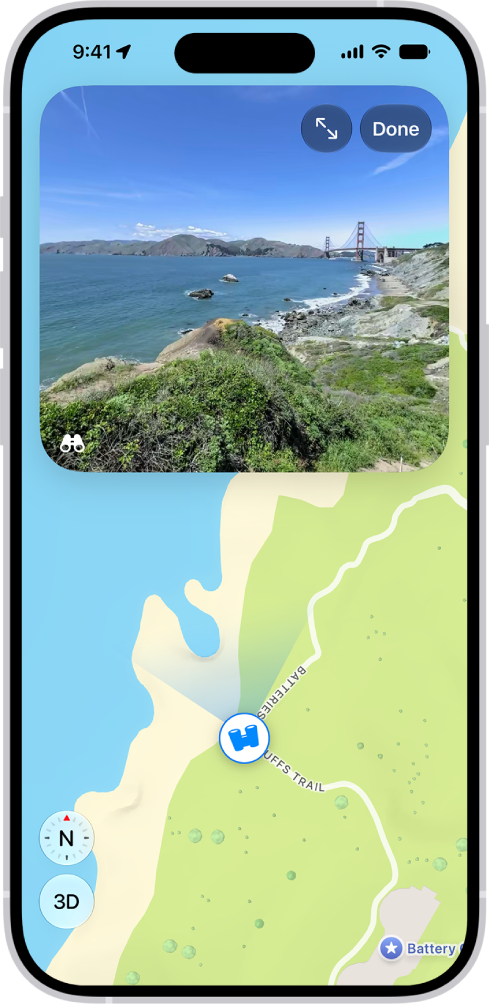
Maps uses aerial imagery to render cities in true-to-life detail. To see sharp details, such as architectural fixtures or the shapes of individual trees, zoom into a 3D satellite map. Or with Look Around, move through a 360-degree panoramic view.

Here’s how to explore maps with immersive views on iPhone.

Note: Not all features are available in all countries or regions.

Explore a city in 3D detail

  1. Open the Maps app on your iPhone.
  2. In most cities, tap the Exploring Map Mode button and tap Satellite. Tap the Close button.
  3. Pinch open to zoom in. Then swipe up with two fingers to see the map in 3D.

A 3D map in the Maps app, showing details of a city.

Look around locations

Some locations have 360-degree panoramic views you can look around.

A moveable, 360-degree panoramic view appears above a map of the area marked in the Maps app. The Look Around icon overlaid on the map points in the direction of the view.

  1. Open the Maps app on your iPhone.
  2. In select cities, tap the Look Around button near the bottom of a map.
  3. To change the view, do any of the following:
    • Pan: Drag a finger left or right on the scene.
    • Move forward: Tap the scene.
    • Zoom in or out: Pinch open or closed.
    • View another point of interest: Switch from full-screen view and then tap elsewhere on the map, or drag the map.
    • Switch to or from full-screen view: Tap the Enter Full Screen Mode button or the Exit Full Screen Mode button.
    • Remove labels in full-screen view: Swipe up from the place name near the bottom of the screen and tap Hide Labels.
  4. When finished, tap Done.

Move, zoom, or rotate a map or globe

  1. Open the Maps app on your iPhone.
  2. Do any of the following:

    • Move around in a map: Drag the map.
    • Zoom in or out: Double-tap. Then drag up to zoom in or drag down to zoom out.

      Or pinch open or closed on the map.

    • Rotate the map: Touch and hold the map with two fingers and then rotate your fingers.

      To show north after you rotate the map, tap the Compass button.

View a 3D map

  1. Open the Maps app on your iPhone.
  2. To turn a 2D map into a 3D map, do one of the following:

    • Drag two fingers up.
    • Tap 3D.
  3. While looking at a 3D map, you can do any of the following:

    • Adjust the angle: Drag two fingers up or down.
    • See buildings and other spatial details: Zoom in.
    • View the Earth: Zoom out until the map changes to a globe.

      Drag the globe to rotate it, or zoom in or out.

    • Return to a flat map: Tap 2D.
Tag: Maps

On supported models, Photographic Styles intelligently adjust specific colors in different parts of your photos to create a customized look. The style you select applies automatically to all photos you take, but you can make adjustments in Camera or edits later in the Photos app.

On iPhone 18 Pro models, you can also adjust the texture of a photo, for example, to soften skin or add film grain. Before you take a photo, you can also fine-tune a style’s tone, color, texture, and intensity. And you can remove or reset a Photographic Style.

Note: On models that support latest generation Photographic Styles, you can only edit Photographic Styles later in Photos if Camera captures photos with High Efficiency image capture. If you need to turn on High Efficiency, go to Settings > Camera > Formats and tap High Efficiency.

Select a Photographic Style

Selecting a Photographic Style before you take a photo changes its overall mood. You can fine-tune the style’s tone, color, texture, and intensity as well.

  1. Open Camera on your iPhone.
  2. Tap the Camera Controls button or swipe up from the camera modes at the bottom of the screen.
  3. Tap Styles and then swipe left or right to preview the available styles.
  4. On models that support Photographic Styles 2 and Photographic Styles 3, tap Customize and then do any of the following:
    • Adjust the tone and color: Drag your finger on Camera Control Status. On iPhone 18 Pro models, tap Palette first.
    • Control the intensity of the style: Drag the slider.
    • Change the texture: Tap Texture. Then choose a texture such as Soft Skin, Glow, or Film. Drag the slider to adjust the intensity, or choose Standard to apply no texture. Tap Grain to add film grain to any texture. (Available on iPhone 18 Pro and iPhone 18 Pro Max).
  5. On other iPhone models, drag the Tone and Warmth sliders to fine-tune the look of the style.
  6. Tap the Reset button to return to the default value, or tap the Dismiss Styles Control button to close the Style menu.

To reset or change the style you selected, follow the instructions above, then select Standard, or choose a different style.

In the Photos app, you can further refine the Photographic Style values after you take a photo.

Remove or reset a Photographic Style

You can remove your Photographic Style or set a new one.

  1. Open the Settings app on your iPhone.
  2. Tap Camera, tap Photographic Styles, and then select Use Standard or choose a different style.
Tag: camera