Got a tip for us?

AirPods

As a regular AirPods user you have probably already experienced it: an incoming message that interrupts your music. It can be very useful to have Siri read messages to you, but we have a tip for those who no longer want this.

For example, you can turn off Announce Messages with Siri

When wearing AirPods, Announce Messages with Siri can be very useful. Especially if you are expecting a message that you really don’t want to miss. But it can also be very annoying. Just in the middle of an intriguing podcast episode, Siri starts reading an incoming message. If the latter sounds familiar to you, it is definitely worth reading on.

Turn off Announce Messages with Siri

  1. Open the settings app on your iPhone and choose Notifications;
  2. Select Announce Messages with Siri;
  3. You can now turn off the feature for all apps by turning off the toggle at the top next to Announce messages with Siri .
  4. You can also choose to turn notifications on or off from a specific app. You can also choose between different senders: Favorites, Recent, Contacts and Everyone. For example, you can choose to receive a notification from your employer while listening to a podcast and to let other messages pass you by.

Add Announce messages with Siri to Control Center

Do you want to be able to adjust your settings regularly? Then put ‘Announce messages with Siri’ in your Control Center. This is done as follows:

  1. Go to Settings and select Control Center;
  2. Under More controls, tap the plus sign and choose Announce messages with Siri;
  3. You can now tap the icon when you want to turn the function on or off.

Looking for more tips to make the most out of your AirPods? Then GeeksModo is the right place. For example, we wrote 20 Best Tips And Tricks For Getting The Most Out Of Your Apple AirPods

Tags: AirPods, Siri

Several Apple users have reported that they can’t hear any sounds when they are using their AirPods. Specifically, the AirPods are connected but no sound. If your AirPods are not playing sound, then you are not alone. In this troubleshooting guide, I’ll explain how to fix AirPods sound issues for good!

AirPodsallows you to listen to music, Podcasts, audio books, take phone calls, and use Siri. Sometimes you may notice that the AirPods are not playing music from iPhone and you don’t know what to do. If you find your AirPods are not playing sound, you might get frustrated. Well, if that’s the case, then here are step-by-step instructions that will help you fix the AirPods not playing audio issue.

Please note: The fixes given in this article apply to all generations of the Apple AirPods, i.e., AirPods 1, AirPods 2, and AirPods Pro that won’t play sound.

See also:
AirPods not Charging?

How to fix AIRPODS THAT DO NOT HAVE SOUNDS

Solution #1: Clean your AirPods properly

AirPods are susceptible to dust and dirt from the environment. To clean your AirPods, use a dry, soft, lint-free cloth. To clean the microphone and speaker meshes, which is probably where most of the wax accumulates, it’s good to use a dry cotton swab. You can also remove debris from the meshes with a clean and dry soft-bristled brush. Do not use sharp or abrasive objects.

Solution #2: Update your iPhone

Head over to Settings > General > Software Update. If an update is available, download and install. Wait for the updates to be installed then turn off your device. Wait for a few minutes and turn it back on. Next, connect your AirPods and check if the music is playing.

Solution #3: Check your volume

AirPods not sounding loud? There is a setting on your iPhone that can limit the maximum level of volume that you can hear. Even if your iPhone is set to full volume, you may not be able to hear any sounds if your device has a low volume limit. If you are experiencing AirPods not playing music but connected issue, head over to Settings > Music and then tap on the “Volume Limit” option. Ensure that the limit is set to the maximum.

Solution #4: Connect your AirPods properly

Navigate to the home screen on your iPhone. Hold the case with the AirPods next to your iPhone. If the setup pop-up appear, all you have to do is tap connect. Press “Done” after the AirPods is connected.

Solution #5: Check your AirPods battery level

Check the level of your AirPods’ battery. If it’s low, charge them as soon as possible. Simply put them in the case and let them charge for about 15 minutes.

Solution #6: Turn on Bluetooth

Head over to settings on your iPhone and tap on Bluetooth. Make sure that the Bluetooth is turned on.

Solution #7: Reset your AirPods

AirPods not playing music from iPhone? Well. Put the AirPods in their case and gently close the lids. After a few seconds, flip open the lids. Press the setup button on the back of the case for a few seconds until the light turns white.

Solution #8: Unpair and reconnect your AirPods

Head over to Settings on your iPhone and then tap Bluetooth. Now, tap Forget this Device to unpair them. Pair them again by turning on your Bluetooth.

Solution #9: Turn off and Turn on your iPhone

To do this, head over to Settings > General > Shut Down. Wait a few seconds and turn your iPhone back on

Solution #10: Disable automatic detection

Head over to Settings and tap on Bluetooth. Tap the AirPods menu then toggle off the option that shows “Automatic Ear Detection.”

Solution #11: Make sure your iPhone and AirPods are paired

Some users pair their iPhones with Bluetooth headphones and external speakers etc. with time, these connections might cause some issues, especially when you want to build a connection between your AirPods and iPhone. If your AirPods are not playing audio, disconnect your iPhone from any external speaker or headphone. On your iPhone, head over to settings > Bluetooth. Here, ensure that your AirPads and iPhone are connected.

Solution #12: Reset network settings

If your AirPods are not working, you may want to reset the network settings on your iPhone. This will reset call settings, WI-FI networks, as well as Bluetooth devices. This will resolve most network problems allowing you to hear your AirPods.

Please follow these steps to reset the network settings

  1. Open the Settings app on your iPhone..
  2. Now, tap on the option labeled general.
  3. Scroll down and tap on the button labeled reset and then follow the onscreen instructions.

After resetting, establish a Bluetooth connection between AirPods and iPhone once your device reboots. All the connection problems should then be fixed.

If you are still experiencing AirPods not playing sound issue, then, you may want to contact Apple Support. You can also get a representative through live chat.

See also:
AirPods not connecting?

Tag: AirPods

Are your Apple AirPods 3 not working? Whether your AirPods 3 can’t connect, they keep pausing, or the audio is poor, here are all the common issues and fixes.

If you find your Apple AirPods 3 not working properly, it can be quite frustrating. The good news is that there’s a quick fix for most AirPods 3 problems, and a few other tricks you can try if your issues persist. Sometimes the problem isn’t with the AirPods at all, but rather the source device, ear wax, or an aging battery.

So here’s our third-generation AirPods troubleshooting guide for solving common issues.

How to Reset Your third-generation AirPods and Fix Most Problems

This tip takes the classic “turn it off and on again” philosophy and applies it to Apple’s third-generation AirPods. You can reset your third-generation AirPods back to an “as new” state by resetting them. After this, simply pair them with your iPhone again and everything should work as normal.

To reset your third-generation AirPods:

Place both the left and right earbuds properly into the charging case.
Once you have ensured the earbuds are properly in the charging case, press and hold the Setup button on the case for 15 seconds until the LED flashes. Open your AirPods case near your iPhone and follow the pairing procedure.
You won’t need to pair your AirPods 3 with every Apple device going forward, since the earphones automatically pair via iCloud. By the way, you should also check to make sure you don’t have fake AirPods 3 if you encounter problems often.

If you’re still experiencing problems with your third-generation AirPods, the following troubleshooting tips can help.

How to Find Lost AirPods (3rd generation)

You can use Apple’s Find My tool to locate your AirPods (3rd generation), but there are a few caveats to doing so. If they’re still powered on, Find My will use the device you’re connected to for a location fix. If your AirPods 3 are in their case or have run out of battery, you will see their last known location.

To locate your AirPods 3:

Head to iCloud.com in your web browser.
Sign in and click on Find iPhone.
At the top of the screen, click the All Devices dropdown list.
Select your AirPods 3 to see their location.
If you know your AirPods are somewhere in your house and you’re having trouble finding them, click the Play Sound option and listen for beeping. This won’t work if they’re both in the case and powered off.

Solving AirPods (3rd generation) Patchy Audio and Static Problems

If you’re having audio problems with your AirPods (3rd generation), you might be too far from your source. The 3rd generation AirPods boast an impressive range of around 100 feet, but this can dip dramatically when you introduce obstacles, like walls, or sources of interference.

If you can put your source device (like an iPhone or iPod) in your pocket, this won’t be a problem anymore. For static sources like a computer, you’ll have to stay within range for optimal audio quality. It’s also possible for sources of interference to reduce the range of your AirPods.

In particular, Wi-Fi is known to interfere with the W1 chip inside your AirPods. You can help reduce this problem by turning off Wi-Fi on your iPhone or moving to another area to take a call.

AirPods (3rd generation) Keep Pausing and Playing Erratically

Your AirPods (3rd generation) have proximity sensors on them, which detect when you put them in or take them out of your ears. Doing so will automatically play or pause content unless you’ve specified otherwise. If you’re wondering why your AirPods (3rd generation) keeps pausing while they’re still in your ears, it’s possible there’s a problem with the sensors.

You can disable this feature in your AirPods settings under Settings > Bluetooth. Tap on the i next to your AirPods and toggle Automatic Ear Detection off. This will reduce the battery life, since your AirPods will use the same amount of power whether you’re wearing them or not, but at least it’ll mean your 3rd generation AirPods won’t keep pausing anymore.

You may also want to try resetting your AirPods, as we showed you earlier. If you think there’s a problem with your 3rd generation AirPods and you can’t resolve this issue, it’s best to contact Apple Support for a possible repair or replacement.

AirPods (3rd generation) Automatic Ear Detection Not Working

Automatic Ear Detection pauses your music or other content when you remove the AirPods from your ears. If this doesn’t happen for you, first check you have the feature enabled. Head to Settings > Bluetooth, tap on the i next to your AirPods, then make sure Automatic Ear Detection is on.

Next, make sure your AirPods are clean! The proximity sensor will not work if ear wax or other gunk is covering it. This will cause your earphones to behave as if they’re constantly in your ears. Don’t forget to clean the case (it’s easy with a cotton swab and some isopropyl alcohol).

AirPods (3rd generation) Won’t Connect to Your iPhone

If you can’t connect your 3rd generation AirPods to your iPhone, try putting them back into the charging case and waiting around 15 seconds. Take them out again, then try reconnecting. You can manually force the connection by opening Control Center, tapping on the top-right corner of the Now Playing box, and manually selecting your AirPods.

The problem may be isolated to your iPhone. Try disabling Bluetooth by toggling Airplane Mode on and off again (access Control Center, tap on the plane icon, wait a few seconds, then tap it again). If this still doesn’t work, restarting your iPhone may do the trick.

AirPods (3rd generation not working still? Reset your AirPods as per the above instructions and try pairing them again. If you don’t see any LEDs, your AirPods are out of battery. Charge them for a few minutes and then try again.

AirPods (3rd generation) Won’t Connect to Your Mac

This is often a problem with older Macs, which have notoriously flaky Bluetooth chips. Begin troubleshooting by turning off Bluetooth. To do so, open the Control Center on your Mac and click to toggle the Bluetooth icon. Wait a few seconds, then turn it back on and try again.

If that doesn’t work, you can also kill the Bluetooth daemon that runs in the background on macOS. Note that you will lose connection to other Bluetooth devices as part of this command.

To do this, open a new Terminal window and type:

sudo pkill blued
Then hit Enter and type in your admin password, followed by Enter again. Wait a second or two and try connecting your earphones again.

AirPods (3rd generation) Won’t Charge

Some users have reported that their AirPods 3 won’t charge properly. Apple recommends checking your charging cable first, which you can do by attempting to charge your iPhone with it. If this works, move on to checking the Lightning port on your AirPods charging case instead.

Since many of us carry our AirPods in pockets and bags, fluff and other debris can become lodged in the charging port. You can clean these out using a thin object, like a straightened paperclip or a pin. I prefer using the same Apple SIM key you’d use to access the SIM tray on an iPhone. Simply scrape the inside down and remove anything that shouldn’t be in there, but be very careful you don’t damage any of the delicate metal connectors inside the port.

If you’re confident the cable works and there’s nothing stopping your Apple AirPods 3 from charging, leave them connected to a power source for 15 minutes and come back. If they’re still dead, it might be time to contact Apple for repair or replacement.

AirPods (3rd generation) Battery Draining Too Fast

You can optimize your 3rd generation AirPods’ battery life by leaving Automatic Ear Detection enabled. Check this by heading to Settings > Bluetooth and tapping the i next to your AirPods. If it’s on, a software quirk may be causing your issue. In this case, you should reset your AirPods, as detailed earlier.

Don’t forget that the battery in your AirPods 3 and charging case are just like the battery in your iPhone. The more cycles these devices complete, the lower the overall battery charge. This is simply how lithium-ion batteries age.

Apple offers AirPods Service and Repair, allowing you to replace the batteries in your AirPods for $49 each, and the battery in your charging case for another $49.

Since your AirPods (3rd generation) are still under warranty, you won’t be charged.

Tag: AirPods

So… you’ve got that gorgeous iPhone and- if you followed the
previous fight
– a shiny new pair of AirPods 2 (unless you, like me, couldn’t decide and got both AirPods and BeatsX).
But… that colleague sitting besides you just went in on a pair of AirPods Pro… and you now have AirPod envy.
Are her Pro-labeled Pods better than your second-generation ear-toothbrushes?
In this article, I’m comparing the
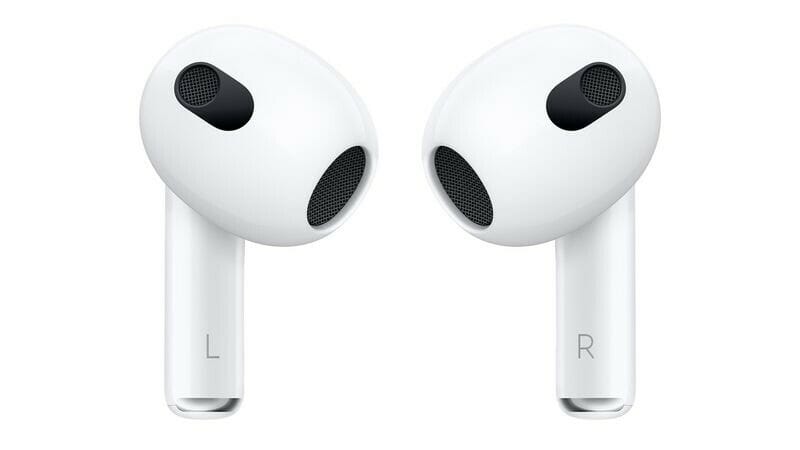
AirPods 2
and the
AirPods Pro
because… well, just because. It’s up to the contest to determine which are the better choice. Set?
3… 2… 1… Fight!

Price

As with my comparison of AirPods 2 Vs. BeatsX, we need to talk about how much these toys are going to cost you. And, like with my comparison of AirPods 2 Vs. BeatsX, I feel obliged to remind you that your gorgeous iPhone came with a beautiful , perfectly usable pair of wired EarPods, EarPods that I personally misplaced within a week of getting the new iPhone. EarPods which cost $29.99 to replace, should you choose to.

Right. Let’s tear the band-aid. AirPods Pro will set you back the “premium” price of $249.99. Yowza. For that amount, you could have bought both pairs of headphones from the previous fight. We’ll discuss what that sum of cash gets you in a moment.

The AirPods 2 comes in two price tags: $159 for the regular pair, and $199 if you want the wireless charger case.

In case you haven’t bought AirPods 2, the Pro model will cost you an additional $90 over the standard 2’s, and $50 over the wireless charging Pods. Or, if you, like me, have already bought AirPods 2, you will have to fork out additional $249.99, which, admittedly, is a tough pill to swallow.

Winner: Too soon to tell.

Battery Life and Connection

One good thing about battery life is that both the AirPods 2 and the AirPods Pro have more or less the same battery life.

Both sets will get you around 5 hours on a charge, and both charging cases carry a max of 24 hours of recharge when you put the Pods away.
That does not mean everything is the same; if you choose to use the AirPods Pro’s Transparency or Noise Cancelling features, you’ll shorten the battery life by about 30 minutes per charge.
Having said that, Apple estimates that in the case with both pairs, you will get about an hour of use after five minutes of charging.

As far as the connection is concern, both are bundled with the same H1 chip and therefore will pair instantly and seamlessly with your Apple devices, and can quickly switch between devices associated with your Apple ID.

Winner: The AirPods 2 have a half-an-hour lead over the AirPods Pro if you utilize the more advanced features (which honestly, you are, because why else would you purchase the AirPods Pro?), but with the similarly quick charge time in the case, I personally don’t think 30 minutes is enough to claim victory here. So, tie.

Sound and Features

Finally. This is where the differences start to emerge. Because I talked a lot about the features of the AirPods 2 in my last fight, I’ll mostly discuss what the Pro’s offers in comparison.

I’ll discuss fit in another category, but the first and most clear difference between the two sets of Pods is the Pods themselves. Not only do the Pro Pods come with a wireless charging case without having to fork out a few extra bucks, but the Pro’s have a complete different form factor. Of course you still have the stem that makes them appear like EarPods with the wires chopped off, but what you’ll notice is the way they go into your ear. While the traditional AirPods have maintained the same design of the EarPods, the AirPods Pro have adopted in-ear design complete with removable silicone tips.

Personally, , I’m not a fan of silicone tip headsets. But outside of Apple’s Ear and AirPod designs and over the ear headphones, most companies have adopted silicone tips. It’s all you ever see. For me personally, they give me a headache and make me feel as if I’m underwater.

One thing I didn’t know until I tested the AirPods Pro is that this is because this style of headset is putting pressure on your ears. Unlike AirPods (1 and 2) and EarPods, which are open enough to still let air in and out of your ears, the silicone tip design block everything up. Except for the AirPods Pro. Apple’s design includes vents that reduce the pressure, making them feel more comfortable than any other headphones of the same nature out there.

But the true magic happens when you pop them in your ears. After identifying the right tip size for your AirPods (via Settings, you can do a size test to find which tips fit the best; Thankfully, mine work with all three, but the smallest ones felt the most comfortable) and you pop them in, they sound… well, they sound almost the same as standard AirPods. However, they include two different modes you can activate.
The first is Transparency Mode, which uses the microphones to allow outside sounds to get in, making it feel almost like you aren’t wearing them at all. This mode allows you to keep abreast of your surroundings and even hold conversations with the Pods in (keep in mind, if music is playing, it’s a good idea to keep the volume low to avoid asking people to repeat themselves). Having said that, there’s a stigma with wearing headsets while trying to hold a conversation; even though you are pretty sure you can hear the other person with Transparency on, there’s a likelihood that the person you are conversing with may think you aren’t attentive because you didn’t take out your headsets.

While the Transparency mode is convenient, comparing them to the AirPods 2 and the original AirPods (which allows in ambient noise by design, whether intentional or not) there’s not much of a difference. Granted, you may not always want your AirPods to let in outside sound (and we’ll discuss that in a bit ), but if Transparency is the main reason you are considering the Pro’s over the 2’s, consider that you will hear ambient noise just as easily with either pair.

The second mode- and arguably the best- is Noise Cancellation. The Cupertino based brand states that with this mode, the Pro Pods play “anti-noise” which cancels out the outside sounds before they reach your ears. Now, I think calling it noise “cancelling” is a stretch; in real-life usage, it is more like noise dimming. As soon as you enable it, it feels as if someone turned the volume down on the external environment. You can still hear it- especially louder noises and voices- but it is definitely muted. Listening to music in this mode certainly enhanced sound and clarity over the regular Pods, and it is better for you, too; you don’t have to turn the volume up to unsafe levels to hear the music.

With Noise Cancellation enabled, the AirPods Pro certainly have better sound quality than the AirPods 2. In Transparency mode or with all modes turned off, the sound quality is, frankly, similar. I switched back and forth between the AirPods Pro and AirPods 2 and couldn’t notice a difference. At least, not enough of a difference to justify the extra bucks. Similarly, with the AirPods 2 in, I could still hear my surroundings about as well as I could with Transparency enabled with the Pros. If you are planning on utilizing Transparency mode at all time, the AirPods 2 are perhaps a better- at least a cheaper- option for you. However, if the Noise Cancellation feature sounds interesting, then definitely go for Pro.

Since both includes the H1 chip, they both can activate Siri with your voice. But the way you control them is totally different. If you are used to regular AirPods, the Pro design takes some getting used to. Instead of tapping your Pod, you are required to squeeze the stem. Each stem has a touch-capacitive button that produces a satisfying click sound in your ear (the click is played through whichever Pod you are interacting with). One squeeze plays or pauses the media, two squeezes plays the next track, three the previous track, and a long squeeze jumps between Noise Cancelling and Transparency.

While you can customize the tap settings for regular AirPods, you can only customize the long squeeze, selecting between mode switching and Siri summoning, the latter which is redundant because you can easily activate Siri with your voice. That said, you do get more controls with the squeezing than with tapping, as the regular AirPods can only have a maximum of one control per Pod.

There is no way to control volume outside of asking Siri to do it or using your iPhone or Apple Watch to do it.

Winner: I give it to AirPods Pro in this category. The Noise Cancellation mode alone is a big leap forward, but I also like that Apple found a solution for the pressure that makes it hard for me to use this style of an headphone. I’m not sure if Apple is the first company to vent the pressure, but they are the first one that I’ve tried.

Fit

Ah. Now, here’s where we come to it. If there’s Been one universal gripe about the original AirPods, is been that they are one size fits few. How then to the Pro Pods stack up?

They fit quite well at first; and unlike the regular AirPods design that is one-size-fits-a-few, the inclusion of different tip sizes means you will surely find the size that fits your ears perfectly.

Having said that, original AirPods have always fit my ears perfectly. But the AirPods Pro are a bit slippery, and that’s even before you pop them in your ears. I fumbled or dropped at least one of the Pro Pods while taking them out of the case around 50% more often than I ever had with the regular AirPods.

To make things worse, while they are in my ears, they have a tendency to slip out. Actually, I’ve tried all three tip sizes, and with each after a few minutes, I find myself pushing one of the pods (usually the left one) back in place. Granted, the regular AirPods and the EarPods have always had this issue, and I am one of the lucky few whose ears wonderfully fit the original design, but it just feels more prevalent with the AirPods Pro, or at least more noticeable; if you have activated the Noise Cancelling mode, the moment a pod begins to loosen its hold on your inner ear, sound begins to trickle in, a sound that otherwise the Pods would be actively cancelling.

I did a headache-inducing head-shake test, and the standard AirPods stayed in longer than the Pros. And I’m not the only one facing this issue; A lot of people online have talked about the AirPods Pro getting slicker over time and having challenge keeping them in.

Winner: Depends on your ears; I give this to the AirPods 2 because I just can’t keep a decent enough seal with the AirPods Pro to make the noise-cancelling feature worthwhile- or to shake the sensation that sooner or later I am going to lose one of the Pro Pods in the toilet or something. And that would be quite unfortunate. However, you may be lucky, particularly if the standard AirPods don’t fit your ears pretty well.

Everyday Usage

So here, sadly, is where AirPods Pro started to fall apart for me. Especially since I am upgrading from AirPods 2, which, frankly, are still pretty new to my headset collection. But this is possibly the most subjective category, so your experiences might differ from mine.

The first thing I noted about my usage of the AirPods Pro was that I wasn’t using them; they spent more time in my pocket than they did in my ears. However, that’s also the case about the AirPods 2. Although, I can use Transparency with the Pro’s and can hear my surroundings pretty well with the 2’s, if I’m not listening to something, I don’t like to have them in my ears. That, however, is mostly a personal preference.
My other usage issue is also of a personal nature, and this, dear reader, is where you will need to do your own homework to find out if this will be an issue for you. The AirPods Pro make my head hurt.

Here is the thing: apparently my ears are sensitive to the anti-noise that the Pods produce to cancel out the regular noise. This combination of noise and anti-noise brings about sensation of pressure in my ears. Even with Apple’s pressure vent, it simply feels like it is strengthening. It only takes minutes of listening in Noise Cancelling mode for the symptoms to manifest themselves, and while the sensation dispels the instant I switch to my AirPods 2 or my BeatsX headsets, a dull ache radiates through the back of my head for a few hours. It’s quite sad, but it is there. I’ve read online that some people are able to get over it, and others don’t experience it at all. But sadly, I’m not one of those people.

I also suffer from Tinnitus, which becomes much more noticeable with active noise cancellation. While music is playing there is no issue, but if my ears are ringing before I put the AirPods Pro in, it can get worse once they are blocking out the sound. On a possibly unrelated note, I’ve also noticed some disorientation while using them in Transparency mode, as if the pass-through effect is fidgeting with my equilibrium.

Again, perhaps my ears are just too sensitive to certain things; I’ve tried other styles of headsets that cause similar effects; both the ANC on Beats Studio 3 and the vibrations of Aftershockz Bone Conduction headphones give me headaches of the same nature, and the BeatsX definitely give me a similar feeling of pressure when they are inserted (though I attribute that more to the stuffing of silicone into my ear canal). There is no absolute best pair of headsets out there. However, I’m not about to part with $250 to have headaches all the time, no matter how charming the noise cancellation feature is.

Winner: Again, I give it to AirPods, for the simple reason that they don’t give me headaches that last for hours.

Bonus Round

I’ve explained in details on how the AirPods Pro stack up against the AirPods 2. But I want to take a moment now to compare them to other headphones I’ve got lying around.

For starters, the BeatsX headphones that I compared the AirPods to in my previous contest. While the BeatsX have a lot in common with AirPods Pro in the style of headphone, there are some pros and cons in each. Of course, the BeatsX have no active noise cancelling feature, however, if with the right size tips on them (and I wish Apple would extent the ear tip fit test in Settings to their other headphones), I couldn’t tell much of a difference between the active noise cancelling of the AirPods Pro and the passive noise cancelling of the BeatsX. Though with the AirPods, you don’t get that irritating rustling sound that persists with the BeatsX cable. But on the flip side, the around-the-neck design of the BeatsX means that even if one falls out of your ear, it isn’t going anywhere.

When looking at headphones with active noise cancelling, I also considered the Beats Studio3. It’s almost unfair to compare the massive over-the-ear Beats to the tiny in-ear AirPods, but since they both bundle this anti-noise feature, they are worth taking a look. While the Studio Beats do have the advantage of passive noise cancellation given their design, comparing the ANC head to head with the AirPods Pro is about equal. If I had to choose one, I think I would have chosen the AirPods, as the silence of the ANC is- I don’t want to say more noticeable, but maybe more apparent- however, with the Beats, the Active Noise Cancellation is optional and doesn’t affect the sound quality of the music (again, that passive noise cancellation does a good job in most cases ), whereas you get a noticeable increase in sound quality when you enable active noise cancellation with the AirPods Pro.

And while the AirPods Pro design minimizes noise and adds bass that the original design can’t compare to, it’s still no match against a proper pair of headphones. The Studio3 (and even the wired, on-ear Beats EP and the aforementioned BeatsX) deliver much more punch than the AirPods Pro can achieve. Granted, Beats are popular for being bass-heavy, but even compared to my fiance’s Skullcandy Hesh 3 headphones or JLab’s GoFlex sports headphones, the AirPods Pro are still lacking in delivering the oomph that other headphones in this price range can deliver.

And if the price is a key determiner, with $70, you can get JLab’s Air Sport or Air Executive, both of which will probably stay in your ears better than the AirPods Pro (particularly the Sport, which have an over-the-ear hook too hold them in place), fantastic passive noise cancellation (when I tried the Sports last year, I could hardly hear the lawnmower engine through the headphones), and a similar pass-through feature to Apple’s Transparency Mode called Be Aware Audio (although this admittedly sounds much more electronic than Apple’s version; you won’t be fooled out of knowing you are listening to a recording of the outside world).

I’m not going to pronounce a winner here, as this fight is exclusively between the AirPods Pro and the AirPods 2, but allow me to say that even for the charm of the AirPods Pro, there are better- and cheaper- options on the market.

Conclusion

Parting is such sweet sorrow. That’s what flashed through my mind as I drove to the Apple Store to return the AirPods Pro. I really wanted to love them. I really did.
But as you have seen, the AirPods 2 won this fight hands down, at least for me. Again, many of these categories are subjective and you may not find the issues I faced affect you at all. Take this less as a condemnation of the AirPods Pro and more of a personal experience that I am sharing with you.

But for shits and giggle’s, let’s run it down. The AirPods 2 are cheaper (especially if you already own them). Personally, they fit perfectly (and while they might not fit you well, many users have complained that the AirPods Pro are unnecessarily slick and that the silicone tips do very little to help them stay in), and they don’t cause headaches.

But even if those don’t hit you the same way they hit me, consider that the Active Noice Cancellation with the AirPods isn’t really that much better than the passive noise cancelling you get with the BeatsX, which costs $150 less; the Transparency mode feature, while a cool party trick, isn’t really any more transparent than the standard AirPods already were; and for the amount of $250, you can grab a much better headsets(albeit without the H1 chip and Apple’s magic pairing). Actually, with the same amount of money, you can get both pairs of headphones from the previous fight and have the best of both worlds (and more battery life between them).

It’s all, honestly, up to you. Personally, they didn’t work for me, but that isn’t saying that the AirPods Pro aren’t outstanding pieces of technology. I really loved the idea of having one pair of headsets that could do everything I needed them to while fitting inside the smallest pocket of my jeans. But alas, earwax*.

*Earwax is something significant to consider when wearing your headsets; particularly if your headsets are getting shoved into your ear canal. Be sure to clean your Headsets on a regular basis. And fun fact; Apple included a mesh filter inside the silicone ear tips of the AirPods Pro to trap earwax before it gets all over the headset grill. Sounds good, right. If I had done a category about earwax, the AirPods Pro would have taken the crown. Oh well.

Tag: AirPods

AirPods have changed my life, mostly for good, but in some ways, for bad.
Since I bought my first pair of AirPods at the end of 2018, they have been in my shirt pocket almost every day.
Not only have they been in my pocket, but one is usually in my ear most of the day as well. As soon as I get up, I often pop one in. Then when going to bed, I pop it out when I am falling asleep.

I have always longed for accessible technology that was small, really small. When Apple
introduced AirPods,
I fantasized about its potential. I longed for a beautiful new device that could rest gently and comfortably on my ear, something gorgeous that would tell me everything I wanted to hear.

In 2019 I probably listened to more podcasts, audiobooks, and music than any other year. You can tell from my usage in the past ten days that I have listened to over 50 hours of audio almost exclusively using my AirPods.
I listen to a lot of podcasts, and lately, a lot of YouTube in the background as well. Usually, all of the usage for YouTube would fall under podcasts, making podcasts around ~45 hours of listening but have been on a YouTube Premium trial to test it out.

Music is usually more and is also being taken up by YouTube usage, and I have also been taking a break on books after reading (and listening to) over 24 of them last year.
Still, a total of 50 hours of audio for a period of ten days is a lot. And I honestly don’t know if I would have managed without the convenience of AirPods.

So what possessed me to even consider buying Apple’s wireless AirPods? They are small, lightweight, easy to forget and always perch precariously from a tiny shelf of ear cartilage. I have learned two great facts about my AirPods over the last two years: They are easy to love and easy to lose.

My old
wired EarPods
were just fine for a long time. If I dropped an EarPod, I could simply trail the wire like bread crumbs to rediscover the treasure.
But, Apple cut my audio umbilicus with the new iPhone models by removing the dedicated headphone jack. I understand that wired EarPods are packaged with the
new iPhones,
but they use the Lightning port, which is also the way I fill my battery during the day. I decided I’d better get used to the wireless lifestyle as early as possible.

I took a deep breath and made the AirPods investment. Around the same time, I also bought the BeatsX wireless offering, as well as the BT Waves much less expensive headset. Nowadays, I almost never touch the BeatsX or BT Waves products. The AirPods are well-engineered, delightfully intuitive and much, much nicer. I love them to the core.

Still, AirPods have a weakness. Gravity. Since I work at home, I generally only use my AirPods in the house. This helps as they are more easily found when they fall off. Fortunately, they don’t shatter on impact. However, I remain fearful. Even after all these months, I still forget when my AirPods are dangling in place. On many occasions, I have lifted an arm to reach up into a kitchen cabinet, knocking an AirPod loose, immediately sending me into a frenzy. There is no dignity in my dropping to my knees on the tiled floor, hoping I do not land on the precious item, then sweeping the surface with my fingers, trying to recapture the elusive accessory.

My AirPods are even vulnerable when I sit in my living room comfy chair. My dog is frequently involved in displacing one or both AirPods as I unwind.
Tom has a couple of endearing traits that cause me minor grief. At least once a day, while I am sitting, Tom will stand on his two hind legs and drape his front paws over my shoulders. He really likes to wipe his nose on my shirt. I am his handkerchief. And, if those two front paws do not successfully fling my AirPods into the abyss, his other little habit certainly will. Tom thinks it is important to sniff my ears, just checking my identity to be sure that I am who I claim to be. That wet nose of his has launched many an AirPod.

Fortunately, I usually find the missing AirPods pretty easily, but I have occasionally needed to use the AirPod “Play Sound” option inside
the
“Find My” app.
The audible beacon it triggers is just loud enough for me to locate the missing accessory. Because I almost only wear my AirPods indoors, I have never had to go hunting outside where the ambient noise might drown out the emergency audio alert.

Of course, the fact that AirPods are so comfortable and easy to forget has left me susceptible to feeling a little foolish. Recently, I took my iPhone upstairs to the master bathroom. I set down my phone and AirPods case and stepped into the walk-in shower. I waited until the rest of me was clean before I started to shampoo my hair. And then I noticed my AirPods dangling from my ears. I’d been in the shower for about a half hour and was mortified. Rather than immediately step out of the shower with soapy hair, I carefully rinsed out the suds and toweled off. I stepped out, put the AirPods on a dry washcloth, and felt dumb as dirt. I patted them dry and decided to just see how permanent the damage was. I popped them back into my ears, started the Music app on my iPhone, and I immediately heard Justin Bieber singing, “love yourself.” Perfect! No damage at all. Somehow they survived a hot shower and shampoo. Do not try this at home. Your mileage may vary.

The previously water-logged pair still works like new. No effect on sound or battery life. What a delight! In fact, recently, I bought a new pair of
AirPods Pro
because I use them all day, every day. After about five hours, I hear the warning signal in the ear piece that the current set is down to 10% of their battery reserve. I immediately put the
first generation AirPods
back into their charging case and start using the AirPods Pro. Rather than wait fifteen minutes to get a decent charge on the depleted AirPods, I simply use the extra pair so that I have no loss in productivity. For me, purchasing a new set of AirPods Pro was very much worth the cost.

The ability to take one out of its case, knowing that it is fully charged, popping it in my ear, automatically connecting to my iPhone, then pressing play on whatever it is I was planning on listening to, has been such a subtle but outstanding life improvement that is hard to describe.
But this improvement has a downside, of course.
Being able to listen to audio comfortably for hours at a time at such a fantastic convenience means I am allowing a separation between myself and the world too easily.
I realized that when I am at home, I always have them in, or at least one, listening to a podcast, audiobook, or watching a video. It has made chores that much more enjoyable, which is a plus, but some chores that I share with my wife have now become cold and quiet. It has even caused my wife to listen to her headsets when we are cooking or cleaning since I am not available to talk.

At work, I am continually listening as well. Even when I get up to go to the bathroom, I make sure to have an AirPod in to listen to a podcast or a song on the way there and back. At our desks, at work, everyone is usually listening to something, but I can’t even walk from the parking lot to my office without popping in an AirPod.

My AirPods, and you can argue Podcasts and AudioBooks, have become my new Twitter or FaceBook when standing inline. Whenever I am at the bank or queuing for food at a restaurant, everyone has there phones out as they wait for their turn at the counter. I know longer stare at my iPhone in line as much anymore because I usually already have an AirPod in listening to my 30th podcast for the day.
Just like using your iPhone for boredom or a time-filler doesn’t always have to be a bad thing, no matter what some people say. But allowing yourself to get bored at times can help you in other ways, such as relieving any anxiety or allowing thoughts to come in organically instead of being forced through social media, authors, or podcasts.

So one thing I have learned in owning Airpods for over two years now is that, to me, audio has become my new boredom filler. Podcasts and AudioBooks are my new form of distraction being fed to me through two beautifully designed white wireless headsets.
Instead of scrolling through the infinity pool of Twitter or Facebook, I now get endless voices in my ear at all hours of the day. This has been a huge advantage in being able to consume so many audio books and podcasts, particularly those that provide tips on life and self-help.
But I am also realizing at the middle of 2020 that I gained a lot of self-help and new ways of living my life last year. The remainder of this year I hope to follow that trend and new knowledge instead of feeling like I need to continue to consume it so much.

There is no way I can cancel some of my favorite podcasts on these topics like The Tim Ferriss Show and Focused, but reading books I am taking a break from this year. I have a stack, digitally and physically, that I still need to read that I may take my time with, but I am not going to try and continuously listen to books throughout the year as I did before.

I have yet to do an actual AirPods review. It is not that I don’t want too, I think it is because when I first got them, there was no friction in becoming my new and, almost, only pair of headphones. I just started using them and never stopped.
Usually, when I write a review about a device, I try to stick to some narrative. Coming up with some pros and cons on the device I am reviewing then counter those pros and cons with reasons why they either don’t matter or should be a deal-breaker.

AirPods, unexpectedly, came into my life and just became an integral part of it promptly. There are cons, besides the ones I described above, causing me to disconnect with the world so easily, but others like them having a hard time to connect to my phone sometimes or them having a hard time switching inputs to another device like my MacBook or iPad.

It took almost a year for my ears to be comfortable with the design of the headphones, too, since I never really like the original EarPods Apple provides in the box with iPhones. They usually start to not last very long on a charge after a year and a half. Also, losing them can be very easy, and the Find My app on my iPhone doesn’t always work when trying to find one.
This is all to say I am never letting my AirPods go, and when these die as the last ones did, I will probably replace them pretty quickly. But I am learning from the habits that these headphones are creating and trying to be better when around my wife or coworkers and be present more.

The AirPod’s biggest pro is the fact that you can listen to anything fairly quickly without fail from your iPhone with comfort and hours at a time. I am most comfortable with them when working in my office, relaxing in the house, or riding in a car. That is most of my day. Even so, I still keep a set of my trusty old EarPods handy for times when walking outdoors or when lying in bed. My AirPods Pro are nice, and I’m glad I bought them, actually, I use them more when I travel by plane or train, when I am in a crowded venue or when I really want to block out the world.

Tag: AirPods

So, you’ve got a gorgeous iPhone. And you notice something awful. Something horrible. You don’t have a headphone jack.

What will you do?!? How are you going to listen to music on that flashy, new Spotify subscription? I mean… you could use the EarPods that came in the box- the ones with the lightning connector instead of a 3.5mm jack. You could spend $10 on a tiny adapter to… well… adapt your old, trusty headphones.
Or you could spend some bucks on Bluetooth headphones and make wires (mostly) a thing of the past.

What is dead may never die.
But which wireless headsets should you purchase? I mean, there are an array of Bluetooth headphones out there, however, I’m not here to discuss every option you could possibly purchase. Let’s discuss two of Apple’s own choices instead. Because if Apple expunged the headphone jack intentionally, they have to have their own options to listen to your music, right?

Granted, there are possibly better options than the AirPods 2 or the BeatsX- for instance, the AirPods Pro or the PowerBeats Pro, which Apple also made- but you’re on some sort of budget; after all, you just paid for a brand new iPhone. And possibly an Apple Watch. And you had to purchase a case for your iPhone. And an AppleCare+ protection plan. Now’s not the time to go nuts spending on wireless headphones that will, in effect, do the same thing those free EarPods with a lightning connector will do.

In this article I’m comparing the
AirPods 2
And
the BeatsX
since they are competitively priced and offers similar features. It’s up to the fight to determine which are the better choice. Set?
3… 2… 1… Fight!

Price

Let’s start by comparing the price before comparing the features. They aren’t cheap, and that’s a fact; the BeatsX will cost you $99, while the AirPods 2 will set you back $159, or $199 if you chose the version with a wireless charging case (you might be able to get the original AirPods for slightly less, but I mean slightly less).

$60 is a huge chunk of cash, but are the AirPods worth that additional bucks? Both options are still much cheaper than their Pro counterparts, but far more costly than options from companies such as Jlab and Sony.
But we can’t really tell whether the price is worth it or not until we talk about what each headphone brings to the table. Therefore, for the moment, this category has no winner.

Winner: Tie… for the time being.

Battery Life

Those freebie EarPods ($30 if you want to purchase a replacement pair, if we’re still hung up on prices) have one thing up on any pair of wireless buds: they don’t need to charge. So long as your iPhone has battery power, so do the EarPods.

Since you’ve chosen to go wireless, you should consider how long your headphones will last. Apple says that the AirPods themselves will last about 5 hours, with 24 hours of charge from the handy dandy charging case. The BeatsX, in contrast, should last you 8 hours.

Having said that, the AirPods are far much better when it comes to battery management. They are only connected while they are in your ears; because of the built-in accelerometers, each AirPod disconnects immediately you take them out of your ear or put them into the charging case. In contrast, the BeatsX will stay connected- and draining their battery- until you turn off the headphones manually with the power button located in the right hand side of the neckband.

To be precise, during my testing, I unplugged the BeatsX around 8:30 in the morning. I didn’t use them at all, and they were down to 91% by 10 am. That’s almost 10% in an hour and a half with no actual usage other than being connected (during playback, they dropped about 10% after an hour). By comparison, in two hours of using the AirPods (the Pods themselves went from 100% to 76%) and popping them into the charging case, the AirPods charging case went from 80% to 75% (charging the Pods back up to 100% in that time). Someone who is better at math could probably tell you just how much longer the AirPods would last, but the long and short of it is that the AirPods provide substantially more use time, particularly if you are using them on and off throughout the day as they will pop back up to 100% each time you place them in the charging case for about 15 minutes. The charging case itself will also stay a couple of days before needing a recharge of its own.

The way you charge the headsets is certainly something else to consider with the AirPods and the BeatsX. Both sets of headphones will charge with a lightning cable, meaning you can use the same charging set up that you use with your iPhone (It’s worth noting, the AirPods ships with a full length lightning cable, whereas the BeatsX ships with a short cable). Again, if you opt to spend double the price of the BeatsX for the AirPods with a wireless charging case, you can charge them with the same nifty charging pad that charges your iPhone. Both deliver fast charging, though the BeatsX will definitely charge more rapidly; they offer 2 hours of use with only 5 minutes of charging time, and will fully charge in under an hour. The Cupertino based company indicates that 15 minutes of charge will give the AirPods three hours of use time (for anyone doing math, fifteen minutes on the BeatsX should give you about six hours of use). Online estimates say it takes about 2.5 hours to fully charge the AirPods charging case.

Also it’s worth noting that you can’t use the BeatsX while they are charging. Sure, it would be a little cumbersome to try, particularly with the short cable Beats offers in the box. But with the AirPods, you can use the Pods while the case is plugged in.
It’s an interesting crossroads; the AirPods will give you more use time, but the BeatsX will charge more rapidly when you do need to plug up. It all depends on which will work better with your lifestyle in this area, but the winner for me is the AirPods, simply because I stand more chance of having them around all day long, especially if I forget to turn off the BeatsX when I’m not using them (which is a constant).

Winner: AirPods 2. Faster charging is good, but headphones that stay charged all day is absolutely fantastic.

Connection

If you aren’t connecting your headphones with a good old wire, then how are these headphones gonna speak to your devices?

We all know how cumbersome it is to switch Bluetooth headphones from one device to another. Most nowadays support syncing with multiple devices, but switching usually means unpairing from one device to pair to the other (or turning of Bluetooth signal on the device you don’t want connected, which could interfere with other gadgets that are linked to the device). But Apple has come up with a way to make switching nearly as seamless as unplugging your wired headphones from one device and plugging into another (as long as those devices are made by apple). They’ve done this through proprietary chips (because of course they have).

Both pairs of headphones feature Apple’s proprietary chips that make connecting to your i-devices a breeze (the BeatsX have the W1 chip while the AirPods 2 pack in the newer H1 chip). Those chips are the reason these headphones are two of the very best options to use with your iPhone; once you sync it to one device, it becomes pretty easy to switch between all devices linked to your iCloud account. No need to unpair your headphones from your iPhone to use them on your iPad. Just simply tap on the headphones in your AirPlay menu and they switch to the device you are currently working with.

Apple says the H1 chip in the AirPods 2 (the same chip that is also in the pricier AirPods Pro and the PowerBeats Pro) provides a much faster connection when switching between devices and reduces latency when watching a video or playing a game, but honestly that speed is negligible; you probably won’t notice it in day to day usage. The AirPods 2 also has Bluetooth 5, whereas the BeatsX features the older 4.2, meaning the AirPods 2 will have a stronger connection when you use them with devices that don’t have an “i” in their title. The newer chip and Bluetooth signal also mean that the AirPods 2 are a tiny bit more future proof; this makes sense, as the BeatsX are a few years older than the AirPods 2.

In day to day use, both version of headsets are just about as easy to use as the other one, however, I did notice that my devices recognized the AirPods more often than the BeatsX when first connecting, and Occasionally, the BeatsX weren’t listed as an available device although they were turned on.

Another strange connection issue with the BeatsX came when using Siri. With the AirPods connected to my iPhone, when I used Siri on my Apple Watch, the audio responses from Siri and the recording of what I was saying to Siri happened on the AirPods. It appeared the BeatsX were trying to do the same, but unfortunately the microphone didn’t pick up anything I said, as if it was confused as to which microphone to use (I’m assuming the one in the Apple Watch is disabled if headphones are paired and listening).
The AirPods aren’t without their connection issues. One that I can’t decide if it should be classified as a connection issue or in the features section causes the AirPods to revert back to my iPhone even if that wasn’t the last device that they were actively connected to. For instance, if I was watching Netflix on my iPad Pro during my lunch break, once I’ve returned to my office and double tap the AirPods to resume playback, they start playing music from my iPhone instead. Of course, I wanted music and not Netflix at that juncture, so either the AirPods are anticipating which device and service I want audio from, but it could also be a glitch that has them reverting back to my iPhone after they’ve been put into the charging case for a few minutes. Whatever it is, the BeatsX don’t do it.
Both will connects seamlessly with your iPhone, but AirPods have the upper hand here.

Winner: AirPods 2. Both offers the magic of Apple’s seamless connection, but the AirPods just felt more seamless than the BeatsX.

Features

It’s not enough for these headsets to just play music in your ears, right? No, if these things are costing you a fortune, you need something more than Beyonce voice echoing in your head.

Neither pair of headsets disappoint, but they are quite different, either, and a lot of that comes down to their form factor. The AirPods are true wireless, which means they look like you just chop the cords off your EarPods and pop them in your ears, while the BeatsX are connected by a cord and a slightly stiff neckband that goes… well… around the back of your neck.

The AirPods includes tap controls which are customizable in Settings on your iPhone. A double tap on either Pod can either play/pause, activate Siri, jump to the next track, or go back to the previous track (or the beginning of the current track). Personally, I set mine up so that the right AirPod skips to the next track and the left goes to the previous track. Since the AirPods 2 have the H1 chip, they support “Hey, Siri,” so tapping for Siri is somewhat redundant, and, likewise, taking one AirPod out of your ear pauses the media, which is faster than double tapping to pause (and makes more sense, as you are probably going to take out the AirPods immediately after pausing anyway). The AirPods don’t have volume control other than to say “Hey, Siri, turn up (or down) the volume”, which can be a bit weird in public.

The BeatsX, unfortunately, do not offer any of those features, but they do include some unique features of their own. They include an inline controller that provides pretty much the same music controls that tapping gets you on the AirPods (plus, volume control), and while they don’t support “Hey, Siri,” you can launch Siri with a long press of the center button (and “Hey, Siri” will work with them if your phone or Apple Watch is nearby enough to hear the command, although the aforementioned confusion with the microphone may or may not interfere with your request). Being around the neck headphones, the BeatsX are also fantastic for when you aren’t using them, as you can just let them drop and rest instead of fumbling around with the charging case (or leaving the loose AirPod sitting at your desk). The BeatsX have no an automatic pause feature when you take one of the headset out, unfortunately, but you don’t really need that with the inline controls. If you are not a fan of that feature you probably won’t miss it, but it can be irritating if you realize your headphones have been playing music for no one for a couple of minutes and sucking that precious battery life.

Another feature to take into consideration with both headphones is the ease of misplacing your headsets. AirPods are pretty easy to lose, and although the Cupertino based brand has a “Find My AirPods” feature to help you locate a stray Pod, if one falls out of your ear while you are on the move, recovering the lost Pod might prove difficult. You can get a replacement for each Pod (or the charge case), but you’ll have to fork out about $50 per missing piece (and more for the case).

The BeatsX, by comparison, are fairly harder to lose. Along with the around the neck design, each bud is also magnetized, so when they are not on your ears, they stick together to form a sort of necklace. Unfortunately, if you happen to place the BeatsX down in some place and forget where that place was, they don’t seem to appear in Apple’s Find My app. One of many small things that honestly makes the BeatsX feel Apple compatible but not Apple made, despite being entirely owned by Apple.

Winne: It’s another close call for me here, and really depends on your preference. The AirPods have the more revolutionary features, but the BeatsX do a better job at not getting lost. Still, in day to day use, I find the AirPods more convenient. So I give this to AirPods, but this category is more subjective.

Fit and Sound

Now, all of this stops short if the headsets sound like crap. So, how do they sound?

I’ll be straightforward; the BeatsX sound better. This is mainly because of the design; BeatsX are in-ear buds that have a couple of different tips to find the best fit for your ear. Because of that, they isolate sound and block the outside world. They don’t feature active noise cancelling, but they definitely blocks up some of the noise. This also means you don’t have to have the volume up as high to hear the music. I’m not an audiophile, but the BeatsX definitely offer better bass and sound more balance than the AirPods.

The AirPods, in comparison, definitely leak a lot of sound from the outside world, which isn’t fantastic for listening to music, but works if you want to keep abreast of your surroundings. This is because their design is basically the same as the EarPods (without the wire), and they don’t include any kind of tips to make a better fit or seal. They are one size fits all, which means they will work- and therefore sound better- to some people than to others. Sound quality is basically the same as the EarPods, as well, which isn’t that bad, but there isn’t much depth to the music either. Treble and Bass all seem a little flat, particularly compared directly to the BeatsX. Likewise, to hear the music in louder atmospheres, you will have to raise the volume to a higher level, which may not be best for your eardrums (maybe that Apple Watch can tell you what decibel the music is at).

But sound quality is subjective to some extent, and it depends on what you are going to use these headsets for. If you prefer sound isolation and better depth in your music, the BeatsX are your best bet, but if you would rather keep abreast of your surroundings while listening and don’t mind sacrificing audio quality to do so, the AirPods might suit your needs.

The AirPods are also capable of working together or on their own; depending on if you pulled one or both out of the case, the audio will automatically switch between stereo sound and mono. I prefer this at work, since I can listen to music but it is great to be able to keep abreast of my surroundings; I usually put just the right Pod in so I can keep in touch with the outside world. The BeatsX only play music in stereo, meaning you might miss part of the song if you don’t have both buds in.

Winner: This one is completely subjective. If audio quality is your first priority, the BeatsX are your best bet, for certain. But if you are looking for something to add more of a background soundtrack to your day without sacrificing alertness, the AirPods are going to be the better option. But I’m not going to pick sides on this category.

Conclusion

So… where do we go from here?
The BeatsX clearly have better sound and clarity (if you’ll pardon the pun), but worse battery life and frankly horrible power management when it comes to standby time.
In contrast, the AirPods have decent-but not outstanding – sound but stellar battery management and performance, as well as more revolutionary features (and design).
By my own categories, AirPods seem to have taken the lead, but really, it is hard for me to say one wins out over the other, as these headsets are trying to do different things. What matters to you? What is most important to you? Do you need the best sounding headsets (between these two choices; there are definitely better sounding headsets out there without Apple’s branding on it)? Do you mind charging you headsets daily (and will you remember to turn off the headphones when you aren’t using them)? Or do you need an excellent battery life, notwithstanding the sound quality?
The choice, dear reader, is yours. Or, you know, save your cash. After all, your gorgeous iPhone did come with perfectly usable wired EarPods. And retro tech is in these days.

Tag: AirPods

The new AirPods look and sound familiar, but have little more tricks.

Of the many cool products that Apple unveiled earlier this year, none have been more grately anticipated than the

second-generation AirPods.

The second generation AirPods look so identical to the first-generation version announced almost three years ago that they are almost indistinguishable. The design,

fit, and sound quality are exactly the same as the

first generation AirPods

Wearing the new AirPods

isn’t any more of a flex

than the first-generation because nobody seeing you will be able to tell the difference.

But there are a couple of improvements here — some outstanding, some less so — that make the new AirPods even great than the previous model. Apple hasn’t solved many of the

long-lasting complaints leveled at the AirPods, such as their fit and ability to work in noisy surroundings, but it has added some things that improve

the experience, without much ulteration.
With AirPods Pro, Apple may have solved a major wireless earbuds design flaw. The newly designed, noise-canceling AirPods might also stay in your ears now. AirPods Pro features active noise cancellation, water and sweat-resistant, an all new lightweight in-ear design, as well as a transparency mode to keep you aware of the world around you. You can read more about AirPods Pro

Here

The Good

  • Outstanding wireless performance and reliability
  • Great ease of use and setup
  • Improved battery life
  • Can effortlessly recharge battery case with wireless mat

The Bad

  • Won’t stay in everyone’s ears
  • “Hey Siri” voice response is sluggish
  • Doesn’t block outside noise well
  • Cannot connect to two devices simultaneously

The ugly

  • What is weird, is actually talking to Siri in public. When I am listening to music and I can’t really hear my own voice, I was worried I would say “Hey Siri” out loud in public and everyone would look at me like a weirdo. And to be honest, I just tried to get Siri to activate with a quiet voice at first and getting louder slowly to finally get Siri to listen to me. Again, it’s a learning curve that you get used to quickly.

The major adjustment from the first-generation AirPods is the ability to recharge the case on a wireless pad. The second-gen AirPods are either sold

with the new wireless charging case for $199 or with the standard case for the same $159 as before. In case you have the first-gen AirPods and would like to buy the wireless charging case, you can purchase it separately for $79 and it will work just the same as it does with the new AirPods.

The wireless charging case uses the Qi standard — just like the iPhone and most Android devices on the market — so, you can use the same charging pad

as your phone to charge your AirPods case. Put the case on the charger and the little charging light on the front of the case will turn orange and begin

charging. The light will go off after a few seconds, but the case will still be getting the juice as long as it’s resting on the mat.

THE NEW WIRELESS CHARGING functionality IS CONVENIENT, BUT THEN SLUGGISH

Charging the case wirelessly is slow — Apple indicates the case charges at 5 watts, which is slower than the iPhone is able to, and it can take up to

three and a half hours to completely fill up the case wirelessly, compared to the roughly two hours it takes over the Lightning cable, which is also an option

on the new case. Also, if you’re using a stand-style charger for your phone, that perhaps won’t work because the coils won’t line up — as desire

using a flat pad charger for the AirPods. I tried charging the case on a few flat pads I have at home and had no problems charging with any of

them.

If you’re the kind of person that puts your AirPods case in another case, wireless charging should still work, but perhaps the

indicator light will not show at all. Finally, if you have Samsung’s Galaxy S10 or a recent Huawei flagship phone, you can use your Android device to wirelessly charge

your AirPods, which is never not funny. And yes, you can use the new AirPods with an Android device and they will work perfectly with it as the first-generation

models. The main functionality you’ll lose are the double-tap controls and the ability to automatically pause music when you take off an AirPod from one of your ear, though

that

can be enabled with a third-party app.

Generally, the wireless charging ability is a pleasant convenience, however, it doesn’t drastically change the AirPods experience. If you’re already charging your

phone on a wireless pad or have one that can charge multiple devices simultaneously (but sadly, isn’t Apple’s

cancelled AirPower mat),

it’s pleasant to be able to charge your AirPods case in the same manner.

The other great thing with the AirPods is the new H1 chip that replaces the W1 chip of the first generation AirPods. Apple states the H1 chip has been explicitly designed

for headphones and facilitates most of the AirPods’ new features, such as faster switching between devices; always-listening, hands-free Siri access; improved

call quality in windy environments; lower latency when playing games; and longer battery life for calls.

Rather than having to double-tap one of the AirPods to launch Siri, you can now say “Hey Siri” to launch it, just like you can on an iPhone or new

Mac. This not only does this provide easier access to Siri, but it also allows me to configure the double-tap gesture to another action, such as play / pause or skipping

tracks.

But even with the new chip and hands-free ability, there’s still a significant delay from when I say “Hey Siri” to getting a response in my ear. Different

From the iPhone, there’s no bell or ding to indicate that the AirPods actually heard my command, and there’s obviously no visual indicator unless my phone is

out and I’m looking at the screen. As a result, I often end up repeating myself because there is no way to tell if Siri heard my command and is just being slow to

respond, or if my command wasn’t registered at all. It’s a frustrating experience that could be greatly improved with an audible ding to confirm that Siri

heard my command.

Apple says the H1 chip enables the AirPods switch between your devices up to two times faster than before, so if you use an iPhone and an iPad or a Mac, you

can swiftly switch between them. Maybe it is technically faster, but it never feels faster in use because switching devices still requires going into the

Bluetooth settings panel or Control Center on the device I want to switch to, selecting the AirPods, and then still waiting a few beats for them to

connect.

THE AIRPODS STILL CANNOT BE CONNECTED TO TWO DEVICES AT THE SAME TIME

I really wish Apple had improved this area. I love how Apple simplifies the process of pairing AirPods to my iCloud account and have them automatically ready

on every device I use, but I also just wish they could be connected to more than one device simultaneously. The Bose QC35s as well as the Sennheiser HD1s, and

many of other Bluetooth headsets are capable of this already. With those other headphones, if I want to switch from my iPhone to my iPad, I simply tab

play on the device I want to use instead of getting my hands dirty with audio source settings. If you are a Mac user, the

ToothFairy app

makes this a slightly better one-click process with the AirPods and is absolutely worth the $3.

The new chip apparently improves voice quality on calls in windy environments, too, but I haven’t really seen much of a difference in my testing. That

isn’t really a knock — I use the first-gen AirPods for taking calls all the time because they are already outstanding for it. Additionally, I haven’t noticed much

of a difference in latency or lag while playing games or watching video, mostly because I didn’t ever experience significant lag with the previous generation. Of

all the truly wireless headsets I’ve used in years,the first-generation AirPods have the tiniest amount of lag or video syncing issues and the second generation

is just as good.

Finally, the H1 chip also prolongs the battery life for talk time to a claimed three hours, a complete hour more than the first model. The battery life for

Music playback or audio remains at five hours, which, while no longer the longest battery life you can get in a truly wireless headphone, is still

Above average and very good. The charging case extends that to up to 24 hours; a 15-minute charge will offer three hours of listening or two hours

of call time.

Besides that, the new AirPods are still AirPods, which means they are truly great wireless earbuds if they fit in your ears. Apple is quick

to claim how last year the AirPods became the most popular wireless headphones on the market, so they evidently work for so many people. But

they don’t fit everyone

and the new generation doesn’t do anything to solve that. They also aren’t great in noisy environments like a plane or subway car because they don’t

have either passive or active noise cancellation abilities.

Just like I mentioned earlier, the sound quality of the new AirPods is precisely the same as the previous generation, with no material modifications. The sound is clear, full, and surprisingly

detailed, without overwhelming bass or fatiguing highs. The lack of any seal or noise-blocking capacity is annoying especially while I’m on the subway, which

makes the AirPods saturate into my environment, like I’m not even wearing headsets whatsoever.

Final thoughts

So should you buy them? If you have the first-gen AirPods and they are still working perfectly, then no, you’re obviously not gaining anything here. If you so desire

wireless charging, you can buy the case separately without having to spend $200 on a whole new set. However, if your first-gen AirPods can hardly hold a juice

any longer because you’ve been using them for a long time, then buying the new AirPods makes sense, since it’s ultimately impossible to repair these or replace the

batteries in them. You’re getting the same basic experience, with little more conveniences. (The fact that a nearly $200 device has a usage lifetime

of less than three years, nonetheless.)

THE NEW AIRPODS ARE JUST AS OUTSTANDING AS THE Previous versions

If you haven’t yet jumped on the AirPods boat and you know they’ll fit in your ears (if the wired EarPods that come with every iPhone fit you, the AirPods

will, fit you as well), they are still among the best truly wireless headphones on the market, with great battery life, solid connectivity, great ease of use, and

pretty good sound quality. They work great for Android users, just like the first model as well. The new wireless charging convenience comes at an higher

price, but for a great number of people, the AirPods are still tough to beat. Read

The 17 Best Tips and Tricks For AirPods Pro

Tag: AirPods

How can you tell fake AirPods 3 from the real thing? Are you perhaps using knock-off AirPods 3 without knowing? Here’s how to find out.

Apple’s hefty price tag on a set of AirPods 3 might send you in search of cheaper deals elsewhere. There are lots of lower prices to be found, but you need to be careful you don’t wind up with a pair of AirPods 3 clone instead.

Fake AirPods 3 range from obvious knock-offs to almost exact replicas, but if you look close enough you can always tell the difference. Before buying the 3rd generation AirPods, use these tips to find out if they’re real or not.

Check packaging

It’s often possible to spot fake AirPods 3 before you even open the packaging. In fact, it’s good to check first because you stand the best chance of getting a refund if you never open the box.

It is easy with some copies of Apple products: The packaging quality of AirPods 3 clone is often poor, typing errors such as “Dseigned by Apple” or translation errors are spotted in the labelling.

Carefully read all the text and inspect each of the images on your AirPods 3 box looking for mistakes. Any typos, double spaces, or low-quality pictures suggest you’ve got a fake AirPods 3 box.

Check serial number

You don’t even have to unpack the device, the first step is to check the serial number on Apple’s website. Apple uses serial numbers to identify each set of AirPods and the charging case they came with. This can be found on the side of the packaging and can be entered into the Apple’s Check Coverage website to see if they’re real or not. Fake AirPods 3 will immediately be identified as invalid exposing them as a copy.

Unfortunately, according to reports, this check is not full-prove, apparently some forgers from Apple use serial numbers that are recognised by Apple. Because of this it can be necessary to open the box and do a few tests.

Check accessories

The best knock-off AirPods 3 get the outside of the packaging exactly right—they might even be plastic wrapped as well. But don’t judge a book by its cover; just because the outside of the box looks right doesn’t mean the AirPods inside are real.

At first glance, the fake AirPods 3 look perfectly fine, and the accessories are complete. Some fake AirPods 3 devices have all the usual papers and instructions, along with real-looking 3rd generation AirPods including charging case and a lightning cable.

However, the enclosed instructions is sometimes suspicious: The print quality of the instructions is usually moderate and the type is normally blurred. Very unusual for Apple leaflets.

Check if they are recognised by an iPhone or Mac

The one thing a fake AirPod 3 won’t have is a W1 chip, which is a special chip from Apple. This chip ensures that AirPods are recognised by and synced immediately to an iPhone, iPad or Mac.

When you open the charging case, a nearby iPhone should immediately recognise and connect to the AirPods. Although some fake AirPods 3 copy this, none of them get the Bluetooth connection exactly right.

Most fake AirPods 3 require you to connect to them through the Bluetooth settings. For some of them, you even need to connect to each AirPod individually. This is never the case for real AirPods 3.

Even if your AirPods 3 connect using Apple’s setup animation, open the Bluetooth settings for your AirPods to make sure everything else looks right.

On your iPhone, go to Settings > Bluetooth. Tap the i button next to your AirPods.

Real AirPods 3 give you the options to rename them, change the controls, and turn Automatic Ear Detection on or off. Most replica AirPods 3 only give you the options to Disconnect or Forget This Device.

Test functionality

The most informative test is the functionality check. Original 3rd generation AirPods come with features that knock-off AirPods 3 cannot replicate. The third-generation AirPods have the force sensor tech from AirPods Pro. Test each of the features below to make sure your AirPods 3 are real.

While listening to music, tap the stem on your AirPods 3 to carry out one of the following actions:

  • Play or pause audio: Press the force sensor on the stem of one of your AirPods once.
  • Skip forward: Double-press the stem.
  • Skip backward: Triple-press the stem.

AirPods 3 also work with “Hey Siri”, provided it’s turned on for your iPhone. Go to Settings > Siri & Search to check.

Fake AirPods 3 Battery Drain Faster Than Real Ones

Most counterfeit AirPods 3 battery drain much faster than the original ones. Genuine AirPods 3 deliver up to 6 hours of continuous listening time, or up to 5 hours when spatial audio is used. If someone’s using AirPods 3 to take a phone call, they’ll get up to 4 hours of talk time on a single charge. The charging case is improved as well. Combing AirPods 3 and their new MagSafe-compatible case, users get up to 30 hours of total listening time and up to 20 hours of talk time. Furthermore, placing AirPods 3 in the case delivers around 1 hour of listening/talk time within 5 minutes.

Fake AirPods 3 Weigh Less Than Real Ones

Most knock-off AirPods 3 use cheaper materials than the official Apple ones. That means they’re often much lighter. If possible, use a set of scales to weigh both AirPods and the charging case; compare the results to the weight listed on Apple’s Tech Specs page for the AirPods 3.

How to Spot a Fake AirPods 3 Charging Case

Fake AirPods 3 often come with an oversized charging case that looks nothing like the real deal. The real AirPods 3 case close magnetically with a satisfying snap, and the back of the lid has a metallic hinge while the rest of the case is white plastic.

The differences between the AirPods 3 and AirPods Pro cases are mostly cosmetic. The AirPods 3 case is a bit taller and narrower than the AirPods Pro case, making it look like a hybrid between the cases for the standard AirPods and AirPods Pro. It’s also lighter than the AirPods Pro case at 1.34 ounces versus 1.61 ounces. Both cases can be charged via Qi wireless charging, Apple MagSafe wireless charging or the company’s Lightning cable.

You should see a Setup button on the back and a single status light on the front (or under the lid for the original charging case).

Take a look at the bottom of the case and make sure it uses a Lightning port to charge. If possible, plug it in to check the status light turns green while charging.

Tag: AirPods

AirPods 3

You can enjoy your AirPods 3 even more if you know how to fully use and customize them. Here are the best AirPods 3 tips and tricks to get the most out of Apple’s wireless earbuds.

The AirPods 3 feature spatial audio and industry-leading sound, longer battery life, and an all-new design. If you’re one of the many to have picked up a new pair of AirPods, but don’t know if you’re making the most of their functionality, here are the best AirPods 3 tips and tricks to help you get the most from your earbuds.

These helpful AirPods 3 tips and tricks can help you control and customize your earbuds to manage playback, preserve the battery, find them if they’re lost, and a lot more. Some of these you may already know, while a few added in iOS 15 might be new. So take a look till the end.

The best AirPods 3 tips and tricks

Here’s a list of the best 31 AirPods 3 tips and tricks that will help you get the most from Apple’s new wireless earbuds. Have fun!

1. Use your iPhone as a remote mic

You can use your iPhone as a remote microphone while it’s connected to your AirPods, if you need to—it can help pick up what’s being said in conversations in noisy environments, or even let you hear what’s happening in another room.

  1. Open Settings on your iPhone.
  2. Choose Control Center.
  3. Select Customize Controls.
  4. Tap the green button next to Hearing to add it to your control center list.
  5. Now, when you want to use it, turn on Live Listen by opening control center.

2. Use Headphone Safety to Protect Your Hearing

With the “Headphone Safety” feature enabled, the iPhone can determine whether you’ve been listening to music too loud over a long period of time and — if so — it will lower your sound levels and send you a warning notification.

  1. Go to Settings.
  2. Go to Sounds & Haptics.
  3. Go to Headphone Safety.
  4. Turn on the toggle next to Headphone Notifications and Reduce Loud Sounds.
  5. Finally, use the slider to adjust the decibel level, and you are all set.

3. Turn on spatial audio for a surround sound effect

With AirPods 3, you can take advantage of spatial audio. This technology creates a 360-degree surround sound effect when watching TV, listening to music or participating in FaceTime calls using AirPods. To activate spatial awareness or to check whether it’s turned on, make sure the AirPods you’re wearing are connected to your iPhone or iPad via Bluetooth. Then tap Settings > Bluetooth, and choose your AirPods. Press the ”i” icon and select Spatial Audio.

4. Get Notified If You Leave Your AirPods 3 Behind

With Find My, you’ll be able to get left behind alerts if you should head out without your AirPods, and you’ll be able to rely on the Find My Network to help locate them.

To turn on left behind alerts:

  1. On your iPhone, launch the Find My app
  2. Tap on your AirPods under the devices tab
  3. Tap Notify When Left Behind under Notifications
  4. This is also where you can white-list locations. You may not want to get a notification every time you leave your house without your AirPods so you can white-list your home. Then you’ll get notifications everywhere but at your own home. You can add multiple locations.

5. Understand What the Light Means

Wondering what the light on the AirPods 3 case is trying to tell you? The light is really useful to quickly see the charging and pairing status of your AirPods.

The AirPods 3 has a single light, but it can change color, and it flashes—it can be difficult the decode the meaning. Here’s what the status light means:

  • White light (flashing): This means that your AirPods are in pairing mode. This happens when you press and hold the Pairing button at the back of the AirPods case.
  • Amber light (with AirPods in case): Ambre is the color for charging. It means that your AirPods are not fully charged, and that the case has now started charging them.
  • Amber light (without AirPods in case): This means that your AirPods case is not fully charged, and that there’s less than one full charge remaining in the case. This is when you should charge your AirPods case.
  • Amber light (with power source): This means your AirPods are being charged.
  • Green light (with AirPods in case): A green light means your battery is fully charged. If your AirPods are inside the case and you’re seeing a green light, it means that both the AirPods and the case are fully charged.
  • Green light (without AirPods in case): If you’re seeing a green light in the case without the AirPods, it means that the case itself is fully charged.
  • Green light (with power source): This means that your AirPods case is fully charged and you can remove the charger.
  • Flashing amber light: A flashing light generally means something has gone wrong. In this case, a flashing amber light denotes a pairing error. If you see this, it means you’ll have to reset your AirPods.
  • No light: Lastly, no status light means your AirPods are dead and have run out of battery.

6. Manually Switch Between Devices

If you’re listening to another device with your AirPods but you want to listen to your ‌iPhone‌ instead, start playing music, a podcast, or other audio on your ‌iPhone‌, and your AirPods will switch to ‌iPhone‌ automatically. Your AirPods can also switch to ‌iPhone‌ when you make or answer a call on your ‌iPhone‌. Sometimes, the automatic switching feature isn’t reliable. But bother not, this is why Apple has included the manual switching so that you can take control of any ill-functioning.

  1. Swipe down from the top-right corner of the screen to bring down the Control Center on iPhones with Face ID or iPads. If you’re using a device with a Home button, swipe up from the bottom of the screen.
  2. Here, tap the “AirPlay” icon found in the top-right corner of the Now Playing widget.
  3. You’ll now see a list of all available devices. As long as your AirPods are out of the case and in your ears, you’ll see them on the list. Select your AirPods to switch to them.

7. Change the name of your AirPods

With so many Bluetooth-enabled devices to connect to — from your car’s audio to your noise-cancelling headphones to your living room speaker — it can be hard to keep track of what’s what. That’s why it can be helpful to rename devices like your AirPods 3 so you never get them mixed up again.

With your AirPods 3 connected to your iPhone or iPad, go to Settings > Bluetooth. Then tap on the ”i” icon next to your AirPods’ name. Next, tap on the Name field and enter your preferred name. The new name will sync to the rest of your iCloud-linked devices.

8. Customize the AirPods controls

Each of your AirPods (3rd generation) has a Force Sensor on the stem. From your AirPods’ settings, you can also change the press-and-hold function for either earbud. Once again, with your AirPods connected to your iPhone or iPad, go to Settings > Bluetooth. Then tap on the ”i” icon next to your AirPods’ name. Tap on Left or Right to alter the functionality of each AirPod, or disable any interaction at all.

9. Use Force Sensor to Control Music With Ease

Each of your AirPods (3rd generation) has a Force Sensor on the stem. You can use the Force Sensor to do any of the following:

  • Play and pause audio: Press the Force Sensor once. To resume playback, press it again.
  • Play the next track: Press the Force Sensor twice.
  • Play the previous track: Press the Force Sensor three times.

10. Use AirPods 3 with Your Apple Watch

One aspect that makes Apple’s AirPods so appealing is how easy it is to set them up. Connecting the earbuds to your iPhone only takes a few seconds and very minimal effort. As long as you’re signed into iCloud, your AirPods 3 will automatically sync with any other supported Apple device — like an Apple Watch — that’s linked to your Apple ID.

11. Use AirPods 3 with your Mac

Being part of the Apple ecosystem, AirPods also work seamlessly with Mac. As long as you’re using the same Apple account on all your devices, once you have paired your AirPods 3 with your iPhone, they are automatically paired with your Mac as well. Though you can still pair your AirPods with your Mac like any other Bluetooth headphones.

12. Check AirPods battery status on an iPhone

To check the battery status of your AirPods and the charging case, simply open the charging case next to your iPhone (it works on the iPad and iPod Touch, as well), which should prompt your phone to display a popup with battery status.

13. Check AirPods battery status on an Apple Watch

If you own an Apple Watch, here’s a cool trick: Place your open AirPods case next to your watch, then open Control Center and tap the battery option. In addition to displaying battery stats for your watch, you will also find stats for your AirPods and the case.

14. Check AirPods battery status on a Mac

  1. Open the lid or take your AirPods out of the case.
  2. Click the Bluetooth icon in the menu bar.
  3. Hover the pointer over your AirPods in the menu.

15. Check the Model Number of Your AirPods 3

Considering how difficult it is to spot the difference between real Vs. Fake AirPods 3, it’s important to check the model number of your AirPods.

  1. Go to Settings > Bluetooth.
  2. Find your AirPods in the list (for example, ”Monica’s AirPods”).
  3. Tap the More Info button next to your AirPods, and you’ll see the model number.

16. Update Your AirPods 3

Apple’s quietly been pushing new firmware to AirPods to help with performance. You can’t update the firmware manually, but you can force an update to make sure you have the latest version.

To force an update: Place AirPods in the charging case, connect it to a power source, place it all next to the iPhone for an auto-update.

17. Hard reset your AirPods 3

Resetting the AirPods, also known as performing a hard reset, is how you return them to their factory settings. After you do this, you can set them up again.

Some of the situations in which you’ll need to reset your AirPods include:

Go to Settings > Bluetooth, tap the i icon next to AirPods in My Devices then tap Forget This Device > Forget Device.
Next: Put Airpods in charging case, wait 30 seconds, then open and press/hold the button until status light flashes yellow, then white.
After a reset, you’ll need to set your Airpods up again just as if they were brand-new.

18. Keep the audio playing

One of the smartest tricks the AirPods are capable of is stopping playback once you pluck either or both of them out of your ears, but you might not always want to interrupt playback while you’re temporarily paying attention to the real world. If you open Settings in iOS, then tap Bluetooth and select the Info button (the “i” next to your AirPods), this feature can be disabled by toggling the Automatic Ear Detection toggle switch to Off.

19. Use your AirPods 3 with non-Apple devices

Notice that small, flush button on the back of the charging case? That’s what you’ll use to pair AirPods 3 to an Android device or anything else that doesn’t work with Apple’s proprietary chips.

To start pairing to anything new, put the AirPods in their case, then flip the lid up and press and hold the small button on the rear of the charging case until the little LED light starts pulsing white. They should then show up in any Bluetooth-pairing settings on an Android phone, or computer, or TV. Simply start the Bluetooth connection process from your other device to establish the wireless link.

Keep in mind that when you’re paired with a non-Apple product, they lose some of their magic. Taking an AirPod out of your ear won’t pause music, and playback controls won’t work either.

20. Have Siri read your notification’s via your AirPods

Want to stay tuned into what’s going on with your phone’s notification’s while listening to music? With iOS 15, you can now turn on “Announce Notifications” and allow Siri to read you every notification. Yep, whether it’s an iMessage or a Snapchat, Siri will know, and she’ll be sure to let you know, too. Here’s how to enable the feature so you never miss a notification again.

  1. Open your Settings, and tap on Notifications.
  2. Tap on ”Announce Notifications.”
  3. Toggle on ”Announce Notifications.”
  4. Choose which apps you want to have notifications announced for.

21. Find out who is calling without looking at your iPhone

You can set up your AirPods 3 to announce who is calling you without having to get your iPhone out of your pocket or handbag by enabling the “Announce Calls” feature on iPhone. To configure how this works, open Settings, then choose Phone, Announce Calls, and Headphones Only (or Headphones & Car). To answer or end a call: Press the Force Sensor on either of your AirPods.

22. Use the Find My network to locate a lost AirPod

Individual AirPods can be easy to lose, but thankfully you can track them down using Apple’s Find My app. If your AirPods 3 are linked to your Apple ID and you’ve set up Find My on your iPhone, you’ll be able to view your AirPods’ last location on a map. If you happen to lose one AirPod, you can also prompt it to play a sound so that you can find it as long as it’s near your other Apple devices and connected to Bluetooth. You can do this by launching the Find My app, navigating to the Devices tab, tapping on your AirPod, and pressing the Play Sound option.

23. Share audio with two pairs of AirPods

You can easily share audio from one iPhone to two pairs of AirPods at the same time, which is very handy for watching movies or listening to tunes with a friend, for example. Open Control Center with a swipe down from the top right corner of the screen, tap the AirPlay icon, then choose Share Audio from the dialog that appears—once you’ve done that, you’ll need to bring the second pair of earbuds close to your phone so they’re detected.

24. Save Battery by Using Just One AirPod

If you only take one AirPod out of its case, your iPhone will route all the audio through it, which is helpful if you’ve got a long day of calls and audio streaming ahead of you and want to maximize the available battery life: when the first AirPod has died, you can switch to the second one and carry on. The other reason you might want to do this is to listen to music in one ear while keeping your other ear open to the sounds of the world around you.

25. Access Siri from your AirPods

On the thirdgen AirPods, you can launch Siri with a “hey Siri” voice command while they’re in your ears without touching your phone at all. If you didn’t enable the functionality when you set the earbuds up the first time, go to Settings on your iPhone, tap Siri & Search, then make sure Listen for “Hey Siri” is enabled. For example, you can ask about the weather, turn the volume down, or skip to the next track.

26. Charge with MagSafe

For the first time ever, Apple has released a charging case for the AirPods that is compatible with MagSafe. Now, you don’t need to worry about misaligning the charging case on your Qi wireless charger as the case just snaps into place.

27. Change the active AirPod microphone

By default, the active microphone automatically switches between left and right AirPods, but you can change it so it is fixed to one side.

Open Bluetooth settings on your iPhone > Make sure your AirPods are connected > Click on the ”i” symbol on the AirPods tab > Scroll down to Microphone > Select your preference.

28. Answer a call using your AirPods 3

It’s possible to answer a call directly from your AirPods, though we recommend switching the Announce Calls feature on so you know who you’re about to speak to.

To answer a call with your AirPods 3, just squeeze the Force Touch sensor when you hear the incoming call chime in your ear.

29. End a call using AirPods 3

To end a call with AirPods 3, simply squeeze the Force Touch sensor on the stem.

30. Turn the volume up on AirPods 3

There are no volume controls on the AirPods themselves, except the AirPods Max. To turn the volume up or down on the AirPods 3, you’ll need to use the device your AirPods are connected to.

For example, if you are using your AirPods with your iPhone, simply adjust the volume as you would if you were talking on your iPhone with the volume rocker on the left of your device.

31. Improve Sound With Headphone Accommodation

The Headphone Accommodations feature enhances the audio from your AirPods by boosting softer sounds and certain frequencies.

Go to Settings > Accessibility > Audio/Visual > Headphone Accommodations and turn on the switch. Tap Play Sample to start playing music, which will allow you to tune the audio for a balanced tone across a range of frequencies, a vocal range for middle frequencies, or brightness for higher frequencies. You can also boost softer sounds slightly, moderately, or strongly.

Your favorite AirPods 3 tips and tricks?

So these were some of the best AirPods 3 tips and tricks you would love to try today. With all these AirPods 3 tips, tricks, and hacks in mind, you should be a master of your new earbuds in no time. Life will be much easier for you and most of the things you need to do are a voice command or two taps away. My favorite AirPods 3 tips and tricks include the ability to read notifications without unlocking my iPhone, Spatial Audio, and find them if they’re lost. Which AirPods 3 tips and tricks did you find the most interesting? Do you have any other life-changing AirPods 3 tips and tricks up your sleeve that we might have missed? Share it with us through the comments.

Tag: AirPods

Your Apple AirPods won’t connect to your android device and you don’t know what to do.

Your smartphone’s software, hardware, and Bluetooth all need to be set up correctly whenever you use your AirPods, so tracking down the problem can be tricky — but I’ll walk you through the process.

In this article, I’ll show you why your AirPods won’t connect to your Android device and how to fix the problem for good.

How to Fix AirPods Not Connecting to Android:

1. Charge Your AirPods

If your AirPods won’t connect to Android devices, it could be because of low or depleted batteries. Charging your AirPods ensures that they will have enough battery life to function properly. AirPods are charged using the Charging Case.

  1. Put your AirPods in the Charging Case.
  2. When your AirPods are in the Charging Case, the Status light will indicate the amount of charge your AirPods have.
  3. The Status light will turn green when your AirPods are fully charged.

2. Charge The AirPods Charging Case

It may be a mouthful, but the Charging Case needs to be charged in order to charge your AirPods.

  1. Plug a Lightning cable into the Lightning connector on your Charging Case.
  2. Plug the other end of the Lightning cable into a USB port or wall charger.
  3. It may take a few hours to fully charge your Charging Case.

3. Clean Your AirPods and Charging Case

If dirt, dust, or other debris gets into your AirPods or Charging Case, it can affect their functionality and cause hardware problems. For example, if there is debris in your Charging Case, your AirPods may not charge properly.

  1. Get a soft, lint-free cloth. Don’t use tissue or cloth that will break up inside your devices.
  2. Gently wipe your AirPods and Charging Case with the cloth.
  3. For more compact debris, you can use an anti-static brush or new toothbrush to clean it out.

4. Make Sure Your AirPods Are In Range Of Your android device

If your AirPods aren’t within range of your android phone, the devices won’t be able to connect to each other. AirPods connect to your android device through Bluetooth, which only works when your devices are within a certain range of each other.

5. Turn Bluetooth Off And Back On Again

Turning Bluetooth off and back on again is sometimes enough to fix minor connectivity issues between your android device and airpods.

  1. Open the Settings app.
  2. Tap Bluetooth.
  3. Tap the switch next to Bluetooth to turn it off.

6. Reset Your AirPods

Since it can often be time-consuming to investigate the root cause behind connectivity issues, resetting your AirPods (Gen 1, 2, 3) or AirPods Pro will usually do the trick.

Resetting deletes all data on your AirPods and restores them to factory default settings. This makes them forget all cache or ‘memory’ and erases any setting issues that may be causing the problem. Additionally, a reset helps clear bugs, glitches, and any potential firmware issues your device may be facing.

Here’s how you can reset your AirPods or AirPods Pro:

  1. Place your AirPods (Gen 1,2, 3) or AirPods Pro back into the charging case and close the lid for about 30 seconds. This will restart your AirPods.
  2. Press and hold the Setup button located on the back of the charging case for about 15 seconds. The status light should change from flashing amber to white, indicating that your AirPods are fully reset.

7. Connect Your AirPods to Android the Right Way

Because AirPods are primarily made for Apple devices, you may occasionally encounter issues pairing your AirPods with Android due to limited functionality or features.

For instance, AirPods normally connect to iOS devices through an automatic pairing function, which is unfortunately not available to Android users. The only option is to manually connect your AirPods to your Android device whenever you want to use them.

Here’s how you can do so:

  1. Open up Settings on your Android device.
  2. Select Connections.
  3. Toggle the Bluetooth feature to turn it on.
  4. Place your AirPods (Gen 1,2,3) or AirPods Pro back in the charging case and open the lid. Then, press the Setup button at the back of the charging case until the status light flashes white.
  5. On your Android device, scan for Bluetooth devices. You should see your AirPods appear under the listed devices in the Bluetooth menu.
  6. Click on your AirPods’ name to successfully connect them to your device.

8. Disconnect From Apple Devices

Apple devices generally enjoy a seamless connection with each other. All you have to do is pop open the charging case’s lid containing your AirPods (Gen 1,2, 3) or AirPods Pro, and any nearby iOS devices will instantly detect them.

While this is convenient for owners of Apple devices, doing so has reportedly caused problems for users trying to connect or reconnect to Android devices. One reason for the same could be that even though your Android device is closer to the AirPods, your AirPods’ pre-existing connections with Apple devices interfere with their ability to connect to your Android.

Given this glaring incompatibility, Android devices can fall a bit short when competing for the AirPods’ Bluetooth signal.

There’s a way to solve this problem: go into your iOS device and manually turn off Bluetooth or remove the AirPods from their existing Bluetooth connections.

Here’s how you can remove your AirPods (Gen 1,2,3) or AirPods Pro from Apple devices’ Bluetooth connection:

  1. Connect your AirPods normally to your iOS device.
  2. Go to Settings and select Bluetooth.
  3. Tap on the ‘i’ icon next to your AirPods.
  4. Selecting ‘More info’ option on AirPods
  5. Select ‘Forget This Device.’ This will disconnect and remove the existing Bluetooth connection with your AirPods. Your AirPods will no longer be visible under the ‘My Devices’ list.

When your device forgets your AirPods, they will no longer automatically recognize each other. Instead of automatically connecting, opening your AirPods (Gen 1,2,3) and AirPods Pro’s charging case will kickstart the setup process.

9. Disable Other Apps

Another possible reason for airpods not connecting to android phone issue might be interference from other Bluetooth apps.

Typically, a phone has many apps running in the background that use Bluetooth, like Fitbit or heart-rate monitor apps, which can sometimes prevent AirPods from establishing a connection.

More recently, users have also reported that using the COVID-19 contact-tracing app, TraceTogether seems to interfere with AirPods, causing them to disconnect intermittently.

TraceTogether app turns your phone into a Bluetooth beacon and uses the Received Signal Strength Indicator (RSSI) to detect other devices in close proximity.
While this technology has helped monitor and combat the spread of COVID-19, constantly detecting nearby Bluetooth devices may prevent your AirPods from properly connecting to your Android device.

If this is the case, you may want to disable Bluetooth for these apps on your Android device.

Follow these steps:

  1. Go to your device Settings.
  2. Tap Privacy settings/Protection.
  3. Tap on either ‘All Permission’ or ‘Permission Manager.’
  4. Tap on either ‘Bluetooth’ or ‘Nearby devices.’
  5. You should see a list of all the apps that are currently using your device’s Bluetooth signal. From this, tap on the specific app you wish to turn off Bluetooth access for.
  6. Tap Dont allow to stop that app from accessing your Bluetooth.

10. Restart Your Android Device

Restarting your device is a popular method that can help resolve many other software issues such as lag or unresponsiveness. It acts as a soft reset which closes all apps and removes all cached data stored in the Random Access Memory (RAM).

Once your phone is rebooted, you can reinitiate the connection process with your AirPods on a clean slate.

Here’s how to restart your Android device:

  1. Press and hold the power button on your phone until you see a few options appear.
  2. Tap Restart.
  3. Wait around one minute for your device to turn back on. Then, try reconnecting your AirPods.

Your AirPods Are Connected To Your android device!

Your AirPods are now connected to your android and you can finally start enjoying your Bluetooth headphones!

Now you know exactly how to keep your AirPods connected to your android.

Thanks for reading our article and we hope you share this with all the AirPods lovers you know. Feel free to leave us a comment down below if you have any further questions, or if you just want to tell us what you think about your AirPods!

Tag: AirPods